Home>Construction & Tools>Building Materials>How To Replace A Hose Bib On A Brick House
Building Materials
How To Replace A Hose Bib On A Brick House
Modified: October 20, 2024
Learn how to replace a hose bib on a brick house with the right building materials. Follow our step-by-step guide for a successful DIY project.
(Many of the links in this article redirect to a specific reviewed product. Your purchase of these products through affiliate links helps to generate commission for Storables.com, at no extra cost. Learn more)
Introduction
Welcome to the world of home improvement, where every project brings a sense of accomplishment and the opportunity to enhance the functionality and aesthetics of your living space. In this guide, we’ll delve into the process of replacing a hose bib on a brick house, a task that can seem daunting at first but is entirely achievable with the right guidance and a willingness to get your hands a little dirty.
Whether you’re a seasoned DIY enthusiast or a newcomer to the world of home maintenance, understanding the steps involved in this process will empower you to tackle the task with confidence. By the end of this guide, you’ll have a clear understanding of the tools and materials you’ll need, as well as a step-by-step overview of the process, from shutting off the water supply to testing the new hose bib. Let’s embark on this journey together and equip you with the knowledge and skills to successfully replace a hose bib on your brick house.
Key Takeaways:
- Replacing a hose bib on a brick house is achievable with the right tools and steps. Shut off the water supply, remove the old bib, install the new one, and test for leaks to ensure a successful replacement.
- By following the guide, you can enhance your home’s functionality and gain valuable DIY skills. Enjoy the satisfaction of a job well done and take pride in contributing to your home’s well-being.
Read more: How To Install A Hose Bib
Tools and Materials Needed
Before diving into the process of replacing a hose bib on a brick house, it’s essential to gather the necessary tools and materials. Here’s a comprehensive list to ensure you’re well-prepared for the task:
Tools:
- Adjustable wrench
- Pipe wrench
- Hacksaw
- Teflon tape
- Screwdriver
- Plumber's putty
- Propane torch (for soldering copper pipes)
- Emery cloth or sandpaper
- Adjustable pliers
- Work gloves
- Safety goggles
Materials:
- New hose bib
- Pipe compound
- Copper or PVC pipes (if replacement pipes are needed)
- Brick mortar (if any brickwork needs to be repaired)
- Threaded adapters (if the new hose bib requires different fittings)
- Replacement screws or bolts
- Plumber's tape
- Silicone caulk (for sealing around the hose bib)
Having these tools and materials at your disposal will streamline the process and ensure that you’re equipped to handle any unforeseen challenges that may arise during the replacement of the hose bib on your brick house. Now that you’ve gathered everything you need, it’s time to move on to the next step: shutting off the water supply.
Shutting off the Water Supply
Before embarking on the task of replacing a hose bib on a brick house, it’s crucial to shut off the water supply to the existing hose bib. This ensures a safe and controlled environment for the replacement process. Here’s a step-by-step guide to help you navigate this essential preliminary task:
- Locate the Main Water Shut-Off Valve: In most homes, the main water shut-off valve is located near the water meter, often in the basement or utility area. It may be a lever-style valve or a round wheel valve. Turn the valve clockwise to shut off the water supply to the entire house.
- Drain Any Remaining Water: After shutting off the main water supply, open the existing hose bib to allow any remaining water to drain out. This step helps prevent water from spilling out during the removal process and reduces the risk of accidental leaks.
- Verify that the Water is Off: To ensure that the water supply is fully shut off, turn on a few faucets inside the house to release any residual water in the pipes. If no water comes out, you have successfully shut off the water supply.
By following these steps, you can effectively shut off the water supply and create a safe working environment for the subsequent stages of the hose bib replacement process. With the water supply secured, you’re ready to move on to the next phase: removing the old hose bib from the brick house.
Read more: What Is A Hose Bib In Plumbing
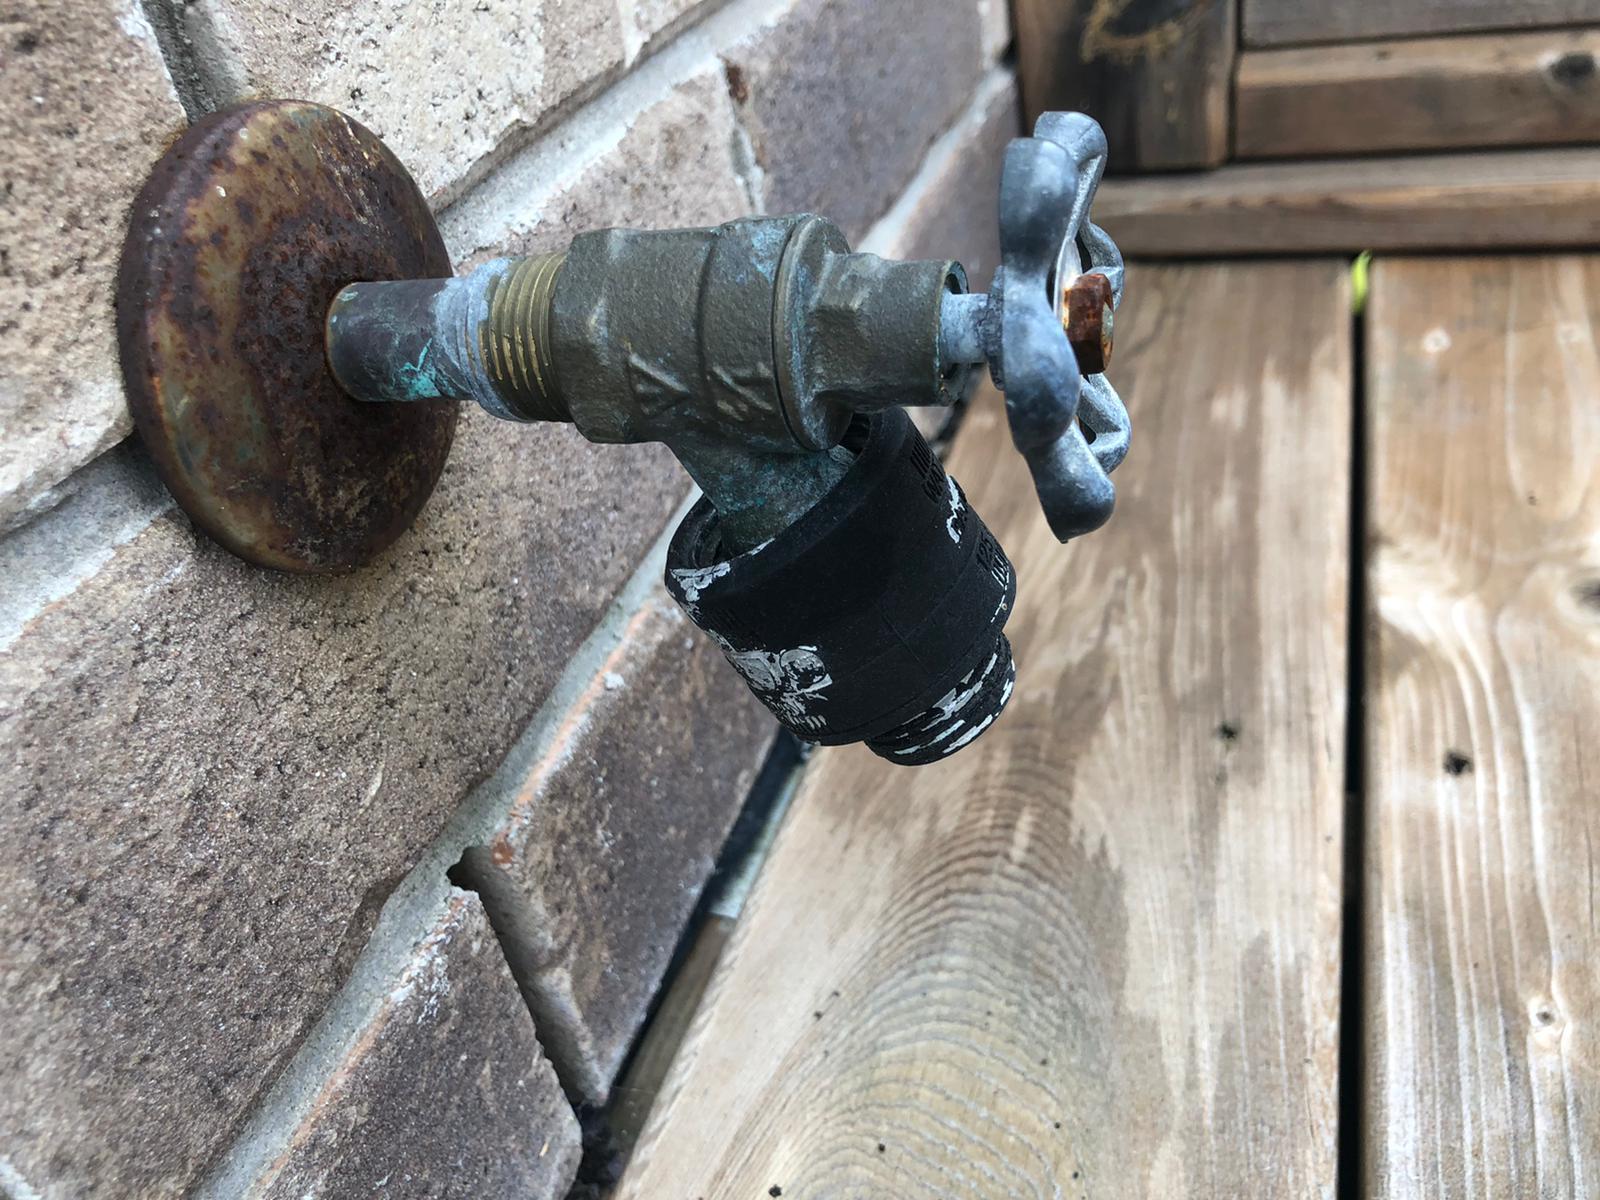
Removing the Old Hose Bib
Now that the water supply has been safely shut off, it’s time to roll up your sleeves and begin the process of removing the old hose bib from your brick house. This phase requires precision and careful execution to avoid damaging the surrounding brickwork. Follow these steps to navigate the removal process with confidence:
- Inspect the Existing Hose Bib: Take a close look at the old hose bib to assess its attachment to the brick wall. Note any visible screws, bolts, or fasteners securing it in place.
- Unscrew or Unbolt the Hose Bib: Using the appropriate tools, such as a screwdriver or wrench, carefully remove any screws or bolts that are securing the hose bib to the wall. Be mindful of the potential presence of rust or corrosion, which may require additional effort to loosen the fasteners.
- Disconnect the Hose Bib: With the fasteners removed, gently pull the old hose bib away from the wall. If the hose bib is connected to pipes inside the wall, you may need to apply a twisting motion to detach it from the pipes.
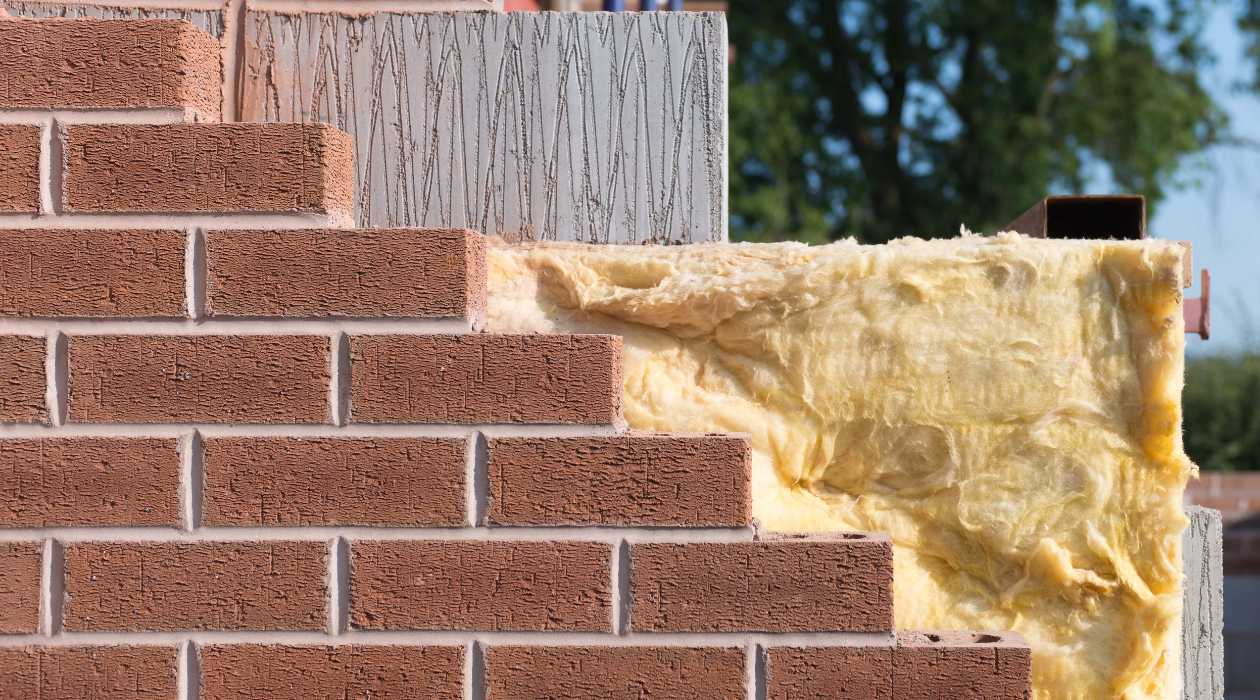
- Inspect the Surrounding Brickwork: After removing the old hose bib, inspect the area around the opening to assess the condition of the brickwork. Look for any signs of damage or deterioration that may require repair before installing the new hose bib.
- Prepare the Opening for the New Hose Bib: Clean the area around the opening to remove any debris, old sealant, or remnants of the previous installation. This step ensures a clean and secure surface for installing the new hose bib.
By meticulously following these steps, you can successfully remove the old hose bib from your brick house, setting the stage for the next phase: installing the new hose bib. With the old hose bib out of the way, you’re one step closer to completing this home improvement project with confidence and precision.
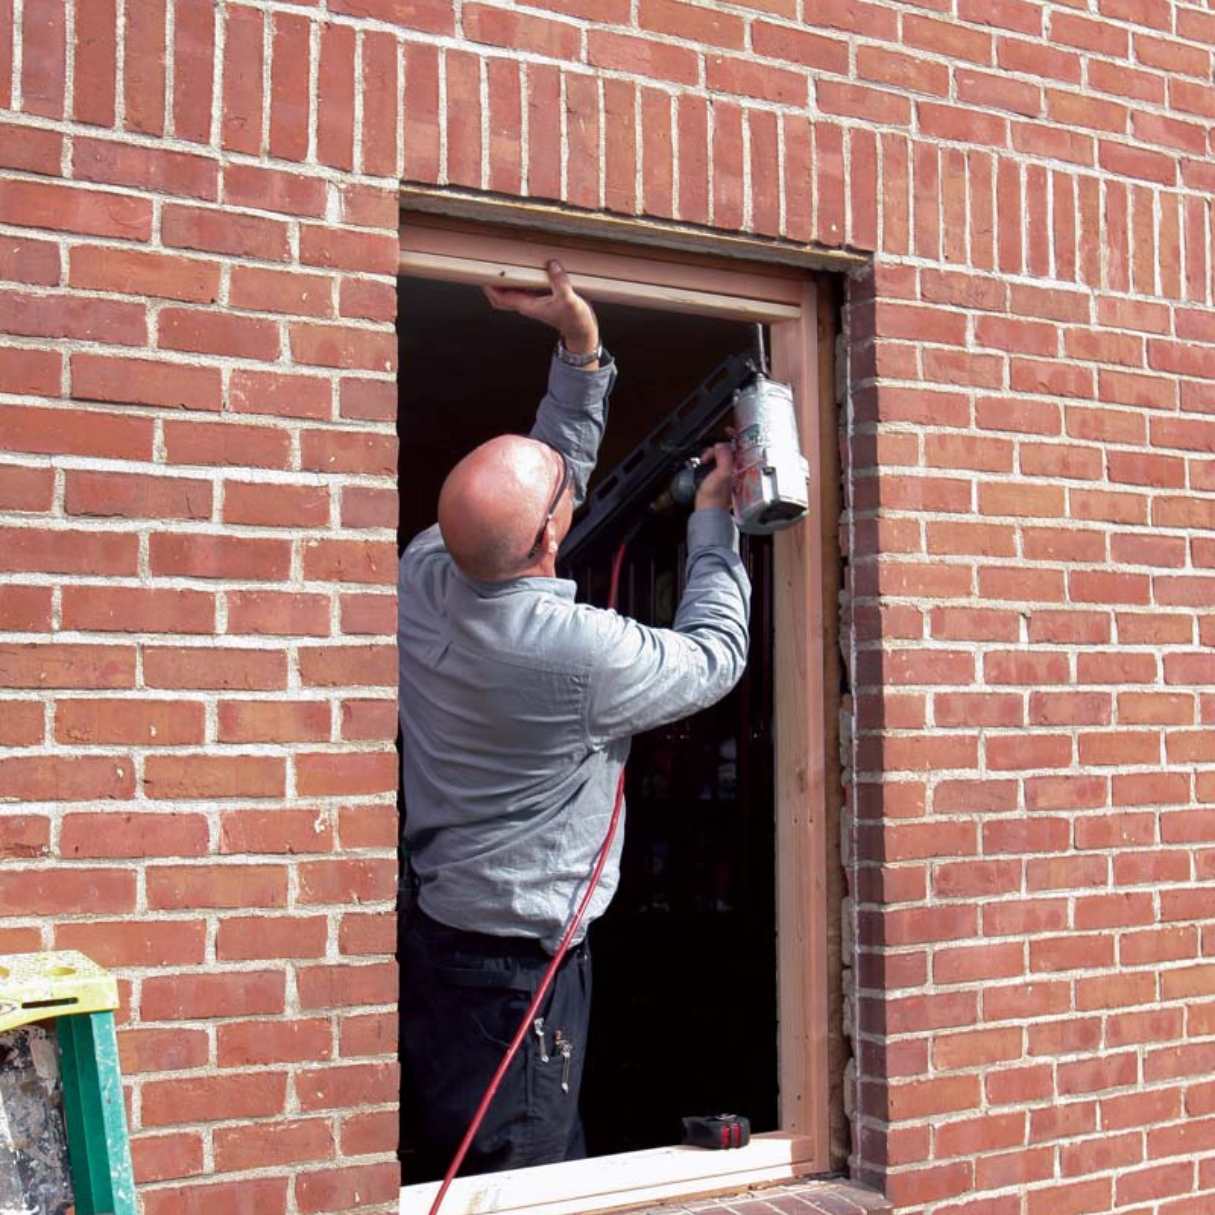
Installing the New Hose Bib
With the old hose bib successfully removed and the area prepared for the installation, it’s time to embark on the exciting phase of installing the new hose bib on your brick house. This process involves careful attention to detail and precision to ensure a secure and watertight fit. Follow these step-by-step instructions to navigate the installation process with confidence:
- Prepare the New Hose Bib: Before installing the new hose bib, ensure that it is compatible with the existing plumbing and fittings. If necessary, apply plumber’s tape or pipe compound to the threaded ends of the hose bib to create a secure seal.
- Position the New Hose Bib: Carefully align the new hose bib with the opening in the brick wall, ensuring that it sits flush and level against the surface. If the new hose bib requires additional fittings or adapters, secure them in place before proceeding.
- Secure the Hose Bib: Using the appropriate fasteners, such as screws or bolts, secure the new hose bib to the brick wall. Ensure that it is firmly anchored in place, taking care not to overtighten the fasteners, which could compromise the seal.
- Connect the Plumbing: If the new hose bib is designed to connect to existing pipes inside the wall, carefully attach the plumbing, ensuring a snug and leak-free connection. If soldering is required for copper pipes, follow best practices for a secure and durable joint.
- Apply Sealant: To prevent water infiltration around the hose bib, apply a bead of silicone caulk around the perimeter of the fixture where it meets the brick wall. This creates a watertight seal and protects the surrounding area from moisture intrusion.
By meticulously following these steps, you can successfully install the new hose bib on your brick house, setting the stage for the final phase of this home improvement project. With the new hose bib securely in place, you’re one step closer to enjoying a reliable and functional outdoor water source for various household tasks.
Before replacing a hose bib on a brick house, make sure to turn off the water supply to the bib. Use a pipe wrench to unscrew the old bib and clean the threads on the pipe. Apply plumber’s tape to the threads of the new bib before screwing it in place. Finally, turn the water supply back on and check for any leaks.
Testing the New Hose Bib
With the new hose bib securely installed, it’s time to ensure that it functions as intended and delivers a reliable water supply to meet your outdoor needs. Testing the new hose bib is a critical step in the replacement process, allowing you to verify its performance and address any potential issues before completing the project. Follow these steps to conduct a thorough and effective test of the new hose bib:
- Turn On the Water Supply: Return to the main water shut-off valve and carefully turn it counterclockwise to restore the water supply to the house. Take note of any sounds or signs of water flow as the system pressurizes.
- Inspect for Leaks: Visually inspect the area around the new hose bib for any signs of leaks or moisture. Check the connections, fasteners, and the perimeter of the hose bib for any indications of water seepage.
- Operate the Hose Bib: Attach a garden hose to the new bib and turn on the water to test its functionality. Ensure that water flows freely from the hose bib without any obstructions or irregularities.
- Check for Proper Shut-Off: After testing the water flow, turn off the hose bib to verify that it shuts off completely without any residual dripping or leakage. This ensures that the internal valve is functioning properly.
- Inspect the Surrounding Area: Once the test is complete, inspect the area around the hose bib for any signs of water accumulation or moisture. This step helps identify any potential issues with the installation or sealant.
By methodically conducting these tests, you can confidently assess the performance and integrity of the new hose bib, ensuring that it meets the highest standards of functionality and reliability. Address any identified issues promptly to guarantee a watertight and efficient outdoor water source for your brick house.
Conclusion
Congratulations on successfully navigating the process of replacing a hose bib on your brick house! By following the comprehensive steps outlined in this guide, you’ve demonstrated the knowledge and skill to tackle a fundamental home improvement task with confidence and precision. As you reflect on the journey from shutting off the water supply to testing the new hose bib, it’s evident that attention to detail and careful execution are key ingredients for a successful outcome.
Not only have you enhanced the functionality and reliability of your outdoor water source, but you’ve also gained valuable insights into the world of home maintenance and repair. The satisfaction of completing this project serves as a testament to your capability and resourcefulness as a homeowner.
As you enjoy the benefits of your newly installed hose bib, take pride in the knowledge that you’ve contributed to the well-being and longevity of your brick house. Your proactive approach to home maintenance sets a solid foundation for a safe, comfortable, and efficient living environment.
Remember, the journey of home improvement is a continuous one, filled with opportunities to learn, grow, and transform your living space. Whether it’s a small repair or a major renovation, each project enriches your connection to your home and empowers you to shape it according to your vision and needs.
As you bask in the satisfaction of a job well done, take a moment to appreciate the skills and determination that have brought you to this point. Your commitment to maintaining and improving your home is a testament to your dedication as a homeowner.
With the successful replacement of the hose bib on your brick house, you’ve not only elevated the functionality of your outdoor water supply but also deepened your understanding of home maintenance and repair. Your proactive approach to this project exemplifies the spirit of resourcefulness and empowerment that defines the world of DIY home improvement.
Embrace the sense of accomplishment that accompanies this achievement, knowing that you’ve added another valuable skill to your repertoire as a homeowner. As you continue to care for and enhance your living space, may this experience serve as a source of inspiration and confidence in all your future endeavors.
Frequently Asked Questions about How To Replace A Hose Bib On A Brick House
Was this page helpful?
At Storables.com, we guarantee accurate and reliable information. Our content, validated by Expert Board Contributors, is crafted following stringent Editorial Policies. We're committed to providing you with well-researched, expert-backed insights for all your informational needs.


0 thoughts on “How To Replace A Hose Bib On A Brick House”