Home>Home Appliances>Kitchen Appliances>How To Make Apple Chips In A Dehydrator
Kitchen Appliances
How To Make Apple Chips In A Dehydrator
Modified: February 23, 2024
Learn how to make delicious apple chips in a dehydrator with our easy recipe. Discover a healthy snack option using kitchen appliances.
(Many of the links in this article redirect to a specific reviewed product. Your purchase of these products through affiliate links helps to generate commission for Storables.com, at no extra cost. Learn more)
Introduction
Welcome to the delightful world of homemade apple chips! If you're a fan of healthy snacking and the irresistible aroma of fresh apples, then you're in for a treat. In this guide, we'll take you through the step-by-step process of creating your own crispy, flavorful apple chips using a dehydrator.
Making apple chips at home is not only a fun and rewarding culinary project, but it also allows you to savor the natural sweetness of apples without any added preservatives or artificial flavors. Whether you're a seasoned chef or a kitchen novice, this simple yet satisfying recipe will surely win you over.
So, grab your apron, roll up your sleeves, and get ready to embark on a delightful journey of transforming ordinary apples into a wholesome and delectable snack. With just a few essential ingredients and a dash of creativity, you'll soon be relishing the crunchy goodness of your very own homemade apple chips.
Key Takeaways:
- Choose firm apples like Granny Smith or Fuji for crispy apple chips. Avoid soft apples and consider organic options for a healthier, tastier snack.
- Prepare apple slices by washing, coring, and adding optional flavors. Dehydrate them in a single layer, then store in airtight containers for a crunchy, wholesome treat.
Read more: How To Make Carrot Chips In A Dehydrator
Choosing the Right Apples
When it comes to creating the perfect batch of apple chips, selecting the right type of apple is crucial. Not all apples are created equal, and certain varieties are better suited for dehydrating due to their texture and flavor profile.
1. Selecting the Ideal Varieties: Opt for firm and crisp apple varieties such as Granny Smith, Honeycrisp, or Fuji. These types of apples hold their shape well during the dehydration process and result in satisfyingly crunchy chips. Their natural sweetness and tartness also make for a delightful snacking experience.
2. Avoiding Soft or Mealy Apples: Steer clear of softer or mealy apples, as they tend to become mushy when dehydrated, resulting in less desirable texture and flavor. While these apples may be enjoyable for fresh consumption, they are not well-suited for the dehydrating process.
3. Organic Options: If possible, choose organic apples to ensure that your homemade apple chips are free from pesticides and other harmful chemicals. Organic apples also tend to retain more of their natural flavor, resulting in a superior snacking experience.
4. Uniform Slicing: Regardless of the apple variety you choose, aim for uniform slices to ensure even dehydration. This not only contributes to a consistent texture but also enhances the visual appeal of your apple chips.
By carefully selecting the right apples for your homemade apple chips, you set the stage for a delightful snacking experience that captures the essence of fresh, wholesome flavors. With your apples of choice in hand, it’s time to move on to the next step: preparing the apples for dehydration.
Preparing the Apples
Before diving into the dehydrating process, it’s essential to properly prepare the apples to ensure optimal results. From washing and coring to adding optional flavor enhancements, the preparation stage sets the foundation for delectable apple chips that are bursting with natural goodness.
1. Thorough Washing: Begin by thoroughly washing the apples under running water to remove any dirt, wax, or residue. This step is crucial, especially if you’re using non-organic apples, as it helps eliminate surface impurities that may affect the final taste and quality of the chips.
2. Coring and Slicing: Using a sharp knife or an apple corer, remove the cores from the apples. Once the apples are cored, proceed to slice them into uniform rounds or thin wedges. Aim for a consistent thickness, as this promotes even dehydration and ensures that all the apple slices dry at the same rate.
3. Optional Flavor Enhancements: While the natural flavor of apples shines on its own, you can elevate the taste of your apple chips by incorporating optional flavor enhancements. Consider sprinkling the apple slices with a hint of cinnamon, a touch of honey, or a squeeze of lemon juice for a delightful twist. These additions infuse the apple chips with extra layers of flavor, making each bite a delightful experience.
4. Pretreatment for Browning Prevention: To prevent the apple slices from browning during the dehydration process, you can opt for a pretreatment step. This can involve dipping the apple slices in a solution of water and lemon juice or using a commercial fruit protector to maintain the apples’ natural color. While this step is optional, it can help preserve the visual appeal of the apple chips.
By taking the time to properly prepare the apples, you lay the groundwork for a batch of apple chips that boast irresistible flavor, texture, and visual appeal. With the apples sliced and ready for the next phase, it’s time to delve into the heart of the process: dehydrating the apple slices to perfection.
To prevent browning, soak apple slices in a mixture of water and lemon juice before dehydrating. This will help maintain their natural color.
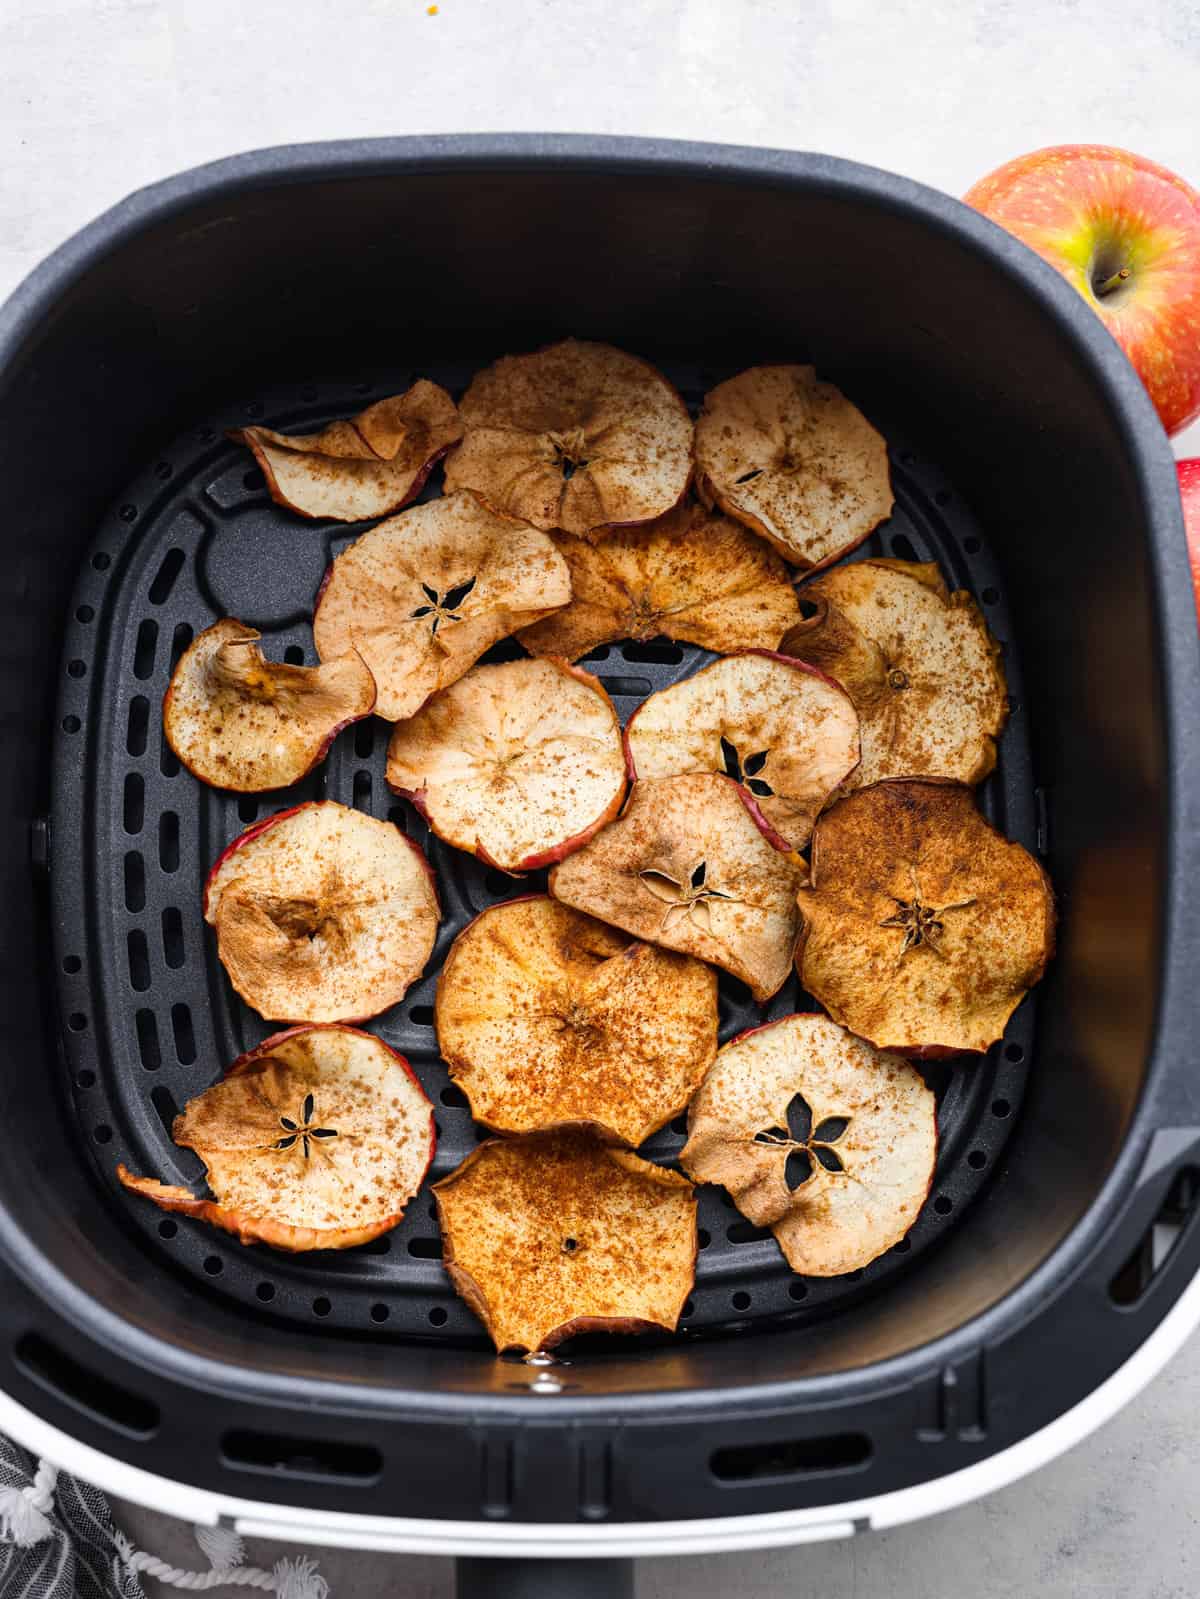
Dehydrating the Apple Slices
Now that your apple slices are meticulously prepared, it’s time to embark on the dehydrating journey that will transform them into delectable apple chips. Using a dehydrator offers an efficient and controlled method for removing the moisture from the apple slices, resulting in crispy, shelf-stable chips that retain the essence of fresh apples.
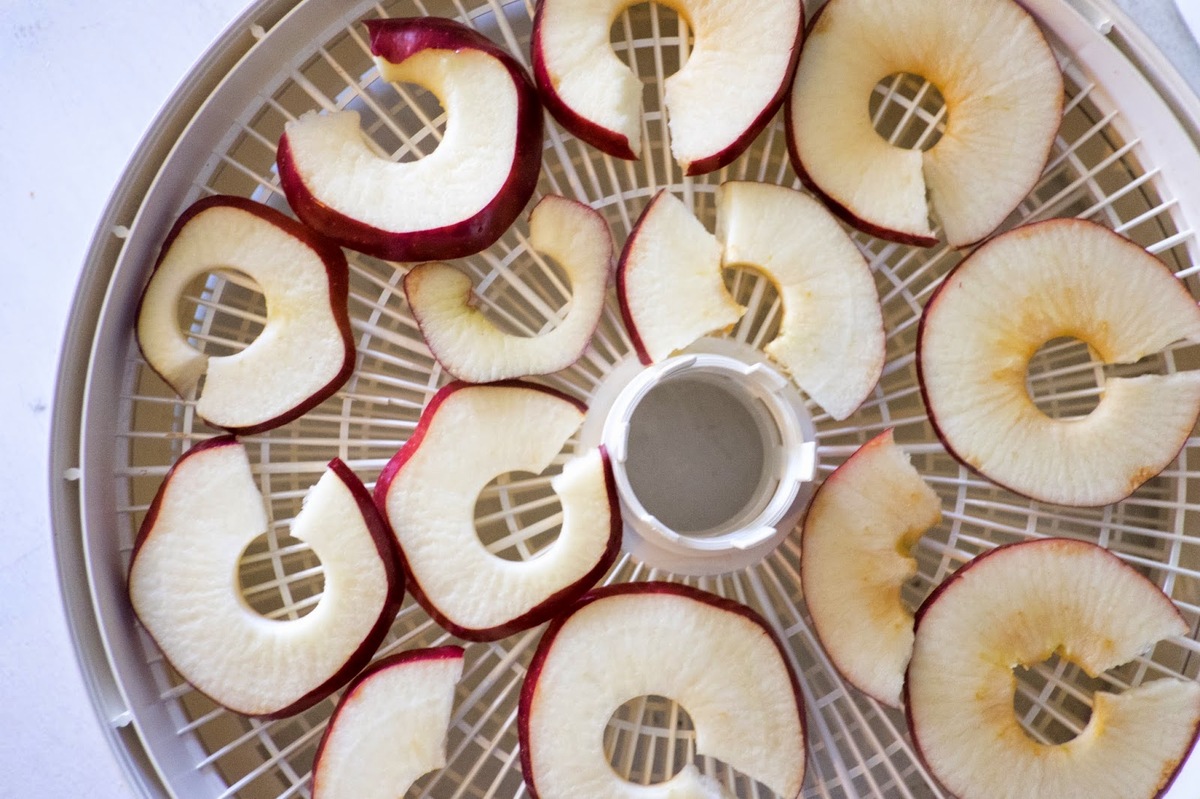
1. Arranging the Apple Slices: Begin by arranging the prepared apple slices in a single layer on the dehydrator trays, ensuring that there is ample space between each slice. This allows for proper air circulation, facilitating even dehydration and preventing the slices from sticking together.
2. Setting the Temperature and Time: Consult your dehydrator’s manual for the recommended temperature and duration for dehydrating apple slices. In general, a temperature range of 135°F to 140°F (57°C to 60°C) is suitable for drying apples. The precise drying time can vary based on factors such as the thickness of the slices and the moisture content of the apples.
3. Monitoring the Dehydration Process: Throughout the dehydration process, periodically check the progress of the apple slices. They should gradually transform from plump and moist to dry and leathery, indicating that the moisture is being successfully removed. Adjust the trays as needed to ensure uniform drying.
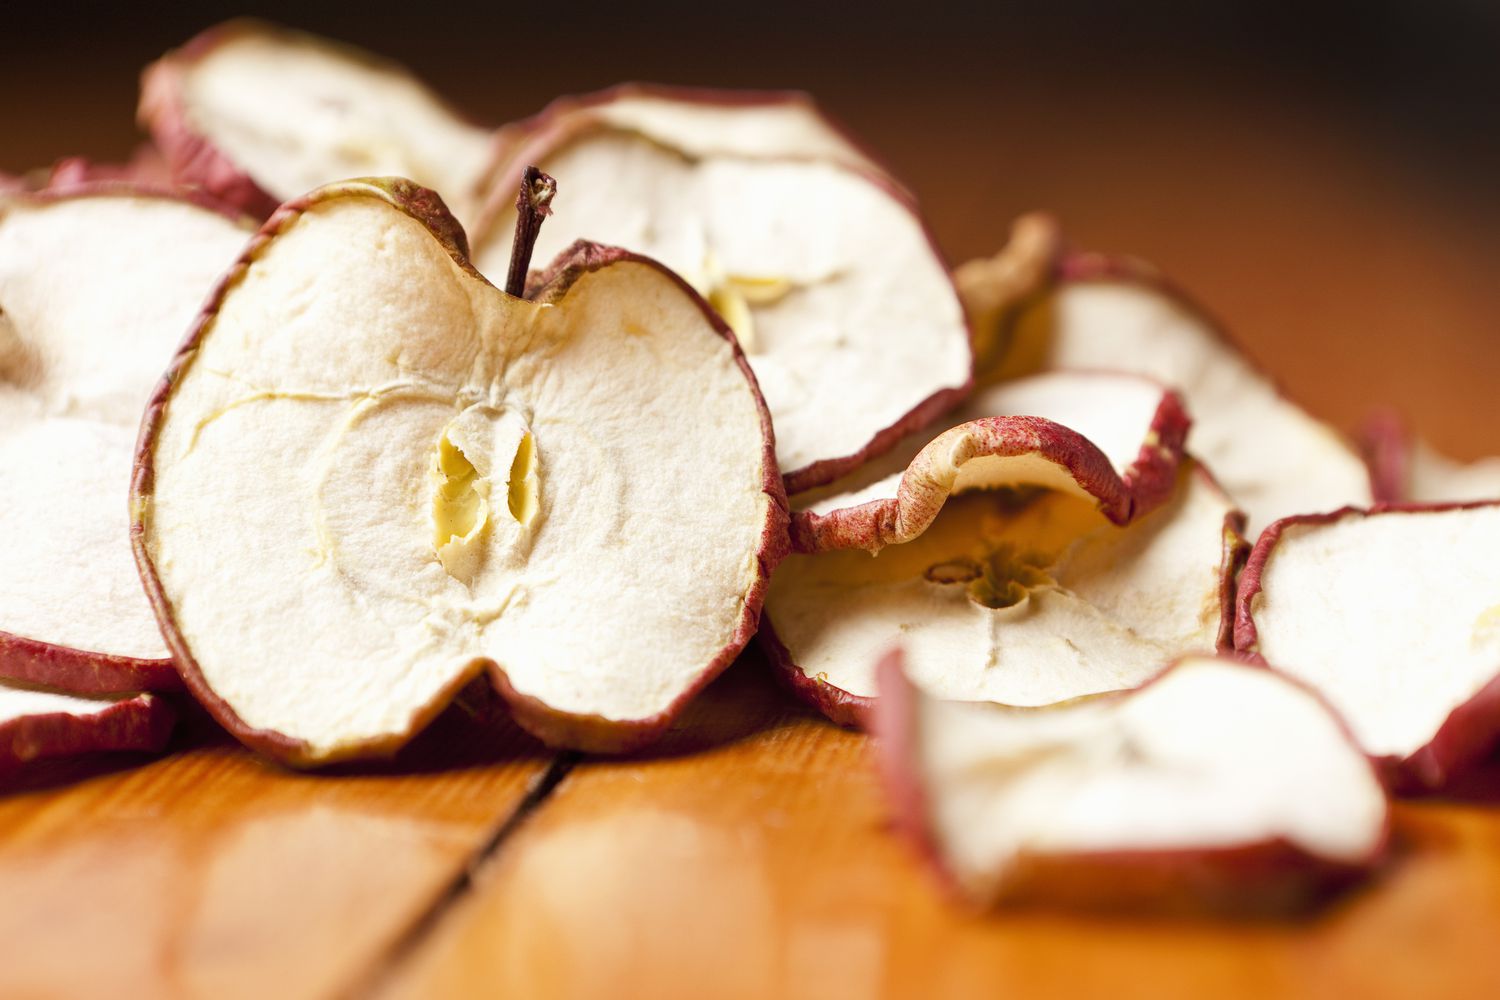
4. Testing for Doneness: To determine if the apple slices are adequately dehydrated, perform a simple test by removing a few slices and allowing them to cool. They should be crispy and brittle, with no signs of moisture when broken. If the slices exhibit these characteristics, they are ready to be removed from the dehydrator.
5. Cooling and Conditioning: Once the apple slices are deemed sufficiently dehydrated, allow them to cool to room temperature. At this stage, you can opt for conditioning the apple chips by placing them in airtight containers for a few days. Conditioning helps distribute any remaining moisture evenly among the chips, reducing the risk of moisture retention that could lead to spoilage.
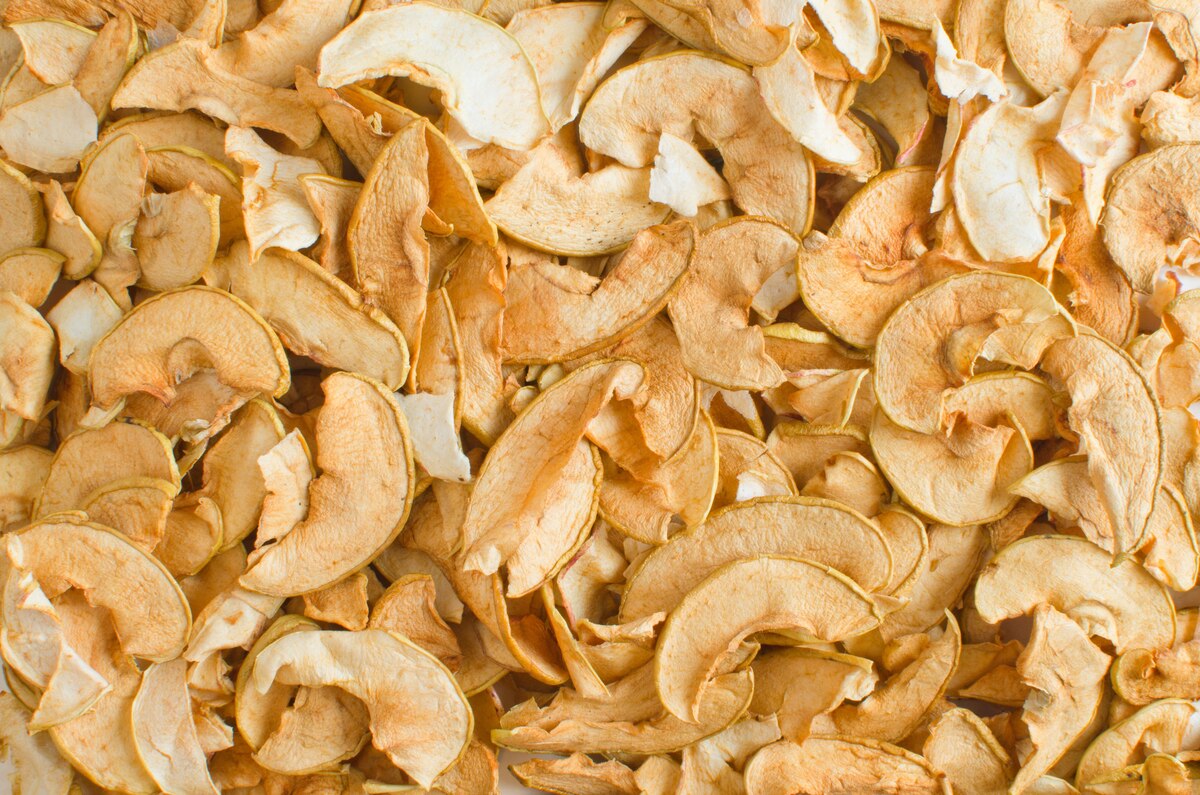
By carefully monitoring the dehydrating process and ensuring that the apple slices reach the desired level of crispness, you are poised to savor the fruits of your labor: a batch of irresistible homemade apple chips. With the apple chips ready for consumption, it’s essential to explore the final phase: storing the apple chips to maintain their quality and freshness.
Storing the Apple Chips
After investing time and effort into creating a delightful batch of homemade apple chips, it’s essential to store them properly to maintain their crispness and flavor over time. By employing suitable storage methods, you can ensure that your apple chips remain a delectable snack option for an extended period, ready to be enjoyed whenever cravings strike.
1. Cooling to Room Temperature: Before initiating the storage process, allow the freshly dehydrated apple chips to cool completely to room temperature. This step is crucial for preventing condensation inside the storage containers, which could compromise the crisp texture of the chips.
2. Choosing Airtight Containers: Opt for airtight containers such as glass jars, plastic food storage containers, or resealable bags to house the apple chips. Airtight containers help safeguard the chips from exposure to moisture and air, preserving their crunchiness and flavor.
3. Avoiding Direct Sunlight and Heat: Store the containers of apple chips in a cool, dark place to shield them from direct sunlight and excessive heat. Exposure to light and heat can accelerate the degradation of the chips, leading to loss of quality and flavor.
4. Refrigeration or Freezing (Optional): While properly stored apple chips can maintain their quality at room temperature for several weeks, you have the option to extend their shelf life by refrigerating or freezing them. If you choose this route, ensure that the containers are tightly sealed to prevent moisture absorption and freezer burn.
5. Monitoring for Moisture: Periodically inspect the stored apple chips for any signs of moisture or softening. If moisture is detected, transfer the chips to a fresh, dry container and ensure that the storage environment is conducive to preserving their crispness.
6. Enjoying and Sharing: With your homemade apple chips safely stored, feel free to indulge in this wholesome snack whenever the mood strikes. Share the joy of your culinary creation with family and friends, and savor the satisfaction of transforming fresh apples into a delightful treat that can be enjoyed at any time.
By adhering to proper storage practices, you can relish the delightful crunch and natural sweetness of your homemade apple chips long after the dehydrating process. With the apple chips safely stored, you can confidently explore various snacking possibilities and share the fruits of your labor with those around you.
Read more: How To Make Potato Chips With A Dehydrator
Conclusion
Congratulations on mastering the art of crafting homemade apple chips using a dehydrator! By embarking on this culinary adventure, you’ve not only delved into the joys of creating wholesome snacks from scratch but also unlocked the potential of transforming ordinary apples into irresistible treats that captivate the senses.
Through the careful selection of apples, meticulous preparation, precise dehydrating, and thoughtful storage, you’ve harnessed the essence of fresh apples and preserved it in the form of crispy, flavorful chips. This journey has not only yielded a delightful snack but has also provided a deeper appreciation for the natural bounty of apples and the joy of creating culinary wonders in your own kitchen.
As you savor the delightful crunch of your homemade apple chips, take pride in the knowledge that you’ve harnessed the power of simplicity and natural goodness. Whether enjoyed as a standalone snack, paired with dips, or incorporated into creative recipes, your apple chips serve as a testament to your culinary prowess and dedication to wholesome living.
Furthermore, the journey of making apple chips in a dehydrator opens the door to endless possibilities. Feel free to experiment with different apple varieties, explore unique flavor combinations, and share your newfound expertise with fellow enthusiasts. Your apple chips are not just a snack; they are a reflection of your creativity and passion for culinary exploration.
As you bask in the satisfaction of your homemade apple chips, remember that the journey doesn’t end here. Embrace the culinary adventures that await, and continue to infuse your kitchen creations with the love and care that make each bite a moment of pure delight.
So, here’s to the joy of homemade snacks, the magic of transforming apples into chips, and the endless possibilities that await in your culinary endeavors. Cheers to the simple pleasures and the culinary triumphs that enrich our lives one delectable bite at a time.
Frequently Asked Questions about How To Make Apple Chips In A Dehydrator
Was this page helpful?
At Storables.com, we guarantee accurate and reliable information. Our content, validated by Expert Board Contributors, is crafted following stringent Editorial Policies. We're committed to providing you with well-researched, expert-backed insights for all your informational needs.


0 thoughts on “How To Make Apple Chips In A Dehydrator”