Home>Construction & Tools>Building Materials>How To Make A Clay Brick
Building Materials
How To Make A Clay Brick
Modified: October 19, 2024
Learn how to make clay bricks, a versatile and durable building material, with our step-by-step guide. Discover the process and techniques for creating high-quality bricks at home. Ideal for DIY projects and construction endeavors.
(Many of the links in this article redirect to a specific reviewed product. Your purchase of these products through affiliate links helps to generate commission for Storables.com, at no extra cost. Learn more)
Introduction
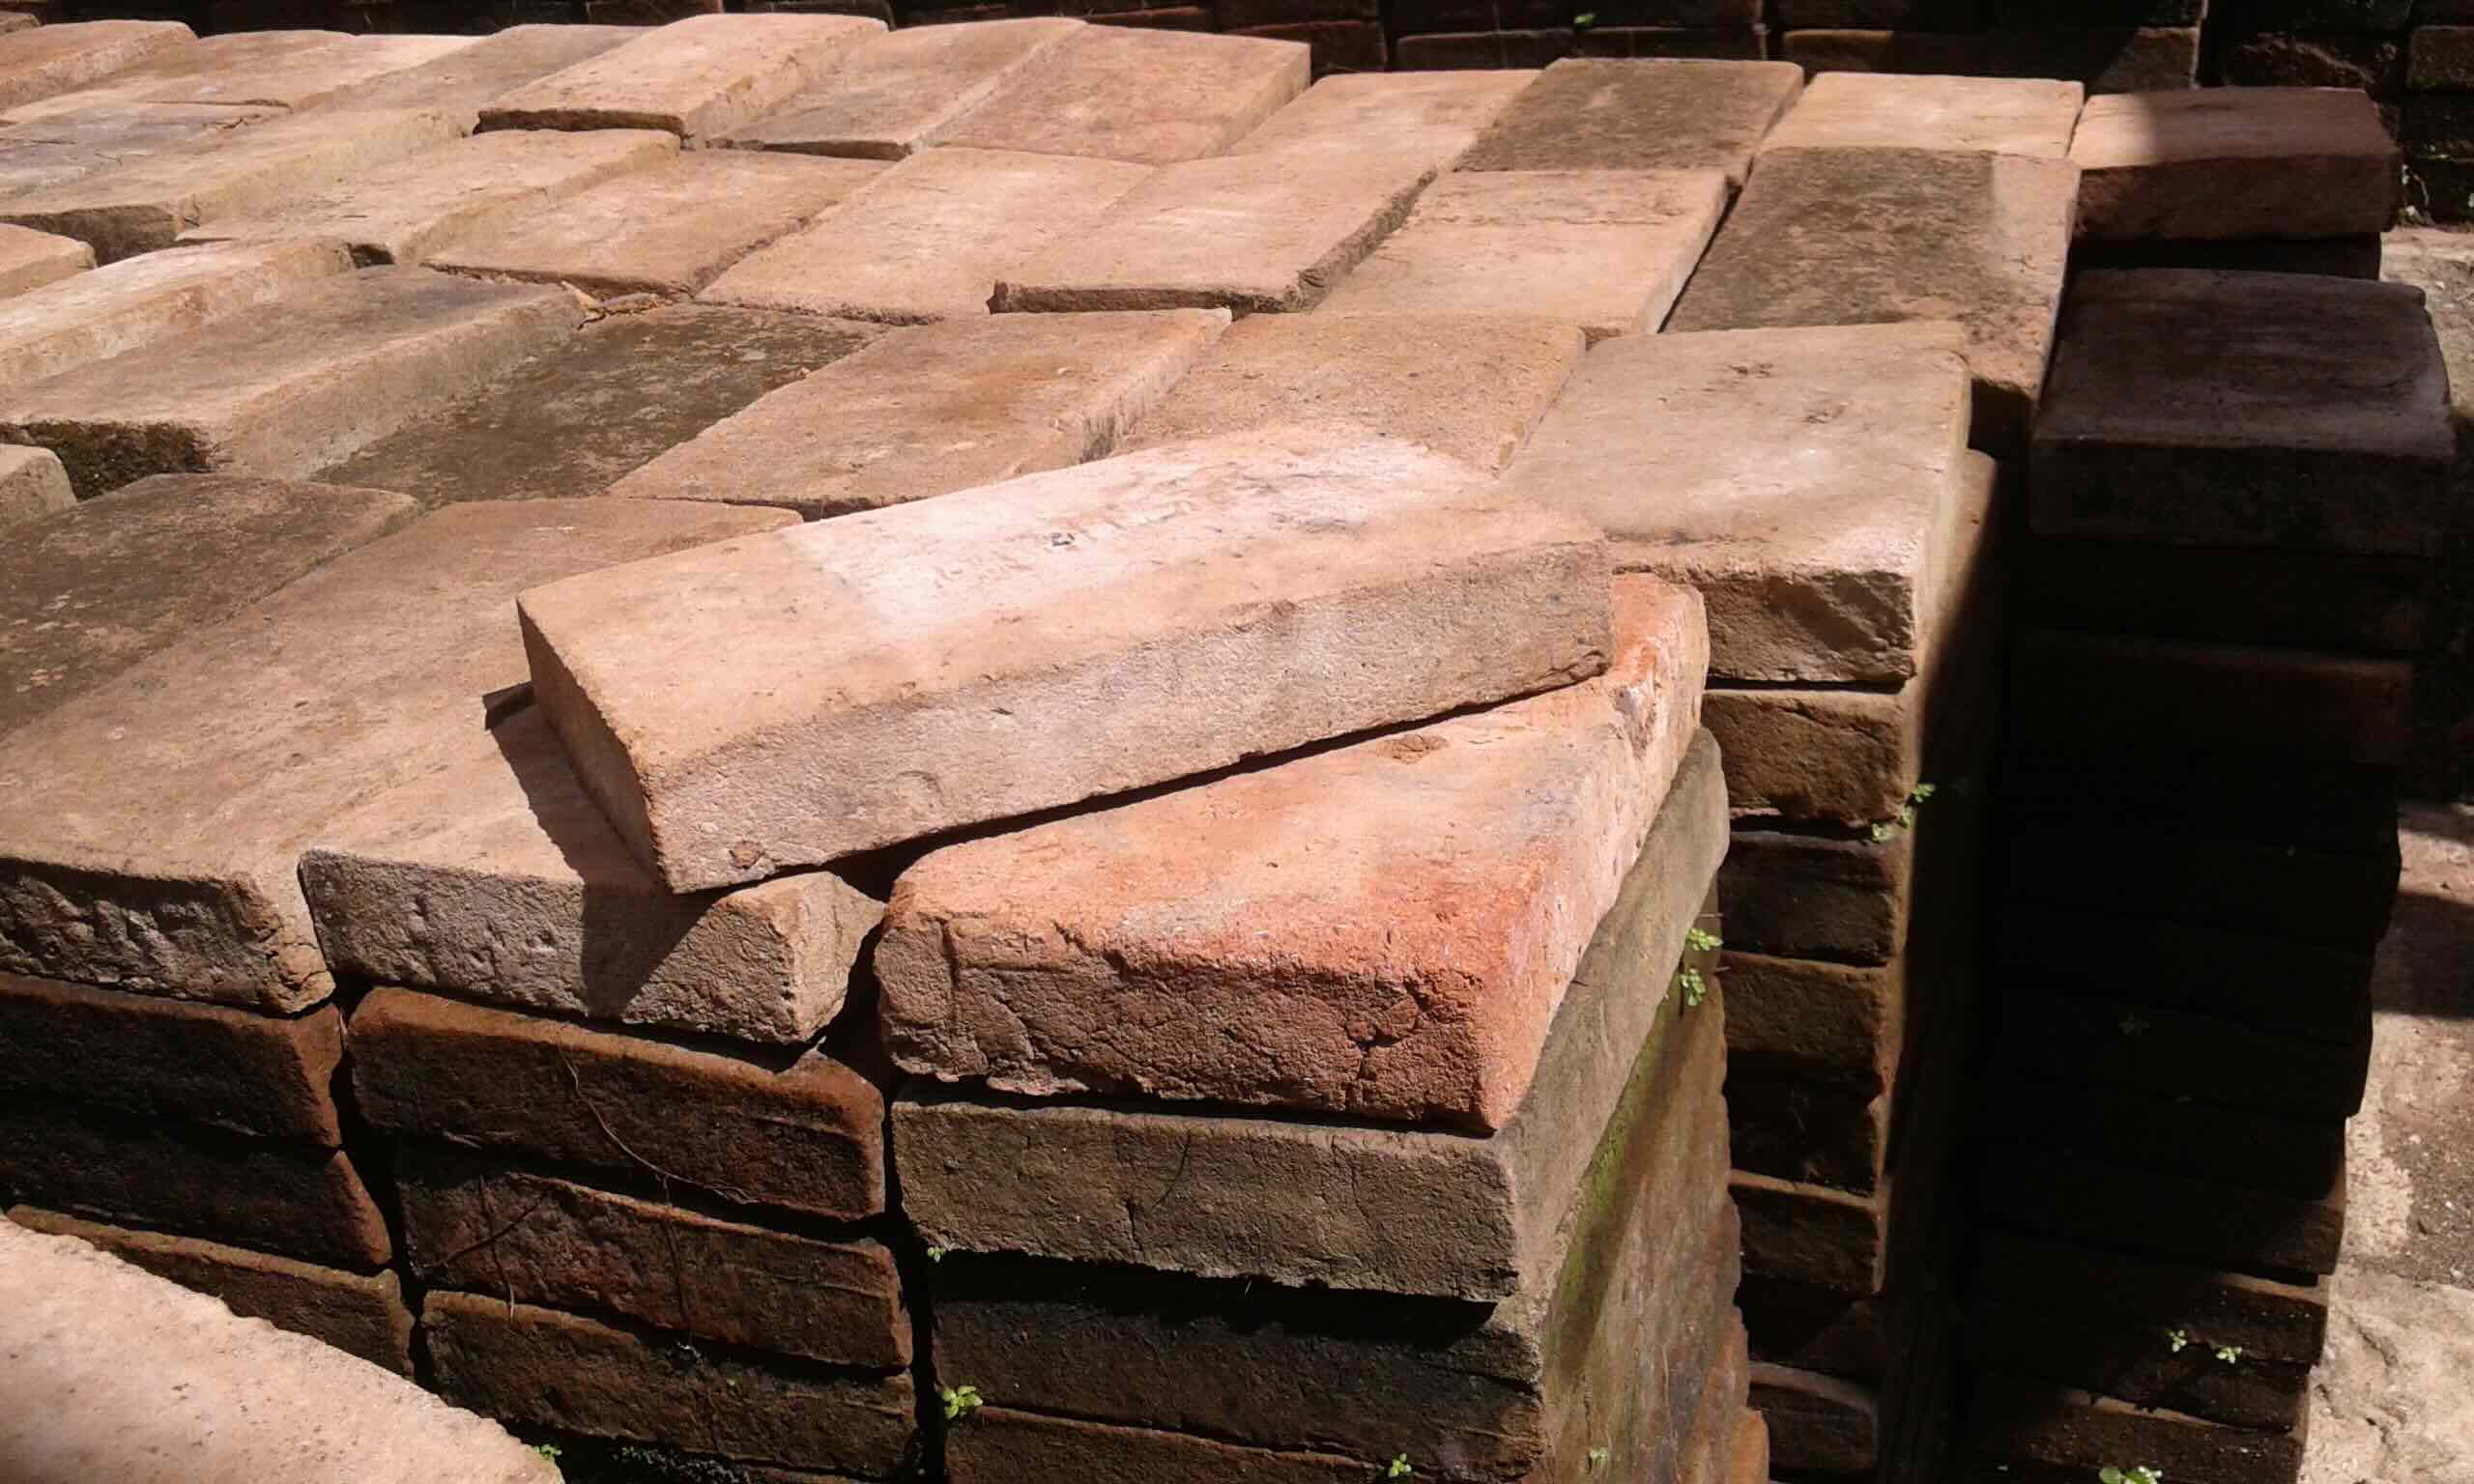
Making clay bricks is a time-honored craft that has been practiced for thousands of years. The process of creating bricks from clay involves a series of intricate steps that require patience, precision, and a deep understanding of the materials involved. Clay bricks are renowned for their durability, versatility, and timeless appeal, making them a popular choice for construction and landscaping projects.
In this comprehensive guide, we will delve into the art of crafting clay bricks from scratch. From gathering the essential materials to shaping, drying, and firing the bricks, each stage of the process plays a crucial role in producing high-quality, resilient bricks. Whether you are a seasoned artisan or a curious enthusiast eager to explore the world of traditional craftsmanship, this step-by-step tutorial will equip you with the knowledge and skills needed to create your own clay bricks.
Embark on this journey with an open mind and a willingness to embrace the rich history and artistry of brick-making. As we unravel the intricacies of this ancient practice, you will gain a profound appreciation for the craftsmanship and dedication required to transform raw clay into sturdy, enduring bricks. So, roll up your sleeves, gather your tools, and let's embark on this fascinating adventure into the world of clay brick production.
Key Takeaways:
- Crafting clay bricks involves gathering materials, preparing the clay, shaping the bricks, drying them, and firing them in a kiln. Each step requires patience, precision, and a deep understanding of the materials involved.
- The art of traditional brick-making is a harmonious dance between nature and human endeavor, yielding enduring structures that stand as testaments to the enduring legacy of craftsmanship and the profound connection between the past, the present, and the timeless artistry that continues to shape our world.
Read more: How To Make A Clay Pizza Oven
Step 1: Gathering Materials
Before delving into the intricate process of making clay bricks, it is essential to gather the necessary materials and tools. Each component plays a crucial role in ensuring the quality and durability of the final product. Here's a detailed breakdown of the materials required:
1. Clay
The primary ingredient for crafting clay bricks is, of course, the clay itself. Opt for high-quality clay that is free from impurities and debris. Clay with a balanced composition of sand, silt, and clay particles is ideal for brick-making. You can source clay from natural deposits, such as riverbanks or quarries, or purchase it from a reputable supplier.
2. Water
Water is a vital component in the brick-making process, as it facilitates the plasticity of the clay and aids in the formation of a cohesive brick mixture. Ensure that the water used is clean and free from contaminants, as impurities can compromise the integrity of the bricks.
3. Sand
Incorporating sand into the brick mixture enhances its strength and reduces shrinkage during the drying and firing stages. Opt for coarse sand with uniform particles to achieve optimal results. The sand should be free from organic matter and other impurities that could affect the structural integrity of the bricks.
Read more: How To Make A Brick
4. Molding Tools
To shape the clay into uniform bricks, you will need appropriate molding tools. Wooden or metal molds, often in the form of rectangular frames, are commonly used to shape the clay mixture into individual bricks. These molds should be sturdy and well-crafted to ensure consistent brick dimensions.
5. Cutting Wire or Knife
A cutting wire or knife is essential for trimming excess clay and achieving clean, precise edges when shaping the bricks. This tool allows for the seamless separation of individual bricks from the larger clay mass, ensuring uniformity in size and shape.
6. Work Surface
A flat, smooth work surface is essential for preparing and molding the clay mixture. Whether it's a sturdy table, a concrete slab, or a wooden board, the work surface should provide ample space for maneuvering the clay and molding tools.
7. Protective Gear
Working with clay and other materials necessitates the use of protective gear. Gloves, aprons, and dust masks are essential for ensuring personal safety and minimizing exposure to potentially harmful substances.
By meticulously gathering these materials and tools, you will lay a solid foundation for the subsequent steps in the brick-making process. Each component contributes to the overall quality and structural integrity of the final clay bricks, underscoring the importance of careful preparation and attention to detail.
Read more: How To Make Brick Molds
Step 2: Preparing the Clay
The process of preparing the clay is a pivotal stage in brick-making, as it sets the foundation for the structural integrity and aesthetic appeal of the final bricks. Properly preparing the clay involves a series of meticulous steps aimed at achieving the ideal consistency, removing impurities, and enhancing the plasticity of the clay mixture.
1. Clay Selection and Extraction
The first step in preparing the clay involves selecting the appropriate type of clay and extracting it from its source. High-quality clay should possess a balanced composition of sand, silt, and clay particles, ensuring optimal plasticity and strength in the final bricks. Whether sourced from natural deposits or obtained from a supplier, the clay should be free from contaminants and debris, requiring careful extraction and handling.
2. Weathering and Aging
Once the clay is collected, it undergoes a process of weathering and aging to improve its workability and plasticity. Weathering involves exposing the clay to natural elements, such as sunlight and moisture, to facilitate the breakdown of organic matter and the development of desirable clay properties. Aging the clay further enhances its plasticity and reduces shrinkage during the drying and firing stages, resulting in more resilient bricks.
3. Crushing and Sieving
To ensure a uniform and refined clay mixture, the raw clay undergoes crushing and sieving processes. Crushing the clay into smaller particles aids in the removal of impurities and the homogenization of its composition. Sieving the crushed clay helps to eliminate coarse particles and foreign matter, resulting in a smoother, more consistent clay mixture ready for further processing.
Read more: How To Make Brick Slips
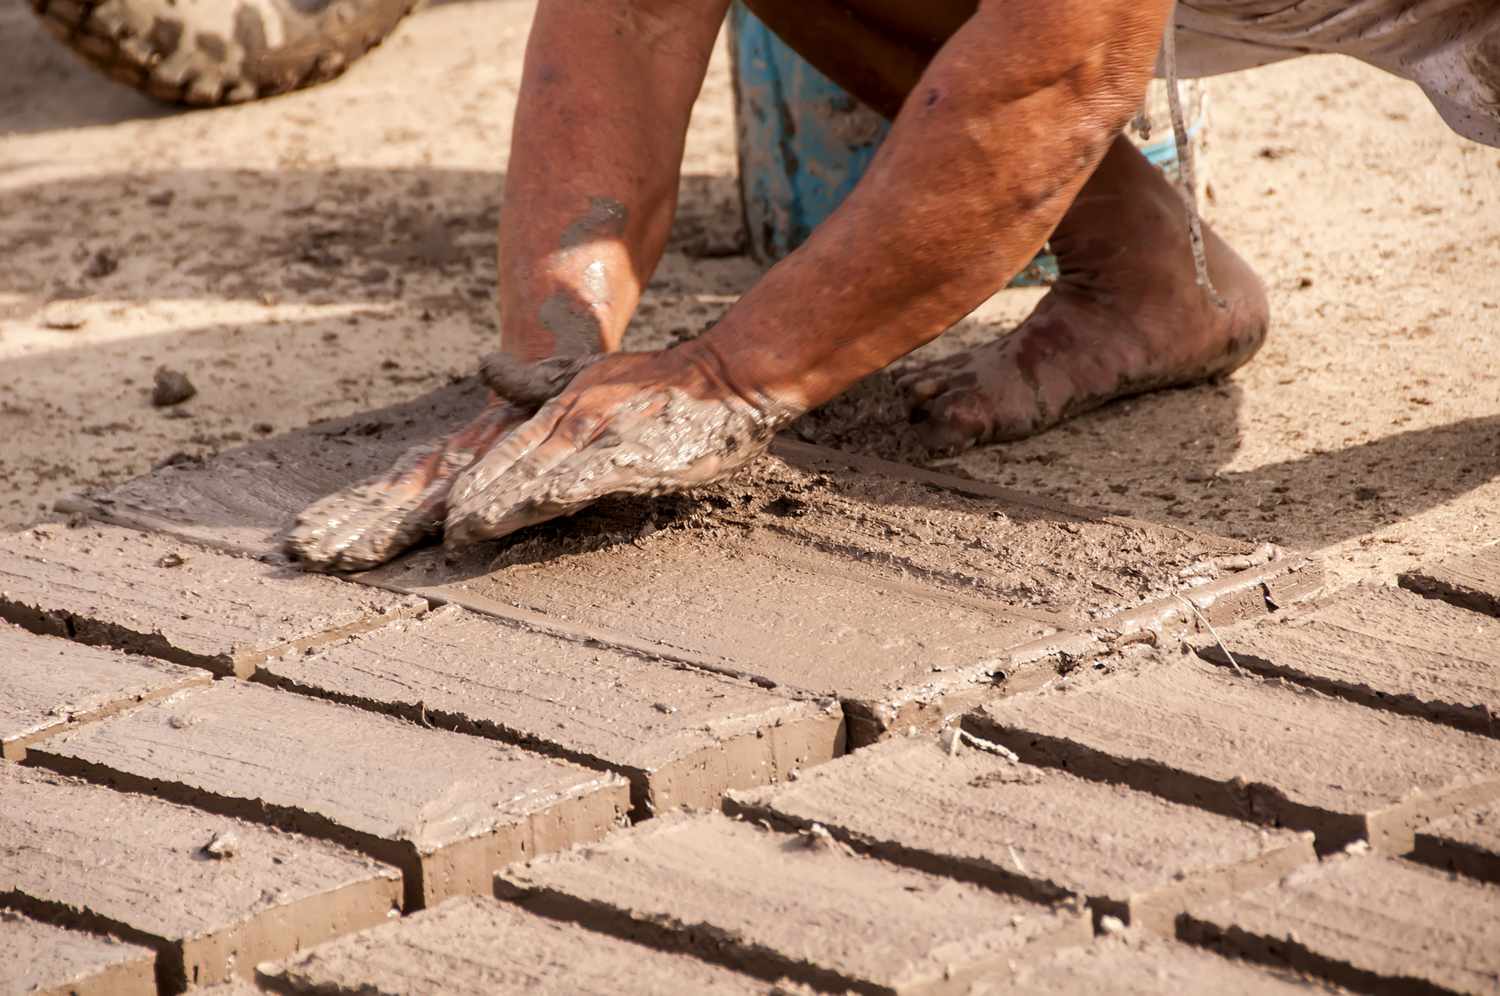
4. Mixing and Tempering
The crushed and sieved clay is then mixed with water to achieve the desired plasticity and workability. This process, known as tempering, involves thoroughly blending the clay and water to create a cohesive, moldable mixture. The water-to-clay ratio is carefully calibrated to ensure that the resulting clay mixture exhibits optimal plasticity without being overly wet or dry, setting the stage for successful brick molding.
5. Testing and Adjustment
Throughout the preparation process, it is crucial to periodically test the clay mixture's plasticity, texture, and consistency. Adjustments to the water content or clay composition may be necessary to achieve the ideal balance for brick-making. This iterative approach to testing and adjustment ensures that the prepared clay meets the stringent requirements for producing durable, high-quality bricks.
By meticulously following these steps, brick-makers can prepare the clay with precision and finesse, laying the groundwork for the subsequent stages of shaping, drying, and firing the bricks. The art of clay preparation embodies the fusion of scientific principles and artisanal expertise, underscoring the intricate nature of traditional brick-making practices.
Step 3: Shaping the Bricks
Shaping the clay into uniform bricks is a pivotal stage in the brick-making process, requiring precision, dexterity, and a keen eye for detail. The art of brick shaping involves transforming the prepared clay mixture into individual bricks of consistent size, shape, and texture, laying the foundation for the structural integrity and visual appeal of the final product.
1. Molding the Clay
The shaping process commences with the placement of the prepared clay mixture into sturdy, well-crafted molds. These molds, often in the form of rectangular frames, provide the framework for shaping the clay into distinct brick units. The clay is carefully pressed and compacted within the molds, ensuring that it fills the entire space and assumes the desired dimensions. The meticulous placement and compaction of the clay within the molds are essential for achieving uniformity and structural integrity in the resulting bricks.
Read more: How To Make Brick Red
2. Smoothing and Leveling
Once the clay is firmly packed into the molds, the surface is meticulously smoothed and leveled to remove any excess clay and achieve clean, precise edges. This process involves using a cutting wire or knife to trim the protruding clay, ensuring that the edges are sharp and well-defined. By meticulously smoothing and leveling the clay within the molds, brick-makers can create bricks with consistent dimensions and a refined, professional finish.
3. Releasing the Bricks
After the clay has been shaped and smoothed within the molds, the next step involves carefully releasing the formed bricks from the molds. This delicate process requires finesse and attention to detail to prevent distortion or damage to the freshly shaped bricks. The released bricks are then set aside for the subsequent drying phase, marking the completion of the shaping process.
4. Artisanal Expertise and Precision
Shaping the clay into bricks is a testament to the artisanal expertise and precision required in traditional brick-making. Each step in the shaping process demands a delicate balance of technique and finesse, as well as a deep understanding of the clay's behavior and characteristics. The art of brick shaping embodies the fusion of craftsmanship and scientific principles, resulting in bricks that exhibit uniformity, strength, and visual appeal.
By meticulously shaping the clay into bricks with precision and care, brick-makers lay the groundwork for the final stages of drying and firing, bringing them one step closer to the realization of durable, timeless clay bricks.
Step 4: Drying the Bricks
Drying the freshly shaped clay bricks is a critical phase in the brick-making process, as it sets the stage for the subsequent firing stage and ultimately determines the bricks' strength, durability, and resistance to weathering. Proper drying is essential to ensure that the bricks maintain their shape and structural integrity, preventing cracking or warping during the firing process. The meticulous approach to drying the bricks involves a combination of time, controlled environmental conditions, and careful handling to achieve optimal results.
Read more: How To Make A Brick Kiln
1. Air Drying
After being shaped and released from the molds, the bricks are carefully arranged in a well-ventilated area to undergo the initial air drying phase. This stage allows the bricks to gradually lose moisture and attain a level of firmness while retaining their shape. The bricks are positioned in a single layer, ensuring adequate airflow around each unit to promote uniform drying. The duration of air drying varies depending on factors such as ambient humidity, temperature, and the initial moisture content of the bricks.
2. Controlled Environment
As the bricks progress through the air drying phase, it is crucial to monitor and regulate the environmental conditions to facilitate consistent and thorough drying. Exposure to direct sunlight and excessive heat should be avoided, as rapid drying can lead to surface cracking and uneven moisture distribution within the bricks. Instead, the bricks are shielded from direct sunlight and placed in a shaded area with good air circulation, allowing for gradual, controlled drying.
3. Turning and Inspection
Throughout the drying process, the bricks are periodically turned to ensure uniform drying on all sides. This practice prevents uneven moisture absorption and minimizes the risk of warping or deformation. Additionally, regular inspection of the bricks allows for the early detection of any surface imperfections or signs of uneven drying, enabling prompt adjustments to the drying conditions as needed.
4. Patience and Precision
The art of drying clay bricks epitomizes the virtues of patience and precision, as brick-makers carefully orchestrate the drying environment to achieve optimal results. The gradual reduction of moisture content within the bricks is a delicate balancing act, requiring attentiveness to environmental factors and a keen eye for detail. By exercising patience and precision during the drying phase, brick-makers lay the groundwork for the subsequent firing stage, ensuring that the bricks are primed for the transformation into resilient, enduring structures.
Read more: How To Make A Brick Stove
5. Readiness for Firing
Once the bricks have undergone thorough air drying and achieved the desired level of firmness, they are deemed ready for the final firing stage. The careful, methodical approach to drying ensures that the bricks are well-prepared to withstand the intense heat of the kiln, allowing for the consolidation of their structure and the development of desirable physical and mechanical properties.
In essence, the drying phase represents a pivotal stage in the journey from raw clay to durable bricks, underscoring the meticulous care and attention to detail that define the art of traditional brick-making.
Step 5: Firing the Bricks
Firing the dried clay bricks is the culminating stage in the intricate process of traditional brick-making, marking the transformation of raw clay into resilient, enduring structures. The firing process involves subjecting the dried bricks to intense heat within a kiln, leading to a series of transformative physical and chemical reactions that imbue the bricks with strength, durability, and resistance to the elements.
1. Loading the Kiln
The firing process commences with the careful loading of the dried bricks into the kiln, a specialized furnace designed to withstand high temperatures. The bricks are arranged in a manner that allows for uniform heat distribution and optimal exposure to the intense firing conditions. This meticulous arrangement ensures that each brick undergoes consistent transformation, resulting in a cohesive, high-quality batch of fired bricks.
2. Gradual Heating
Once the kiln is loaded, the firing chamber is gradually heated to elevate the temperature within the kiln. The initial stages of firing involve a gradual increase in temperature, allowing the bricks to acclimate to the rising heat and minimizing the risk of thermal shock. This controlled heating process is essential for preventing cracking or structural damage to the bricks, ensuring a successful firing outcome.
Read more: How To Store Clay
3. Firing Cycle
As the temperature within the kiln continues to rise, the bricks undergo a series of critical transformations. At lower temperatures, the organic matter within the clay combusts, releasing gases and impurities from the bricks. Subsequently, the clay particles undergo vitrification, a process in which they fuse together, forming a dense, solid matrix. This fusion results in the development of the bricks' characteristic strength and durability, setting the stage for their enduring utility in construction and landscaping applications.
4. Cooling and Unloading
Following the completion of the firing cycle, the kiln is gradually cooled to allow the fired bricks to reach a manageable temperature. This controlled cooling phase is essential for preventing thermal stress and ensuring that the bricks retain their structural integrity. Once the bricks have cooled to a suitable level, they are carefully unloaded from the kiln, revealing their transformed state as durable, resilient building materials ready for use in a myriad of construction projects.
5. Quality Assurance
The fired bricks undergo meticulous inspection to assess their quality, structural integrity, and uniformity. Any imperfections or irregularities are identified and addressed, ensuring that only the highest-quality bricks are selected for use in construction and architectural endeavors. This rigorous quality assurance process underscores the commitment to excellence and precision that defines the art of traditional brick-making.
In essence, the firing of clay bricks represents the culmination of a time-honored craft, where the fusion of artistry, scientific principles, and meticulous craftsmanship yields enduring structures that stand the test of time. The fired bricks, imbued with strength, durability, and timeless appeal, serve as a testament to the rich legacy of traditional brick-making and the enduring value of artisanal expertise.
Conclusion
The journey from raw clay to durable, fired bricks is a testament to the artistry, precision, and time-honored craftsmanship that define traditional brick-making. Each stage of the process, from gathering the essential materials to shaping, drying, and firing the bricks, embodies a delicate balance of scientific principles and artisanal expertise. The culmination of these intricate steps yields bricks that are not merely building materials, but enduring symbols of human ingenuity and resilience.
As the fired bricks emerge from the kiln, they bear the indelible marks of a transformative journey. Their robust structure, timeless appeal, and unwavering durability stand as a testament to the enduring value of traditional craftsmanship. These bricks, imbued with strength and character, are poised to become integral components of architectural endeavors, construction projects, and landscaping ventures, enriching the built environment with their enduring presence.
The art of traditional brick-making transcends mere technical proficiency; it embodies a profound connection to the earth, the elements, and the timeless traditions of human creativity. It is a celebration of the raw materials that shape our world and the skilled hands that mold them into enduring structures. The process of crafting clay bricks from raw materials is a harmonious dance between nature and human endeavor, yielding structures that stand as testaments to the enduring legacy of traditional craftsmanship.
As we conclude this comprehensive guide, it is essential to recognize the profound heritage and cultural significance embedded within the craft of brick-making. The knowledge and skills passed down through generations, the reverence for natural materials, and the dedication to precision and excellence converge in the creation of each brick. These bricks, born from the earth and shaped by human hands, carry within them the echoes of centuries past and the promise of enduring strength for generations to come.
In essence, the art of making clay bricks is a timeless testament to the enduring spirit of human creativity and resilience. It is a celebration of tradition, craftsmanship, and the enduring legacy of a craft that has shaped the built environment for millennia. As we reflect on the intricate process of transforming raw clay into durable, fired bricks, we are reminded of the profound connection between the past, the present, and the timeless artistry that continues to shape our world.
Frequently Asked Questions about How To Make A Clay Brick
Was this page helpful?
At Storables.com, we guarantee accurate and reliable information. Our content, validated by Expert Board Contributors, is crafted following stringent Editorial Policies. We're committed to providing you with well-researched, expert-backed insights for all your informational needs.


0 thoughts on “How To Make A Clay Brick”