Home>Home Appliances>Laundry Appliances>How To Clean The Filter In A Kenmore Top Loader Washing Machine
Laundry Appliances
How To Clean The Filter In A Kenmore Top Loader Washing Machine
Modified: August 27, 2024
Learn how to properly clean the filter in your Kenmore top loader washing machine for optimal performance and longevity. Keep your laundry appliances in top condition with these simple maintenance tips.
(Many of the links in this article redirect to a specific reviewed product. Your purchase of these products through affiliate links helps to generate commission for Storables.com, at no extra cost. Learn more)
Introduction
Maintaining a clean and efficient washing machine is essential for ensuring the longevity of your appliance and the cleanliness of your laundry. One crucial aspect of washing machine maintenance is cleaning the filter in a Kenmore top loader washing machine. Over time, debris, lint, and other particles can accumulate in the filter, hindering the machine's performance and potentially leading to malfunctions. By regularly cleaning the filter, you can prevent clogs, improve washing machine efficiency, and extend its lifespan.
Cleaning the filter in a Kenmore top loader washing machine is a relatively simple task that can be performed with basic tools and minimal effort. This essential maintenance step can help you avoid costly repairs and keep your washing machine running smoothly. In this guide, we will walk you through the step-by-step process of cleaning the filter, empowering you to take proactive measures in maintaining your appliance. With a few easy steps, you can ensure that your Kenmore top loader washing machine continues to deliver optimal performance and clean clothes with every cycle.
Key Takeaways:
- Regularly cleaning the filter in your Kenmore top loader washing machine with basic tools and materials can prevent clogs, improve efficiency, and extend its lifespan, saving you from costly repairs.
- After cleaning and reinstalling the filter, test your washing machine to ensure it operates smoothly, indicating that the maintenance was effective in restoring optimal functionality and cleanliness.
Tools and Materials Needed
To clean the filter in your Kenmore top loader washing machine, you will need a few basic tools and materials to facilitate the process. Having these items on hand will ensure that you can efficiently and effectively complete the task without any unnecessary interruptions. Here's what you'll need:
-
Screwdriver: A screwdriver is essential for accessing the filter compartment in your Kenmore top loader washing machine. Depending on the model, you may need a Phillips or flat-head screwdriver to remove the access panel or cover.
-
Cleaning Cloth or Brush: A soft cleaning cloth or a small brush, such as a toothbrush, will be useful for gently removing any accumulated debris or lint from the filter. These tools will help you thoroughly clean the filter without causing any damage to its components.
-
Bucket or Towel: It's a good idea to have a bucket or a towel on hand to catch any water that may spill out when removing the filter. This will help prevent any mess and make the cleaning process more convenient.
-
Mild Detergent: Using a mild detergent or soap can aid in cleaning the filter effectively. This will help remove any stubborn residue or buildup that may have accumulated over time.
-
Gloves (Optional): While not essential, wearing gloves can protect your hands from coming into direct contact with any dirt or grime that may be present in the filter. This can be particularly helpful if the filter is heavily soiled.
By gathering these tools and materials before you begin, you can streamline the process of cleaning the filter in your Kenmore top loader washing machine. With these items at your disposal, you'll be well-prepared to tackle this maintenance task and keep your washing machine in optimal working condition.
Step 1: Turn Off the Washing Machine
Before embarking on the task of cleaning the filter in your Kenmore top loader washing machine, it is crucial to ensure the appliance is safely powered down. This initial step is essential for your safety and the proper execution of the maintenance process.
To begin, locate the power cord of the washing machine and unplug it from the electrical outlet. This action will effectively cut off the power supply to the appliance, preventing any potential electrical hazards during the cleaning procedure. It is important to verify that the washing machine is completely powered down before proceeding to the next steps.
In addition to unplugging the power cord, it is advisable to turn off the water supply to the washing machine. This can typically be achieved by shutting off the water valves connected to the appliance. By doing so, you can prevent any water from entering the machine while the filter is being cleaned, minimizing the risk of leaks or spills.
Turning off the washing machine and its water supply is a fundamental safety measure that should not be overlooked. By taking these precautions, you create a secure environment for performing the necessary maintenance tasks without the risk of electrical shock or water-related mishaps.
Once the washing machine is safely powered down and the water supply is turned off, you can proceed with confidence to the subsequent steps of locating, removing, and cleaning the filter. This proactive approach to safety sets the stage for a smooth and secure maintenance process, ensuring that you can effectively address the cleanliness and functionality of the filter in your Kenmore top loader washing machine.
By adhering to this initial step and prioritizing safety, you lay the groundwork for a successful and hassle-free filter cleaning process, ultimately contributing to the overall maintenance and performance of your washing machine.
Step 2: Locate the Filter
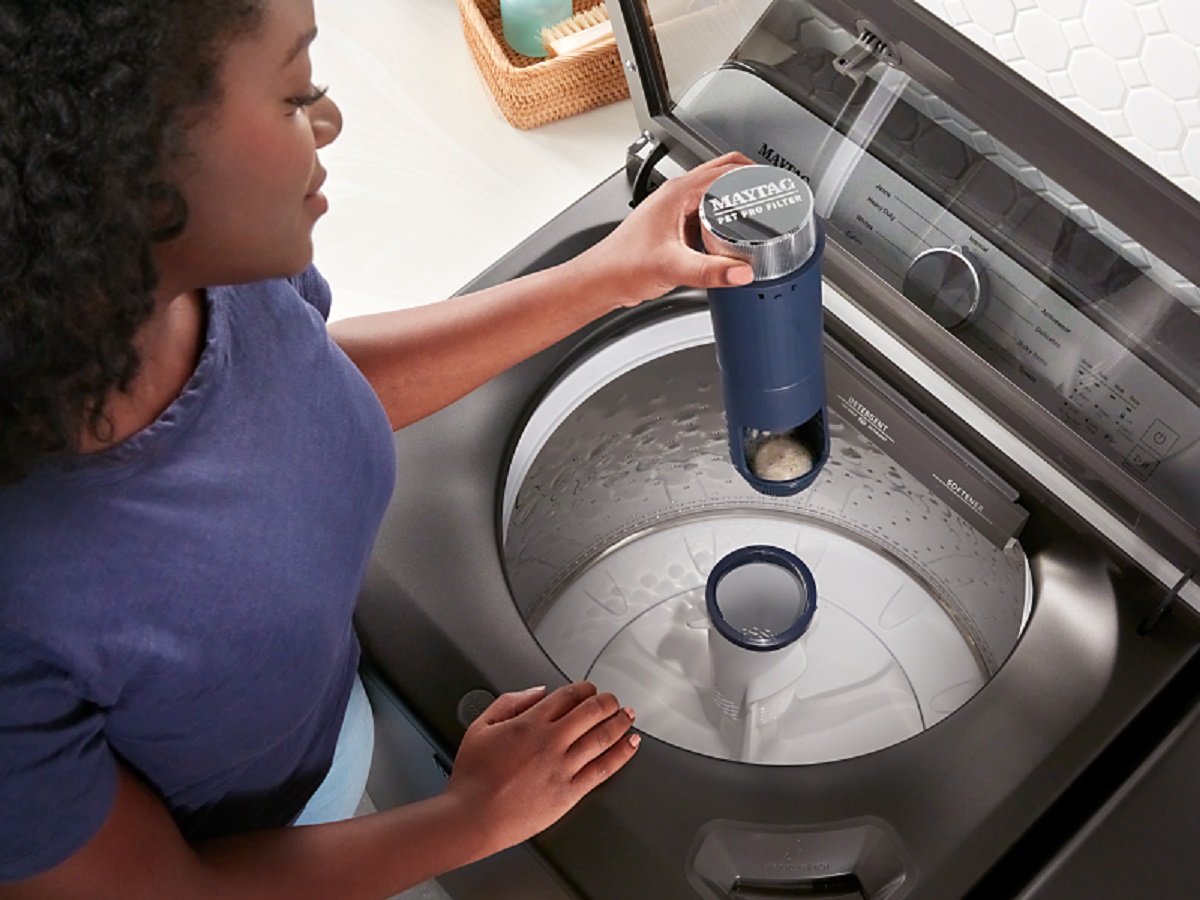
Locating the filter in your Kenmore top loader washing machine is a crucial step in the process of cleaning and maintaining your appliance. The filter plays a pivotal role in trapping lint, debris, and other particles that may be present in the laundry water, preventing them from entering the washing machine's drainage system. By effectively capturing these materials, the filter helps to maintain the cleanliness and functionality of the appliance, making it essential to identify its precise location for proper maintenance.
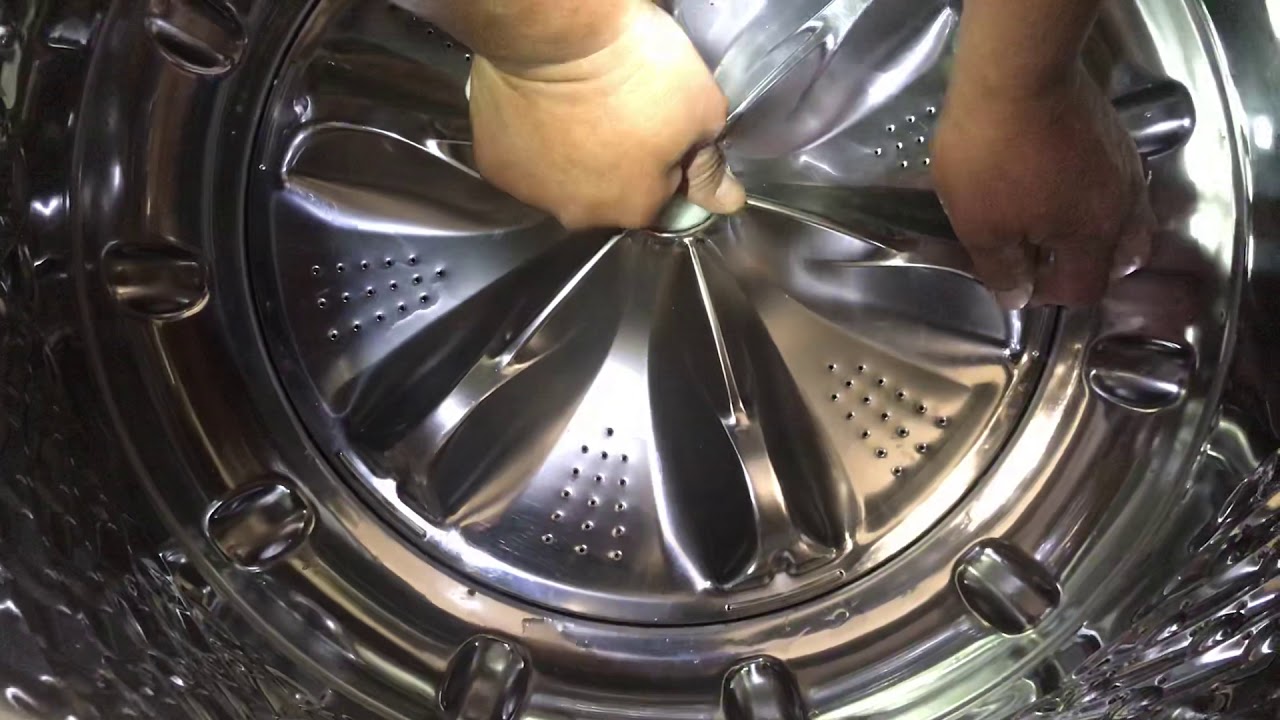
In most Kenmore top loader washing machines, the filter is typically situated near the agitator at the bottom of the tub. To begin the process of locating the filter, open the washing machine's lid and visually inspect the interior of the tub. Look for any visible access panels or covers that may conceal the filter compartment. Depending on the specific model of your Kenmore washing machine, the filter access point may be secured with screws or clips, requiring the use of a suitable tool, such as a screwdriver, to gain entry.
Once you have identified the access panel or cover, carefully remove any fasteners or attachments that may be securing it in place. Exercise caution to avoid damaging the panel or the surrounding components of the washing machine. With the access point open, you should be able to spot the filter housing, which may appear as a cylindrical or rectangular component located near the agitator.
As you visually inspect the filter housing, take note of any markings or labels that indicate its purpose and function. This can provide valuable insight into the specific design and characteristics of the filter, aiding in the subsequent steps of removing and cleaning it effectively. Additionally, refer to the washing machine's user manual for detailed guidance on locating the filter, as it may contain model-specific instructions and illustrations to assist you in this process.
By carefully identifying and accessing the filter in your Kenmore top loader washing machine, you set the stage for the subsequent steps of removing, cleaning, and reinstalling the filter. This proactive approach to locating the filter ensures that you can proceed with confidence and precision, ultimately contributing to the optimal maintenance and performance of your washing machine.
To clean the filter in a Kenmore top loader washing machine, first unplug the machine. Then, locate the filter near the bottom of the machine and remove any debris or lint. Finally, rinse the filter with warm water and reinsert it back into the machine.
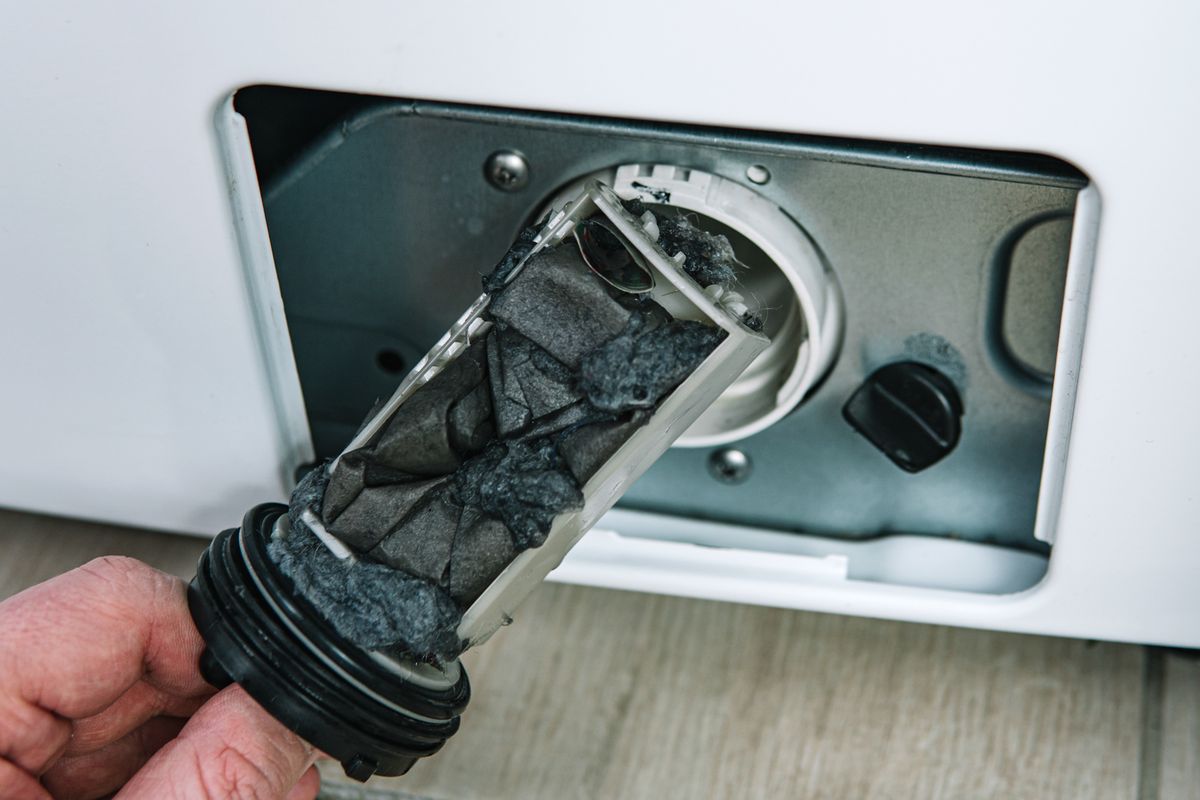
Step 3: Remove the Filter
With the filter housing accessible, the next critical step in the maintenance process of your Kenmore top loader washing machine is to remove the filter. This task requires careful attention to detail and a methodical approach to ensure the safe extraction of the filter for cleaning.
Begin by examining the filter housing to identify the specific mechanism securing the filter in place. Depending on the design of your washing machine, the filter may be held in position by a twist-lock mechanism, clips, or screws. Refer to the user manual for your Kenmore washing machine to understand the precise method for detaching the filter from its housing.
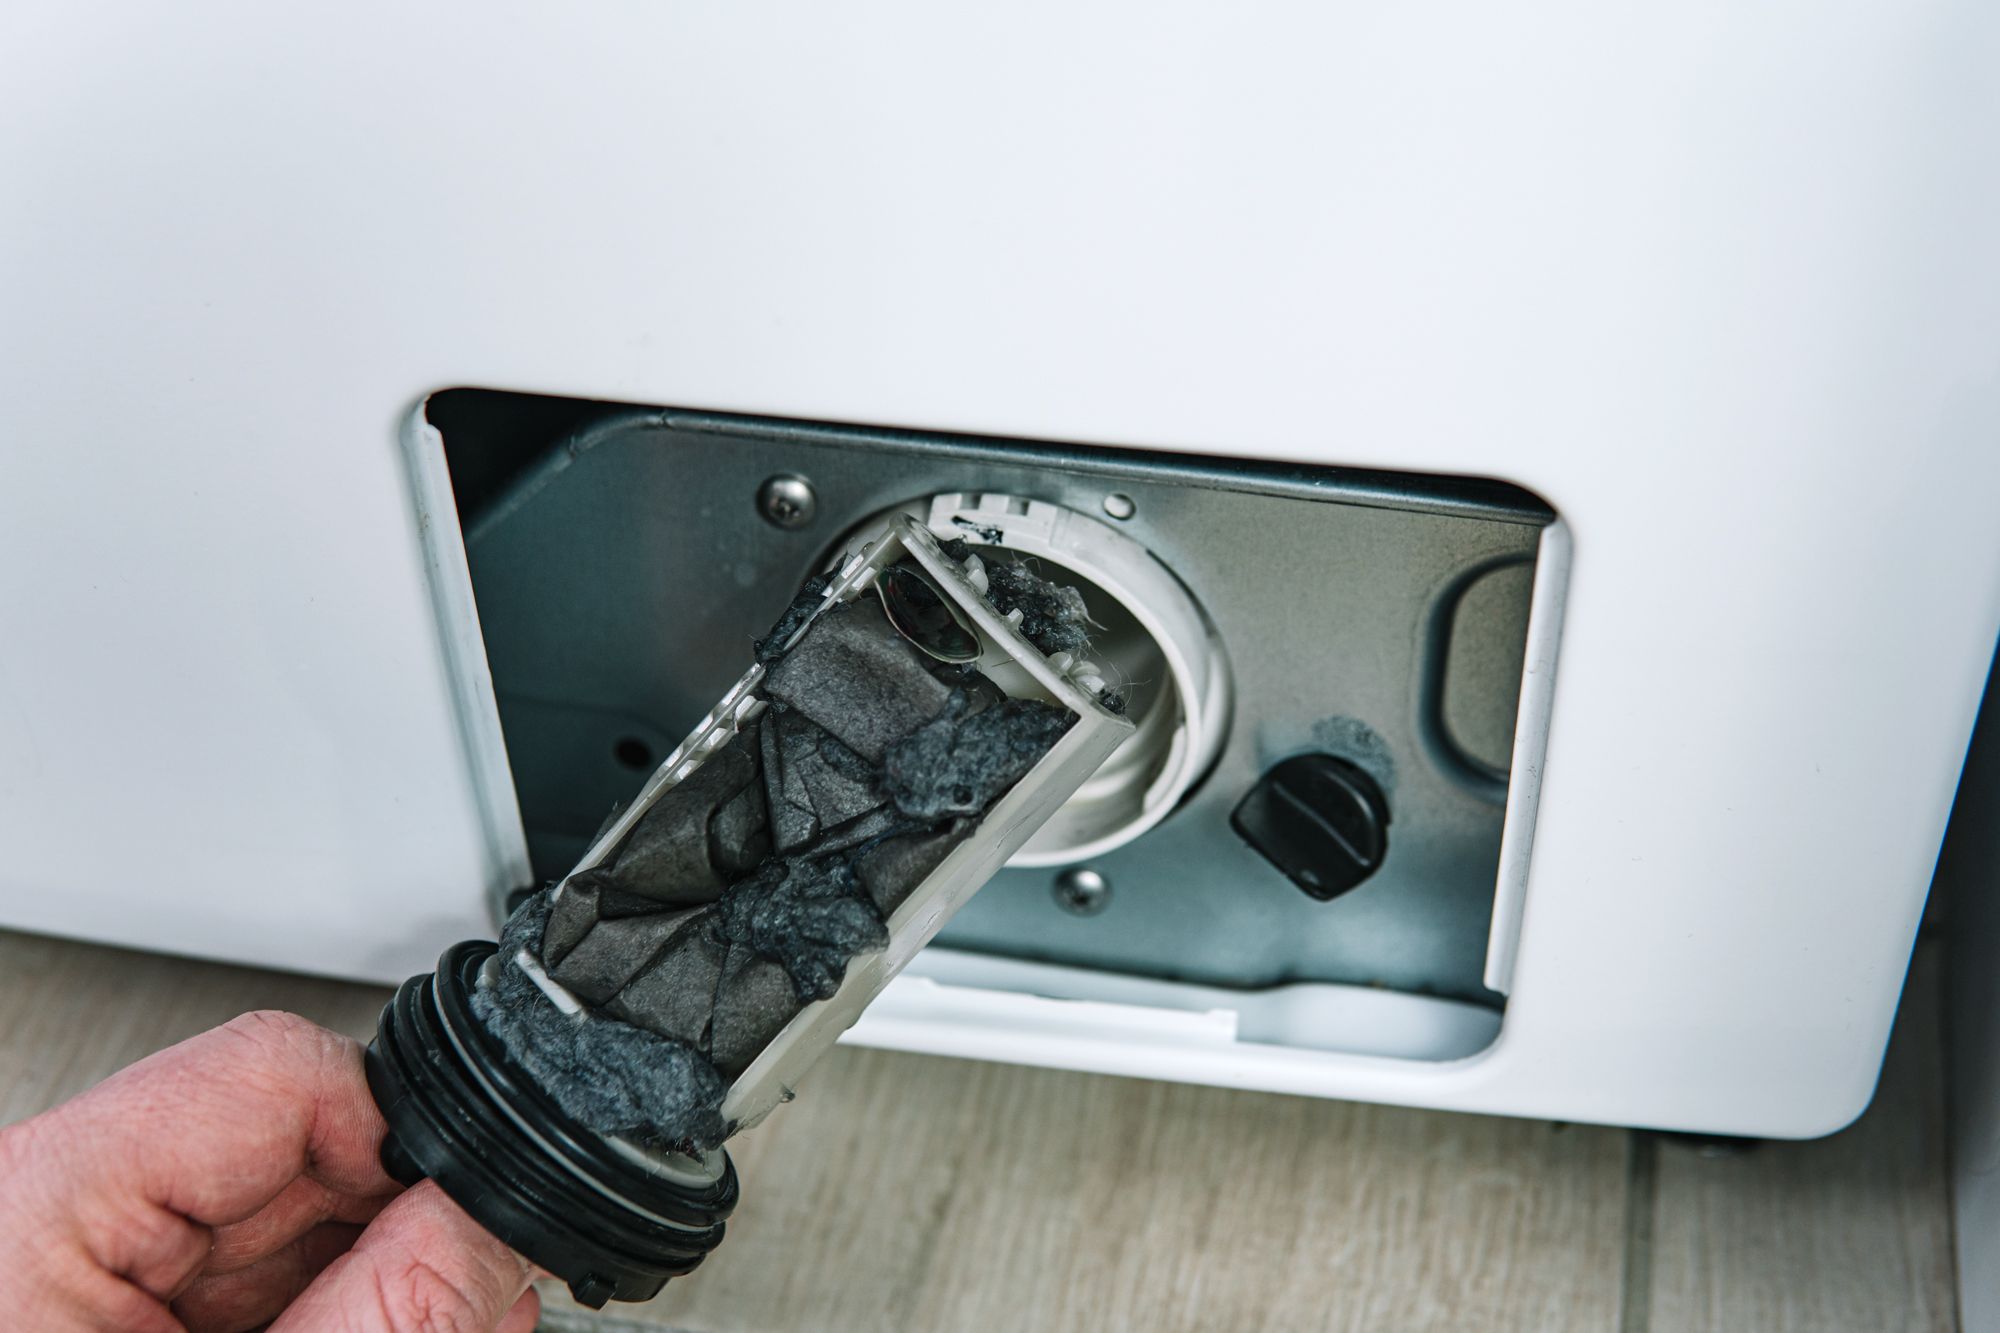
If the filter is secured with a twist-lock mechanism, carefully rotate it in the designated direction to release it from the housing. Exercise gentle and consistent pressure to avoid damaging the filter or its housing. In the case of clips or screws, use the appropriate tool, such as a screwdriver, to disengage the fasteners and free the filter from its position.
As you proceed to remove the filter, it is essential to handle it with care to prevent any damage or spillage of accumulated debris. Slowly and steadily extract the filter from the housing, taking note of its orientation and any additional components, such as gaskets or seals, that may be present. By maintaining a deliberate and cautious approach, you can ensure the safe removal of the filter without causing any unintended complications.
Once the filter is successfully detached from the housing, take a moment to inspect it for any visible signs of damage, wear, or excessive buildup. This visual assessment can provide valuable insights into the condition of the filter and any potential issues that may require attention. Additionally, take note of the location of any gaskets or seals to facilitate their proper reinstallation during the subsequent steps.
By methodically removing the filter from the housing, you pave the way for the pivotal stage of cleaning and maintaining this essential component of your Kenmore top loader washing machine. This proactive approach to filter removal sets the stage for the subsequent steps, ensuring that you can proceed with confidence and precision in restoring the cleanliness and functionality of the filter.
Read more: How to Clean Filter on LG Top Load Washer
Step 4: Clean the Filter
Cleaning the filter in your Kenmore top loader washing machine is a critical maintenance task that directly impacts the appliance's performance and longevity. Once the filter has been safely removed from its housing, the next step involves thorough cleaning to eliminate any accumulated debris, lint, or residue that may hinder its functionality. This essential process requires attention to detail and a methodical approach to ensure that the filter is effectively restored to optimal condition.
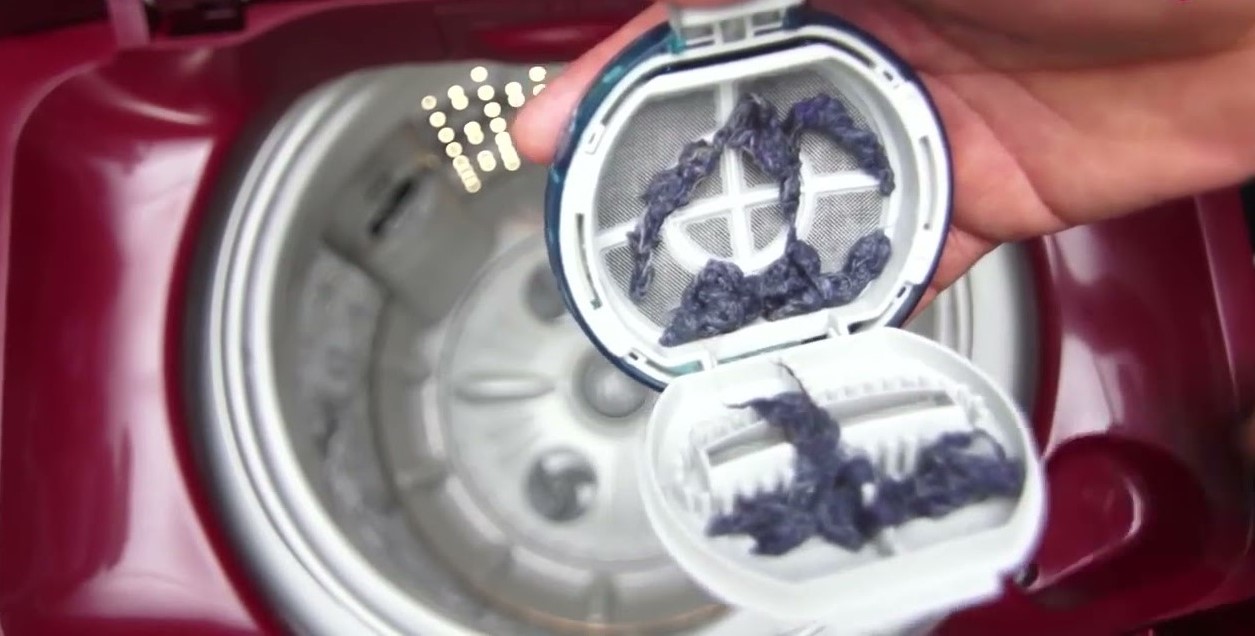
Begin the cleaning process by visually inspecting the filter for any visible debris, lint, or buildup. Use a soft cleaning cloth or a small brush, such as a toothbrush, to gently remove these particles from the surface of the filter. Exercise caution to avoid causing any damage to the filter's components while effectively dislodging the accumulated debris. Pay particular attention to the filter's mesh or screen, as this is where lint and particles tend to accumulate, potentially impeding water flow and drainage.
If the filter exhibits stubborn residue or buildup that cannot be easily removed with a dry cloth or brush, consider using a mild detergent or soap to aid in the cleaning process. Dilute the detergent in water and carefully apply it to the filter, allowing it to penetrate and loosen any persistent residue. Use the cleaning cloth or brush to gently scrub the filter, focusing on areas with noticeable buildup. Rinse the filter thoroughly with clean water to remove any traces of detergent, ensuring that it is completely free from cleaning agents before reinstallation.
In cases where the filter is heavily soiled or has not been cleaned for an extended period, it may be beneficial to soak it in a solution of water and mild detergent for a more thorough cleaning. Allow the filter to soak for a sufficient duration to loosen stubborn debris and residue, facilitating easier removal during the subsequent cleaning steps. After soaking, gently agitate the filter in the solution to dislodge any loosened particles before rinsing it thoroughly with clean water.
Once the filter has been cleaned and rinsed, carefully inspect it to ensure that all debris and residue have been effectively removed. Verify that the mesh or screen is clear of any obstructions and that the filter's components are free from damage or wear. Allow the filter to air dry completely before proceeding to the next step of reinstalling it in the washing machine.
By meticulously cleaning the filter, you contribute to the overall efficiency and functionality of your Kenmore top loader washing machine, ensuring that it can continue to deliver optimal performance and cleanliness with every laundry cycle. This proactive approach to filter maintenance sets the stage for the subsequent steps, ultimately enhancing the appliance's longevity and reliability.
Step 5: Reinstall the Filter
After the thorough cleaning of the filter, the next crucial step in the maintenance process of your Kenmore top loader washing machine is to reinstall the filter in its designated housing. This step requires precision and attention to detail to ensure that the filter is securely and correctly positioned, allowing it to effectively fulfill its role in maintaining the cleanliness and functionality of the appliance.
Begin the reinstallation process by carefully examining the filter and its housing to identify any gaskets or seals that may need to be positioned or replaced. These components play a vital role in creating a secure and watertight seal, preventing any leaks or bypass of debris during the washing machine's operation. If the gaskets or seals appear worn or damaged, consider replacing them with suitable replacements to maintain the integrity of the filter housing.
With the gaskets or seals in place, align the filter with its designated position in the housing, ensuring that it is oriented correctly and securely seated. Depending on the design of your Kenmore washing machine, the filter may need to be twisted, clipped, or fastened into place according to the manufacturer's specifications. Refer to the user manual for detailed guidance on the precise method for securing the filter in its housing, taking care to follow the recommended procedure to avoid any misalignment or instability.
As you proceed to reinstall the filter, verify that it is firmly and securely positioned, with no signs of looseness or misalignment. Gently test the filter to ensure that it is stable and properly seated, confirming that it will effectively trap debris and lint during the washing machine's operation. Pay close attention to any locking mechanisms or fasteners, ensuring that they are engaged according to the manufacturer's instructions to maintain the filter's integrity.
Once the filter is successfully reinstalled and secured in its housing, take a moment to double-check the surrounding area for any loose components or debris that may have been displaced during the reinstallation process. Clear any obstructions and ensure that the filter housing is free from any residual particles or cleaning agents, creating an optimal environment for the washing machine's subsequent operation.
By meticulously reinstalling the filter in your Kenmore top loader washing machine, you contribute to the appliance's overall functionality and efficiency, ensuring that it can continue to deliver exceptional performance and cleanliness with every laundry cycle. This proactive approach to filter maintenance sets the stage for the subsequent steps, ultimately enhancing the appliance's longevity and reliability.
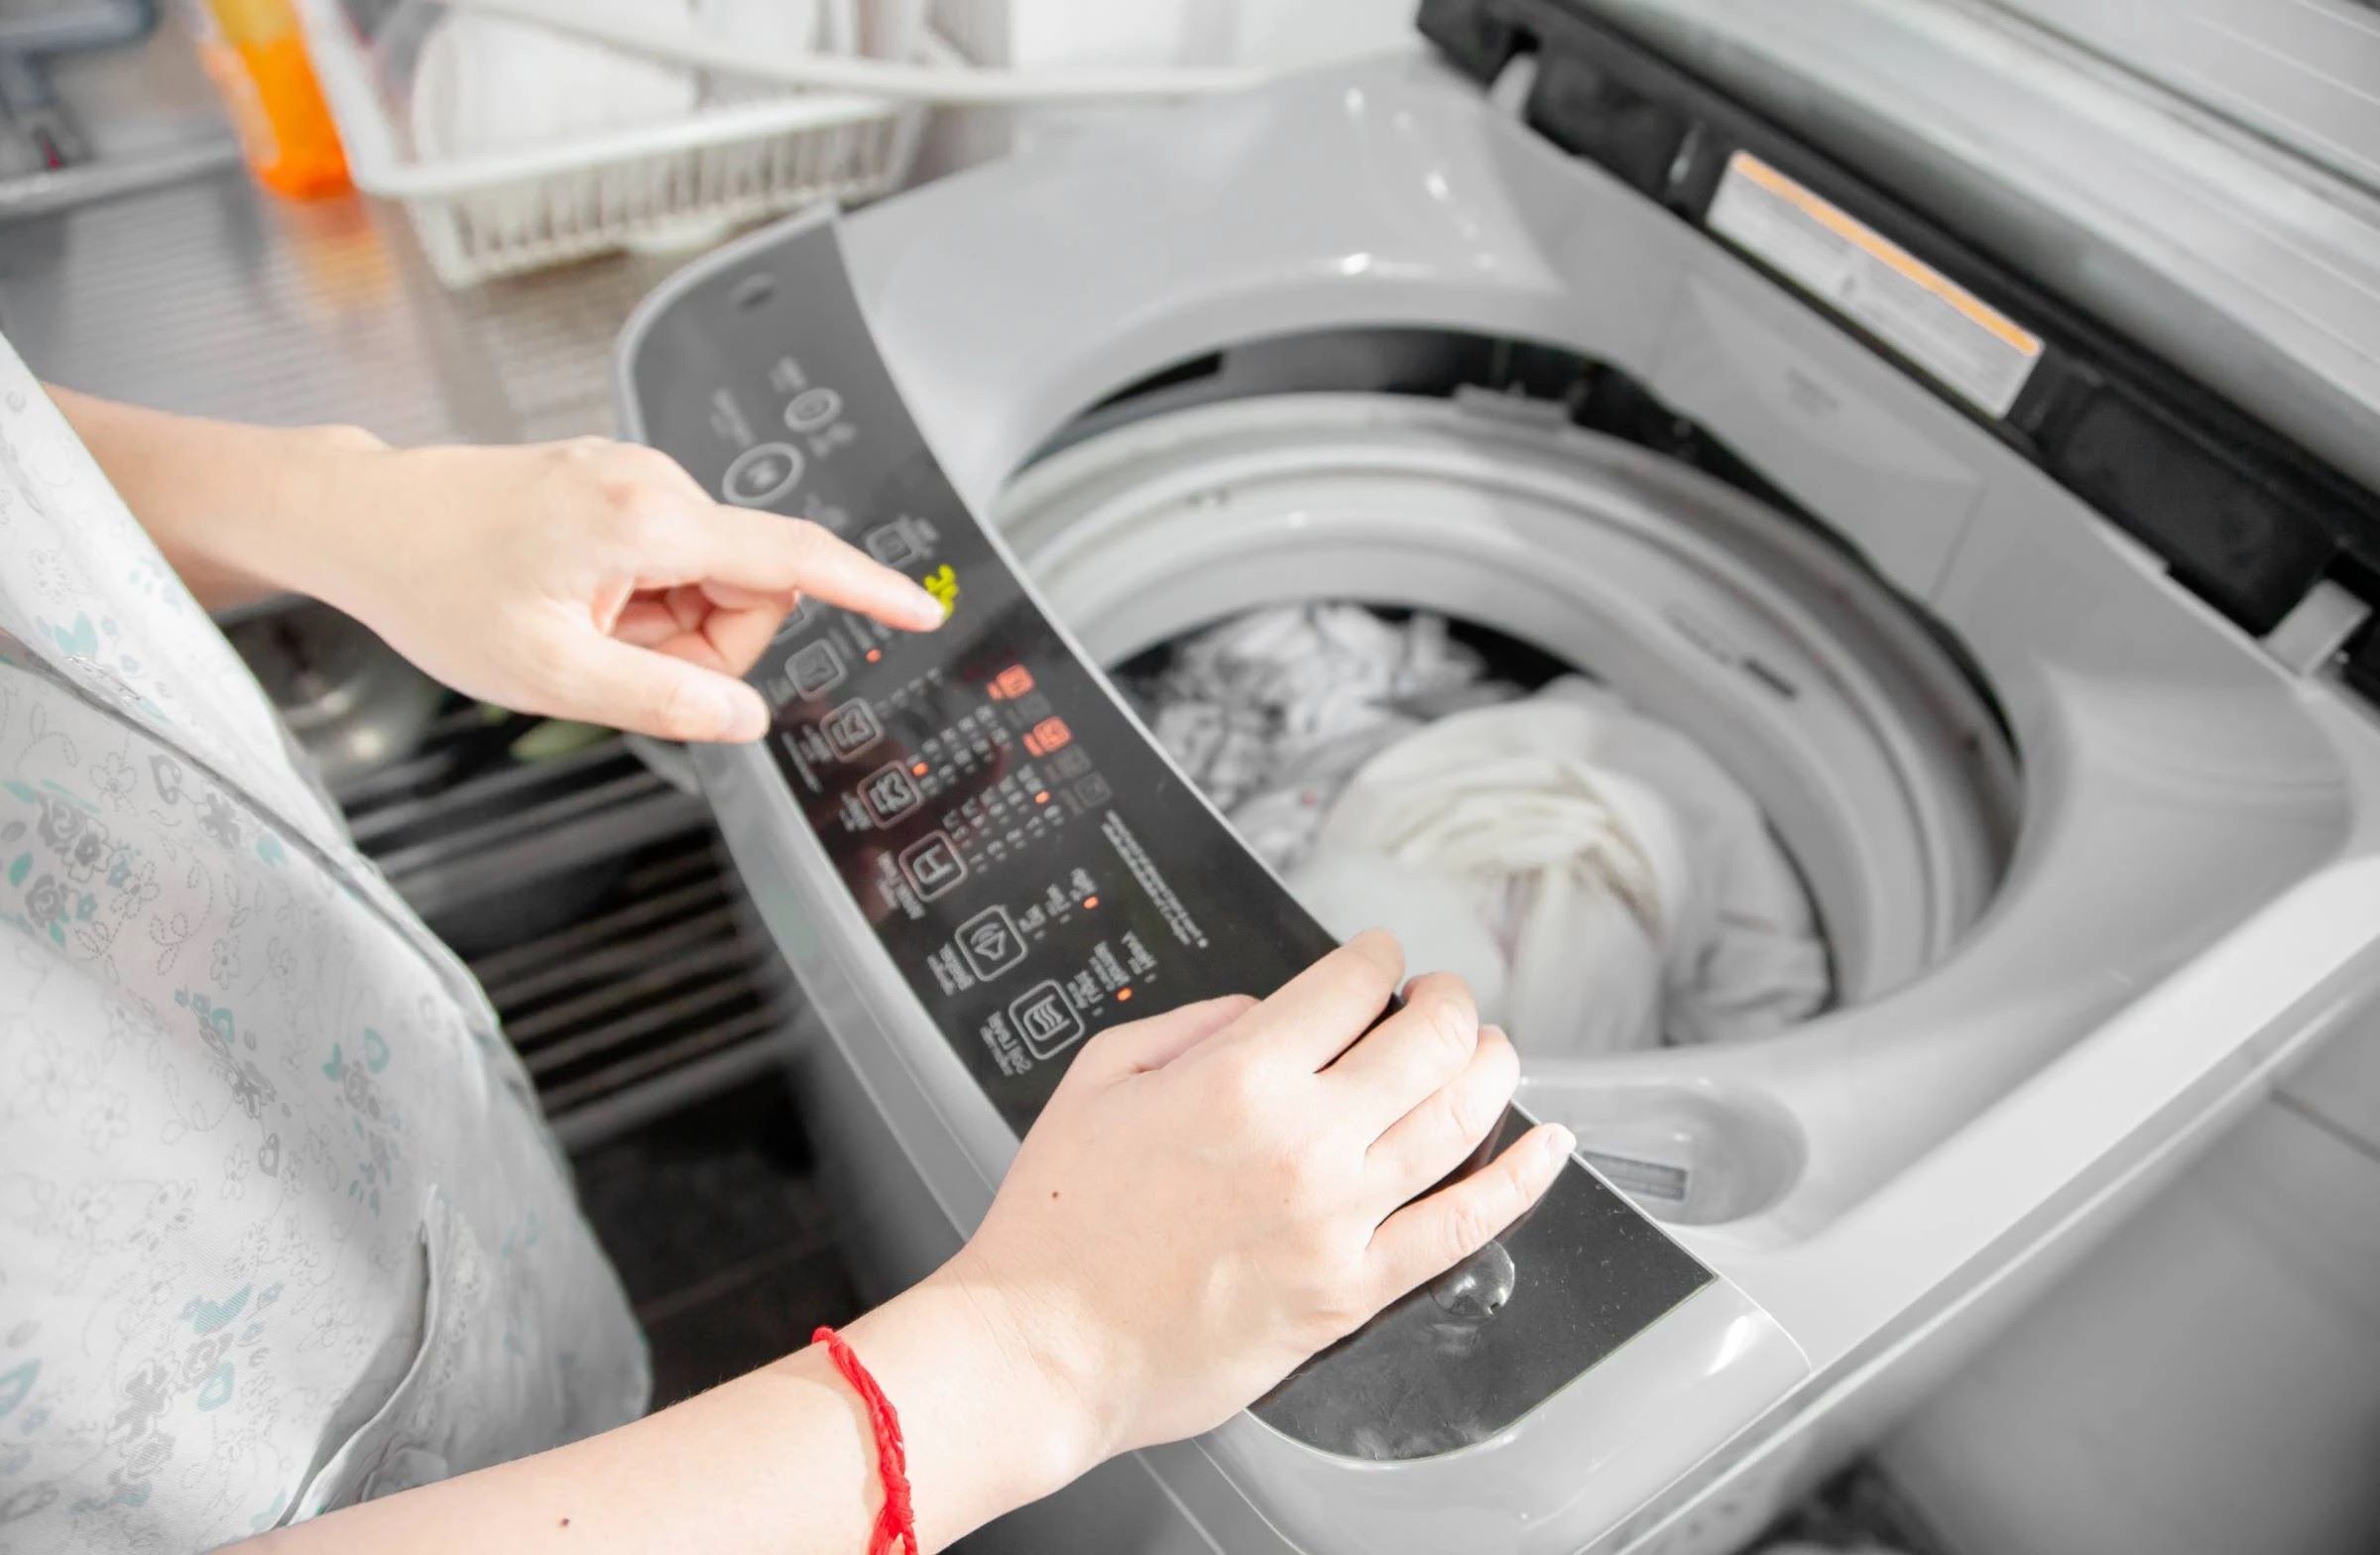
Step 6: Test the Washing Machine
After completing the meticulous process of cleaning and reinstalling the filter in your Kenmore top loader washing machine, the final step involves testing the appliance to ensure that the filter maintenance has been executed successfully. This critical phase allows you to verify the effectiveness of the cleaning process and confirm that the washing machine operates optimally following the maintenance procedure.
To begin the testing phase, plug the washing machine's power cord back into the electrical outlet, restoring the appliance's power supply. Once the power is restored, carefully turn on the water supply to the washing machine, ensuring that the valves are fully open to allow for the proper flow of water during the testing process. These initial steps prepare the appliance for operation, setting the stage for the evaluation of its performance following the filter maintenance.
With the washing machine powered up and the water supply reinstated, select a standard laundry load, such as a small batch of clothing or linens, to initiate a test cycle. Add the laundry to the washing machine's tub, ensuring that the load is balanced and distributed evenly to facilitate a smooth and effective washing process. Once the laundry is in place, add the appropriate amount of detergent according to the manufacturer's recommendations, preparing the washing machine for a typical cleaning cycle.
Initiate the washing cycle according to the appliance's standard operating procedure, selecting the desired settings and options to commence the test cycle. Observe the washing machine's performance closely as it progresses through the various stages of the cycle, paying attention to any unusual sounds, vibrations, or operational issues that may indicate potential complications.
As the washing machine completes the test cycle, monitor the drainage process to ensure that water flows freely and efficiently, indicating that the filter is effectively capturing debris and lint without impeding the appliance's functionality. Additionally, assess the cleanliness and condition of the laundered items upon the cycle's completion, verifying that the washing machine has effectively removed soil and stains from the laundry load.
Upon the successful completion of the test cycle, evaluate the washing machine's overall performance and functionality, taking note of any improvements in its operation following the filter maintenance. If the appliance operates smoothly, with no signs of drainage issues or operational anomalies, it indicates that the filter cleaning process has been effective in restoring the washing machine's optimal functionality.
By conducting a thorough test of the washing machine following the filter maintenance, you can confidently affirm that the appliance is in prime working condition, delivering exceptional performance and cleanliness with every laundry cycle. This proactive approach to testing ensures that the filter maintenance has been successful, contributing to the longevity and reliability of your Kenmore top loader washing machine.
Frequently Asked Questions about How To Clean The Filter In A Kenmore Top Loader Washing Machine
Was this page helpful?
At Storables.com, we guarantee accurate and reliable information. Our content, validated by Expert Board Contributors, is crafted following stringent Editorial Policies. We're committed to providing you with well-researched, expert-backed insights for all your informational needs.


0 thoughts on “How To Clean The Filter In A Kenmore Top Loader Washing Machine”