Home>Home Maintenance>How To Build A Rain Garden In A Drainage Ditch
Home Maintenance
How To Build A Rain Garden In A Drainage Ditch
Modified: May 6, 2024
Learn how to build a rain garden in a drainage ditch for effective home maintenance. Find step-by-step instructions and expert tips to create a sustainable and beautiful solution.
(Many of the links in this article redirect to a specific reviewed product. Your purchase of these products through affiliate links helps to generate commission for Storables.com, at no extra cost. Learn more)
Introduction
Welcome to the world of rain gardens! If you’re looking for an effective and eco-friendly solution to manage stormwater runoff in your home, then building a rain garden in a drainage ditch could be the perfect option for you. A rain garden is a beautiful and functional addition to any outdoor space, helping to reduce erosion, filter pollutants, and recharge the groundwater.
But what exactly is a rain garden? In essence, it is a shallow depression filled with native plants and specially engineered soil that allows stormwater to be absorbed naturally. Instead of water running off into drains and causing flooding, a rain garden helps the water infiltrate the ground, replenishing the water table and preventing erosion.
Building a rain garden in a drainage ditch has numerous benefits. Not only does it provide an effective way to redirect and manage stormwater runoff, but it also adds aesthetic appeal, increases biodiversity, and promotes sustainability. Plus, it’s a fantastic DIY project that can be accomplished with some basic tools and materials.
Before you embark on designing and building your own rain garden, it’s important to gather all the necessary information and understand the specific requirements of your site. Assessing the soil type, slope, and drainage patterns will help determine the appropriate size and design of the rain garden. Additionally, familiarize yourself with any local regulations or permits that may be required.
In this article, we will guide you through the process of building a rain garden in a drainage ditch, step-by-step. From assessing the site and design considerations to planting and maintenance, we’ve got you covered. So, let’s dive in and create a beautiful and functional rain garden that will enhance your outdoor space while helping to protect the environment.
Key Takeaways:
- Building a rain garden in a drainage ditch helps manage stormwater, reduce pollution, and enhance biodiversity. It’s a DIY project with benefits for the environment and your outdoor space.
- To create a successful rain garden, assess the site, design carefully, gather the right tools, and maintain it regularly. Enjoy the beauty and eco-friendly impact of your rain garden!
Read more: How To Build A Drainage Ditch Around A House
Benefits of Building a Rain Garden in a Drainage Ditch
Building a rain garden in a drainage ditch offers a multitude of benefits, both for you and the environment. Let’s explore some of the key advantages:
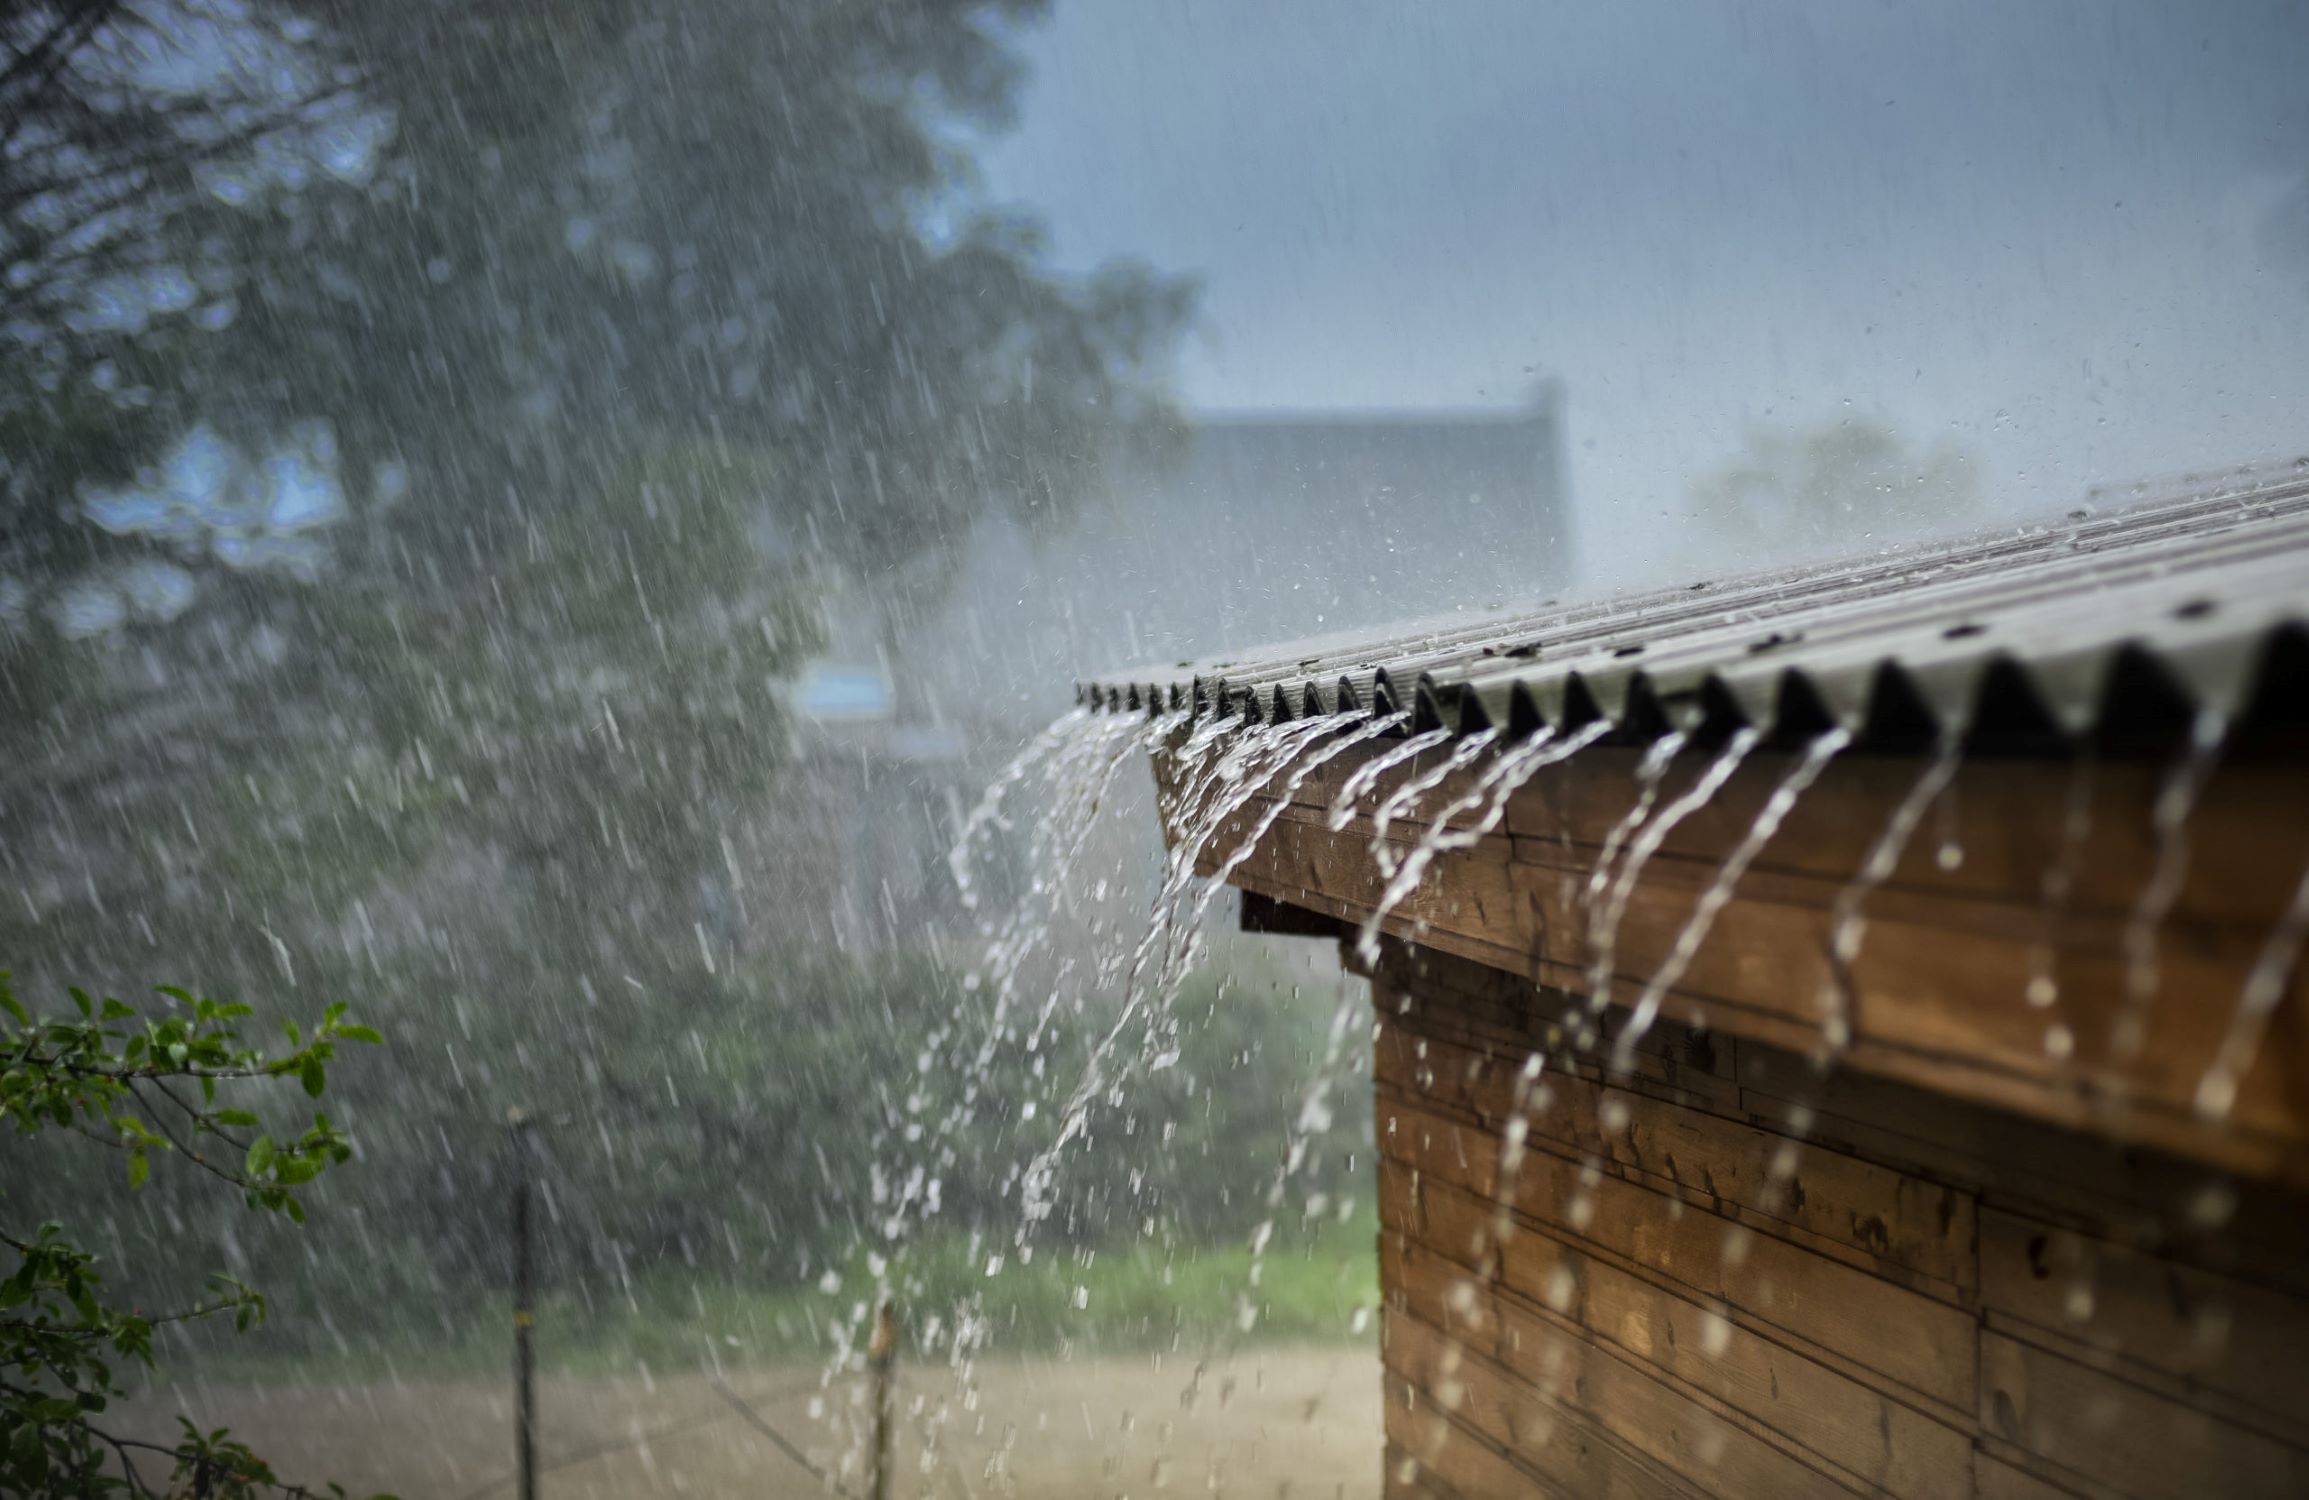
- Stormwater management: One of the primary benefits of a rain garden is its ability to effectively manage stormwater runoff. By capturing and absorbing rainwater, the garden helps prevent flooding and erosion. The specially engineered soil and deep-rooted plants in the rain garden act as natural filters, removing pollutants and contaminants from the water before it seeps into the ground.
- Reducing water pollution: Traditional drainage systems often lead to water pollution by transporting pollutants directly into water bodies. However, with a rain garden, the water is filtered through the soil, which acts as a natural cleanser. The plants in the garden also help break down harmful substances, promoting cleaner water in nearby streams, rivers, and lakes.
- Enhancing biodiversity: Rain gardens support a diverse range of plant and animal life. By using native plants in the garden, you can create a habitat that attracts birds, butterflies, bees, and other beneficial insects. The increased biodiversity contributes to a healthier ecosystem, promoting pollination and natural pest control.
- Improving water quality: As stormwater passes through the rain garden, the plants and soil help to filter out sediments and nutrients that can harm water bodies. Excessive nutrients, such as nitrogen and phosphorus, can cause algae blooms and oxygen depletion in water bodies, leading to negative impacts on aquatic life. By reducing these nutrients, rain gardens help improve water quality, benefiting both humans and wildlife.
- Conserving water: By capturing and infiltrating rainwater, rain gardens help recharge the groundwater supply. This can be particularly beneficial in areas prone to drought or with limited water resources. In addition, the plants in the rain garden require less supplemental watering, reducing overall water consumption.
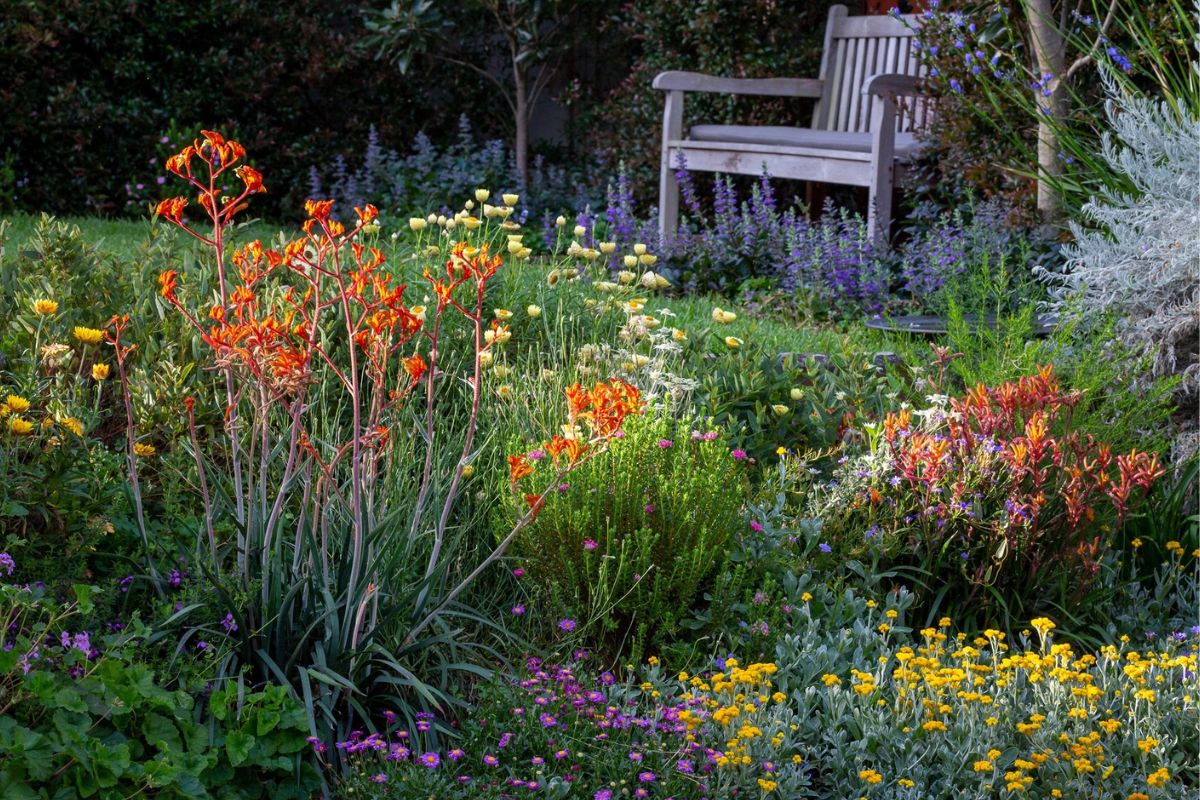
- Aesthetically pleasing: A well-designed rain garden can be a beautiful addition to your outdoor space. With carefully selected native plants, you can create an attractive landscape feature that changes with the seasons. The assortment of colors, textures, and heights adds visual interest and enhances the overall appeal of your yard.
Building a rain garden in a drainage ditch is an environmentally friendly and sustainable solution for managing stormwater runoff. It provides numerous benefits, including effective stormwater management, water pollution reduction, increased biodiversity, improved water quality, water conservation, and aesthetic appeal. Now that you’re aware of the advantages, let’s move on to the next steps: assessing the site and understanding specific design considerations for your rain garden.
Assessing the Site and Requirements
Before diving into the design and construction process of your rain garden in a drainage ditch, it’s crucial to assess the site and understand the specific requirements. Here are the key considerations:
- Drainage patterns: Observe how water flows and accumulates in the drainage ditch during rainstorms. Identify any areas of pooling or runoff that can potentially be directed towards the rain garden.
- Soil type and condition: Assess the soil type and its ability to absorb water. Sandy or loamy soil is ideal for rain gardens, while compacted or clayey soil may require additional amendments to improve drainage.
- Slope: Evaluate the slope of the drainage ditch to determine the level of water flow. Generally, a gentle slope is desirable to encourage water movement without causing erosion or excessive pooling in the rain garden.
- Sunlight exposure: Note the amount of sunlight the area receives throughout the day. Most plants in rain gardens prefer full to partial sunlight, so choose plants accordingly based on the sun exposure of the site.
- Size and shape: Determine the appropriate size and shape of the rain garden based on the site’s available space and the amount of runoff that needs to be captured. A larger rain garden will have a higher capacity for water storage and filtration.
- Local regulations and permits: Check with your local municipality or homeowner’s association to ensure compliance with any regulations or permits required for building a rain garden in a drainage ditch. This step is important to avoid any legal issues and to ensure the proper implementation of your project.
During the assessment, take measurements of the drainage ditch’s dimensions, soil type, and slope. Consider sketching out a rough layout of the site to visualize the placement and size of the rain garden. Keep in mind that a typical rain garden should be at least 10 square feet in size, but larger gardens are more effective at managing stormwater.
Once you have assessed the site and gathered the necessary information, you will be well-prepared to move on to the next step: designing your rain garden. In the next section, we will discuss the key elements to consider during the design process to ensure an effective and visually appealing rain garden in your drainage ditch.
Designing the Rain Garden
Designing your rain garden is an exciting process that allows you to create a functional and visually appealing landscape feature. Consider the following elements when designing your rain garden:
- Location: Choose a suitable spot within your drainage ditch to build your rain garden. Ideally, it should be located downhill from areas where water runoff collects.
- Size and shape: Determine the size and shape of your rain garden based on the available space in your drainage ditch and the amount of water runoff to be managed. A larger rain garden will accommodate more water and provide greater stormwater management.
- Depth: The depth of your rain garden should be around 6-12 inches to allow for proper infiltration of stormwater. If the drainage ditch has a steep slope, consider creating terraces to prevent erosion and ensure water retention.
- Soil composition: Create a custom soil mix incorporating equal parts of sand, compost, and topsoil. This blend promotes good drainage while retaining enough moisture for the plants’ roots to thrive. The soil should be loose and permeable to encourage water infiltration.
- Plant selection: Choose native plants that are adapted to your local climate and soil conditions. Native plants have deep roots that facilitate water absorption and provide habitat for local wildlife. Incorporate a variety of plant types, such as grasses, sedges, wildflowers, and shrubs, to create a diverse and resilient ecosystem.
- Plant placement: Group plants with similar water requirements together in your rain garden. Place taller plants towards the back and shorter plants towards the front to create depth and visual interest. Consider planting dense vegetation around the inlet area to help filter sediments and capture pollutants.
- Maintenance access: Design your rain garden with easy maintenance in mind. Leave enough room around the edges to access and tend to the plants. Avoid placing any large rocks or obstacles that may impede maintenance tasks, such as weeding or debris removal.
- Overflow control: Plan for potential overflow by incorporating overflow channels or spillways that direct excess water away from structures or sensitive areas. This prevents flooding and ensures proper water management during heavy rain events.
As you design your rain garden, visualize how it will fit into the overall landscape of your property. Consider incorporating pathways or stepping stones to provide access and create an inviting space for you to enjoy the garden. Remember to balance functionality with aesthetic appeal to create a rain garden that is both useful and visually pleasing.
Once your rain garden design is finalized, you’re ready to gather the necessary tools and materials to bring your vision to life. In the next section, we will discuss the essential tools and materials required for constructing your rain garden in a drainage ditch.
Gathering the Necessary Tools and Materials
Before you start construction on your rain garden in a drainage ditch, it’s essential to gather all the necessary tools and materials. Having everything prepared will help streamline the construction process and ensure that you have everything you need. Here’s a list of the key items:
- Shovels: A round-point shovel and a square-point shovel will be useful for digging and shaping the rain garden. The round-point shovel is ideal for moving soil, while the square-point shovel can be used for more precise digging.
- Garden rake: A garden rake will be necessary for leveling the soil and removing any debris or rocks from the rain garden area.
- Trowel: A trowel is essential for planting individual plants and making small adjustments to the soil as needed.
- Wheelbarrow or garden cart: A wheelbarrow or garden cart will come in handy for transporting soil, compost, and other materials around the construction site.
- Measuring tape: Use a measuring tape to ensure accurate dimensions for the rain garden’s size and shape.
- String and stakes: String and stakes can be used to outline the rain garden’s boundaries and guide your construction process.
- Compost or organic matter: Incorporating compost or other organic matter into the soil will improve fertility and drainage in the rain garden.
- Native plants: Acquire a variety of native plant species suitable for your region and the conditions of your rain garden. Consider the different height, bloom time, and moisture requirements of the plants to create an aesthetically pleasing and functional garden.
- Mulch: Mulch helps retain moisture in the soil and suppresses weed growth. Organic mulch, such as wood chips or straw, is recommended for rain gardens.
- Watering can or hose: While rain gardens are designed to be self-sustaining, it’s important to water newly planted plants and during dry spells until they become established. A watering can or hose with a gentle spray attachment can be used for this purpose.
- Garden gloves: Protect your hands from blisters, cuts, or irritation by wearing a sturdy pair of garden gloves throughout the construction process.
It’s always a good idea to check with local garden centers or landscapers for any additional tools or materials specific to your region or project requirements. Consider creating a checklist to ensure that you have everything you need before starting the construction process.
With all the necessary tools and materials prepared, you’re now ready to begin the construction process. In the following section, we will guide you through the step-by-step process of building your rain garden in a drainage ditch.
When building a rain garden in a drainage ditch, make sure to choose native plants that can handle both wet and dry conditions. This will help the garden thrive and absorb excess water.
Read more: What To Plant In A Drainage Ditch
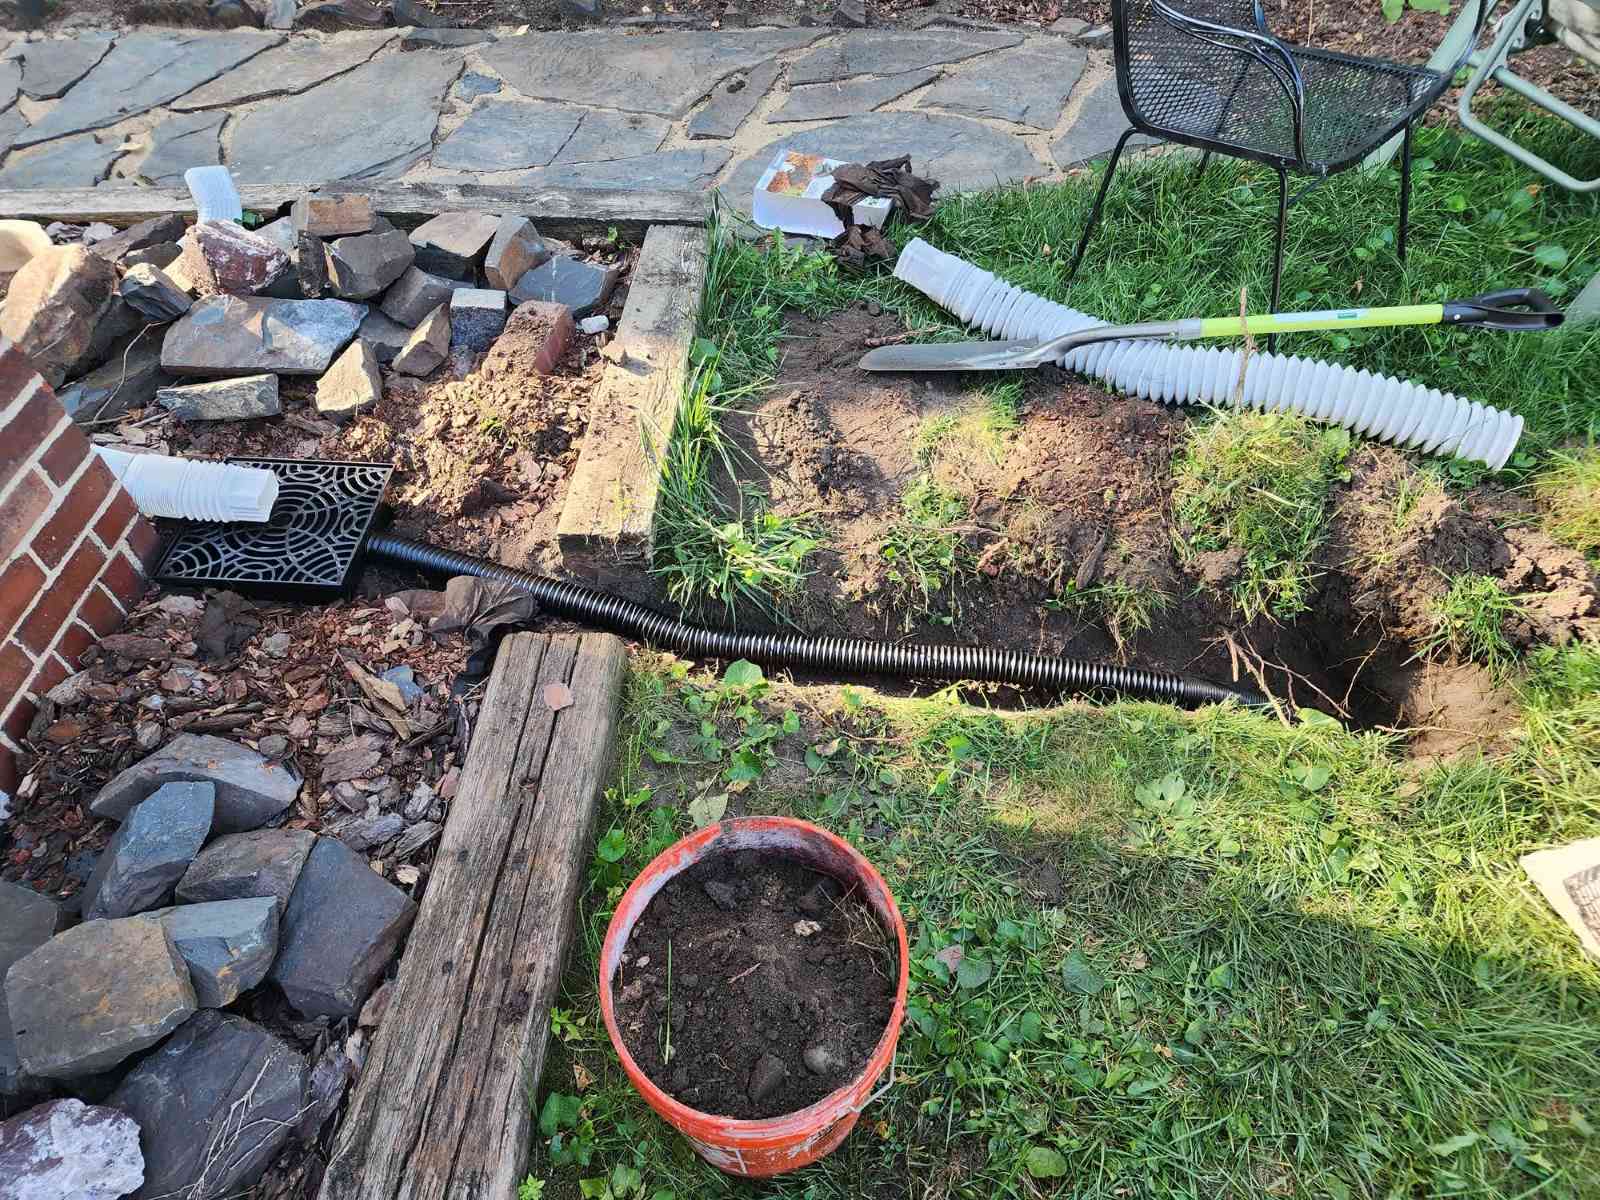
Construction Process
Now that you have gathered all the necessary tools and materials, it’s time to start constructing your rain garden in the drainage ditch. Follow these steps to ensure a successful construction process:
- Mark the boundaries: Use string and stakes to mark the boundaries of your rain garden. This will serve as a guide as you dig and shape the garden.
- Dig the rain garden: Begin by removing the grass or vegetation within the marked boundaries. Use a square-point shovel to dig out the soil to the desired depth, typically around 6-12 inches. Slope the sides of the rain garden gradually to blend with the surrounding landscape, but ensure that there is a visible depression for water capture.
- Level the bottom: Use a garden rake to level the bottom of the rain garden. Remove any rocks, roots, or debris that may hinder water movement or plant growth.
- Amend the soil: Mix compost or organic matter into the excavated soil to improve fertility and drainage. Spread a layer of the amended soil on the bottom of the rain garden to create a loose and nutrient-rich planting bed.
- Plant the native species: Start planting the native plants at appropriate intervals and depths, ensuring that each plant is positioned securely and surrounded by the amended soil. Follow the specific planting instructions for each species, considering factors such as spacing and watering requirements.
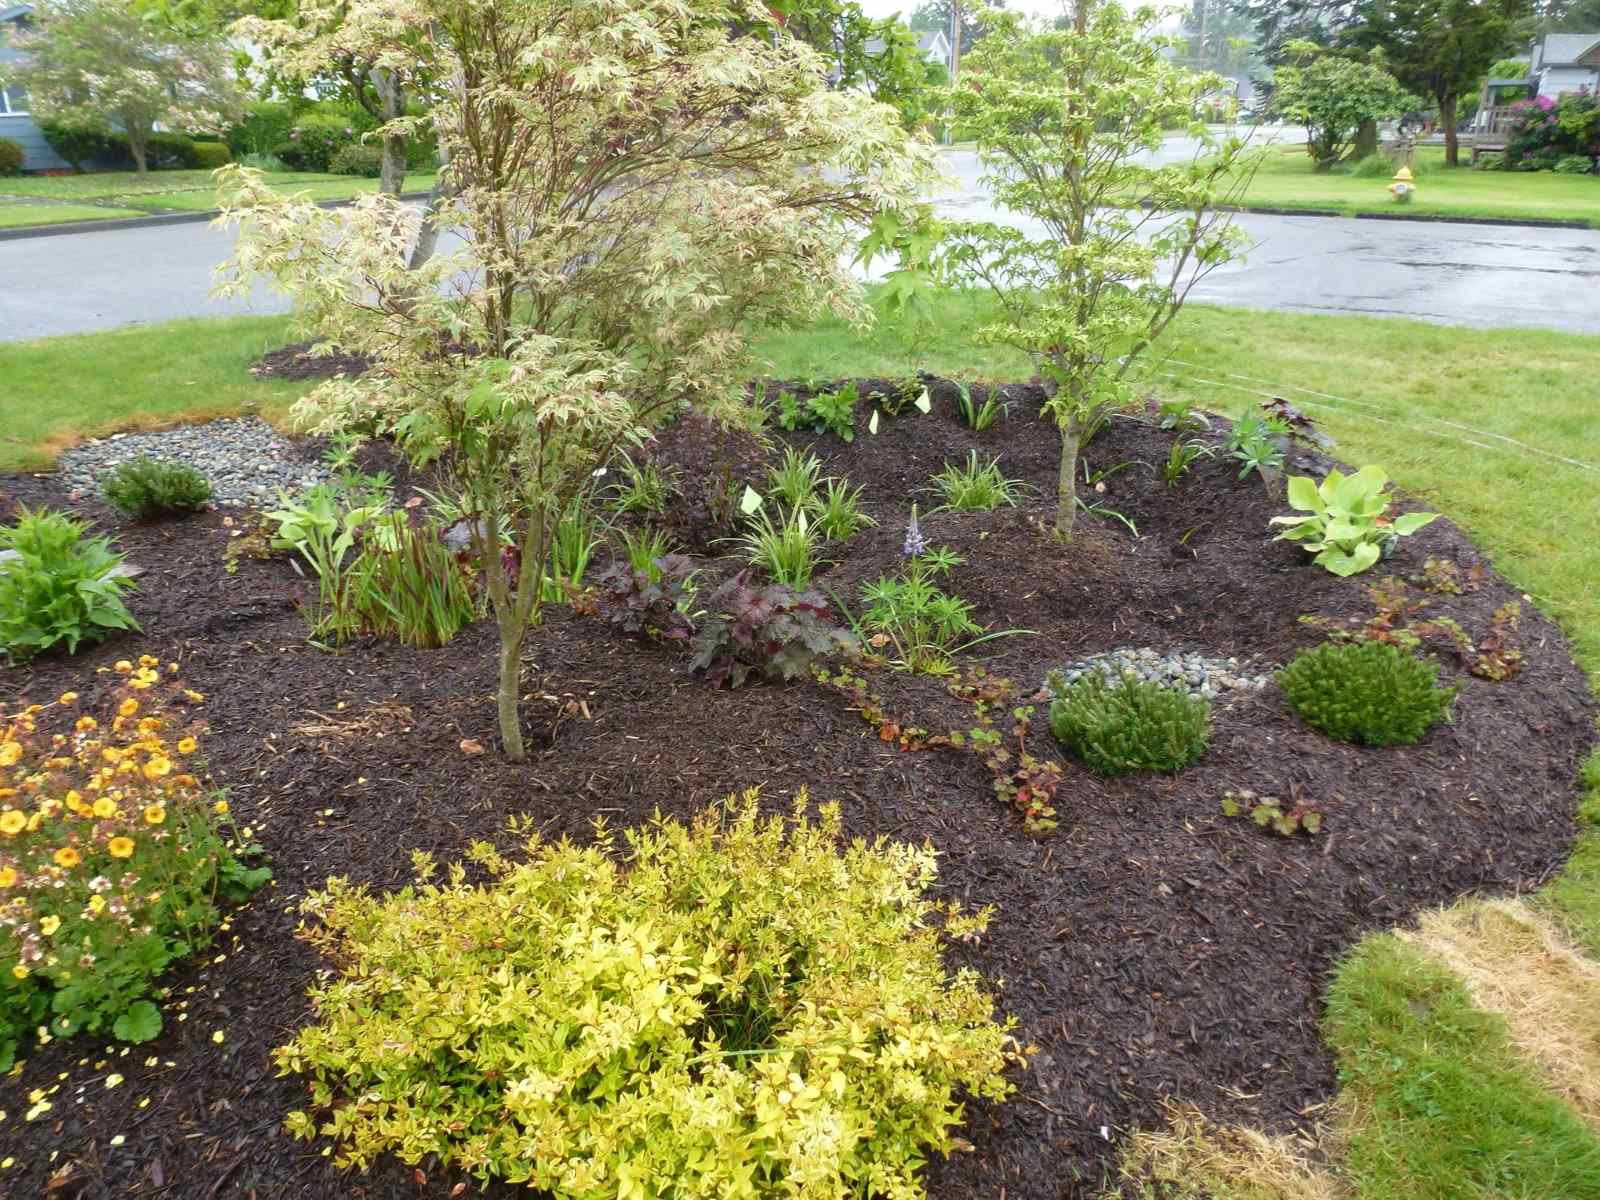
- Add mulch: Spread a layer of organic mulch, such as wood chips or straw, around the planted area. Mulch will help retain moisture, suppress weeds, and regulate soil temperature.
- Water the plants: Immediately after planting, thoroughly water the plants to ensure proper hydration. Be sure to water them regularly, especially during the first few weeks until they become established. Afterward, the rain garden should be self-sustaining, relying primarily on rainfall.
- Monitor and adjust: Regularly monitor the rain garden for any issues, such as standing water or erosion. Adjust the garden as needed, adding additional soil or reshaping it if necessary.
Throughout the construction process, take breaks as needed and stay hydrated. It’s important to pace yourself and work in a methodical manner to ensure a well-constructed rain garden.
Once your rain garden is constructed, it’s time to move on to the next step, which is planting and caring for your rain garden. In the following section, we will provide guidelines to help you successfully establish and maintain your rain garden in the drainage ditch.
Planting and Care Guidelines
Planting and caring for your rain garden in the drainage ditch is crucial for its long-term success and functionality. Follow these guidelines to ensure that your rain garden thrives:
- Watering: Initially, water the newly planted rain garden regularly to help establish the plants’ root systems. Once the plants are established, they should be able to thrive on natural rainfall, with minimal supplemental watering.
- Mulching: Apply a layer of organic mulch, such as wood chips or straw, around the plants to help retain moisture, suppress weeds, and regulate soil temperature. Replenish the mulch as needed to maintain a thickness of around 2-3 inches.
- Weeding: Regularly inspect the rain garden for weeds and remove them promptly to prevent competition for nutrients and water. Be careful not to disturb the established plant roots while weeding.
- Pruning: Periodically prune the plants as necessary to maintain their shape and encourage healthy growth. Remove any dead or diseased plant material and trim back overgrown branches to promote air circulation and prevent crowding.
- Fertilizing: Native plants in a rain garden generally do not require fertilization, as they are adapted to the local soil conditions. However, if you notice signs of nutrient deficiency, such as yellowing leaves or stunted growth, consider using a slow-release, organic fertilizer or compost tea to provide a gentle boost to the plants.
- Monitoring: Regularly monitor the rain garden for any signs of erosion, standing water, or inadequate drainage. Address any issues promptly by adding soil, adjusting slopes, or installing erosion control measures if necessary.
- Seasonal maintenance: In the spring, remove any accumulated debris, such as leaves or twigs, from the rain garden. This will help maintain the overall health and appearance of the garden. Additionally, check for any signs of plant pests or diseases and take appropriate measures to control them, such as handpicking pests or using organic pest control methods.
- Winter care: Before the onset of winter, cut back any dead or dried plant material to prevent disease and minimize the risk of pest infestation. Apply a layer of mulch around the plants to provide protection against freezing temperatures.
Remember, a rain garden is a dynamic and evolving ecosystem. It may take some time for the plants to fully establish and for the garden to mature. Be patient and allow nature to take its course. With regular care and monitoring, your rain garden will continue to provide stormwater management and contribute to the health of the surrounding environment.
Now that you are equipped with the knowledge and guidelines for planting and caring for your rain garden, it’s time to put it into practice. In the next section, we will discuss how to maintain your rain garden in the drainage ditch to ensure its continued functionality and beauty.
Maintaining Your Rain Garden in a Drainage Ditch
Maintaining your rain garden in a drainage ditch is essential to ensure its long-term functionality and beauty. Regular maintenance will help preserve the health of the plants, promote effective stormwater management, and prevent issues such as erosion or stagnant water. Follow these maintenance guidelines to keep your rain garden thriving:
- Inspect the garden: Regularly inspect your rain garden for any signs of erosion, standing water, or weed growth. Address these issues promptly to prevent further damage and maintain optimal water flow.
- Remove weeds: Pull out weeds as soon as you notice them to prevent them from competing with your rain garden plants for nutrients and water. Be careful when weeding not to disturb the plant roots or the integrity of the soil.
- Monitor water flow: Pay attention to how water flows and pools in the drainage ditch during rainstorms. Make adjustments to the garden if specific areas consistently experience runoff or pooling. Modifying the slope or adding terraces can help redirect water appropriately.
- Inspect the plants: Regularly check the health of your rain garden plants. Look for signs of disease, pests, or nutrient deficiencies. Prune any dead or damaged plant material to encourage healthy growth and mitigate the spread of diseases.
- Clean debris: Remove any debris, such as leaves or branches, from the rain garden. This will prevent clogging and ensure proper water flow. Clearing debris regularly is especially important during the fall when deciduous trees shed their leaves.
- Monitor and adjust mulch: Check the mulch layer in your rain garden regularly. Ensure that it is not too thick or too thin to achieve optimal moisture retention and weed suppression. Replenish the mulch as needed to maintain a depth of 2-3 inches.
- Manage pests organically: If you notice any pest infestations, such as aphids or snails, carefully remove them by hand or use organic pest control methods. Avoid using synthetic pesticides, as they can harm beneficial insects and pollinators.
- Seasonal care: During the spring, clean and prepare your rain garden for the growing season. Remove any dead plant material, trim back overgrown branches, and apply a slow-release organic fertilizer if necessary. In the fall, cut back any spent foliage and apply a layer of mulch to protect the plants during the winter months.
- Monitor water quality: Assess the quality of the water flowing into and out of your rain garden. If you notice any signs of pollution or contaminants, contact your local environmental agency for guidance. It’s important to ensure that your rain garden effectively filters and improves water quality.
Regular maintenance is key to the long-term success of your rain garden in a drainage ditch. By staying proactive and addressing any issues promptly, you can ensure that your rain garden continues to provide effective stormwater management and remains a beautiful addition to your property.
With these maintenance guidelines in mind, you are well-equipped to care for your rain garden. In the final section, we will conclude our journey through building and maintaining a rain garden in a drainage ditch.
Conclusion
Congratulations on successfully completing your journey through building and maintaining a rain garden in a drainage ditch! By implementing this eco-friendly solution, you have not only created a beautiful and functional addition to your outdoor space but also contributed to the protection of the environment. Let’s recap what we have covered:
Building a rain garden in a drainage ditch offers numerous benefits, including effective stormwater management, water pollution reduction, increased biodiversity, improved water quality, water conservation, and aesthetic appeal. By capturing and infiltrating rainwater, rain gardens help prevent flooding, filter pollutants, and recharge the groundwater system.
To ensure a successful rain garden, it’s important to assess the site and understand the specific requirements. Consider factors such as drainage patterns, soil type and condition, slope, sunlight exposure, size and shape, and any local regulations or permits that may apply.
Designing the rain garden involves careful planning of the location, size, and shape. Consider the depth, soil composition, plant selection, plant placement, maintenance access, and overflow control to create a functional and visually appealing rain garden in the drainage ditch.
Gathering the necessary tools and materials, such as shovels, rakes, trowels, compost, native plants, mulch, and watering cans, will ensure a smooth construction process. Follow the step-by-step construction process, which includes marking the boundaries, digging the rain garden, amending the soil, planting the native species, adding mulch, and watering the plants.
Once your rain garden is established, it requires ongoing care and maintenance. This includes regular watering, weeding, pruning, monitoring water flow, cleaning debris, adjusting mulch, managing pests organically, and seasonal care.
With proper maintenance and monitoring, your rain garden will continue to thrive and effectively manage stormwater runoff for years to come. Remember to enjoy and appreciate the beauty and functionality of your rain garden, as well as the positive impact it has on the environment.
Thank you for joining us in this journey of building and maintaining a rain garden in a drainage ditch. By incorporating this sustainable practice into your home, you are making a difference in the mitigation of stormwater runoff and the protection of our precious water resources. Enjoy the benefits of your rain garden, and may it inspire others to follow suit!
Ready to broaden your green thumb prowess beyond rain gardens in drainage ditches? Dive deeper into the world of water-wise planting with our guide on how to build a rain garden. You'll discover practical steps to enhance your home's environment. For those curious about the bigger picture, our article on sustainable landscaping offers insights into eco-friendly garden design. Learn why this approach not only beautifies your space but also contributes to the planet's health.
Frequently Asked Questions about How To Build A Rain Garden In A Drainage Ditch
Was this page helpful?
At Storables.com, we guarantee accurate and reliable information. Our content, validated by Expert Board Contributors, is crafted following stringent Editorial Policies. We're committed to providing you with well-researched, expert-backed insights for all your informational needs.


0 thoughts on “How To Build A Rain Garden In A Drainage Ditch”