Home>Home Maintenance>How To Catch Lint From An Outdoor Dryer Vent
Home Maintenance
How To Catch Lint From An Outdoor Dryer Vent
Modified: October 23, 2024
Learn how to efficiently catch lint from your outdoor dryer vent with these home-maintenance tips. Prevent clogs and ensure optimal dryer performance today!
(Many of the links in this article redirect to a specific reviewed product. Your purchase of these products through affiliate links helps to generate commission for Storables.com, at no extra cost. Learn more)
Introduction
Welcome to the world of home maintenance, where knowing how to catch lint from an outdoor dryer vent can save you from potential hazards and keep your appliances running efficiently. While it may seem like a small task, neglecting to clean your dryer vent can result in serious consequences, such as reduced airflow, increased energy consumption, and even the risk of a fire.
Lint is a common byproduct of drying clothes, and it tends to accumulate in the dryer vent over time. When the vent becomes clogged with lint, it restricts the airflow, causing your dryer to work harder and take longer to dry your clothes. This not only wastes energy but also puts unnecessary strain on the dryer, leading to potential breakdowns and costly repairs.
Moreover, a clogged dryer vent poses a fire hazard. Lint is highly flammable, and when it accumulates in the vent, it creates the perfect environment for a fire to ignite. According to the U.S. Fire Administration, failure to clean the dryer vent is a leading cause of home clothes dryer fires. By taking the necessary steps to catch lint from the outdoor dryer vent, you can reduce the risk of a fire and ensure the longevity of your dryer.
In this article, we will walk you through the process of catching lint from an outdoor dryer vent, highlighting the tools and materials you will need, as well as providing step-by-step instructions on how to effectively clean the vent. So, let’s roll up our sleeves and get started on keeping your dryer and home safe!
Key Takeaways:
- Regularly catching lint from your outdoor dryer vent prevents fire hazards, improves dryer efficiency, and extends its lifespan, ensuring a safe and efficient home environment.
- Use the right tools and materials to inspect, clean, and maintain your dryer vent, including a screwdriver, vent brush, lint trap, and safety gear. Regularly monitor and clean the exterior vent opening to prevent lint buildup and ensure optimal airflow.
Read more: How To Clean The Lint Screen And Dryer Vent
Why It’s Important to Catch Lint from an Outdoor Dryer Vent
Catching lint from an outdoor dryer vent is an essential maintenance task that should not be overlooked. Here are some reasons why it’s crucial to keep your dryer vent free from lint buildup:
- Prevent Fire Hazards: As mentioned before, lint is highly flammable. If it accumulates in your dryer vent, it can easily ignite and cause a dangerous house fire. Cleaning the vent regularly will minimize this risk significantly and provide you with peace of mind.
- Improve Dryer Efficiency: When lint builds up in the dryer vent, it obstructs the airflow, making your dryer less efficient. This leads to longer drying times, increased energy consumption, and higher utility bills. By catching lint and keeping the vent clean, you ensure that your dryer operates at optimal efficiency.
- Extend the Lifespan of Your Dryer: A clogged dryer vent puts excess strain on the machine, causing it to work harder than necessary. This increased workload can lead to premature wear and tear, reducing the lifespan of your dryer. Regularly catching lint and cleaning the vent helps maintain the longevity of your appliance.
- Prevent Mold and Mildew Growth: Excess moisture from a blocked dryer vent can create a favorable environment for mold and mildew growth. These fungi thrive in damp environments and can be harmful to your health. By catching lint and ensuring proper ventilation, you minimize the risk of mold and mildew in your home.
- Promote Indoor Air Quality: A clogged dryer vent not only affects your dryer’s performance but also impacts the quality of the air in your home. When lint accumulates in the vent, it can release allergens and contaminants into the air, leading to respiratory issues, allergies, and other health problems. Catching lint helps maintain clean and healthy indoor air quality.
By understanding the importance of catching lint from an outdoor dryer vent, you can prioritize this simple yet significant maintenance task. Now, let’s move on to discussing the tools and materials you will need for the job.
Tools and Materials Needed
Before you begin to catch lint from an outdoor dryer vent, it’s important to gather the necessary tools and materials. Here’s a list of what you’ll need:
- Screwdriver: You will need a screwdriver to remove any screws securing the dryer vent cover.
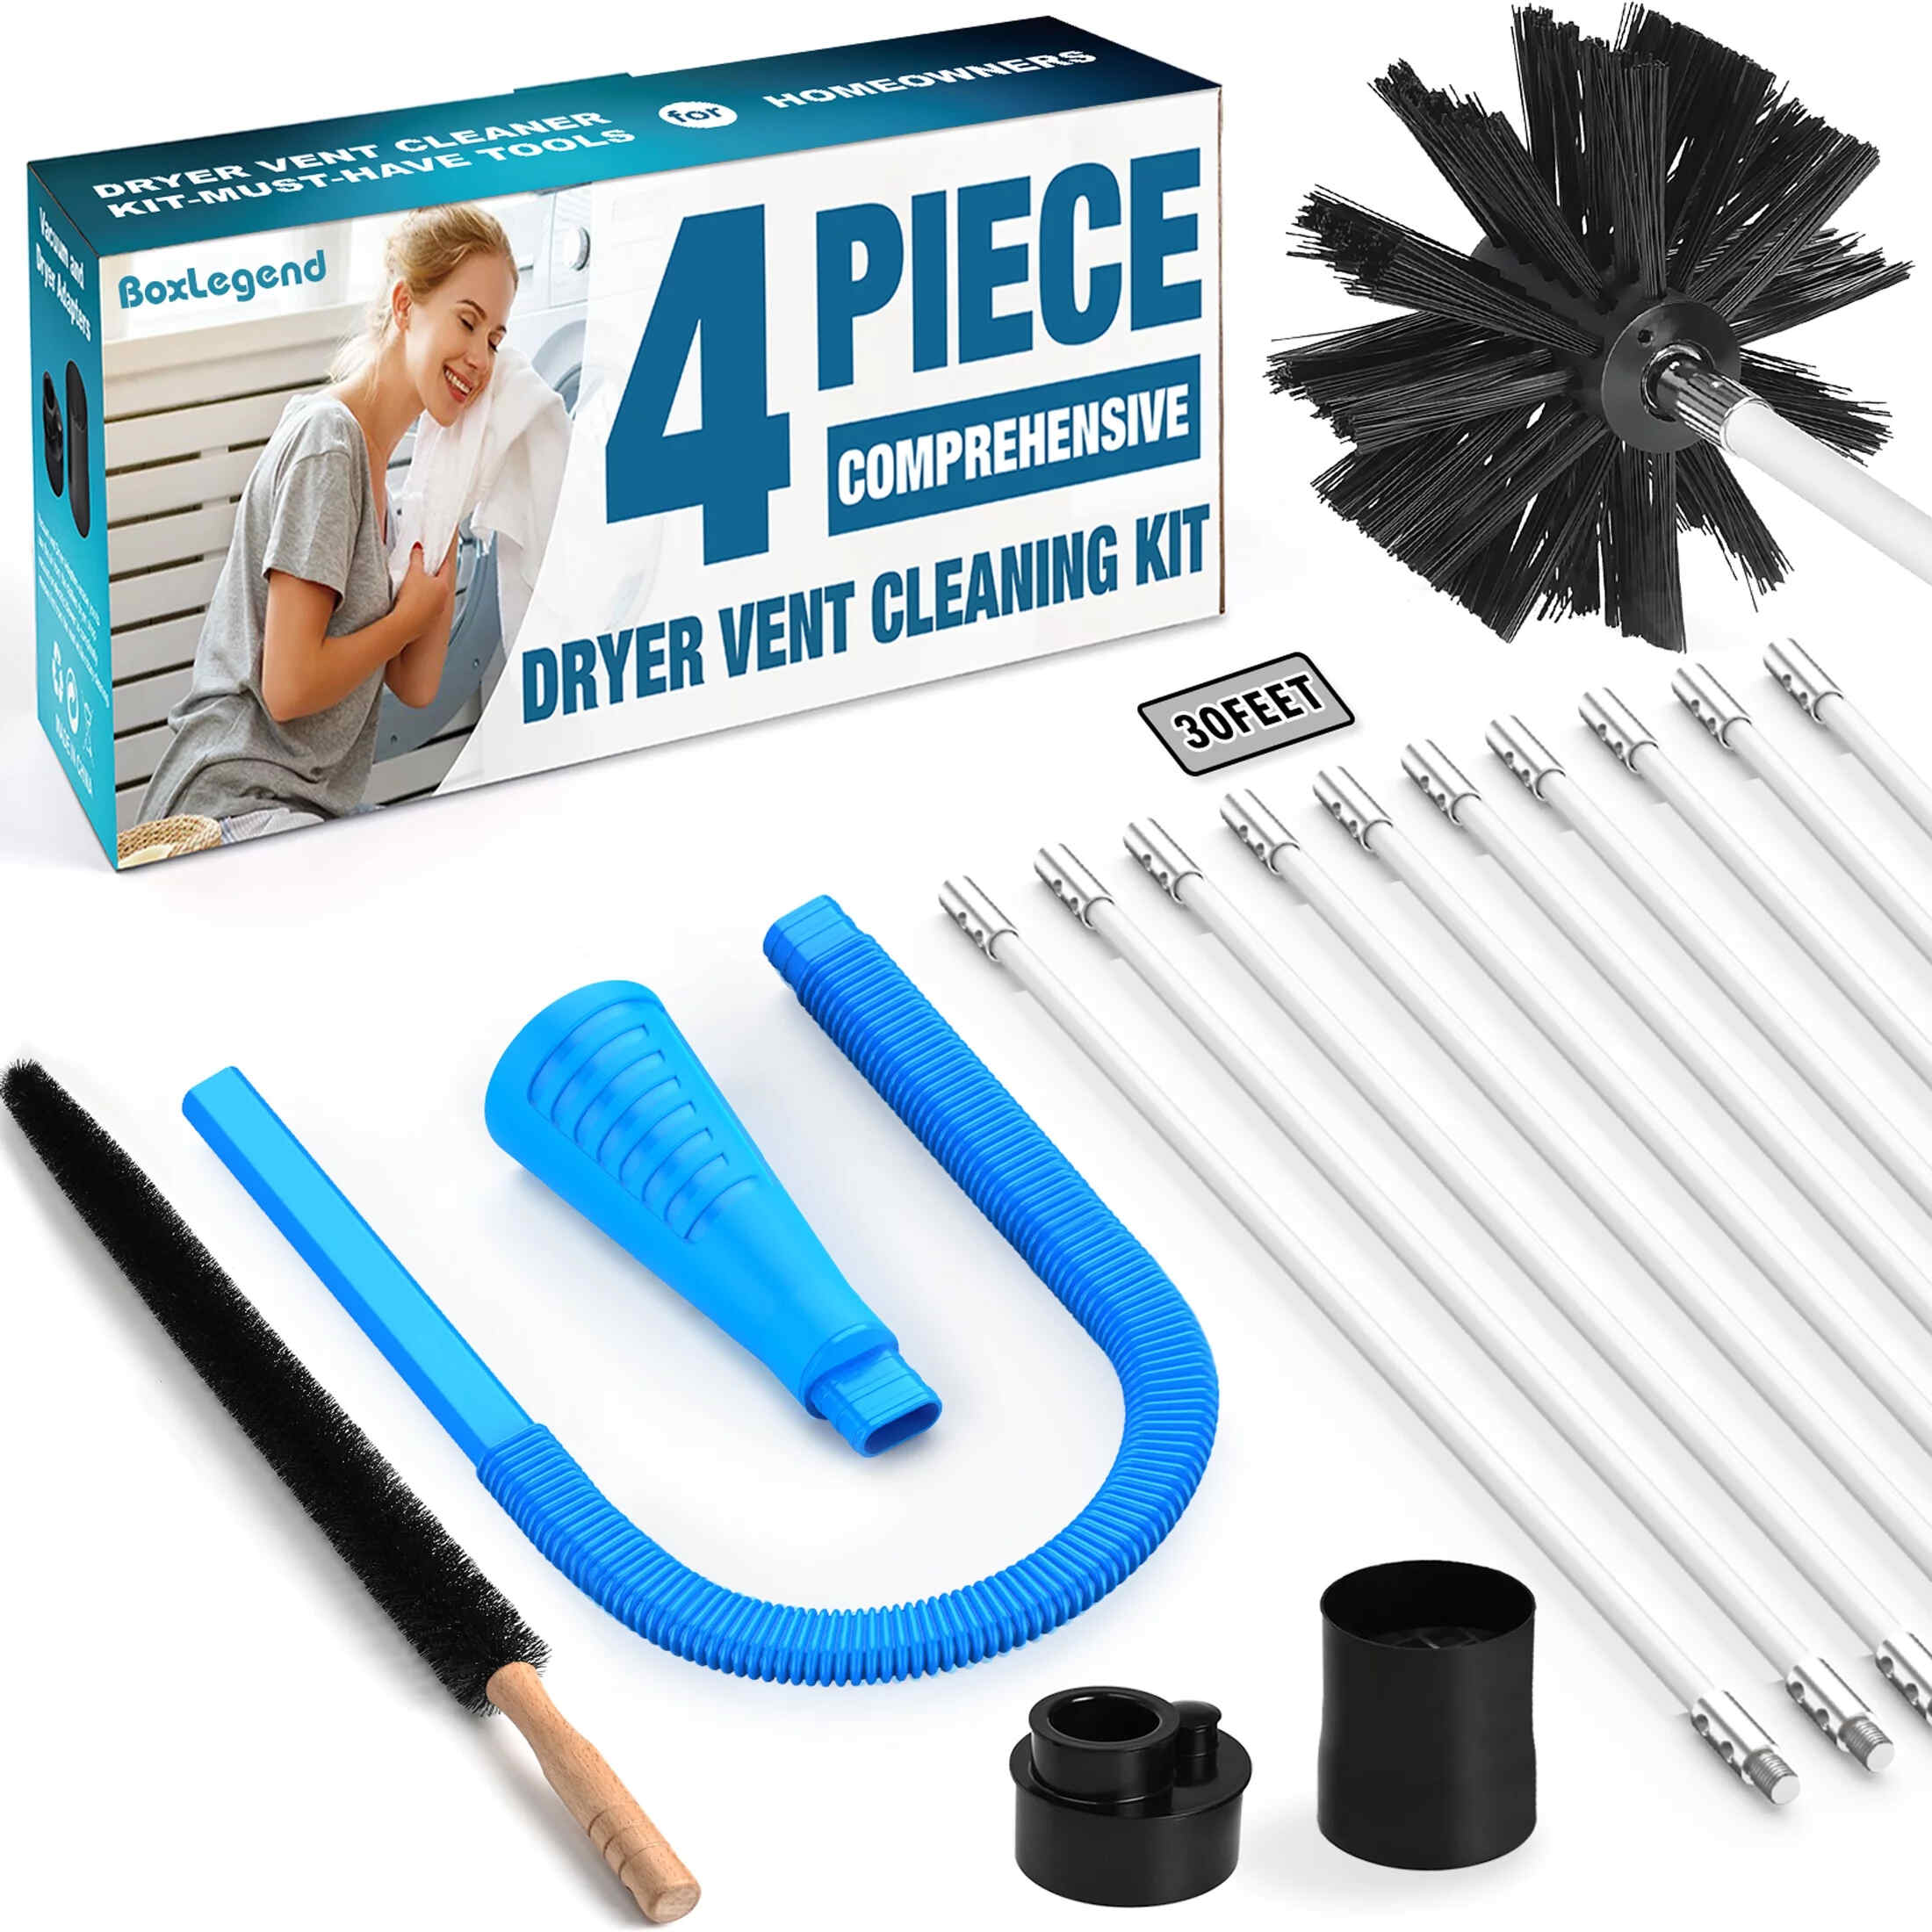
- Vent Brush or Vacuum Attachment: A vent brush or a vacuum attachment specifically designed for cleaning dryer vents will help remove lint and debris from the vent’s interior.
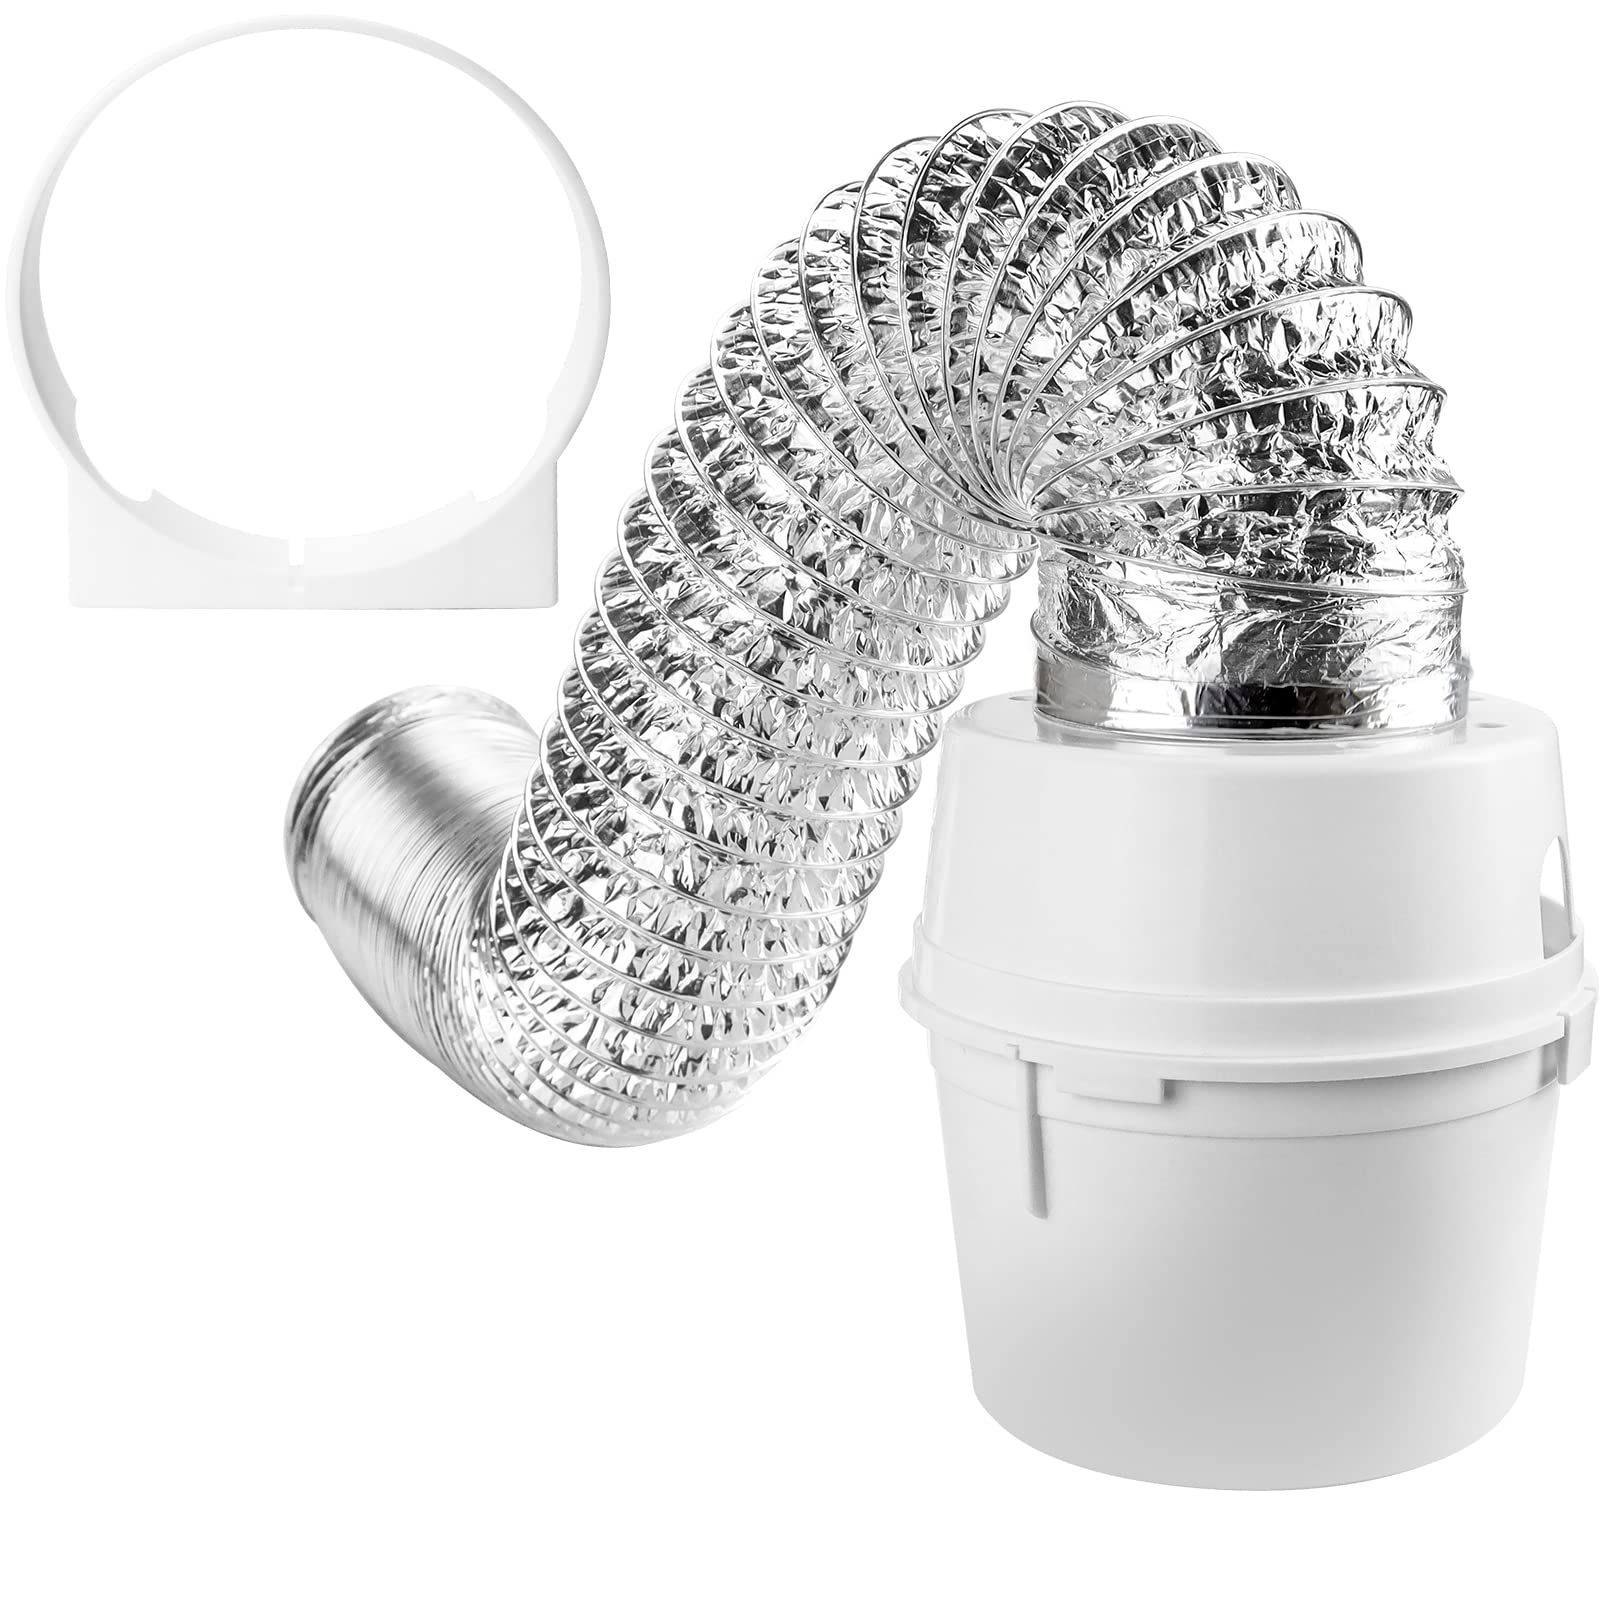
- Lint Trap or Screen: A lint trap or screen is an important addition to the dryer vent. It helps capture the lint and prevents it from clogging the vent. You can find lint traps or screens at most home improvement stores.
- Bucket or Bag: To collect the lint and debris that you remove from the vent, have a bucket or a bag handy.
- Gloves and Safety Glasses: It’s important to protect your hands and eyes when working on your dryer vent. Wearing gloves and safety glasses will ensure your safety during the cleaning process.
- Flashlight: A flashlight will help you see into the vent and identify any obstructions or lint buildup.
It’s always a good idea to check your dryer’s manufacturer instructions or consult a professional to verify the specific tools and materials required for your particular dryer model.
Once you have gathered all the necessary tools and materials, you’re ready to begin inspecting and cleaning your dryer vent. In the next section, we’ll walk you through the first step of the process, which is inspecting the dryer vent.
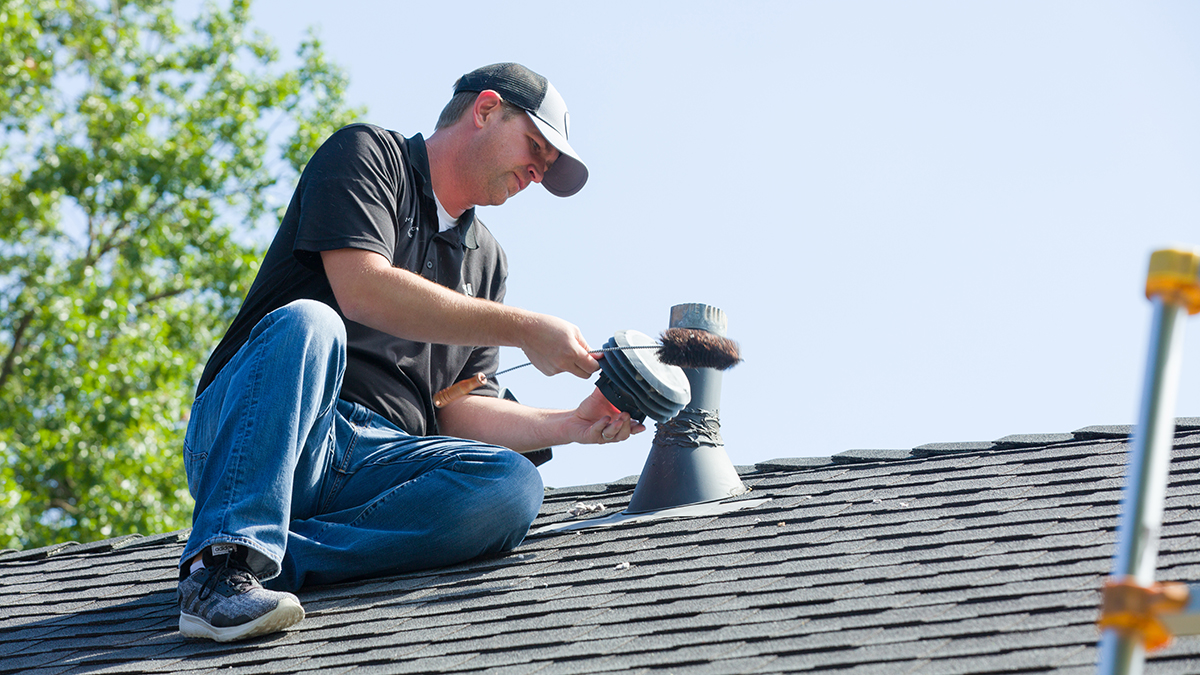
Step 1: Inspect the Dryer Vent
The first step in catching lint from an outdoor dryer vent is to thoroughly inspect the vent and assess its condition. Follow these steps to inspect the dryer vent:
- Turn off the dryer: Before you start, make sure the dryer is turned off and unplugged from the power source. Safety should always be a priority.
- Locate the dryer vent: Depending on your home’s layout, the dryer vent can be located on the side of your house, on the roof, or through an exterior wall. Find the vent opening and take note of its position.
- Remove the vent cover: Using a screwdriver, carefully remove any screws or fasteners securing the vent cover in place. Set the screws aside in a safe place, as you will need them later.
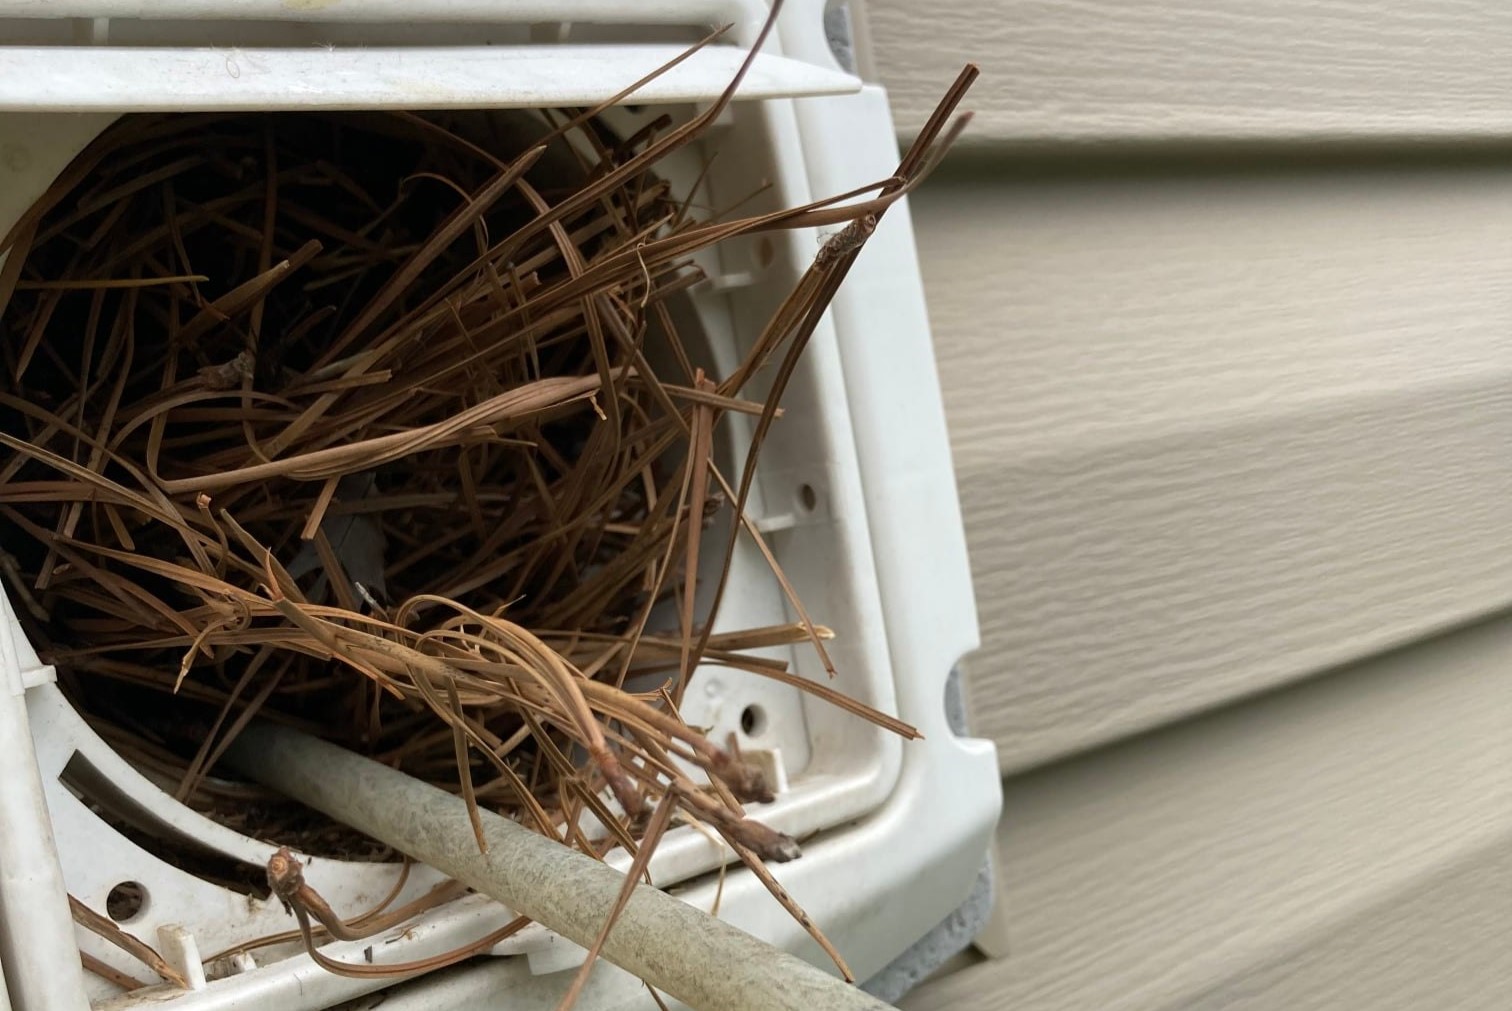
- Inspect the vent opening: Shine a flashlight into the vent opening and look for any visible signs of lint buildup, debris, or obstructions. Pay close attention to the area around the opening, as well as the interior of the vent.
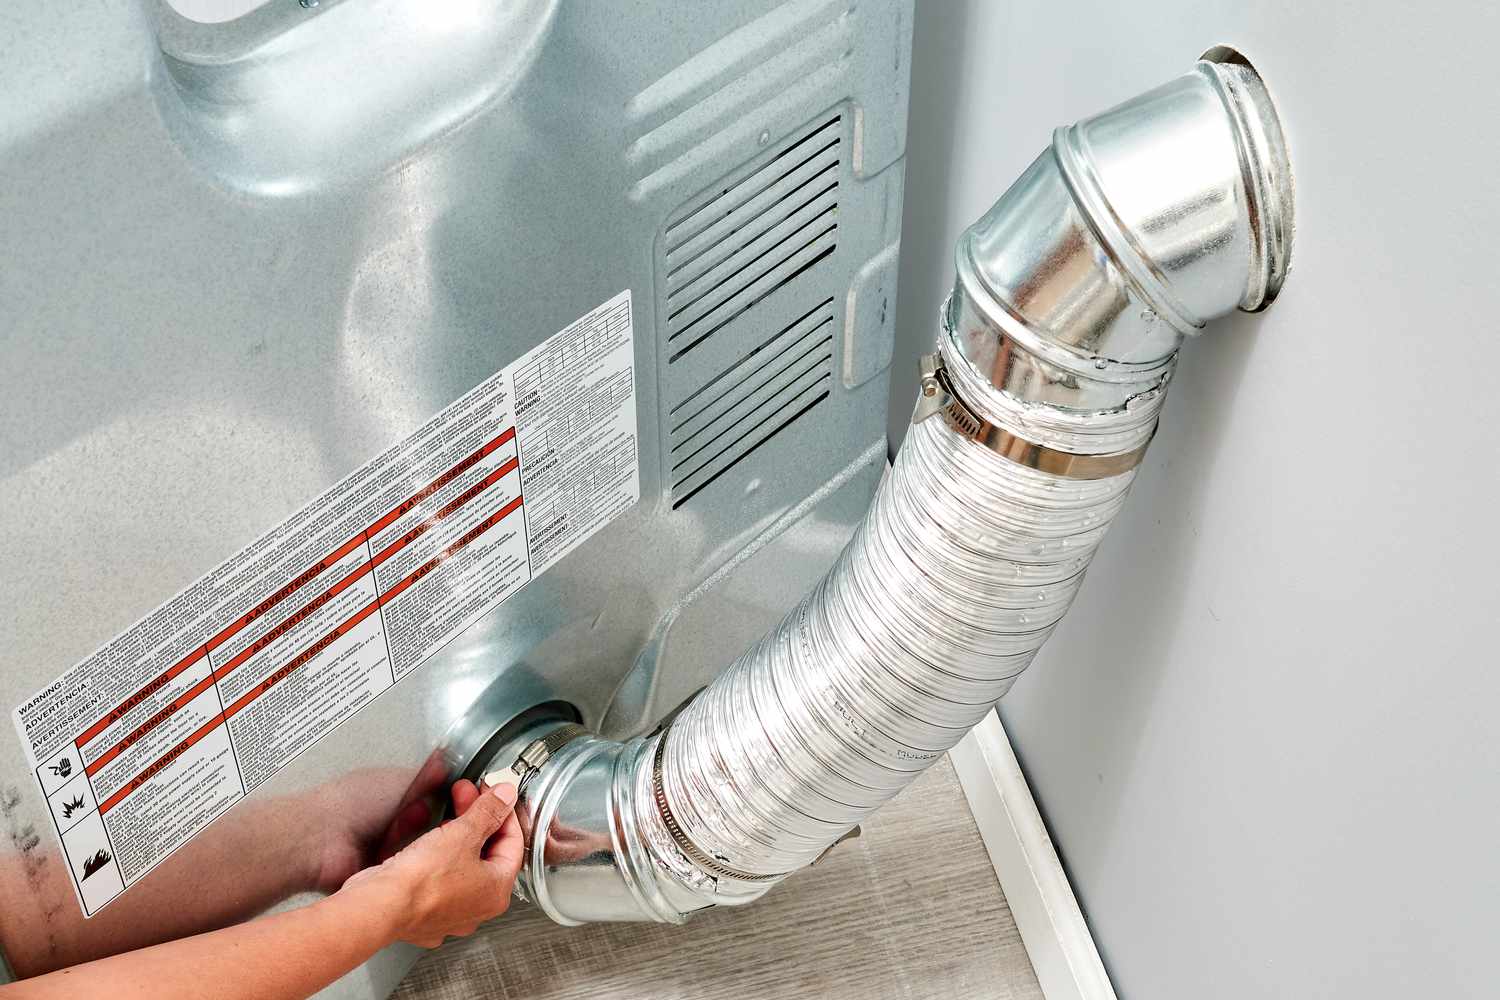
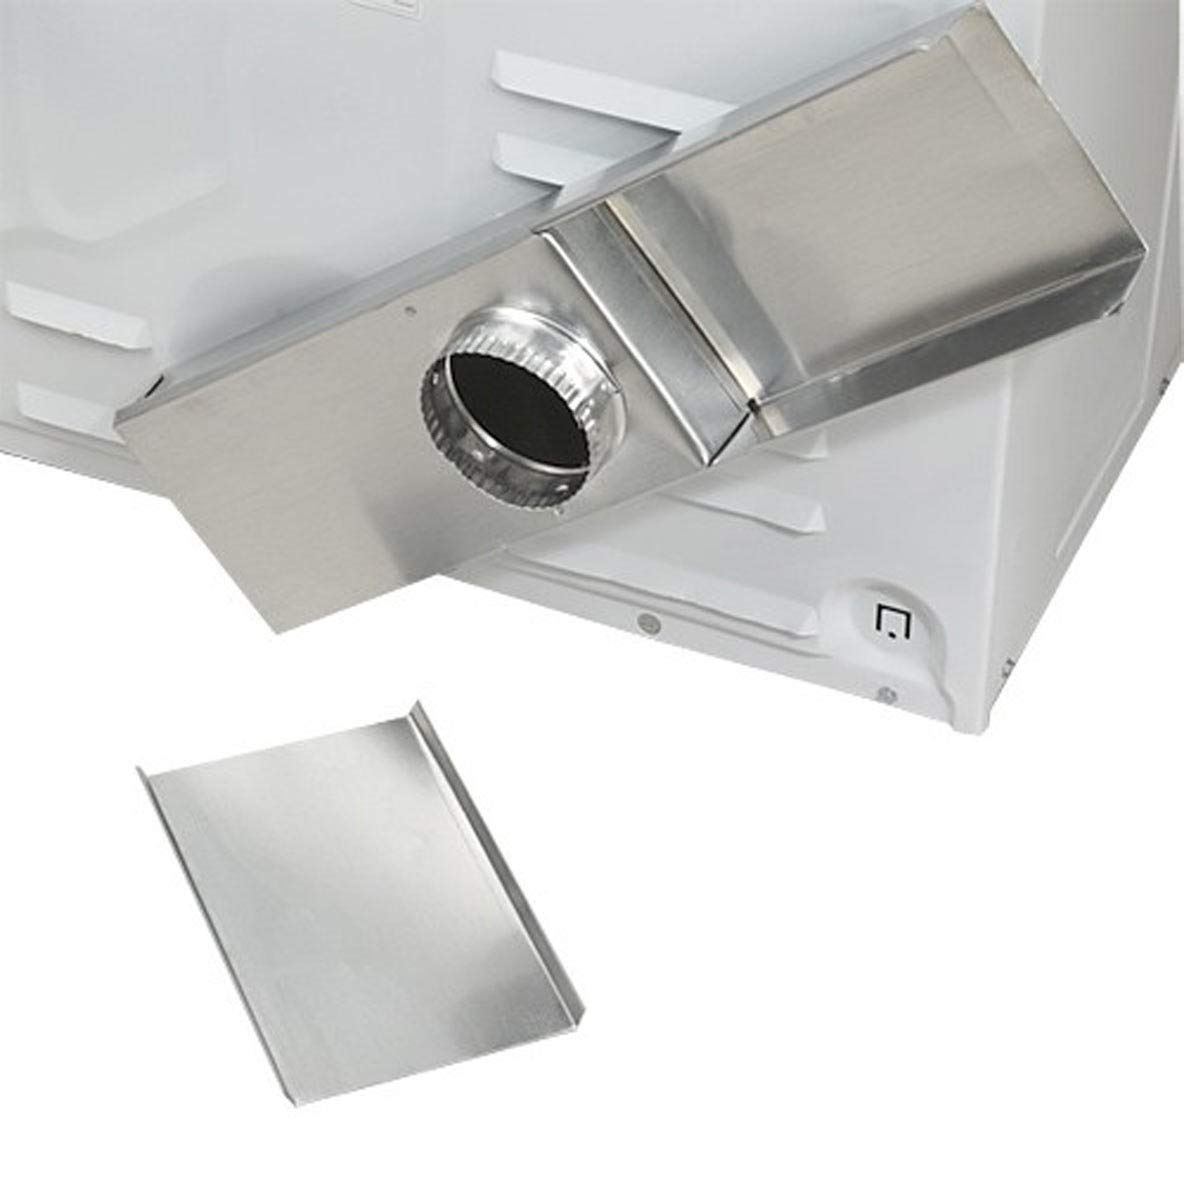
- Check the vent hose: While inspecting the vent, also examine the vent hose that connects the dryer to the outdoor vent opening. Look for any signs of damage, such as cracks or holes, as this can affect the efficiency of the vent system.
During the inspection, if you notice a significant amount of lint buildup or any other issues, it’s important to proceed with cleaning the vent. Regularly inspecting the vent helps identify potential problems early on and allows you to address them promptly.
Once you’ve completed the inspection and noted any necessary repairs or cleaning, you’re ready to move on to the next step: removing any obstructions from the dryer vent. Stay tuned for step 2!
Step 2: Remove any Obstructions
After inspecting the dryer vent and identifying any signs of lint buildup or obstructions, it’s time to remove them. Follow these steps to effectively remove obstructions from the dryer vent:
- Put on safety gear: Before you begin, protect yourself by wearing gloves and safety glasses. This will help prevent any injuries or irritation while working on the vent.
- Clear the area around the vent: Ensure that the area around the dryer vent is clear of any objects or debris. This allows you to have easy access to the vent and prevents anything from obstructing the removal process.
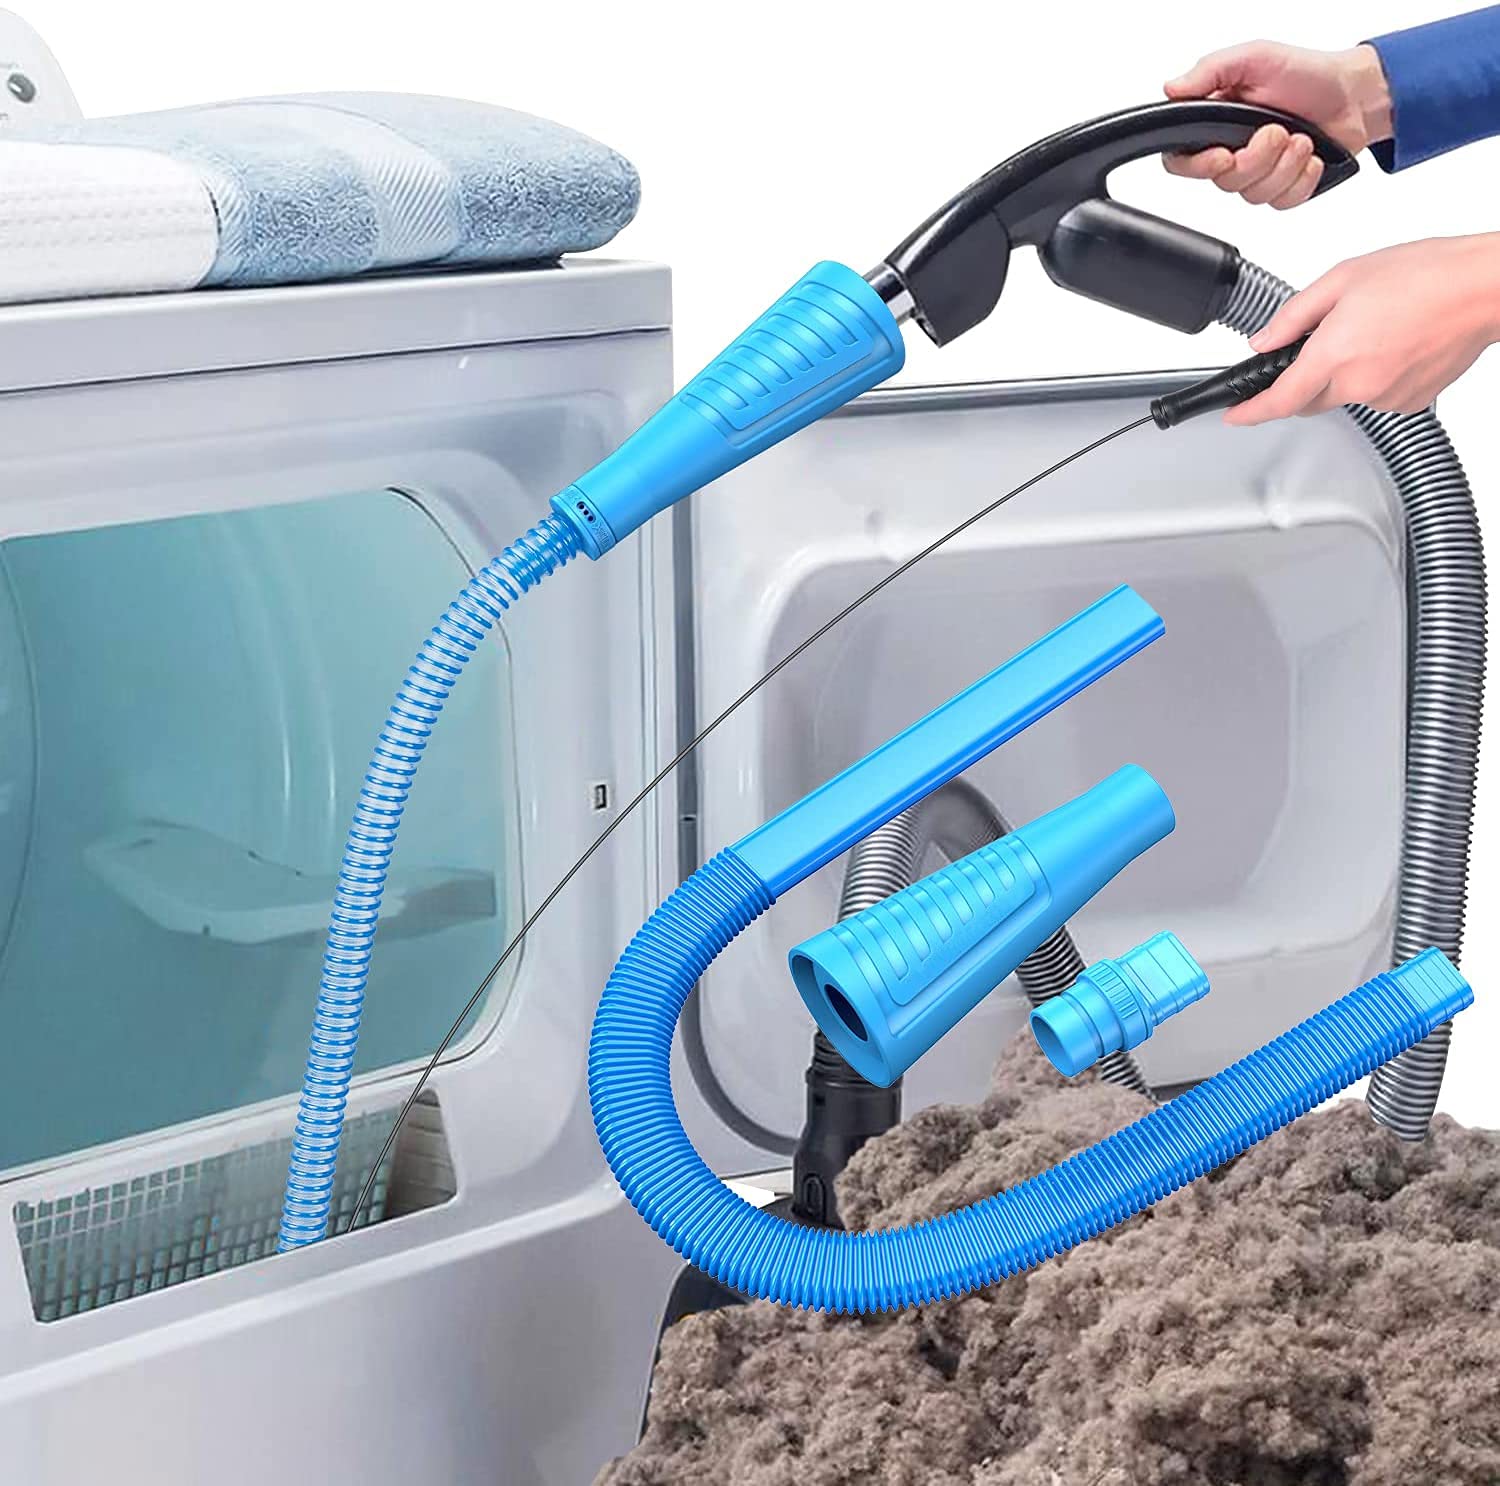
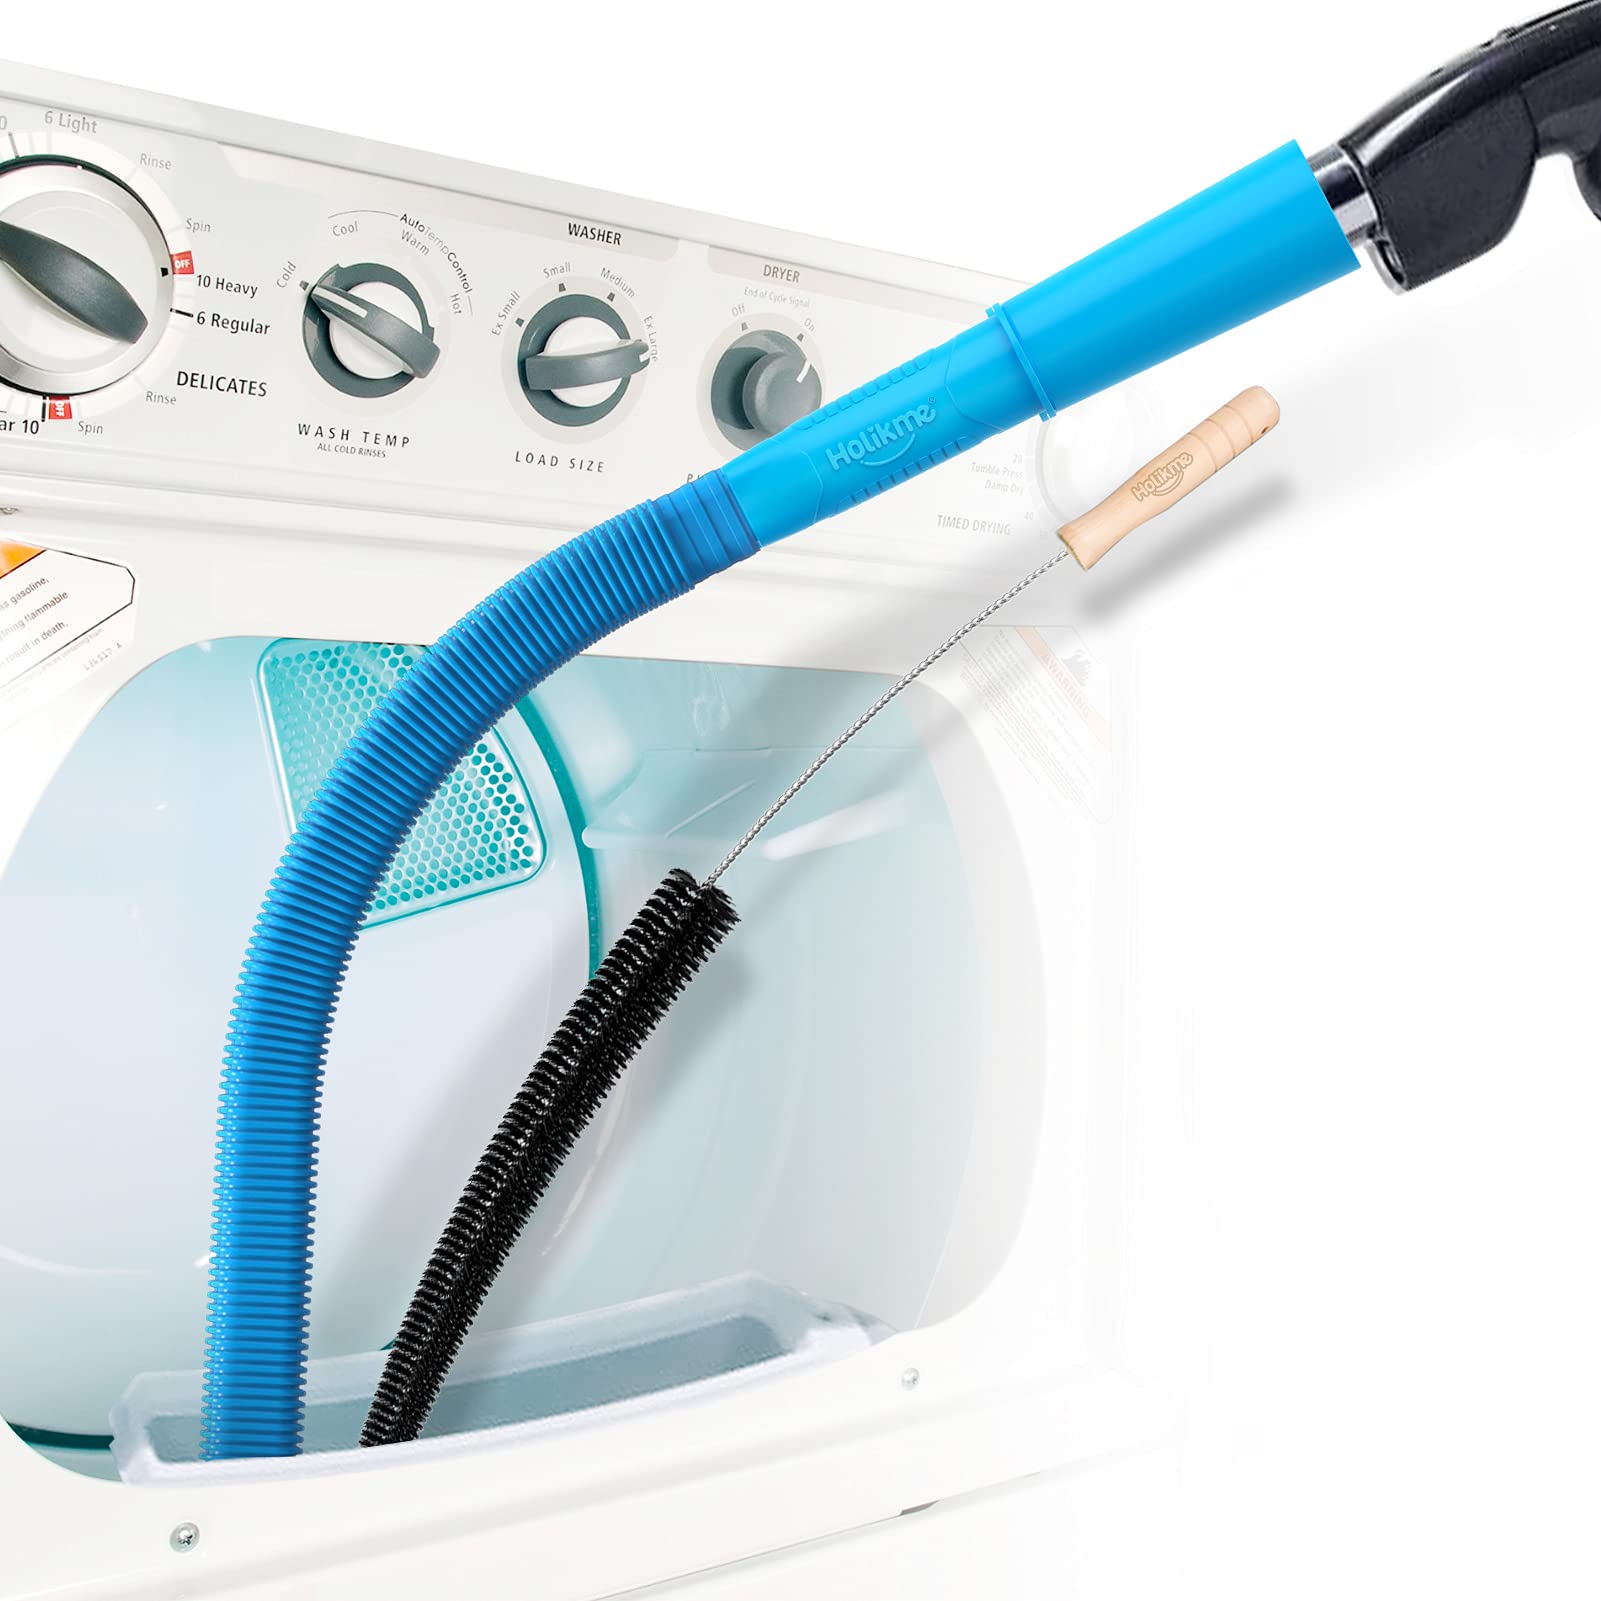
- Use the appropriate tool: Depending on the type of obstruction and the accessibility of the vent, you can use either a vent brush or a vacuum attachment specifically designed for cleaning dryer vents.
- Start from the dryer end: Start by inserting the brush or vacuum attachment into the dryer end of the vent. Push it gently but firmly to reach as far into the vent as possible.
- Rotate and maneuver: Rotate the brush or move the vacuum attachment back and forth to dislodge any lint or debris stuck inside the vent. Continue this process, gradually moving the tool further into the vent to cover the entire length.
- Remove and collect the debris: As you clean, the brush or vacuum attachment will dislodge the lint and debris from the vent. Keep a bucket or bag nearby to collect the removed material.
- Repeat if necessary: If you encounter any resistance or have a particularly stubborn obstruction, you may need to repeat the process multiple times until the vent is clear.
Remember, when removing obstructions, it’s crucial to be gentle yet thorough to avoid damaging the vent or pushing the debris further into the system. Take your time and ensure that you effectively dislodge and collect all lint and debris.
With the obstructions removed, you can now move on to step 3: installing a lint trap or screen to prevent future buildup. Keep reading to learn more!
Regularly clean the outdoor dryer vent by removing the cover and using a vent brush or vacuum to remove lint buildup. This will help prevent clogs and improve dryer efficiency.
Read more: Why Is Lint Coming Out Of The Dryer Vent
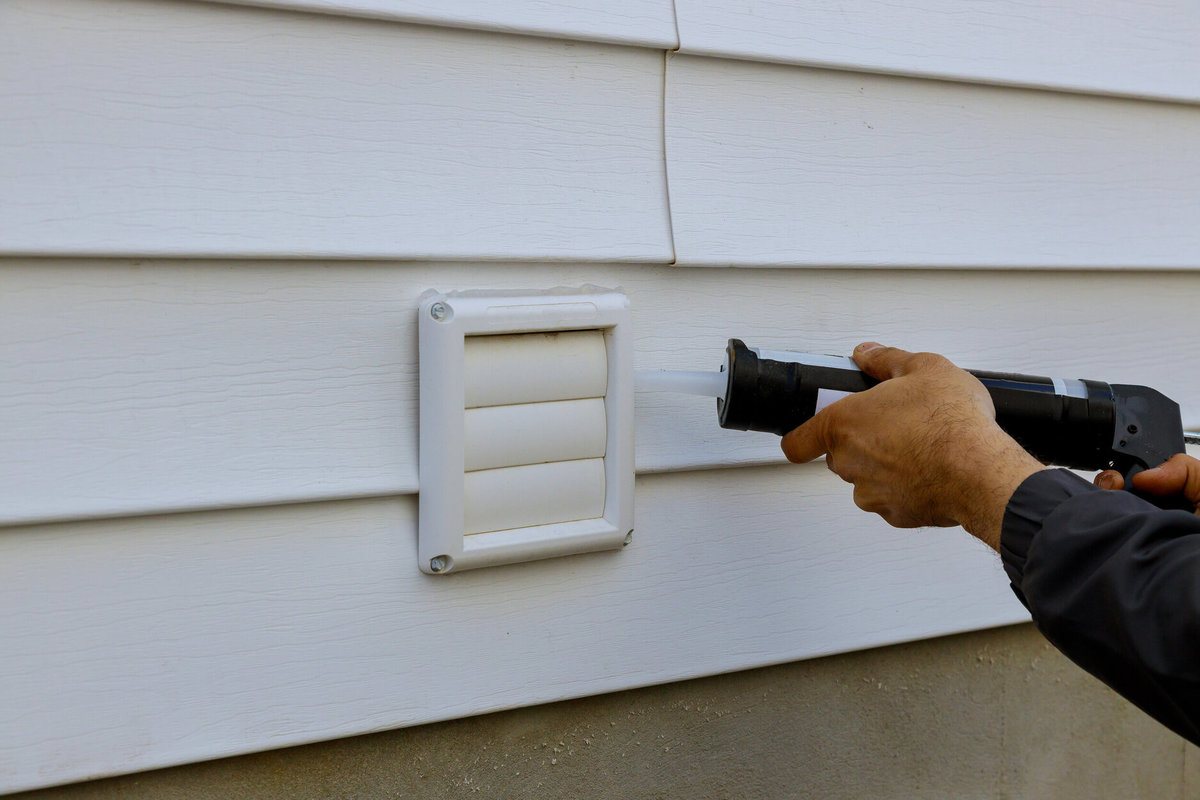
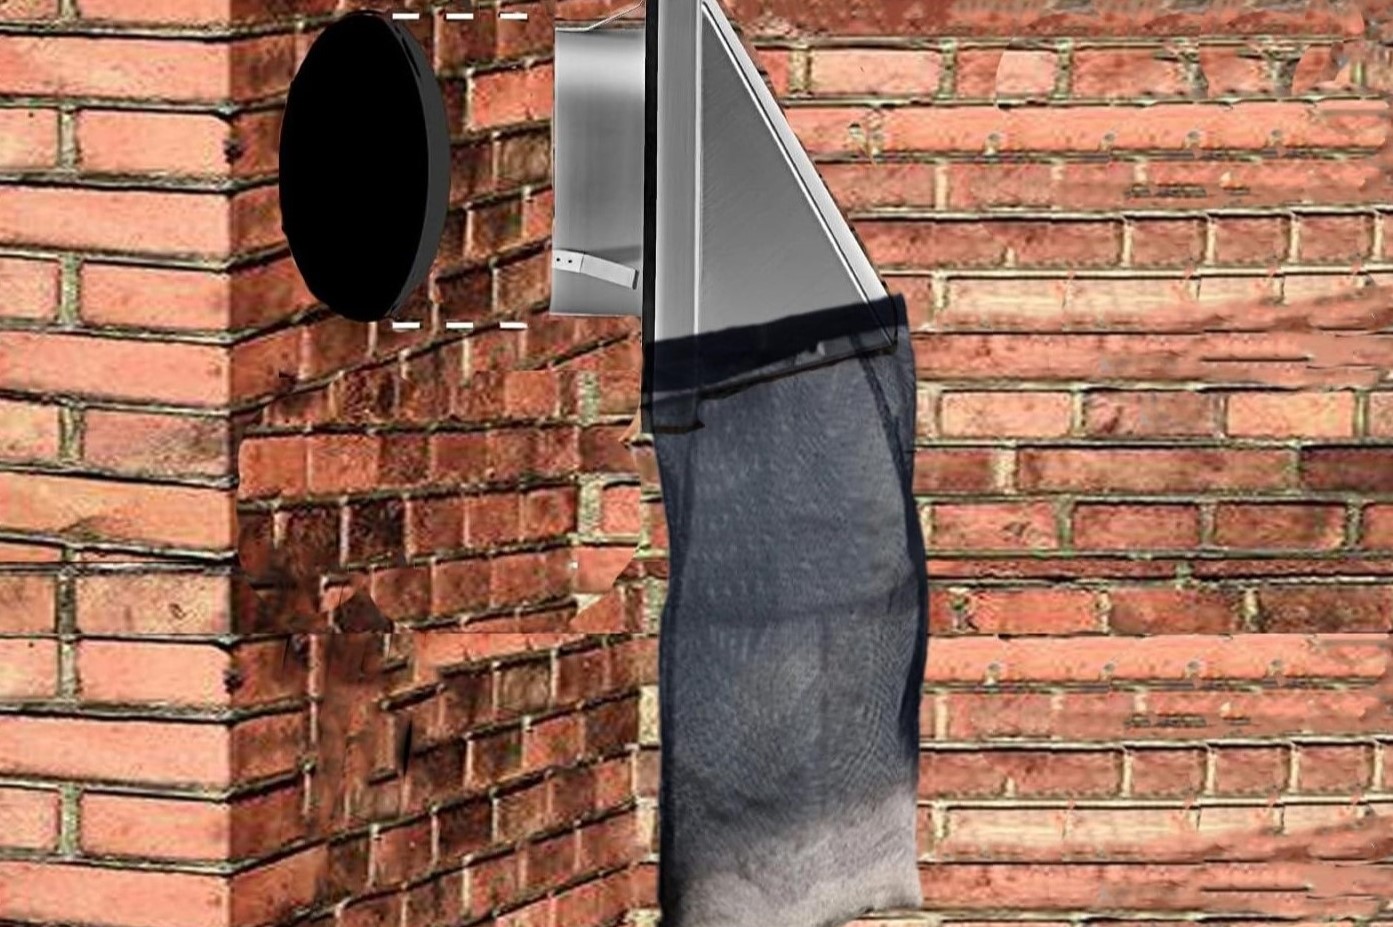
Step 3: Install a Lint Trap or Screen
Installing a lint trap or screen is an effective way to prevent lint from accumulating in your outdoor dryer vent. The trap or screen acts as a barrier, catching lint before it has a chance to enter the vent and cause buildup. Follow these steps to install a lint trap or screen:
- Choose the right type: Lint traps and screens come in various sizes and styles. Select one that is compatible with your dryer vent and suits your needs.
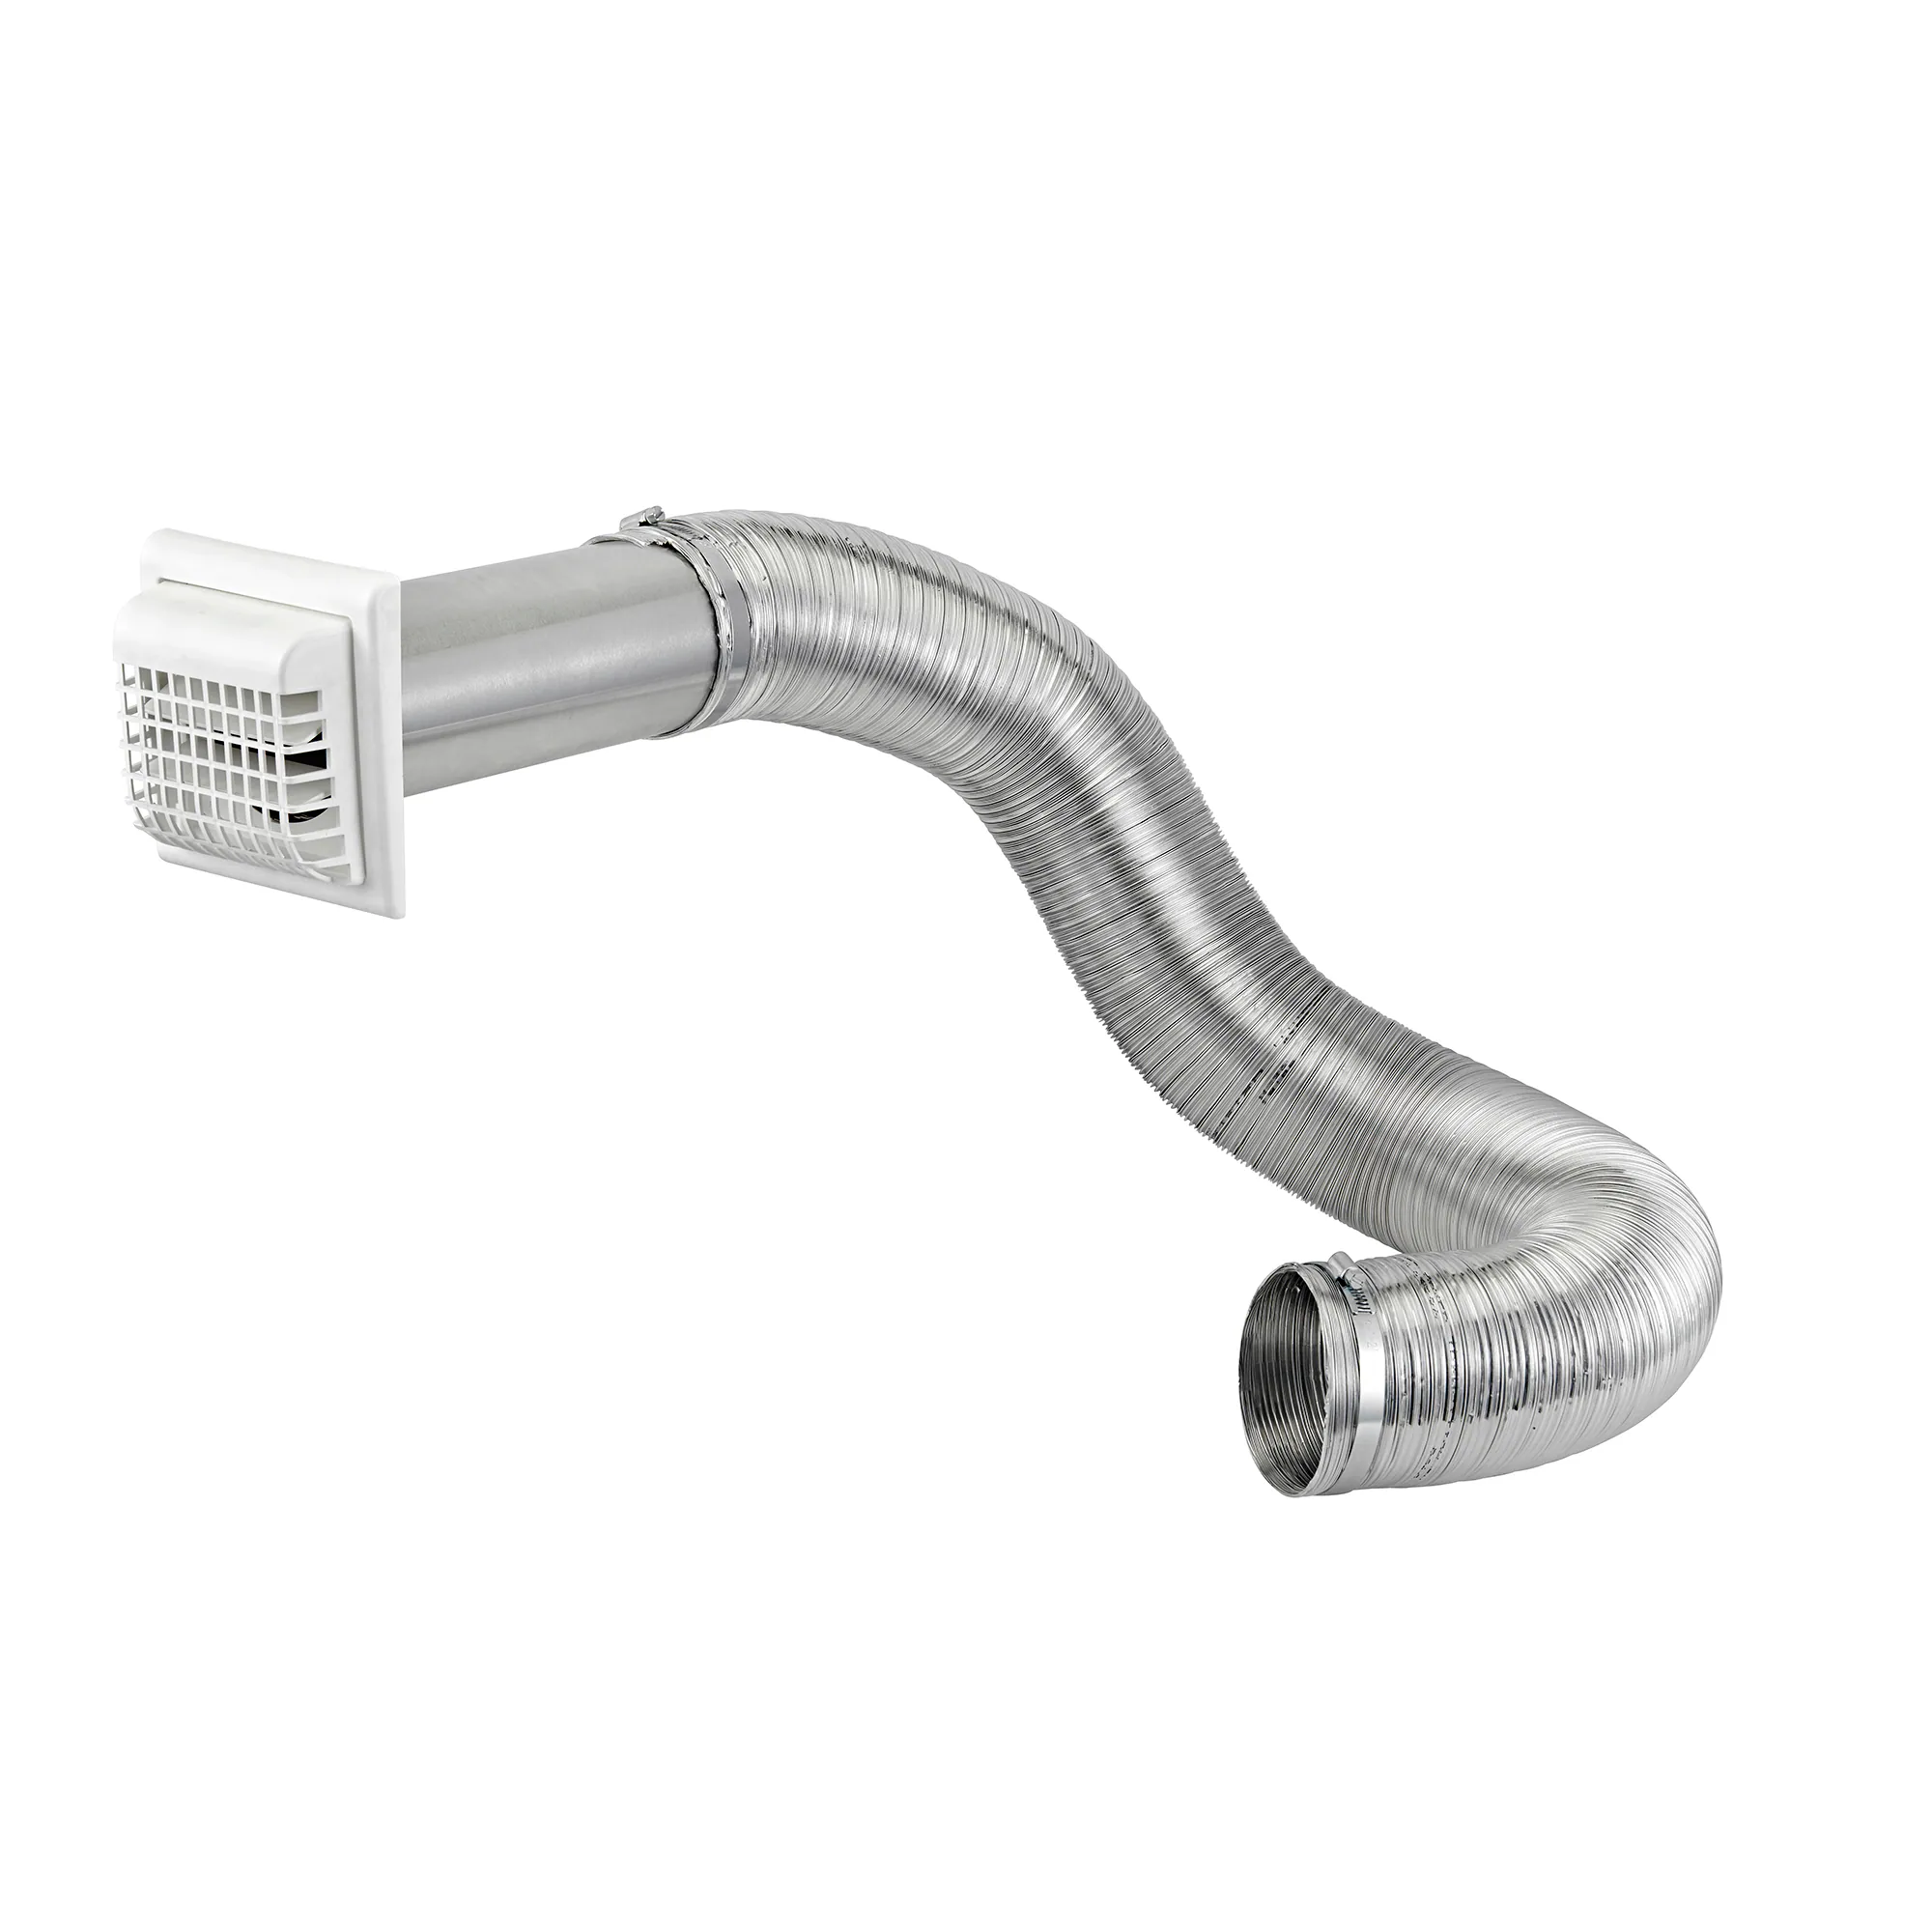
- Locate the vent opening: Identify the outdoor vent opening where the lint trap or screen will be installed. This is typically located on the exterior side of your house, on the roof, or through an exterior wall.
- Clean the vent opening: Before installing the lint trap or screen, make sure the vent opening is clean and free from any debris or obstructions. This will ensure optimal functionality.
- Follow the manufacturer’s instructions: Each lint trap or screen may have specific installation instructions provided by the manufacturer. Read the instructions carefully and follow them accordingly.
- Secure the lint trap or screen: Attach the lint trap or screen securely to the vent opening, following the manufacturer’s guidelines. Ensure that it fits snugly and that there are no gaps for lint to escape.
- Test the installation: Once installed, give the lint trap or screen a gentle tug to ensure it is properly secured. It should not come loose or move easily.
Installing a lint trap or screen provides an additional layer of protection against lint accumulation in your outdoor dryer vent. It is a simple and effective way to reduce the risk of clogs and maintain proper airflow.
Now that you have installed a lint trap or screen, it’s important to regularly clean and maintain it to ensure its effectiveness. In the next step, we will guide you through the process of cleaning and maintaining the lint trap or screen. Keep reading!
Step 4: Regularly Clean and Maintain the Lint Trap
Regularly cleaning and maintaining the lint trap is essential to keep your dryer vent free from lint buildup and ensure its efficient operation. Follow these steps to clean and maintain the lint trap:
- Turn off the dryer: Before you begin, make sure the dryer is turned off and unplugged from the power source. Safety should always be a priority.
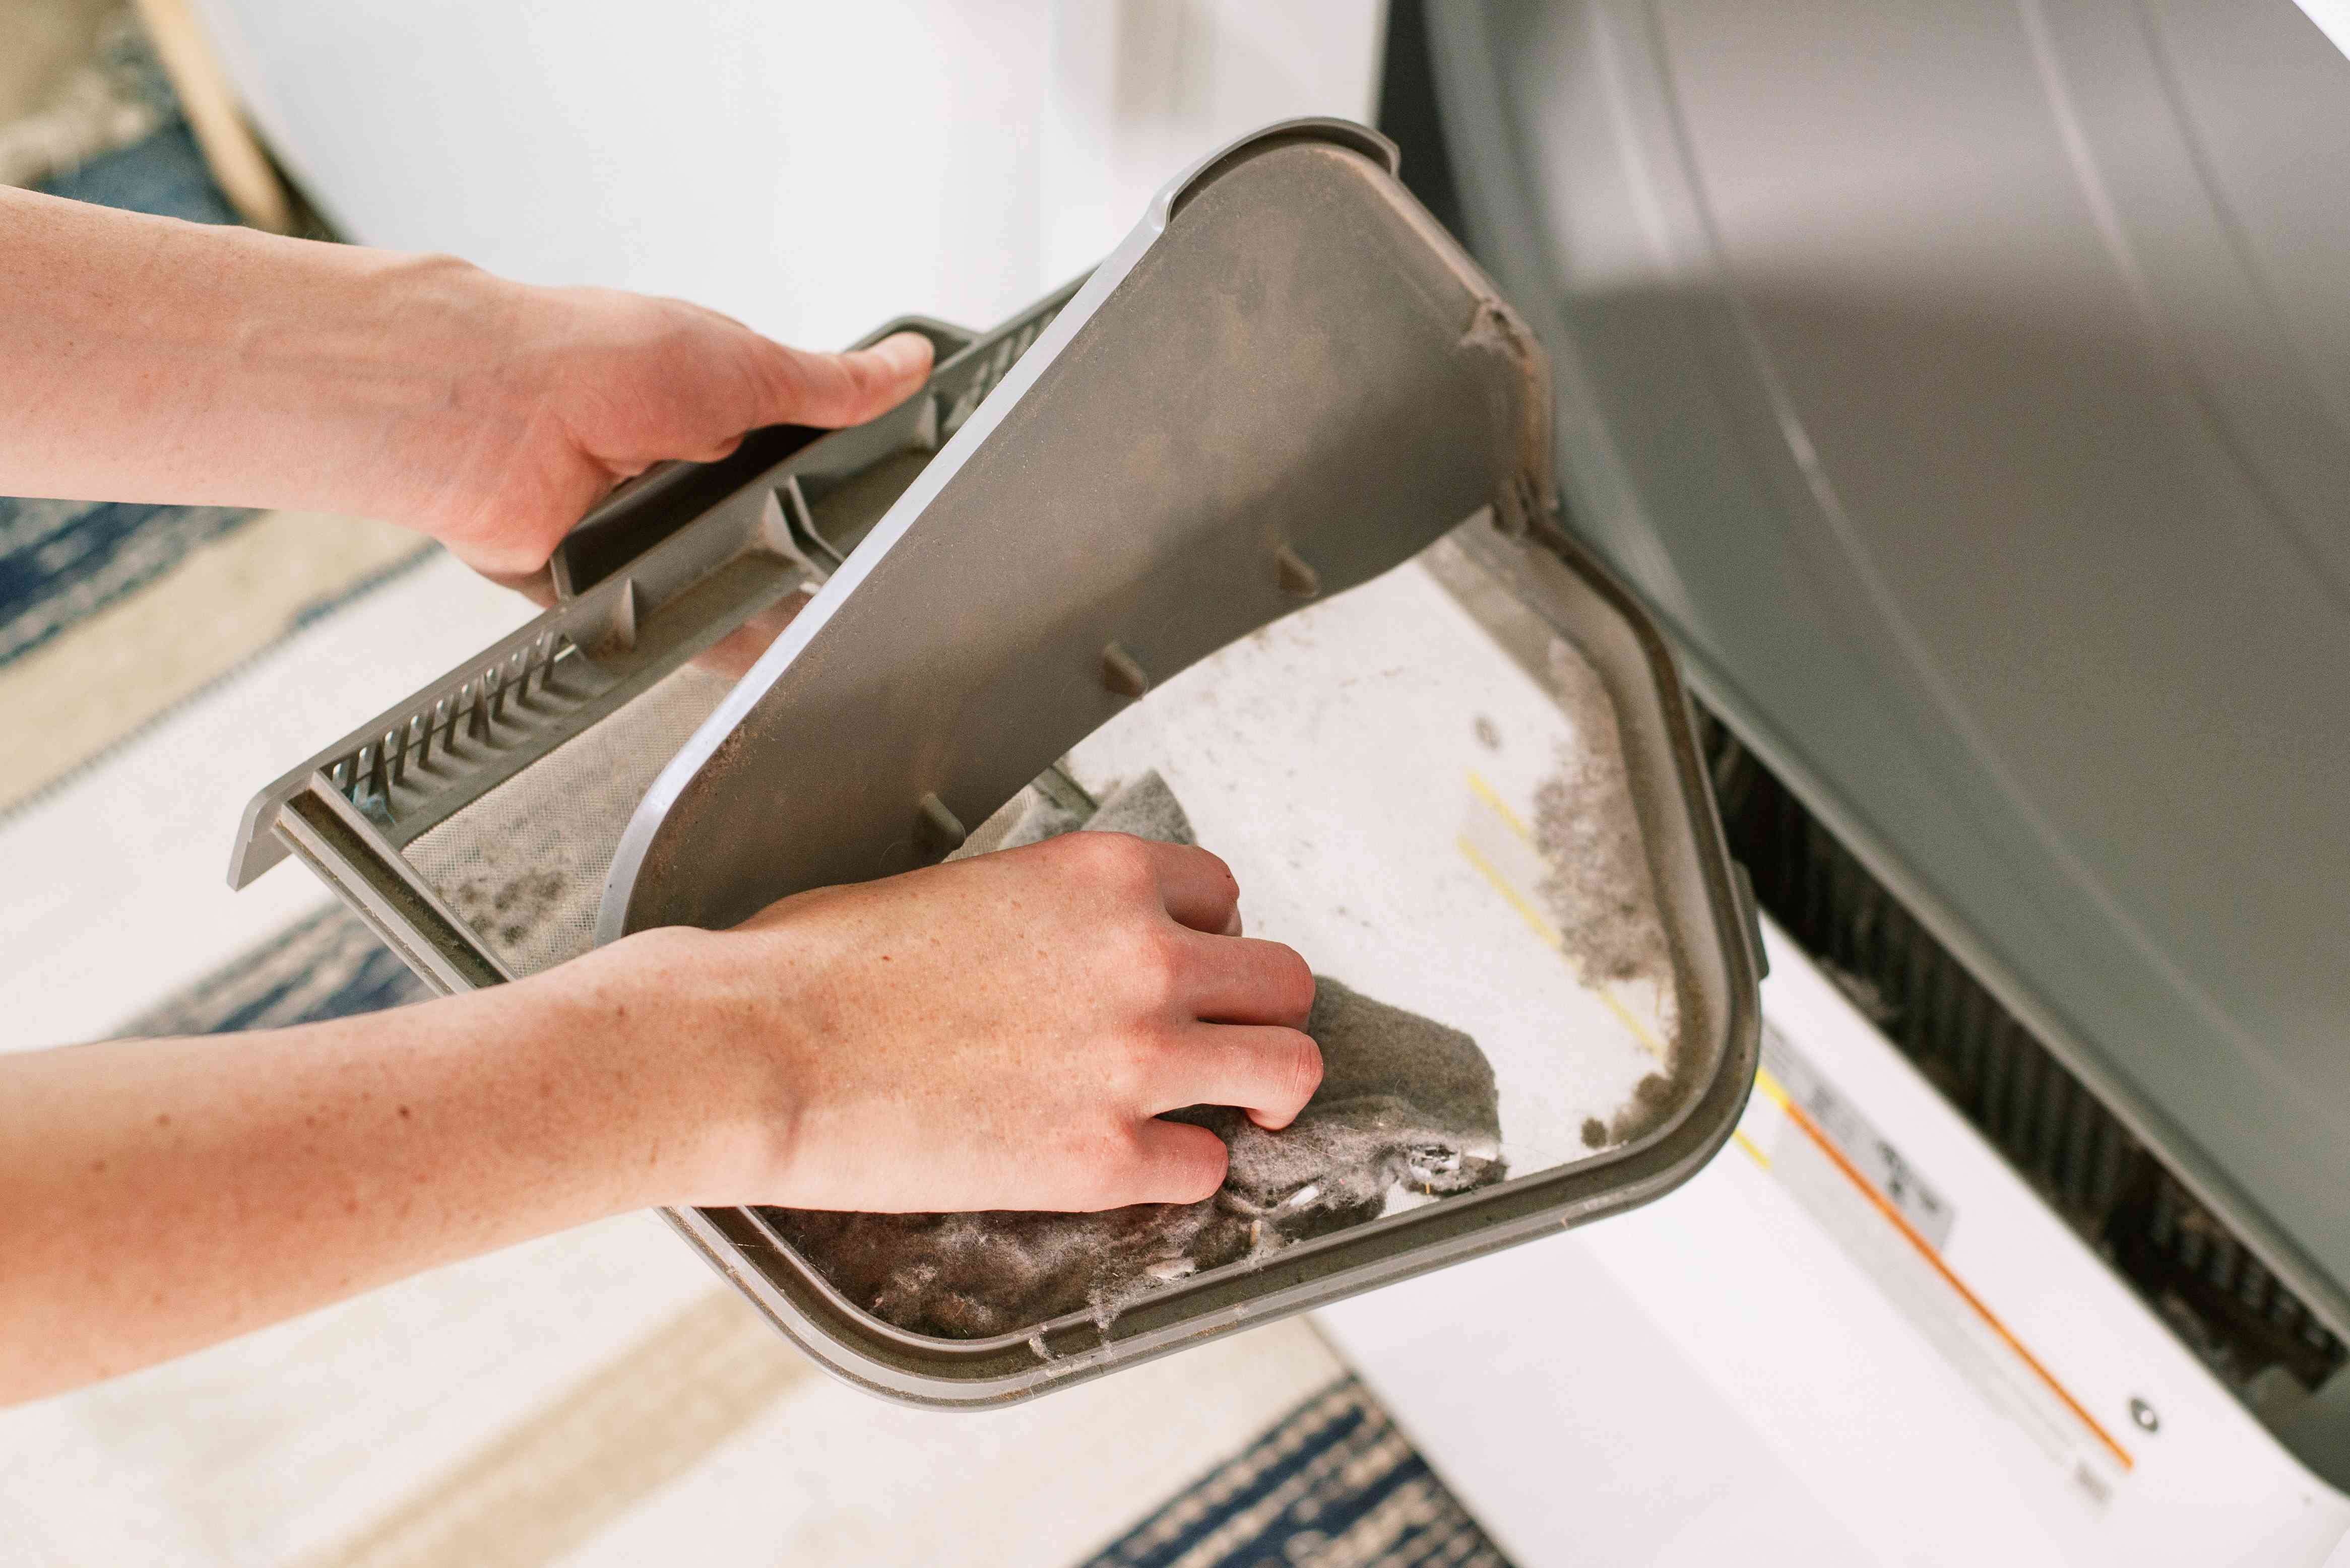
- Locate the lint trap: The lint trap is typically located inside the dryer, near the dryer door. It is a removable screen or filter that catches lint during the drying process.
- Remove the lint trap: Carefully pull out the lint trap or filter from its designated slot inside the dryer. Be gentle to avoid damaging the trap or its housing.
- Dispose of the lint: Empty the collected lint from the trap into a garbage bag or trash bin. Make sure to remove all lint and debris, as any remaining buildup can restrict airflow and affect dryer performance.
- Clean the lint trap: Use a soft brush or a lint brush to clean any remaining lint or debris from the lint trap. Pay extra attention to the screen or filter, ensuring it is free from any clogs or blockages.
- Rinse and dry if necessary: Some lint traps are reusable and can be rinsed with water to remove any trapped residue. Check the manufacturer’s instructions to see if your lint trap can be rinsed and ensure it is thoroughly dried before reinserting.
- Reinsert the lint trap: Once the lint trap is clean and dry, place it back into its designated slot inside the dryer. Make sure it fits securely and is properly aligned.
It is recommended to clean the lint trap after each use or, at the very least, on a monthly basis. Routinely maintaining the lint trap helps prevent lint from entering the vent system and ensures that your dryer operates efficiently.
In the next step, we will focus on monitoring and cleaning the exterior vent opening to further maintain the cleanliness of your dryer vent. Keep reading!
Step 5: Monitor and Clean the Exterior Vent Opening
Monitoring and cleaning the exterior vent opening of your outdoor dryer vent is crucial to maintain proper airflow and prevent lint buildup. Follow these steps to effectively monitor and clean the vent opening:
- Regularly check the vent opening: Take the time to visually inspect the exterior vent opening of your dryer vent on a monthly basis. Look for any signs of lint buildup, debris, or obstructions.
- Remove any visible lint: If you notice lint or debris around the vent opening, carefully remove it using your hands or a soft brush. Be gentle to avoid pushing the lint further into the vent.
- Use a vent brush or vacuum attachment: Insert a vent brush or a vacuum attachment into the vent opening if you see lint or debris that is difficult to reach or remove by hand. Move the brush or vacuum attachment back and forth to dislodge and collect the buildup.
- Clean the vent cover: Clean the exterior vent cover by wiping it with a damp cloth to remove any dirt or grime that may have accumulated over time. This will allow for better airflow and minimize the risk of obstruction.
- Inspect for damage: While cleaning, take the opportunity to inspect the vent cover for any signs of damage or deterioration. If you notice any cracks, holes, or other issues, consider replacing the vent cover to maintain optimal performance.
Regularly monitoring and cleaning the exterior vent opening of your outdoor dryer vent helps prevent lint buildup and ensures that the vent operates efficiently. By taking these preventive measures, you reduce the risk of clogs and minimize drying time.
In addition to the above steps, there are some extra tips you can follow to keep your dryer vent clean and safe. We’ll cover these tips in the next section. Keep reading!
Step 6: Additional Tips for Keeping the Dryer Vent Clean
Aside from the previous steps, there are several additional tips you can follow to ensure your dryer vent remains clean and in optimal condition. Here are some extra tips to keep in mind:
- Clean the dryer lint trap after each use: Get into the habit of cleaning the lint trap after every drying cycle. This will minimize lint buildup and improve the overall efficiency of your dryer.
- Avoid overloading the dryer: Overloading the dryer with too many clothes can increase drying time and put additional strain on the vent system. Dry smaller loads to allow for better airflow and more effective drying.
- Use proper dryer venting materials: When installing or replacing the vent hose, use rigid or semi-rigid metal venting instead of flexible plastic or foil venting. Metal venting is less likely to kink or trap lint, ensuring better airflow.
- Keep the area around the dryer clean: Regularly vacuum or sweep the area around the dryer to remove any lint, dust, or debris that may accumulate. This prevents loose lint from entering the vent system.
- Leave space behind the dryer: Make sure there is ample space between the back of the dryer and the wall to allow proper ventilation. This helps prevent lint from getting trapped and allows for better airflow.
- Schedule professional dryer vent cleaning: While regular maintenance is essential, it is recommended to have a professional dryer vent cleaning at least once a year. A professional will have the necessary tools and expertise to thoroughly clean the vent system and ensure its optimal performance.
By following these additional tips, you can minimize lint buildup, improve the efficiency of your dryer, and reduce the risk of lint-related fire hazards.
Now you have all the tools, knowledge, and steps to catch lint from an outdoor dryer vent. By following this comprehensive guide, you can maintain a clean and safe vent system, enhance drye
Read also: 9 Amazing Lint Brush For Dryer Vent For 2025
Conclusion
Catching lint from an outdoor dryer vent is a vital maintenance task that should not be overlooked. By taking the time to inspect, clean, and maintain your dryer vent, you can ensure the safety, efficiency, and longevity of your dryer while reducing the risk of lint-related fire hazards.
Throughout this article, we’ve covered the essential steps to catch lint from an outdoor dryer vent. We started with the importance of this task, highlighting the hazards of lint buildup and the benefits of keeping a clean vent. We then discussed the tools and materials you’ll need, including a screwdriver, vent brush or vacuum attachment, lint trap or screen, bucket or bag, gloves, safety glasses, and a flashlight.
We walked you through inspecting the dryer vent, identifying any obstructions, and removing them. Next, we discussed the installation of a lint trap or screen to prevent future lint buildup. We emphasized the significance of regularly cleaning and maintaining the lint trap to ensure its effectiveness in capturing lint.
Furthermore, we covered the monitoring and cleaning of the exterior vent opening and provided extra tips for keeping your dryer vent clean. These tips included cleaning the lint trap after each use, avoiding overloading the dryer, using proper venting materials, keeping the area around the dryer clean, leaving space behind the dryer, and scheduling professional dryer vent cleaning.
By following these steps and tips, you can effectively catch lint from your outdoor dryer vent, maintain optimal airflow, reduce energy consumption, and minimize the risk of lint-related fires. Remember, safety should always be a priority, so be sure to follow the manufacturer’s instructions and exercise caution throughout the process.
Now it’s time to put your knowledge into action and take care of your dryer vent. Regular maintenance and cleaning will not only keep your dryer running smoothly but also provide you with peace of mind knowing that you are keeping your home and family safe from potential hazards.
Frequently Asked Questions about How To Catch Lint From An Outdoor Dryer Vent
Was this page helpful?
At Storables.com, we guarantee accurate and reliable information. Our content, validated by Expert Board Contributors, is crafted following stringent Editorial Policies. We're committed to providing you with well-researched, expert-backed insights for all your informational needs.