Articles
How To Clean Dryer Vent From Roof
Modified: October 20, 2024
Learn effective techniques for cleaning your dryer vent from the roof. Read our informative articles for step-by-step instructions and expert tips!
(Many of the links in this article redirect to a specific reviewed product. Your purchase of these products through affiliate links helps to generate commission for Storables.com, at no extra cost. Learn more)
Introduction
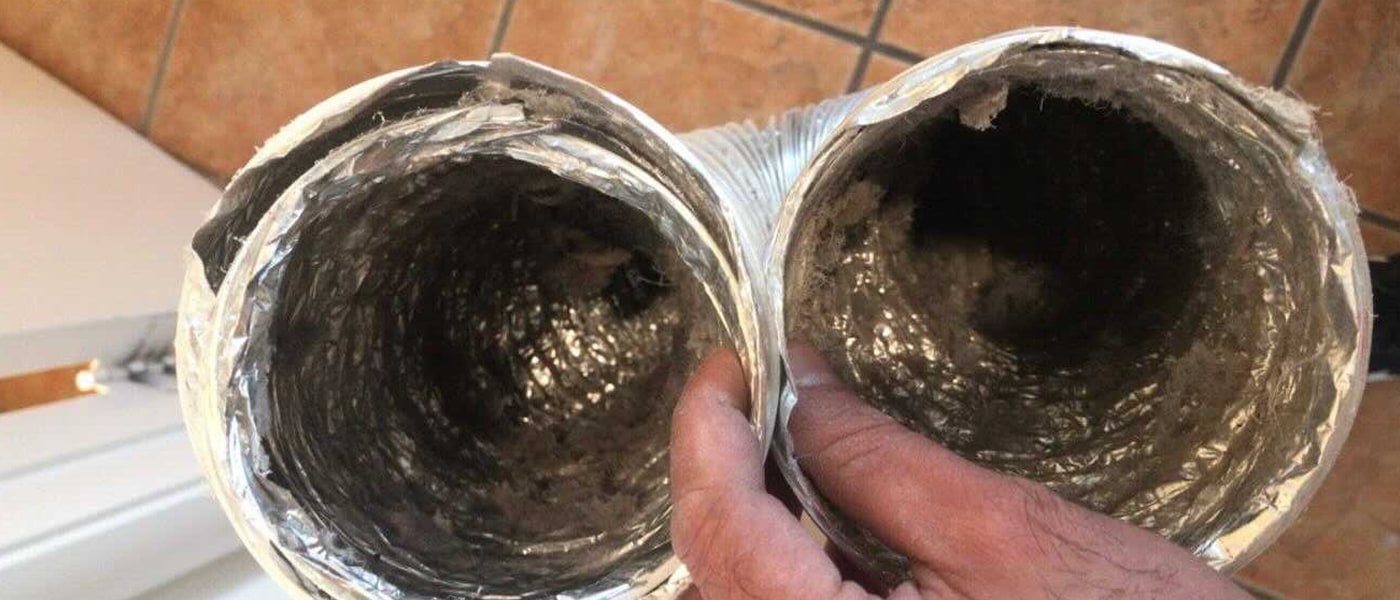
Keeping your dryer vent clean and properly maintained is essential for the efficient and safe operation of your dryer. Over time, lint and debris can accumulate in the vent, causing reduced airflow and increasing the risk of a fire hazard. While cleaning the dryer vent from the exterior is a common practice, cleaning it from the roof is often overlooked. However, cleaning the dryer vent from the roof is just as important and can help ensure optimal performance and safety.
In this guide, we will walk you through the process of cleaning your dryer vent from the roof. We will discuss the reasons why it is important to clean your dryer vent regularly, the safety precautions you need to take, the tools and materials you will need, and provide you with a step-by-step guide on how to clean the dryer vent from the roof.
By following the steps outlined in this article, you can help prevent lint buildup, improve dryer efficiency, extend the lifespan of your dryer, and reduce the risk of fire hazards. So, let’s dive in and learn how to clean your dryer vent from the roof.
Key Takeaways:
- Regularly cleaning your dryer vent from the roof is crucial for preventing fire hazards, improving dryer efficiency, and extending the lifespan of your appliance. Follow the safety precautions and step-by-step guide for optimal results.
- By maintaining a clean dryer vent system, you can enjoy efficient and safe drying cycles while minimizing the risk of fire hazards. Remember to schedule regular maintenance and cleanings to ensure optimal performance.
Read more: How To Vent A Dryer Through The Roof
Reasons to Clean Dryer Vent
Cleaning your dryer vent regularly offers several key benefits. Let’s take a closer look at why it is important to clean your dryer vent:
- Fire Prevention: One of the top reasons to clean your dryer vent is to prevent the risk of a fire. Lint, dust, and debris can accumulate in the vent over time, creating a highly flammable environment. When the dryer is in use, the heat can ignite the lint, leading to a potentially dangerous fire. Regularly cleaning the vent helps remove this buildup and reduces the risk of a dryer fire.
- Improved Dryer Efficiency: A clogged dryer vent restricts airflow and can cause your dryer to work harder and longer to dry your clothes. This not only increases energy consumption but also puts unnecessary strain on your appliance. By cleaning the vent, you allow for proper airflow, resulting in improved dryer efficiency and shorter drying times.
- Prevention of Carbon Monoxide Poisoning: Gas-powered dryers produce carbon monoxide, a colorless and odorless gas that can be deadly if it accumulates in your home. A blocked dryer vent can cause carbon monoxide to be vented back into your living space instead of outside, putting you and your household at risk. Regular cleaning of the vent helps prevent carbon monoxide buildup and ensures the safe operation of your gas dryer.
- Prevention of Mold and Mildew: Excessive moisture from damp clothes and condensation can accumulate in a clogged dryer vent. This moisture provides the perfect breeding ground for mold and mildew to grow. Cleaning the vent helps remove any moisture buildup, reducing the likelihood of mold and mildew formation and maintaining a healthy indoor environment.
- Extended Dryer Lifespan: When a dryer vent is clogged, the dryer has to work harder to push out the damp air. This puts additional strain on the dryer’s motor, heating element, and other components, potentially leading to premature wear and tear. By cleaning the vent regularly, you can help extend the lifespan of your dryer and save on costly repairs or replacements.
Now that we understand the importance of cleaning our dryer vent, let’s move on to the safety precautions you need to consider before getting started.
Safety Precautions
Before you begin cleaning your dryer vent, it is important to take certain safety precautions to ensure your well-being. Follow these guidelines to minimize the risk of accidents or injuries:
- Disconnect the Power: Start by unplugging your dryer from the electrical outlet or turning off the circuit breaker that supplies power to the dryer. This will prevent any accidental activation of the dryer while you are working on the vent.
- Protective Gear: Wear appropriate protective gear, including gloves, safety glasses, and a dust mask, to protect yourself from sharp edges, debris, and dust particles.
- Secure Ladder or Work Platform: If you are accessing the roof to clean the dryer vent, make sure your ladder or work platform is stable and securely positioned. Ensure that it is on a level surface and use ladder stabilizers if needed.
- Be Mindful of Electrical Wires: Check the vicinity of the dryer vent for any electrical wires or cables. Exercise caution to avoid cutting or damaging any electrical connections or live wires.
- Beware of Wildlife: Before proceeding, inspect the area around the vent for any signs of nests or wildlife activity. Animals may seek shelter and create nests in dryer vents, which can hinder the cleaning process and pose a safety hazard. If necessary, contact a professional to safely remove any wildlife.
- Use Caution with Tools: When using tools to remove the vent cover or clean the vent pipe, be cautious of sharp edges and moving parts. Follow the manufacturer’s instructions for safe use and handle tools with care.
- Work in Well-Ventilated Areas: Make sure you have proper ventilation while working on the dryer vent. Open windows or doors or work in an area with good airflow to prevent the accumulation of dust and lint particles.
- Have a Fire Extinguisher Available: Keep a fire extinguisher nearby in case of emergencies. It’s always better to be prepared in case a fire breaks out during the cleaning process.
By adhering to these safety precautions, you can minimize the risks associated with cleaning your dryer vent and ensure a safe working environment. Next, we will discuss the tools and materials you will need for the cleaning process.
Tools and Materials Needed
Before you begin cleaning your dryer vent from the roof, gather the necessary tools and materials. Here’s a list of what you will need:
- Ladder or Work Platform: A sturdy ladder or work platform will be required to safely access the roof. Make sure it is the appropriate size and height for reaching the vent.
- Screwdriver or Nut Driver: Depending on the type of vent cover, you may need a screwdriver or nut driver to remove the screws or nuts holding the cover in place.
- Flexible Dryer Vent Brush: A flexible dryer vent brush is essential for cleaning the vent pipe from the roof. It should have long bristles to reach deep into the vent and remove lint and debris effectively.
- Shop Vacuum or Leaf Blower: A shop vacuum or leaf blower can be used to blow air through the vent pipe and remove any remaining debris. Make sure to use the proper attachments for the desired airflow.
- Duct Tape or Clamps: Duct tape or clamps may be needed to secure and seal the vent pipe connections after cleaning. This helps prevent air leaks and ensures proper venting.
- Bucket or Trash Bag: Have a bucket or trash bag handy to collect the lint and debris that is removed from the vent. This will make the cleanup process easier.
- Protective Gear: As mentioned earlier, wear safety gloves, goggles, and a dust mask to protect yourself from sharp edges, debris, and dust particles.
Make sure to gather all the necessary tools and materials before you commence the cleaning process. This will ensure that you have everything at your disposal and can complete the task efficiently. Now that you are equipped with the required tools and materials, let’s move on to the step-by-step guide on how to clean your dryer vent from the roof.
Step-by-Step Guide to Cleaning Dryer Vent from the Roof
Now that you have gathered all the necessary tools and materials, let’s walk through the step-by-step process of cleaning your dryer vent from the roof:
- Disconnect the Dryer: Start by disconnecting your dryer from the power source. Unplug it from the electrical outlet or turn off the circuit breaker that supplies power to the dryer.
- Access the Roof: Use a sturdy ladder or work platform to access the roof. Make sure the ladder is securely positioned and stable before climbing on it.
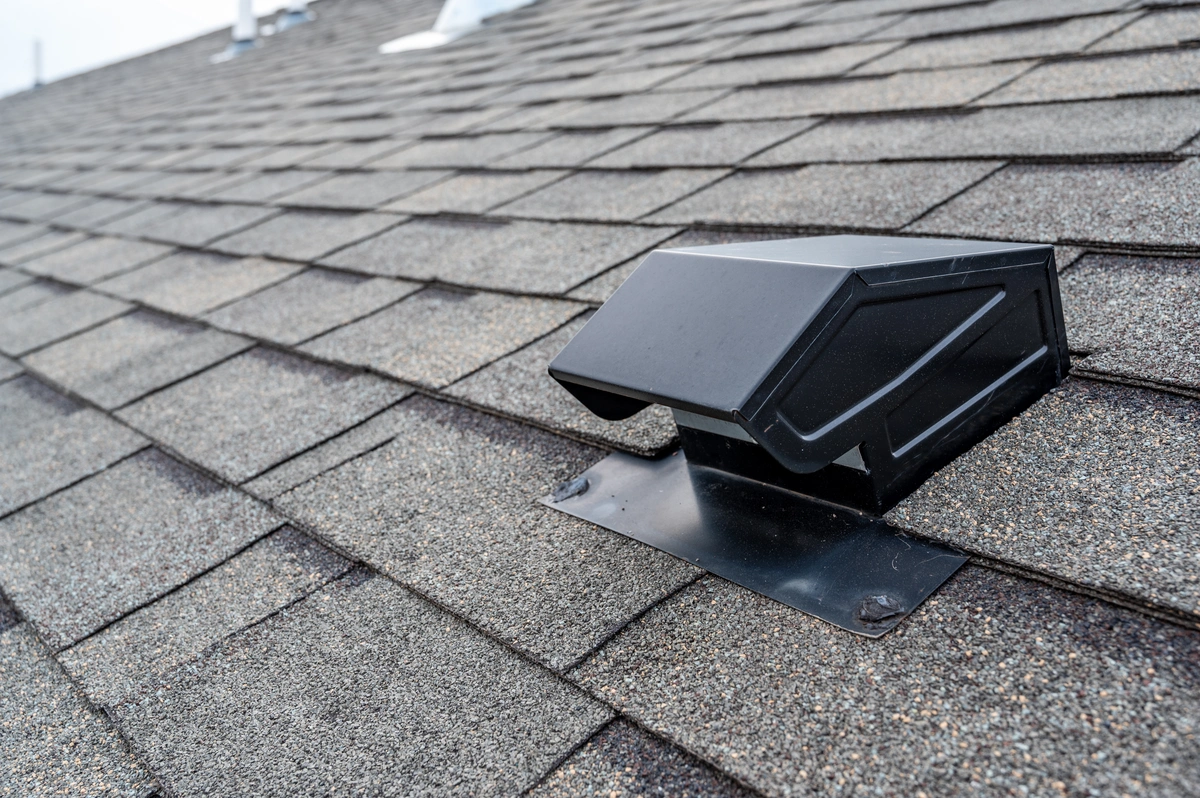
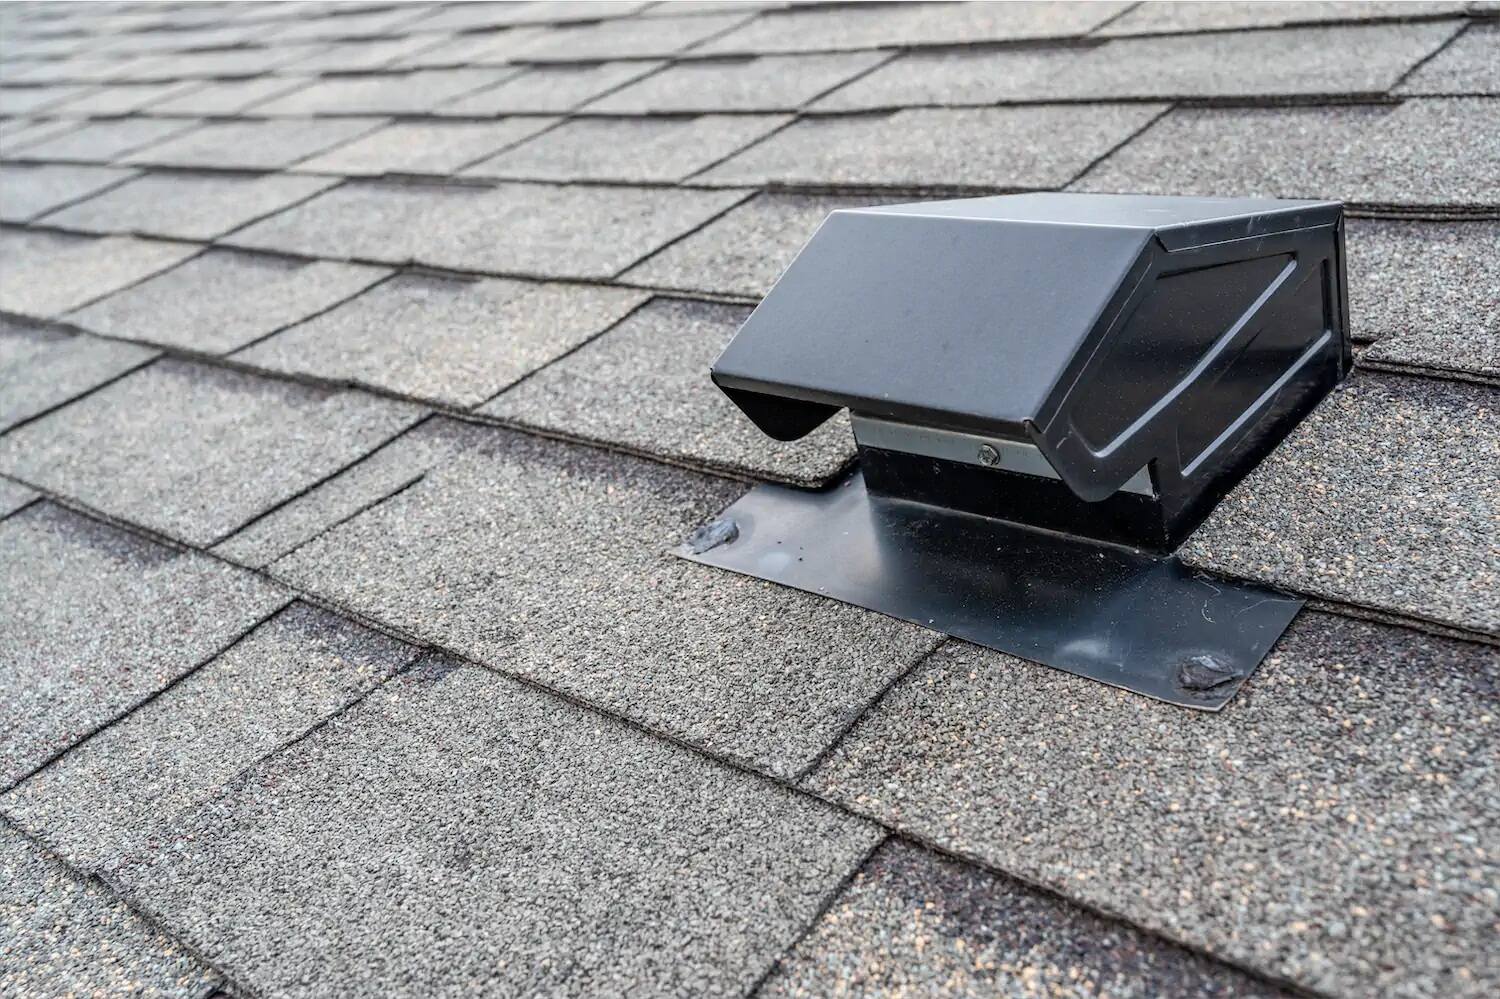
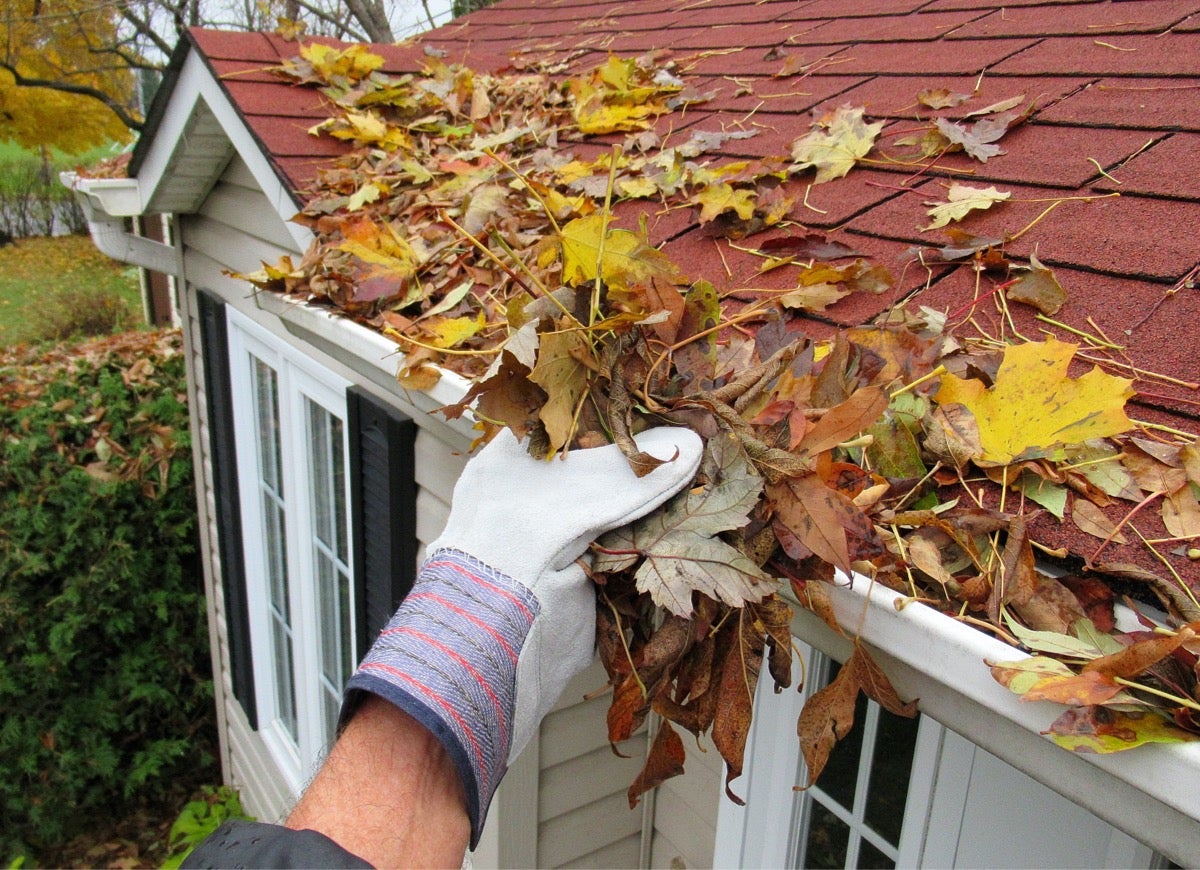
- Locate the Dryer Vent: Locate the dryer vent on the roof. It is usually a round or rectangular opening with a vent cover. Remove any debris or leaves that may have accumulated around the vent.
- Remove the Vent Cover: Use a screwdriver or nut driver to remove the screws or nuts holding the vent cover in place. Set the screws or nuts aside in a safe place to avoid losing them.
- Clean the Vent Cover: Inspect the vent cover for any lint or debris. Use a brush or vacuum to remove any dirt, lint, or obstructions from the vent cover. This will help ensure proper airflow through the vent.
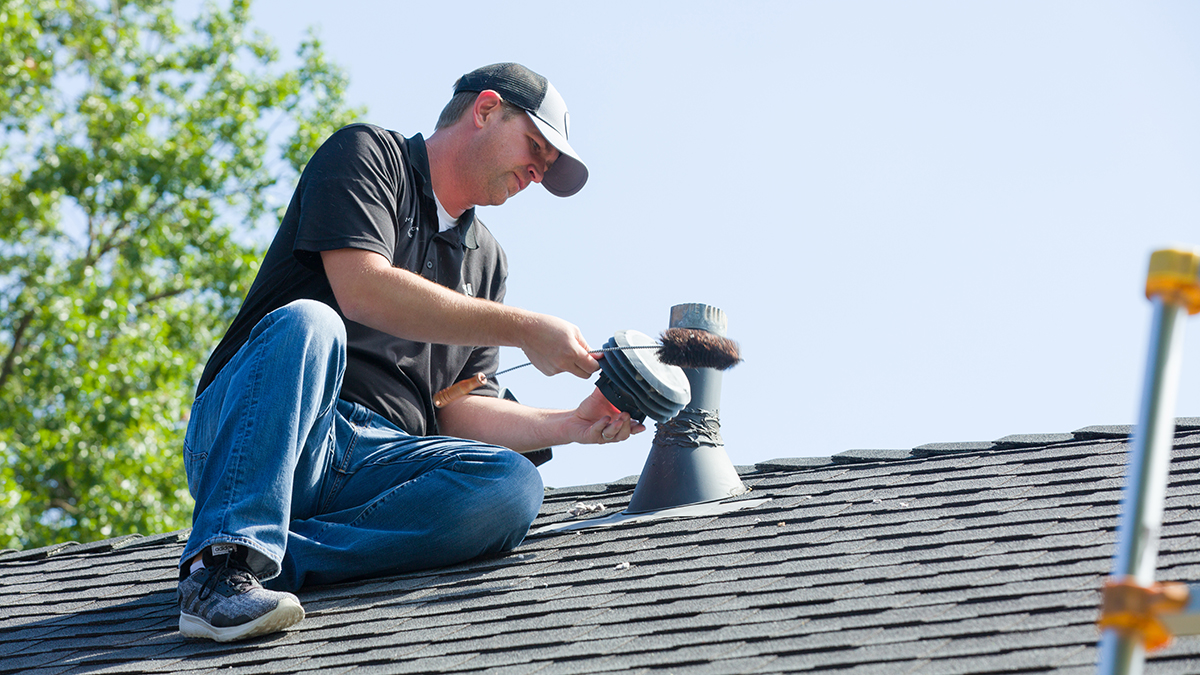
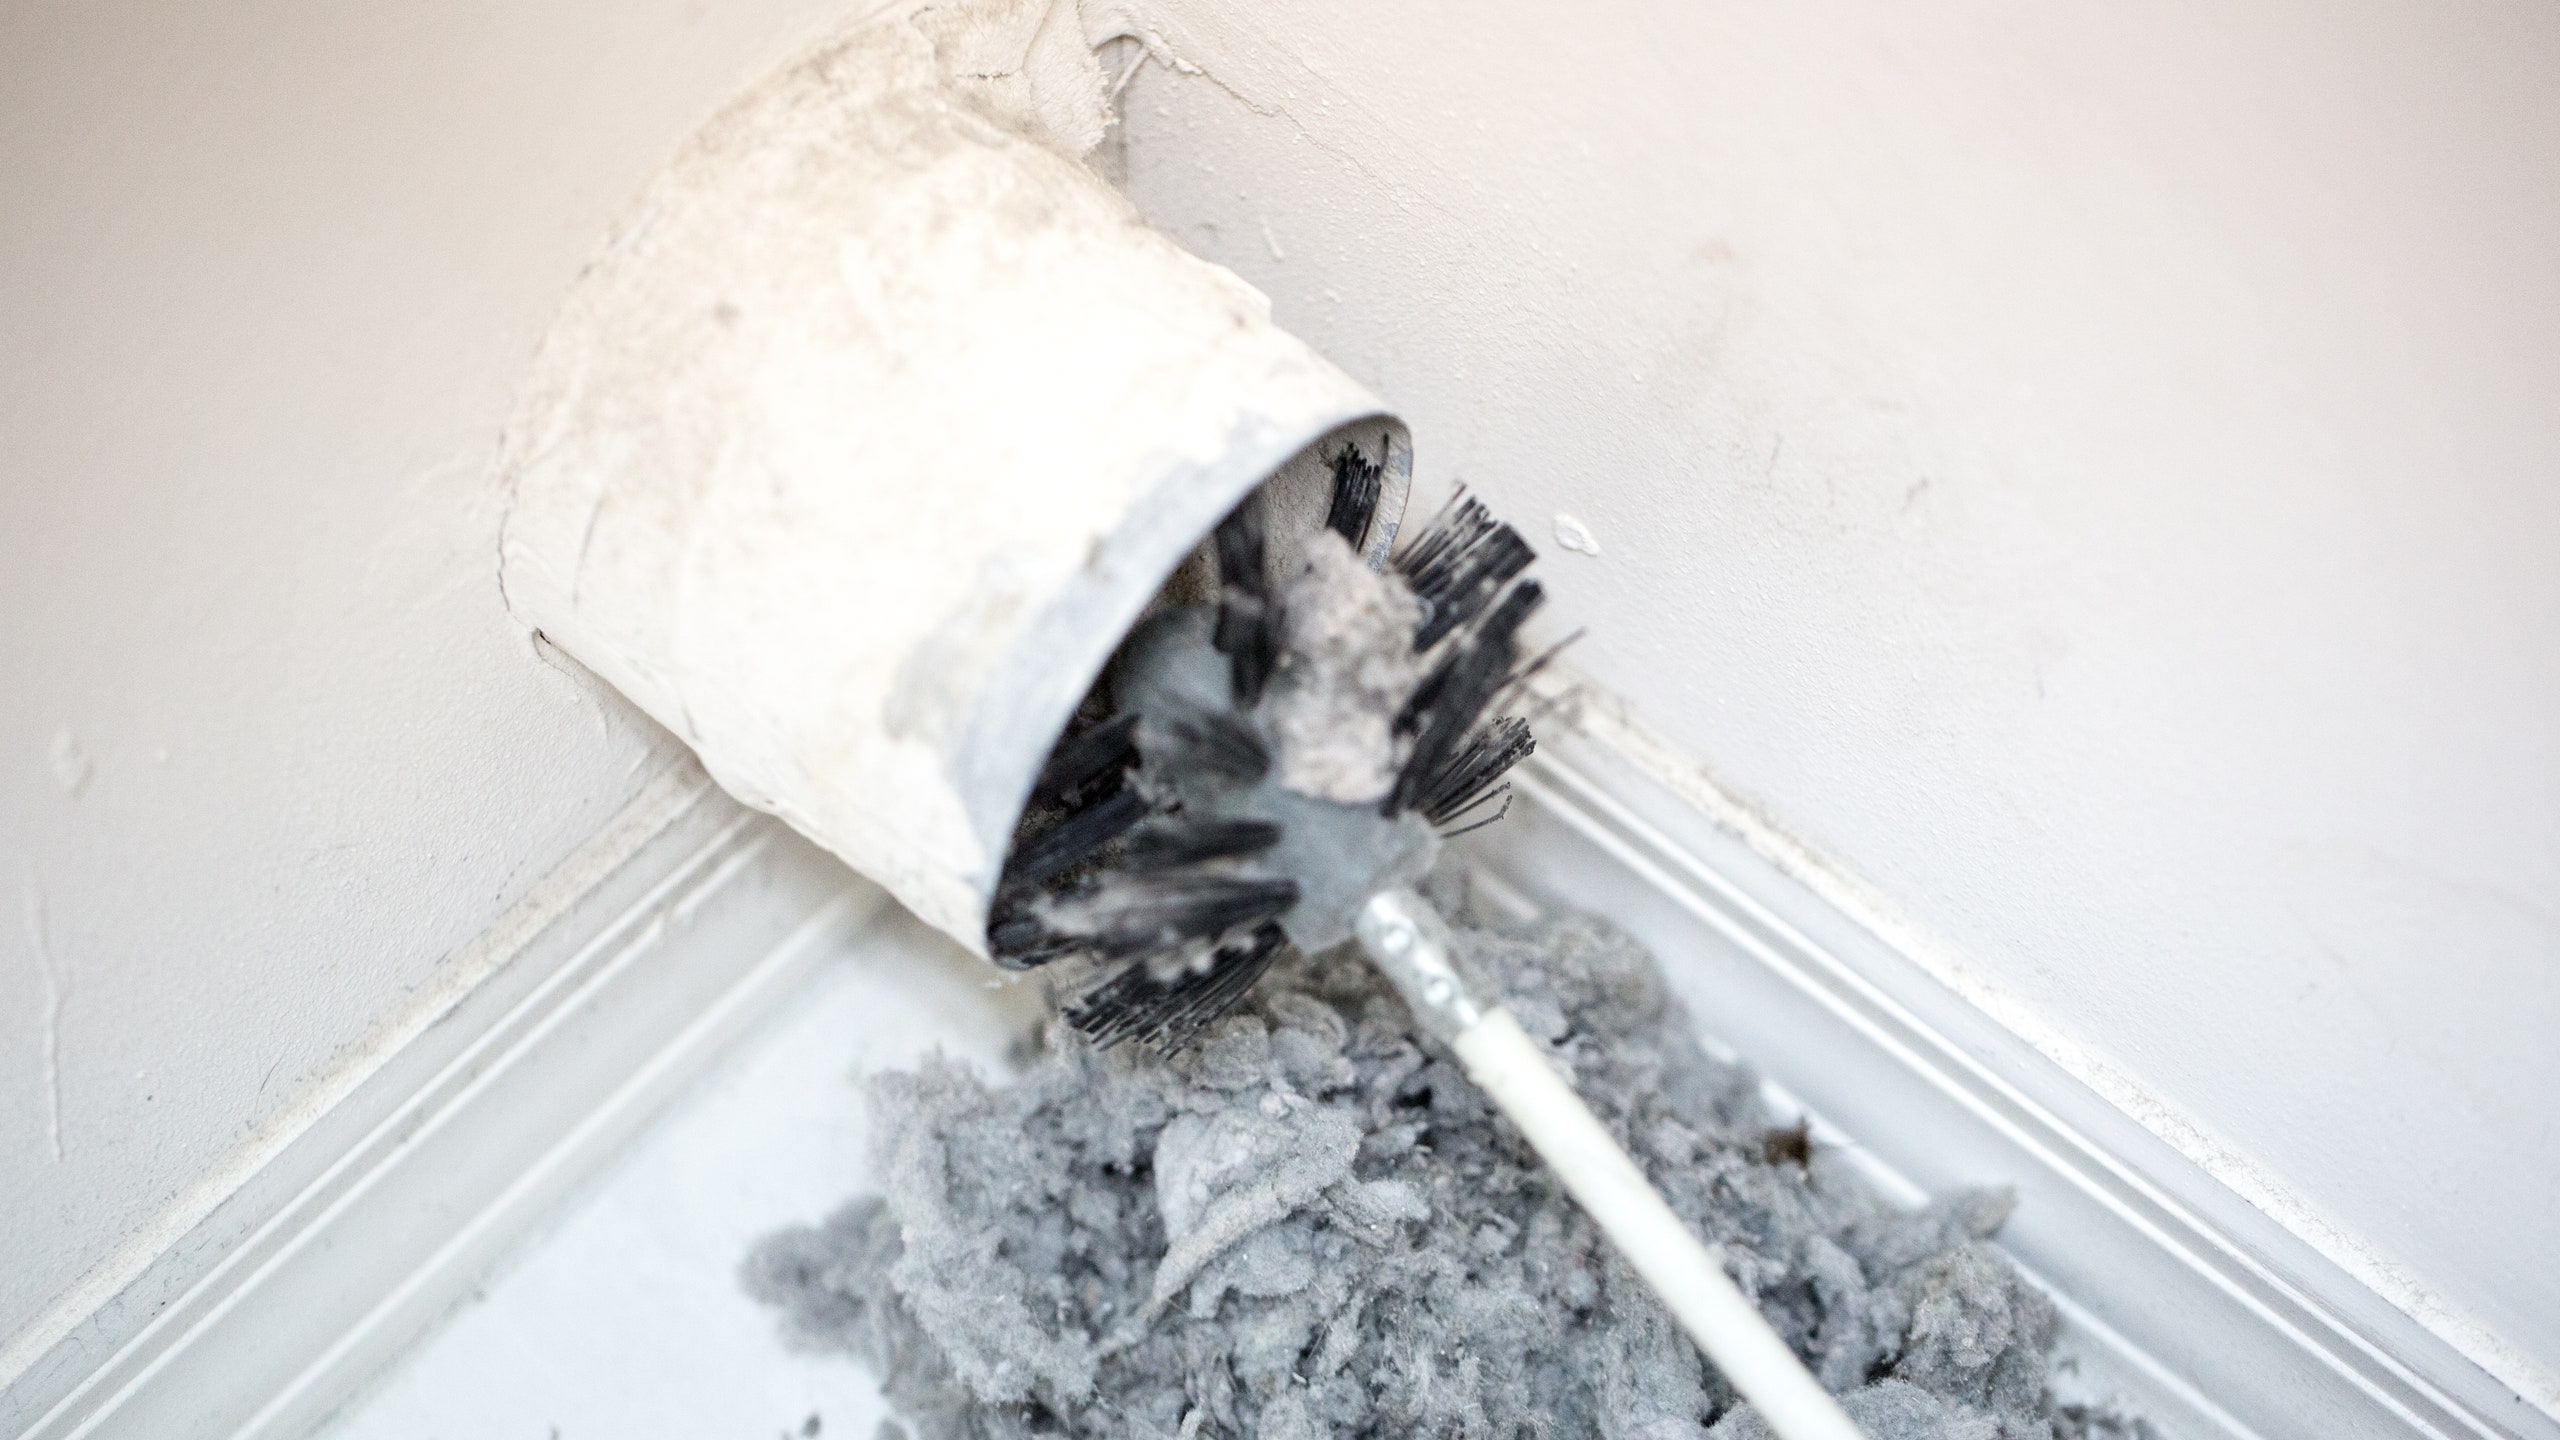
- Clean the Vent Pipe: Insert a flexible dryer vent brush into the vent pipe and start scrubbing in a circular motion. Push the brush as far as you can into the vent pipe to remove lint and debris. Repeat this process several times to ensure a thorough cleaning.
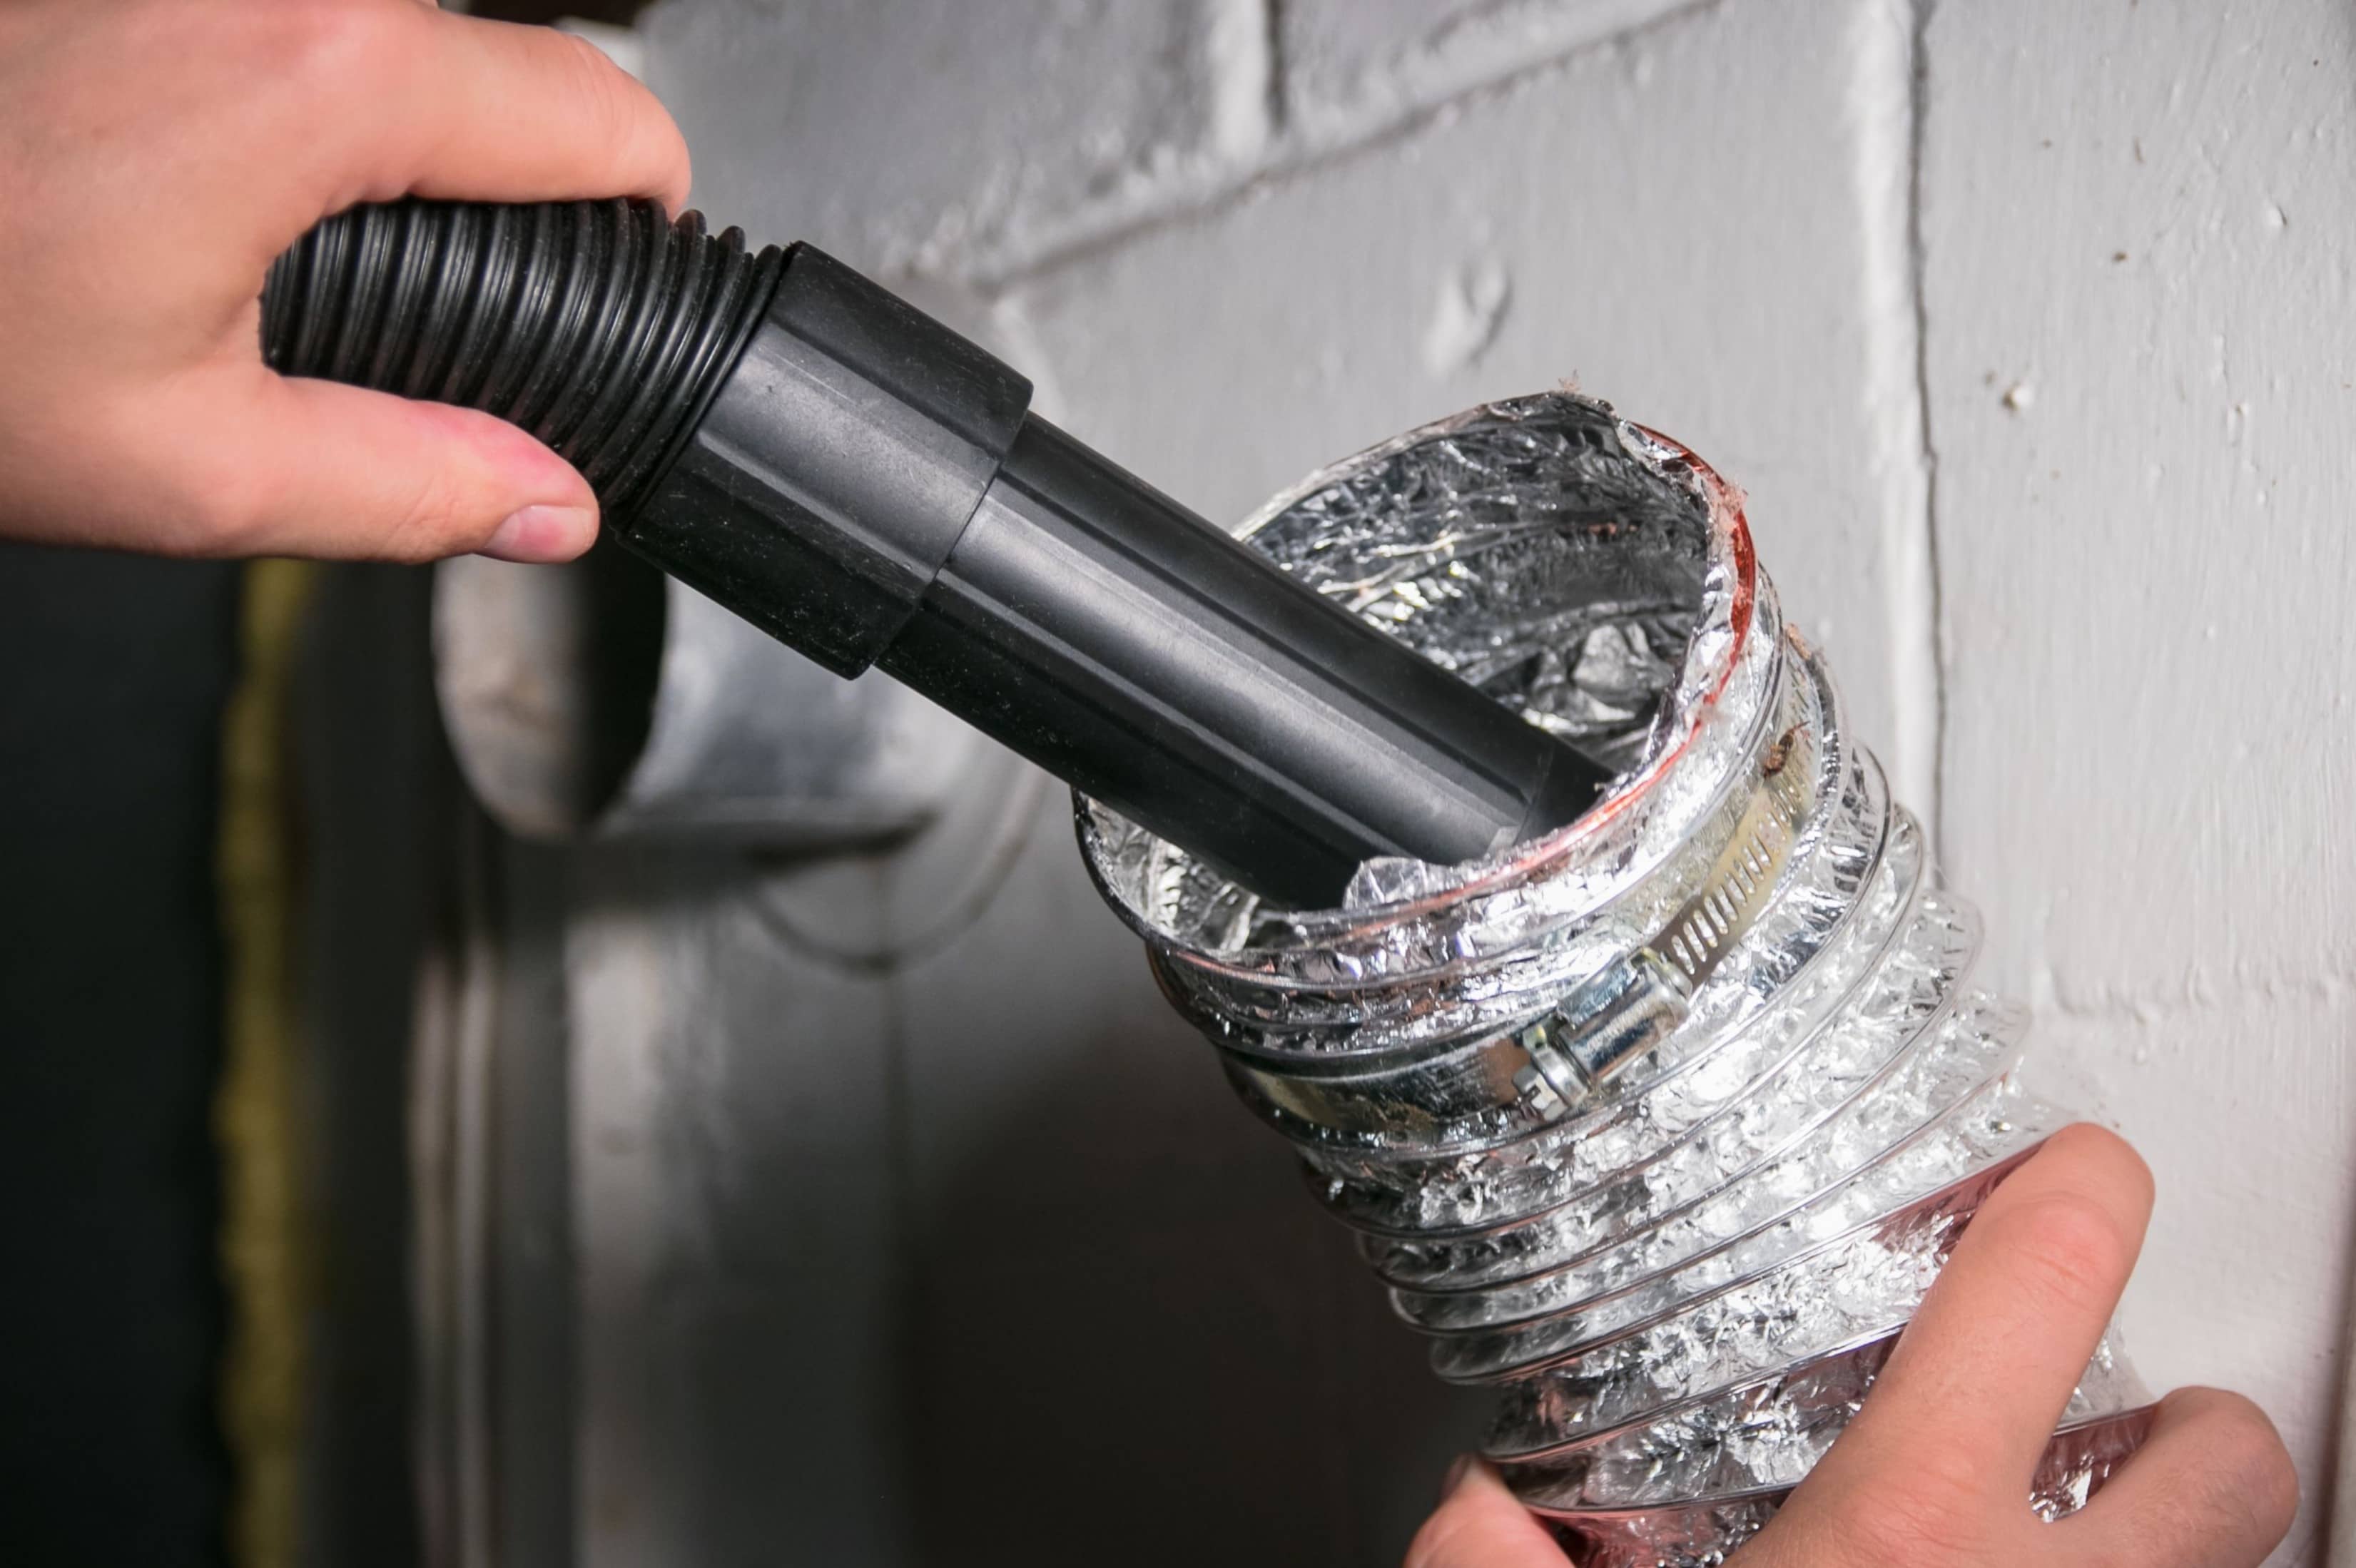
- Blow Air through the Pipe: Once you have finished using the brush, use a shop vacuum or leaf blower to blow air through the vent pipe. This will help dislodge any remaining lint and debris. Start from the inside of the house and work your way towards the roof.
- Collect Debris: Have a bucket or trash bag ready to collect the lint and debris that is blown out of the vent pipe. This will make the cleanup process easier and prevent the debris from scattering around.
- Reassemble the Vent: After cleaning the vent cover and vent pipe, reattach the vent cover to the roof. Secure it tightly with the screws or nuts that you removed earlier. Ensure that the cover is properly aligned and sealed.
- Reconnect the Dryer: Lastly, return to the interior of your home and reconnect the dryer to the power source. Plug it back into the electrical outlet or turn on the circuit breaker. Test the dryer to ensure it is working properly.
Congratulations! You have successfully cleaned your dryer vent from the roof. By following these steps on a regular basis, you can keep your dryer vent clean, promote optimal dryer performance, and minimize the risk of fire hazards. Remember to clean your dryer vent at least once a year or more frequently if needed. Now that you have completed the cleaning process, it’s time to enjoy efficient and safe drying cycles.
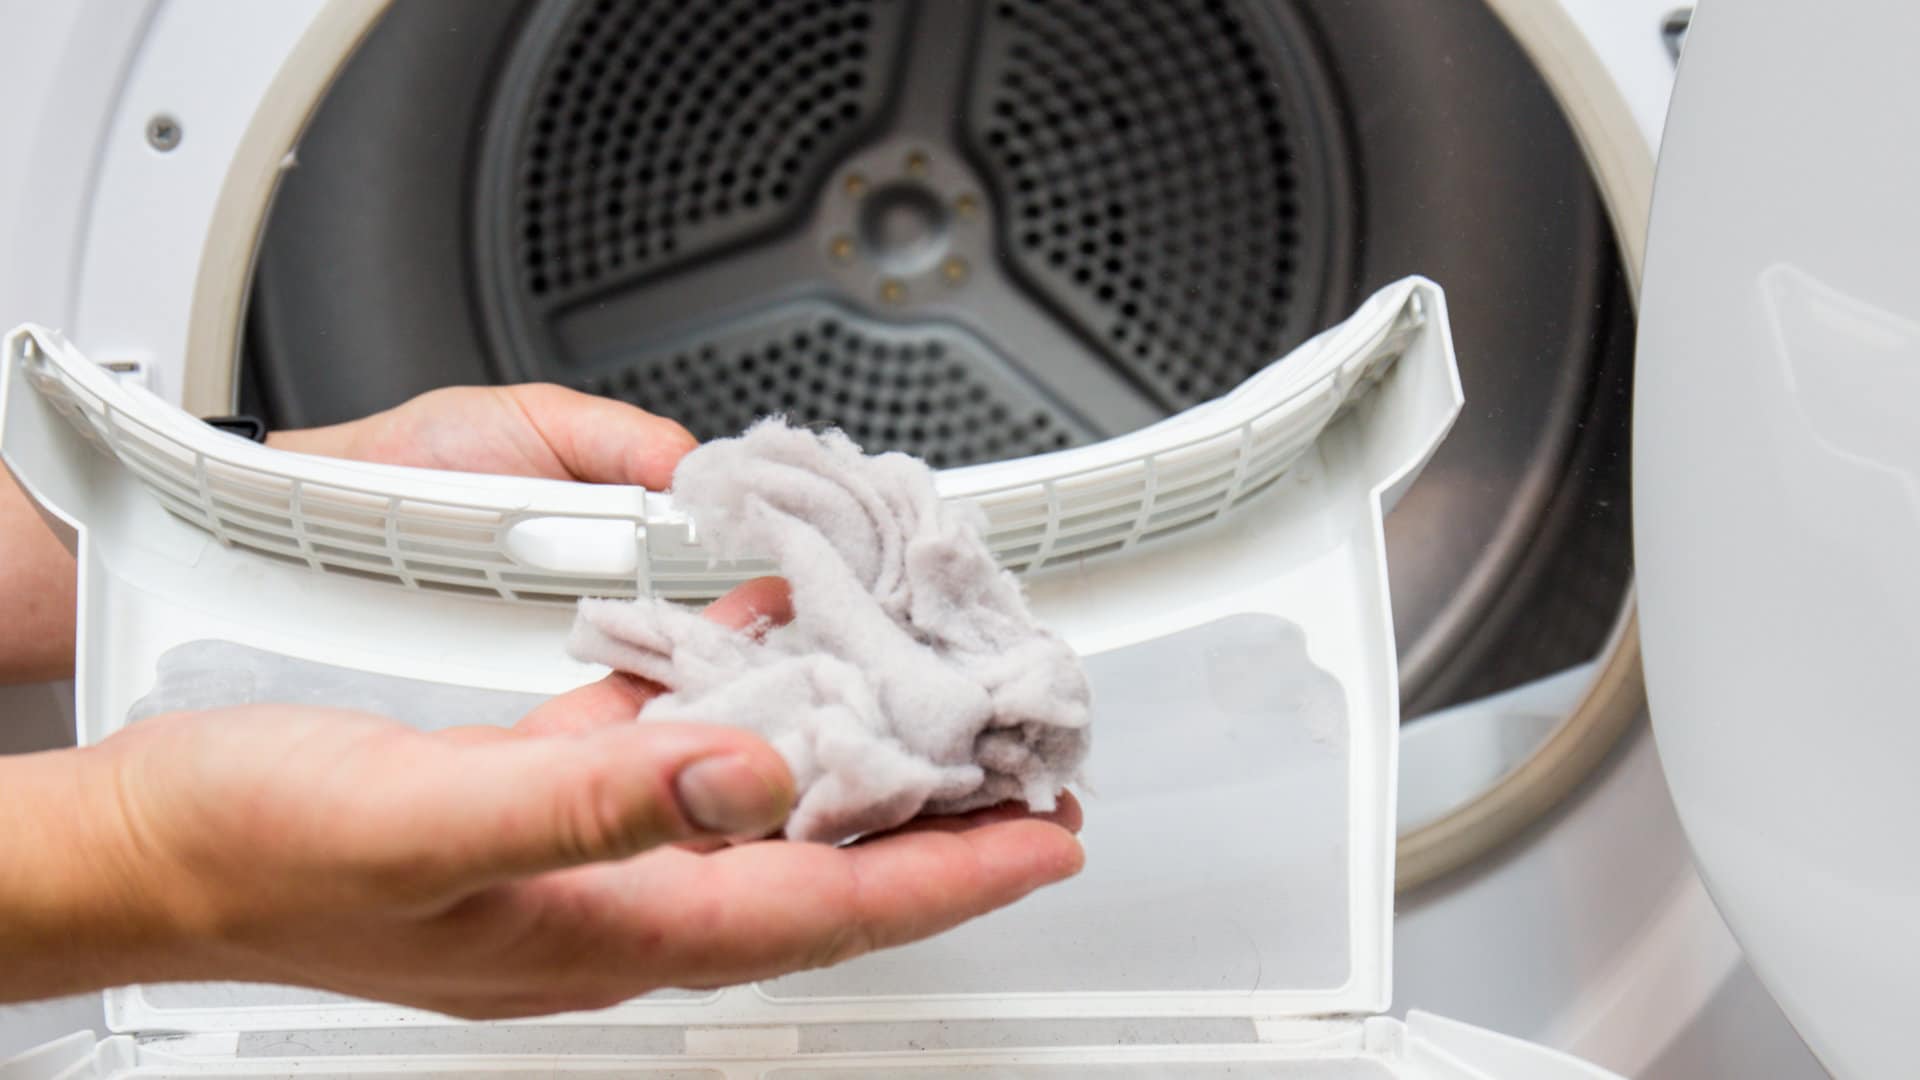
Make sure to regularly clean the lint trap and use a vent brush to remove any buildup in the dryer vent from the roof. This will help prevent fire hazards and improve dryer efficiency.
Read more: How To Install A Dryer Vent Through The Roof
Cleaning the Roof Vent Cover
Cleaning the roof vent cover is an essential step in maintaining a clean and efficient dryer vent system. Here’s a step-by-step guide on how to clean the roof vent cover:
- Access the Roof: Use a sturdy ladder or work platform to access the roof. Ensure that the ladder is securely positioned and stable before climbing on it. Take necessary precautions to ensure your safety.
- Locate the Vent Cover: Locate the vent cover on the roof. It is typically a round or rectangular opening with a cover. Remove any debris or leaves that may have accumulated around the vent.
- Remove the Screws or Nuts: Use a screwdriver or nut driver to carefully remove the screws or nuts that secure the vent cover in place. Keep the screws or nuts in a safe place to avoid losing them.
- Inspect the Vent Cover: Once the vent cover is removed, inspect it for any visible build-up of lint, dust, or debris. Look for signs of blockage or obstruction that may impede proper airflow.
- Brush or Vacuum the Vent Cover: Use a soft brush or vacuum cleaner to gently remove any lint, dust, or debris from the vent cover. Pay attention to all the crevices and corners where lint buildup may occur.
- Wash the Vent Cover (if necessary): If the vent cover has stubborn stains or residue that cannot be easily removed with a brush or vacuum, you can wash it with mild soap and water. Use a sponge or cloth to gently scrub the cover, then rinse it thoroughly and allow it to dry completely before reattaching it.
- Check for Damages: While cleaning the vent cover, inspect it for any damages, such as cracks or breaks. If you notice any significant damage, consider replacing the vent cover to ensure optimal functioning and safety.
- Reattach the Vent Cover: Once the vent cover is clean and dry, reattach it to the roof. Align it properly with the vent opening and secure it tightly using the screws or nuts you removed earlier. Ensure a snug fit to prevent any air leaks.
- Test the System: After reattaching the vent cover, it is important to test the dryer and ensure that it is functioning properly. Run a test cycle and check for any signs of air leaks, unusual noises, or inefficiencies in drying performance. If any issues arise, further inspection and maintenance may be required.
Cleaning the roof vent cover is a crucial step in maintaining a clean and efficient dryer vent system. Regularly inspecting and cleaning the vent cover helps to prevent blockages, ensure proper airflow, and reduce the risk of fire hazards. By following these steps, you can ensure optimal performance and safety of your dryer vent system. Now, let’s move on to cleaning the vent pipe from the roof.
Cleaning the Vent Pipe
Cleaning the vent pipe is a critical step in maintaining a clear and efficient dryer vent system. Here’s a step-by-step guide on how to clean the vent pipe from the roof:
- Access the Roof: Use a sturdy ladder or work platform to access the roof. Ensure that the ladder is securely positioned and stable before climbing on it. Take necessary precautions to ensure your safety.
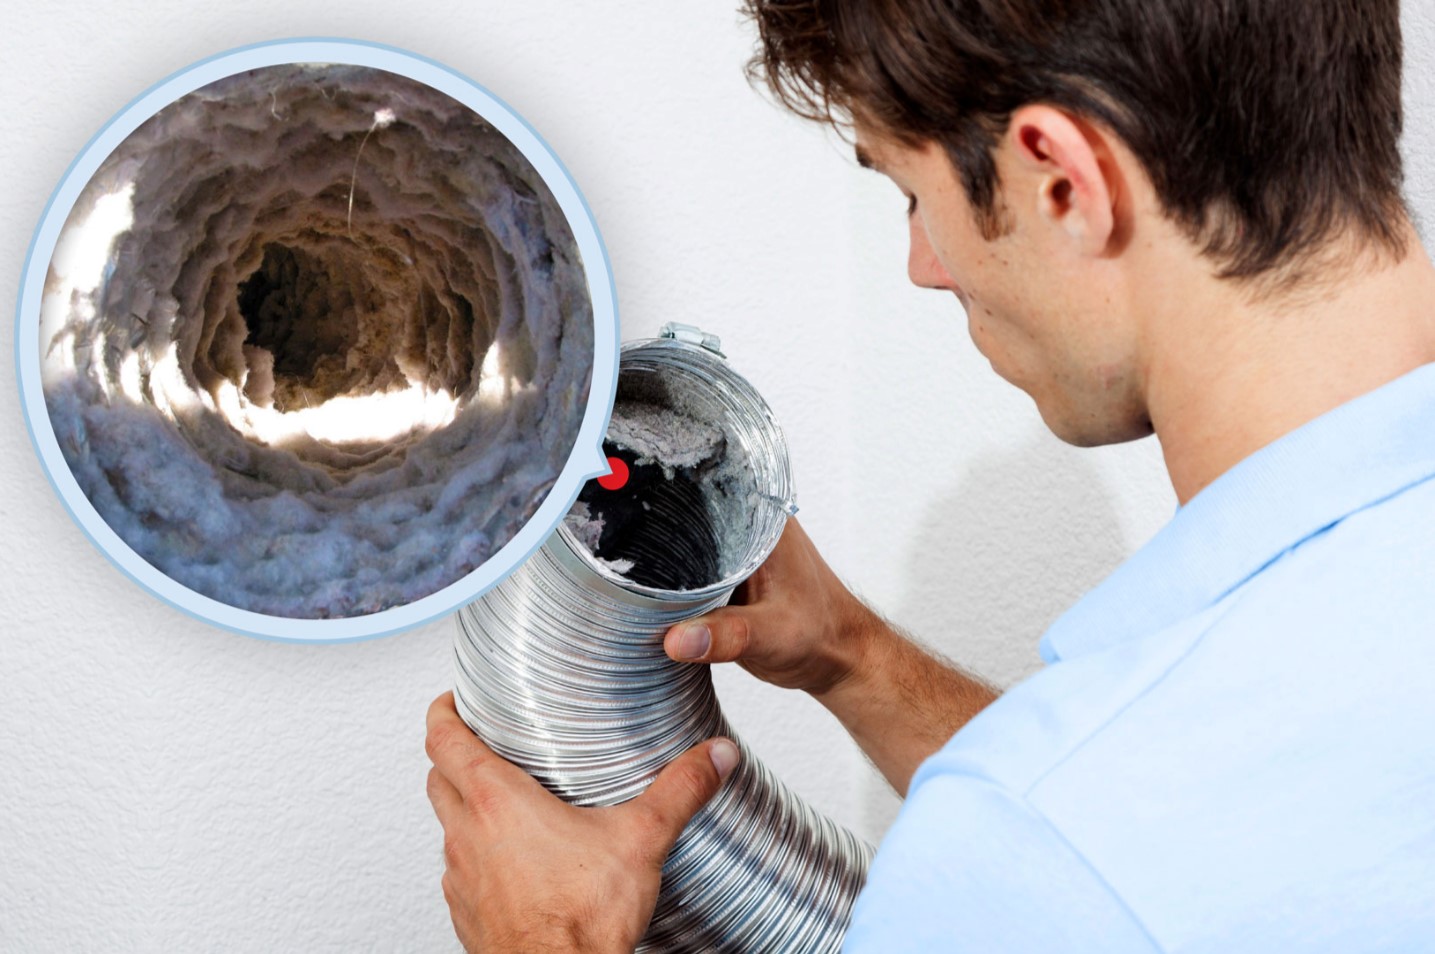
- Locate the Vent Pipe: Locate the vent pipe that extends from the roof. It is connected to the vent cover and allows the hot air and moisture from the dryer to escape outdoors.
- Insert the Flexible Dryer Vent Brush: Insert a flexible dryer vent brush into the vent pipe. The brush should have long bristles to reach deep into the pipe and effectively remove lint and debris. Push the brush as far as it can go into the vent pipe without forcing it.
- Scrub the Vent Pipe: Scrub the inside of the vent pipe by moving the brush back and forth in a circular motion. Apply gentle pressure to dislodge any lint, dust, or debris that may have accumulated. Repeat this process several times to ensure a thorough cleaning.
- Remove the Brush and Debris: Carefully remove the brush from the vent pipe, being cautious not to let any debris fall back into the pipe. It’s a good idea to have a bucket or trash bag ready to collect the lint and debris for easy disposal.
- Inspect for Further Blockages: Once the brush is removed, inspect the vent pipe for any remaining blockages. Use a flashlight to illuminate the interior of the pipe and look for signs of lint or debris that may require further cleaning.
- Blow Air through the Pipe: Use a shop vacuum or leaf blower to blow air through the vent pipe from the inside of the house towards the roof. This will help dislodge any remaining lint or debris that may be stuck to the walls of the pipe. Repeat this process a few times to ensure a thorough cleaning.
- Reattach the Vent Pipe: After cleaning the vent pipe, securely reattach it to the vent cover on the roof. Ensure that the connection is tight and properly sealed to prevent any air leaks.
- Test the Dryer: Once you have finished cleaning the vent pipe, reconnect the dryer to the power source and run a test cycle. Monitor the dryer to ensure that it is operating efficiently and producing hot, dry air without any unusual sounds or issues. If you notice any abnormalities, further inspection may be required.
Cleaning the vent pipe from the roof is an important step in maintaining a clear and functional dryer vent system. By following these steps, you can ensure optimal airflow, prevent blockages, and reduce the risk of fire hazards. Remember to clean your dryer vent regularly to keep it operating efficiently. Now that you have cleaned both the roof vent cover and the vent pipe, let’s move on to reassembling the dryer and conducting a final test.
Reassembling and Testing the Dryer
Now that you have cleaned the roof vent cover and the vent pipe, it’s time to reassemble the dryer and conduct a final test to ensure everything is working properly. Follow these steps for reassembling and testing your dryer:
- Reconnect the Dryer: Return to the inside of your home and reconnect the dryer to the power source. Plug it back into the electrical outlet or turn on the circuit breaker. Ensure that the dryer is securely connected and ready for operation.
- Reattach the Dryer Vent Hose: Reattach the hose that connects the dryer to the vent pipe. Ensure that the hose is properly secured and sealed to prevent any air leaks. Use duct tape or hose clamps if necessary.
- Check for Proper Venting: Double-check that there are no kinks or obstructions in the dryer vent hose. Ensure that the vent hose is tightly connected to both the dryer and the vent pipe. Proper venting is crucial for efficient airflow and optimal dryer performance.
- Turn on the Dryer: Turn on the dryer and run a test cycle to ensure that it is functioning properly. Observe the dryer to ensure that hot air is being properly expelled through the vent pipe and that there are no unusual noises or issues.
- Monitor the Drying Cycle: During the test cycle, monitor the drying process. Ensure that clothes are drying efficiently and in a reasonable amount of time. If you notice any issues such as clothes taking longer to dry or an excessive amount of heat, it may indicate further blockages in the vent system that require attention.
- Clean Up and Dispose of Debris: Dispose of any lint and debris collected during the cleaning process. Clean up the work area and ensure that there is no leftover debris or dust. Properly dispose of collected lint and debris according to local regulations.
- Schedule Regular Maintenance: Regularly check and maintain your dryer vent system to ensure it remains clean and free from blockages. Schedule annual or bi-annual cleanings, depending on the usage and level of lint accumulation in your vent system.
By reassembling the dryer and conducting a final test, you can verify that the cleaned vent system is functioning properly. Regular maintenance and cleaning of your dryer vent will not only ensure optimal performance but also reduce the risk of fire hazards. Remember to follow these steps regularly to keep your dryer vent system in excellent condition. Now that you have successfully cleaned, reassembled, and tested your dryer, you can enjoy efficient and safe drying cycles once again.
Keep in mind that performing maintenance tasks such as cleaning the dryer vent can be potentially dangerous. If you are uncomfortable or unsure about any step in the process, it is always recommended to consult a professional dryer vent cleaning service for assistance.
Conclusion
Cleaning your dryer vent from the roof is a vital maintenance task that should not be overlooked. By regularly cleaning the dryer vent, you can ensure optimal performance, prevent fire hazards, and extend the lifespan of your dryer.
In this guide, we covered the reasons why it is important to clean your dryer vent, the safety precautions you need to take, the tools and materials required, and provided a step-by-step guide for cleaning the vent from the roof. We emphasized the importance of cleaning the roof vent cover, thoroughly scrubbing the vent pipe, and reassembling and testing the dryer after the cleaning process.
Regularly cleaning your dryer vent helps prevent lint buildup, improve dryer efficiency, reduce the risk of fire hazards, and ensure the safe operation of your dryer. By following the steps outlined in this guide, you can effectively clean your dryer vent from the roof and enjoy the benefits of a properly maintained dryer vent system.
Remember to schedule regular maintenance and cleanings for your dryer vent system to prevent lint accumulation and blockages. Regularly inspect the vent cover, clean the vent pipe, and check for proper venting to ensure optimal performance.
Keep in mind that if you are uncomfortable or unsure about any step in the cleaning process, it is always recommended to consult a professional dryer vent cleaning service for assistance. They have the expertise and tools necessary to thoroughly clean your dryer vent and ensure its safe and efficient operation.
By taking the time to clean your dryer vent from the roof, you are investing in the safety and efficiency of your home. So, don’t neglect this important task. Clean your dryer vent regularly, and enjoy a well-functioning and safe dryer for years to come.
Excited about sprucing up your living space with your own two hands? Dive into our comprehensive guide on "How To DIY Home Projects." Whether you're looking to tackle some minor fixes or major renovations, you'll find all the necessary steps, tips, and tricks to ensure your projects turn out just right. Let's roll up our sleeves and transform your home into a masterpiece of your making!
Frequently Asked Questions about How To Clean Dryer Vent From Roof
Was this page helpful?
At Storables.com, we guarantee accurate and reliable information. Our content, validated by Expert Board Contributors, is crafted following stringent Editorial Policies. We're committed to providing you with well-researched, expert-backed insights for all your informational needs.


0 thoughts on “How To Clean Dryer Vent From Roof”