Home>Home Maintenance>How To Tighten A Dryer Vent Clamp
Home Maintenance
How To Tighten A Dryer Vent Clamp
Modified: October 23, 2024
Learn how to tighten a dryer vent clamp with this easy home maintenance guide. Keep your dryer running efficiently and prevent air leaks.
(Many of the links in this article redirect to a specific reviewed product. Your purchase of these products through affiliate links helps to generate commission for Storables.com, at no extra cost. Learn more)
Introduction
Maintaining a properly functioning dryer is essential for efficient home maintenance. One common issue that homeowners may encounter is a loose dryer vent clamp. The dryer vent clamp is responsible for securing the connection between the dryer vent hose and the vent outlet, ensuring that hot air and lint are properly vented outside the home.
A loose dryer vent clamp can lead to a range of problems, including reduced airflow, increased energy consumption, and even potential fire hazards. Therefore, it’s crucial to address this issue promptly to prevent any further complications.
In this article, we will guide you through the steps to tighten a dryer vent clamp effectively. By following these instructions, you can ensure that your dryer operates optimally, reducing the risk of dryer-related issues and improving its overall performance.
But before we begin, let’s gather the necessary materials to make the process smoother.
Key Takeaways:
- Don’t overlook the importance of a secure dryer vent clamp. Tightening it ensures efficient airflow, reduces energy consumption, and minimizes fire hazards, keeping your dryer running smoothly and safely.
- Regular maintenance, including tightening the dryer vent clamp, extends your dryer’s lifespan and saves on repair costs. Take the time to ensure a secure connection for optimal performance and safety.
Read also: 9 Amazing Dryer Vent Clamp For 2025
Step 1: Gather necessary materials
Before you start tightening the dryer vent clamp, it’s important to have all the required materials at hand. This will help ensure a smooth process without any unnecessary interruptions. Here are the materials you will need:
1. Screwdriver: You will need a screwdriver to loosen and tighten the clamps. Depending on the type of dryer vent clamp you have, a flat-head or Phillips-head screwdriver may be required.
2. Adjustable wrench: An adjustable wrench will come in handy if the dryer vent clamp is difficult to reach or if it requires more torque to tighten properly.
3. Safety gloves: It’s always a good idea to wear safety gloves to protect your hands while working on machinery. This will prevent any accidental injuries or potential cuts.
4. Flashlight: A flashlight will be useful if the dryer vent clamp is in a dark or hard-to-reach area. It will help you see clearly and ensure that you are tightening the clamp correctly.
5. Replacement clamp (optional): If the existing dryer vent clamp is damaged, corroded, or ineffective, you may need a replacement clamp. It’s a good idea to have one on hand, just in case.
Once you have gathered all the necessary materials, you are ready to move on to the next step. Remember to take all the necessary safety precautions and ensure that the dryer is disconnected from the power source before proceeding. Safety should always be a top priority when working with appliances.
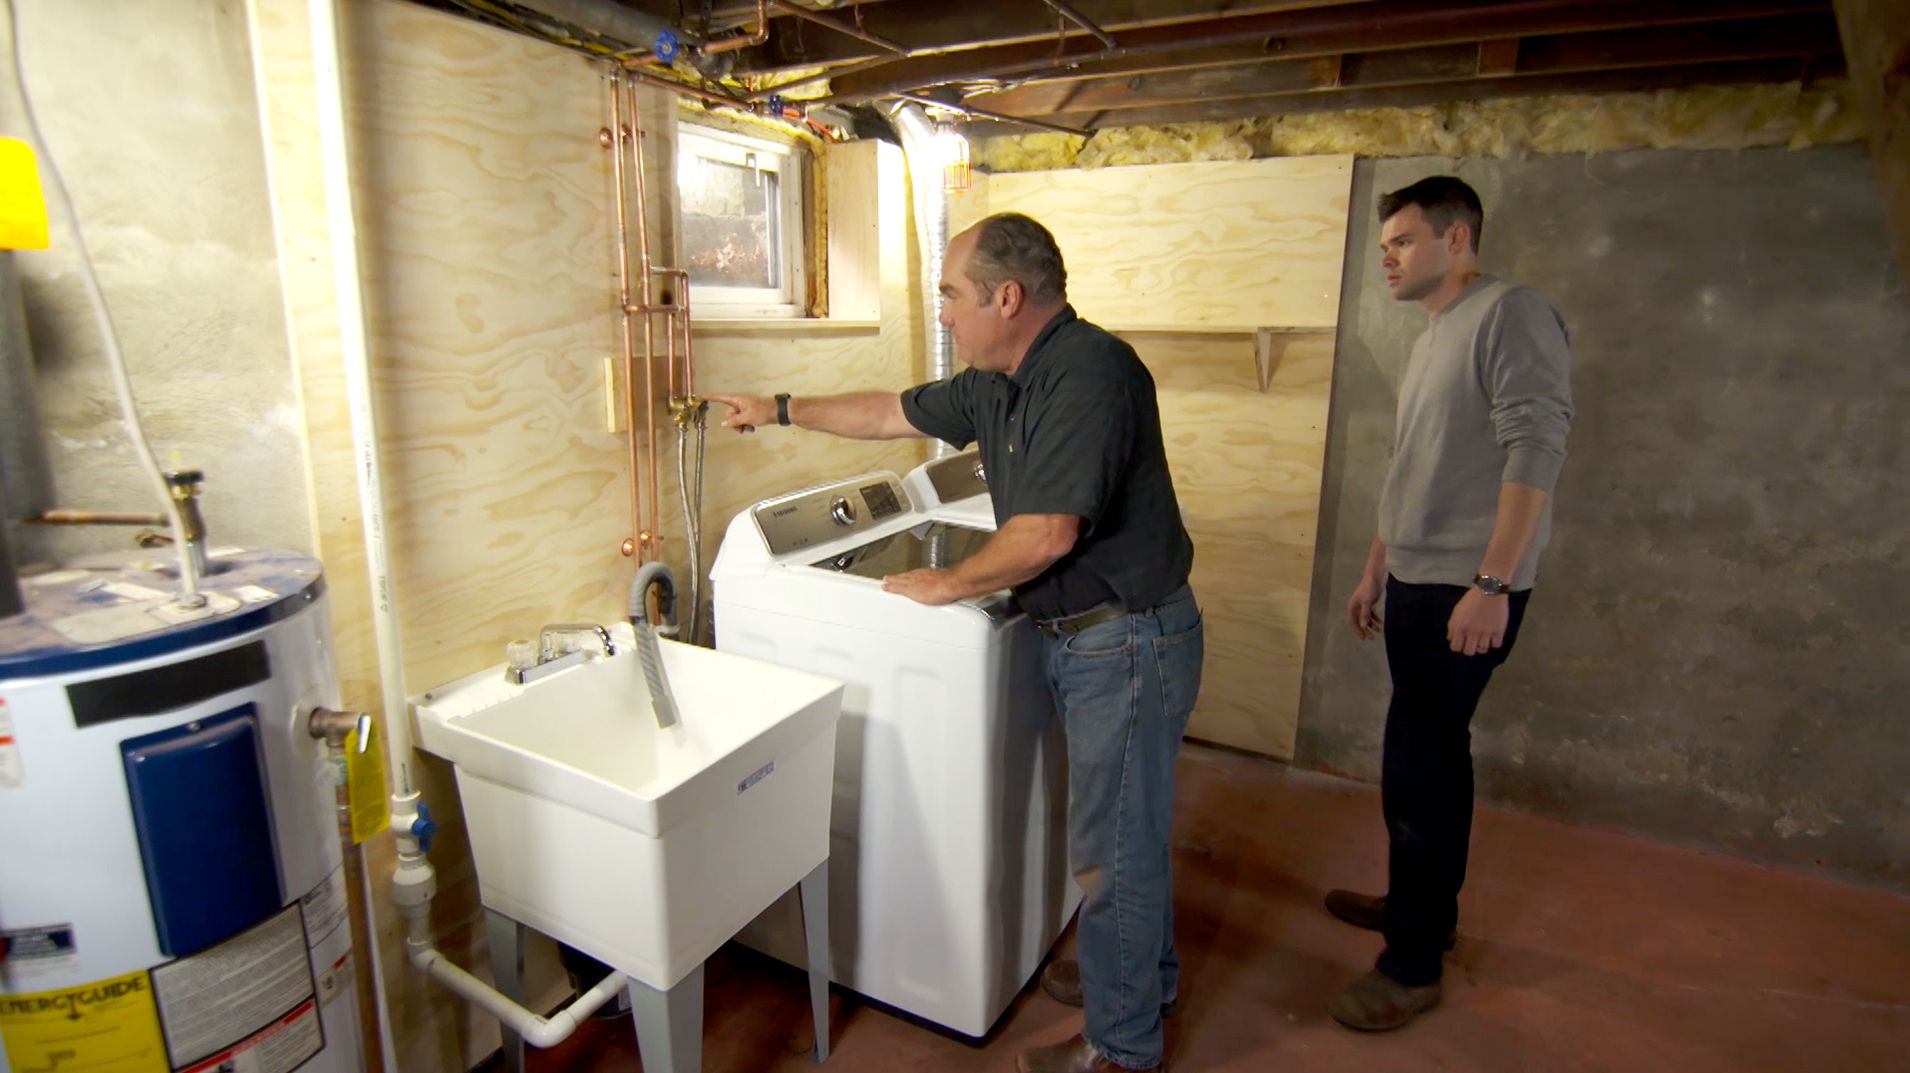
Step 2: Locate the dryer vent clamp
To tighten the dryer vent clamp, you first need to locate its position. The dryer vent clamp is typically found where the vent hose connects to the dryer’s back or on the vent outlet on the wall or floor. Follow these steps to locate the clamp:
1. Inspect the back of the dryer: Start by moving the dryer away from the wall to gain access to its back. Carefully examine the area where the vent hose is connected to the dryer. Look for a metal band or clamp securing the hose in place. This is the dryer vent clamp.
2. Check the vent outlet: If you cannot locate the clamp at the back of the dryer, the next step is to check the vent outlet on the wall or floor. This is where the vent hose expels the hot air outside. Look for a clamp securing the vent hose to the outlet.
3. Use a flashlight if needed: In some cases, the dryer vent clamp may be in a dark or hard-to-reach area. To make the clamp more visible, use a flashlight to illuminate the space and help you identify its exact location.
Remember that the specific location of the dryer vent clamp may vary depending on your dryer model and setup. Take your time to carefully examine both the back of the dryer and the vent outlet to locate the clamp accurately.
Once you have identified the position of the dryer vent clamp, you can proceed to the next step: preparing the area for tightening the clamp.
Step 3: Prepare the area
Before tightening the dryer vent clamp, it’s essential to prepare the area to ensure a smooth and hassle-free process. Follow these steps to properly prepare the area:
1. Turn off the dryer: Start by disconnecting the power supply to the dryer. This will prevent any accidents or injuries while working on the vent clamp. Unplug the dryer from the electrical outlet or switch off the circuit breaker that powers the dryer.
2. Clear the surrounding area: Move any objects or obstacles near the dryer that could obstruct your access to the vent clamp. Create a clear working space to maneuver comfortably and safely.
3. Inspect the vent hose: Take a close look at the vent hose connecting the dryer to the vent outlet. Check for any signs of damage, such as tears, cracks, or excessive lint buildup. If you notice any issues, it may be necessary to replace the vent hose before tightening the clamp. A damaged or clogged vent hose can hinder the effectiveness of the clamp.
4. Clean the vent area: Using a vacuum cleaner or a brush, remove any accumulated lint or debris from the vent area. This will help improve airflow and prevent any potential blockages. Ensure that both the vent outlet and the hose are clear of any obstructions.
By properly preparing the area before tightening the dryer vent clamp, you will create an environment that is safe, clean, and conducive to efficient maintenance. This will help you achieve the best results and ensure the optimal performance of your dryer. With the area prepared, you are now ready to proceed to the next step: loosening the dryer vent clamp.
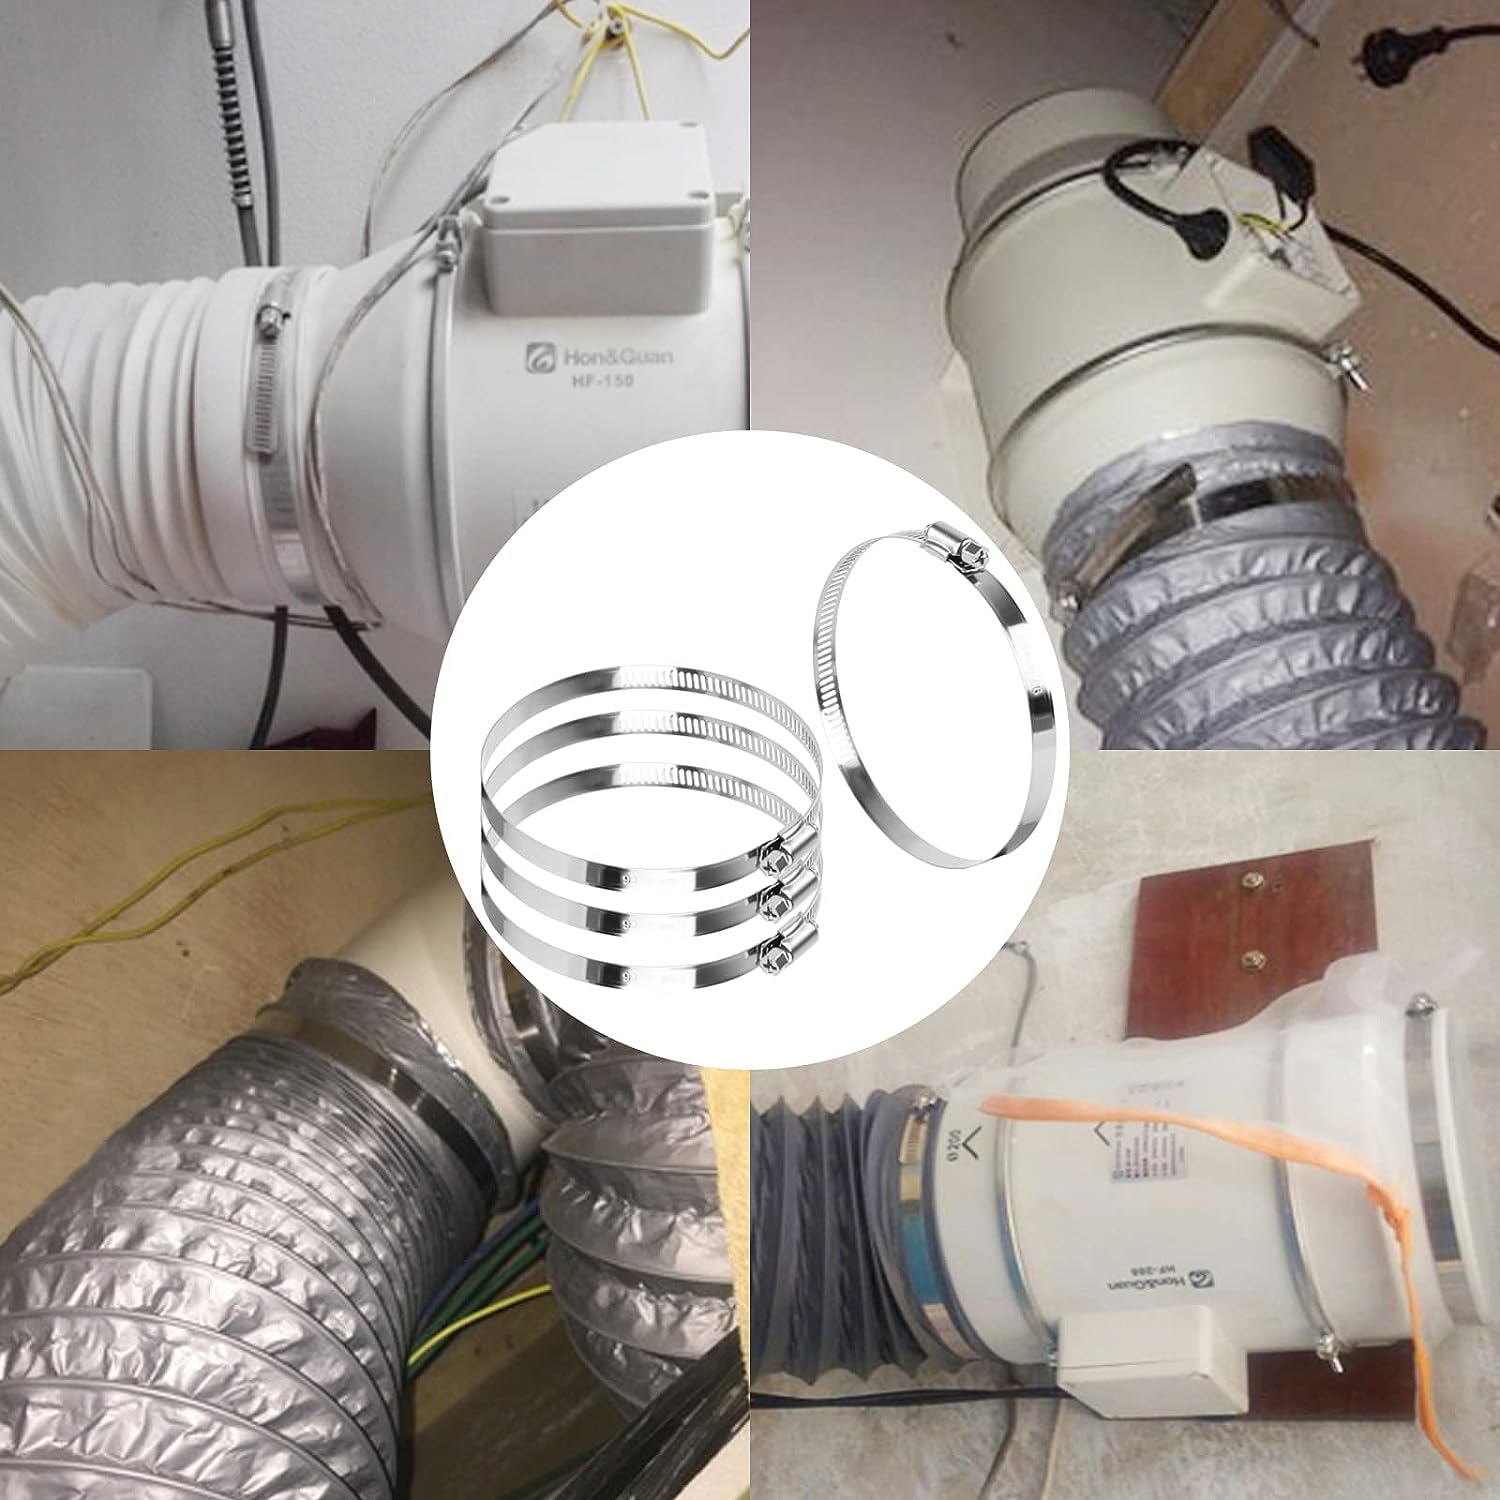
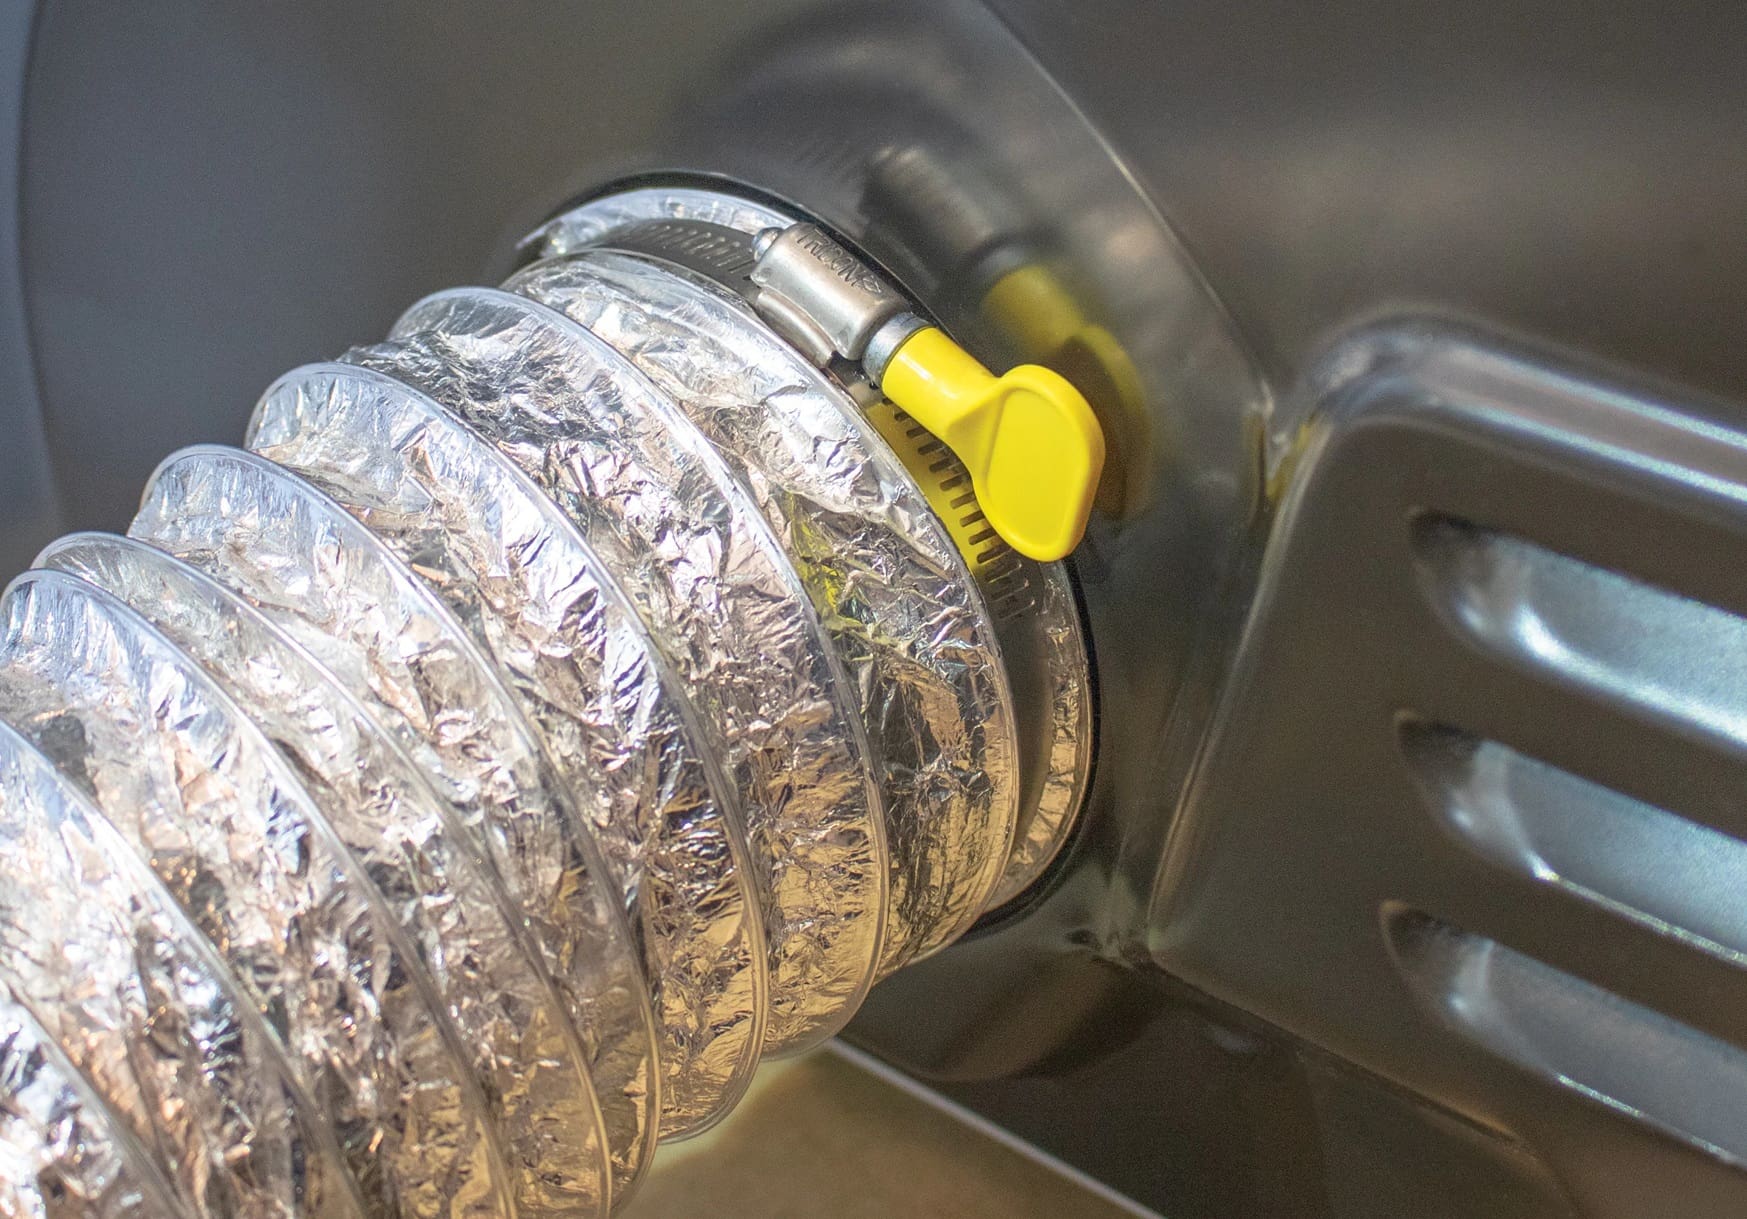
Use a screwdriver to tighten the screw on the dryer vent clamp until it feels secure. Check for any gaps or leaks in the connection to ensure proper ventilation.
Step 4: Loosen the dryer vent clamp
Now that you have prepared the area, it is time to loosen the dryer vent clamp. This step will allow you to adjust and tighten the clamp effectively. Follow these steps to loosen the dryer vent clamp:
1. Identify the screw or fastening mechanism: Inspect the dryer vent clamp to determine its type of fastening mechanism. Some clamps may have screws that need to be loosened, while others may have a spring-loaded mechanism that can be released by squeezing or pulling on the clamp.
2. Loosen the screws: If your dryer vent clamp has screws, use the appropriate screwdriver to loosen them. Turn the screws counterclockwise to loosen the clamp’s grip on the vent hose. Loosen the screws enough to allow adjustment and movement of the clamp.
3. Release the spring-loaded clamp: For clamps with a spring-loaded mechanism, locate the point where you can release the tension. This may involve squeezing or pulling on the clamp to disengage the spring and loosen the grip on the vent hose. Be cautious while releasing the tension to avoid any injury.
4. Gently remove the vent hose: Once the clamp is loosened, gently pull or slide the vent hose out of the dryer or vent outlet. Take care not to damage the hose or the surrounding area.
By following these steps, you will successfully loosen the dryer vent clamp, allowing for adjustments and tightening in the next step. Ensure that the clamp is sufficiently loosened to facilitate movement and ensure a secure connection. With the clamp loosened, you can now proceed to the next step: adjusting and tightening the dryer vent clamp.
Read also: 9 Incredible Dryer Vent Clamps For 2025
Step 5: Adjust and tighten the dryer vent clamp
With the dryer vent clamp loosened, you can now proceed to adjust its position and tighten it securely. Proper adjustment and tightening of the clamp will ensure a tight and efficient connection between the vent hose and the dryer or vent outlet. Follow these steps to adjust and tighten the dryer vent clamp:
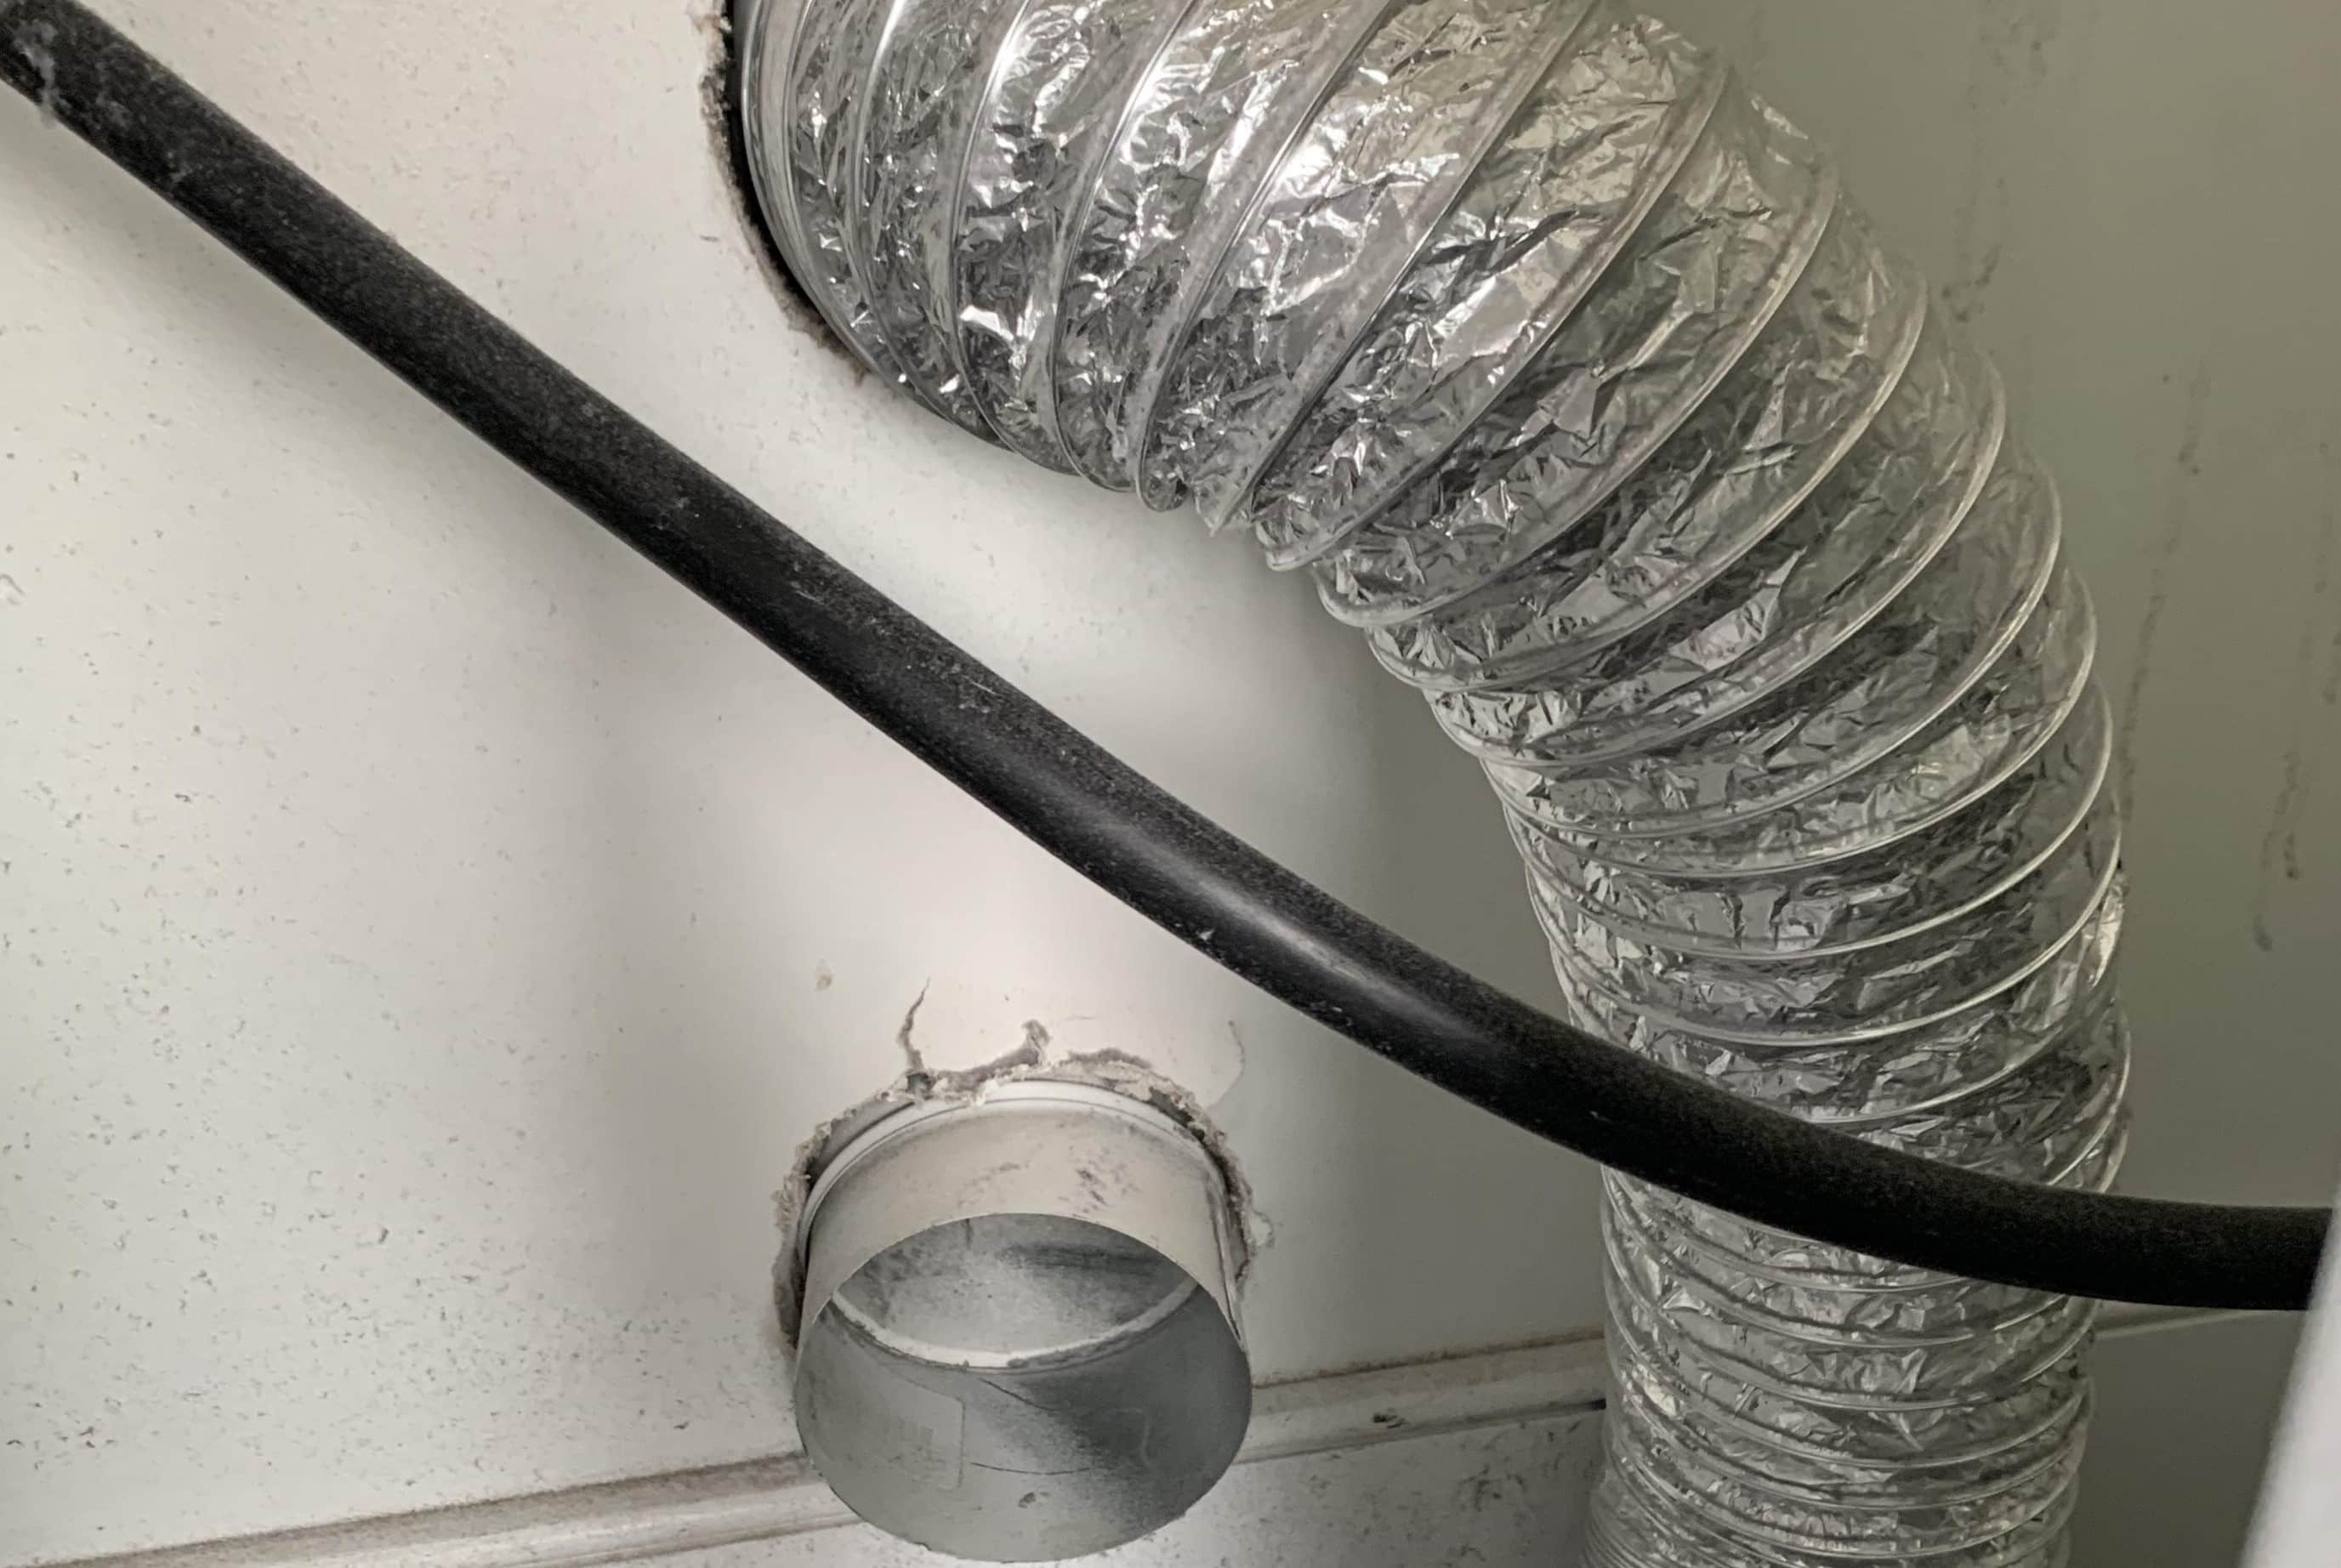
1. Align the vent hose: Carefully align the vent hose with either the dryer’s back or the vent outlet on the wall or floor. Make sure the hose is properly positioned and free of any kinks or bends that could restrict airflow.
2. Slide the vent hose onto the connection point: Slide one end of the vent hose onto the connection point, whether it’s the dryer or the vent outlet. Ensure that the hose fits securely, making a snug connection with the surface.
3. Adjust the position of the clamp: Once the hose is properly connected, position the dryer vent clamp over the joint where the vent hose meets the dryer or the vent outlet. Ensure that the clamp is centered over the joint for even and secure tightening.
4. Tighten the screw or spring mechanism: Use your screwdriver to tighten the screws on the clamp or engage the spring mechanism. Turn the screws clockwise to securely tighten the clamp or squeeze and lock the spring mechanism into place. Make sure the clamp holds the vent hose firmly without crushing it or causing any damage.
5. Check for secure and tight fit: Confirm that the dryer vent clamp is tightly secured and that there are no gaps or looseness between the vent hose and the connection point. A secure and tight fit will prevent any leaks, reduce lint buildup, and ensure proper airflow.
By following these steps, you will successfully adjust and tighten the dryer vent clamp, creating a secure connection between the vent hose and the dryer or vent outlet. This will promote proper ventilation, prevent obstructions, and help maintain the efficiency and safety of your dryer system.
Step 6: Test the dryer vent clamp
After adjusting and tightening the dryer vent clamp, it is crucial to test its effectiveness to ensure that the connection is secure and the airflow is unobstructed. Proper testing will help identify any remaining issues or potential leaks. Follow these steps to test the dryer vent clamp:
1. Reconnect the power: Plug the dryer back into the electrical outlet or turn on the circuit breaker to restore power to the machine.
2. Run the dryer: Start the dryer and allow it to run for a complete cycle. Observe the dryer’s performance, paying close attention to any unusual noises or vibrations that may indicate an improper connection.
3. Check for leaks or gaps: During the drying cycle, inspect the area around the dryer vent clamp for any signs of leaks or gaps. Feel for any air escaping around the connection point, which could indicate a loose or inadequately tightened clamp.
4. Verify proper airflow: Assess the airflow from the vent outlet using your hand or a small piece of paper. Ensure that there is a steady and strong flow of hot air expelled from the vent. A weak airflow could suggest a blockage or a poorly connected vent hose.
5. Monitor for excessive lint buildup: Over time, lint can accumulate in the vent hose and ductwork, potentially causing blockages and reducing dryer efficiency. Keep an eye out for excessive lint buildup around the vent area and clean it periodically to maintain optimal airflow.
If you notice any issues during the testing phase, such as leaks, gaps, weak airflow, or excessive lint buildup, it may indicate that the dryer vent clamp still needs adjustment or that further maintenance is required. In such cases, consider repeating the tightening process or seeking professional assistance to address any underlying problems.
Taking the time to test the dryer vent clamp ensures that the connection is secure, minimizes the risk of fire hazards, and promotes the efficient operation of your dryer. Regularly monitoring and maintaining the dryer vent system will help prolong the lifespan of your appliance and improve its performance in the long run.
Conclusion
Properly maintaining your dryer is essential for its performance and safety, and tightening the dryer vent clamp is a crucial maintenance task. A loose or ineffective clamp can lead to reduced airflow, increased energy consumption, and even fire hazards. By following the steps outlined in this article, you can effectively tighten the dryer vent clamp and ensure a secure and efficient connection.
In the process of tightening the dryer vent clamp, we covered steps such as gathering necessary materials, locating the clamp, preparing the area, loosening the clamp, adjusting and tightening the clamp, and finally, testing its effectiveness. Each step is crucial to ensure that the clamp provides a tight and secure connection between the vent hose and the dryer or vent outlet.
Regularly inspecting and maintaining your dryer vent system is important to prevent lint buildup, ensure proper airflow, and minimize the risk of fire hazards. This includes not only tightening the vent clamp but also cleaning the vent hose and exhaust ducts periodically to remove any lint or debris.
Remember, safety should always be a top priority when working with appliances. Be sure to disconnect the power supply before beginning any maintenance tasks and take the necessary precautions to protect yourself, such as wearing safety gloves.
By tightening the dryer vent clamp and properly maintaining your dryer, you can enjoy improved efficiency, reduced energy consumption, and enhanced safety. Taking the time to perform these maintenance tasks will also extend the lifespan of your dryer, saving you money on repairs or replacements in the long run.
So, don’t ignore the importance of a properly tightened dryer vent clamp. Follow the steps outlined in this article and keep your dryer running smoothly and efficiently. By investing a little time and effort into maintenance, you can ensure that your dryer will continue to serve you well for years to come.
Frequently Asked Questions about How To Tighten A Dryer Vent Clamp
Was this page helpful?
At Storables.com, we guarantee accurate and reliable information. Our content, validated by Expert Board Contributors, is crafted following stringent Editorial Policies. We're committed to providing you with well-researched, expert-backed insights for all your informational needs.