Home>Home Maintenance>How To Clean A Filter On A GE Air Conditioner
Home Maintenance
How To Clean A Filter On A GE Air Conditioner
Modified: October 20, 2024
Learn how to properly clean the filter on your GE air conditioner for optimal home maintenance. Keep your air clean and fresh with our step-by-step guide.
(Many of the links in this article redirect to a specific reviewed product. Your purchase of these products through affiliate links helps to generate commission for Storables.com, at no extra cost. Learn more)
Introduction
Welcome to our comprehensive guide on how to clean the filter on a GE air conditioner. Regular maintenance of your air conditioner is vital to ensure optimal performance and extend its lifespan. One crucial aspect of maintenance is keeping the air filter clean.
The air filter plays a significant role in filtering out dust, pollen, pet dander, and other airborne particles, ensuring the air you breathe is clean and healthy. Over time, the filter can become clogged with dirt and debris, hindering airflow and reducing the efficiency of your air conditioner.
In this article, we will walk you through the step-by-step process of cleaning the filter on your GE air conditioner. By following these simple instructions, you can keep your air conditioner running smoothly and enjoy cleaner, fresher air in your home.
Key Takeaways:
- Regularly cleaning the filter on your GE air conditioner ensures cleaner, healthier air and better performance. Follow safety precautions, remove, clean, and dry the filter, then enjoy improved airflow and air quality.
- By cleaning and maintaining your GE air conditioner’s filter, you can extend its lifespan, improve energy efficiency, and enjoy cleaner, fresher air in your home. Prioritize safety, follow the steps, and test the unit for optimal performance.
Safety Precautions
Before you start cleaning the filter on your GE air conditioner, it is essential to take some safety precautions to protect yourself and your appliance. Here are a few guidelines to follow:
- Turn off and unplug the air conditioner: Before performing any maintenance tasks, make sure the unit is powered off and disconnected from the power source. This step will prevent any electrical accidents and ensure your safety.
- Wear protective gloves and goggles: During the cleaning process, you may encounter dirt, dust, and other debris. Wearing gloves and goggles will protect your hands and eyes from potential irritants and allergens.
- Work in a well-ventilated area: Cleaning the air filter can release dust particles into the air. It is advisable to perform this task in a well-ventilated area or open a window to allow for proper airflow.
- Use mild cleaning agents: When washing the filter, avoid using harsh chemicals or bleach as they can damage the filter material. Instead, opt for a mild detergent or dish soap diluted in water.
- Allow the filter to dry completely: Ensure that the filter is thoroughly dry before reinstalling it in the air conditioner. Moisture can promote the growth of mold and mildew, which can be detrimental to your health.
- Follow the manufacturer’s instructions: While these general guidelines apply to most GE air conditioners, it is always a good idea to consult the user manual specific to your model. The manual may provide additional safety precautions or model-specific cleaning instructions.
By taking these safety precautions, you can protect yourself and your appliance while effectively cleaning the filter on your GE air conditioner.
Step 1: Turn Off and Unplug the Air Conditioner
The first step in cleaning the filter on your GE air conditioner is to ensure that the unit is turned off and unplugged. This is crucial for your safety and to prevent any potential electrical accidents.
Locate the power switch on your air conditioner and turn it to the “Off” position. Once the unit is powered off, unplug it from the electrical outlet to ensure that no power is flowing to the appliance.
By disconnecting the power source, you eliminate the risk of electric shock while working on the air conditioner. It also provides a safe environment for you to clean the filter without any electrical interference.
Take a moment to double-check and ensure that the unit is completely powered off and unplugged before proceeding to the next step.
Remember, safety should always be a top priority when performing maintenance tasks on any electrical appliance. By turning off and unplugging the air conditioner, you minimize the risks and create a secure working environment.
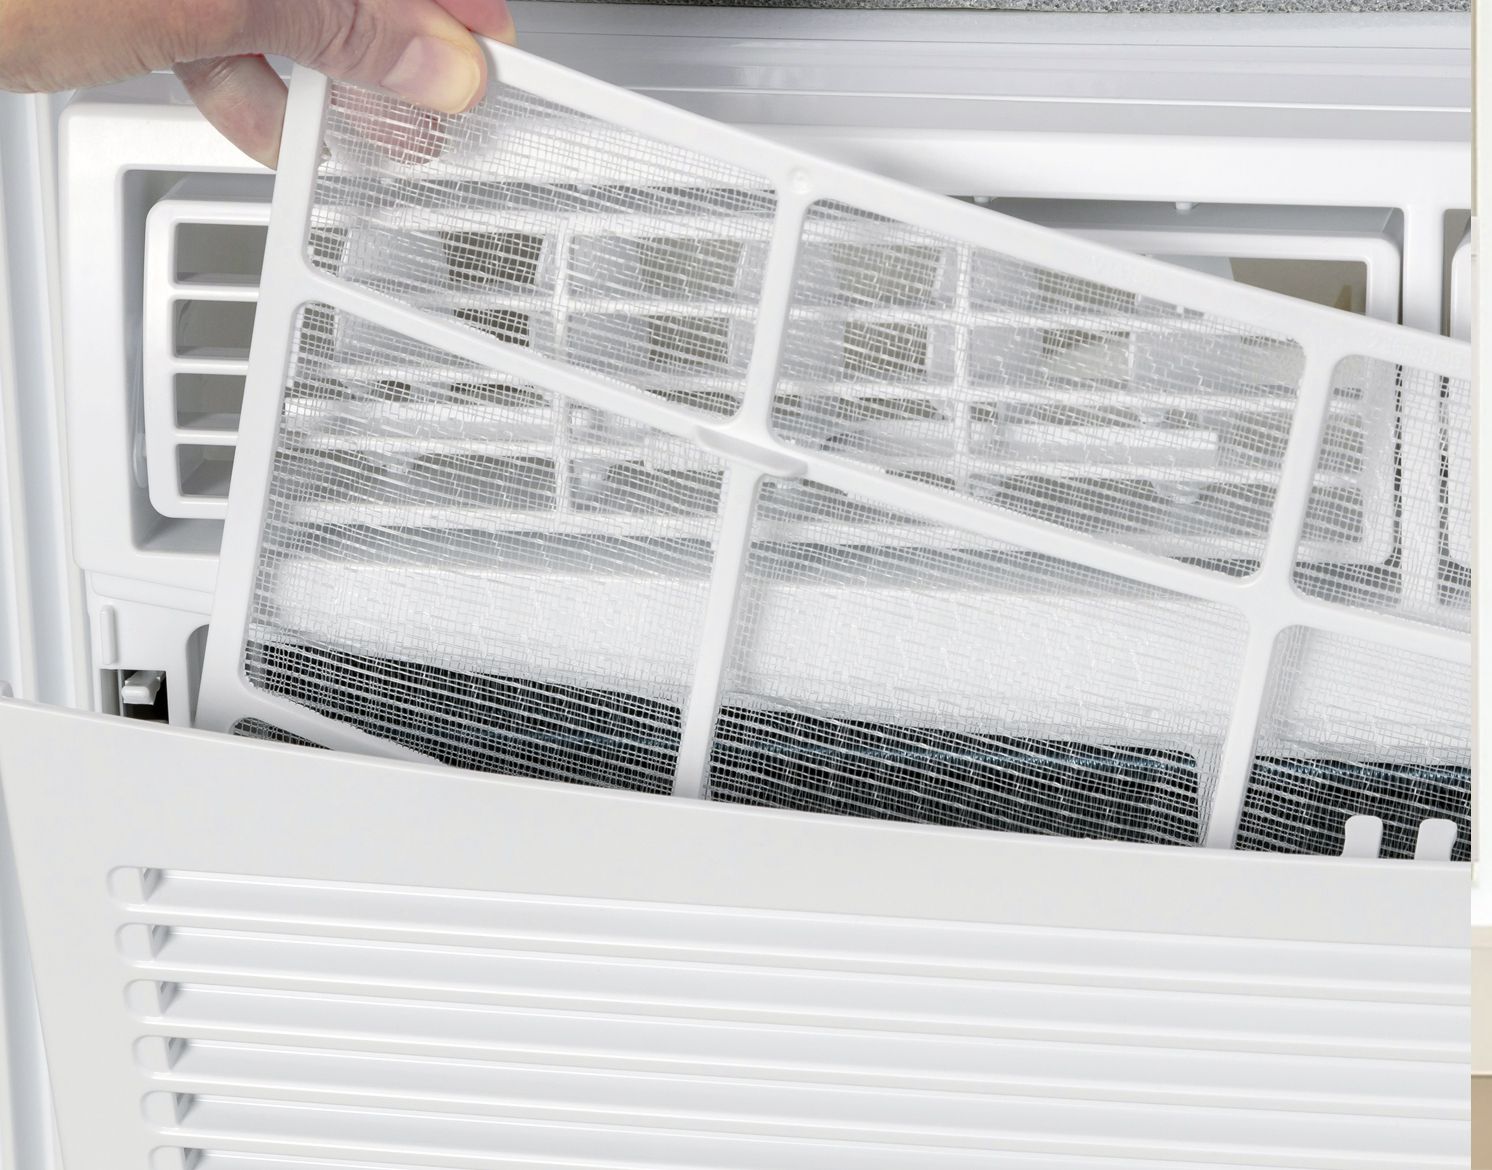
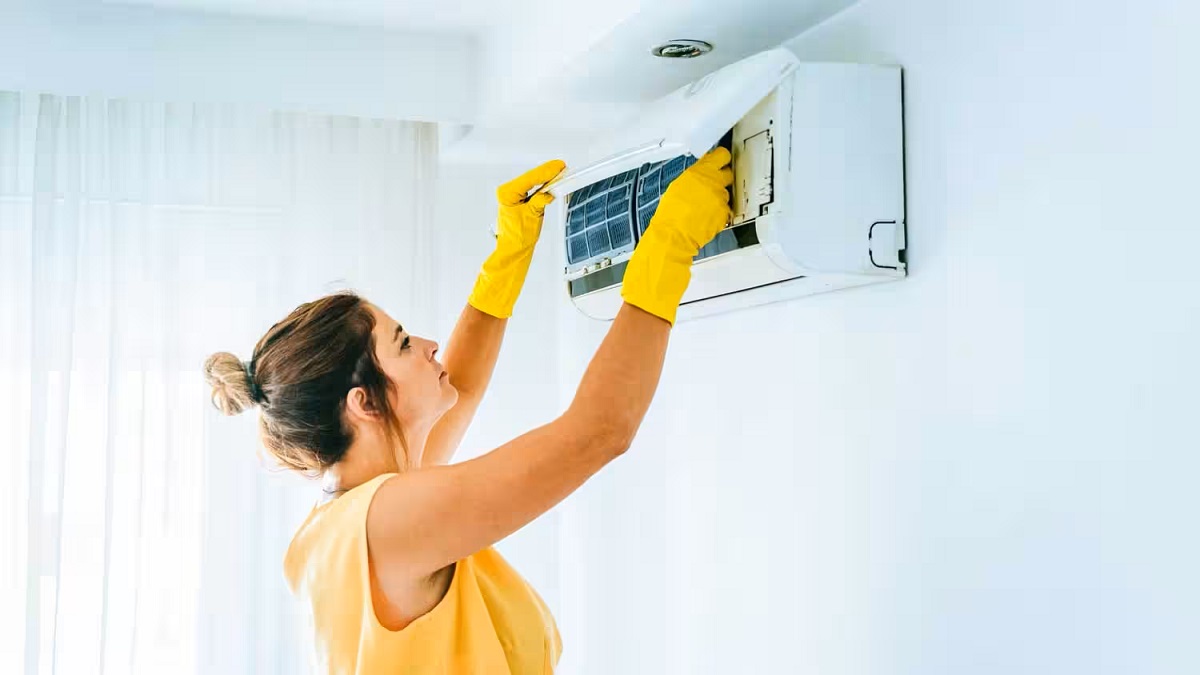
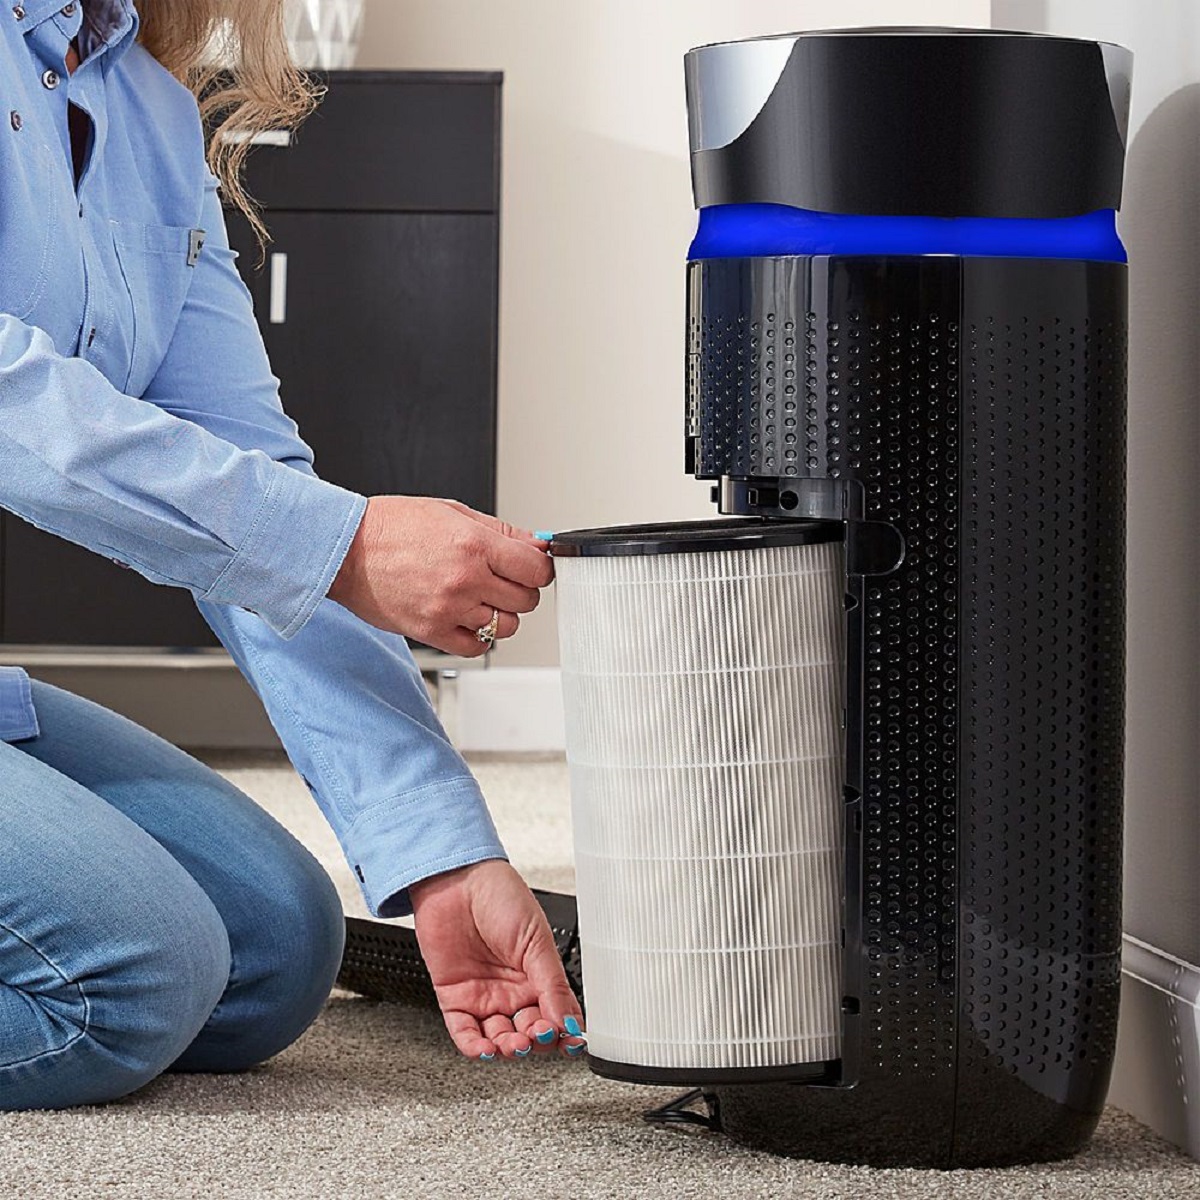
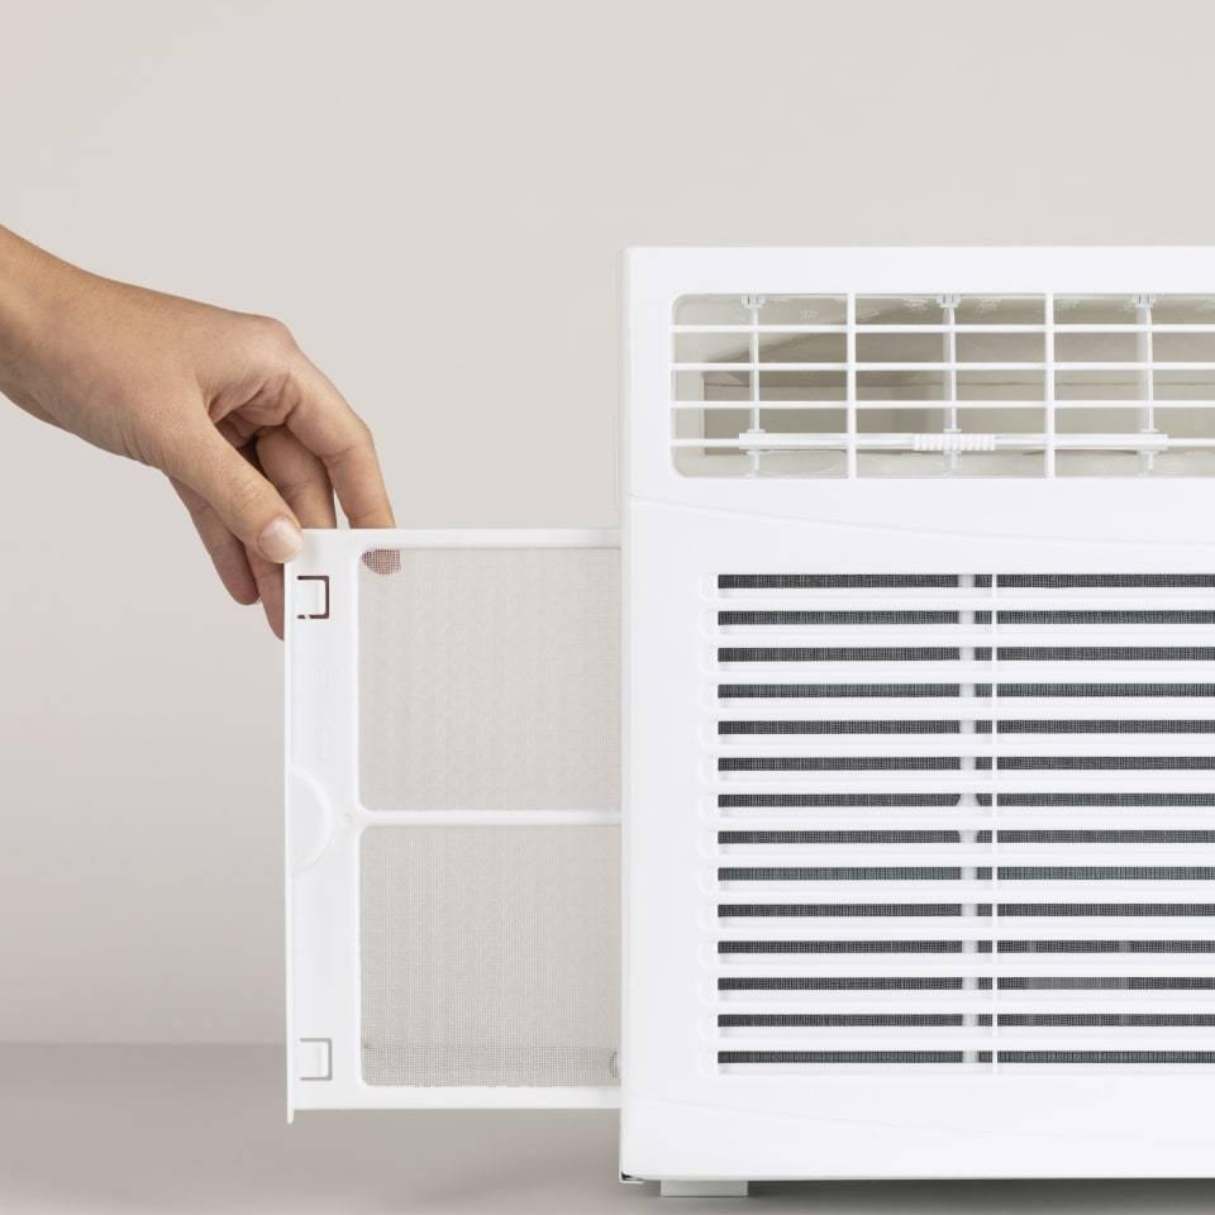
Step 2: Locate and Remove the Air Filter
After ensuring the air conditioner is turned off and unplugged, it’s time to locate and remove the air filter. The air filter is typically located behind a front grille or on the side of the unit, depending on your GE air conditioner model.
Take a moment to familiarize yourself with the different components of your air conditioner, specifically the location of the air filter. Refer to the user manual if you’re unsure about the exact placement.
Once you’ve identified the air filter, carefully remove the front grille or access panel to gain access to the filter. In some models, you may need to unscrew or unclip the panel to remove it.
It’s important to handle the panel and filter with care to avoid any damage. Follow the user manual’s instructions or any markings on the unit to ensure you remove the filter correctly.
Depending on the design of your GE air conditioner, the filter may be reusable or disposable. If it’s a reusable filter, you can proceed to clean it following the steps outlined in the subsequent sections. If it’s a disposable filter, you will need to replace it with a new one. Refer to the user manual for guidance on the type of filter your model requires.
Once the filter is removed, set it aside in a safe and clean area. Avoid placing the dirty filter on surfaces that may cause contamination or damage.
By locating and removing the air filter correctly, you are one step closer to cleaning and maintaining your GE air conditioner for optimal performance.
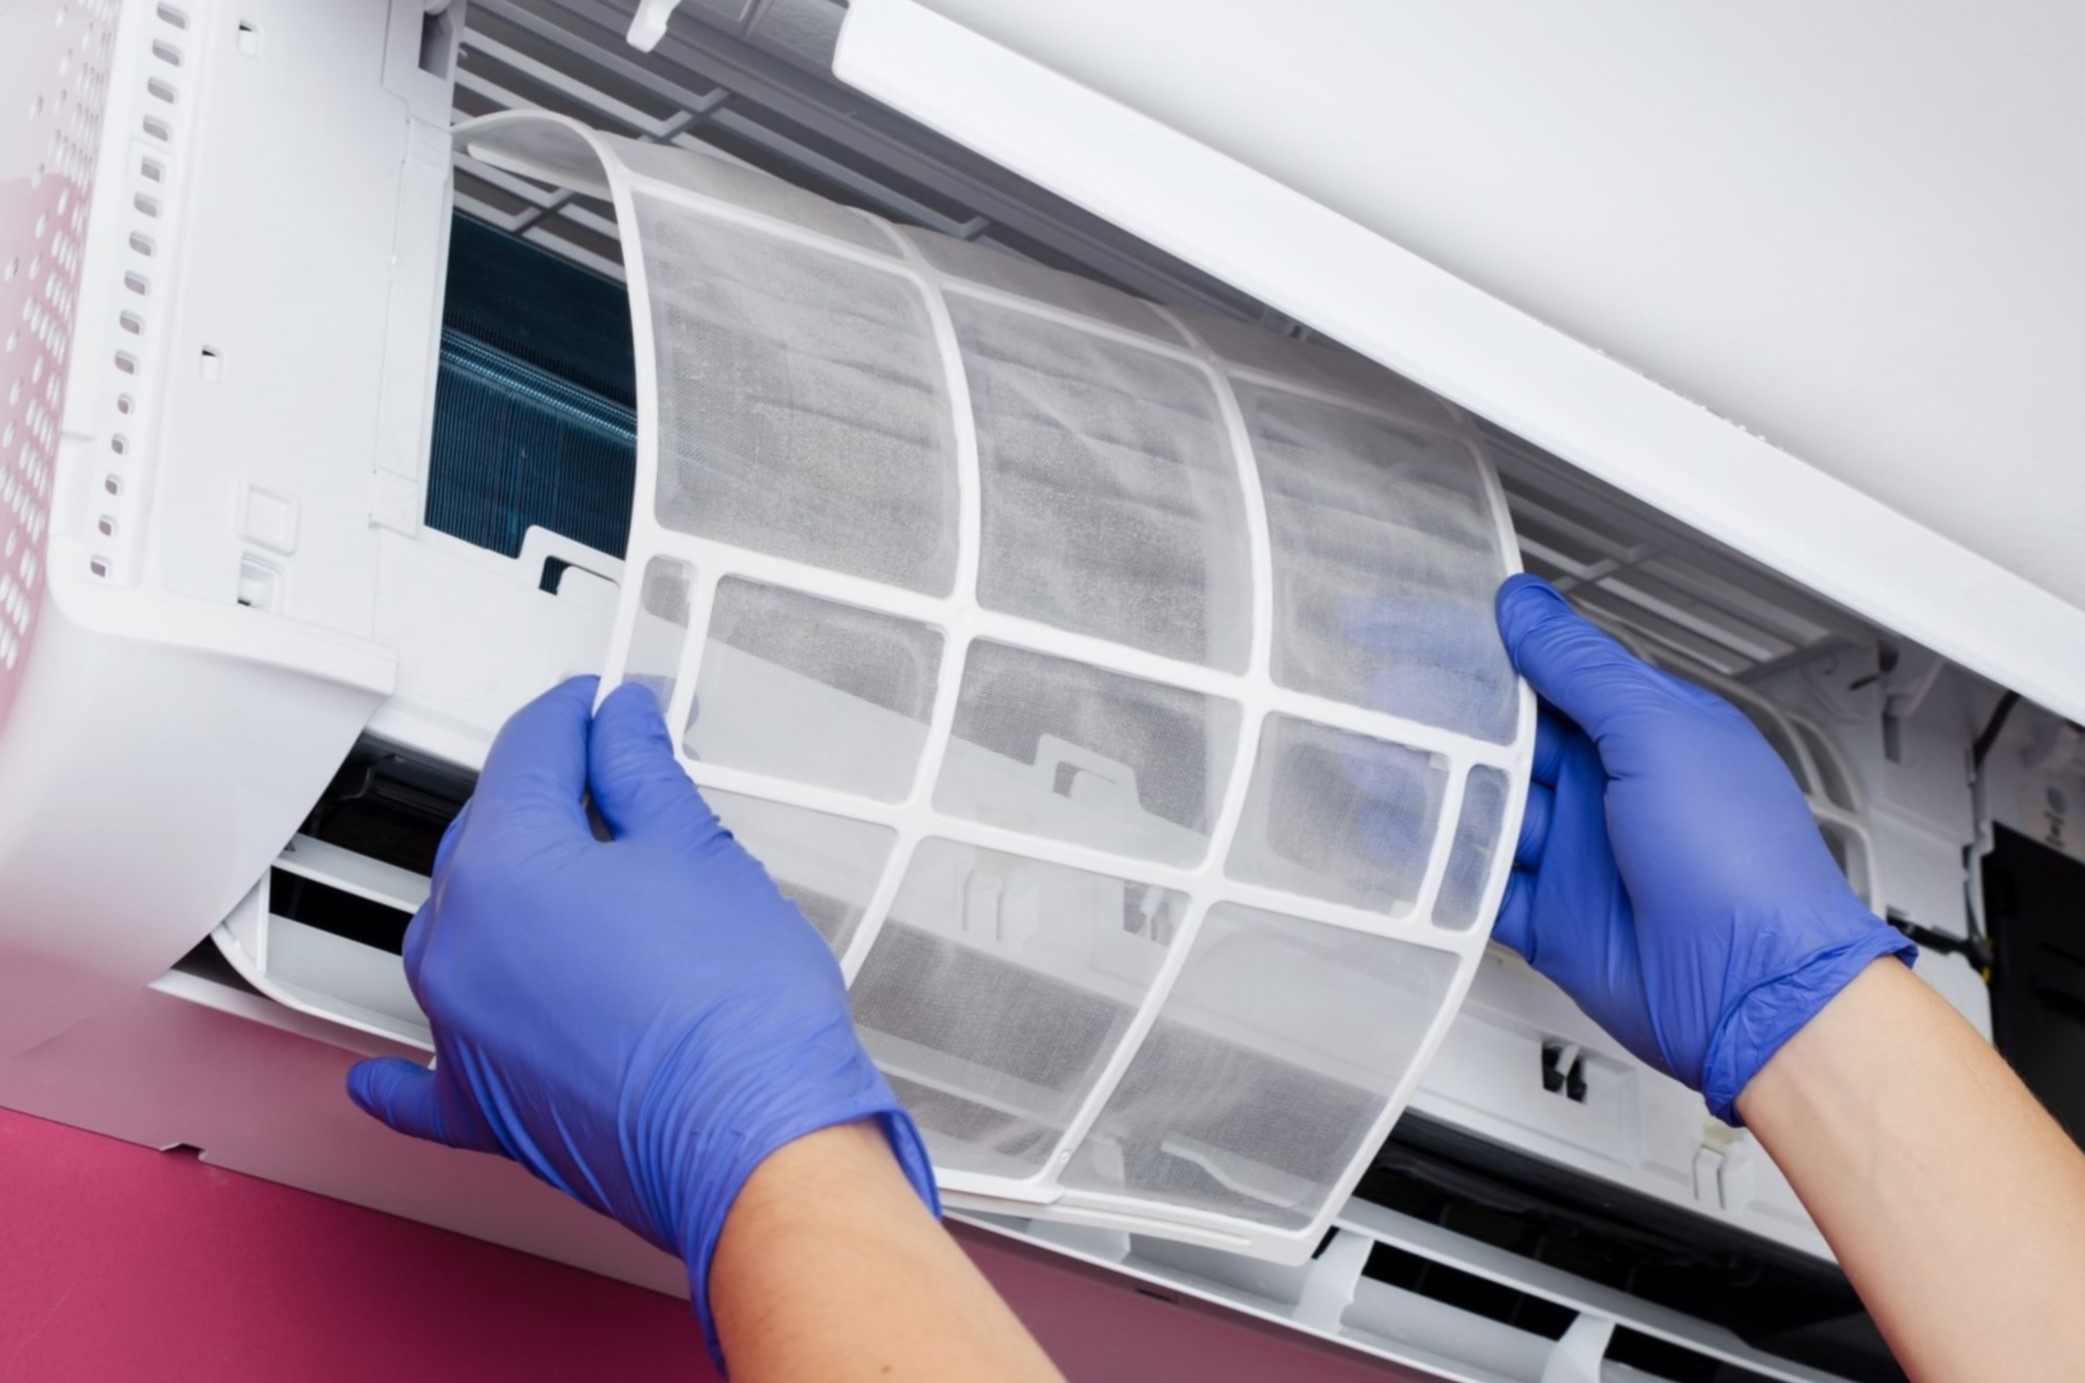
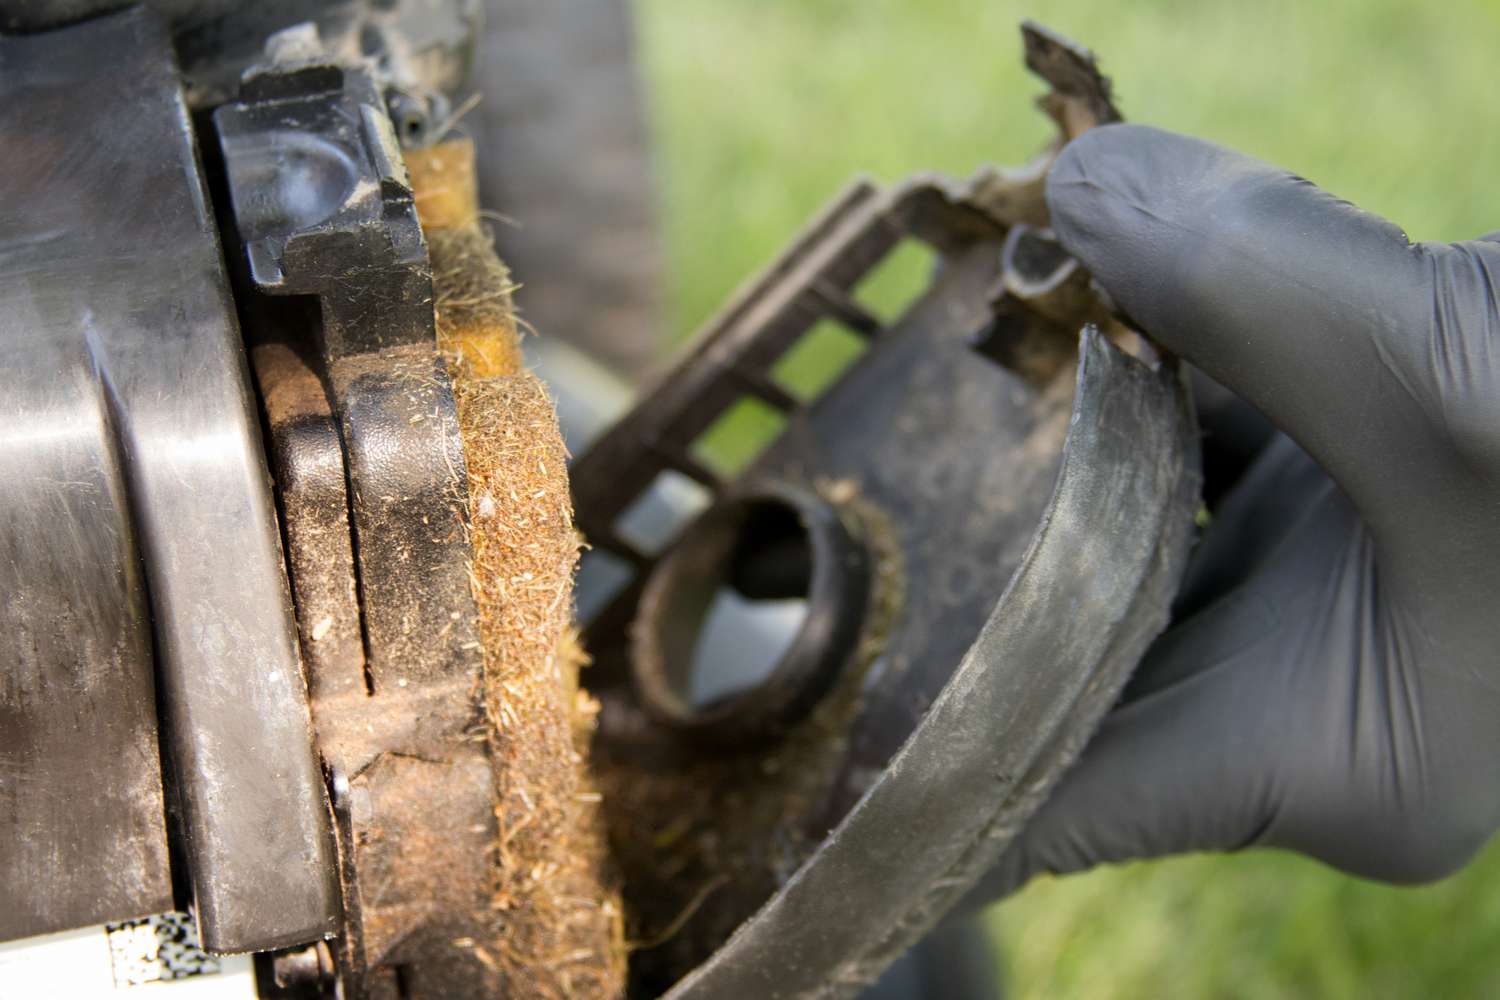
Step 3: Vacuum or Brush Away Dust and Debris
With the air filter removed from your GE air conditioner, it’s time to clean away any accumulated dust and debris. This step is crucial to ensure that the filter is free from clogs and can effectively filter the air.
Start by using a vacuum cleaner with a brush attachment or a soft-bristle brush to gently remove any loose dirt and dust from the filter. Make sure to cover all surfaces of the filter, including the front and back.
Using the brush attachment or soft-bristle brush, sweep away the dirt and debris in a gentle, sweeping motion. Be careful not to apply too much pressure or scrub aggressively, as this could damage the filter material.
If your air conditioner’s filter is particularly dirty or clogged, you may notice a significant amount of dust and debris. Take your time and continue vacuuming or brushing until the filter appears clean and free from visible dirt.
It’s important to note that if your air conditioner has a reusable filter, vacuuming or brushing may be sufficient for regular maintenance. However, if the filter is heavily soiled or clogged, you may need to proceed to the next steps for a more thorough cleaning.
By vacuuming or brushing away dust and debris, you are taking an important step in ensuring that your GE air conditioner’s filter is clean and functioning optimally. A clean filter will not only improve the efficiency of your air conditioner but also help maintain the air quality in your home.
To clean the filter on a GE air conditioner, first turn off the unit. Then, remove the filter and vacuum or wash it with mild soap and water. Let it dry completely before putting it back in.
Step 4: Wash the Filter with Water and Mild Detergent
After vacuuming or brushing away loose dust and debris, it’s time to give your GE air conditioner’s filter a thorough cleaning. This step involves washing the filter with water and a mild detergent to remove any remaining dirt and contaminants.
Start by preparing a cleaning solution in a basin or sink. Mix a small amount of mild detergent or dish soap with water until it forms a soapy solution. Avoid using harsh chemicals or bleach, as they can damage the filter material.
Submerge the filter in the cleaning solution and gently agitate it to ensure that the entire surface of the filter is covered. Allow the filter to soak for a few minutes to help loosen any stubborn dirt and grime.
Next, use a soft-bristle brush or your hands to gently scrub the filter. Focus on areas with visible dirt or stains, being careful not to scrub too vigorously. The goal is to lift away the dirt without damaging the filter’s delicate material.
Pay attention to both the front and the back of the filter, ensuring that all surfaces receive a thorough cleaning. Take your time to ensure that the filter is clean and free from any remaining dirt or detergent residue.
Once you’re satisfied with the cleaning, rinse the filter thoroughly with clean water. Hold it under running water and rinse both sides until the water runs clear, removing all traces of detergent.
It’s crucial to rinse the filter completely to prevent any leftover detergent from compromising the filter’s function and potentially releasing harmful fumes into the air. Make sure that the water runs through the filter completely, ensuring a thorough rinse.
By washing the filter with water and mild detergent, you are effectively removing dirt, allergens, and other contaminants, improving the filter’s efficiency and ensuring clean, fresh air in your home.
Step 5: Allow the Filter to Dry Completely
After washing the filter, it’s essential to allow it to dry completely before reinstalling it in your GE air conditioner. Drying the filter ensures it is free from moisture, preventing the growth of mold or mildew.
Start by gently shaking the excess water off the filter. Be careful not to scrub or wring the filter, as this could damage the delicate material.
Next, find a clean and well-ventilated area to place the filter for drying. You can either lay it flat on a clean towel or prop it up against a surface, ensuring that both sides are exposed to air.
It’s crucial to dry the filter completely to prevent any moisture from being trapped within the filter. Moisture can create a breeding ground for mold and mildew, compromising the filter’s effectiveness and potentially releasing harmful particles into the air.
The drying time will vary depending on the humidity level in your environment. In general, it’s recommended to allow the filter to dry for at least 24 hours or until it is completely dry to the touch.
Avoid the temptation to rush the drying process by using heat sources such as hairdryers or placing the filter in direct sunlight. Excessive heat can damage the filter material and affect its performance.
By allowing the filter to dry completely, you are ensuring that it is free from moisture and ready to be reinstalled in your GE air conditioner. This step is vital to maintaining optimal performance and preventing any potential health issues.
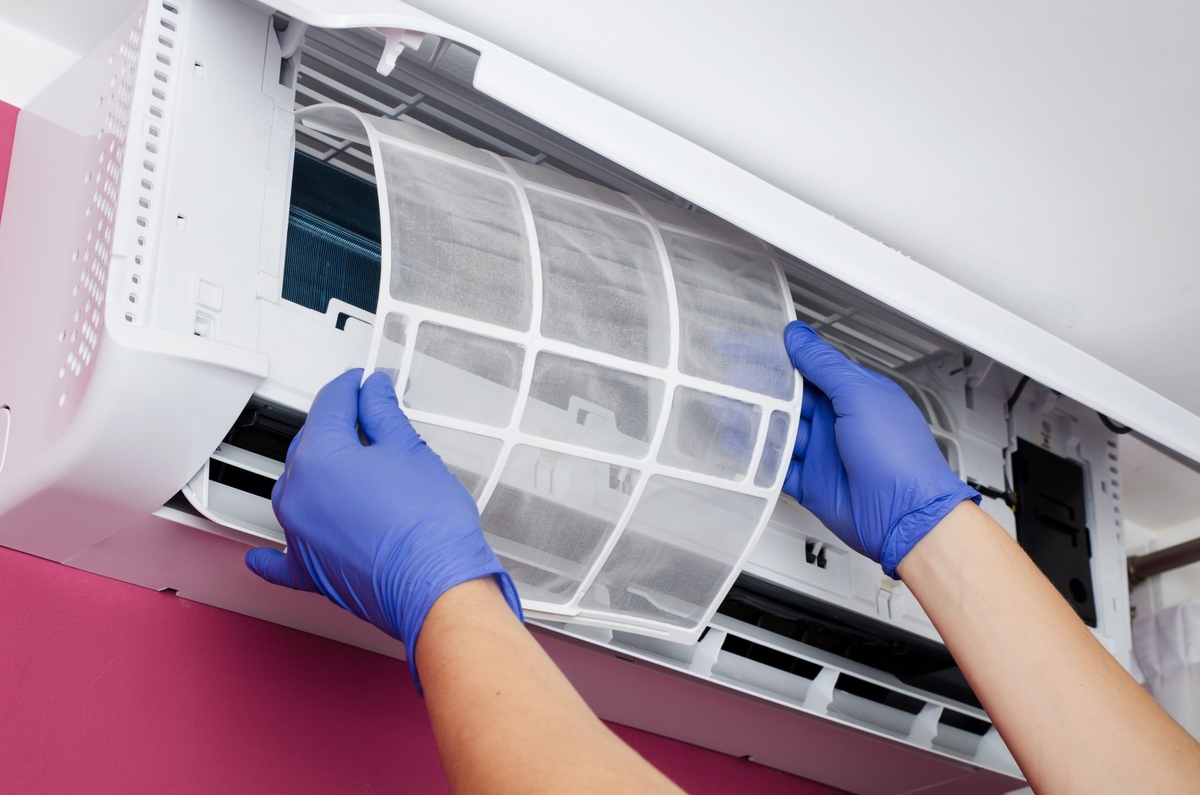
Step 6: Reinstall the Filter
Now that the filter is clean and completely dry, it’s time to reinstall it in your GE air conditioner and restore proper airflow and filtration. The process of reinstalling the filter is relatively straightforward.
Carefully locate the filter slot or compartment in your air conditioner. This is usually where you found and removed the filter earlier in the cleaning process.
Align the filter properly with the slot, making sure it fits securely and snugly. Pay attention to any arrows or indicators on the filter or inside the unit that indicate the correct orientation of the filter.
Gently slide the filter back into the slot, ensuring that it is positioned correctly and fully inserted. Take care not to force the filter or apply excessive pressure, as this can cause damage to the filter or the air conditioner.
Once the filter is in place, double-check that it is securely seated and properly aligned with the unit. A loose or misaligned filter can hinder airflow and reduce the efficiency of your air conditioner.
Now that the filter is reinstalled, take a moment to clean the front grille or access panel that you removed earlier. Dust or debris may have accumulated on it during the cleaning process. Use a cloth or a vacuum cleaner with a brush attachment to gently clean the grille or panel before reattaching it to the unit.
By reinstalling the filter correctly, you are ensuring that your GE air conditioner can function effectively and that the air in your home is properly filtered. This step completes the cleaning process, and your air conditioner is now ready to provide you with clean, refreshing air once again.
Step 7: Turn On the Air Conditioner and Test
After successfully reinstalling the filter in your GE air conditioner, it’s time to turn on the unit and test its functionality. This step ensures that the air conditioner is working correctly and that proper airflow is restored.
Plug the air conditioner back into the electrical outlet and turn on the power switch. Make sure all settings are set to your desired preferences, such as temperature and fan speed.
Allow the air conditioner to run for a few minutes, monitoring the airflow and listening for any unusual noises or vibrations. You should notice improved airflow compared to before the filter cleaning, as the clean filter allows for better circulation.
If you notice any issues such as reduced airflow or abnormal sounds, double-check that the filter is properly installed and that the front grille or access panel is securely attached. If the problem persists, consult the user manual or contact a professional for further assistance.
Once you’ve confirmed that the air conditioner is running smoothly and providing cool air, take a moment to enjoy the refreshed air quality in your home.
Remember that regular maintenance is crucial to keep your air conditioner running efficiently. It’s recommended to clean the filter on a monthly basis or as needed, depending on factors such as air quality and usage frequency.
By turning on the air conditioner and testing its functionality, you are ensuring that the cleaning process was successful and that your GE air conditioner is ready to provide you with a comfortable and healthy indoor environment.
Conclusion
Cleaning the filter on your GE air conditioner is a vital maintenance task that helps ensure optimal performance and clean air in your home. By following the step-by-step guide outlined in this article, you can easily clean and maintain your air conditioner’s filter, promoting its efficiency and extending its lifespan.
Remember to prioritize safety by turning off and unplugging the air conditioner before beginning the cleaning process. Wear protective gloves and goggles, and work in a well-ventilated area to minimize any potential risks.
Locate and remove the filter carefully, vacuuming or brushing away loose dust and debris. If necessary, wash the filter with water and mild detergent, ensuring a thorough cleaning of all surfaces. Allow the filter to dry completely before reinstalling it in the air conditioner.
Once the filter is back in place, turn on the air conditioner and test its functionality. If everything is working correctly, enjoy the improved airflow and clean air in your home. Remember to perform regular filter maintenance to ensure the continued efficiency and performance of your GE air conditioner.
By taking the time to clean and maintain the filter on your GE air conditioner, you can enjoy better air quality, improved energy efficiency, and a longer lifespan for your appliance. So don’t neglect this important maintenance task and keep breathing clean, fresh air with your GE air conditioner!
Frequently Asked Questions about How To Clean A Filter On A GE Air Conditioner
Was this page helpful?
At Storables.com, we guarantee accurate and reliable information. Our content, validated by Expert Board Contributors, is crafted following stringent Editorial Policies. We're committed to providing you with well-researched, expert-backed insights for all your informational needs.