Home>Home Maintenance>How To Clean A Lennox Air Conditioner
Home Maintenance
How To Clean A Lennox Air Conditioner
Modified: September 1, 2024
Learn how to properly clean and maintain your Lennox air conditioner with our easy-to-follow guide. Keep your home cool and comfortable with regular home maintenance.
(Many of the links in this article redirect to a specific reviewed product. Your purchase of these products through affiliate links helps to generate commission for Storables.com, at no extra cost. Learn more)
Introduction
Welcome to our comprehensive guide on how to clean a Lennox air conditioner. Regular maintenance and cleaning of your air conditioner is vital to ensure its optimal performance and longevity. Lennox air conditioners are renowned for their efficiency and reliability, and by following these step-by-step instructions, you can keep your unit in pristine condition all year round.
An air conditioner accumulates dirt, dust, and debris over time, which can hinder its performance and lead to various issues such as reduced cooling efficiency, increased energy consumption, and potential breakdowns. Cleaning your Lennox air conditioner not only improves its functionality but also helps maintain healthy indoor air quality by eliminating pollutants trapped in the system.
Before we dive into the cleaning process, it’s important to note that safety should always be the top priority. Make sure to follow the safety precautions outlined in this guide and turn off the power to the unit before starting any cleaning procedures.
Key Takeaways:
- Regularly cleaning your Lennox air conditioner’s filter, coils, and fan blades ensures efficient cooling, extends its lifespan, and maintains healthy indoor air quality by eliminating dust and allergens.
- Prioritize safety by following the recommended precautions, wearing protective gear, and consulting the owner’s manual. Consider scheduling professional maintenance for thorough inspections and specialized cleaning.
Read more: How Much Does A Lennox Air Conditioner Cost
Safety Precautions
Before you begin cleaning your Lennox air conditioner, it’s crucial to take the necessary safety precautions to protect yourself and avoid any accidents or damage to the unit. Here are some important safety guidelines to follow:
- Turn off the power: Before handling any electrical components, ensure that the power supply to the air conditioner is turned off. This will prevent the risk of electric shock.
- Wear protective gear: Put on a pair of gloves and safety goggles to protect your hands and eyes from potential hazards, such as sharp edges or chemical cleaners.
- Use a stable platform: When working on the air conditioner, make sure you are standing on a stable and secure surface, such as a ladder or step stool, to prevent falls or accidents.
- Avoid excessive force: When removing or reinstalling parts, use gentle and controlled movements to avoid damaging the unit or causing injury.
- Use approved cleaning products: Only use cleaning solutions recommended by Lennox or follow the manufacturer’s instructions for cleaning products. Avoid using harsh chemicals or abrasive cleaners that can damage the unit.
- Keep the area well-ventilated: Ensure that there is proper airflow in the space where you are cleaning the air conditioner to prevent the accumulation of fumes or stale air.
- Read the owner’s manual: Familiarize yourself with the specific cleaning instructions provided by Lennox in the owner’s manual for your air conditioner model. This will give you a better understanding of the unit’s components and the recommended cleaning procedures.
By following these safety precautions, you can confidently proceed with cleaning your Lennox air conditioner, knowing that you have taken the necessary steps to protect yourself and the unit. Let’s gather the materials needed for the cleaning process.
Materials Needed
Before you start cleaning your Lennox air conditioner, gather the following materials to ensure a smooth and effective cleaning process:
- Clean cloth: Use a soft, lint-free cloth to wipe down surfaces and remove dirt and debris from the air conditioner.
- Cleaning solution: Prepare a mixture of mild detergent and water or use a specialized air conditioner coil cleaner recommended by Lennox. Avoid using harsh chemicals or abrasive cleaners that can damage the unit.
- Brush or soft bristle attachment: Use a brush with soft bristles or a vacuum cleaner with a soft bristle attachment to remove dust and debris from the coils and fan blades.
- Garden hose or spray bottle: You will need a garden hose or a spray bottle filled with clean water to rinse off the cleaning solution from the coils and other components of the air conditioner.
- Protective gloves: Wear a pair of protective gloves to shield your hands from any chemicals or sharp edges while cleaning.
- Safety goggles: Protect your eyes from debris or cleaning solution splashes by wearing safety goggles.
- Screwdriver or wrench: Keep a screwdriver or wrench handy to assist with removing and reinstalling any panels or grills.
Having these materials readily available will make the cleaning process more efficient and ensure that you have everything you need to effectively clean your Lennox air conditioner. Now that we have our materials ready, let’s move on to the step-by-step process of cleaning the unit.
Step 1: Turn off the Power
Before you begin cleaning your Lennox air conditioner, it is crucial to turn off the power to the unit. This step is essential to ensure your safety and prevent any potential damage to the unit or electrical shock.
Here’s how to turn off the power to your Lennox air conditioner:
- Locate the electrical disconnect box near the outdoor unit of your Lennox air conditioner.
- Open the disconnect box by lifting the cover or flipping the switch inside.
- Once the cover is opened or the switch is flipped, the power to the unit will be disconnected. You can verify this by confirming that the air conditioner’s condenser fan and compressor are no longer running.
- For added safety, it is also advisable to switch off the circuit breaker or remove the fuse for the air conditioner in your home’s electrical panel.
By turning off the power to your Lennox air conditioner, you eliminate the risk of accidental electrocution during the cleaning process. It is important to wait for a few minutes after turning off the power to allow any residual electrical charge to dissipate before proceeding to the next steps.
With the power turned off, you can now safely move on to the next step of removing the front grill of the air conditioner. Let’s continue our cleaning journey to keep your Lennox air conditioner in top-notch condition.
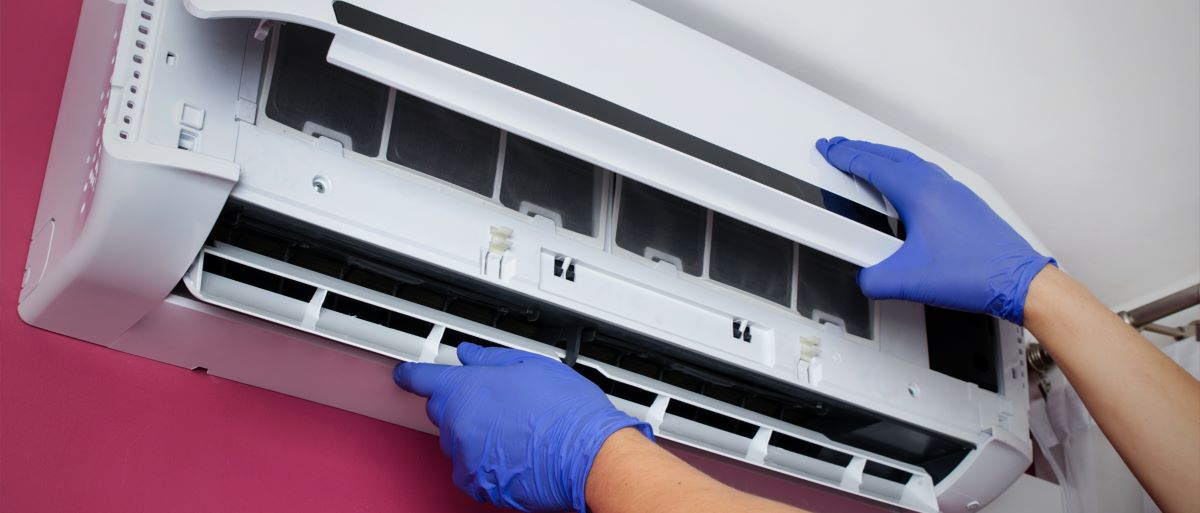
Step 2: Remove the Front Grill
Once the power to your Lennox air conditioner is turned off, the next step is to remove the front grill. This will allow you to access the filter and other components for cleaning.
Follow these steps to remove the front grill:
- Locate the tabs or screws on either side of the front grill. These are usually located near the top or bottom edge of the grill.
- Use a screwdriver or wrench to remove the screws or gently press the tabs inward to release them.
- With the tabs or screws loosened, firmly but gently pull the front grill towards you to remove it from the air conditioner unit.
As you remove the front grill, be cautious of any wires or connections that may be attached to it. Take note of their placement and avoid damaging them during the removal process.
Once the front grill is removed, set it aside in a safe place. You can now proceed to the next step of cleaning the filter, which plays a crucial role in the air conditioning process. Let’s move on to step 3 to learn how to clean the filter effectively.
Read more: How To Clean A Frigidaire Air Conditioner
Step 3: Clean the Filter
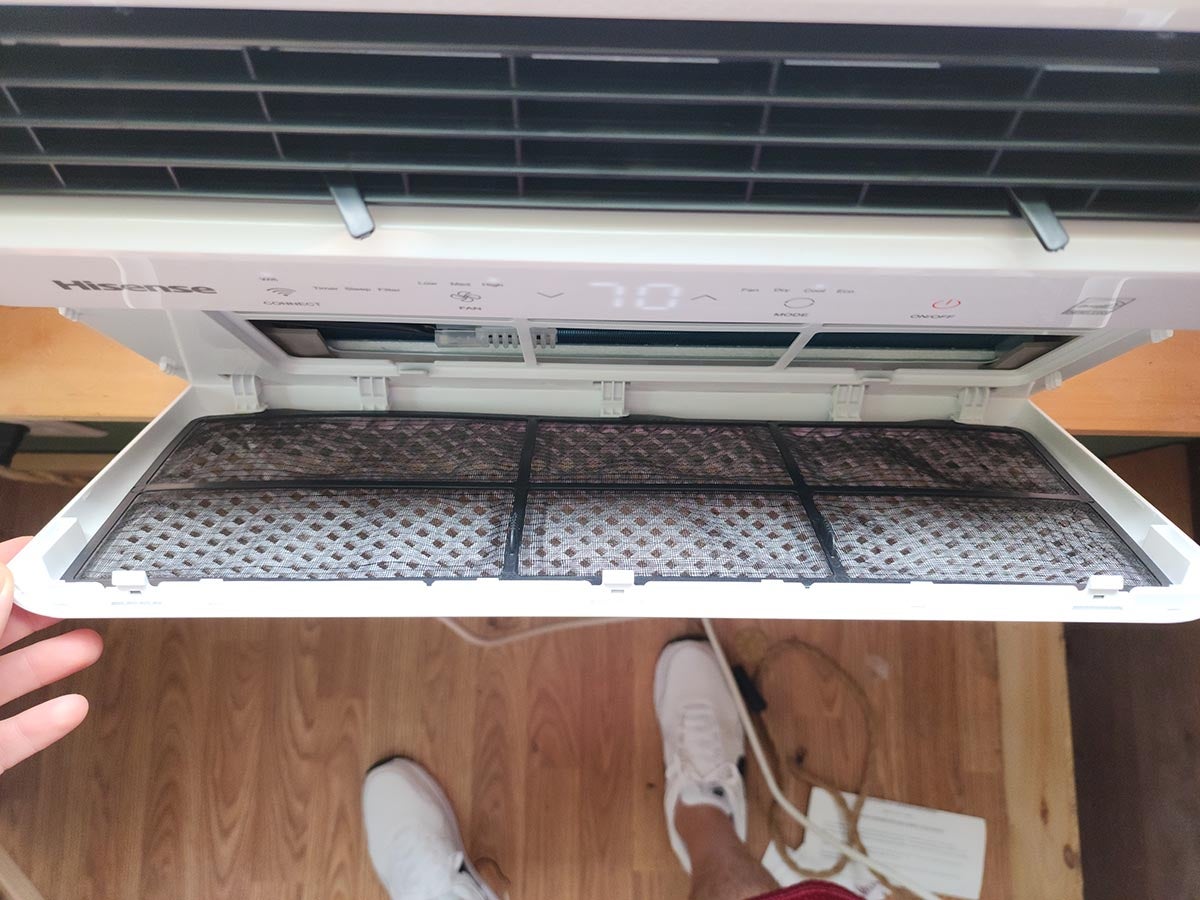
Now that you have removed the front grill of your Lennox air conditioner, it’s time to clean the filter. The filter is responsible for trapping dust, pollen, and other airborne particles, ensuring clean and healthy air flow throughout your home.
Follow these steps to clean the filter:
- Locate the filter behind the front grill. The filter is typically positioned near the bottom of the air conditioner unit.
- Gently remove the filter from its housing by sliding it out.
- Inspect the filter for dust, dirt, and debris. If the filter is heavily soiled or clogged, it is recommended to replace it with a new one. However, if the filter is only lightly soiled, it can be cleaned and reused.
- To clean the filter, use a vacuum cleaner or rinse it under running water. If rinsing the filter, use lukewarm water and gently scrub it with a soft brush to remove any stubborn dirt.
- Allow the filter to air dry completely before reinstalling it in the air conditioner. This is important to prevent mold or mildew growth.
Once the filter is dry, carefully slide it back into its housing behind the front grill. Ensure that it is properly aligned and securely in place.
Regularly cleaning or replacing the filter is essential to maintain the efficiency and performance of your Lennox air conditioner. It is recommended to clean or replace the filter every one to three months, depending on usage and the level of pollutants in your environment.
With the filter cleaned and reinstalled, we can now proceed to the next step of cleaning the coils. Coils play a vital role in the cooling process, and keeping them clean ensures optimal performance. Let’s move on to step 4.
Regularly clean or replace the air filters in your Lennox air conditioner to ensure proper airflow and efficiency. This can help improve indoor air quality and extend the life of your unit.
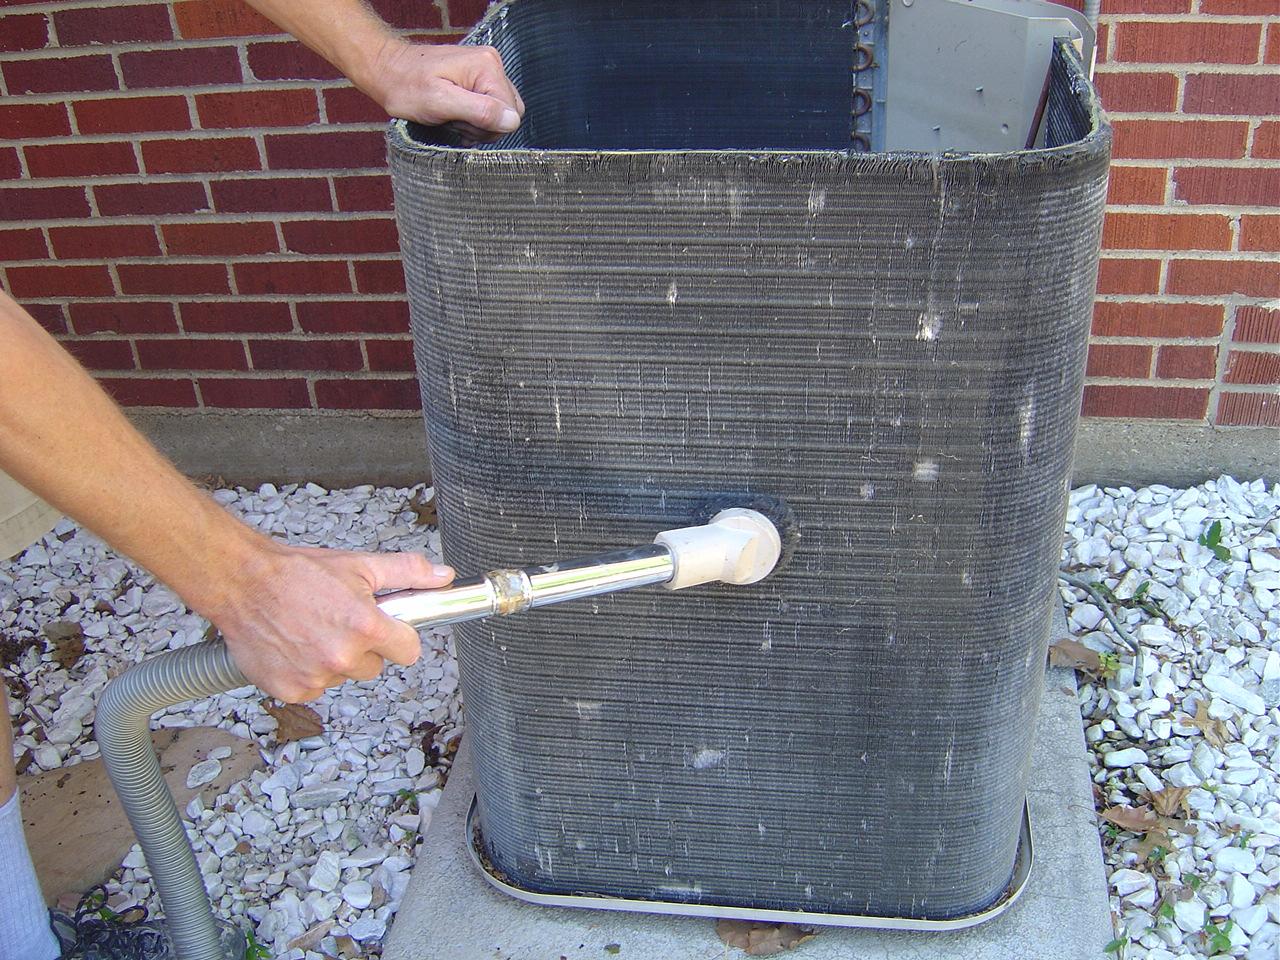
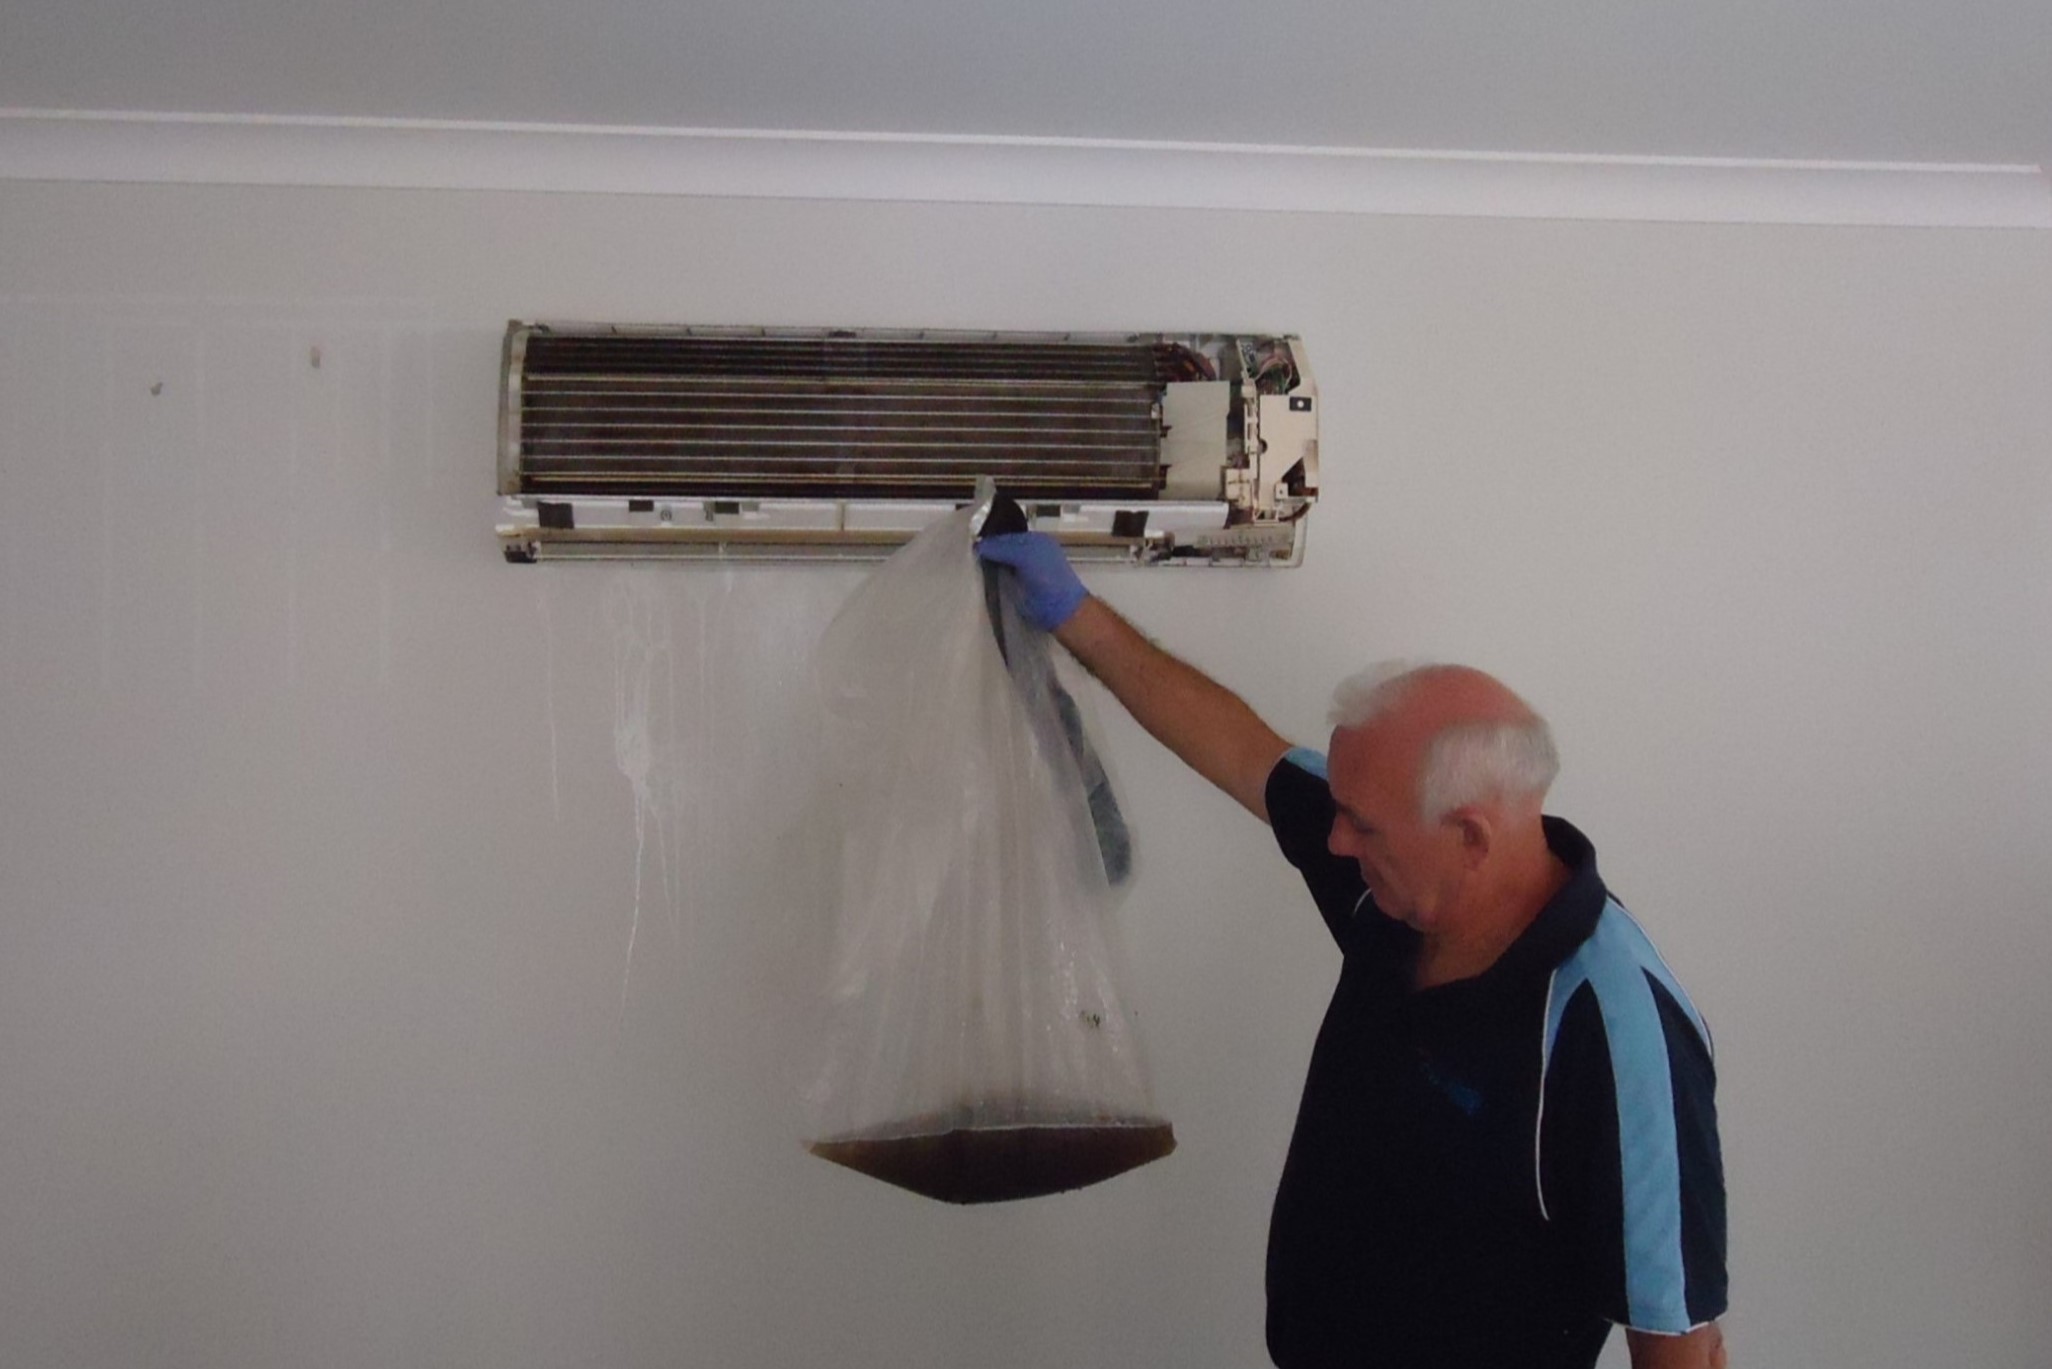
Step 4: Clean the Coils
Now that you have cleaned the filter, it’s time to move on to cleaning the coils of your Lennox air conditioner. The coils, both the evaporator and condenser coils, play a crucial role in the cooling process by transferring heat from the indoor air to the outside environment.
Follow these steps to clean the coils:
- Locate the evaporator coil located inside the air conditioner unit. It is typically found near the blower unit, behind the filter.
- Using a soft brush or a vacuum cleaner with a soft bristle attachment, gently remove any dust, dirt, or debris from the evaporator coil. Be careful not to bend or damage the delicate fins of the coil.
- If the evaporator coil is heavily soiled, you can use a specialized coil cleaner recommended by Lennox. Follow the manufacturer’s instructions for the appropriate application and cleaning process. Avoid using harsh chemicals or abrasive cleaners that can damage the coil.
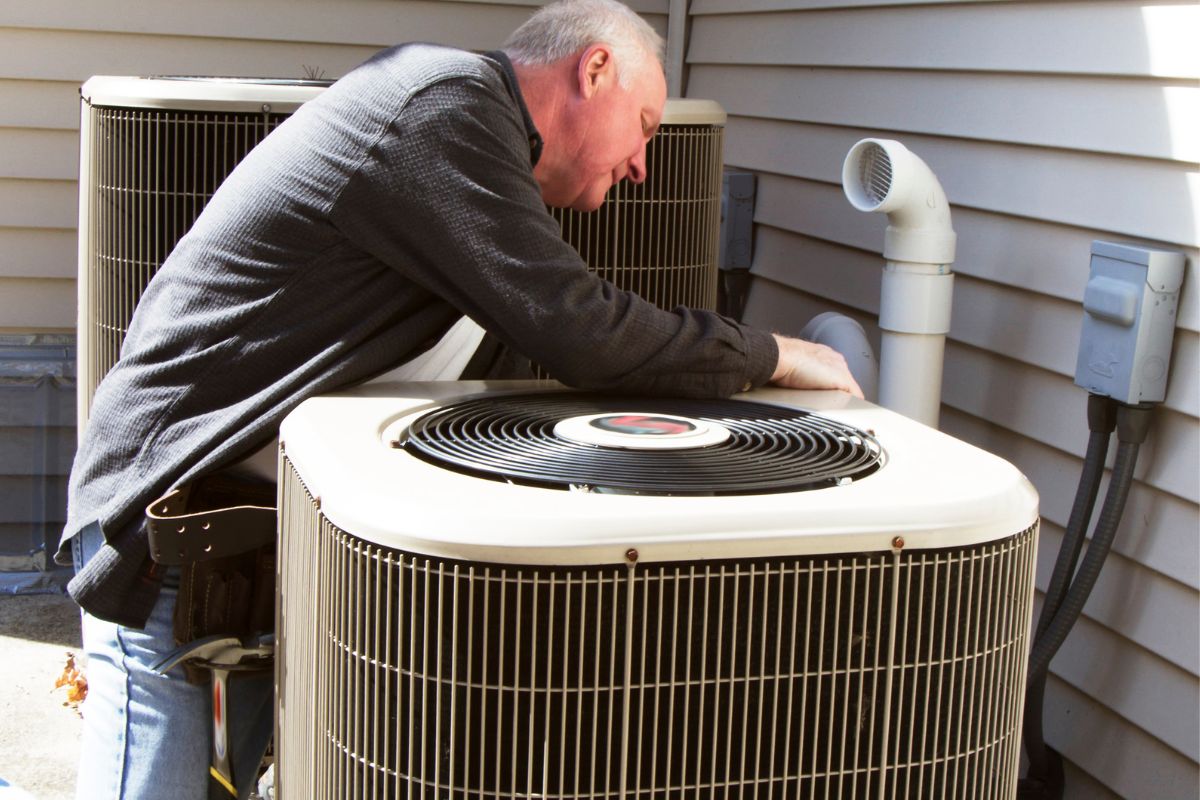
- Next, move to the outdoor unit and locate the condenser coil. This coil is usually found behind the grill or housing of the outdoor unit.
- Using the soft brush or vacuum cleaner with a soft bristle attachment, remove any dirt, leaves, or debris from the condenser coil. Be thorough but gentle to avoid bending the coil fins.
- If the condenser coil is heavily soiled, you can use a garden hose or a spray bottle filled with clean water to rinse off the dirt. Direct the water stream from the inside out to effectively clean the coil.
- Allow the coils to dry completely before reassembling the air conditioner.
Cleaning the coils of your Lennox air conditioner helps to maintain their efficiency, allowing for better cooling performance and energy efficiency. It’s important to perform this cleaning process regularly or as needed, especially if you notice a decrease in cooling efficiency or airflow.
Now that the coils are clean, let’s move on to step 5, where we will focus on cleaning the condensate drain to ensure smooth water drainage from the unit.
Step 5: Clean the Condensate Drain
As we continue the cleaning process for your Lennox air conditioner, it’s important to pay attention to the condensate drain. Over time, the condensate drain can become clogged with debris, algae, or mold, leading to water leakage or even system malfunctions.
Follow these steps to clean the condensate drain:
- Locate the condensate drain or drain line on your Lennox air conditioner. The drain is usually located at the base of the indoor evaporator coil or connected to the drip pan.
- Carefully inspect the condensate drain for any signs of blockage. Common signs include standing water in the drain pan or unusual water leakage around the unit.
- To clear a clogged condensate drain, you can use a small brush or a pipe cleaner to gently remove any debris or mold buildup. Insert the brush or pipe cleaner into the drain and rotate it to dislodge the blockage.
- After removing the initial blockage, flush the condensate drain with a mixture of equal parts water and vinegar. This helps to kill any remaining mold or bacteria and prevent future clogs.
- Pour the water and vinegar solution into the condensate drain and let it sit for a few minutes.
- Using a funnel or a small cup, slowly pour additional clean water into the drain to flush out the solution along with any remaining debris or mold.
- Once the condensate drain is clear, check the drip pan for any standing water or debris. Clean the drip pan if needed and ensure it is properly aligned.
By regularly cleaning the condensate drain, you can prevent issues such as water leakage, mold growth, and system malfunctions. It’s important to repeat this cleaning process every few months or as needed to maintain the efficiency and functionality of your Lennox air conditioner.
With the condensate drain cleaned, we can now move on to step 6, which involves cleaning the fan blades for optimal air circulation. Let’s continue to make your Lennox air conditioner shine.
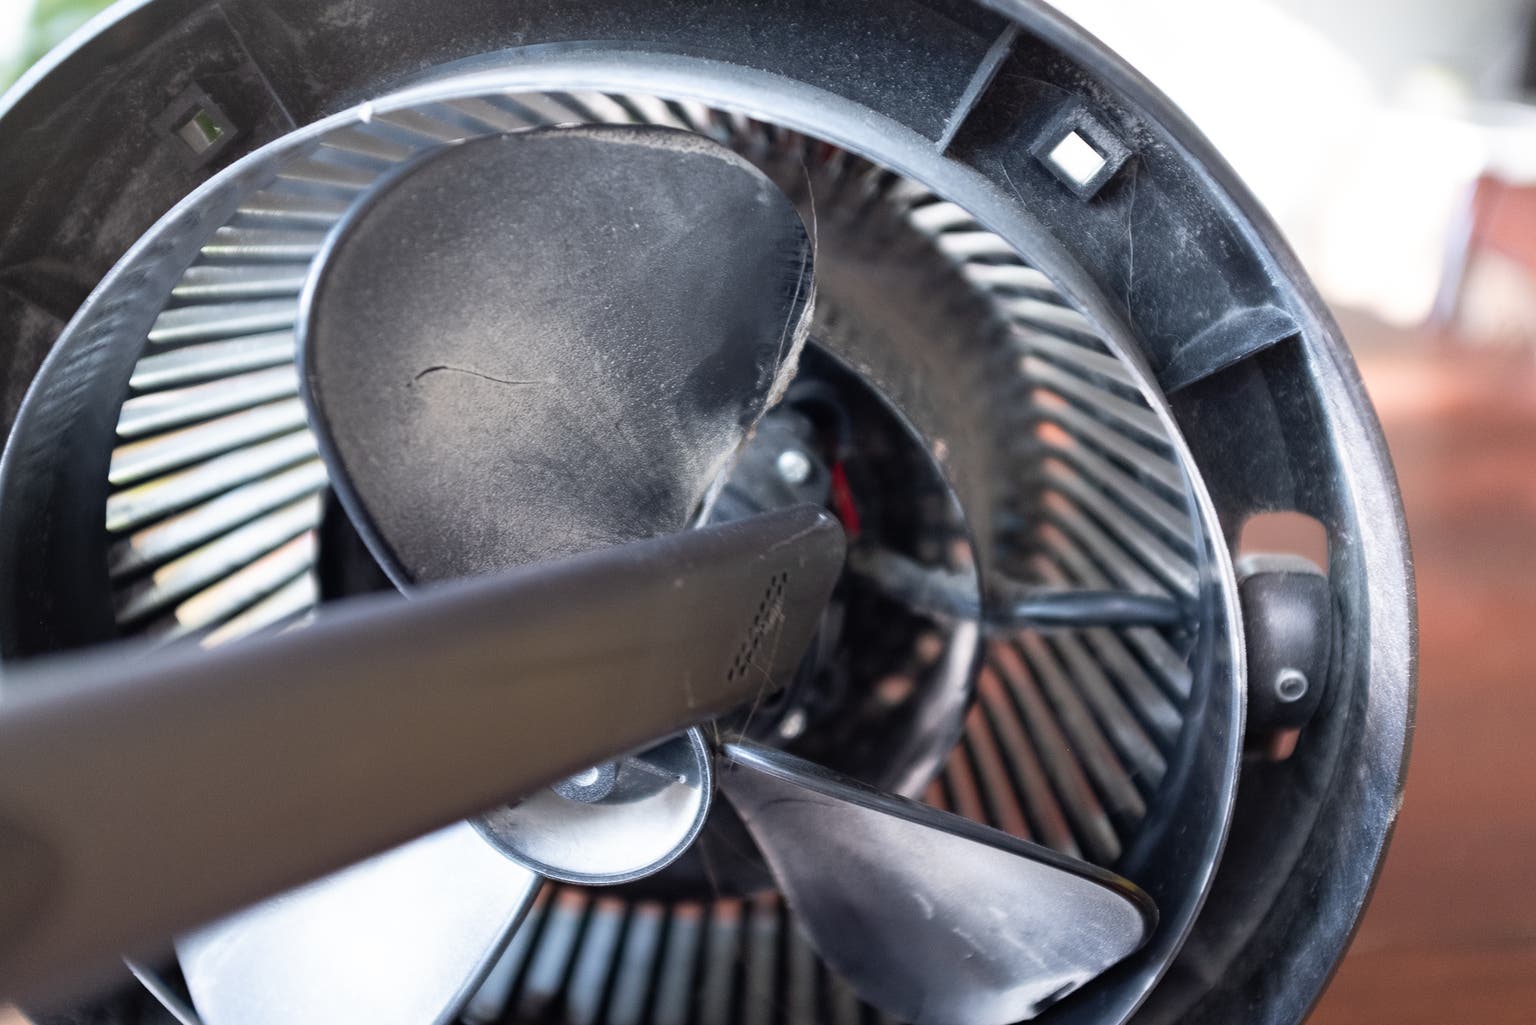
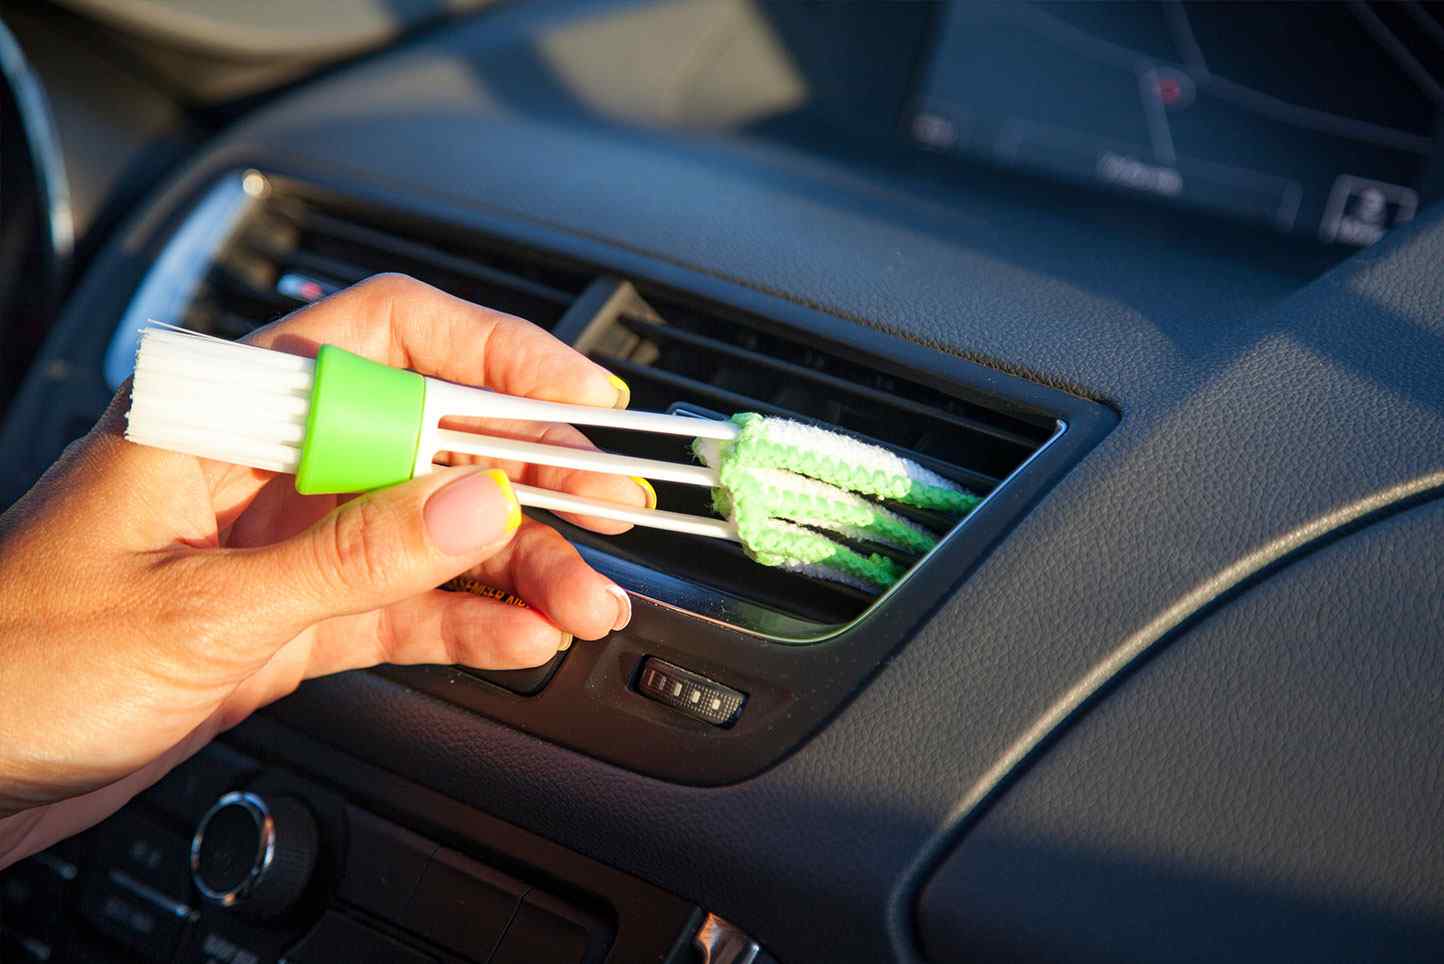
Step 6: Clean the Fan Blades
In this step, we’ll focus on cleaning the fan blades of your Lennox air conditioner. Over time, dust and debris can accumulate on the fan blades, which can lead to reduced airflow and decreased cooling efficiency.
Follow these steps to clean the fan blades:
- Locate the fan blades inside the air conditioner unit. They are typically located near the evaporator coil or the blower unit.
- Using a soft brush or a vacuum cleaner with a soft bristle attachment, gently remove any dust and debris from the fan blades. Pay attention to both sides of the blades to ensure thorough cleaning.
- If the fan blades are heavily soiled or have stubborn dirt, you can dampen a clean cloth with a mixture of mild detergent and water. Gently wipe the fan blades to remove the dirt and grime. Avoid using excessive moisture to prevent damage to the motor or other components.
- For hard-to-reach areas or tight spaces between the blades, you can use a small brush or a toothbrush to clean them effectively.
- Carefully clean the motor housing and any other surfaces around the fan blades to remove any dust or dirt accumulation.
- Allow the fan blades and other cleaned components to dry completely before reassembling the air conditioner.
Cleaning the fan blades is essential to maintain optimal airflow and cooling efficiency. By keeping the blades clean, you ensure that air circulates freely, preventing strain on the system and allowing your Lennox air conditioner to work efficiently.
With the fan blades cleaned, we are now ready to reassemble the air conditioner in the final step. Let’s proceed to step 7 and bring everything together to complete the cleaning process.
Read more: How To Clean An RV Air Conditioner
Step 7: Reassemble the Air Conditioner
Congratulations! You have successfully cleaned the various components of your Lennox air conditioner. Now it’s time to reassemble the unit and get it running smoothly again.
Follow these steps to reassemble your air conditioner:
- Start by placing the cleaned fan blades back into their original position. Make sure they are aligned properly and securely attached.
- Next, carefully slide the filter back into its housing behind the front grill. Ensure it is properly aligned and fully inserted.
- Place the front grill back onto the air conditioner unit. Line up the tabs or screws and gently push it into place until it fits snugly.
- If you removed any screws during the cleaning process, use a screwdriver or wrench to securely tighten them.
- Once the front grill is securely in place, double-check that all connections are properly reattached, including any wires or components that were disconnected.
- If you turned off the power supply at the circuit breaker, switch it back on to restore power to the air conditioner.
- Test the air conditioner to ensure that it is functioning properly. Listen for any unusual sounds or vibrations and check if cool air is coming out from the vents.
Congratulations! Your Lennox air conditioner has been successfully cleaned and reassembled. By following these steps regularly, you can ensure optimal performance, extended lifespan, and clean, healthy air flow from your unit.
Remember to refer to the owner’s manual provided by Lennox for specific instructions and guidelines for your particular air conditioner model. It’s also a good idea to schedule regular professional maintenance for your air conditioner to keep it in top condition.
Enjoy the cool and refreshing air provided by your freshly cleaned Lennox air conditioner!
With the completion of step 7, we have reached the end of our comprehensive guide on how to clean a Lennox air conditioner. We hope this guide has been informative and helpful in ensuring the optimal performance of your unit. Feel free to refer back to this guide whenever you need to clean your air conditioner or share it with others who may find it useful. Thank you for reading, and happy cleaning!
Conclusion
Congratulations! You’ve reached the end of our comprehensive guide on how to clean a Lennox air conditioner. By following the step-by-step instructions provided in this guide, you can ensure that your Lennox air conditioner remains clean, efficient, and operating at its best.
Regular cleaning and maintenance of your air conditioner are essential for several reasons. It helps improve the unit’s cooling efficiency, extends its lifespan, reduces energy consumption, and ensures a healthy indoor environment by eliminating dust, dirt, and allergens from the air.
Throughout this guide, we’ve covered important steps such as turning off the power, removing the front grill, cleaning the filter, coils, condensate drain, and fan blades, as well as reassembling the air conditioner. Following these steps will help keep your Lennox air conditioner in top-notch condition and ensure optimal performance for years to come.
Remember, safety is of utmost importance when cleaning your air conditioner. Always follow the recommended safety precautions, wear protective gear, and consult the owner’s manual for your specific model.
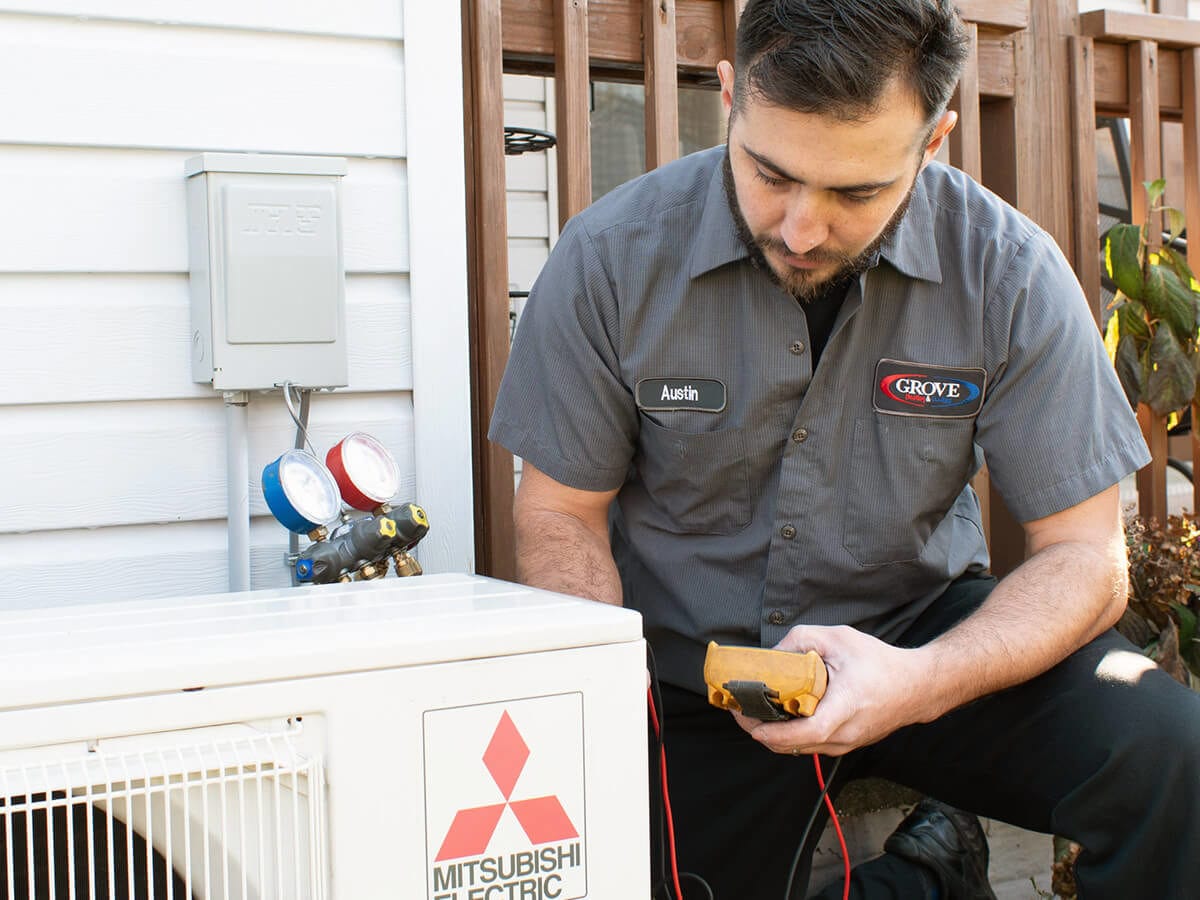
Additionally, don’t forget to schedule regular professional maintenance for your Lennox air conditioner. A professional technician can perform more thorough inspections, identify any potential issues, and provide specialized cleaning and maintenance for optimum performance.
We hope this guide has provided you with valuable insights and practical tips on how to clean your Lennox air conditioner effectively. By investing a little time and effort into regular cleaning and maintenance, you can enjoy a comfortable, energy-efficient, and healthy indoor environment all year round.
Thank you for reading, and happy cleaning!
Frequently Asked Questions about How To Clean A Lennox Air Conditioner
Was this page helpful?
At Storables.com, we guarantee accurate and reliable information. Our content, validated by Expert Board Contributors, is crafted following stringent Editorial Policies. We're committed to providing you with well-researched, expert-backed insights for all your informational needs.