Home>Gardening & Outdoor>Garden Tools & Equipment>How To Clean A Lawnmower Air Filter
Garden Tools & Equipment
How To Clean A Lawnmower Air Filter
Modified: August 27, 2024
Learn how to clean a lawnmower air filter with our expert tips. Keep your garden tools and equipment in top condition for a healthy lawn.
(Many of the links in this article redirect to a specific reviewed product. Your purchase of these products through affiliate links helps to generate commission for Storables.com, at no extra cost. Learn more)
Introduction
Maintaining a healthy lawn not only requires regular mowing but also demands attention to the upkeep of the lawnmower itself. One crucial aspect of lawnmower maintenance is the proper care of its air filter. An air filter plays a pivotal role in the smooth operation of a lawnmower by preventing dirt, debris, and other contaminants from entering the engine. Over time, the air filter becomes clogged, hindering the airflow and compromising the engine's performance. Therefore, knowing how to clean a lawnmower air filter is an essential skill for any lawn care enthusiast.
In this comprehensive guide, we will delve into the significance of cleaning a lawnmower air filter and provide a step-by-step tutorial on how to do so effectively. By following these instructions, you can ensure that your lawnmower continues to operate at its best, promoting a healthy and vibrant lawn. Let's embark on this journey to discover the art of maintaining a clean and efficient lawnmower air filter.
Key Takeaways:
- Regularly cleaning your lawnmower’s air filter is crucial for optimal engine performance, fuel efficiency, and prolonged engine life. It’s like giving your lawnmower a breath of fresh air to keep it running smoothly!
- By following the step-by-step guide to clean and maintain your lawnmower’s air filter, you can ensure that your equipment remains reliable and efficient, contributing to a healthy and well-groomed lawn.
Read more: How To Clean A Lawnmower
Why Cleaning the Lawnmower Air Filter is Important
The air filter of a lawnmower is akin to the respiratory system of a living being. Just as we need clean air to breathe, a lawnmower engine requires a steady flow of clean air to function optimally. The air filter serves as the first line of defense, preventing dust, dirt, and debris from infiltrating the engine. As the lawnmower operates, the air filter accumulates these particles, eventually leading to clogging.
When the air filter becomes clogged, it obstructs the airflow to the engine, resulting in a rich fuel mixture. This imbalance can lead to a decrease in engine performance, causing rough idling, difficulty starting the engine, and reduced power output. In severe cases, a clogged air filter can lead to engine damage, potentially requiring costly repairs or replacements.
Regularly cleaning the air filter of your lawnmower is vital for maintaining its efficiency and longevity. By doing so, you not only ensure optimal engine performance but also contribute to fuel efficiency and reduced emissions. Additionally, a clean air filter promotes smoother operation, prolonging the life of the engine and other vital components of the lawnmower.
Understanding the importance of a clean air filter empowers you to take proactive measures in maintaining your lawnmower. By incorporating air filter cleaning into your regular maintenance routine, you can safeguard the performance and durability of your lawnmower, ultimately contributing to a well-groomed and healthy lawn.
Tools and Materials Needed
Before embarking on the task of cleaning your lawnmower’s air filter, it’s essential to gather the necessary tools and materials. Having the right equipment at hand will streamline the cleaning process and ensure thorough maintenance of the air filter. Here’s a list of tools and materials you’ll need:
- Safety Gear: Prioritize safety by wearing protective gloves and safety goggles to shield your hands and eyes from debris and contaminants.
- Lawnmower Manual: Keep the lawnmower’s manual accessible for reference, especially for specific instructions related to the air filter and maintenance.
- Flathead Screwdriver: This tool will be useful for removing the air filter cover and accessing the air filter.
- Clean Cloth or Brush: Prepare a clean, lint-free cloth or a soft brush to remove debris and dirt from the air filter.
- Mild Detergent or Air Filter Cleaner: Depending on the type of air filter, you may need a mild detergent solution or a specialized air filter cleaner to thoroughly clean the filter element.
- Water Source: Access to a water source, such as a garden hose, for rinsing and cleaning the air filter.
- Well-Ventilated Area: Ensure that you have ample space in a well-ventilated area to carry out the cleaning process, minimizing exposure to fumes and ensuring proper drying of the air filter.
- Replacement Air Filter (if necessary): Assess the condition of the air filter during cleaning. If the filter is damaged or excessively soiled, it may be prudent to have a replacement filter on hand.
By preparing these tools and materials, you set the stage for a thorough and efficient cleaning process, allowing you to maintain the air filter of your lawnmower with confidence and precision.
Step 1: Preparation
Before initiating the cleaning process, it’s essential to prepare the lawnmower and create a conducive environment for working on the air filter. Follow these steps to ensure a smooth and organized preparation:
- Turn Off the Lawnmower: Prioritize safety by turning off the lawnmower and allowing the engine to cool before beginning the maintenance process. Disconnect the spark plug wire to prevent accidental starts.
- Read the Manual: Refer to the lawnmower’s manual for specific instructions related to accessing and maintaining the air filter. Familiarize yourself with the recommended cleaning procedures and safety precautions.
- Inspect the Air Filter Cover: Locate the air filter cover on the lawnmower’s engine. Depending on the model, the cover may be secured with screws or clips. Prepare to remove the cover using the appropriate tools, such as a flathead screwdriver.
- Prepare the Cleaning Area: Choose a well-ventilated outdoor space for cleaning the air filter. Ensure that the area is clear of debris and provides easy access to a water source for rinsing the filter.
- Gather the Necessary Tools and Materials: Assemble the tools and materials required for the cleaning process, including safety gear, cleaning agents, and a replacement air filter if needed. Having everything within reach will streamline the maintenance procedure.
- Inspect the Air Filter: Assess the condition of the air filter. If it is excessively soiled or damaged, consider replacing it with a new filter to maintain optimal engine performance.
By meticulously preparing the lawnmower and the cleaning area, you lay the groundwork for a systematic and effective air filter cleaning process. Attention to detail during this preparatory phase sets the stage for a successful maintenance endeavor, ensuring the continued efficiency of your lawnmower’s air filtration system.
Step 2: Removing the Air Filter
Once the preparatory steps are complete, you can proceed to remove the air filter from your lawnmower. This process allows for thorough access to the filter, facilitating effective cleaning and inspection. Follow these steps to safely and efficiently remove the air filter:
- Locate the Air Filter Housing: Identify the air filter housing, typically situated near the carburetor or the engine’s intake system. The housing may be enclosed within a cover, secured by screws or clips.
- Remove the Air Filter Cover: Using the appropriate tool, such as a flathead screwdriver, carefully unscrew or unclip the air filter cover. Place the screws or clips in a secure location to prevent misplacement.
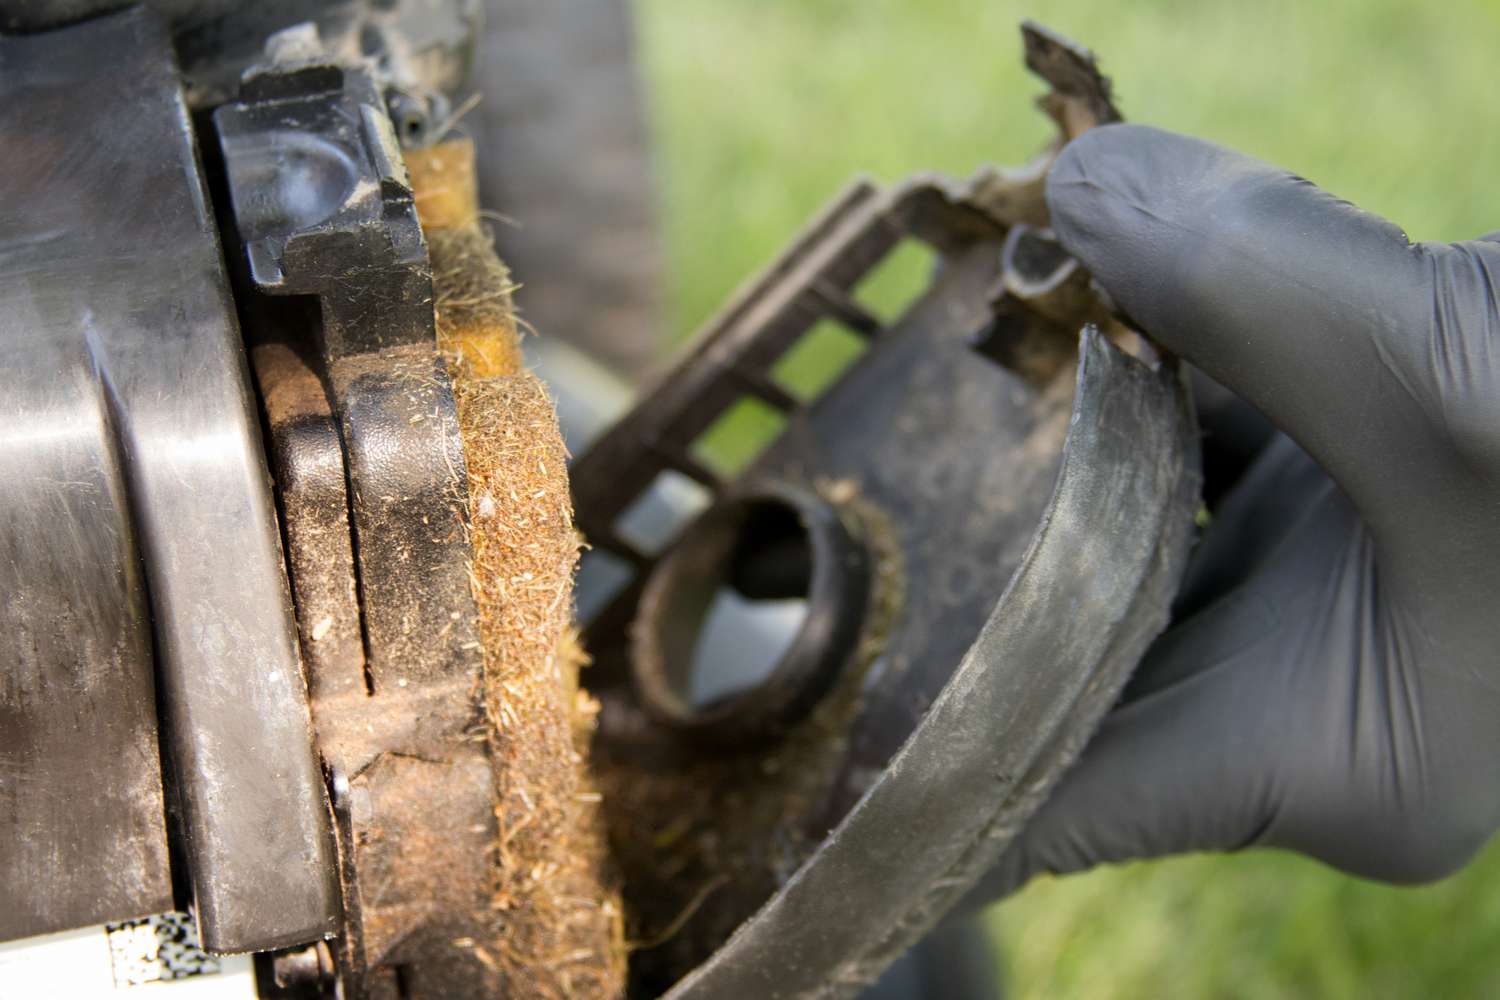
- Inspect the Air Filter Housing: Upon removing the cover, visually inspect the air filter housing for any signs of debris, dirt, or contaminants. Clear away any loose particles to prevent them from entering the engine during the cleaning process.
- Extract the Air Filter: Gently remove the air filter from the housing, taking care not to dislodge any accumulated debris. Assess the condition of the filter, noting the degree of soiling and any visible damage.
- Examine the Housing and Seals: While the air filter is removed, inspect the housing and its seals for any wear, tear, or deterioration. Ensure that the seals are intact and free from damage to maintain proper air filtration.
- Set Aside the Air Filter: Place the removed air filter on a clean, dry surface, readying it for the subsequent cleaning steps. If a replacement filter is necessary, have it readily available for installation after the cleaning process.
By methodically removing the air filter and conducting a thorough inspection of the housing, you pave the way for a comprehensive cleaning process. This meticulous approach ensures that the air filter is primed for effective cleansing, ultimately contributing to the sustained performance of your lawnmower’s engine.
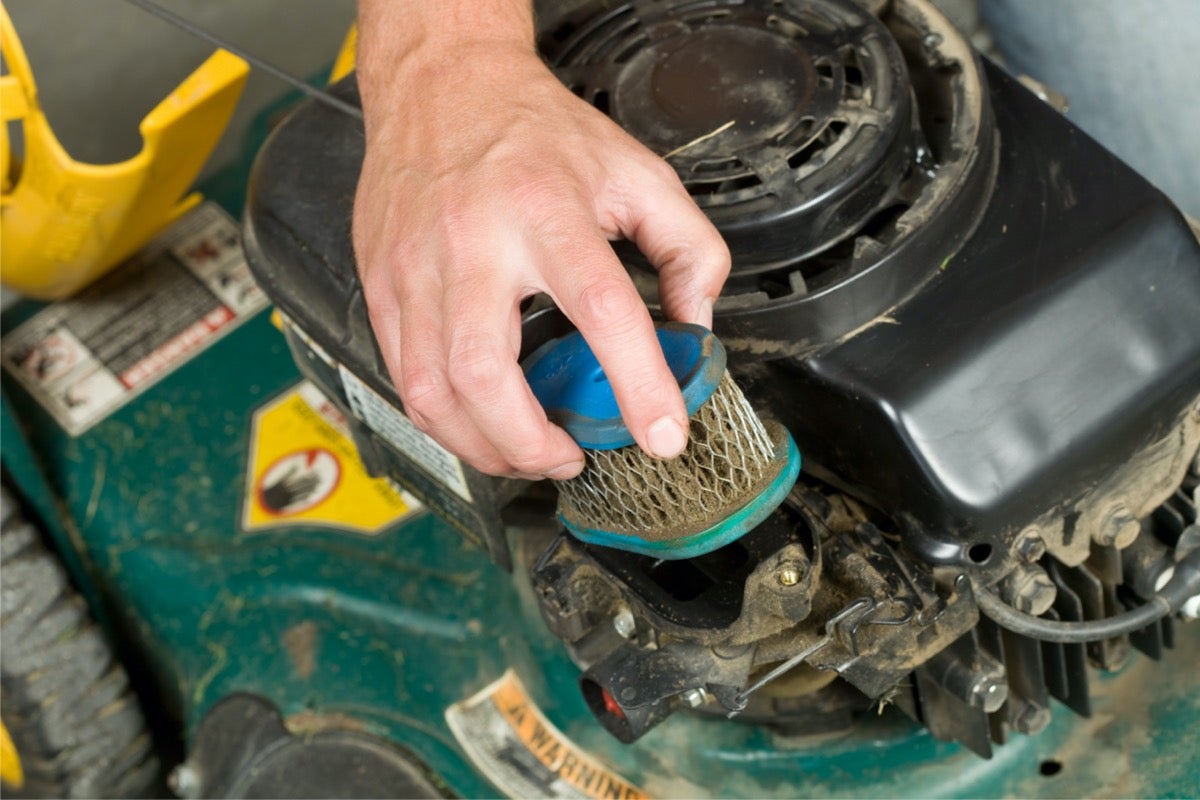
Regularly cleaning or replacing your lawnmower air filter is essential for maintaining optimal engine performance. To clean the air filter, remove it from the mower and gently tap off any loose debris. Then, wash the filter in soapy water, rinse thoroughly, and allow it to dry completely before reinserting it into the mower.
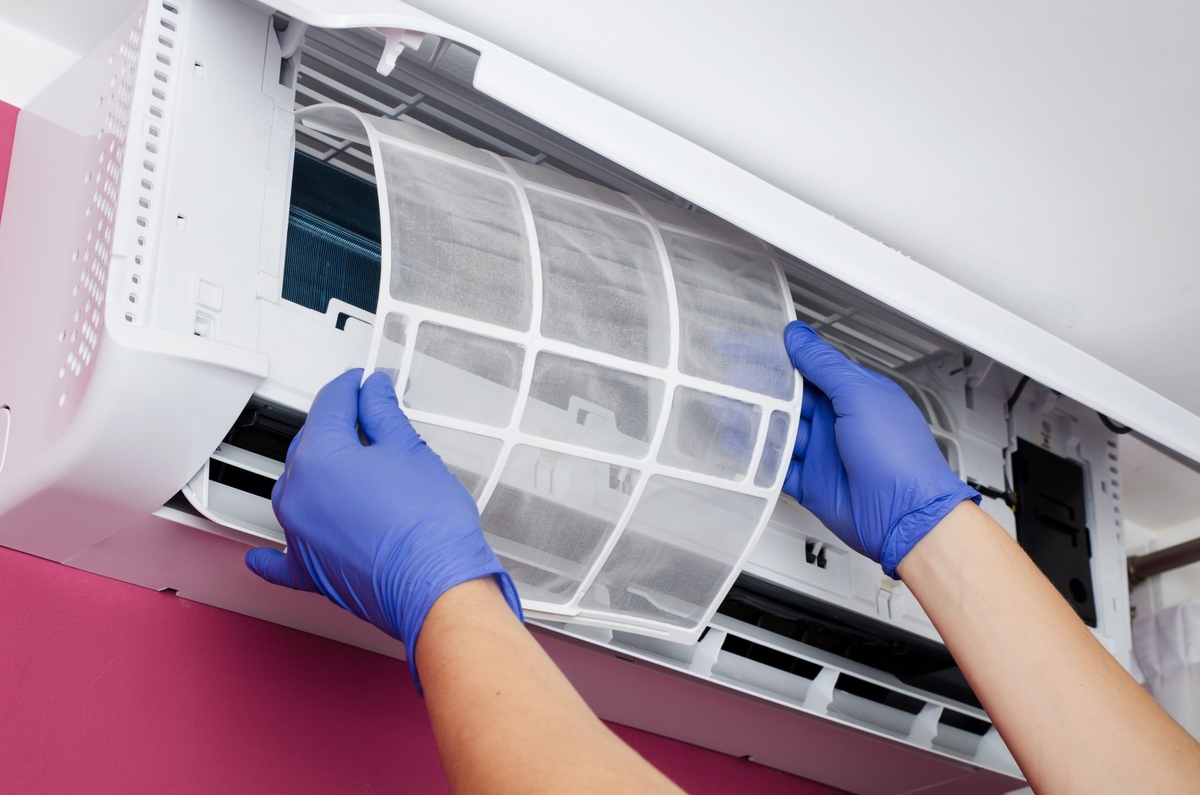
Read more: How To Clean AC Air Filter
Step 3: Cleaning the Air Filter
With the air filter removed from the lawnmower, it’s time to embark on the essential task of cleaning the filter element. This step is pivotal in restoring the filter’s functionality and ensuring optimal air flow to the engine. Follow these detailed steps to effectively clean the air filter:
- Initial Assessment: Evaluate the degree of soiling and the type of debris present on the air filter. Note any areas of concentrated dirt or blockages, as these will require focused cleaning.
- Pre-Cleaning Debris Removal: Gently tap the air filter against a solid surface to dislodge loose debris and dirt. Avoid excessive force to prevent damage to the filter material.
- Use of Cleaning Agents: Depending on the type of air filter, determine whether a mild detergent solution or a specialized air filter cleaner is required. If using a detergent, dilute it in water according to the manufacturer’s recommendations.
- Cleaning Process: Submerge the air filter in the cleaning solution, ensuring that the entire filter element is immersed. Gently agitate the filter to dislodge embedded dirt and contaminants. Allow the filter to soak for the recommended duration to facilitate thorough cleaning.
- Brushing or Dabbing: For stubborn dirt or localized soiling, use a soft brush or cloth to carefully dab and brush the affected areas. Exercise caution to avoid damaging the filter material while targeting specific areas of concern.
- Rinsing: Thoroughly rinse the air filter with clean water to remove the cleaning solution and dislodged debris. Ensure that the water flows in the direction opposite to the normal airflow through the filter, facilitating complete cleansing.
- Drying Process: Allow the air filter to air dry completely before reinstalling it in the lawnmower. Avoid using compressed air or heat sources for drying, as these methods can damage the filter material.
By meticulously cleaning the air filter with precision and care, you ensure the removal of contaminants and debris that hinder its performance. This thorough cleaning process sets the stage for the optimal functioning of the air filter, promoting efficient airflow and sustained engine performance in your lawnmower.
Step 4: Drying and Reinstalling the Air Filter
After completing the cleaning process, the next crucial step involves drying the air filter and reinstating it in the lawnmower. Proper drying is essential to ensure that the filter is free from moisture and ready to resume its role in safeguarding the engine from contaminants. Follow these meticulous steps to facilitate effective drying and reinstallation of the air filter:
- Air Drying: Position the cleaned air filter in a well-ventilated area, allowing it to air dry naturally. Ensure that the filter is placed on a clean surface and is shielded from direct sunlight to prevent potential damage to the filter material.
- Patience in Drying: Exercise patience during the drying process, allowing ample time for the filter to dry completely. While the duration may vary based on environmental factors, ensuring thorough drying is paramount to prevent moisture-related issues in the engine.
- Inspection of Dryness: Verify that the air filter is entirely dry by conducting a tactile assessment. Confirm that there are no residual dampness or moisture present on the filter material, as any moisture can compromise the filter’s effectiveness.
- Reinstallation of the Air Filter: Once the air filter is fully dry, carefully place it back into the air filter housing, ensuring proper alignment and fit. Verify that the filter is securely positioned within the housing to prevent air leaks and ensure optimal filtration.
- Secure the Air Filter Cover: Reattach the air filter cover securely, using the appropriate screws or clips. Confirm that the cover is tightly fastened to prevent the entry of debris and maintain the integrity of the air filtration system.
- Reconnect the Spark Plug Wire: Prior to starting the lawnmower, reconnect the spark plug wire to restore power to the engine. This step ensures that the engine is ready for operation after the air filter maintenance is complete.
By meticulously overseeing the drying and reinstallation process, you guarantee that the air filter is primed for seamless integration back into the lawnmower. This meticulous approach ensures that the filter can resume its pivotal role in preserving the engine’s performance and longevity.
Step 5: Final Checks and Maintenance Tips
Upon completing the air filter cleaning and reinstallation process, it’s essential to conduct final checks and implement maintenance tips to ensure the continued efficiency of the lawnmower’s air filtration system. Follow these comprehensive steps to finalize the maintenance procedure and optimize the performance of your lawnmower:
- Visual Inspection: Conduct a visual inspection of the air filter and its housing to ensure that all components are securely in place. Verify that the air filter cover is tightly fastened to prevent the ingress of debris.
- Test Run: Start the lawnmower and allow it to run for a few minutes, observing the engine’s performance. Ensure that the engine operates smoothly and that there are no unusual sounds or vibrations, indicating proper airflow with the cleaned air filter.
- Regular Maintenance Schedule: Incorporate air filter cleaning into your lawnmower’s regular maintenance schedule. Check the air filter periodically and clean it as needed to prevent the accumulation of dirt and maintain optimal engine performance.
- Replacement Consideration: Assess the condition of the air filter regularly, and consider replacing it if it shows signs of excessive wear, damage, or persistent clogging. A fresh air filter contributes to improved engine performance and longevity.
- Clean Surrounding Areas: Keep the area around the lawnmower clean to prevent debris and dirt from entering the air filter housing. Regularly remove grass clippings, leaves, and other debris to maintain a clean environment for the lawnmower.
- Storage Precautions: When storing the lawnmower, ensure that it is placed in a clean and dry location. Cover the lawnmower to prevent the accumulation of dust and debris, safeguarding the air filter and other components.
By conducting final checks and implementing these maintenance tips, you uphold the integrity of the air filtration system and contribute to the sustained performance of your lawnmower. Regular vigilance and proactive maintenance practices ensure that your lawnmower remains a reliable and efficient tool for maintaining a pristine lawn.
Conclusion
Maintaining a clean air filter is a fundamental aspect of preserving the performance and longevity of your lawnmower. By understanding the importance of a clean air filter and following the comprehensive steps outlined in this guide, you have acquired the knowledge and skills necessary to uphold the efficiency of your lawnmower’s air filtration system.
Regularly cleaning the air filter not only ensures optimal engine performance but also contributes to fuel efficiency, reduced emissions, and prolonged engine life. By incorporating air filter maintenance into your regular lawnmower care routine, you actively safeguard the engine from contaminants, promoting smooth operation and a healthy lawn.
Through meticulous preparation, systematic air filter removal, thorough cleaning, careful drying, and precise reinstallation, you have demonstrated a commitment to maintaining the integrity of your lawnmower’s air filtration system. By conducting final checks and implementing maintenance tips, you have solidified your role as a proactive steward of your lawnmower’s performance.
As you continue to care for your lawnmower, remember that regular attention to the air filter is an investment in the sustained efficiency and reliability of your equipment. By prioritizing proper air filter maintenance, you ensure that your lawnmower remains a dependable tool for cultivating a vibrant and well-groomed lawn, enriching the outdoor spaces you cherish.
With these insights and skills at your disposal, you are well-equipped to maintain a clean and efficient air filter, empowering your lawnmower to thrive as a vital companion in your lawn care endeavors.
Frequently Asked Questions about How To Clean A Lawnmower Air Filter
Was this page helpful?
At Storables.com, we guarantee accurate and reliable information. Our content, validated by Expert Board Contributors, is crafted following stringent Editorial Policies. We're committed to providing you with well-researched, expert-backed insights for all your informational needs.


0 thoughts on “How To Clean A Lawnmower Air Filter”