Home>Home Maintenance>How To Clean An RV Air Conditioner
Home Maintenance
How To Clean An RV Air Conditioner
Modified: August 25, 2024
Learn how to clean your RV air conditioner easily with these home maintenance tips. Keep your RV cool and comfortable all summer long!
(Many of the links in this article redirect to a specific reviewed product. Your purchase of these products through affiliate links helps to generate commission for Storables.com, at no extra cost. Learn more)
Introduction
RV owners know the importance of a properly functioning air conditioner in ensuring comfort during their travels. Whether you’re embarking on a road trip or taking a camping adventure, keeping your RV’s air conditioner clean and well-maintained is essential for optimal performance.
Over time, dust, dirt, and debris can accumulate in the air conditioner, leading to reduced airflow and decreased cooling efficiency. Regular cleaning and maintenance can help prolong the lifespan of your RV’s air conditioner and prevent potential breakdowns, ensuring you stay cool and comfortable on your journeys.
In this article, we will provide you with a comprehensive guide on how to properly clean an RV air conditioner. We will walk you through the step-by-step process, including preparing for cleaning, safely shutting off power, removing and cleaning the air filter, clearing debris from the unit, cleaning the condenser and evaporator coils, cleaning the drain pan, reassembling the air conditioner, and finally testing its functionality.
By following these guidelines, you can ensure that your RV air conditioner operates efficiently, maintains optimal cooling performance, and provides a comfortable environment during your adventures.
So let’s get started and learn how to clean your RV air conditioner, keeping it in top-notch condition for all your future travels.
Key Takeaways:
- Regularly cleaning and maintaining your RV air conditioner, including the air filter, coils, and drain pan, ensures efficient cooling, cleaner air, and a comfortable environment during your travels.
- Properly preparing for cleaning, safely shutting off power, and conducting thorough testing after reassembly are essential steps to ensure the optimal performance and longevity of your RV air conditioner.
Read more: How To Recharge An RV Air Conditioner
Preparing for Cleaning
Before you begin cleaning your RV air conditioner, it’s important to gather the necessary tools and materials. Here’s what you’ll need:
1. Safety equipment: Wear protective goggles, gloves, and a dust mask to safeguard yourself from debris and cleaning agents.
2. Cleaning agents: You will require mild detergent or a specialized air conditioner coil cleaner. Be sure to choose a cleaner that is safe for use on the specific components of your RV air conditioner.
3. Soft-bristle brush: This will help you gently remove dirt and debris from the coils and other areas of the air conditioner.
4. Vacuum cleaner with a brush attachment: This is useful for removing loose dirt and debris from the air conditioner.
5. Screwdriver: Depending on the model of your RV air conditioner, you may need a screwdriver to remove the access panel or other parts.
6. Clean, lint-free cloth or towel: This will be used to wipe down the surfaces and components of the air conditioner.
7. Water source: You will need access to a water source, such as a garden hose, for rinsing off the cleaning agent and debris.
Once you’ve gathered all the necessary supplies, ensure that your RV is parked on a level surface and the air conditioner is turned off. This will prevent any accidents or damage during the cleaning process. It’s also recommended to perform the cleaning on a clear day so that your RV stays dry during the process.
Taking the time to properly prepare for cleaning will make the process smoother and more efficient. By having all the necessary tools and equipment ready, you’ll be able to focus on the task at hand and ensure that you clean your RV air conditioner effectively and safely. So, let’s move on to the next step: shutting off power and disconnecting the unit.
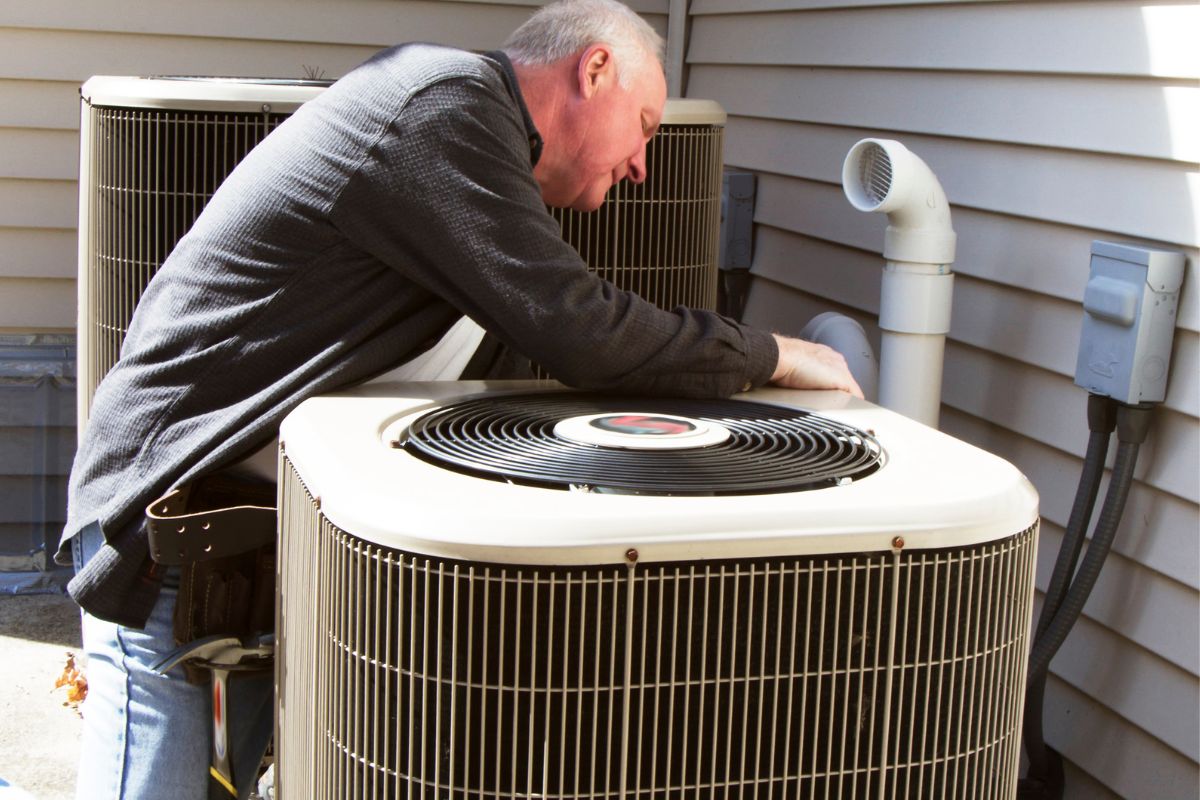
Shutting Off Power and Disconnecting the Unit
Before you begin cleaning your RV air conditioner, it’s crucial to ensure that the power supply is disconnected. Taking this precautionary measure will prevent any electrical accidents or damage during the cleaning process. Here’s how you can safely shut off power and disconnect the unit:
1. Locate the RV’s power source: Depending on your RV model, the power source for the air conditioner may be located either on the RV itself or in the electrical panel. Refer to your RV’s manual or consult a professional if you’re unsure.
2. Turn off the power: Once you’ve located the power source, switch it off. This will cut off the electricity supply to the air conditioner unit. It’s essential to double-check that the power is properly turned off before proceeding.
3. Disconnect the unit: After ensuring that the power is off, disconnect the unit from the power source. This may involve removing any electrical plugs or wires connected to the air conditioner. Again, refer to your RV’s manual or seek professional guidance if needed.
4. Wait for the unit to cool down (optional): If your air conditioner has been running recently, it’s a good idea to let it cool down for a while before starting the cleaning process. This will prevent any burns or injuries from hot surfaces.
By following these steps and ensuring that power is safely shut off and the unit is disconnected, you can proceed with peace of mind knowing that you are minimizing the risk of accidents during the cleaning process. Now let’s move on to the next step: removing the air filter.
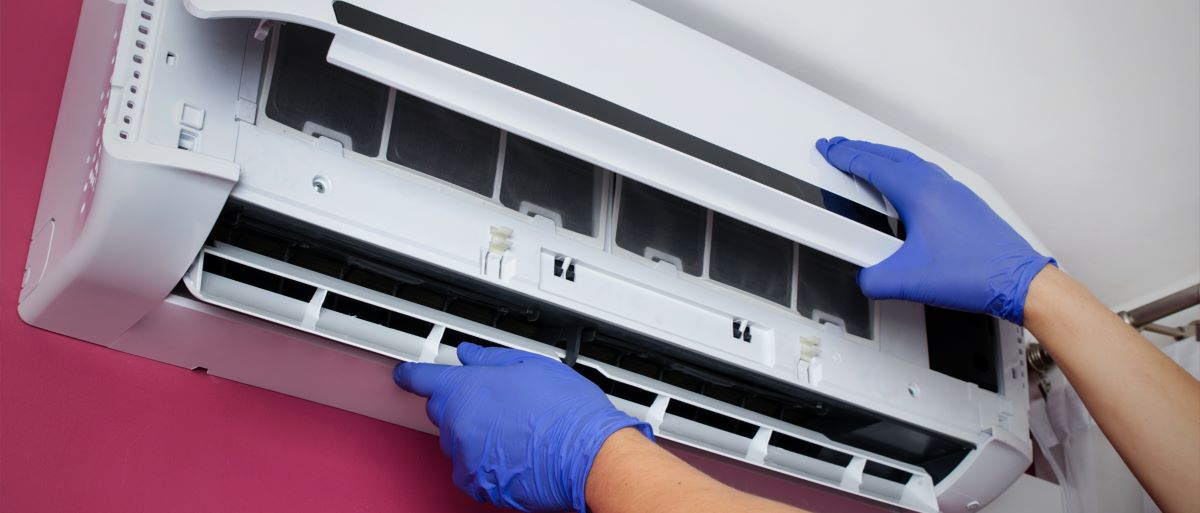
Removing the Air Filter
The air filter plays a crucial role in maintaining clean and healthy air inside your RV. It helps trap dust, pollen, and other particles, preventing them from entering the air conditioner and affecting its performance. Cleaning or replacing the air filter regularly is essential to ensure proper airflow and optimal cooling efficiency. Here’s how to remove the air filter from your RV air conditioner:
1. Locate the air filter: The air filter is typically located behind a cover or grille on the interior side of the air conditioner. Look for a labeled panel or follow the manufacturer’s instructions to locate the exact position.
2. Remove the cover: Unscrew or unclip the cover to gain access to the air filter. Use a screwdriver or your hands, depending on the type of fasteners used.
3. Inspect the air filter: Once the cover is removed, carefully examine the condition of the air filter. If it appears heavily soiled, torn, or damaged, it may need to be replaced rather than cleaned.
4. Remove the air filter: Take out the air filter from its housing. Pay attention to its orientation or any arrows indicating the proper direction of airflow.
5. Clean the air filter (if reusable): If your air filter is reusable, gently clean it to remove dust and debris. You can use a vacuum cleaner with a brush attachment or rinse it under running water. Allow the filter to dry thoroughly before reusing it.
6. Dispose of and replace the air filter (if non-reusable): If your air filter is designed to be disposable, discard it properly and replace it with a new filter. Ensure you are using the correct filter size and type recommended by the manufacturer.
7. Clean the filter housing: While the air filter is removed, take the opportunity to clean the filter housing using a soft brush or cloth. Remove any dust or debris that may have accumulated.
By following these steps, you can safely remove the air filter from your RV air conditioner, inspect its condition, and clean or replace it as needed. A clean and well-maintained air filter will help optimize the performance of your air conditioner and ensure cleaner air inside your RV. Now let’s move on to the next step: cleaning the air filter.
Cleaning the Air Filter
Cleaning the air filter of your RV air conditioner is a crucial step in maintaining its efficiency and ensuring clean and healthy air inside your recreational vehicle. A dirty or clogged air filter can restrict airflow, reduce cooling capacity, and even lead to potential damage to your unit. Here’s how you can effectively clean the air filter:
1. Preparation: Ensure that you have removed the air filter from the unit, as mentioned in the previous step. If it is a reusable filter, inspect it for any excessive dirt or debris accumulation.
2. Vacuuming: Start by using a vacuum cleaner with a brush attachment to gently remove loose dirt and debris from the filter. Be careful not to damage the filter during this process, as it may be delicate.
3. Washing: If your air filter is reusable and still dirty after vacuuming, you can proceed to wash it. Fill a sink or basin with warm water and add a mild detergent. Submerge the filter in the soapy water and gently agitate it to dislodge any stubborn dirt or contaminants.
4. Rinsing: After washing the filter, rinse it thoroughly with clean water to remove all traces of detergent. Ensure that the water flows in the opposite direction of the airflow indicated on the filter. This will help remove any remaining dirt or soap residue.
5. Drying: Once the filter is rinsed, gently shake off any excess water and pat it dry with a clean, lint-free cloth. Avoid using excessive force or wringing the filter, as it can damage its delicate structure. Allow the filter to air dry completely before reinstalling it.
6. Cleaning frequency: It is recommended to clean the air filter of your RV air conditioner at least once every camping season or as needed. Factors such as the frequency of use, environmental conditions, and the presence of allergens can influence the cleaning frequency.
Regularly cleaning and maintaining your RV air conditioner’s air filter will help ensure optimal airflow, improve cooling efficiency, and promote a healthier indoor environment. Remember to refer to your unit’s manual for specific instructions and recommendations regarding cleaning and maintenance. Now that the air filter is clean, let’s move on to the next step: removing debris from the air conditioner.
Read more: How To Replace An RV Air Conditioner
Removing Debris from the Air Conditioner
Over time, debris such as leaves, dirt, and other foreign objects can accumulate in your RV air conditioner. This buildup can obstruct airflow, reduce cooling efficiency, and potentially cause damage to the unit. Cleaning out the debris is an important step in maintaining the performance and longevity of your air conditioner. Here’s how you can effectively remove debris from your RV air conditioner:
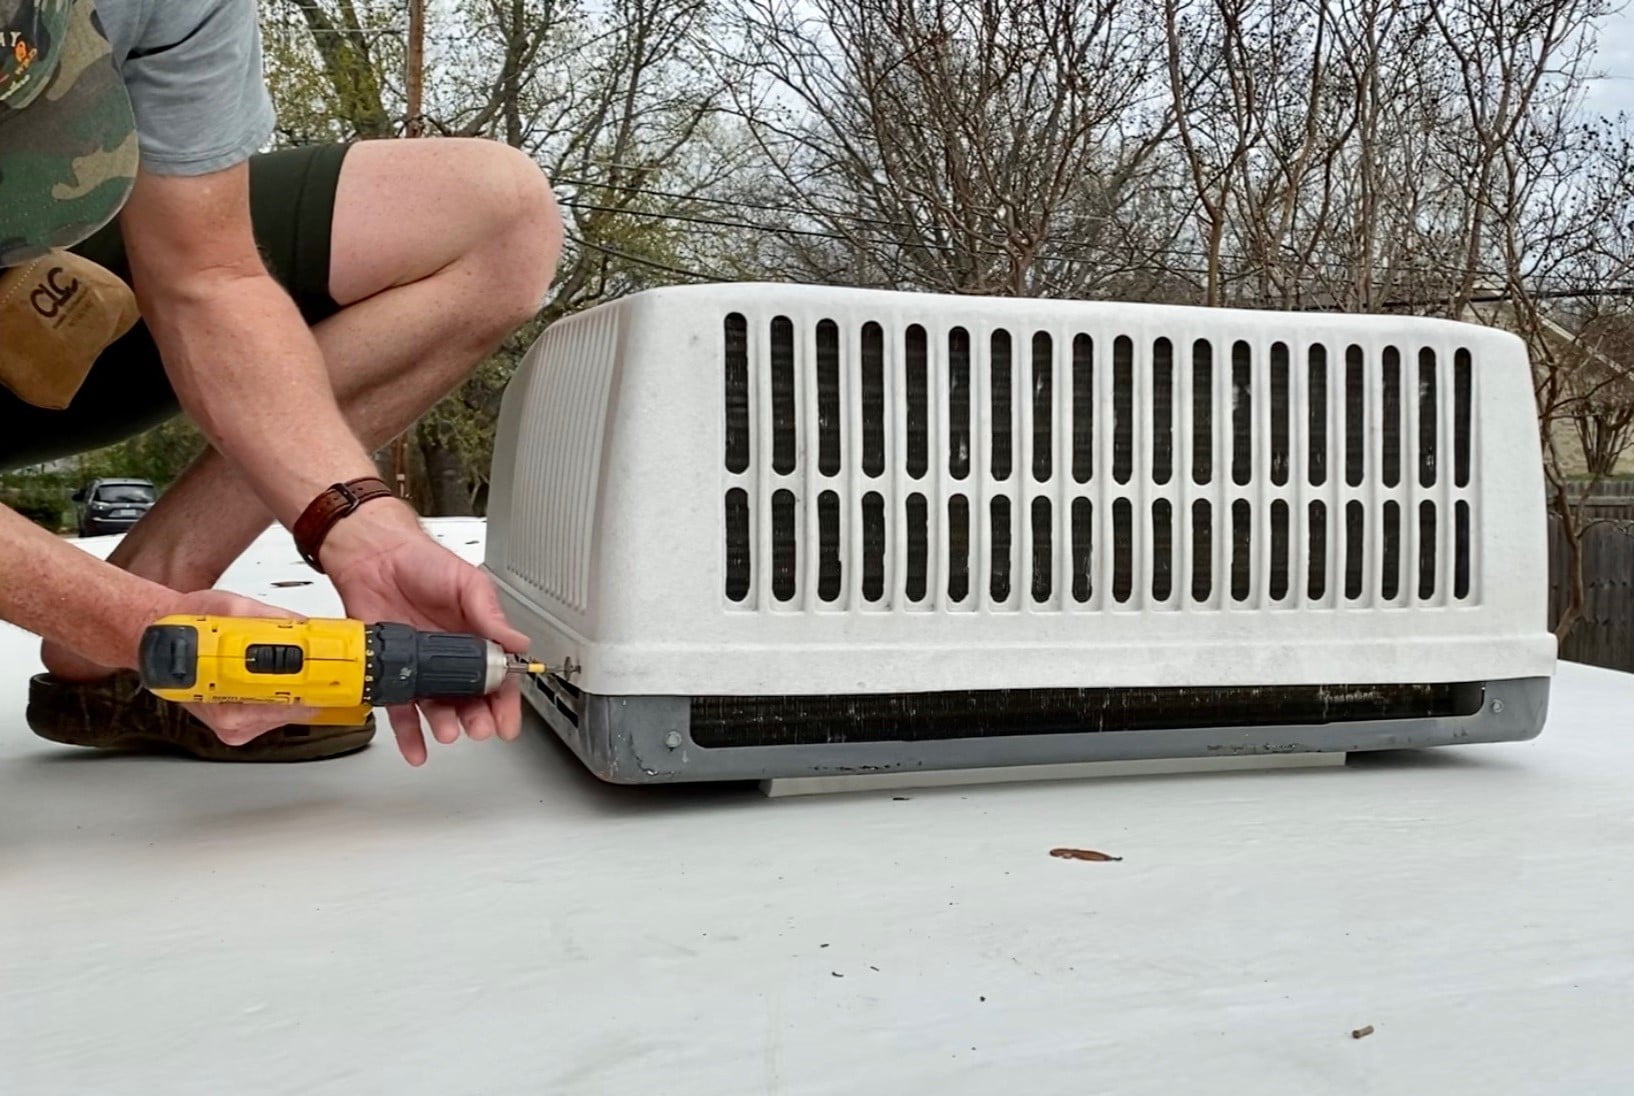
1. Examine the exterior: Start by inspecting the exterior of the air conditioner for any visible debris or obstructions. Look for leaves, twigs, or other large particles that may have accumulated around the unit. Remove these manually using gloves and a brush or your hands, ensuring to be careful and gentle.
2. Access the interior: Depending on the model of your RV air conditioner, there may be one or more access panels or grilles that can be removed to gain access to the interior components. Refer to your unit’s manual or consult a professional if you’re unsure about the specific access points.
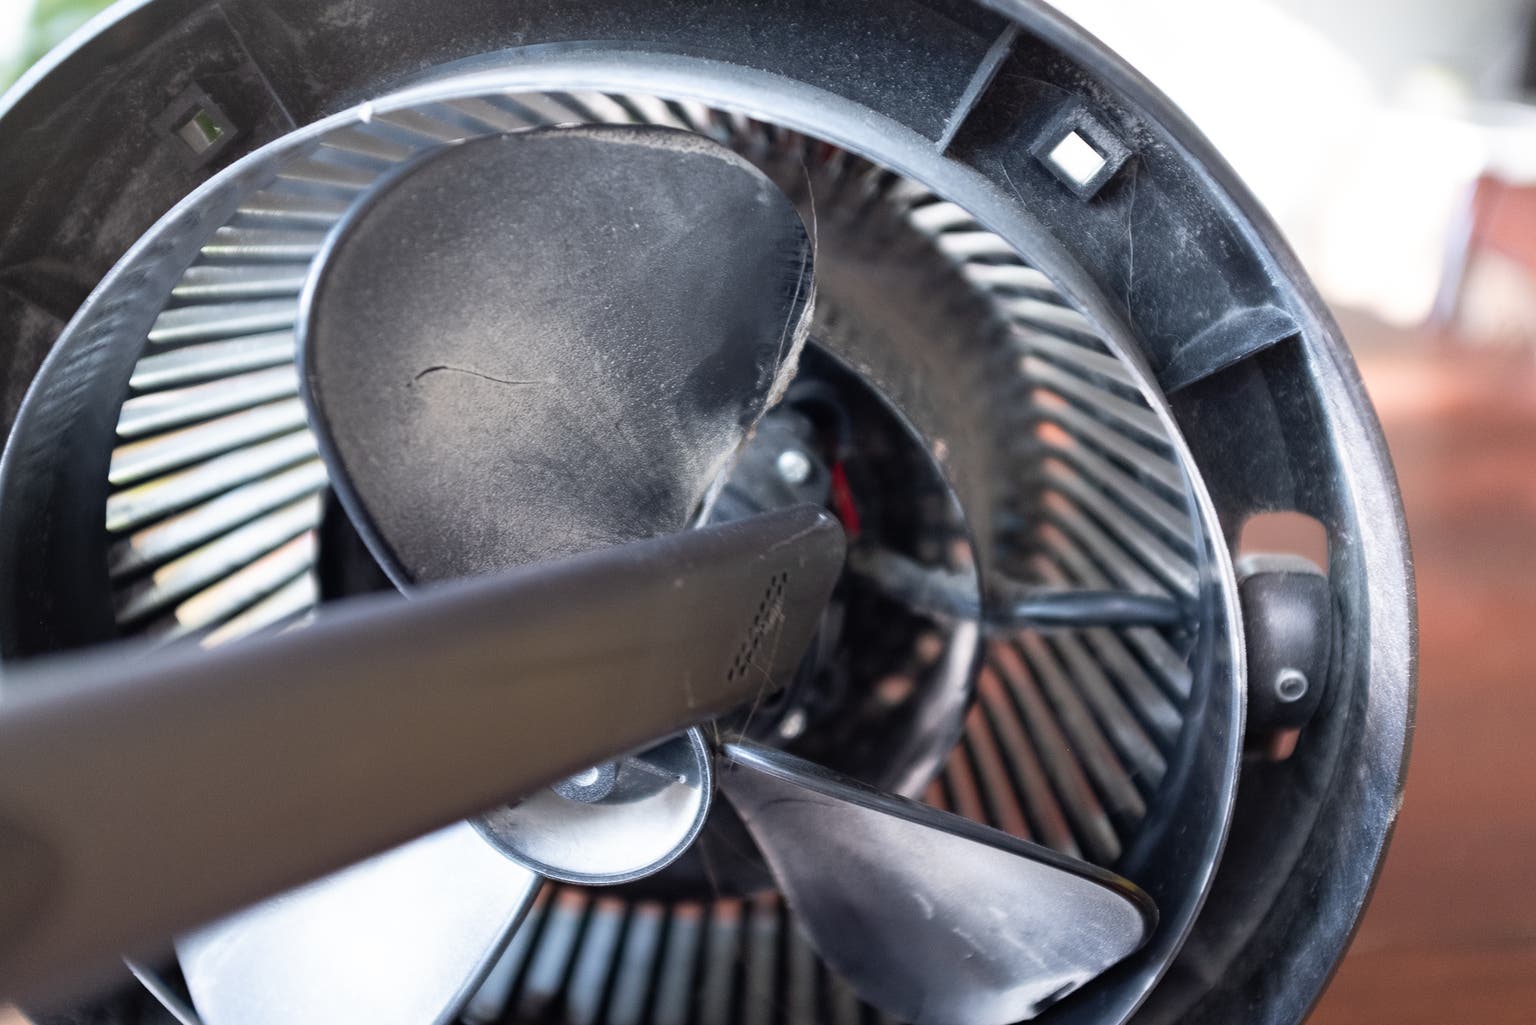
3. Use a vacuum cleaner: With the access panels removed, use a vacuum cleaner with a brush attachment to carefully clean the interior components of the air conditioner. Pay close attention to the fan blades, motor housing, and any other visible areas where debris may have accumulated. Be thorough, but gentle, to avoid damaging any delicate components.
4. Inspect the fan blades: Check the condition of the fan blades for any visible dirt or debris. If necessary, use a soft brush or cloth to remove any stubborn buildup. It’s important to maintain clean fan blades to keep the air conditioner running smoothly and prevent vibrations or imbalanced airflow.
5. Clear the drain channels: Locate the drain channels or conduits that remove excess moisture from the air conditioner. Use a small brush or pipe cleaner to clear any blockages or clogs in the channels. This will ensure proper drainage and prevent water from accumulating within the unit.
6. Reassemble the air conditioner: Once you have thoroughly cleaned the interior components and cleared any debris, carefully reassemble the unit. Ensure that all access panels and grilles are securely in place before moving on to the next step.
By removing debris from your RV air conditioner, you can improve its airflow, enhance cooling efficiency, and prevent potential damage. Regular maintenance and cleaning will help ensure that your air conditioner operates optimally and provides you with a comfortable and refreshing environment during your travels. Now let’s move on to the next step: cleaning the condenser coils.
Regularly clean or replace the air filters in your RV air conditioner to maintain optimal performance and prevent dust and debris buildup.
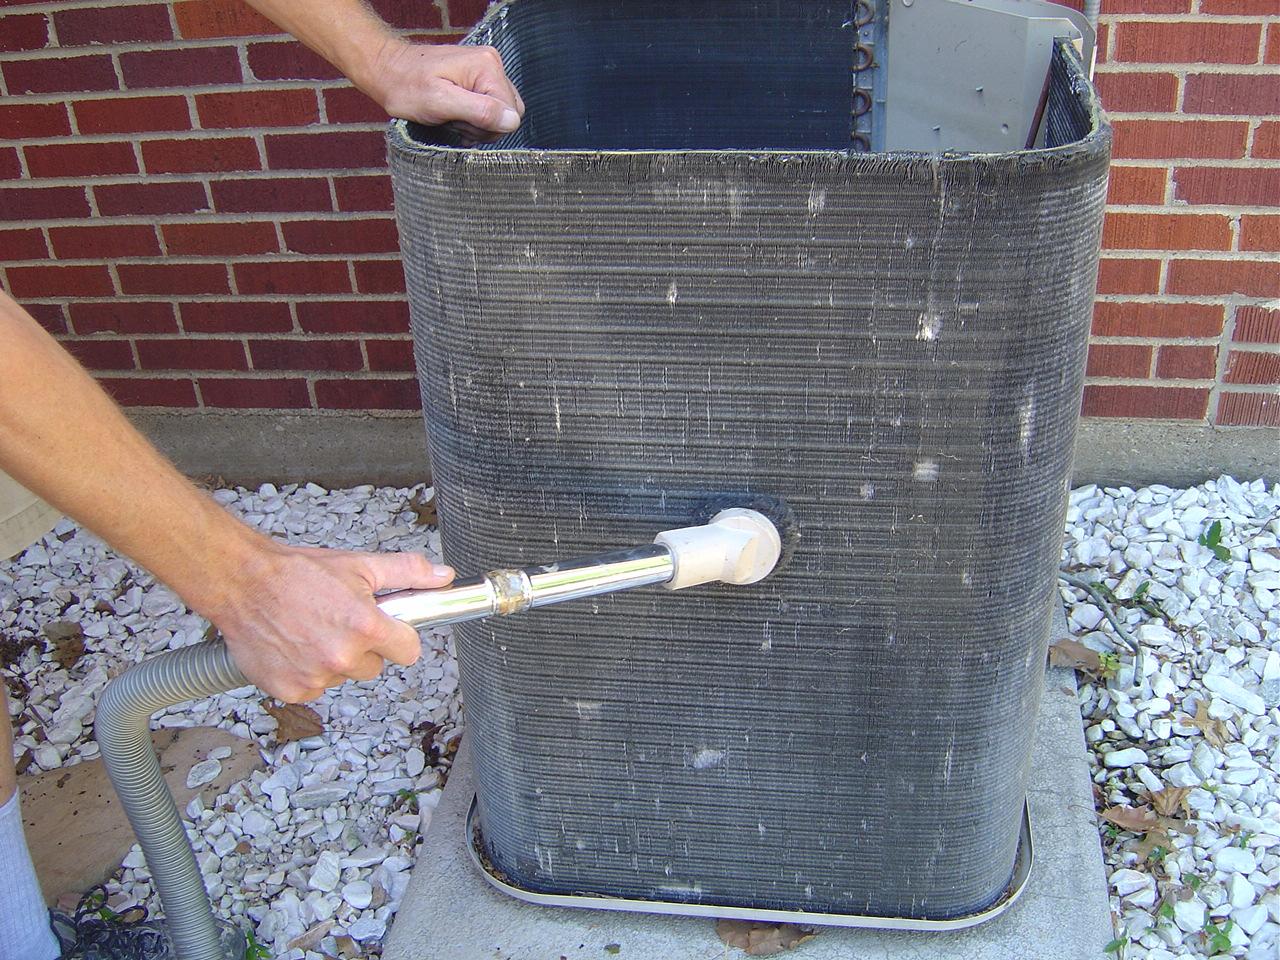
Cleaning the Condenser Coils
The condenser coils in your RV air conditioner play a vital role in removing heat from the air before it is circulated back into your vehicle. Over time, these coils can become dirty and coated with dust, debris, and other buildup, reducing their efficiency and overall cooling performance. Cleaning the condenser coils is an essential maintenance task that can help ensure optimal airflow and cooling efficiency. Here’s how you can effectively clean the condenser coils of your RV air conditioner:
1. Safety first: Before you begin, ensure that the power to your RV air conditioner is turned off, and the unit is safely disconnected from the power source, as discussed in the previous steps. This step is crucial to prevent any accidents or electrical shock during the cleaning process.
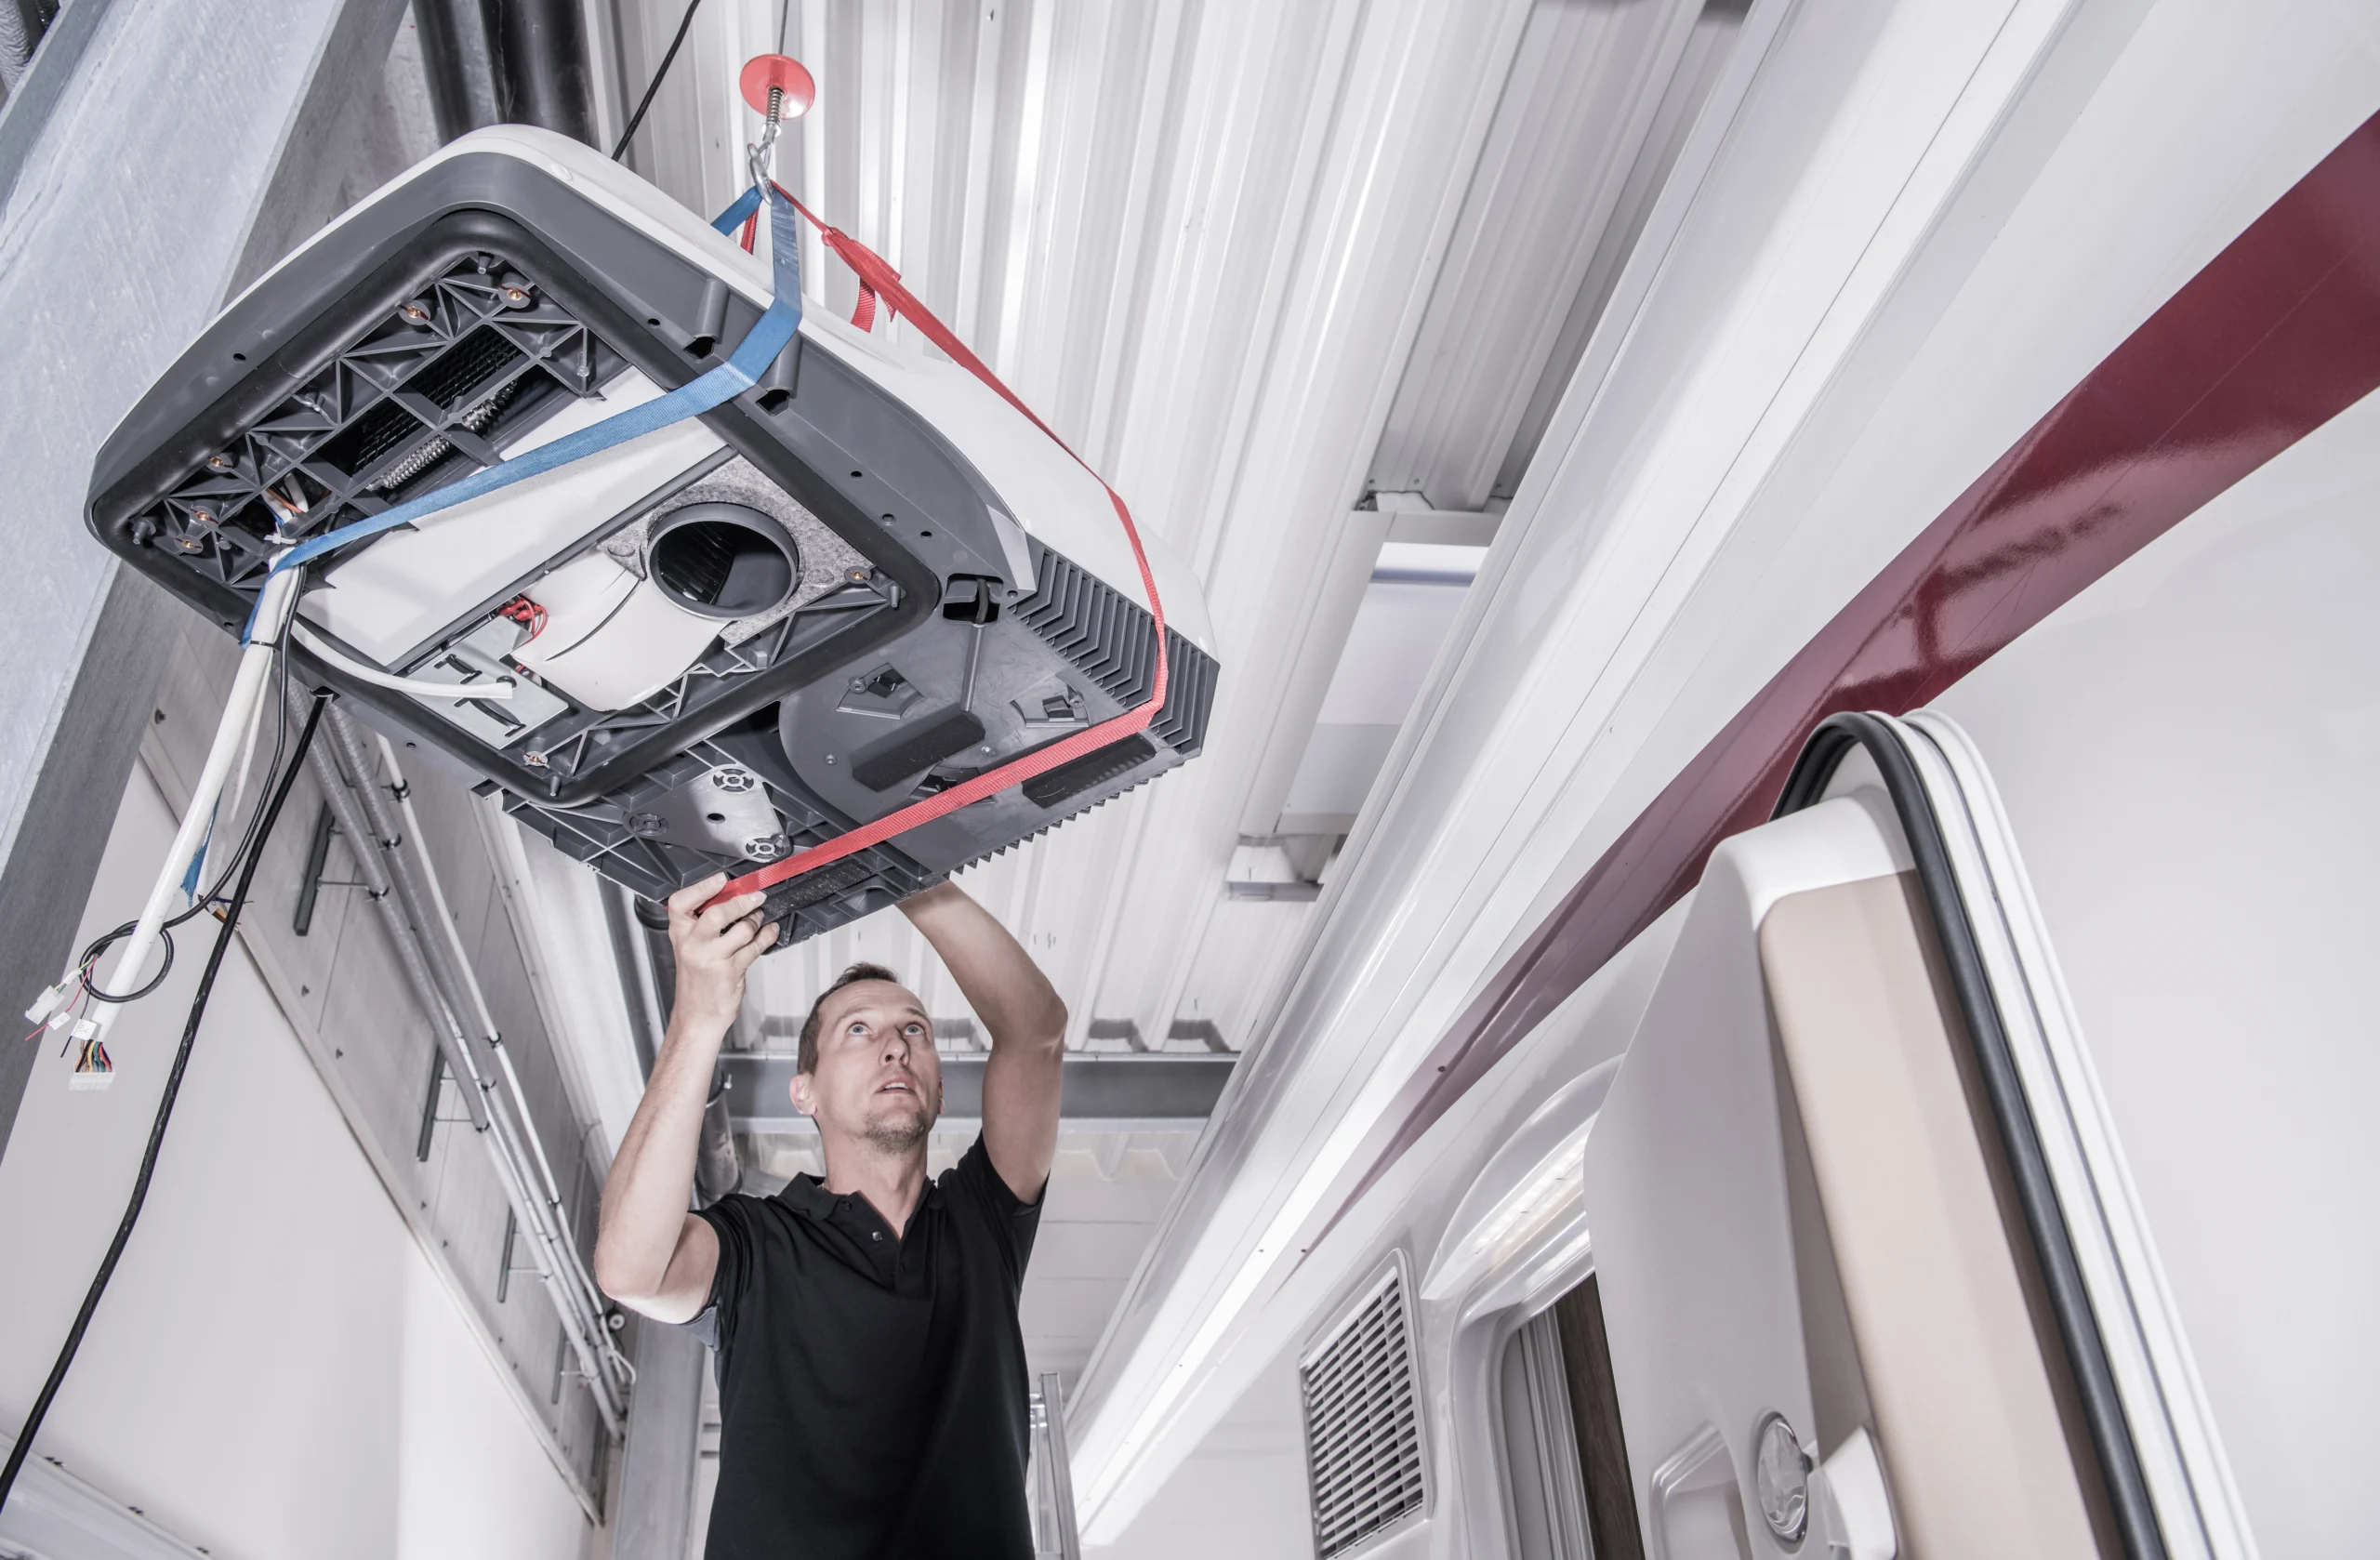
2. Locate the condenser coils: The condenser coils are usually located on the exterior part of the air conditioner, at the back or sides. Depending on the model, you may need to remove an access panel or grille to gain access to the coils. Consult your RV air conditioner’s manual or seek professional guidance for specific instructions.
3. Inspect the coils: Once you have accessed the condenser coils, visually inspect them for any signs of dirt, dust, or debris buildup. You may notice a layer of dirt or even tiny bits of leaves or insects clinging to the coils. If the buildup is excessive, it’s time to clean the coils.
4. Use a soft brush or cloth: Gently brush or wipe away the loose dirt and debris from the condenser coils using a soft-bristle brush or a cloth. Be careful not to bend or damage the fragile fins. It’s important to remove as much loose debris as possible before proceeding to the next step.
5. Apply a coil cleaner (if needed): If the condenser coils are heavily soiled or coated with stubborn dirt, you may need to use a specialized coil cleaner. Follow the manufacturer’s instructions and guidelines for the specific product you are using. Apply the cleaner to the coils, ensuring to cover all surfaces thoroughly.
6. Rinse the coils: After applying the coil cleaner, rinse off the coils with a gentle stream of water from a hose. Start from the top and work your way down, ensuring that the water flows in the opposite direction of the airflow. This will help flush out any remaining dirt or cleaning residue.
7. Allow the coils to dry: Once the coils are rinsed, allow them to air dry completely before reassembling the unit. Avoid applying any direct heat sources to speed up the drying process, as this can damage the coils.
Cleaning the condenser coils of your RV air conditioner is essential to maintain optimal cooling efficiency and airflow. By following these steps and performing this maintenance task regularly, you can ensure that your air conditioner operates at its best, providing you with cool and comfortable air during your travels. Now, let’s move on to the next step: cleaning the evaporator coils.
Cleaning the Evaporator Coils
The evaporator coils in your RV air conditioner are responsible for removing heat and humidity from the air inside your vehicle. Over time, these coils can become dirty and clogged with dust, debris, and other contaminants, which can hamper their efficiency and cooling performance. Regular cleaning of the evaporator coils is essential to maintain optimal airflow and ensure that your air conditioner operates at its best. Here’s how you can effectively clean the evaporator coils of your RV air conditioner:
1. Ensure safety precautions: Before you begin, make sure that the power to your RV air conditioner is turned off, and the unit is safely disconnected from the power source. This step is crucial to prevent accidents or electrical shocks during the cleaning process.
2. Locate the evaporator coils: The evaporator coils are usually located on the interior part of the air conditioner, behind an access panel or grille. Refer to your RV air conditioner’s manual or seek professional guidance for specific instructions on how to access the coils.
3. Remove any access panels or grilles: If there are any access panels or grilles covering the evaporator coils, carefully remove them to gain access. Take note of any screws or clips that may be securing them in place.
4. Inspect the coils: Once you have access to the evaporator coils, visually inspect them for any signs of dirt, dust, or debris buildup. You may notice a layer of dirt or even mold growth on the coils. If the coils are heavily soiled, cleaning is necessary.
5. Spray a coil cleaner (if needed): If the coils are particularly dirty, you may need to use a specialized coil cleaner. Follow the manufacturer’s instructions and guidelines for the specific product you are using. Spray the cleaner onto the coils, ensuring to cover all surfaces thoroughly.
6. Allow the cleaner to penetrate: After applying the coil cleaner, allow it to penetrate and dissolve any built-up dirt or grime. Refer to the manufacturer’s recommended dwell time for the cleaner.
7. Brush away the debris: Using a soft-bristle brush, gently scrub the evaporator coils to dislodge and remove any remaining dirt or debris. Be careful not to apply too much pressure to avoid damaging the coils. Pay attention to the fins and hard-to-reach areas.
8. Rinse the coils: After brushing, rinse the coils thoroughly with a gentle stream of water from a hose. Start from the top and work your way down, ensuring that the water flows in the opposite direction of the airflow. This will help flush out any loosened dirt or residue.
9. Allow the coils to dry: Once the coils are rinsed, allow them to air dry completely before reassembling the unit. Avoid using any direct heat sources as they can damage the coils.
Regularly cleaning the evaporator coils of your RV air conditioner is essential to maintain its cooling efficiency and prevent the buildup of mold or bacteria. By following these steps and performing this maintenance task on a routine basis, you can ensure that your air conditioner operates optimally and provides you with cool and refreshing air during your travels. Now, let’s move on to the next step: cleaning the drain pan.
Cleaning the Drain Pan
The drain pan in your RV air conditioner collects condensate and moisture that is generated during the cooling process. Over time, this pan can become dirty and accumulate debris, mold, and bacteria. Cleaning the drain pan is an essential maintenance step to prevent water leakage, foul odors, and potential health hazards. Here’s how you can effectively clean the drain pan of your RV air conditioner:
1. Safety precautions: Before you begin, ensure that the power to your RV air conditioner is turned off and the unit is safely disconnected from the power source. This step is crucial to prevent accidents or electrical shocks during the cleaning process.
2. Locate the drain pan: The drain pan is typically located beneath the evaporator coils, inside the unit. Refer to your RV air conditioner’s manual or seek professional guidance for specific instructions on how to access the drain pan.
3. Remove the access panel or grille: If there is an access panel or grille covering the drain pan, carefully remove it to gain access. Take note of any screws or clips that may be securing it in place.
4. Inspect the drain pan: Once you have access to the drain pan, visually inspect it for any signs of dirt, debris, or mold growth. Pay attention to any stagnant water or foul odor, as these could indicate a need for cleaning.
5. Remove standing water: If there is any standing water in the drain pan, carefully remove it using a sponge, towel, or wet/dry vacuum. Ensure that you dispose of the water properly, following local regulations.
6. Clean the drain pan: Mix a solution of mild detergent or a specialized air conditioner cleaning agent with warm water. Use a soft brush or cloth to scrub the surfaces of the drain pan, ensuring that you remove any dirt or residue. Pay attention to the corners and crevices where mold or bacteria may accumulate.
7. Rinse the drain pan: Once the drain pan is thoroughly cleaned, rinse it with clean water to remove any remaining soap or cleaning solution. Ensure that you remove all traces of the cleaning agent.
8. Disinfect the drain pan (if necessary): If you notice mold or bacterial growth in the drain pan, it may be necessary to disinfect it. You can use a mixture of one part bleach to ten parts water. Apply this solution to the drain pan and let it sit for a few minutes before rinsing it off. Be sure to follow safety precautions and manufacturer’s guidelines when using bleach.
9. Dry the drain pan: After rinsing, use a clean, dry cloth or towel to absorb any excess moisture from the drain pan. Allow it to air dry completely before reassembling the unit.
Regularly cleaning and maintaining the drain pan of your RV air conditioner can help prevent water leakage, foul odors, and the growth of mold or bacteria. By following these steps and performing this maintenance task on a routine basis, you can ensure that your air conditioner operates efficiently and provides you with clean and refreshing air during your travels. Now, let’s move on to the next step: reassembling the air conditioner.
Read more: How To Reset A Dometic RV Air Conditioner
Reassembling the Air Conditioner
Now that you have completed the cleaning process for your RV air conditioner, it’s time to reassemble the unit. Proper reassembly is crucial to ensure its optimal functioning and to prevent any potential damage. Here’s how you can effectively reassemble your RV air conditioner:
1. Ensure all components are clean and dry: Before proceeding with reassembly, double-check that all the cleaned components, including the air filter, condenser coils, evaporator coils, and drain pan, are completely clean and dry. This will prevent any moisture or debris from interfering with the proper operation of the air conditioner.
2. Align the components: Begin by aligning the cleaned components properly. For example, place the air filter back into its designated slot, ensuring that it is oriented correctly according to the manufacturer’s instructions. Align the condenser coils and evaporator coils in their respective positions. Take care not to force any components into place, as this can lead to damage. Consult your RV air conditioner’s manual if you need guidance on the proper alignment of specific components.
3. Replace access panels or grilles: Once the components are aligned, securely replace any access panels or grilles that were removed during the cleaning process. Use the appropriate screws or clips to fasten them in place, ensuring a snug fit.
4. Check for any loose connections: Before fully finishing the reassembly, double-check all the connections, such as electrical plugs or wires, to ensure they are secure and properly reconnected. Take care not to overtighten any screws or connections to avoid damaging the components.
5. Inspect for any remaining debris: After reassembling the air conditioner, inspect the unit one final time for any remaining debris or loose materials. Use a soft cloth or brush to remove any visible dirt or particles.
6. Perform a functional test: Once you have completed the reassembly, it’s important to perform a functional test of the air conditioner. Reconnect the power source of your RV air conditioner and turn it on. Listen for any unusual sounds, check for proper airflow, and monitor the cooling performance. If you notice any issues or abnormalities, consult a professional for further assistance.
By carefully reassembling the components of your RV air conditioner, you ensure that all parts are securely in place and properly aligned. This will contribute to the overall efficiency and reliable functioning of the unit. Now that you have successfully reassembled your air conditioner, let’s move on to the final step: testing the air conditioner.
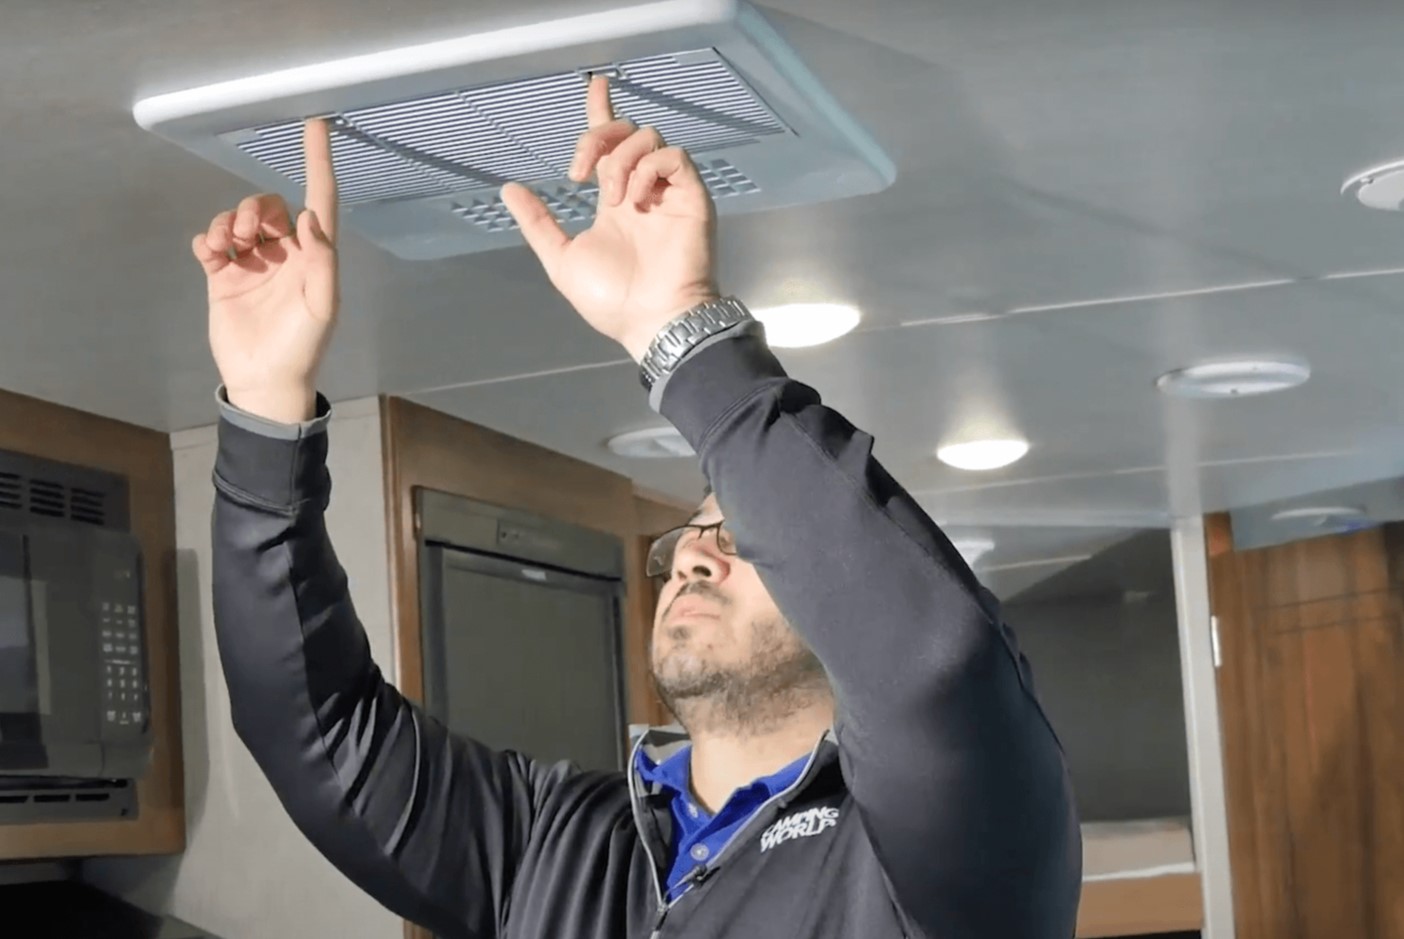
Testing the Air Conditioner
After cleaning and reassembling your RV air conditioner, it’s essential to thoroughly test its functionality before hitting the road. Testing the air conditioner will help ensure that it is operating optimally and providing the desired cooling performance. Here’s how you can effectively test your RV air conditioner:
1. Power on the air conditioner: Reconnect the power source to your RV air conditioner and turn it on. Allow the unit to run for a few minutes to let it stabilize.
2. Check for proper airflow: Feel the airflow coming from the air vents inside your RV. Ensure that there is a steady and sufficient amount of cool air blowing out. If you notice weak airflow, it could indicate an issue that requires further investigation or a professional inspection.
3. Monitor the cooling performance: Set the desired temperature on your air conditioner and monitor how effectively it cools down the interior space of your RV. Keep an eye on the temperature gauge and ensure that the air conditioner is able to maintain a comfortable temperature.
4. Listen for unusual sounds: While the air conditioner is running, listen for any unusual or unfamiliar noises. A well-functioning air conditioner should operate quietly, with minimal rattling or humming. If you notice any strange sounds, it may be a sign of a problem that requires attention.
5. Verify proper drainage: Check the drain pan or condensate drain outlet to ensure that water is draining properly and not pooling or leaking inside your RV. If you observe any issues with drainage, it’s important to address them to prevent water damage.
6. Conduct periodic checks: After the initial test, it’s a good practice to periodically check the air conditioner’s performance throughout your travels. Monitor its cooling efficiency, airflow, and any signs of abnormal behavior. Address any issues promptly to prevent further damage or inconvenience.
Regularly testing your RV air conditioner helps ensure that it is functioning optimally, providing sufficient cooling, and maintaining a comfortable environment inside your vehicle. If you encounter any significant concerns or malfunctions during the testing process, it’s recommended to seek professional assistance for a thorough inspection and repair.
By following these steps and performing routine tests, you can help prolong the lifespan of your air conditioner and ensure that it remains in top-notch condition for all your future adventures. Now that you have successfully tested your air conditioner, you can rest assured knowing that it’s ready to keep you cool and comfortable on your journeys.
Conclusion
Properly cleaning and maintaining your RV air conditioner is essential for optimal performance and a comfortable living environment during your travels. By following the step-by-step guide outlined in this article, you can ensure that your air conditioner remains in top-notch condition and provides efficient cooling for your RV.
Starting with the preparation and safety measures, shutting off power and disconnecting the unit ensures a safe cleaning process. Removing the air filter and cleaning it, or replacing it if necessary, helps maintain optimal airflow and clean air circulation. Clearing debris from the air conditioner, including the condenser coils and evaporator coils, ensures efficient cooling and prevents potential damage.
Cleaning the drain pan helps prevent water leakage, foul odors, and the growth of mold or bacteria. Finally, reassembling the air conditioner properly and conducting a comprehensive test ensures that all components are in their correct positions and operating effectively.
Regular maintenance and cleaning of your RV air conditioner will not only enhance its performance but also extend its lifespan. It will help prevent breakdowns, save energy, and provide you with a comfortable and enjoyable travel experience.
Remember to consult your RV air conditioner’s manual for specific instructions and recommendations regarding cleaning and maintenance. If you encounter any significant issues or concerns during the cleaning process or testing, it’s advisable to seek professional assistance.
By investing time and effort into cleaning and maintaining your RV air conditioner, you are ensuring that it operates efficiently, keeping you cool and comfortable throughout your journeys. So, take care of your air conditioner, and it will take care of you for many more trips to come.
Frequently Asked Questions about How To Clean An RV Air Conditioner
Was this page helpful?
At Storables.com, we guarantee accurate and reliable information. Our content, validated by Expert Board Contributors, is crafted following stringent Editorial Policies. We're committed to providing you with well-researched, expert-backed insights for all your informational needs.