Home>Home Maintenance>How To Cover An Air Conditioner Outside
Home Maintenance
How To Cover An Air Conditioner Outside
Modified: August 30, 2024
Learn how to effectively cover and protect your outdoor air conditioner unit with our helpful home maintenance tips. Safeguard your AC from the elements and extend its lifespan.
(Many of the links in this article redirect to a specific reviewed product. Your purchase of these products through affiliate links helps to generate commission for Storables.com, at no extra cost. Learn more)
Introduction
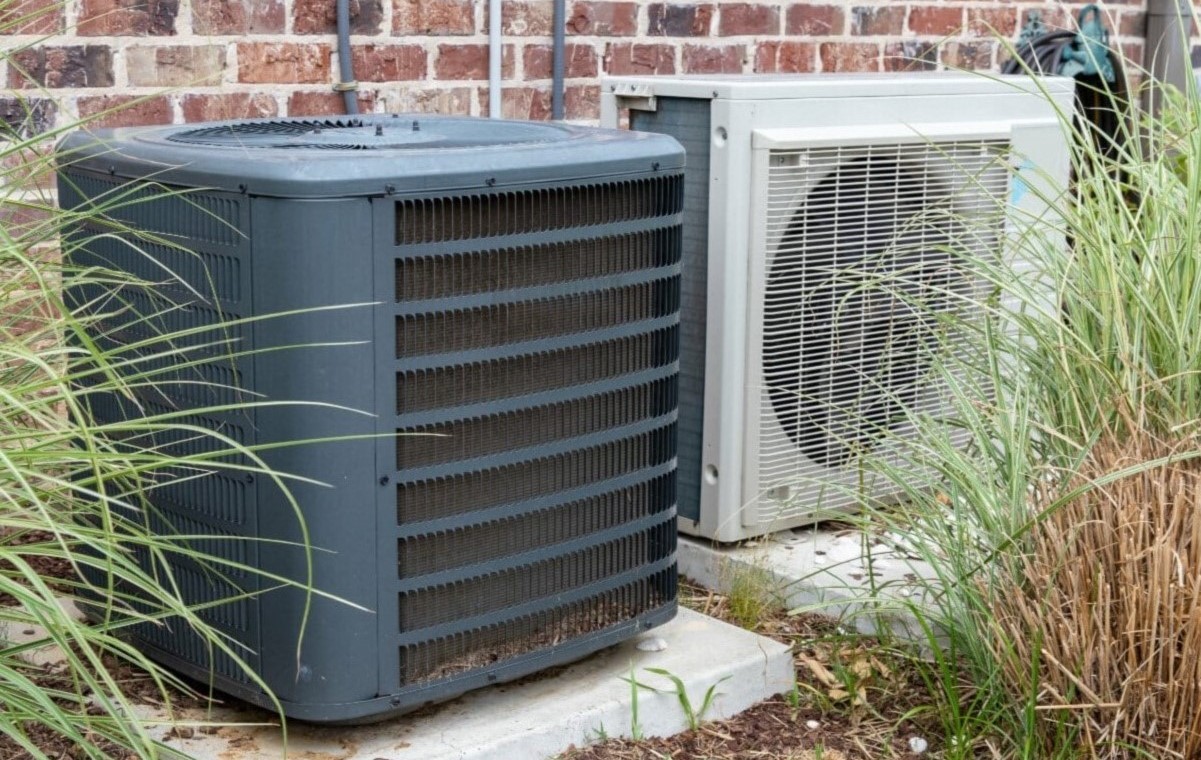
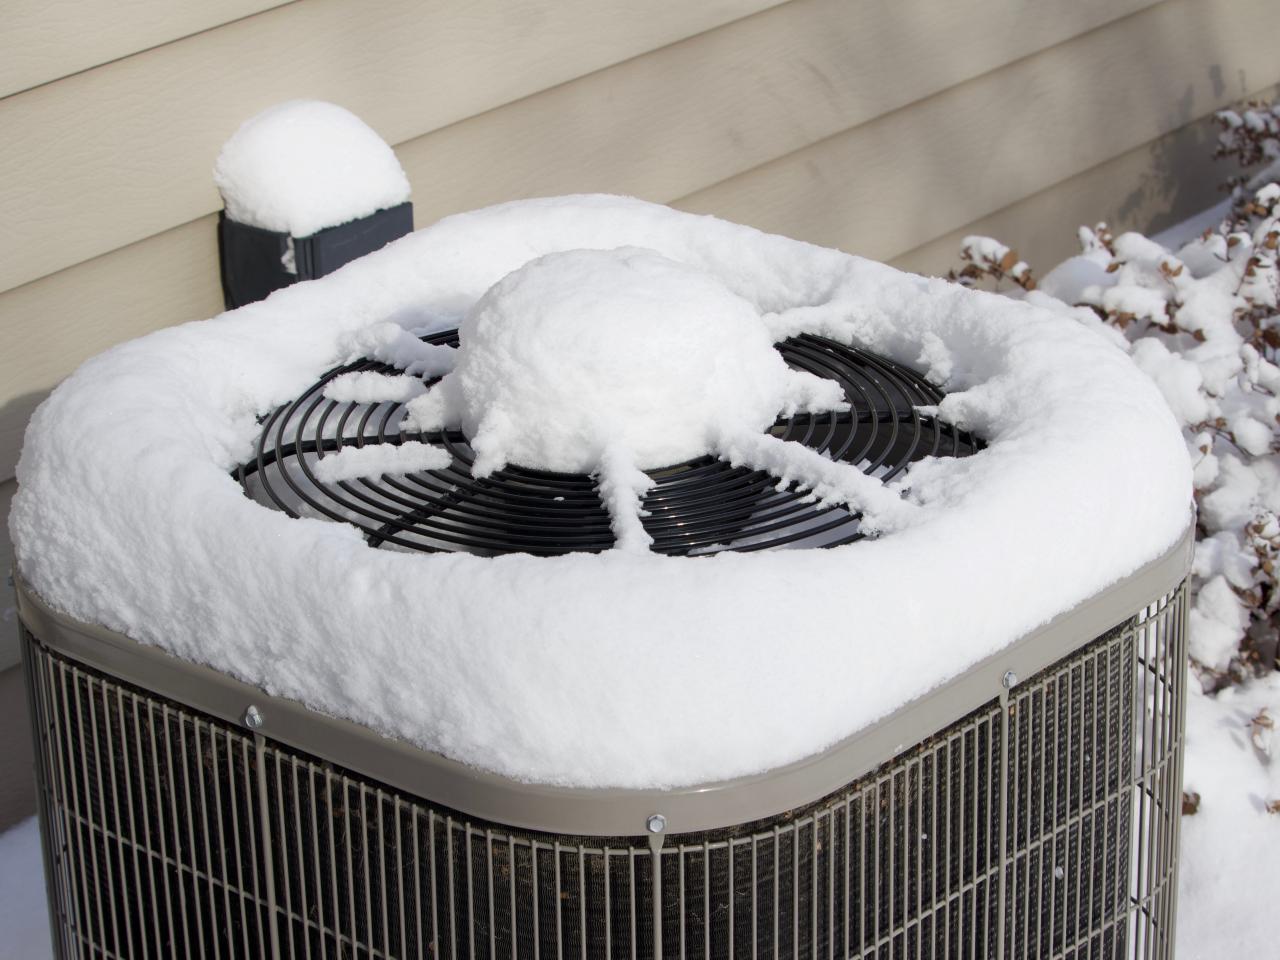
Welcome to our comprehensive guide on how to cover an air conditioner outside. As the temperature rises and summer approaches, it’s essential to take care of your air conditioning unit to ensure its optimal performance and durability. One of the best ways to protect your air conditioner from the elements and prolong its lifespan is by covering it when not in use.
Although air conditioners are built to withstand outdoor conditions, they can still be affected by rain, snow, dirt, debris, and harsh UV rays. By investing a little time and effort into covering your air conditioner, you can prevent damage, minimize the need for repairs, and improve its overall efficiency.
In this guide, we will outline step-by-step instructions to help you cover your air conditioner properly. From measuring the dimensions and purchasing the right cover to cleaning the unit and securing the cover in place, we’ll cover everything you need to know to protect your air conditioner and keep it running smoothly.
So, without further ado, let’s dive into the first step: measuring the dimensions of your air conditioner.
Key Takeaways:
- Protect your air conditioner by measuring its dimensions and purchasing a suitable cover made of durable, weather-resistant material. Properly securing the cover is crucial to safeguard it from harsh weather conditions.
- Regular maintenance, including periodic cover removal, inspection, and professional servicing, is essential to ensure optimal performance and longevity of your air conditioner. Keep the area around the unit clean and free of debris to maintain efficiency.
Step 1: Measure the Dimensions of the Air Conditioner
The first step in covering your air conditioner is to accurately measure its dimensions. This will ensure that you purchase a cover that fits properly and provides adequate protection.
Here’s how to measure the dimensions of your air conditioner:
- Start by turning off the air conditioner and removing any obstacles around it.
- Using a tape measure, measure the height, width, and depth of the air conditioner unit. Be sure to measure the entire unit, including any protrusions such as pipes or vents.
- Record the measurements in inches or centimeters. It’s important to be precise to ensure a snug fit for the cover.
Once you have the dimensions, you can proceed to the next step of purchasing a suitable cover.
Keep in mind that air conditioners come in various sizes, so it’s crucial to measure your specific unit. Avoid assuming that all air conditioners have the same dimensions, as this can lead to purchasing the wrong size cover.
By measuring your air conditioner accurately, you’ll be able to find a cover that fits snugly, providing optimal protection against the elements. Now that you have the measurements, let’s move on to step 2: purchasing a suitable cover.
Step 2: Purchase a Suitable Cover
Now that you have the measurements of your air conditioner, it’s time to choose a cover that will provide the best protection and fit properly.
Here are some factors to consider when purchasing a suitable cover:
- Material: Look for covers made from durable and weather-resistant materials such as heavy-duty vinyl or polyester. These materials will withstand the elements and prevent moisture buildup.
- Size: Ensure that the cover you choose matches the dimensions of your air conditioner. Check the product specifications to confirm the size range it can accommodate.
- Design: Consider covers with ventilation flaps or mesh panels to allow for airflow and prevent condensation. This will help prevent the growth of mold and mildew.
- Security: Look for covers that come with straps, buckles, or drawstrings to secure the cover in place and prevent it from being blown away by strong winds.
When shopping for a cover, you can visit your local home improvement store or browse online retailers. Take the time to read customer reviews and product descriptions to ensure you’re selecting a high-quality cover that meets your specific needs.
Once you have purchased the cover, you can move on to the next step of preparing the area around the air conditioner.
Remember, investing in a suitable cover will provide an added layer of protection to your air conditioner, prolonging its lifespan and reducing the risk of damage. Now that you have a cover, let’s move on to step 3: preparing the area around the air conditioner.
Step 3: Prepare the Area Around the Air Conditioner
Before you install the cover, it’s important to prepare the area around your air conditioner to ensure a clean and well-maintained space. This step will help prevent debris from accumulating and obstructing the air conditioner’s performance.
Follow these steps to prepare the area around the air conditioner:
- Remove any loose debris: Clear away leaves, branches, and other debris that may have accumulated near the air conditioner. Use a rake or broom to sweep the area and ensure it is clean.
- Trim vegetation: Trim any nearby bushes, shrubs, or branches that are too close to the air conditioner. This will prevent them from obstructing the airflow or causing damage to the unit.
- Clean the surroundings: Use a hose or pressure washer to clean the area around the air conditioner. Remove any dirt, dust, or stains from the ground or nearby surfaces.
By preparing the area around your air conditioner, you’ll create a clean and optimal environment for the unit to function efficiently. It will also reduce the risk of debris entering the air conditioner and potentially causing damage.
Once you’ve finished preparing the area, you’re ready to move on to step 4: cleaning the air conditioner unit itself.
Remember, regular maintenance and keeping the area around the air conditioner clean are essential for optimal performance and longevity of the unit. Now that the area is ready, let’s move on to step 4: cleaning the air conditioner.
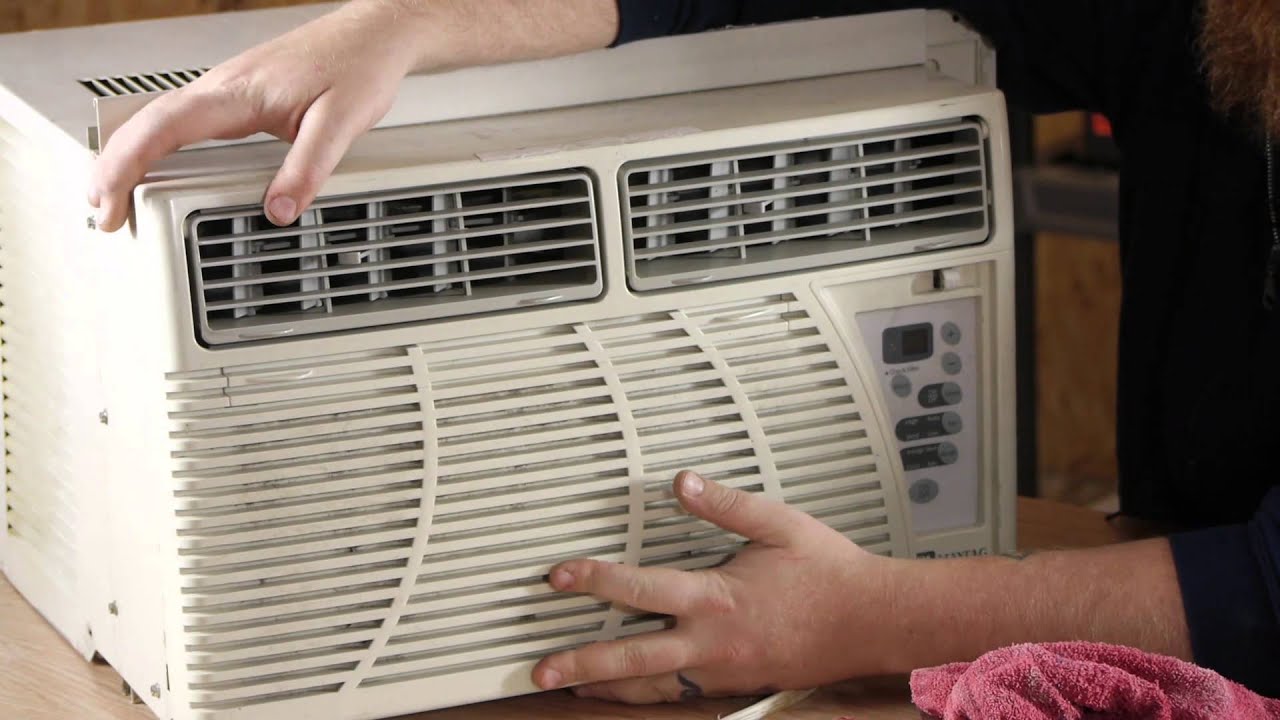
Step 4: Clean the Air Conditioner Unit
Keeping your air conditioner unit clean is crucial for its proper functioning and efficiency. Before installing the cover, it’s important to clean the unit to remove any dirt, dust, or debris that may have accumulated.
Follow these steps to clean the air conditioner unit:
- Turn off the air conditioner: Before cleaning, make sure the air conditioner is turned off and disconnected from the power source to avoid any accidents.
- Remove the outer cover: If your air conditioner has a removable outer cover, carefully remove it by following the manufacturer’s instructions.
- Use a brush or vacuum cleaner: Gently brush or vacuum the coils, fan blades, and fins of the air conditioner to remove any dirt or debris. Be careful not to bend the fins during this process.
- Clean the coils: If the coils are particularly dirty, you can use a coil cleaner or a mixture of water and mild detergent to clean them. Spray the cleaner onto the coils and let it sit for a few minutes before rinsing it off with water.
- Check the drain pan and condensate drain: Inspect the drain pan and condensate drain for any clogs or blockages. Clear them if necessary to ensure proper drainage of water from the unit.
- Reinstall the outer cover: Once the unit is clean and dry, carefully place the outer cover back onto the air conditioner and secure it properly.
Regular cleaning of your air conditioner unit will not only improve its efficiency and performance but also prevent the buildup of dirt and debris that could potentially cause damage or block the airflow. Once you have cleaned the unit, you can proceed to the next step: installing the cover over the air conditioner.
Remember, a clean air conditioner is a happy and efficient air conditioner. Now that the unit is clean, let’s move on to step 5: installing the cover.
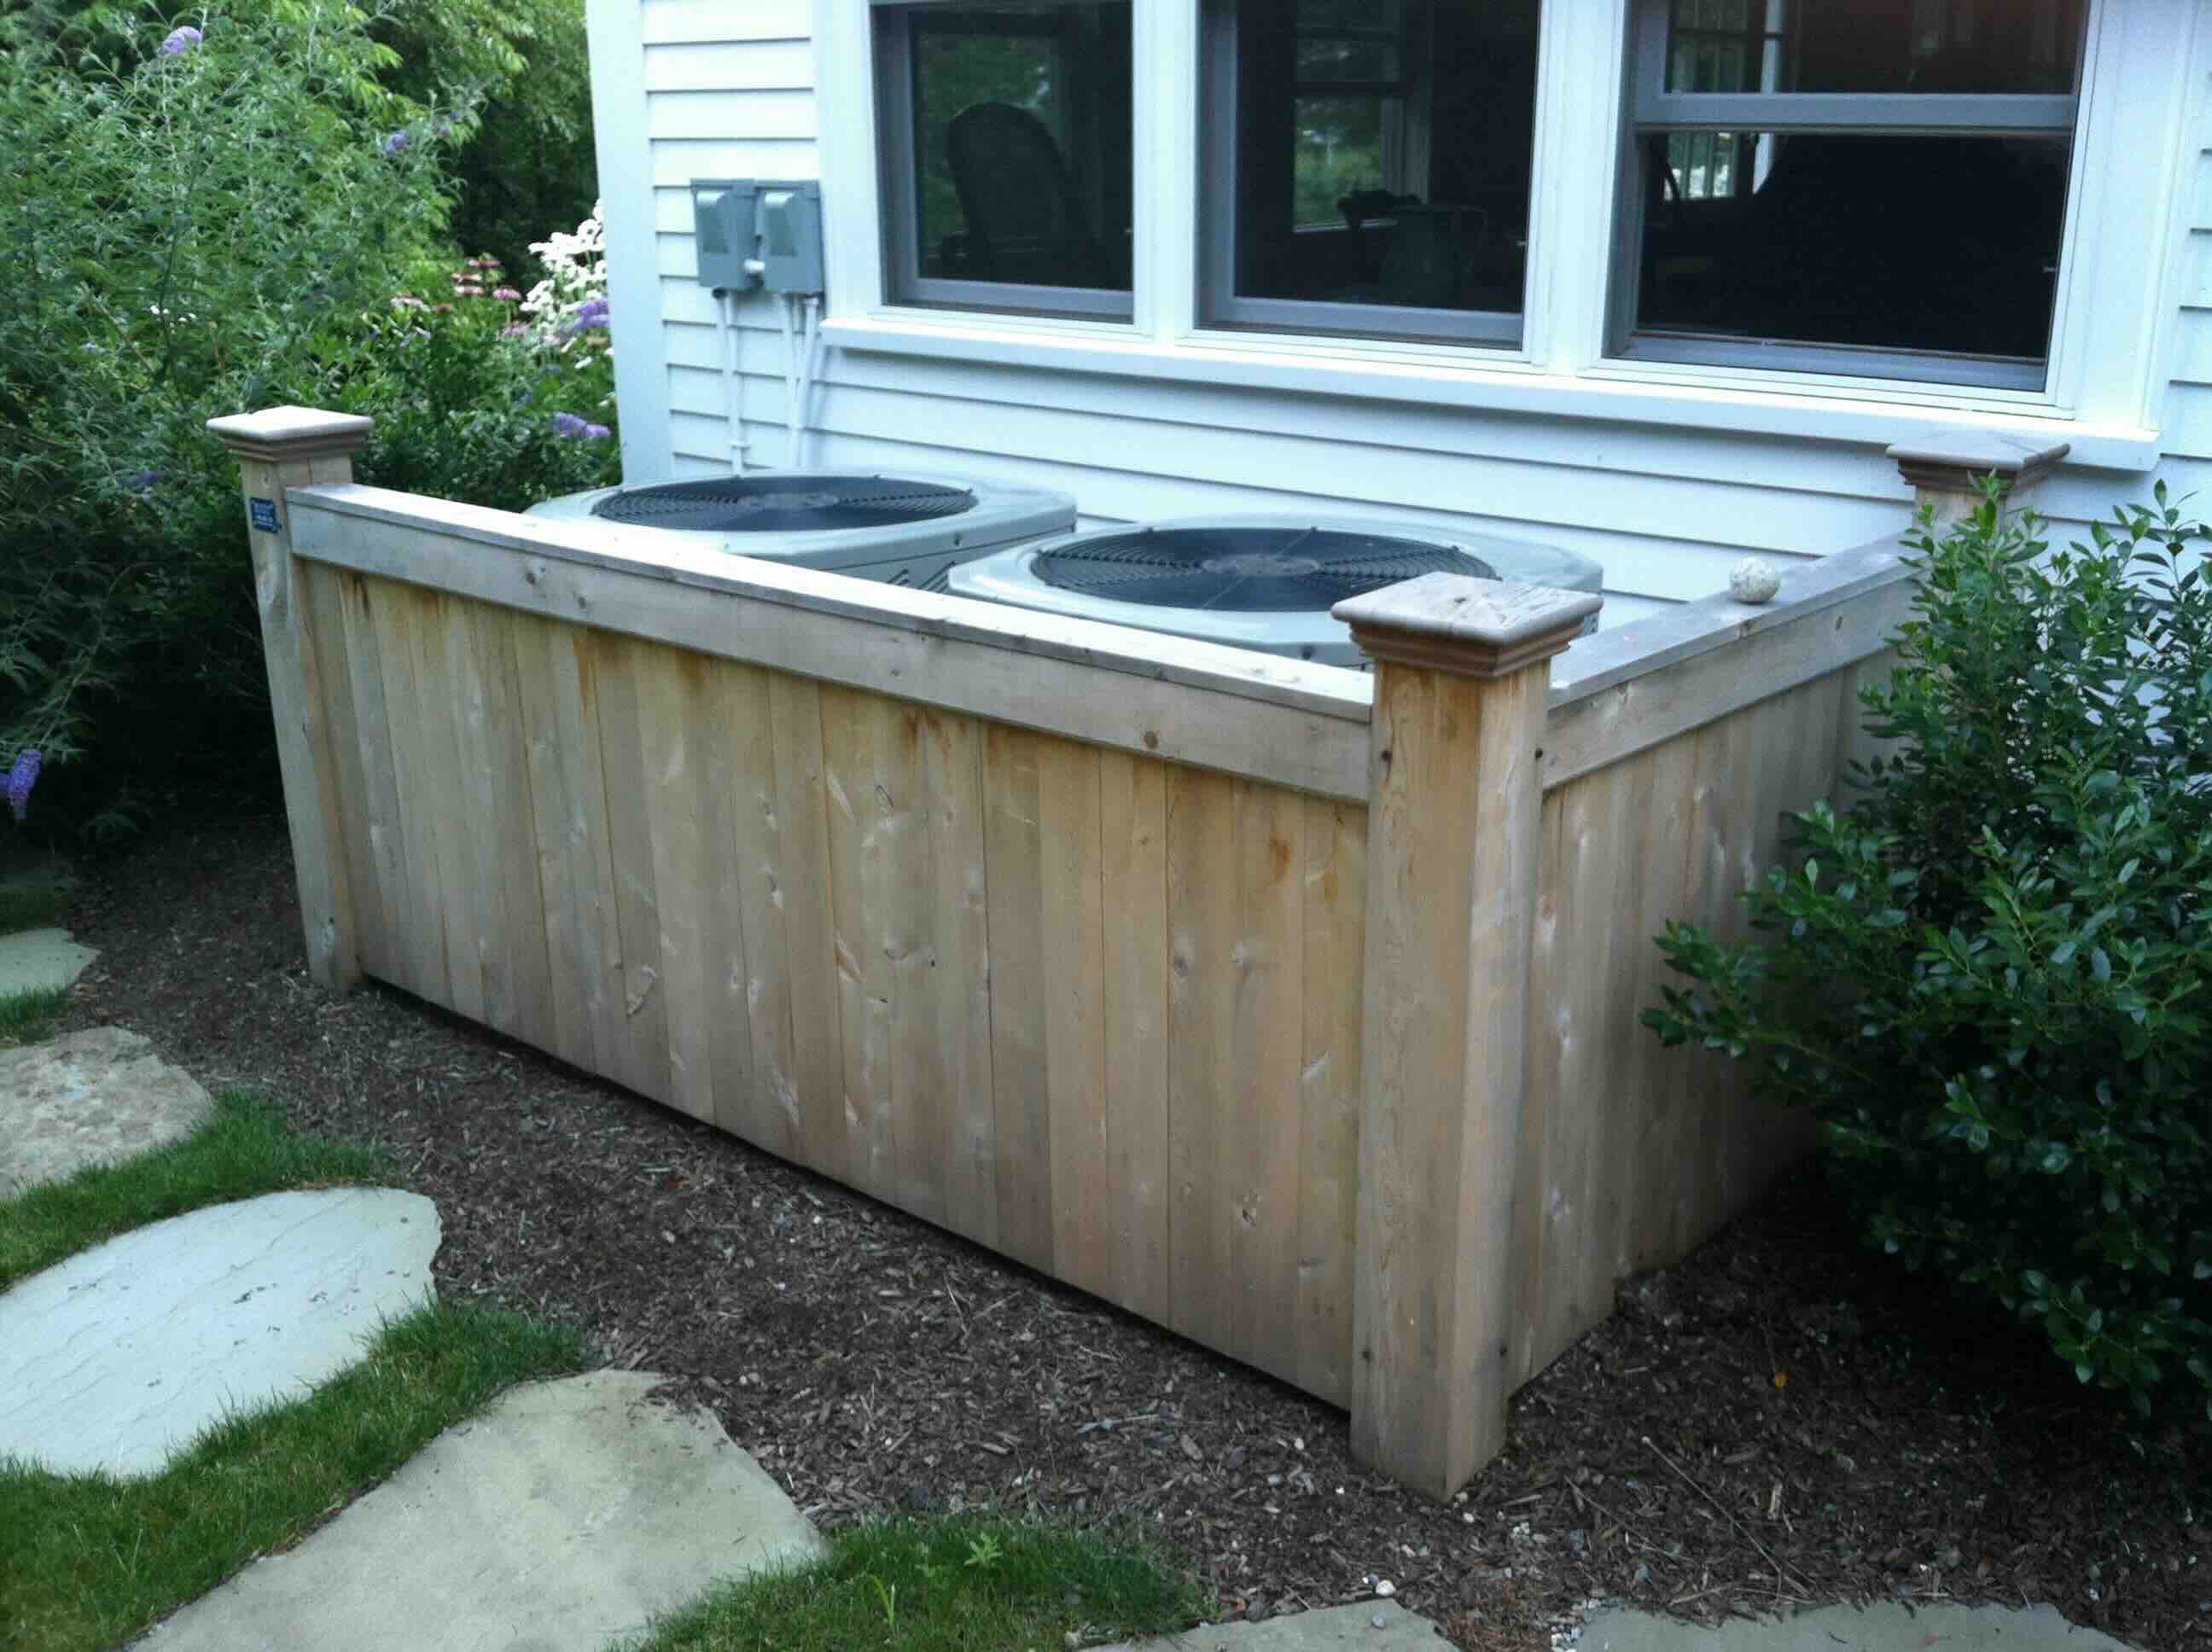
Consider using a weatherproof cover specifically designed for air conditioners to protect it from the elements. Make sure the cover allows for proper ventilation to prevent moisture buildup.
Step 5: Install the Cover over the Air Conditioner
Now that you have measured your air conditioner, purchased a suitable cover, prepared the area, and cleaned the unit, it’s time to install the cover over the air conditioner.
Follow these steps to properly install the cover:
- Start by placing the cover over the air conditioner unit, ensuring that it aligns with the dimensions of the unit.
- Secure the cover: Depending on the design of the cover, use the provided straps, buckles, or drawstrings to secure it in place. Make sure the cover fits snugly but not too tight, allowing for proper ventilation.
- Ensure proper airflow: Double-check that there are no obstructions such as leaves, branches, or debris blocking the airflow openings on the sides or top of the air conditioner unit.
- Confirm accessibility: If your air conditioner has any panels or controls that need access, ensure they are not covered by the cover or can be easily accessed when needed.
As you install the cover, make sure it is taut and properly secured to prevent it from being blown away by strong winds. A well-fitted cover will provide maximum protection against the elements, keeping your air conditioner in good condition.
Once the cover is properly installed, you can move on to the next step: securing the cover in place.
Remember, the cover acts as a protective shield for your air conditioner, safeguarding it from weather elements and debris. Now that the cover is in place, let’s proceed to step 6: securing the cover.
Step 6: Secure the Cover in Place
Securing the cover properly is essential to ensure that it stays in place and provides the maximum protection for your air conditioner. Strong winds or harsh weather conditions can cause the cover to shift or even come off if it is not securely fastened.
Here are some tips to help you secure the cover in place:
- Use the provided straps or buckles: Many air conditioner covers come with built-in straps or buckles that allow you to tighten them around the unit. Follow the instructions provided by the manufacturer to secure the cover using these attachments. Make sure the straps are tightly fastened without overly straining the cover.
- Add additional tie-downs: If your cover doesn’t have built-in straps or buckles, you can use bungee cords or tie-downs to keep the cover in place. Secure the cords or tie-downs to the base of the air conditioner or any other sturdy structure nearby, ensuring that they are tight enough to prevent the cover from being blown away.
- Check regularly: Periodically inspect the cover to ensure that it remains securely fastened. If you notice any loosening or shifting, make the necessary adjustments or add extra tie-downs as needed.
By securely fastening the cover, you can have peace of mind knowing that your air conditioner is well-protected throughout the year, even during strong winds or storms.
Now that you have secured the cover in place, let’s move on to step 7: regular maintenance and inspection of your air conditioner.
Remember, properly securing the cover is crucial to maintain the integrity of your air conditioner and extend its lifespan. Let’s proceed to the final step: regular maintenance and inspection.
Step 7: Regular Maintenance and Inspection
Regular maintenance and inspection of your air conditioner are key to ensure its optimal performance and longevity. By following a routine maintenance schedule, you can identify and address any issues early on, preventing costly repairs and keeping your unit running smoothly.
Here are some maintenance tips to keep in mind:
- Remove the cover periodically: While it’s important to cover your air conditioner when not in use, it’s also crucial to remove the cover periodically to inspect the unit and perform any necessary maintenance tasks.
- Inspect for damage or wear: Check for any signs of damage, wear, or corrosion on the air conditioner’s components, such as the coils, fins, or fan blades. If you notice any issues, consult a professional for repairs or replacement.
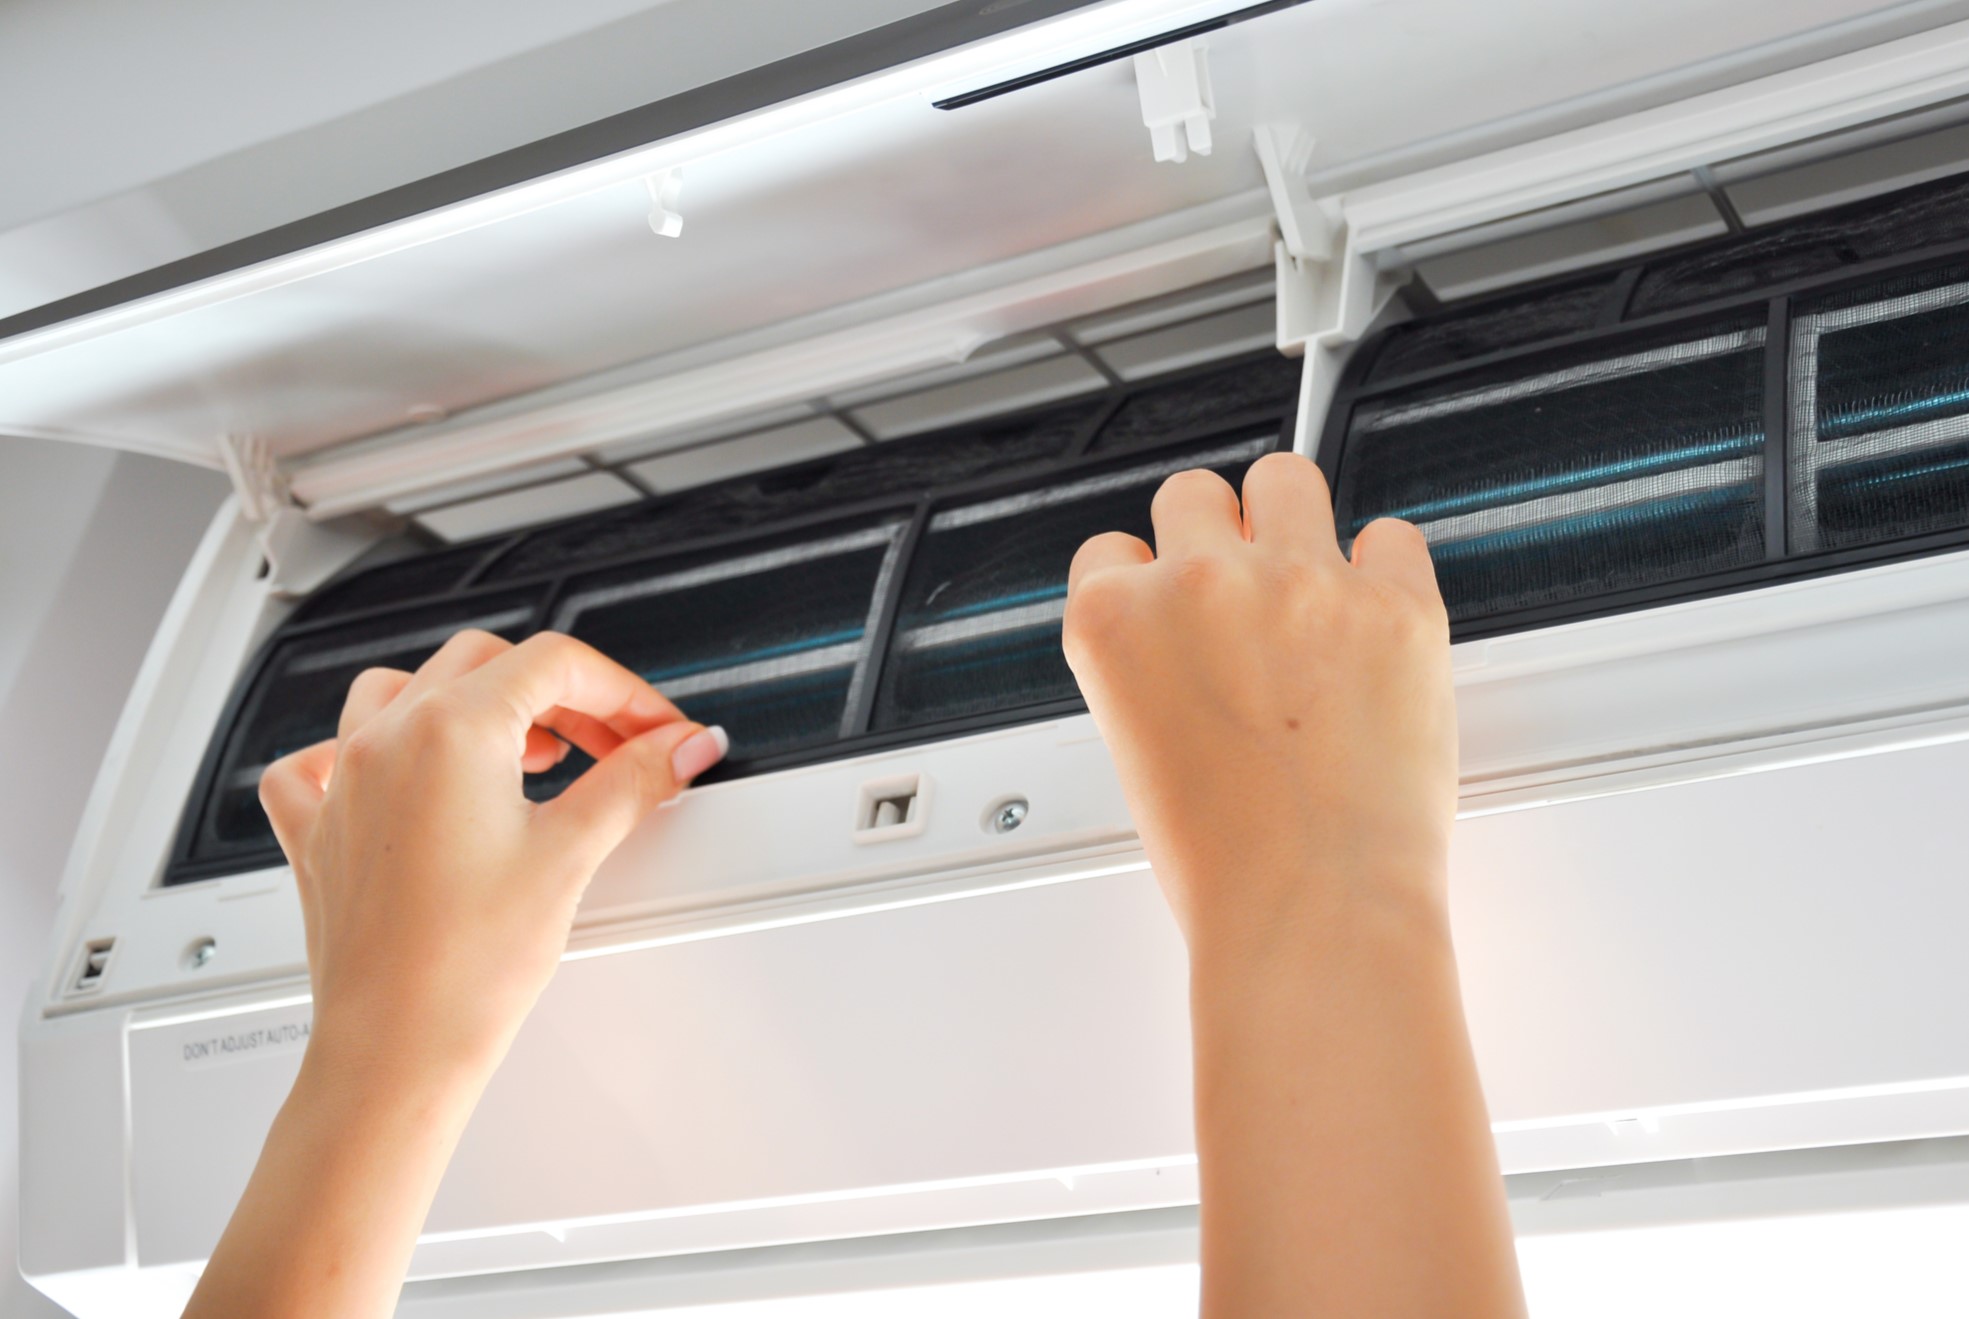
- Clean or change the air filters: Regularly clean or replace the air filters to ensure proper airflow and maintain the air quality in your home. Clogged or dirty filters can hinder the performance of your air conditioner and reduce its efficiency.
- Trim vegetation regularly: Keep an eye on nearby vegetation and trim it regularly to prevent it from growing too close to the air conditioner unit. Overgrown branches or bushes can obstruct the airflow and potentially damage the unit.
- Check for leaks or drainage issues: Look for any signs of leaks or drainage problems, such as water pooling around the air conditioner. If you notice any abnormalities, contact a professional to inspect and repair the issue.
- Schedule professional maintenance: It’s a good idea to have your air conditioner professionally serviced at least once a year. A trained technician can conduct a thorough inspection, clean the components, and address any potential issues.
By practicing regular maintenance and inspection, you can ensure that your air conditioner operates at its best and avoid unexpected breakdowns or inefficiencies.
As a responsible homeowner, it’s essential to prioritize the maintenance and care of your air conditioner. By following these maintenance tips and scheduling professional servicing, you can keep your air conditioner in excellent condition for years to come.
Now that you’ve completed all the steps, you’re ready to enjoy the benefits of a covered and well-maintained air conditioner.
Conclusion
Covering your air conditioner outside is a simple yet important step in maintaining its performance and prolonging its lifespan. By following the steps outlined in this comprehensive guide, you can ensure that your air conditioning unit remains protected from the elements and operates efficiently throughout the year.
We began by emphasizing the significance of measuring the dimensions of your air conditioner and purchasing a suitable cover that fits snugly. We then discussed the importance of preparing the area around the air conditioner, cleaning the unit, and finally, installing and securing the cover in place.
Regular maintenance and inspection were highlighted as crucial steps in ensuring your air conditioner’s optimal performance. We covered the importance of removing the cover periodically to assess your unit, checking for any damage or wear, cleaning or changing air filters, and scheduling professional maintenance when necessary.
By following these steps and incorporating regular maintenance into your routine, you can maximize the lifespan of your air conditioner, prevent costly repairs, and enjoy consistent cooling in your home.
Remember, taking care of your air conditioner is an investment that pays off in the long run. By dedicating a little time and effort to cover and maintain your unit, you can enjoy the benefits of a comfortable and efficient living space.
Thank you for reading our guide on how to cover an air conditioner outside. We hope this information has been valuable and will assist you in protecting your air conditioner for years to come. Stay cool!
Frequently Asked Questions about How To Cover An Air Conditioner Outside
Was this page helpful?
At Storables.com, we guarantee accurate and reliable information. Our content, validated by Expert Board Contributors, is crafted following stringent Editorial Policies. We're committed to providing you with well-researched, expert-backed insights for all your informational needs.