Home>Home Security and Surveillance>Honeywell Vista 20P: How To Wire The CDMA-X To The Wired Security System
Home Security and Surveillance
Honeywell Vista 20P: How To Wire The CDMA-X To The Wired Security System
Modified: August 27, 2024
Learn how to wire the CDMA-X to your wired security system with the Honeywell Vista 20P. Enhance your home security and surveillance with this step-by-step guide.
(Many of the links in this article redirect to a specific reviewed product. Your purchase of these products through affiliate links helps to generate commission for Storables.com, at no extra cost. Learn more)
Introduction
Welcome to the world of home security and surveillance. In today’s fast-paced world, it has become increasingly important to prioritize our home’s safety and protect our loved ones and valuable possessions. With advancements in technology, home security systems have evolved to provide comprehensive solutions that ensure peace of mind.
One such system that stands out in the market is the Honeywell Vista 20P. Known for its reliability and versatility, it offers advanced features and integration options for seamless control and monitoring of your home’s security.
In this article, we will focus on a specific aspect of the Honeywell Vista 20P system – the CDMA-X module. We will guide you through the process of wiring the CDMA-X module to your wired security system, enabling you to take advantage of cellular communication for increased reliability and remote access.
Whether you are a homeowner looking to upgrade your existing security system or a professional installer seeking detailed instructions, this article will provide the information you need to successfully wire the CDMA-X module to your Honeywell Vista 20P system.
But before we dive into the detailed steps, let’s take a closer look at what the CDMA-X module is and why you should consider incorporating it into your security setup.
Key Takeaways:
- Upgrade your Honeywell Vista 20P security system with the CDMA-X module for reliable cellular communication. Enjoy remote access, two-way voice communication, and enhanced security features for peace of mind.
- Ensure a smooth installation by gathering necessary tools, powering down the system, and following step-by-step instructions. Activate the module with your security system provider for seamless integration.
Read more: How To Setup Motion Detector On Vista 20P
Understanding the CDMA-X Module
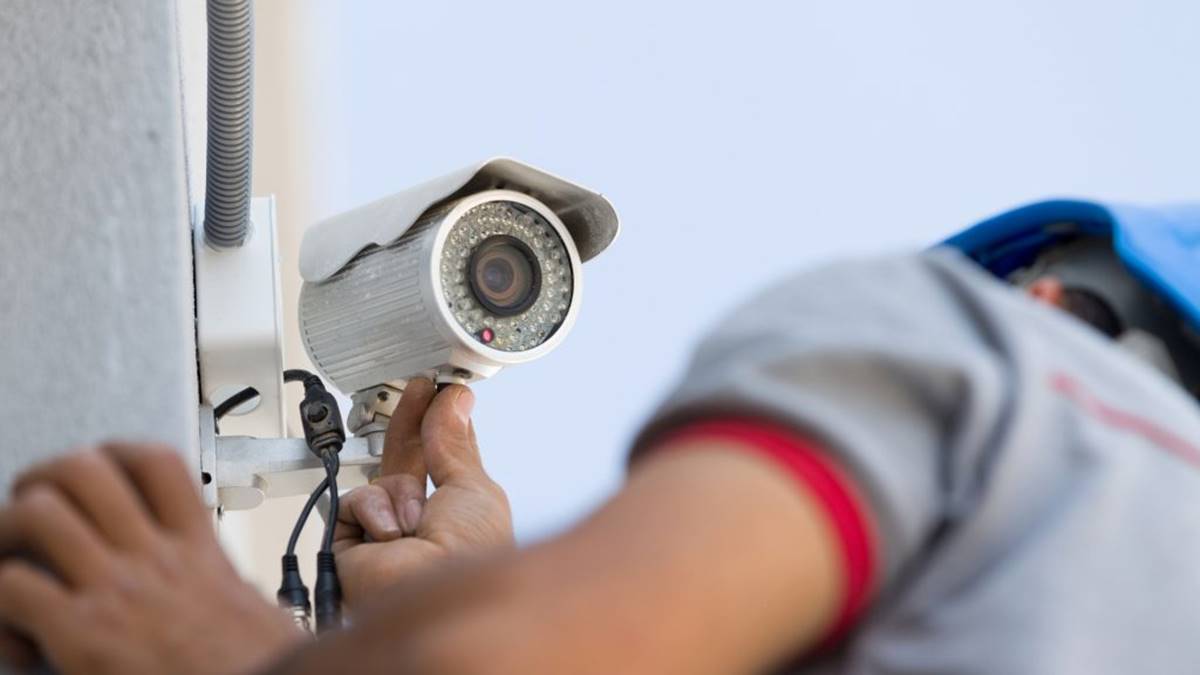
The CDMA-X module is a cellular communicator that can be added to the Honeywell Vista 20P wired security system. It utilizes cellular networks to transmit alarm signals, ensuring a reliable and secure connection to your monitoring station. With the CDMA-X module, you no longer have to rely solely on a landline or internet connection, providing an additional layer of protection for your home.
One of the key benefits of using the CDMA-X module is its compatibility with a wide range of security system features. It supports features such as two-way voice communication, alarm signaling, and remote access via smartphone applications. This allows you to arm or disarm your system, receive notifications, and even view live camera feeds from anywhere, providing you with complete control and peace of mind.
Moreover, the CDMA-X module is designed with advanced encryption algorithms, ensuring that your security system is highly protected against potential hacking or tampering attempts. It provides a secure and encrypted communication channel that enhances the overall security of your system.
Additionally, the CDMA-X module offers a seamless integration with Honeywell Total Connect service. This cloud-based platform allows you to effortlessly manage and control your security system remotely. You can customize alerts, view event history, and even receive video clips or images in case of an alarm or event.
Now that we have a better understanding of the CDMA-X module and its capabilities, let’s move on to the tools and materials you will need to wire the module to your Honeywell Vista 20P security system.
Required Tools and Materials
Before you begin the process of wiring the CDMA-X module to your Honeywell Vista 20P security system, it’s important to gather all the necessary tools and materials. Having everything prepared in advance will ensure a smooth installation process and prevent any unnecessary delays.
Here’s a list of the tools and materials you will need:
- Screwdriver: A flathead or Phillips screwdriver will be needed to open the security system’s enclosure and connect the CDMA-X module.
- Wire Cutters: You will need wire cutters to trim the communication bus wires and connect them to the CDMA-X module.
- Wire Strippers: Wire strippers will be necessary to remove the insulation from the communication bus wires and ensure a proper connection.
- CDMA-X Module: Of course, you will need the CDMA-X module itself, which can be purchased separately as an add-on accessory for your Honeywell Vista 20P system.
- Power Supply: The CDMA-X module requires a power supply for operation. Make sure you have the appropriate power supply that is compatible with the module.
- CDMA Antenna: An antenna is necessary to establish a reliable cellular connection. Ensure you have the CDMA antenna specifically designed for the CDMA-X module.
- Communication Bus Terminals: You may need additional communication bus terminals if your Honeywell Vista 20P system does not have any available.
- Wire Connectors: Wire connectors will be used to secure the connections between the communication bus wires and the CDMA-X module.
- Electrical Tape: Electrical tape will come in handy to insulate and secure the wired connections, preventing any short circuits.
By ensuring you have all the necessary tools and materials ready beforehand, you can proceed with confidence to the next step of wiring the CDMA-X module to your Honeywell Vista 20P security system.
Step 1: Power Down the Security System
Before you begin any installation or wiring process, it’s crucial to ensure the power to your Honeywell Vista 20P security system is completely turned off. This step will protect both you and the system from any potential electrical hazards.
Follow these steps to power down your security system:
- Locate the main power supply of your security system. This is typically a large transformer connected to an electrical outlet.
- Unplug the power supply from the outlet. This will disconnect the system from the main power source.
- Scan the security system keypad or control panel to ensure that the screen is completely blank and there are no lights or indications of power.
- It’s also a good idea to disconnect the backup battery of the security system. Usually, the battery is housed in a separate compartment within the control panel. Open the compartment and disconnect the battery to disable the backup power.
Once you have successfully powered down your security system, you can proceed with the next steps of wiring the CDMA-X module. Remember to always exercise caution when working with electrical systems and ensure that all power sources are disconnected before proceeding.
In the next step, we will guide you on locating the wired communication bus of your Honeywell Vista 20P security system.
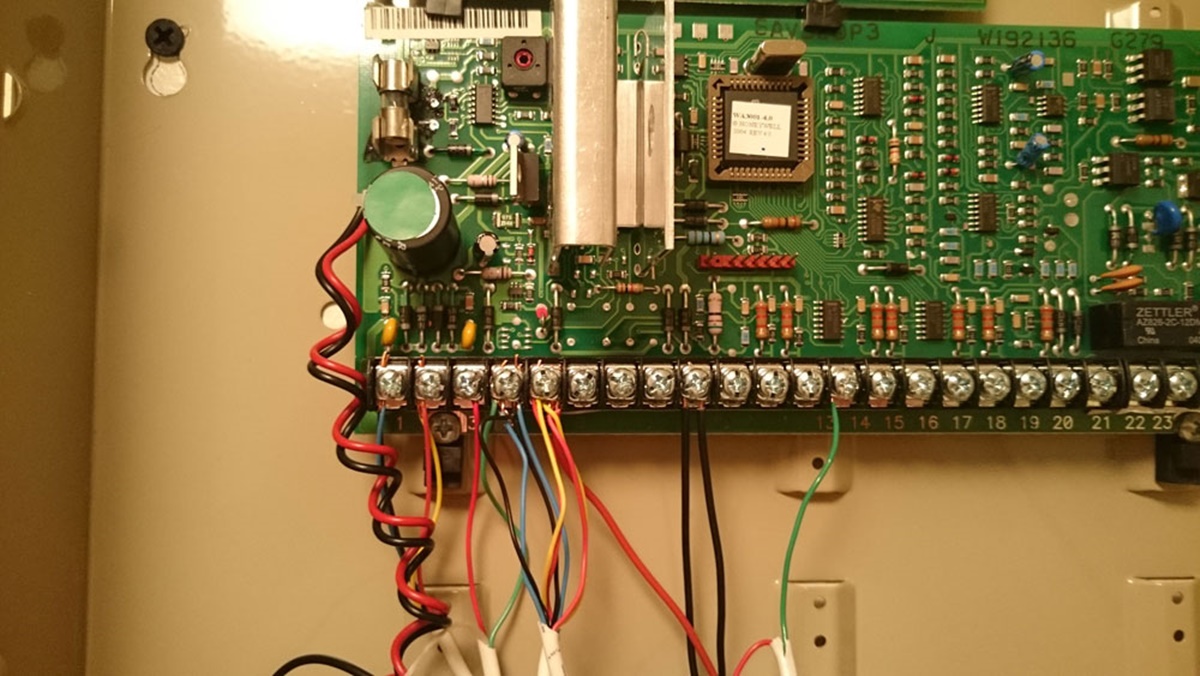
Step 2: Locate the Wired Communication Bus
Now that your Honeywell Vista 20P security system is powered down, it’s time to locate the wired communication bus. This is where the CDMA-X module will be connected to enable communication between the system and the module.
Follow these steps to locate the wired communication bus:
- Open the control panel or enclosure of your security system. In most cases, you will need to remove the cover by unscrewing the screws holding it in place.
- Once the control panel is exposed, look for a terminal strip or a group of terminals where the wired connections are made.
- Identify the communication terminals, which are usually labeled as “Data In” and “Data Out.” These terminals are responsible for transmitting and receiving data signals within the system.
- Inspect the existing wiring and determine if there are any available terminals for connecting the CDMA-X module. If there are no vacant terminals, you may need to remove or disconnect an unused device or expansion module to free up space for the CDMA-X module. Take note of the wires connected to those terminals for reference during the installation process.
- If necessary, label the communication terminals or take a picture for future reference. This will make it easier to identify the correct terminals when connecting the CDMA-X module.
Once you have located and identified the wired communication bus, you are ready to proceed to the next step of connecting the CDMA-X module. Keep in mind that the exact location and appearance of the communication bus may vary depending on your specific Honeywell Vista 20P security system model.
In the next step, we will guide you through the process of connecting the CDMA-X module to the wired communication bus.
Read more: How To Upgrade My Wired Security System
Step 3: Connect CDMA-X Module to the Communication Bus
Now that you have located the wired communication bus, it’s time to connect the CDMA-X module to establish a secure and reliable connection with your Honeywell Vista 20P security system.
Follow these steps to connect the CDMA-X module to the communication bus:
- Take the CDMA-X module and carefully align the communication bus terminals with the corresponding terminals on the module. Ensure that the terminals are properly aligned to ensure a secure connection.
- Once aligned, firmly press the module onto the communication bus terminals. Apply gentle pressure to ensure that the module is securely attached and the terminals make proper contact with each other.
- If there are no vacant terminals available on the communication bus, you will need to remove or disconnect an unused device or expansion module to free up space. Disconnect the wires from the terminal and reattach them to the corresponding terminals on the CDMA-X module. Ensure that the wires are properly inserted and secured.
- If you have labeled or taken a picture of the communication terminals in the previous step, use it as a reference to connect the wires to the correct terminals on the CDMA-X module. Double-check the connections to ensure that each wire is securely attached.
- Once you have connected all the wires to the CDMA-X module, use wire connectors to secure the connections. Twist the exposed ends of the wires together and insert them into the wire connectors. Tighten the connectors to ensure a sturdy and reliable connection.
After you have successfully connected the CDMA-X module to the communication bus, you are ready to move on to the next step of connecting the power supply to the module. These connections will provide the necessary power for the module to function.
In the next step, we will guide you through the process of connecting the power supply to the CDMA-X module.
When wiring the CDMA-X to the Honeywell Vista 20P, make sure to connect the red wire to the positive terminal and the black wire to the negative terminal on the power supply. Also, connect the yellow wire to the data in terminal and the green wire to the data out terminal on the control panel.
Step 4: Connect the Power Supply to the CDMA-X Module
In this step, you will be connecting the power supply to the CDMA-X module, providing the necessary power for its operation.
Follow these steps to connect the power supply to the CDMA-X module:
- Locate the power terminals on the CDMA-X module. These terminals are typically labeled as “Power In” or “DC Power.”
- Take the power supply and identify the positive (+) and negative (-) terminals. It’s important to connect the power supply correctly to avoid any electrical issues.
- Connect the positive (+) wire from the power supply to the positive (+) terminal on the CDMA-X module. Insert the wire into the terminal and secure it tightly.
- Connect the negative (-) wire from the power supply to the negative (-) terminal on the CDMA-X module. Insert the wire into the terminal and ensure it is securely connected.
- Once all the power connections are made, use electrical tape to insulate and secure the wired connections. This step will help prevent any accidental contact and ensure a safe installation.
After connecting the power supply to the CDMA-X module, you have provided the necessary power for its operation. The next step involves installing the CDMA antenna for establishing cellular communication.
In the next step, we will guide you through the process of installing the CDMA antenna.
Step 5: Install the CDMA Antenna
In this step, you will install the CDMA antenna to establish a cellular connection for your CDMA-X module. The antenna plays a critical role in ensuring reliable and uninterrupted communication between your security system and the monitoring station.
Follow these steps to install the CDMA antenna:
- Locate the antenna port on the CDMA-X module. It is typically labeled as “Antenna” or “Cellular Antenna.”
- Take the CDMA antenna and connect it to the antenna port on the module. Ensure that the antenna connector is aligned correctly with the port and push it in gently until it is securely connected.
- Once the antenna is connected, find a suitable location to mount it. Ideally, the antenna should be placed in an area with good cellular reception and away from any large metal objects or obstructions that could interfere with the signal.
- Prepare the mounting surface by cleaning it to ensure a secure attachment. You can use a cleaning solution or a damp cloth to remove any dirt or debris.
- Peel off the backing of the adhesive on the back of the antenna and carefully press it onto the mounting surface. Apply firm pressure to ensure that the antenna sticks securely. Alternatively, if the antenna comes with mounting brackets, follow the manufacturer’s instructions to attach it securely.
- Once the antenna is installed, check the connection to ensure it is properly connected. Gently wiggle the antenna to confirm that it is securely attached to the module.
After successfully installing the CDMA antenna, you have established a reliable cellular connection for your CDMA-X module. The next step involves powering up your security system to activate the module.
In the next step, we will guide you through the process of powering up the security system.
Step 6: Power Up the Security System
With the CDMA-X module and CDMA antenna successfully installed, it’s time to power up your Honeywell Vista 20P security system and prepare it for the activation of the module.
Follow these steps to power up the security system:
- Reconnect the main power supply of your security system to an electrical outlet. Ensure that it is securely plugged in.
- If you had disconnected the backup battery during the power-down process, reconnect it to the control panel. Ensure that the battery is properly connected and secured in its compartment.
- Verify that the control panel or keypad of the security system displays the appropriate power indicators. The screen should light up, and you may see LED lights or indicators showing power and system status.
- Wait for your security system to complete its power-up sequence. This may take a few minutes as the system initializes all its components and checks for any errors.
- Once the security system has powered up completely, check that the CDMA-X module and antenna are recognized. The control panel or keypad should display indicators or messages confirming the presence and status of the CDMA-X module.
By following these steps and powering up your security system, you have completed the necessary preparations for the activation of the CDMA-X module. In the next step, we will guide you through the process of activating the module.
Keep in mind that the specific steps and indicators may vary depending on your Honeywell Vista 20P system model. Always refer to the manufacturer’s instructions for your specific system for the most accurate information.
Read more: How To Wire Home Security Camera System
Step 7: Activate the CDMA-X Module
Now that your Honeywell Vista 20P security system is powered up and the CDMA-X module is installed and connected, it’s time to activate the module and establish cellular communication. Activation will enable your security system to transmit alarm signals and other data to the monitoring station via the cellular network.
Follow these steps to activate the CDMA-X module:
- Contact your security system provider or monitoring station to initiate the activation process for the CDMA-X module. They will provide you with the necessary activation information and guide you through the steps. This may include providing the module’s serial number or other identifying information.
- Follow the instructions provided by your security system provider to complete the activation process. This may involve providing specific information, such as the module’s IMEI (International Mobile Equipment Identity) number, to activate the cellular service.
- Once the activation process is complete, the CDMA-X module will establish a cellular connection with the monitoring station and be ready to transmit alarm signals and other data.
- Perform a test to ensure that the CDMA-X module is functioning properly. Arm and disarm your security system, and trigger a test alarm to verify that the module is successfully transmitting signals to the monitoring station. Contact your security system provider to confirm that they have received the signals.
- If there are any issues or problems with the activation or functionality of the CDMA-X module, contact your security system provider for assistance and troubleshooting.
By following these steps and activating the CDMA-X module, you have successfully integrated cellular communication into your Honeywell Vista 20P security system. This ensures reliable and secure transmission of alarm signals, providing you with peace of mind and enhanced home security.
Congratulations on completing the process of wiring and activating the CDMA-X module for your Honeywell Vista 20P security system. Enjoy the benefits of cellular communication and remote access to your home security system.
If you have any further questions or concerns, don’t hesitate to reach out to your security system provider for assistance. Stay vigilant and enjoy the added protection of your upgraded security system!
Conclusion
Investing in a reliable and comprehensive home security system is essential in today’s world. The Honeywell Vista 20P, combined with the CDMA-X module, offers advanced features and integration options that provide increased security and peace of mind.
In this article, we have explored the process of wiring and activating the CDMA-X module for your Honeywell Vista 20P security system. By following the step-by-step instructions provided, you can successfully integrate cellular communication into your system and enhance its functionality.
The CDMA-X module allows for secure and reliable communication between your security system and the monitoring station via cellular networks. It provides features such as two-way voice communication, remote access, and compatibility with Honeywell Total Connect service, enabling you to stay connected and in control of your home security.
Remember to gather all the necessary tools and materials before starting the installation process. Ensure that your security system is powered down and locate the wired communication bus and power supply terminals. Connect the CDMA-X module and install the CDMA antenna in an optimal location. Power up your security system and activate the module with the assistance of your security system provider. Test the functionality to ensure a successful installation.
By wiring and activating the CDMA-X module, you have significantly enhanced the capabilities of your Honeywell Vista 20P security system. You now have the ability to remotely access and monitor your home, receive real-time alerts, and enjoy the benefits of cellular communication for increased reliability.
Always refer to the manufacturer’s instructions and consult with professionals if you encounter any difficulties during installation or activation. It is crucial to ensure that your security system is properly configured and functioning to provide maximum protection.
With the CDMA-X module integrated into your Honeywell Vista 20P security system, you can enjoy the peace of mind that comes with knowing your home and loved ones are well-protected. Stay diligent, and continue to prioritize the safety and security of your home.
Remember, home security is an ongoing process, and it’s always a wise choice to stay informed about the latest advancements and updates in the field. By doing so, you can continue to enhance and optimize your home security system for years to come.
Frequently Asked Questions about Honeywell Vista 20P: How To Wire The CDMA-X To The Wired Security System
Was this page helpful?
At Storables.com, we guarantee accurate and reliable information. Our content, validated by Expert Board Contributors, is crafted following stringent Editorial Policies. We're committed to providing you with well-researched, expert-backed insights for all your informational needs.