Home>Gardening & Outdoor>Outdoor Structures>How To Build A 12X20 Shed
Outdoor Structures
How To Build A 12X20 Shed
Modified: August 27, 2024
Learn how to build a 12x20 shed and create the perfect outdoor structure for your storage needs. Get step-by-step guidance and expert tips.
(Many of the links in this article redirect to a specific reviewed product. Your purchase of these products through affiliate links helps to generate commission for Storables.com, at no extra cost. Learn more)
Introduction
So, you've decided to tackle the exciting project of building a 12×20 shed. Congratulations! Whether you need extra storage space, a workshop, or a cozy retreat, a well-built shed can add both functionality and charm to your property. However, embarking on this endeavor requires careful planning, the right materials, and a solid understanding of the construction process. Fear not, though, as I'm here to guide you through each step with expert tips and insights.
In this comprehensive guide, we'll delve into every aspect of constructing a 12×20 shed, from selecting the ideal location to adding the finishing touches. You'll learn about obtaining permits, choosing the right materials, and mastering essential building techniques. By the end, you'll feel confident and equipped to embark on this rewarding journey.
Throughout this article, we'll explore the importance of proper planning and preparation, the essential tools and materials you'll need, and the step-by-step process of building a sturdy and visually appealing shed. Additionally, we'll touch on the significance of adhering to local regulations and obtaining necessary permits to ensure a smooth and compliant construction process.
So, roll up your sleeves, gather your enthusiasm, and let's dive into the exciting world of shed construction. Whether you're a seasoned DIY enthusiast or a novice builder, this guide will provide valuable insights and practical advice to help you bring your 12×20 shed to life. Get ready to unleash your creativity, hone your construction skills, and embark on a fulfilling journey that culminates in the proud accomplishment of a beautifully crafted outdoor structure.
Key Takeaways:
- Planning and preparation are crucial for building a 12×20 shed. Consider the shed’s purpose, location, and create a detailed plan. Thorough planning sets the stage for a successful construction journey.
- Obtaining permits, gathering materials, and constructing a solid foundation are essential steps in building a 12×20 shed. Attention to detail and adherence to regulations ensure a smooth and durable construction process.
Read more: How Many Square Feet Is A 12X20 Shed
Planning and Preparation
Before you grab your hammer and nails, it’s crucial to lay a solid foundation for your shed project through meticulous planning and preparation. This phase sets the stage for a smooth and successful construction process, ensuring that you have a clear vision of your shed’s purpose, design, and structural requirements.
First and foremost, consider the intended use of your 12×20 shed. Will it primarily serve as storage for garden tools and equipment? Are you envisioning a versatile workspace for DIY projects? Perhaps you’re planning a cozy retreat where you can unwind and immerse yourself in hobbies. Understanding the shed’s function will influence its design, layout, and the features you incorporate.
Next, assess your property to determine the optimal location for the shed. Consider factors such as sunlight exposure, terrain, and proximity to utilities. Additionally, check local zoning regulations and homeowner association guidelines to ensure compliance with setback requirements and other relevant restrictions.
Once you’ve defined the shed’s purpose and identified the ideal location, it’s time to create a detailed plan or blueprint. This plan should encompass the shed’s dimensions, layout, door and window placements, and any custom features you wish to include. While this step may seem meticulous, a well-thought-out plan will streamline the construction process and minimize unexpected challenges.
Furthermore, compile a comprehensive list of materials and tools required for the project. From lumber and fasteners to roofing materials and paint, having a detailed inventory will facilitate efficient procurement and organization. Consider consulting with a knowledgeable professional at your local hardware store to ensure that you have everything you need for a seamless construction experience.
Lastly, establish a realistic timeline for your shed construction, factoring in potential weather-related delays and your availability to work on the project. Setting achievable milestones and deadlines will help you stay organized and motivated throughout the building process.
By investing time and effort in thorough planning and preparation, you’ll lay the groundwork for a successful and gratifying shed construction journey. With a clear vision, a well-defined plan, and a comprehensive inventory, you’ll be well-equipped to progress to the next phase: choosing the right location for your 12×20 shed.
Choosing the Right Location
When it comes to building a 12×20 shed, selecting the perfect location on your property is a pivotal decision that can significantly impact the shed’s functionality, aesthetics, and longevity. Before breaking ground, carefully assess various factors to ensure that the chosen site aligns with your vision and practical requirements.
One of the primary considerations when choosing a location is the shed’s intended purpose. If you envision using the shed as a workshop or hobby space, consider placing it near a power source for convenient access to electricity. On the other hand, if the shed will primarily serve as storage for garden tools and equipment, easy accessibility from the yard or garden may be a priority.
Take into account the terrain and ground conditions of the potential locations. A level and well-drained area is ideal for the shed’s foundation and overall stability. Additionally, consider the surrounding landscape and vegetation. Placing the shed in close proximity to trees can provide natural shade and a picturesque backdrop, but be mindful of overhanging branches and falling debris that may require regular maintenance.
Sunlight exposure is another crucial factor to contemplate. If you plan to use the shed as a workspace or craft area, ample natural light can enhance the ambiance and functionality of the interior. Conversely, if you aim to store items that are sensitive to heat or sunlight, such as certain paints or chemicals, consider a location that minimizes prolonged exposure to direct sunlight.
Before finalizing the location, it’s essential to review local regulations and zoning requirements. Ensure compliance with setback regulations, which dictate the minimum distance between structures and property lines. Additionally, check for any easements or utility line restrictions that may impact the placement of your shed.
Lastly, consider the visual impact of the shed within your property’s landscape. While the shed can complement your outdoor space, its placement should harmonize with the overall aesthetics of your home and garden. Strategic positioning can enhance the visual appeal and create a cohesive outdoor environment.
By thoughtfully evaluating these factors, you can confidently select a location that aligns with your needs, enhances the functionality of the shed, and integrates seamlessly into your property. With the location chosen, you’re ready to move forward with the next steps of obtaining permits and ensuring compliance with local regulations.
Obtaining Permits and Regulations
Before you embark on the construction of your 12×20 shed, it’s essential to navigate the regulatory landscape and secure the necessary permits. While the prospect of navigating permits and regulations may seem daunting, adhering to local building codes is crucial for ensuring the safety, compliance, and longevity of your outdoor structure.
The first step in this process is to research and familiarize yourself with the specific building codes and zoning regulations in your area. Local government offices, such as the building or planning department, can provide valuable information regarding permit requirements, setback regulations, and any restrictions pertaining to shed construction on residential properties.
Once you’ve gained a clear understanding of the applicable regulations, it’s time to initiate the permit application process. This typically involves submitting detailed plans or blueprints of your shed, along with the necessary forms and documentation. Some jurisdictions may also require site surveys or inspections as part of the permit application.
While the permit application process may vary by location, it’s important to approach it with thoroughness and attention to detail. Double-check that your plans align with the local building codes and zoning requirements, as deviations can lead to delays, fines, or the need to modify your project mid-construction.
Additionally, be mindful of any homeowner association guidelines or covenants that may apply to your property. These regulations can impose additional restrictions or design considerations for outdoor structures, so it’s crucial to ensure compliance to avoid potential conflicts or complications down the line.
Securing the required permits and adhering to regulations not only ensures legal compliance but also provides the peace of mind that your shed is constructed in a safe and structurally sound manner. By proactively addressing these administrative aspects, you can proceed with the construction process with confidence, knowing that your project aligns with the established standards and requirements.
With the permits in hand and a thorough understanding of the regulatory framework, you’re poised to move forward with gathering the materials and tools necessary for the construction of your 12×20 shed.
Gathering Materials and Tools
As you prepare to embark on the construction of your 12×20 shed, assembling the necessary materials and tools is a critical step that sets the stage for a smooth and efficient building process. By ensuring that you have all the required components and equipment on hand, you can minimize delays and work with confidence as you bring your shed to life.
The first consideration when gathering materials is the primary building material for the shed’s frame and structure. Treated lumber, such as pressure-treated pine or cedar, is a popular choice for its durability and resistance to decay and insects. Additionally, you’ll need plywood for sheathing, as well as roofing materials such as shingles or metal panels.
Fasteners are another essential component of shed construction. Nails, screws, and bolts will be used extensively throughout the project, so ensure that you have an ample supply of each type in various sizes to accommodate different aspects of the build.
When it comes to tools, a comprehensive set of hand and power tools will be indispensable. Essential hand tools include hammers, screwdrivers, levels, tape measures, and utility knives. Power tools such as a circular saw, drill/driver, and nail gun will expedite the construction process and ensure precision in cutting and fastening materials.
Other materials to consider include insulation for climate control, windows and doors suited to your shed’s design, and exterior finishes such as paint or stain. If your shed will include electrical wiring, factor in the necessary components and fixtures, including wiring, outlets, and lighting.
While gathering materials, it’s beneficial to create an organized inventory to track the quantities and specifications of each item. This will facilitate efficient procurement and help you stay on top of the project’s budget and timeline.
Consider consulting with professionals at your local hardware or home improvement store to ensure that you have accounted for all the materials and tools specific to your shed’s design and local building requirements. Their expertise can provide valuable guidance and help you make informed decisions throughout the procurement process.
By meticulously gathering the required materials and tools, you’ll set the stage for a productive and rewarding shed construction experience. With the inventory complete and the tools at the ready, you’re poised to transition to the next phase: laying the foundation for your 12×20 shed.
Read more: How To Build A 10×20 Shed
Building the Foundation
The foundation of your 12×20 shed is a critical element that provides stability, support, and protection against moisture. By laying a solid foundation, you’ll ensure the longevity and structural integrity of your outdoor structure. Whether you opt for a concrete slab, a skid foundation, or a gravel pad, meticulous attention to detail during this phase is paramount.
If you choose to construct a concrete slab foundation, the first step involves marking and excavating the area where the slab will be poured. This entails leveling the ground, removing any debris, and compacting the soil to create a stable base. Next, formwork is assembled to contain the concrete, and a layer of gravel is spread to facilitate drainage and minimize moisture retention.
Once the preparation is complete, concrete is poured into the formwork and leveled to the desired thickness. Reinforcement such as rebar or wire mesh may be incorporated to enhance the slab’s strength and resilience. After the concrete cures, the result is a sturdy and level foundation that forms the base for the shed’s structure.
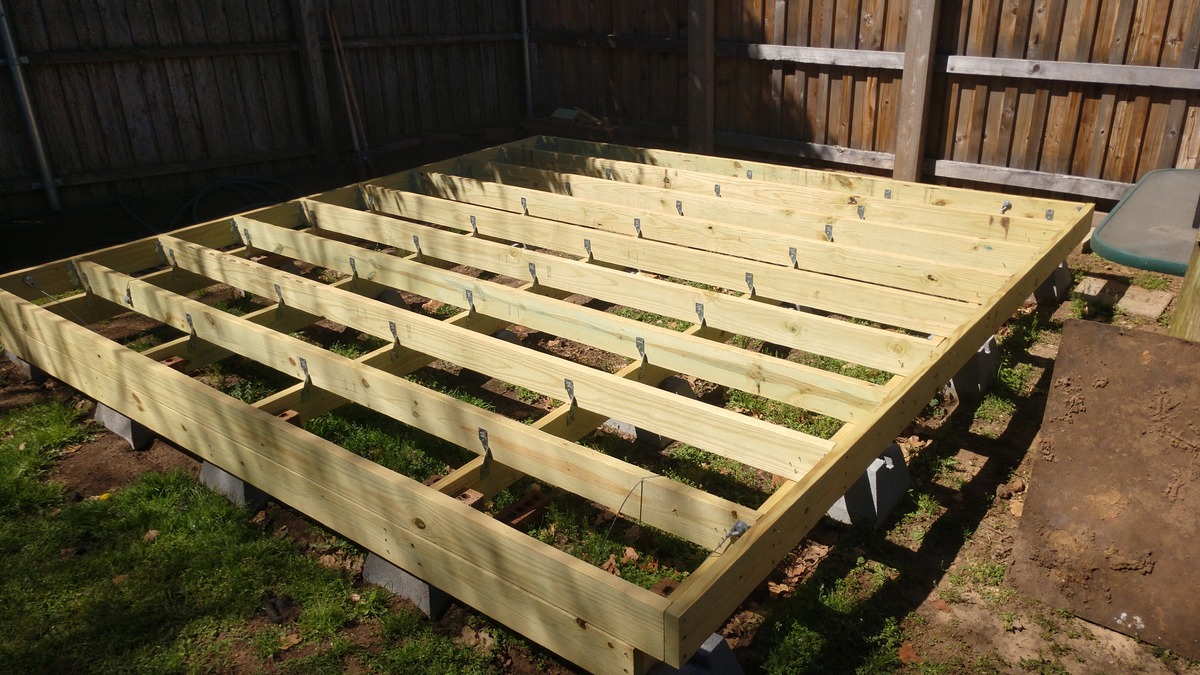
Alternatively, a skid foundation, which utilizes pressure-treated lumber beams set directly on the ground, offers a versatile and cost-effective option. This approach involves positioning the skids at precise intervals to support the shed’s floor joists, providing a stable and elevated platform for the structure. Gravel or concrete pavers may be used to level and stabilize the skids, ensuring a secure foundation for the shed.
A gravel pad, consisting of a bed of compacted gravel, is another viable foundation option for your shed. This approach offers excellent drainage and is well-suited for sites with uneven terrain. By carefully leveling the gravel and compacting it to achieve a firm and stable surface, you create an ideal foundation for the shed’s base.
Regardless of the foundation type you choose, attention to detail and precision are paramount. Ensuring that the foundation is level, well-drained, and structurally sound sets the stage for a successful and enduring shed construction project.
As you embark on the foundation phase, take the time to meticulously follow the chosen method’s specific guidelines and best practices. By doing so, you’ll establish a robust and reliable foundation that forms the cornerstone of your 12×20 shed’s construction.
When building a 12×20 shed, make sure to start with a solid foundation, use pressure-treated lumber for the frame, and properly seal all seams to prevent water damage.
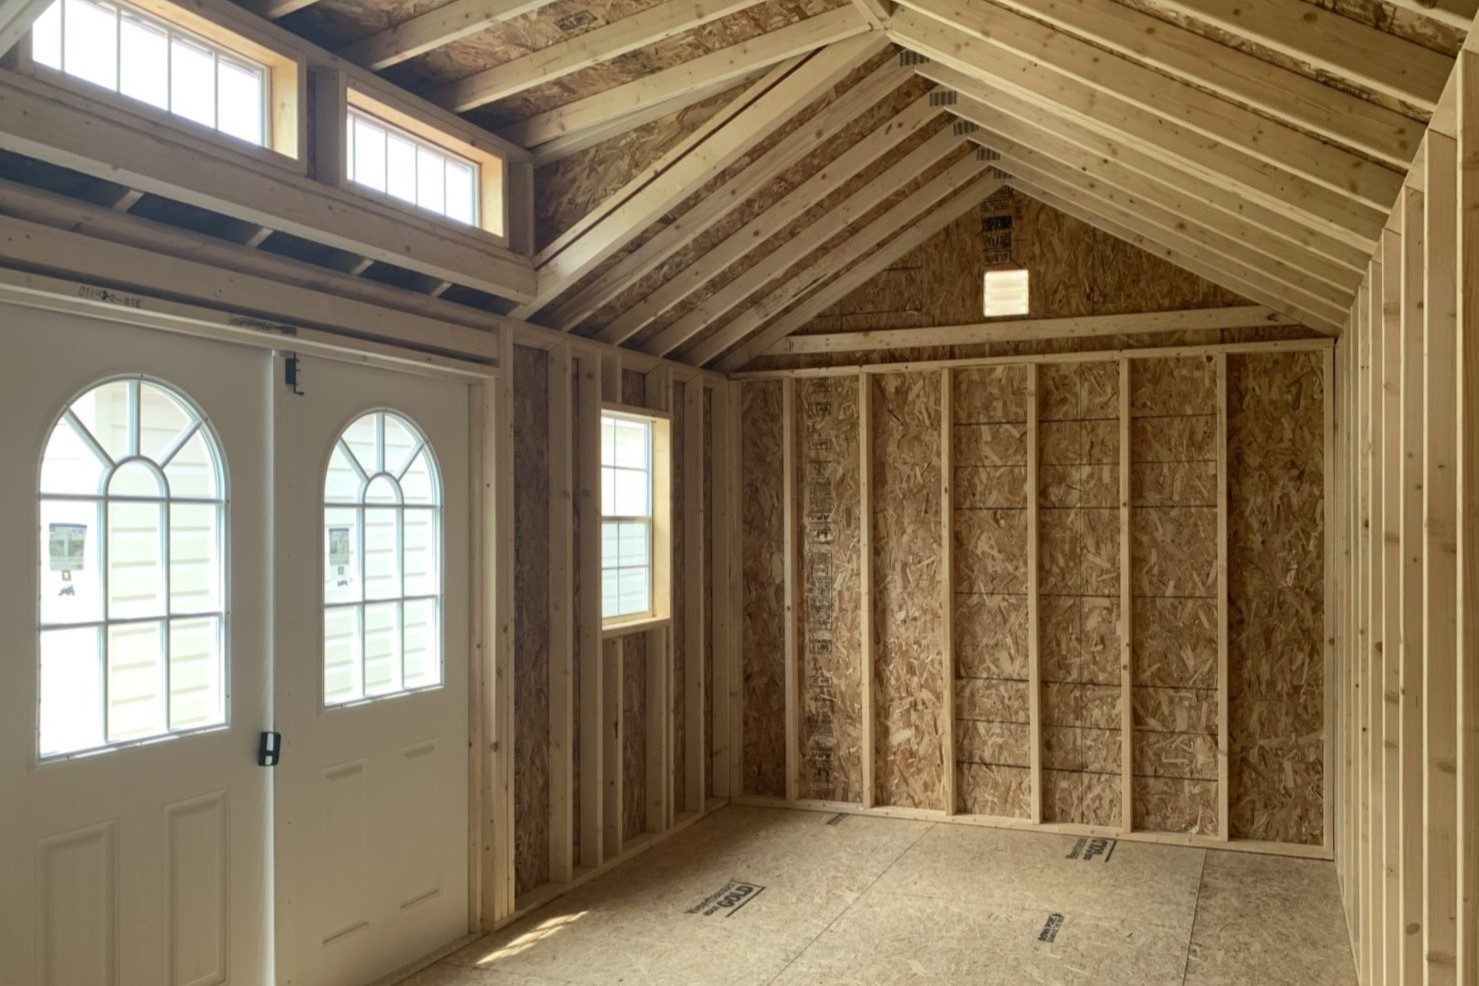
Constructing the Frame
With the foundation in place, it’s time to embark on the exhilarating phase of constructing the frame for your 12×20 shed. The frame serves as the skeletal structure of the shed, providing support, strength, and the framework for the exterior and interior elements. Whether you opt for a traditional stick-built frame or a prefabricated truss system, meticulous attention to detail during this phase is essential for a sturdy and resilient structure.
If you’re pursuing a stick-built frame, the process begins with assembling the shed’s floor frame. This involves laying out pressure-treated lumber joists at precise intervals, ensuring that they are level and securely anchored to the foundation. Subsequently, the wall frames are constructed, comprising vertical studs, horizontal plates, and headers for door and window openings. Careful measurement and alignment are crucial at this stage to ensure that the walls are plumb and square, setting the stage for a seamless construction process.
When it comes to the roof structure, the rafters or trusses form the framework that supports the roof’s weight and shape. Rafters are individual beams that span from the top plate of one wall to the opposite side, creating the traditional triangular roof shape. Alternatively, prefabricated trusses offer a convenient and efficient option, as they are pre-engineered for strength and stability, simplifying the roof construction process.
As you assemble the frame, it’s essential to secure all connections with appropriate fasteners, such as nails or screws, to ensure structural integrity. Additionally, consider reinforcing critical joints with metal connectors or braces to enhance the frame’s stability and resistance to external forces.
Throughout the frame construction process, meticulous attention to detail and precision is paramount. Double-check measurements, ensure proper alignment, and verify the integrity of all connections to lay the foundation for a robust and resilient shed structure.
As you progress through the frame construction phase, take the time to appreciate the tangible progress and the emergence of your shed’s form. With the frame in place, you’re poised to transition to the next phase: adding siding and roofing to enclose and protect your 12×20 shed.
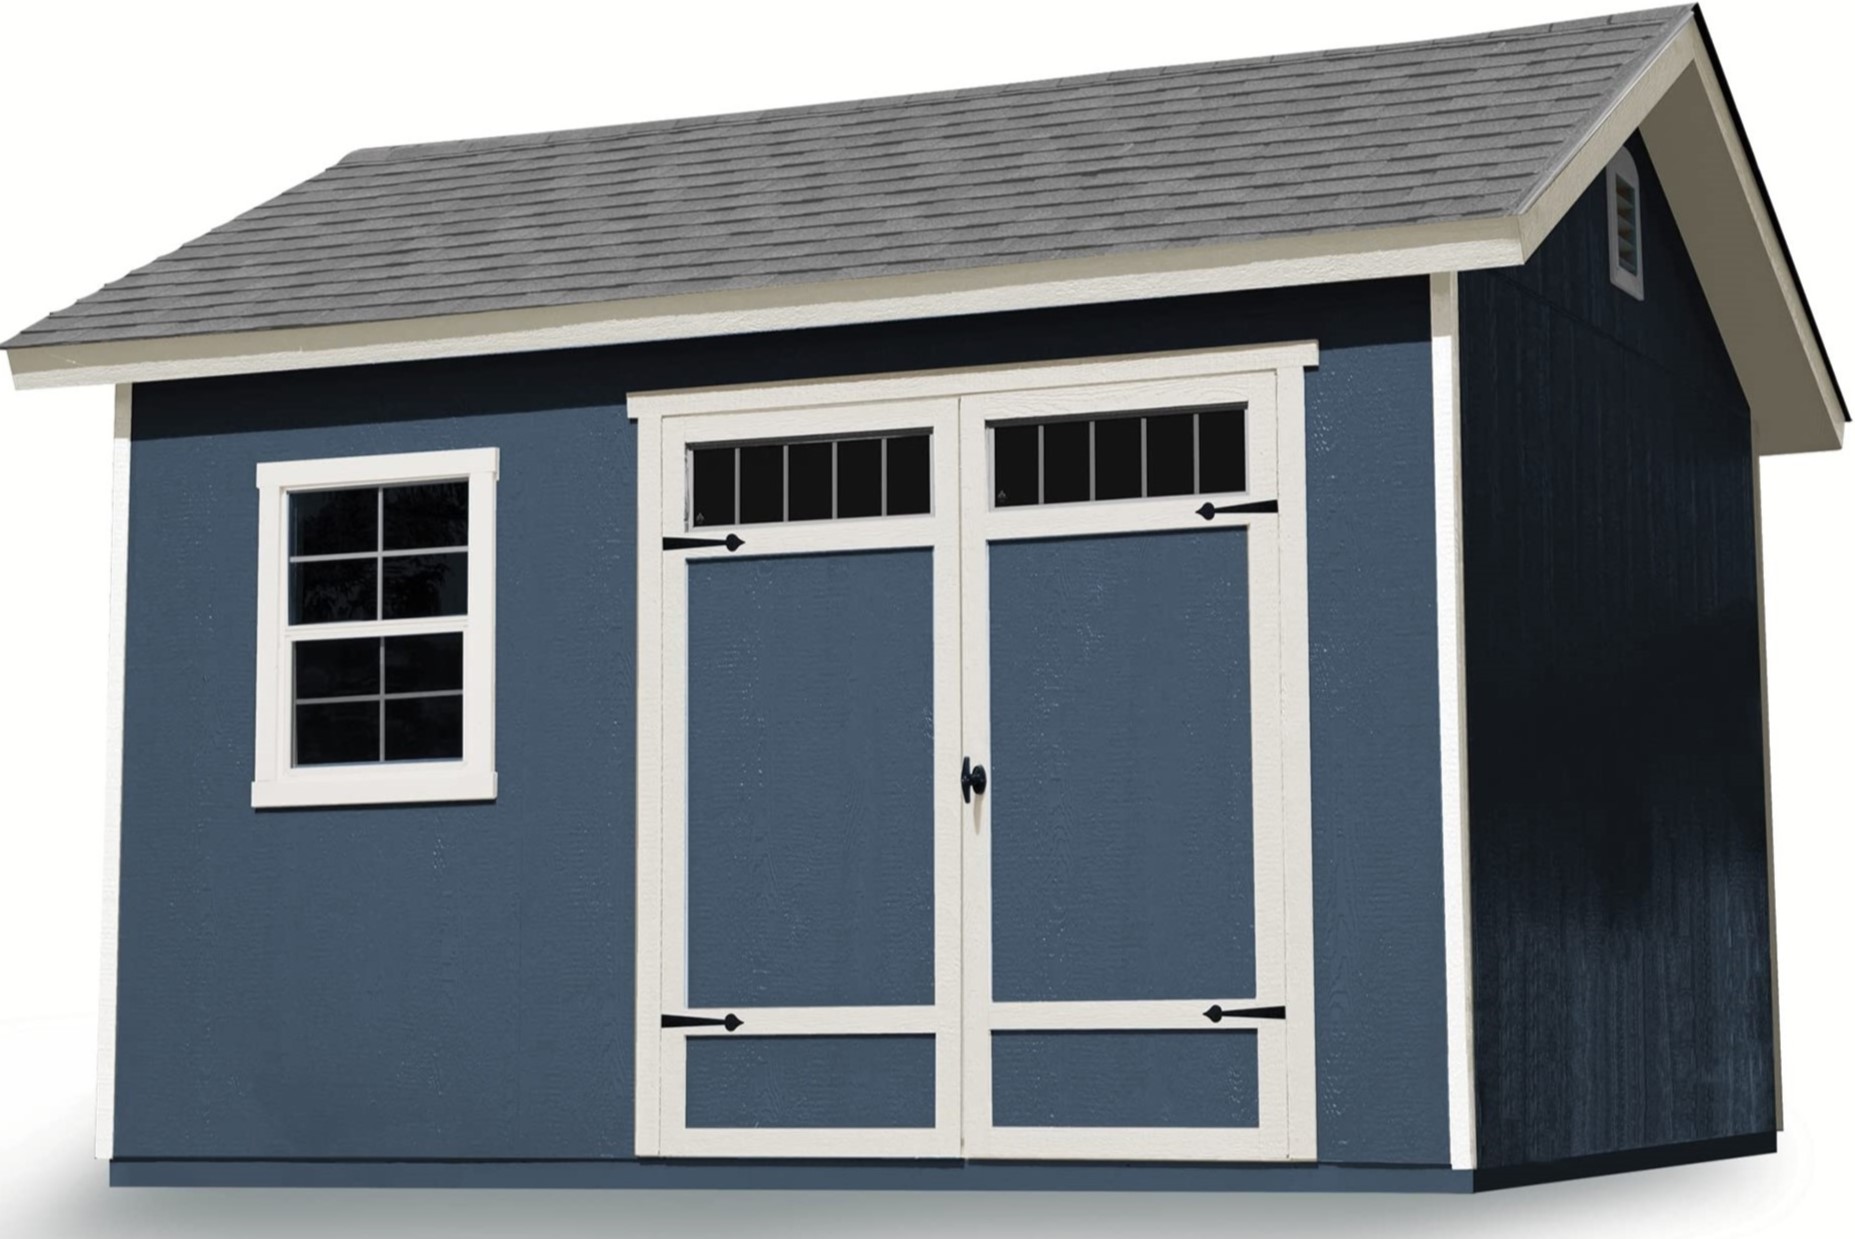
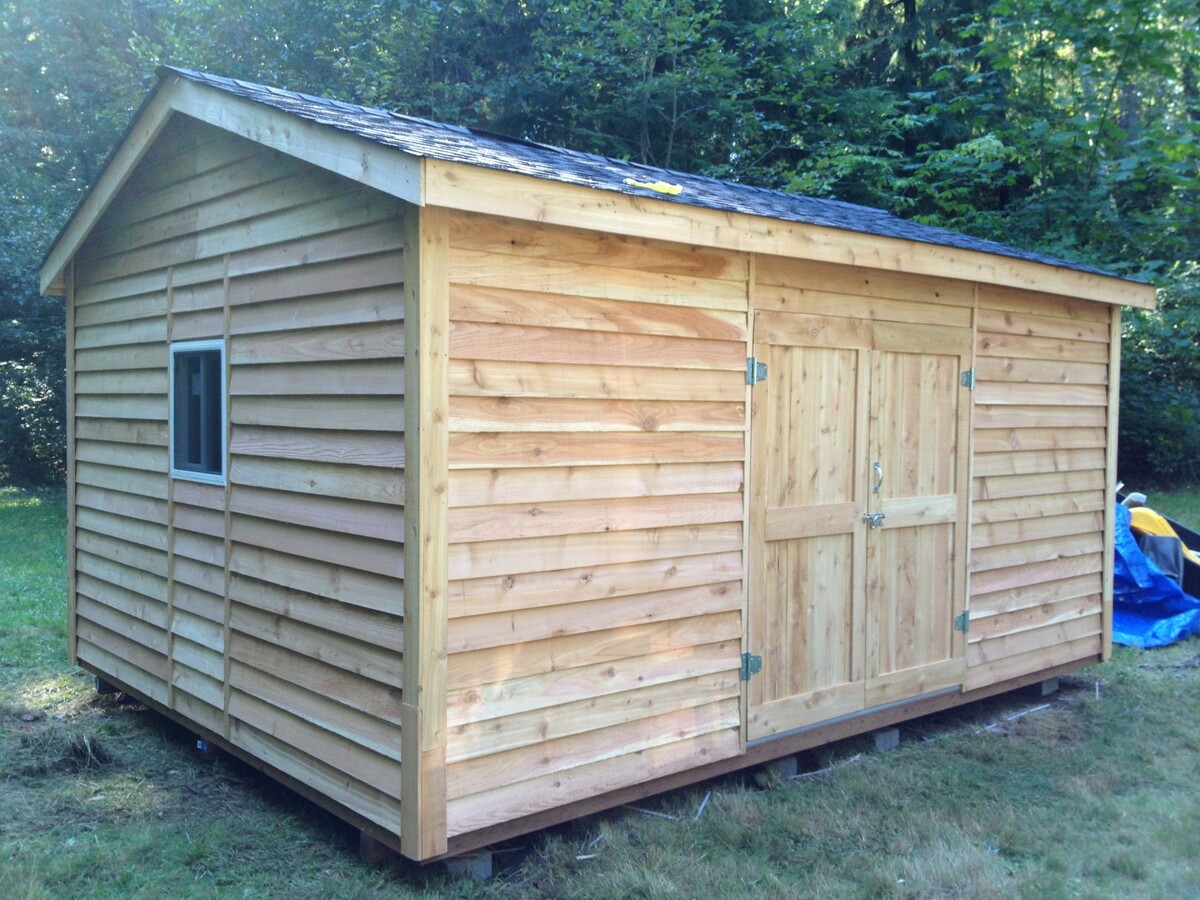
Adding Siding and Roofing
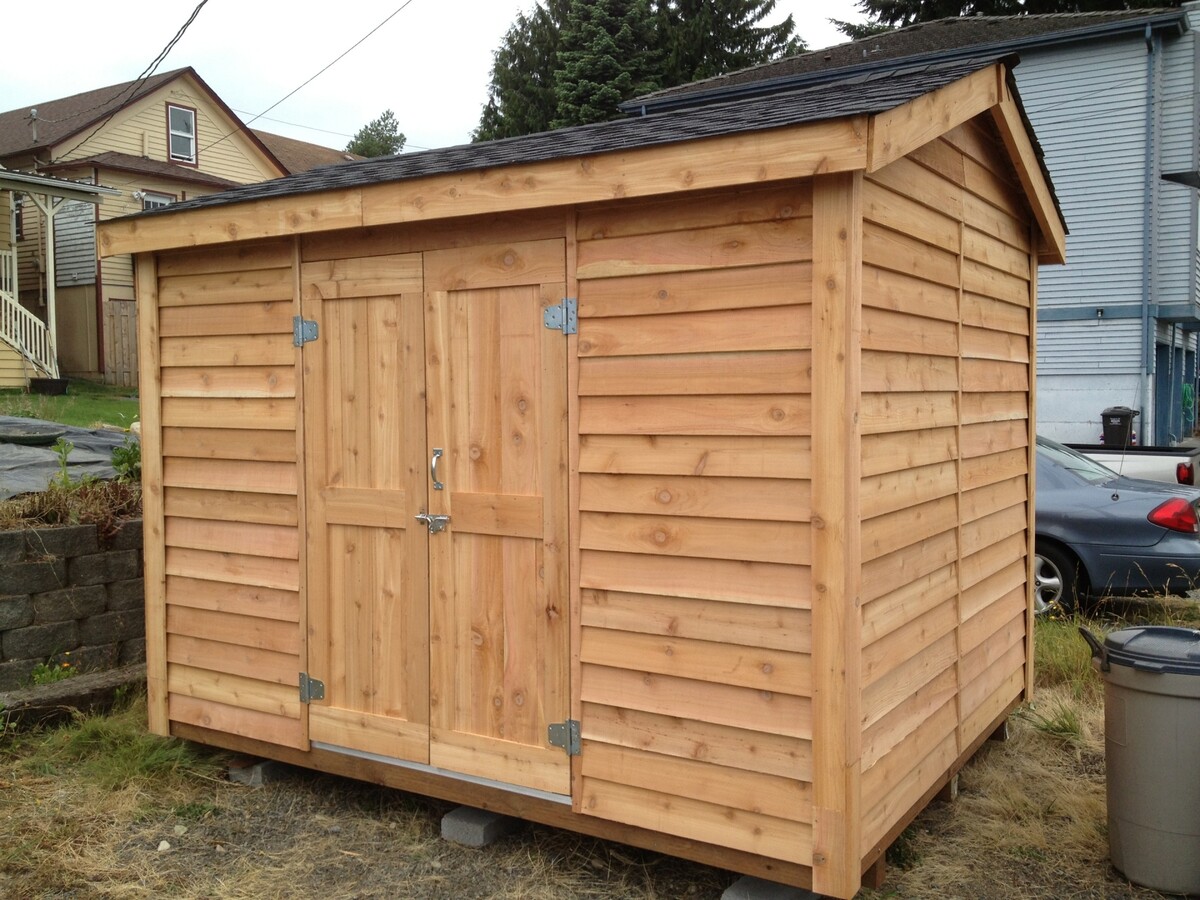
As your 12×20 shed takes shape, the addition of siding and roofing marks a significant milestone in the construction process, transforming the frame into a weather-tight and visually appealing structure. The selection of suitable siding materials and roofing components is crucial, as they not only contribute to the shed’s aesthetics but also provide essential protection against the elements.
When it comes to siding, you have a range of options to consider, including traditional wood siding, engineered wood panels, vinyl siding, or durable fiber cement boards. Each material offers unique benefits in terms of durability, maintenance, and visual appeal. Consider the architectural style of your shed, as well as your preferences for color and texture, when selecting the most suitable siding material.
Prior to installing the siding, it’s essential to apply a weather-resistant barrier to the exterior walls to protect against moisture and enhance the shed’s insulation. This barrier, often in the form of building wrap or house wrap, serves as a crucial line of defense against water infiltration while allowing for the shedding of internal moisture.
As you proceed with the siding installation, meticulous attention to detail is essential to ensure that the panels are level, securely fastened, and properly sealed at joints and corners. Properly installed siding not only enhances the shed’s visual appeal but also contributes to its structural integrity and weather resistance.
Turning to the roofing, the selection of roofing materials and the precision of the installation are paramount for safeguarding the shed against precipitation and environmental factors. Asphalt shingles, metal roofing panels, and cedar shakes are popular choices, each offering unique aesthetics and performance characteristics.
Prior to installing the roofing material, it’s imperative to apply an underlayment to the roof deck to provide an additional layer of protection against water infiltration. This underlayment acts as a barrier, safeguarding the shed’s interior from potential leaks and moisture intrusion.
As you install the roofing material, ensure that it is applied in accordance with the manufacturer’s guidelines, paying close attention to proper fastening, alignment, and flashing details. A well-executed roofing installation not only enhances the shed’s visual appeal but also provides essential protection against the elements, ensuring a durable and resilient structure.
With the siding and roofing in place, your 12×20 shed is now enclosed and protected, poised for the next phase of installing doors and windows to enhance functionality and aesthetics.
Installing Doors and Windows
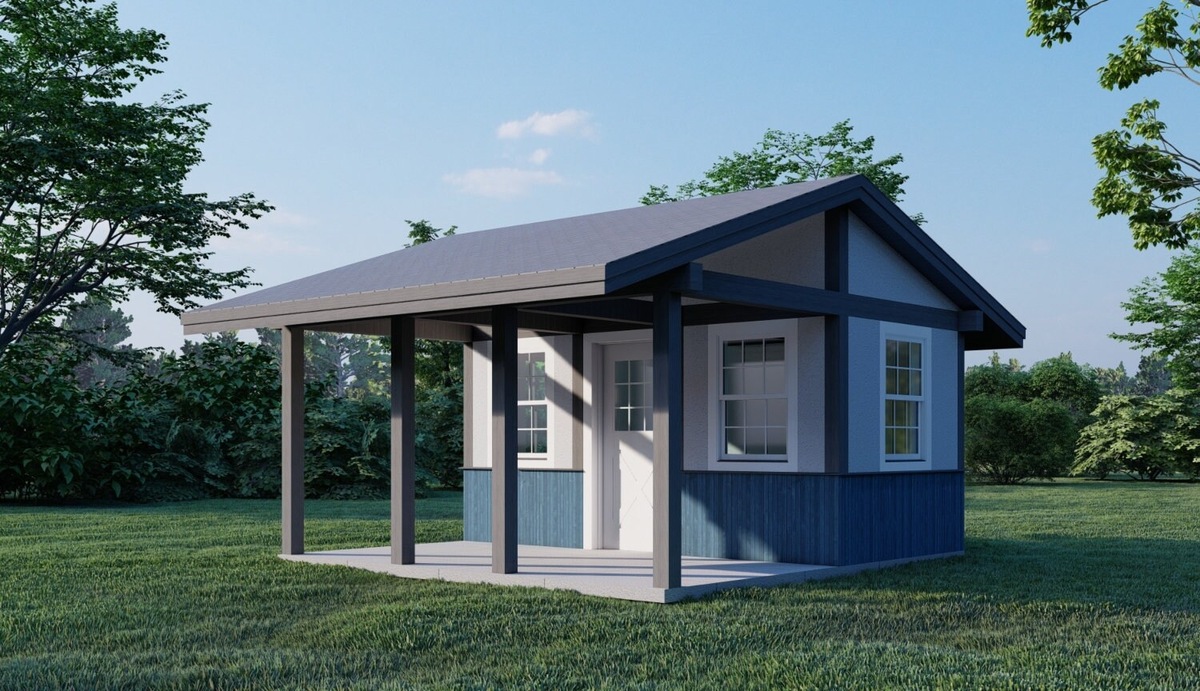
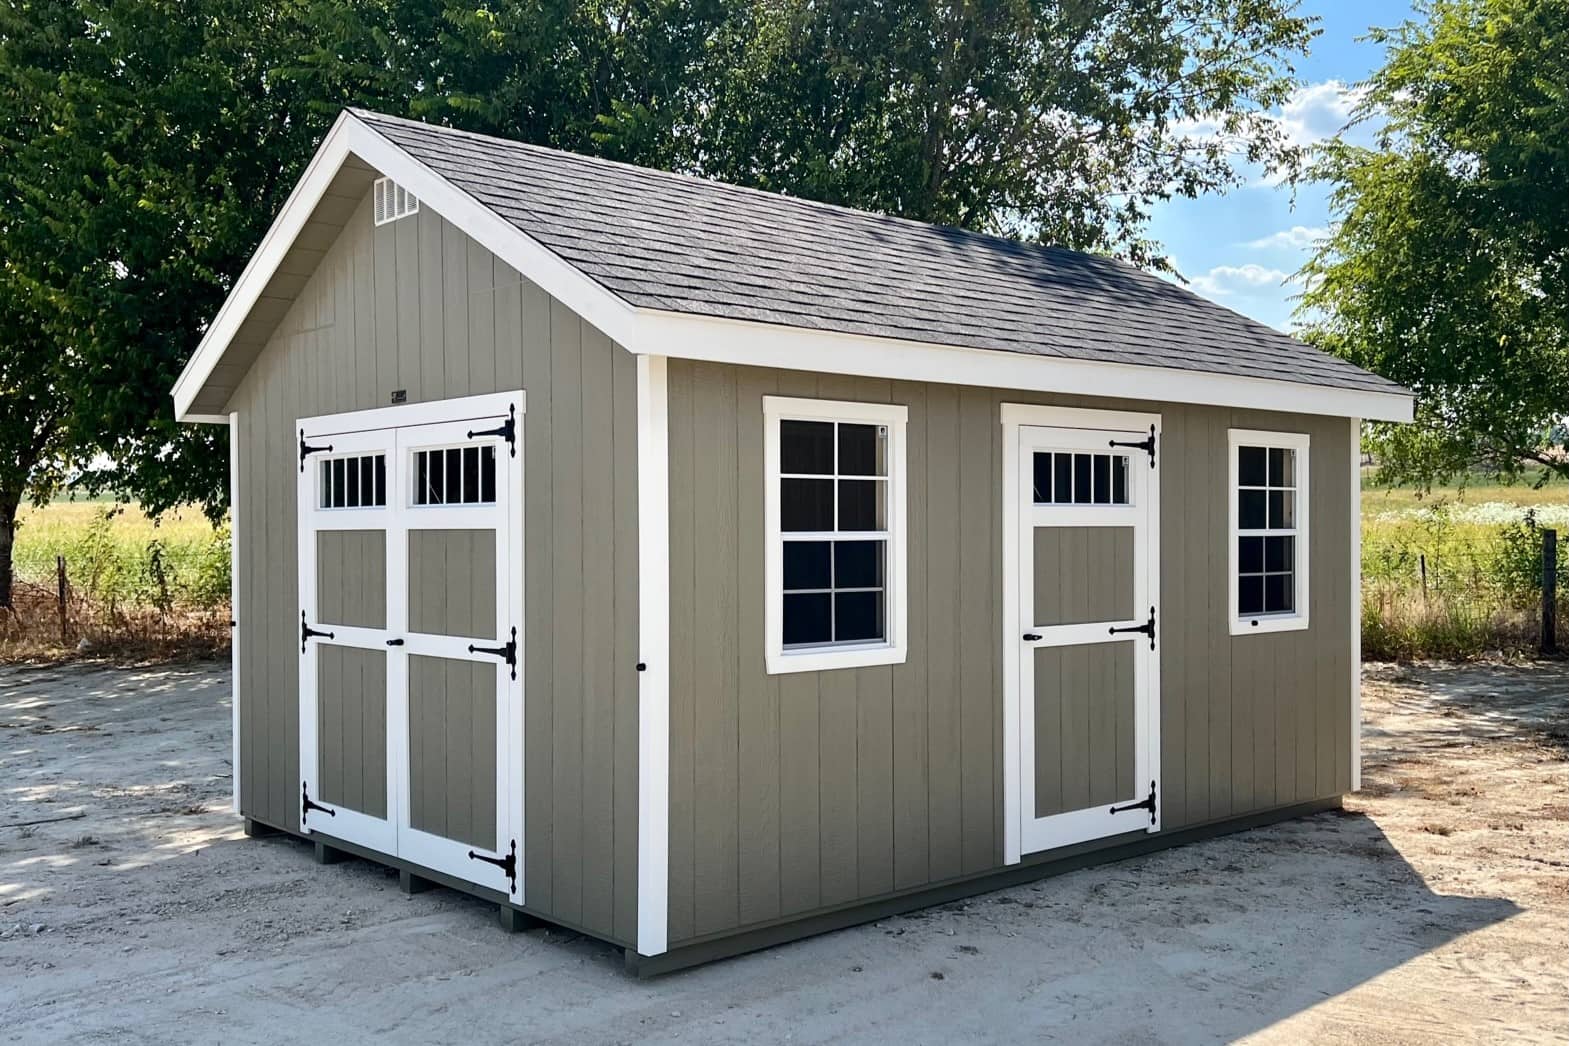
As your 12×20 shed nears completion, the installation of doors and windows adds both functionality and aesthetic appeal to the structure, creating an inviting and versatile space. Thoughtful consideration of the design, placement, and features of these elements can significantly enhance the shed’s usability, natural lighting, and overall ambiance.
When selecting doors for your shed, factors such as accessibility, security, and visual appeal come into play. Options range from traditional hinged doors to sliding barn-style doors, each offering unique benefits in terms of space utilization and architectural character. Consider the shed’s intended use and the surrounding landscape when choosing the most suitable door style and configuration.
Windows play a vital role in illuminating the shed’s interior and fostering a welcoming atmosphere. The size, placement, and design of windows can significantly impact the shed’s visual appeal and functionality. Consider the shed’s orientation and the desired balance of natural light and ventilation when determining the optimal window configuration.
Prior to installing doors and windows, it’s crucial to ensure that the openings are properly framed and flashed to prevent water infiltration and ensure structural integrity. Carefully follow the manufacturer’s recommendations and building codes to ensure that the installations meet safety and performance standards.
As you proceed with the installation, meticulous attention to detail is essential to ensure that the doors and windows are level, securely anchored, and properly sealed to prevent air and water infiltration. Properly installed doors and windows not only enhance the shed’s functionality and visual appeal but also contribute to its energy efficiency and weather resistance.
Consider incorporating additional features such as window shutters, decorative trim, or custom hardware to further enhance the aesthetic appeal of your shed’s exterior. These details can add a touch of character and personalization, elevating the shed’s visual impact and complementing your property’s overall aesthetic.
With doors and windows in place, your 12×20 shed is now a fully enclosed and inviting space, ready for the final phase of finishing touches and maintenance to ensure its long-term durability and visual appeal.
Read more: How To Build A 12×12 Shed
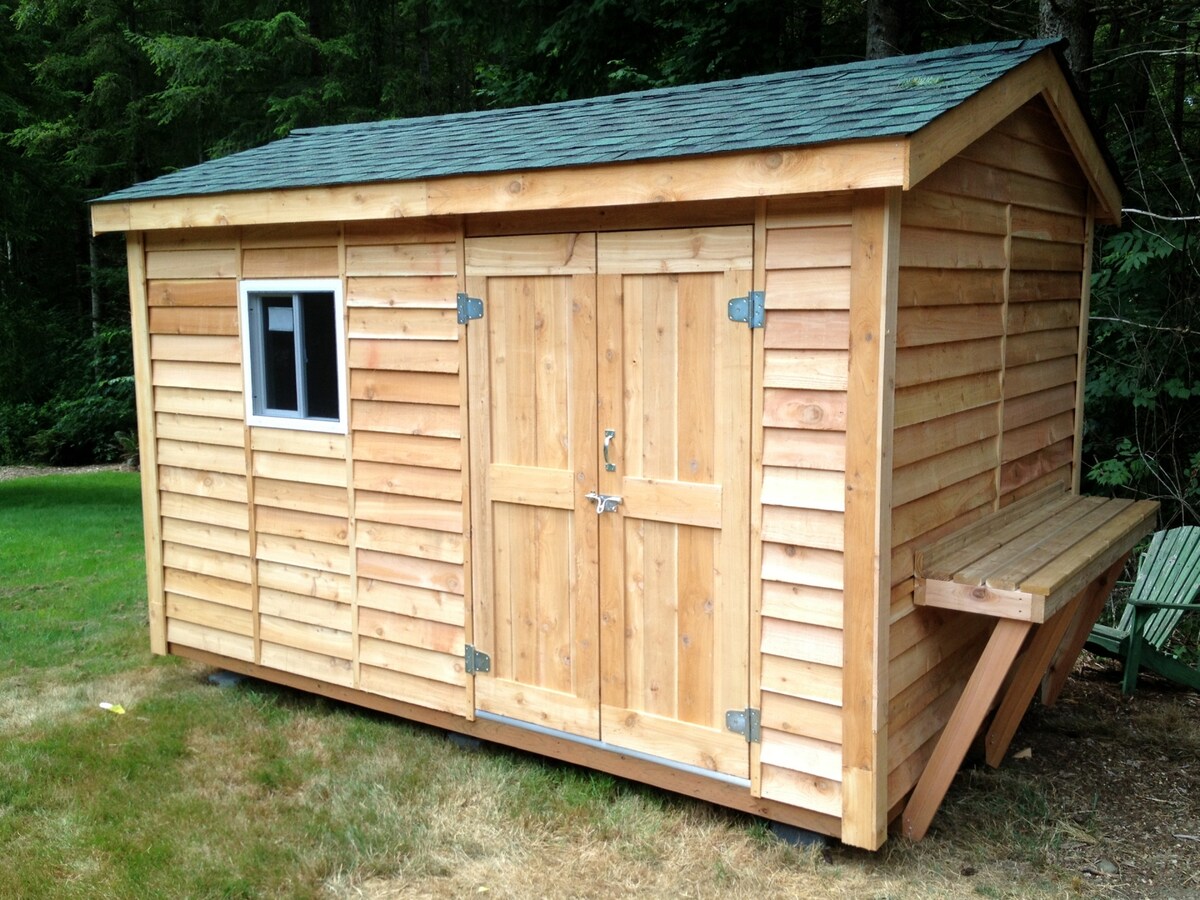
Finishing Touches and Maintenance
As the construction of your 12×20 shed draws to a close, attention to finishing touches and maintenance ensures that your outdoor structure not only looks appealing but also stands the test of time. From interior finishes to ongoing upkeep, these final steps are essential for creating a functional and enduring space that enhances your property’s aesthetics.
Interior finishes, such as insulation, wall paneling, and flooring, contribute to the comfort and usability of your shed. Insulation helps regulate the interior temperature, making the space more conducive to year-round use. Wall paneling, whether in the form of drywall, wood, or composite materials, adds a polished look and provides a surface for hanging tools and equipment. Additionally, selecting a durable and easy-to-maintain flooring material, such as concrete, vinyl, or treated wood, ensures that your shed’s interior is both practical and visually appealing.
Exterior finishes, such as paint or stain, not only enhance the shed’s visual appeal but also provide essential protection against the elements. Choose a high-quality exterior finish that complements your property’s aesthetic and provides long-lasting durability. Regular maintenance, including periodic cleaning and refinishing, will help preserve the shed’s appearance and safeguard it from weather-related wear and tear.
As you add the final decorative elements and organizational features to your shed, consider incorporating storage solutions, workbenches, and shelving to optimize its functionality. Thoughtful organization and utilization of space ensure that your shed serves its intended purpose effectively, whether as a storage space, workshop, or hobby area.
As your shed nears completion, take the time to review and address any remaining construction details, ensuring that all components are securely fastened, sealed, and functioning as intended. Thoroughly inspect the shed’s exterior and interior to identify and address any potential maintenance needs or adjustments.
Looking ahead, establishing a proactive maintenance routine is essential for preserving your shed’s structural integrity and visual appeal. Regular inspections, cleaning, and minor repairs will help prevent issues from escalating and ensure that your shed remains a valuable and attractive asset on your property for years to come.
With the finishing touches complete and a maintenance plan in place, your 12×20 shed is now a fully realized and functional addition to your property. Whether you’re using it for storage, hobbies, or relaxation, your well-crafted shed is poised to enhance your outdoor living experience and provide enduring value.
Conclusion
Congratulations on completing the construction of your 12×20 shed! This journey has been a testament to your dedication, craftsmanship, and vision for creating a valuable and versatile addition to your property. As you reflect on the process and admire the finished structure, it’s evident that your commitment to meticulous planning, precise execution, and thoughtful finishing touches has yielded a space that enhances both functionality and aesthetics.
Throughout this comprehensive guide, you’ve navigated every phase of shed construction with confidence and expertise. From selecting the ideal location and obtaining permits to framing the structure, adding siding and roofing, and incorporating doors and windows, each step has been a testament to your craftsmanship and attention to detail.
As your shed now stands as a testament to your hard work and dedication, it’s poised to serve as a versatile and valuable asset on your property. Whether it’s providing storage for gardening tools, serving as a workshop for DIY projects, or offering a tranquil retreat, your well-constructed shed is a reflection of your creativity and commitment to enhancing your outdoor living space.
Looking ahead, the ongoing maintenance and care of your shed will ensure that it remains a resilient and visually appealing structure for years to come. By establishing a proactive maintenance routine and addressing any potential issues promptly, you’ll safeguard your investment and continue to enjoy the benefits of your thoughtfully crafted outdoor space.
As you embark on this new chapter with your completed shed, take pride in the knowledge that your efforts have culminated in a valuable and enduring addition to your property. Whether you’re using it for storage, hobbies, or relaxation, your shed stands as a testament to your vision and craftsmanship, enriching your outdoor living experience and adding lasting value to your property.
As you celebrate the completion of your 12×20 shed, take a moment to appreciate the journey you’ve undertaken and the tangible result of your hard work and dedication. Your shed is a reflection of your creativity, skill, and commitment to enhancing your outdoor space, and it’s poised to provide enduring utility and enjoyment for years to come.
Frequently Asked Questions about How To Build A 12X20 Shed
Was this page helpful?
At Storables.com, we guarantee accurate and reliable information. Our content, validated by Expert Board Contributors, is crafted following stringent Editorial Policies. We're committed to providing you with well-researched, expert-backed insights for all your informational needs.


0 thoughts on “How To Build A 12X20 Shed”