Home>Home Security and Surveillance>How To Make Lens Material For A Motion Detector
Home Security and Surveillance
How To Make Lens Material For A Motion Detector
Modified: November 1, 2024
Learn how to make the lens material for a motion detector, a crucial component of home security and surveillance systems. Enhance your DIY skills and protect your home with this step-by-step guide.
(Many of the links in this article redirect to a specific reviewed product. Your purchase of these products through affiliate links helps to generate commission for Storables.com, at no extra cost. Learn more)
Introduction
Welcome to the world of home security and surveillance! In today’s fast-paced society, ensuring the safety of our homes and loved ones has become a top priority. With advancements in technology, there is now a wide range of home security solutions available, including motion detectors, which play a crucial role in detecting and deterring potential intruders.
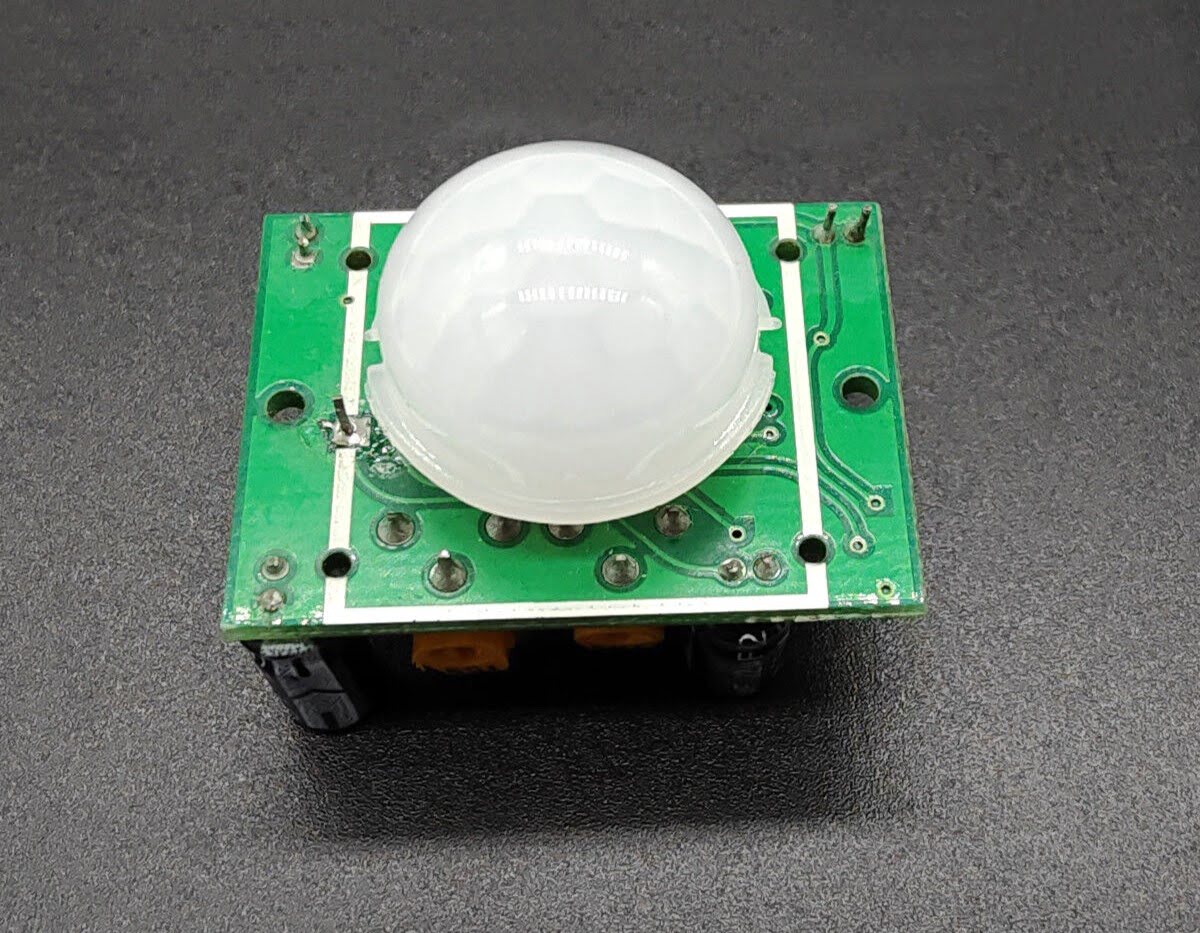
One essential component of a motion detector is the lens material. The lens material is responsible for focusing and directing the infrared signals, enabling the detector to accurately detect motion within its range. While you can easily find lens materials on the market, making your own lens material can be a rewarding and cost-effective DIY project.
In this article, we’ll guide you through the process of making your own lens material for a motion detector. With a few simple steps and some common materials, you’ll be able to create a high-quality lens that enhances the sensitivity and effectiveness of your motion detector.
Before we dive in, let’s gather all the materials you’ll need for this project.
Key Takeaways:
- You can make your own lens material for a motion detector using acrylic sheet, resin, and a mold. It’s a rewarding DIY project that enhances your home security system.
- Testing the lens material is crucial. Attach it to your motion detector, perform motion tests, and fine-tune the sensitivity for optimal performance. Enjoy your custom-made security solution!
Read more: How To Make A Motion Detector
Step 1: Gather Materials
Before you begin making your lens material for a motion detector, it’s essential to have all the necessary materials on hand. Here’s a list of items you’ll need:
- Acrylic sheet: You can find this at a local hardware store or online. Make sure to choose a transparent acrylic sheet with a thickness suitable for your motion detector.
- Heat-resistant mold: This can be a silicone mold or any other heat-resistant material that can withstand the curing process.
- Measuring scale or ruler: To ensure precise measurements and accuracy during the lens-making process.
- Heat-resistant adhesive: You’ll need this to attach the lens material to your motion detector later on.
- Protective gloves and goggles: It’s important to prioritize safety when working with chemicals and hot materials. Always wear protective gear to avoid any accidents.
Once you have all the materials ready, you can move on to the next step of preparing the lens mixture.
Step 2: Prepare the Lens Mixture
Now that you have gathered all the necessary materials, it’s time to prepare the lens mixture for your motion detector. Follow these steps:
- Cut the acrylic sheet: Use a measuring scale and a sharp cutting tool to cut the acrylic sheet into the desired shape and size for your motion detector’s lens. Make sure to cut it precisely, as any irregularities may affect the performance of the lens.
- Mix the resin and hardener: Follow the instructions on the resin and hardener packaging to mix the two components. Use a clean container and mix them thoroughly until you achieve a homogenous mixture. Avoid creating any air bubbles during the mixing process, as they may affect the clarity of the lens.
- Add a UV stabilizer (optional): If you want to enhance the UV resistance of your lens material, you can add a small amount of a UV stabilizer to the mixture. This will help protect the lens from yellowing or deteriorating over time when exposed to sunlight.
- Stir in a mold release agent: To ensure easy release of the lens from the mold later on, apply a thin layer of a mold release agent to the mold surface, ideally a heat-resistant silicone-based agent. This will prevent the lens material from sticking to the mold during the curing process.
Once you’ve prepared the lens mixture, it’s time to move on to the next step of molding the lens material according to your desired shape.
When making lens material for a motion detector, use a clear and durable material like acrylic or polycarbonate to ensure optimal light transmission and protection from the elements.
Step 3: Mold the Lens Material
With the lens mixture prepared, it’s now time to mold the lens material for your motion detector. Follow these steps:
- Place the acrylic sheet in the mold: Carefully place the cut acrylic sheet into the prepared heat-resistant mold, ensuring that it fits snugly and is centered.
- Pour the lens mixture into the mold: Slowly pour the prepared lens mixture into the mold, covering the acrylic sheet completely. Be cautious not to overfill the mold, as the excess material may spill over the sides.
- Remove air bubbles: Gently tap the mold on a solid surface to help release any trapped air bubbles within the lens mixture. You can also use a toothpick or a small needle to pop any visible air bubbles on the surface of the lens material.
- Allow the lens material to settle: Let the lens material settle in the mold for a few minutes to allow it to even out and achieve a smooth surface.
It’s important to note that the molding process should be done in a clean and dust-free environment to prevent any debris from getting trapped in the lens material. Additionally, ensure that the mold is stable and level to avoid any distortion or unevenness in the final lens shape.
Once you’ve successfully molded the lens material, it’s time to move on to the next step of curing the lens.
Step 4: Curing the Lens
After molding the lens material, the next step is to cure it to ensure it hardens and solidifies properly. Follow these steps to effectively cure your lens:
- Read the curing instructions: Different types of lens materials may have specific curing requirements. Make sure to refer to the instructions provided with the resin and hardener you used to determine the recommended curing time and temperature.
- Heat the mold: If your lens material requires heat curing, preheat an oven or a heat source to the specified temperature. Place the mold with the lens material into the oven and allow it to cure for the recommended duration.
- Monitor the curing process: Keep a close eye on the curing process to ensure the lens material doesn’t overheat or deform. Follow the recommended time and temperature guidelines provided by the manufacturer.
- Allow the lens to cool: Once the curing process is complete, carefully remove the mold from the heat source and allow the lens material to cool down. This will help the lens to solidify and maintain its shape.
- Inspect the lens: After the lens has cooled, carefully remove it from the mold and inspect it for any imperfections or defects. Check for clarity, smoothness, and any signs of bubbles or distortions. If necessary, you can polish the lens surface using a mild polishing compound or a microfiber cloth.
It’s important to ensure that you follow the curing instructions accurately. Deviating from the prescribed temperature or time frame may result in an improperly cured lens, affecting its overall performance.
Now that you’ve successfully cured the lens material, it’s time to proceed to the final step of testing its effectiveness in your motion detector.
Step 5: Testing the Lens Material
Now that you have completed the process of making your own lens material for a motion detector, it’s important to test its effectiveness. Follow these steps to ensure your lens material is working properly:
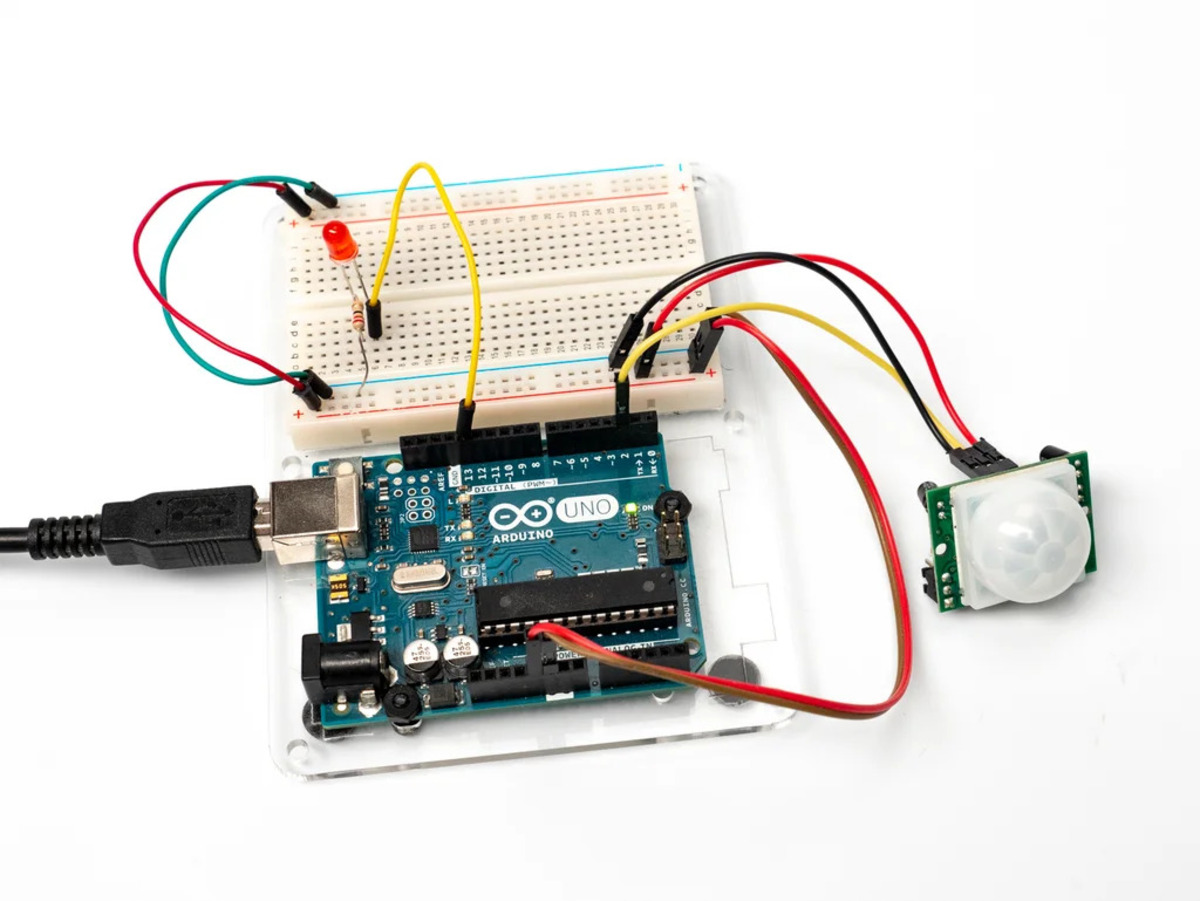
- Attach the lens to your motion detector: Using a heat-resistant adhesive, carefully attach the lens material to your motion detector. Make sure the lens is securely in place and aligned properly with the detector’s sensor.
- Power up the motion detector: Connect the motion detector to a power source and activate it according to the manufacturer’s instructions. Ensure that the detector is positioned correctly and has an unobstructed view of the area you want to monitor.
- Perform motion tests: Walk in front of the motion detector within its specified range and observe its response. The lens should accurately detect and trigger the motion detection system, alerting you to any movement in the area.
- Adjust and fine-tune: If you notice any issues with the motion detection or if the sensitivity needs to be adjusted, refer to the instruction manual of your motion detector. Most detectors have adjustable sensitivity settings that can be fine-tuned to your specific needs.
- Continue monitoring: Once you are satisfied with the performance of your lens material, keep an eye on the motion detector’s functionality to ensure it consistently and reliably detects motion within the desired range.
By following these testing procedures, you can ensure that the lens material you made is effectively enhancing the motion detection capabilities of your security system.
Congratulations! You have successfully made your own lens material for a motion detector. By taking the DIY approach, not only have you saved costs but also gained a sense of accomplishment. Now you can enjoy enhanced home security and surveillance with a custom-made lens that fits your specific needs.
Remember, the lens material is a critical component of a motion detector, so it’s essential to maintain and clean it regularly to ensure optimal performance. Keep it free from dust, fingerprints, and debris to maximize its effectiveness in detecting motion.
Happy home security and surveillance!
Frequently Asked Questions about How To Make Lens Material For A Motion Detector
Was this page helpful?
At Storables.com, we guarantee accurate and reliable information. Our content, validated by Expert Board Contributors, is crafted following stringent Editorial Policies. We're committed to providing you with well-researched, expert-backed insights for all your informational needs.