Home>Home Security and Surveillance>How To Make A Motion Detector Detonator With Breadboards
Home Security and Surveillance
How To Make A Motion Detector Detonator With Breadboards
Modified: November 1, 2024
Learn how to create a homemade motion detector detonator using breadboards. Enhance your home security and surveillance with this DIY project.
(Many of the links in this article redirect to a specific reviewed product. Your purchase of these products through affiliate links helps to generate commission for Storables.com, at no extra cost. Learn more)
Introduction
Welcome to the world of home security and surveillance! In today’s fast-paced world, it’s essential to ensure that our homes are protected from potential threats. One of the most effective ways to achieve this is by installing a reliable home security system. Among the many components of a comprehensive security system, motion detectors play a crucial role.
Motion detectors are devices that can detect movement within a given area. They are commonly used in home security systems to trigger alarms or notify homeowners of possible intrusions. In this article, we will guide you through the process of creating your own motion detector detonator using breadboards, a popular prototyping tool for electronics projects.
By the end of this tutorial, you will have a fully functional motion detector detonator that can be used as a part of your DIY home security system. So let’s gather the necessary materials and get started on this exciting journey!
Key Takeaways:
- Create your own motion detector detonator using breadboards for enhanced home security. Follow step-by-step instructions to build and test your DIY system.
- Ensure safety and compliance when building a motion detector detonator. Enjoy the DIY process and stay proactive in protecting your home.
Required Materials
Before we dive into the step-by-step process, let’s take a look at the materials you will need to create your motion detector detonator:
- Breadboard – This is the main platform where you will be connecting and prototyping your circuit.
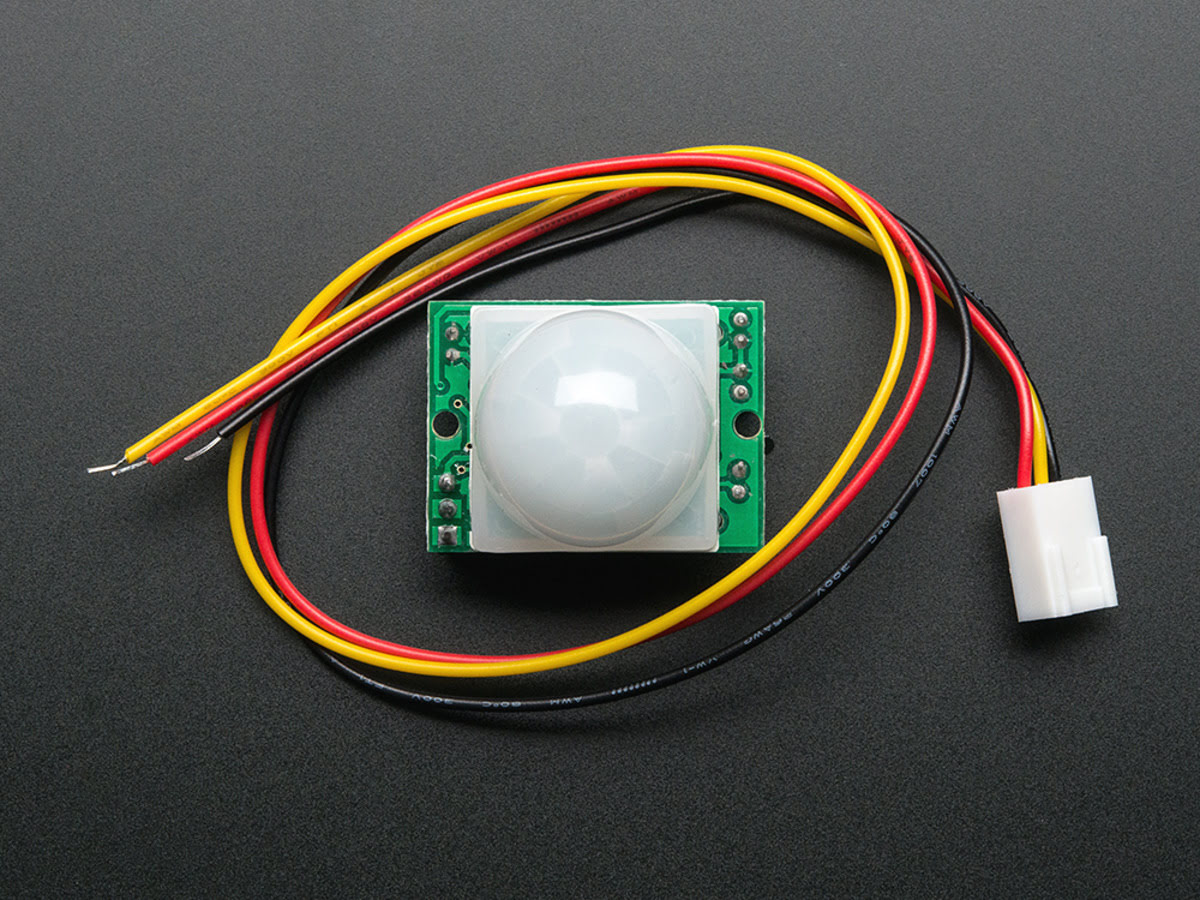
- Motion Detector Sensor – This sensor will be responsible for detecting motion within its range.
- Arduino Board – An Arduino board will serve as the brain of the motion detector detonator.
- Jumper Wires – These wires will be used to connect the components on the breadboard.
- LEDs – LEDs will be used to indicate the detection of motion.
- Resistors – To protect the LEDs and ensure proper functioning.
- Buzzer – A buzzer can be added to the circuit to provide an audible alarm when motion is detected.
- Power Supply – You will need a power supply to power the Arduino board and provide power to the circuit.
These are the basic materials required, but you can always add more components based on your preferences and requirements. Now that you have gathered all the necessary materials, let’s move on to the next step: setting up the breadboard.
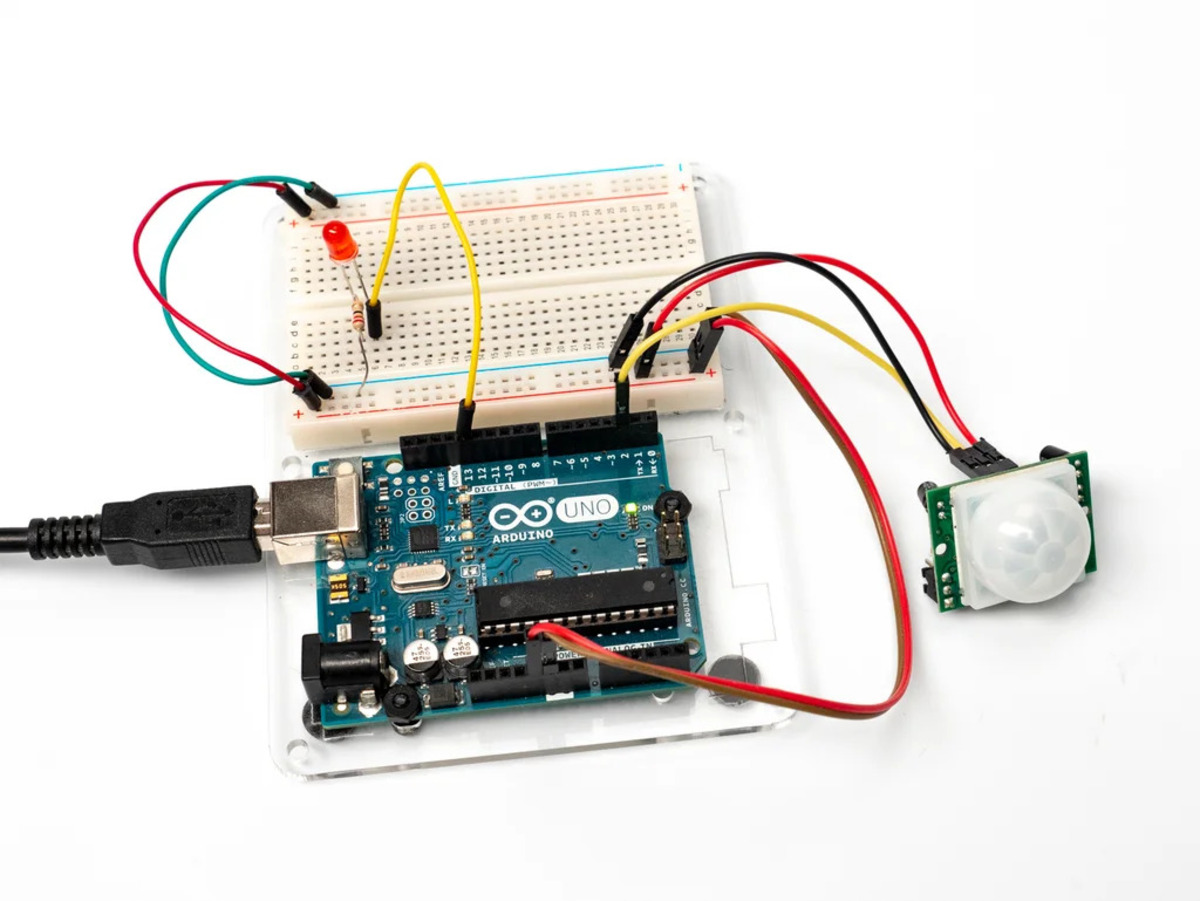
Step 1: Setting up the Breadboard
The breadboard is a crucial component in any electronics project as it allows for easy and temporary connections between the various components. Before we begin connecting the components for our motion detector detonator, let’s set up the breadboard.
Follow these steps to set up the breadboard:
- Take your empty breadboard and place it on a flat and stable surface.
- Notice that the breadboard is divided into two sections, with each section having multiple rows and columns.
- Locate the power rails on the breadboard. These are typically indicated by red and blue lines on the sides of the board.
- Connect the Arduino board’s power supply to the breadboard’s power rails. Make sure to connect the positive and negative terminals correctly.
- Now that the power supply is connected, you can start connecting the components to the breadboard. We will begin with the motion detector sensor.
With the breadboard properly set up, we can move on to connecting the components for our motion detector detonator. In the next step, we will guide you through the process of connecting the various components on the breadboard, ensuring a proper circuit connection for effective functionality.
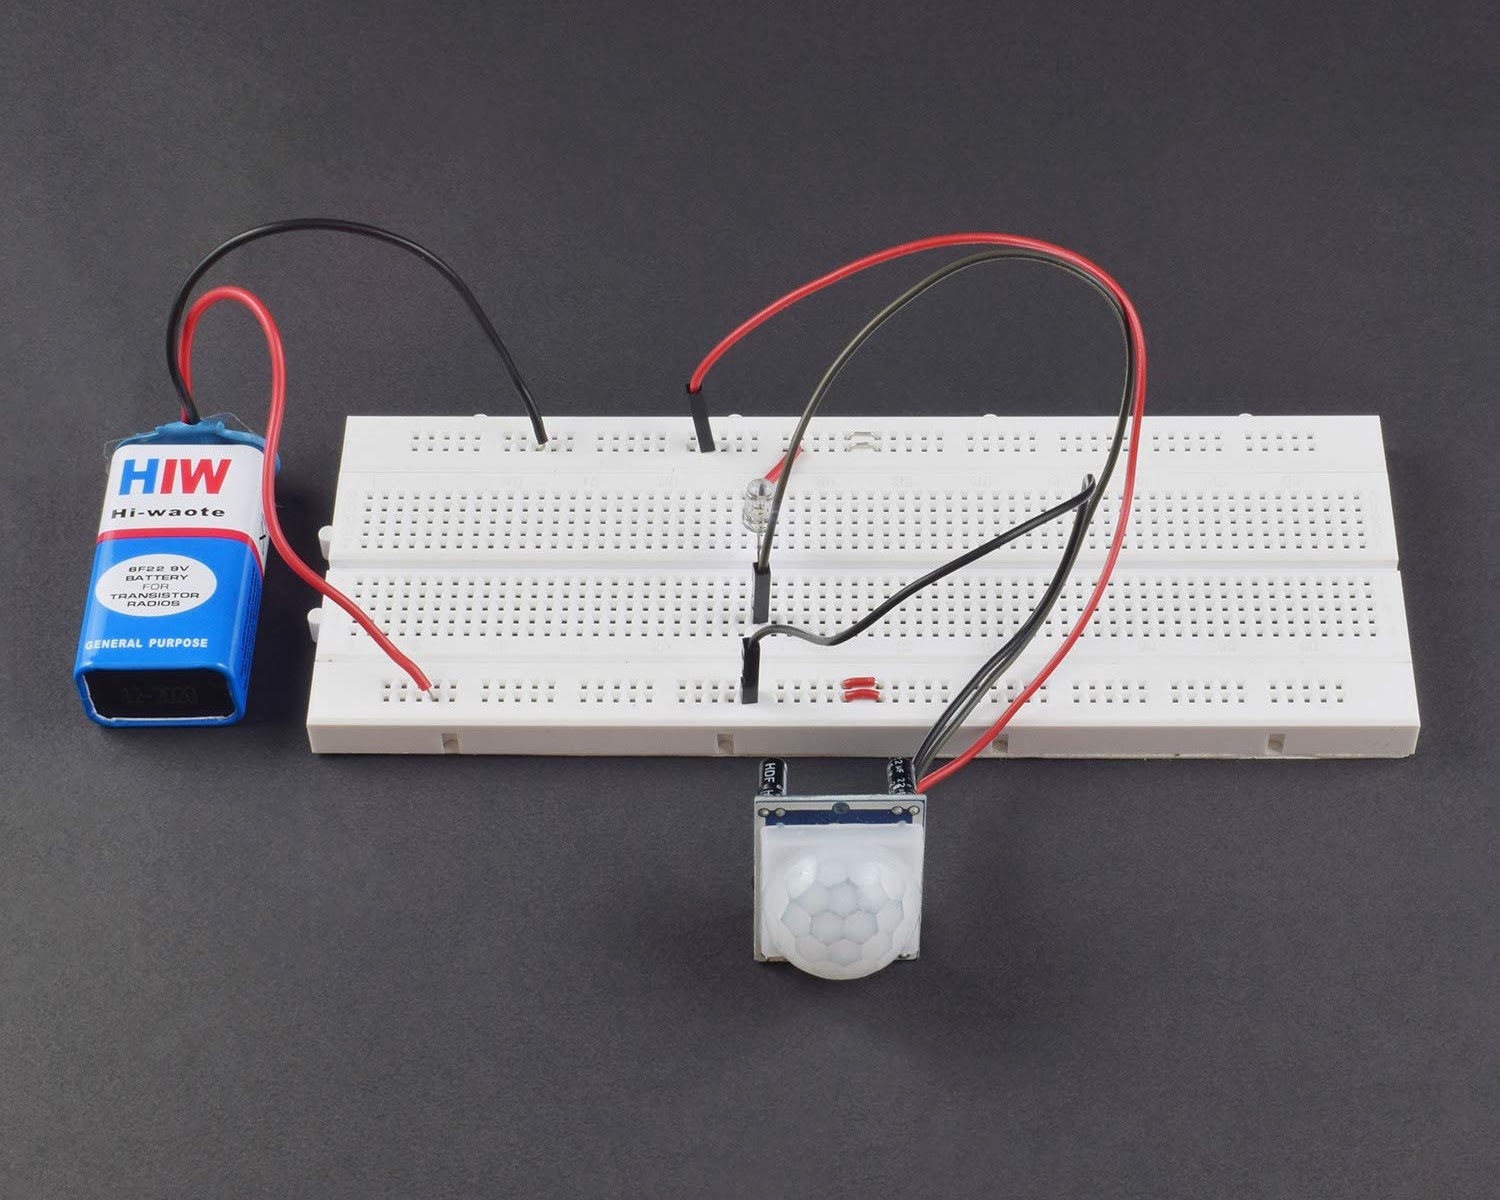
Step 2: Connecting the Components
Now that we have our breadboard set up, it’s time to connect the components for our motion detector detonator. Follow these steps to properly connect the components on the breadboard:
- Start by connecting the motion detector sensor. Locate the VCC, GND, and OUT pins on the sensor.
- Connect the VCC pin of the motion detector sensor to the positive power rail on the breadboard.
- Connect the GND pin of the motion detector sensor to the negative power rail on the breadboard.
- Take a jumper wire and connect the OUT pin of the motion detector sensor to any available row on the breadboard.
- Next, connect an LED to the breadboard. Connect the longer leg (anode) of the LED to the positive power rail on the breadboard using a resistor.
- Connect the shorter leg (cathode) of the LED to the same row where you connected the OUT pin of the motion detector sensor.
- Repeat the above steps to connect more LEDs if desired, ensuring that each LED is connected to a separate row on the breadboard.
- If you want to add a buzzer to your circuit, connect one end of the buzzer to a separate row on the breadboard.
- Connect the other end of the buzzer to the positive power rail on the breadboard using a resistor.
- Now that all the components are connected on the breadboard, it’s time to program the motion detector sensor using an Arduino board.
By properly connecting the components on the breadboard, you are creating the foundation for a functional motion detector detonator. In the next step, we will guide you through the process of programming the motion detector using an Arduino board.
Step 3: Programming the Motion Detector
In this step, we will program the motion detector using an Arduino board. The Arduino board will receive signals from the motion detector sensor and control the LEDs and buzzer accordingly. Follow these steps to program the motion detector:
- Connect your Arduino board to your computer using a USB cable.
- Open the Arduino IDE (Integrated Development Environment) on your computer.
- Create a new sketch in the Arduino IDE.
- Copy and paste the following code into the Arduino IDE:
cpp
int motionPin = 2;
int ledPin = 13;
int buzzerPin = 8;
void setup() {
pinMode(ledPin, OUTPUT);
pinMode(buzzerPin, OUTPUT);
pinMode(motionPin, INPUT);
}
void loop() {
if (digitalRead(motionPin) == HIGH) {
digitalWrite(ledPin, HIGH);
tone(buzzerPin, 1000);
delay(1000);
digitalWrite(ledPin, LOW);
noTone(buzzerPin);
delay(1000);
}
}
- Upload the code to your Arduino board by clicking on the “Upload” button in the Arduino IDE.
- After the upload is complete, disconnect the Arduino board from your computer.
The code provided sets up the motion detector pin, LED pin, and buzzer pin as variables. In the setup() function, we set the LED and buzzer pins as output pins, and the motion detector pin as an input pin. In the loop() function, we continuously check if motion is detected. If motion is detected, the LED will turn on, the buzzer will emit a tone, and then both will turn off after a delay. The code will repeat itself.
Now that we have programmed the motion detector, it’s time to test the functionality of our motion detector. In the next step, we will guide you through the testing process.
When working with motion detectors and breadboards, always double-check your connections and ensure that the components are securely attached to avoid any false alarms or malfunctions.
Read more: How To Make A Motion Detector
Step 4: Testing the Motion Detector
Now that we have programmed the motion detector, it’s time to test its functionality. Follow these steps to test the motion detector:
- Connect the Arduino board to the power supply.
- Make sure the motion detector sensor is properly positioned in an area where it can detect motion.
- Observe the LED(s) and buzzer on the breadboard.
- Walk in front of the motion detector sensor to trigger motion.
- If motion is detected, the LED(s) on the breadboard will light up and the buzzer will emit a tone. If there is no motion, the LED(s) and buzzer will remain off.
- Repeat the test multiple times to ensure consistent detection and functionality.
- If the motion detector is working as expected, congratulations! You have successfully tested your motion detector. If not, double-check the connections and the code to troubleshoot any issues.
Testing the motion detector is an essential step to ensure that it accurately detects motion and triggers the desired outputs. Once you are satisfied with the functionality of the motion detector, you are ready to move on to the next step: adding the detonator circuit.
Step 5: Adding the Detonator Circuit
In this step, we will add the detonator circuit to our motion detector setup. The detonator circuit will simulate an alarm or activate an external device when motion is detected. Follow these steps to add the detonator circuit:
- Start by identifying the output pin on your Arduino board that will be used to trigger the detonator circuit. This can be any available digital output pin.
- Take a jumper wire and connect one end to the chosen output pin on the Arduino board.
- Connect the other end of the jumper wire to a separate row on the breadboard.
- From the same row on the breadboard, connect the negative terminal of the detonator device (e.g., a buzzer, LED, or relay) to the negative power rail.
- Connect the positive terminal of the detonator device to the positive power rail on the breadboard using a resistor.
- Ensure that all connections are properly secured and that there are no loose wires.
By adding the detonator circuit, we enhance the functionality of our motion detector by enabling it to activate external devices or simulate an alarm. This provides an extra layer of security to your home surveillance system. Now, let’s move on to the final step: testing the motion detector detonator.
Step 6: Testing the Motion Detector Detonator
Now that we have added the detonator circuit to our motion detector setup, it’s time to test the functionality of our motion detector detonator. Follow these steps to test the motion detector detonator:
- Ensure that all connections are secured and double-check the wiring of the detonator circuit.
- Connect the Arduino board to the power supply.
- Position the motion detector sensor in an area where it can detect motion.
- Observe the LED(s), buzzer, and the detonator device connected to the breadboard.
- Trigger motion in front of the motion detector sensor.
- If motion is detected, the LED(s) will light up, the buzzer will emit a tone, and the detonator device will activate. If there is no motion, the LED(s), buzzer, and detonator device will remain off.
- Repeat the test multiple times to ensure consistent detection and functionality.
- If the motion detector detonator is working as expected, congratulations! You have successfully tested and built your own motion detector detonator.
- Remember to exercise caution and ensure that the detonator device used is legal, safe, and fits within the legal boundaries of your jurisdiction.
Testing the motion detector detonator is crucial to ensure that it functions as desired, triggering the appropriate actions when motion is detected. Once you are satisfied with the performance of your motion detector detonator, you can integrate it into your home security system or customize it further to suit your specific needs.
With your motion detector detonator in place, you can enjoy enhanced security and peace of mind knowing that your home is guarded against potential threats. Take the time to regularly test and maintain your system to ensure its continued effectiveness. Stay proactive in protecting your home and loved ones!
Thank you for joining us on this DIY journey to create a motion detector detonator. Happy securing!
Conclusion
Home security and surveillance are of utmost importance in ensuring the safety of our homes and loved ones. By creating our own motion detector detonator using breadboards, we have taken a step towards enhancing our home security system.
Throughout this tutorial, we have learned how to set up a breadboard, connect components, program a motion detector, and add a detonator circuit. By following these steps and testing our creation, we have built a motion detector detonator that can detect motion, trigger LEDs and a buzzer, and activate a detonator device.
It is essential to note that the motion detector detonator is a DIY project that should be used responsibly and within the boundaries of the law. Always ensure that you are complying with local regulations and obtaining proper permits if needed.
By creating our own motion detector detonator, we have not only gained a sense of accomplishment but also improved the security of our homes. With this newfound knowledge, we can continue to explore and expand our home security systems, incorporating additional components and functionalities.
Remember to regularly inspect and maintain your motion detector detonator to keep it in optimal working condition. Stay updated on new technologies and advancements in the field of home security to ensure that your system remains effective and capable of protecting your home.
We hope that this tutorial has empowered you to take control of your home security. By combining creativity, technical skills, and a DIY spirit, you can create a safe and secure environment for you and your loved ones.
Thank you for joining us on this journey. Happy DIYing and stay safe!
Frequently Asked Questions about How To Make A Motion Detector Detonator With Breadboards
Was this page helpful?
At Storables.com, we guarantee accurate and reliable information. Our content, validated by Expert Board Contributors, is crafted following stringent Editorial Policies. We're committed to providing you with well-researched, expert-backed insights for all your informational needs.