Home>Home Security and Surveillance>How To Turn Off Red Light On A Blink Outdoor Camera
Home Security and Surveillance
How To Turn Off Red Light On A Blink Outdoor Camera
Modified: September 1, 2024
Learn how to easily turn off the red light on your Blink Outdoor camera to enhance your home security and surveillance. Take control of your camera settings today!
(Many of the links in this article redirect to a specific reviewed product. Your purchase of these products through affiliate links helps to generate commission for Storables.com, at no extra cost. Learn more)
Introduction
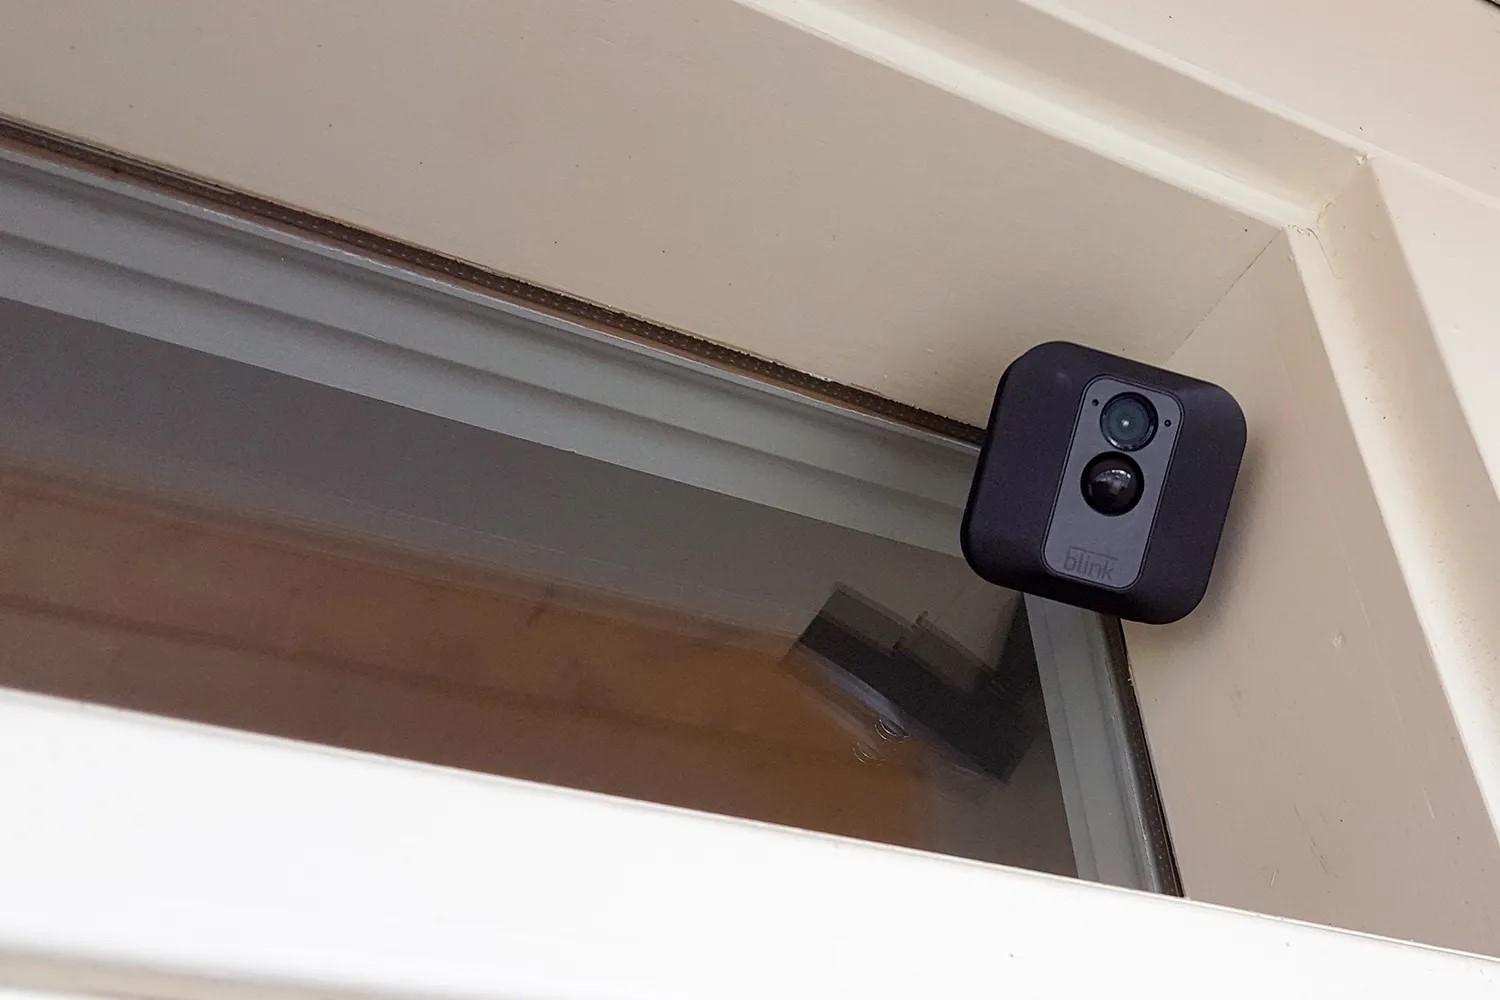
Welcome to our guide on how to turn off the red light on a Blink Outdoor Camera. If you have a Blink Outdoor Camera installed in your home for security and surveillance purposes, you may have noticed a small red light that illuminates when the camera is active. While this light is intended to indicate that the camera is recording or capturing footage, it can sometimes be distracting, especially if you want to maintain a discreet presence.
Fortunately, Blink allows you to disable the red light if you prefer a more discreet camera setup. In this article, we will walk you through the steps to turn off the red light on your Blink Outdoor Camera, ensuring you can maintain surveillance without drawing unnecessary attention.
Before we dive into the step-by-step process, it’s important to note that disabling the red light may not be legal or acceptable in certain jurisdictions. Be sure to check your local laws and regulations regarding surveillance and privacy before proceeding.
Key Takeaways:
- Disabling the red light on your Blink Outdoor Camera is possible through the Blink app, allowing for a more discreet surveillance setup. Remember to respect local laws and regulations regarding surveillance and privacy.
- While turning off the red light can make your camera less conspicuous, it may also impact its ability to deter potential intruders. Always consider the trade-off between discretion and visibility for effective home security.
Read more: Why Is My Blink Outdoor Camera Flashing Red?
Step 1: Accessing the Blink App
The first step in turning off the red light on your Blink Outdoor Camera is to access the Blink app on your smartphone or tablet. The Blink app is available for both iOS and Android devices and can be downloaded from the respective app stores.
Once you have downloaded and installed the Blink app, open it and log in to your Blink account. If you don’t have an account yet, you will need to create one by following the on-screen instructions.
After logging in, you will be taken to the dashboard, where you can see all the Blink devices connected to your account. Look for the camera that you want to disable the red light on and tap on it to select it.
Now that you have accessed the Blink app and selected the specific camera, you can proceed to the next step.
Step 2: Selecting the Camera
Once you have accessed the Blink app and logged into your account, it’s time to select the camera for which you want to disable the red light. The Blink app will display a list of all the cameras associated with your account, allowing you to easily identify and choose the specific camera you wish to modify.
To select the camera, navigate through the list within the Blink app. Look for the name or location associated with the camera you want to customize. Tap on the camera to highlight it and access its settings.
It’s important to note that if you have multiple cameras connected to your Blink account, you will need to repeat the following steps for each individual camera if you want to disable the red light across all of them.
With the camera selected, you are now ready to proceed to the next step.
Step 3: Opening the Camera Settings
Now that you have selected the specific camera for which you want to disable the red light, it’s time to open the camera settings in the Blink app. The camera settings allow you to customize various aspects of the camera’s functionality, including the option to turn off the red light.
To open the camera settings, look for the gear icon or the “Settings” option within the Blink app. This icon or option is typically located in the top right corner of the screen or within a menu accessible by tapping on the camera’s name or location.
Once you have located the camera settings, tap on it to open a new screen with a list of available customization options for the camera.
At this stage, it’s important to ensure a stable internet connection between your smartphone or tablet and the Blink camera. A solid connection is necessary for seamless communication and to make sure that the changes you make in the settings are applied successfully.
Now that you have accessed the camera settings, you can move on to the next step of disabling the red light on your Blink Outdoor Camera.
To turn off the red light on a Blink outdoor camera, go to the camera settings in the Blink app and disable the “LED Illuminator” option. This will deactivate the red light during recording.
Step 4: Disabling the Red Light
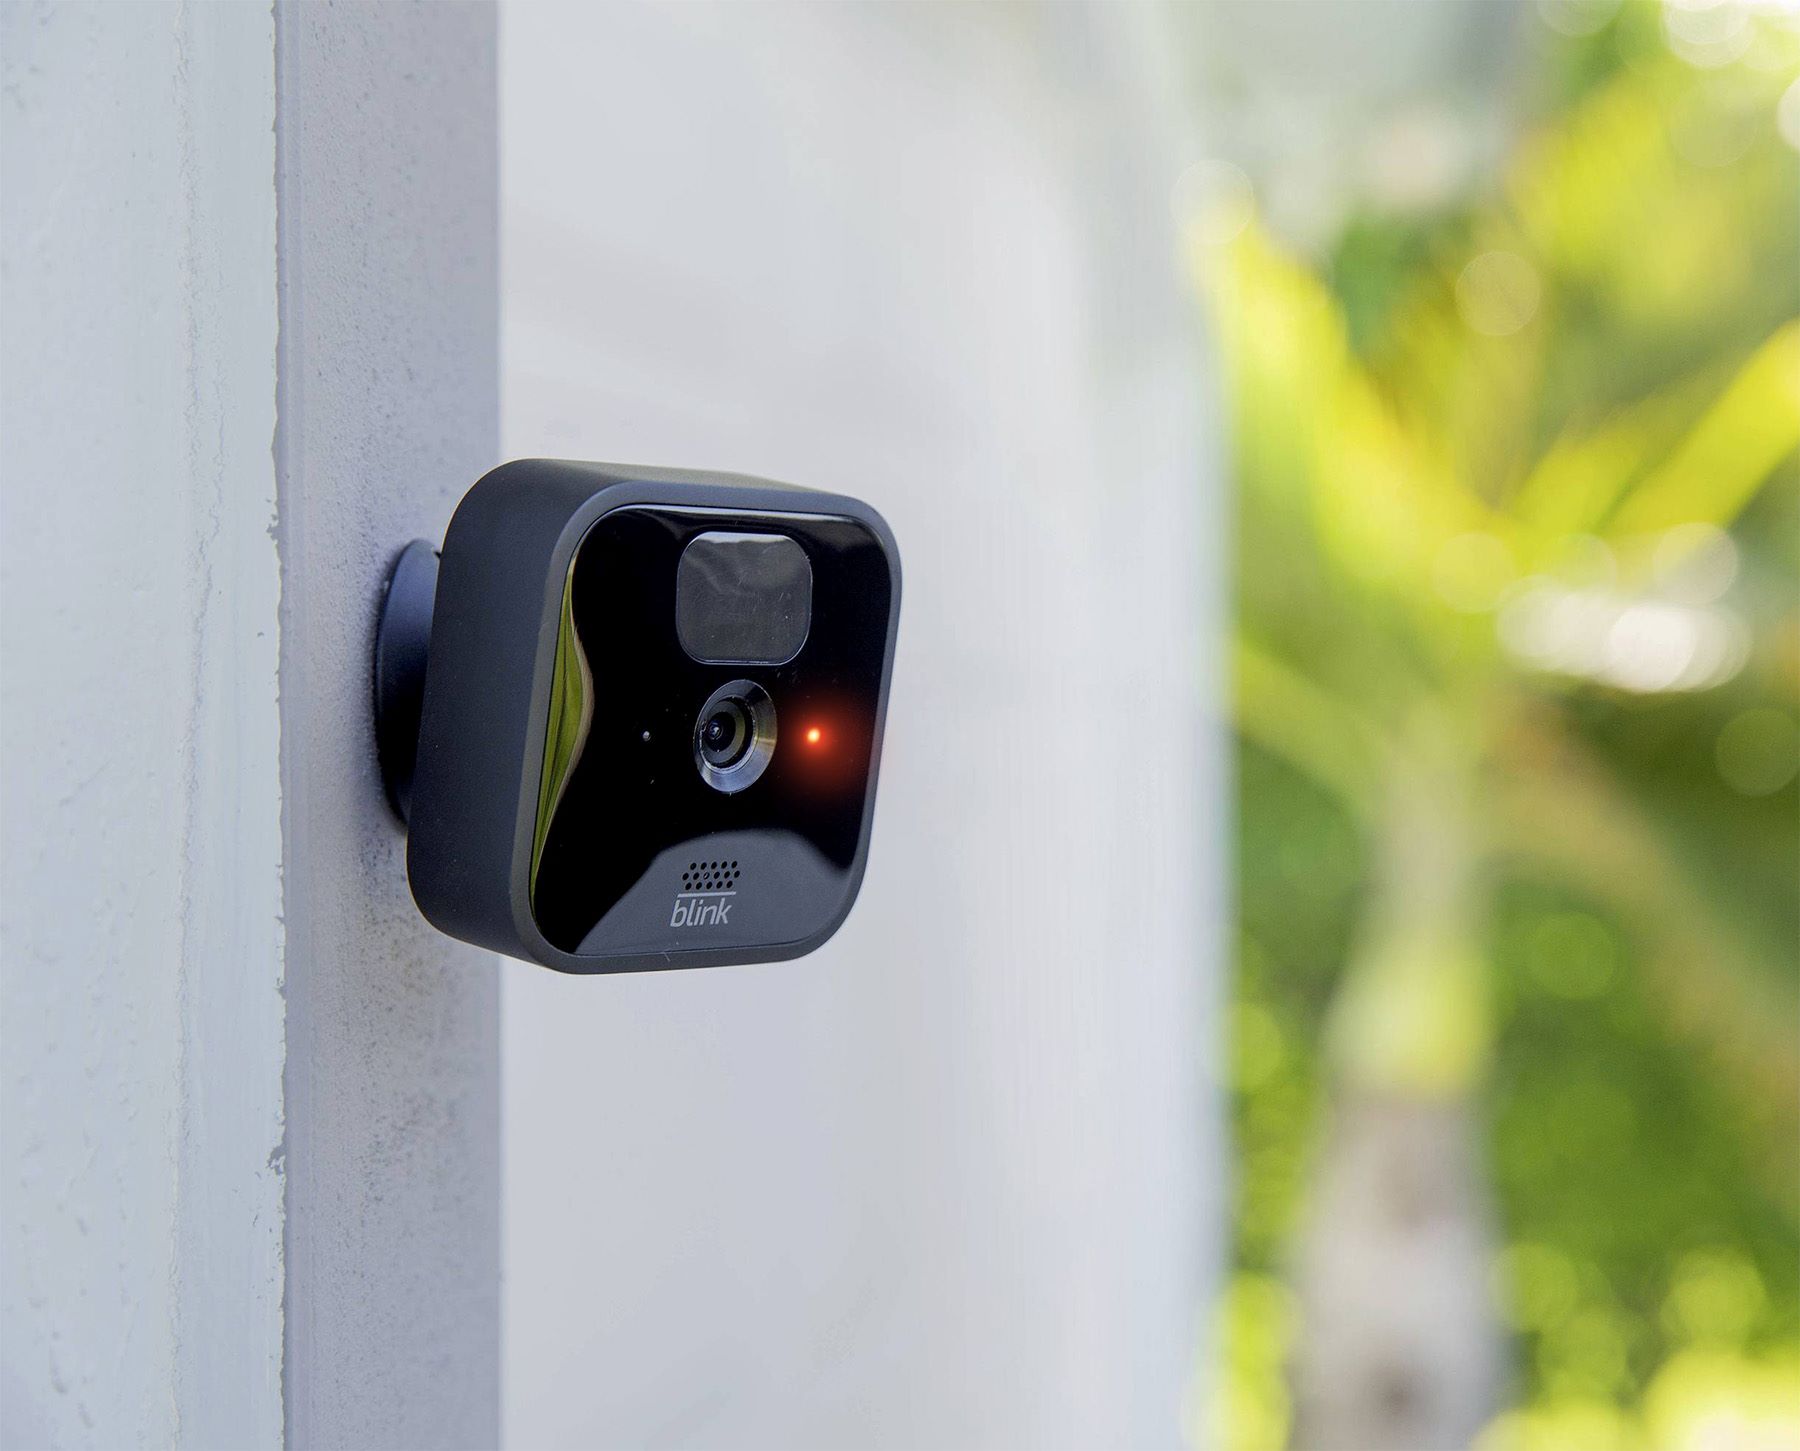
Now that you have accessed the camera settings in the Blink app, it’s time to disable the red light. This step will allow you to turn off the illumination of the red light indicator on your Blink Outdoor Camera.
Within the camera settings screen, scroll down until you find the option that controls the red light feature. The specific name or location of this option may vary depending on the version of the Blink app you are using, but it is usually labeled as “Red Light” or “Camera Status Light.”
Tap on the toggle switch or the checkbox next to the red light option to disable the feature. Once disabled, the red light will no longer illuminate when the camera is active or capturing footage.
It’s worth noting that while disabling the red light might make your camera less conspicuous, it may also affect the camera’s ability to act as a deterrent to potential intruders. Keep this in mind when deciding whether to disable the red light.
Before moving on to the next step, take a moment to ensure that the change you made in the camera settings is successfully applied by testing the camera and checking if the red light remains off.
You have successfully disabled the red light on your Blink Outdoor Camera! Now, let’s move on to the final step.
Read more: How To Unscrew Blink Outdoor Camera
Step 5: Saving the Changes
After you have disabled the red light on your Blink Outdoor Camera, it’s important to save the changes you made in the camera settings to ensure they are applied and maintained. Saving the changes will ensure that the red light remains turned off whenever the camera is active or capturing footage.
Within the camera settings screen, look for a Save or Apply button. This button is typically located at the bottom of the settings screen or in the top right corner of the app interface.
Tap on the Save or Apply button to confirm your changes and save them to the camera’s configuration. This step ensures that the red light remains disabled even when you exit the camera settings and the app.
Once you have saved the changes, the red light on your Blink Outdoor Camera should no longer illuminate when the camera is active or capturing footage. You can now enjoy a more discreet camera setup for your home security and surveillance needs.
Remember to periodically check the camera settings in the Blink app to ensure that the red light remains disabled. In some cases, software updates or app settings may revert the changes you made, so it’s always good practice to verify the settings when you access the app.
Congratulations! You have successfully turned off the red light on your Blink Outdoor Camera and optimized its setup for your home security requirements.
Overall, the Blink app provides a user-friendly interface that allows you to customize various aspects of your Blink Outdoor Camera, including disabling the red light. By following these steps, you can ensure a more discreet and inconspicuous camera presence while still maintaining effective surveillance capabilities.
Remember to always respect local laws and regulations regarding surveillance and privacy when using security cameras, and use them responsibly to protect your home and loved ones.
Thank you for choosing Blink for your home security needs, and we hope this guide has been helpful in turning off the red light on your Blink Outdoor Camera.
Conclusion
In conclusion, we have explored the step-by-step process of turning off the red light on a Blink Outdoor Camera. By accessing the Blink app, selecting the specific camera, opening the camera settings, disabling the red light, and saving the changes, you can create a more discreet camera setup for your home security and surveillance needs.
Throughout this process, it is crucial to consider local laws and regulations regarding surveillance and privacy. Depending on your jurisdiction, disabling the red light on your security cameras may have legal implications. Make sure to familiarize yourself with any applicable rules and regulations and consult with local authorities or legal professionals if necessary.
Turning off the red light on your Blink Outdoor Camera can provide several benefits. It allows you to maintain a lower profile, ensuring that the camera’s presence is less conspicuous. This can be helpful if you want to enhance the effectiveness of the camera as a surveillance tool without drawing unnecessary attention.
However, keep in mind that disabling the red light may also affect the camera’s ability to act as a deterrent to potential intruders. The red light serves as a visible indication that the camera is capturing footage, potentially deterring unwanted activity. Consider the trade-off between a discreet setup and the potential deterrent effect when deciding whether to disable the red light.
Finally, always remember to periodically check the camera settings in the Blink app to ensure that the red light remains disabled. Due to software updates or app settings, the changes you make may be reverted, so it is best to verify the settings regularly.
Thank you for choosing Blink to secure your home, and we hope this guide has been informative and helpful in your quest for a more discreet camera setup. Stay safe and enjoy the peace of mind that comes with reliable and effective home security.
After mastering your Blink Outdoor camera's settings, why stop there? Securing your home goes beyond just adjusting a device. Dive into our comprehensive guide on why bolstering home safety is a must. We'll cover effective strategies and tools that ensure peace of mind, day and night. Don't miss out on vital information that could transform your approach to security.
Frequently Asked Questions about How To Turn Off Red Light On A Blink Outdoor Camera
Was this page helpful?
At Storables.com, we guarantee accurate and reliable information. Our content, validated by Expert Board Contributors, is crafted following stringent Editorial Policies. We're committed to providing you with well-researched, expert-backed insights for all your informational needs.