Home>Ideas and Tips>Creating the Perfect Gallery Wall: A Step-by-Step Guide

Ideas and Tips
Creating the Perfect Gallery Wall: A Step-by-Step Guide
Published: September 17, 2024
Learn how to create a stunning gallery wall with our step-by-step guide. Perfect for adding a personal touch to any room.
(Many of the links in this article redirect to a specific reviewed product. Your purchase of these products through affiliate links helps to generate commission for Storables.com, at no extra cost. Learn more)
Creating a gallery wall is an exciting and creative project that can add a personal touch to any room. Whether you're an experienced art collector or simply looking to enhance your home decor, a well-planned gallery wall can be a stunning focal point that reflects your personality and style. In this article, we'll guide you through the process of creating the perfect gallery wall, step by step.
Step 1: Determine the Look and Theme
Before you start collecting pieces, it's essential to decide on the overall look and theme of your gallery wall. There are typically two types of gallery wall designs:
Orderly and Tidy
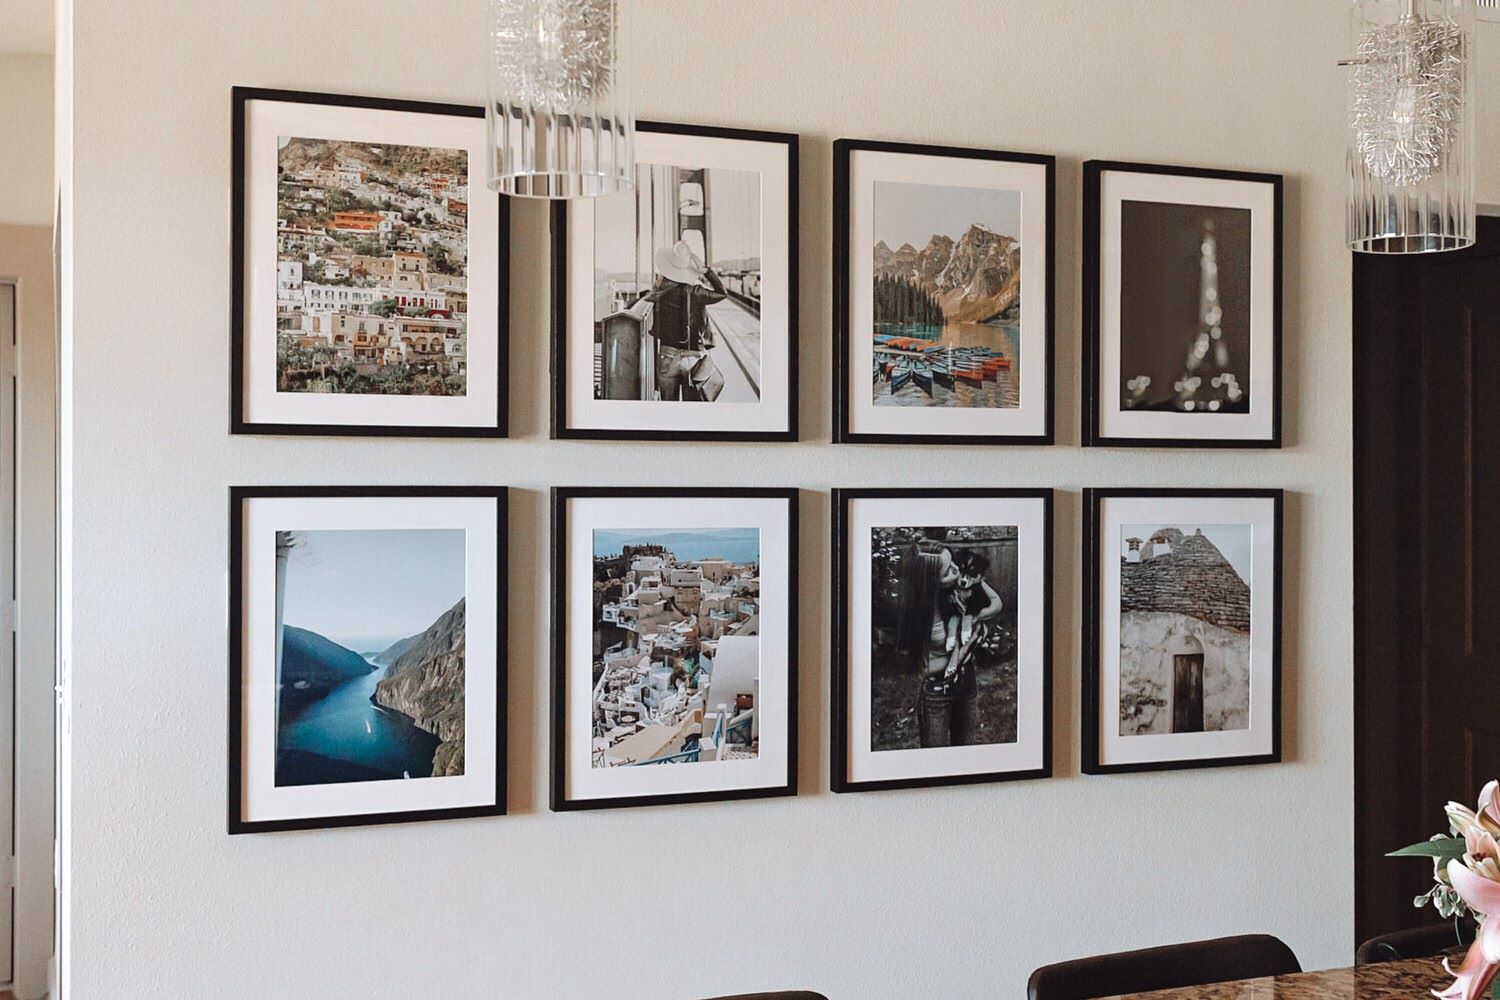
This design is characterized by linear patterns with the same type of framing. It often uses black and white photos, which creates a clean and modern aesthetic. This approach is perfect for those who prefer a neat and organized look.
Colorful and Chaotic
This design is more free-flowing and allows for a mix of colors and frame styles. It's ideal for those who want to add a personal touch with unique pieces and colors. A chaotic gallery wall can be both visually appealing and reflective of your personality.
Choosing Your Theme
Your theme will guide the selection of your pieces and frames. For example, if you're creating a gallery wall for your office, you might choose pieces that inspire productivity or creativity. For a kids' room, you might opt for colorful prints and playful frames.
Step 2: Pick Your Photos, Artwork, and Frames
Read more: Step-by-Step Guide To Making A Pillowcase
Selecting Pieces
When selecting pieces for your gallery wall, consider the following tips:
- Anchor with a Large Piece: Start with a larger piece to anchor the rest of the collection. This will help you build around it and create a cohesive look.
- Common Color Theme: Choose a common color theme to unify the collection. This can be achieved by sticking to a specific palette or mixing and matching colors in a way that feels cohesive.
- Variety of Sizes and Frames: Mix up the sizes and styles of frames to keep your gallery wall interesting. However, ensure that similar color tones are used for frames to avoid disrupting the aesthetic.
Example Collections
- Chaotic Style: Choose a larger main photo and surround it with smaller pieces. Use light colors like white as the majority, then add a variant of a bright color to make it pop.
- Orderly Style: Use black and white photos for a uniform look. Consider using the same size pattern for your photos and frames, such as a large photo followed by three smaller frames vertically aligned.
Step 3: Plan Your Colors
Once you have your prints decided upon, start thinking about frame colors. If you're aiming for a cohesive look, sticking to a few colors can help. For example, you might choose black frames, white frames, and then mix in a few wood frames.
Tips for Mixing Frames
- Start with Three Frame Styles: If you're worried about your gallery wall getting too chaotic or eclectic, start with three frame styles and see how you feel. You could go with a clean option like white frames, black frames, and wood frames.
- Add a Pop of Color: If you want to add some excitement, consider adding a pop of gold or another contrasting color.
Read more: How To Press Flowers: A Step By Step Guide
Step 4: Develop a Plan
Developing a plan is crucial for creating a cohesive and visually appealing gallery wall. Here are some steps to follow:
Determine the Wall
First, decide where you want your gallery wall to go. This will impact how many pieces you’ll need, the size of frames, and your overall plan. Knowing where your gallery wall will be will influence every step that comes next.
Choose the Style
Next, choose your style. You may want an entirely black and white gallery wall or one filled with old family portraits and places you've traveled. The theme or style will guide you throughout the process.
Types of Gallery Walls
There are several types of gallery walls you can create:
- Linear: This involves hanging pieces in a straight line.
- Grid: This involves creating a grid pattern with your pieces.
- Salon Style: This involves creating a more free-flowing arrangement that resembles a salon-style display.
Each type has its own unique vibe and can be tailored to fit your space and style.
Read more: 10 Steps To A Perfectly Organized Pantry
Step 5: Collect Your Pieces
Collecting your pieces is an exciting part of the process. Here are some tips to help you:
Curated Collection
A curated wall with a collected feel is better than just ordering random pieces online. Look at sites with prints often and save your favorites. Keep meaningful photos from travel on hand that you want to frame or use.
Example Collections
- Personal Touches: Include personal touches like family photos, artwork, or sentimental items.
- Inspiration: Choose pieces that inspire you, whether it's travel photos, quotes, or artwork.
Step 6: Lay Out Your Pieces
Laying out your pieces is where the magic happens. Here are some steps to follow:
Read more: A Step-By-Step Guide To DIY Walk In Closet
Step-by-Step Layout
- Measure and Mark: Measure the wall and mark where each piece will go. You can use a pencil and tape to create a rough outline.
- Use Templates: If you're feeling ambitious, use a giant paper template to tape directly on the wall. Pencil in where the nails go, and nail directly into the paper. This will make it easy to remove once you've placed all the nails.
- Arrange Cutouts: Arrange the cutouts of your frames on the wall using painter’s tape. This will give you a clear visual of how everything will look before you start hanging.
- Adjust as Needed: Once you have all the pieces arranged, take a step back and decide if any adjustments need to be made. Level any frames that are off-center and make sure everything is balanced.
Step 7: Hang Your Pieces
Hanging your pieces is the final step in creating your gallery wall. Here are some tips to keep in mind:
Precision is Key
- Use the Right Tools: Use a level to ensure that all frames are straight and even.
- Mark the Spots: Use a pencil to mark where each nail will go. This will help you avoid making mistakes.
- Start with the Largest Piece: Begin with the largest piece and work your way down to the smallest.
Mixing Horizontal and Vertical Pieces
To keep your gallery wall interesting, mix horizontal and vertical pieces. If your largest pieces are horizontal, try placing a smaller vertical piece next to it (centered or bottom aligned), and vice versa.
Creating Grids
Creating grids within your gallery wall by putting a mini collection of 2, 3, or 4 pieces together can add depth and interest. This is like gallery wall inception—it’s also pretty cool and can look very pulled together.
Step 8: Add Something Personal
Art can be expensive, so digital prints are totally fair game and offer a cost-effective way to add personal touches to your gallery wall. Any piece that holds sentimental value or inspires you can be considered art.
Example Personal Touches
- Travel Photos: Include photos from your travels to add a personal touch.
- Quotes: Frame quotes that inspire you or hold special meaning.
- Sentimental Items: Incorporate sentimental items like family heirlooms or handmade crafts.
Step 9: Final Touches
After hanging all your pieces, take a step back and evaluate your gallery wall. Here are some final touches to consider:
Leveling Frames
Make sure all frames are level and evenly spaced. If necessary, adjust the hanging hardware to achieve this.
Adjusting Placement
If something doesn’t feel right, don’t hesitate to rehang it. Remember that it’s okay if it’s not perfect—the imperfections can add character to your gallery wall.
Enjoy Your Creation!
Finally, enjoy your creation A well-planned gallery wall can bring a smile to your face every day. It’s a reflection of your personality and style, making it a unique addition to any room.
By following these steps, you'll be able to create a gallery wall that not only looks stunning but also reflects your personal style and creativity. Happy decorating
Was this page helpful?
At Storables.com, we guarantee accurate and reliable information. Our content, validated by Expert Board Contributors, is crafted following stringent Editorial Policies. We're committed to providing you with well-researched, expert-backed insights for all your informational needs.


0 thoughts on “Creating the Perfect Gallery Wall: A Step-by-Step Guide”