Home>Interior Design>Decorating With Dried Flowers: 12 Pretty Arrangements
Interior Design
Decorating With Dried Flowers: 12 Pretty Arrangements
Modified: October 20, 2024
Discover the beauty of decorating with dried flowers in these 12 pretty arrangements. Enhance your interior design with these stunning botanical displays.
(Many of the links in this article redirect to a specific reviewed product. Your purchase of these products through affiliate links helps to generate commission for Storables.com, at no extra cost. Learn more)
Introduction
Welcome to the wonderful world of decorating with dried flowers! As interior design trends evolve, dried flowers have found their way back into the spotlight as a charming and sustainable way to add natural beauty to any space. Whether you’re a fan of traditional dried flowers or you prefer a more contemporary approach, there are endless possibilities for incorporating these botanical treasures into your home decor.
Not only do dried flowers bring a touch of nature indoors, but they also have a unique charm that sets them apart from fresh blooms. With their earthy colors, textured petals, and preserved forms, dried flowers can create a warm and cozy ambiance that lasts long after fresh flowers have withered away.
One of the great advantages of decorating with dried flowers is their longevity. Unlike their fresh counterparts, dried flowers can retain their beauty for months, or even years, if cared for properly. This means you can achieve stunning floral arrangements that will remain a focal point in your home for an extended period of time.
Whether you’re looking to create a rustic country feel, a bohemian-inspired space, or a stylish and modern atmosphere, dried flowers can be adapted to suit any interior style. From wreaths to bouquets, wall hangings to centerpieces, there are endless ways to incorporate dried flowers into your home decor.
In this article, we will explore 12 unique and charming ways to decorate with dried flowers. Whether you’re a seasoned DIY enthusiast or just starting out, these ideas will inspire you to create stunning floral arrangements that will bring a touch of natural beauty into your home.
Key Takeaways:
- Embrace the timeless charm of dried flowers to create stunning and sustainable decor for any season, from rustic wreaths to elegant centerpieces, adding natural beauty and warmth to your home.
- Elevate your holiday decor with the enchanting allure of dried flowers, crafting festive wreaths, centerpieces, and ornaments that evoke nostalgia and celebrate the season with a touch of natural elegance.
Choosing the Right Dried Flowers
When it comes to decorating with dried flowers, selecting the right blooms is crucial to achieve the desired aesthetic. Different types of flowers have varying textures, colors, and shapes, so it’s essential to choose ones that complement your overall decor theme.
First and foremost, consider the color palette of your space. Dried flowers come in a range of hues, from vibrant and bold to subtle and earthy. If you’re aiming for a minimalist and modern look, opt for dried flowers in neutral shades like beige, ivory, or dusty pink. For a more vibrant and eclectic feel, go for blooms in rich jewel tones or bright, energetic shades.
Next, think about the texture and form of the dried flowers. Some may have delicate, wispy petals, while others may be more robust and structural. Consider the overall composition of your arrangement and choose blooms that will complement each other in terms of shape and texture.
The size of the dried flowers is also important. Depending on the scale of your space or the specific area you’re decorating, you may need larger, statement blooms or more petite flowers for a subtle touch. Consider the proportions of your arrangement and choose flowers accordingly.
Consider the durability and longevity of the dried flowers. Some blooms hold up better over time and maintain their shape and color, while others may fade or become brittle. Take into account how long you want your arrangement to last and choose flowers that will withstand the test of time.
When choosing dried flowers, it’s important to source them from reputable suppliers to ensure quality and authenticity. Visit local farmers’ markets, specialty flower shops, or trusted online stores that offer a wide selection of dried flowers. Read reviews and check for certifications to ensure you’re purchasing flowers that have been properly preserved and dried.
Lastly, embrace the opportunity to mix and match different types of dried flowers to create a visually interesting and dynamic arrangement. Experiment with different combinations of colors, textures, and sizes to create a unique and personalized look.
By taking the time to choose the right dried flowers for your decor, you can create stunning arrangements that reflect your personal style and add a touch of natural beauty to your space.
Creating a Rustic Dried Flower Wreath
A dried flower wreath is a timeless and charming decoration that can add a rustic touch to any space. Whether you hang it on your front door or use it as a centerpiece on your wall, a wreath made with dried flowers exudes natural beauty and a welcoming ambiance.
To create your rustic dried flower wreath, you’ll need a few essential supplies, including a wreath frame, floral wire, and an assortment of dried flowers and foliage. Start by selecting a wreath frame that suits your desired size and style. Wicker or grapevine wreath frames are popular choices for a rustic look.
Next, gather an assortment of dried flowers and foliage that complement the rustic theme. Look for blooms with earthy colors, such as dried lavender, dried wheat stalks, eucalyptus leaves, or dried herbs like rosemary or thyme. You can also incorporate dried corn husks, dried cotton stems, or dried berries for an extra touch of rustic charm.
Once you have your supplies ready, begin by securing the dried foliage and larger flowers to the wreath frame using floral wire. Start at one end of the frame and work your way around, layering the foliage and flowers to create a full and visually appealing arrangement.
As you continue to add the flowers, consider the positioning and balance of each element. Vary the height and direction of the flowers and foliage to create a natural and organic look. You can also add smaller accent flowers or dried seed pods to fill in any gaps and add texture.
When attaching the flowers to the wreath frame, make sure to secure them firmly with the floral wire to ensure the arrangement stays intact. Trim any excess stems or wire to maintain a clean and polished appearance.
Once you’ve completed your wreath, it’s time to hang it and admire your rustic creation. Use a wreath hanger to display it on your front door or hang it in a prominent spot on your wall. You can also embellish the wreath with ribbons, jute twine, or rustic bows for an extra touch of charm.
A rustic dried flower wreath is not only a beautiful decoration but also a versatile one. You can customize it to match the seasons by adding seasonal accents like pinecones, dried berries, or ornaments during the holidays. It’s a timeless piece that will bring a touch of nature and rustic elegance to your home decor.
Decorating with Dried Flower Bouquets in Mason Jars
Mason jars have become a popular choice for home decor, and they provide the perfect vessel for displaying dried flower bouquets. This simple yet charming arrangement can add a touch of rustic beauty to any space, whether it’s a kitchen countertop, a dining table centerpiece, or a side table display.
To create your dried flower bouquet in a mason jar, start by choosing a selection of dried flowers that fit your desired color palette and style. You can mix and match different types of flowers, incorporating various textures, shapes, and sizes to create a visually appealing arrangement.
Next, prepare your mason jar by cleaning it thoroughly and ensuring it’s free from any dirt or residue. You can also enhance the rustic appeal by using vintage or tinted mason jars for a unique and nostalgic touch.
Gather your dried flowers and trim their stems to fit the height of the mason jar. It’s often best to cut the stems at an angle to allow for better water absorption, even though the flowers are dried. This will help to maintain their appearance and prolong their lifespan.
Start placing the dried flowers one by one into the mason jar, adjusting their positions to create an aesthetically pleasing arrangement. You can play around with the height and layering of the flowers, ensuring a balanced and visually appealing composition.
Consider incorporating different textures and foliage to add depth and interest to the bouquet. This could include dried grasses, seed pods, or even feathers for a unique touch. The key is to experiment and find a combination that speaks to your personal style and decor.
Once your dried flower bouquet is arranged to your liking, you can further enhance its charm by adding embellishments. Consider tying some rustic twine or ribbon around the neck of the mason jar for added texture and visual interest.
This versatile arrangement can be placed in various locations throughout your home. Place a dried flower bouquet in a mason jar on your kitchen windowsill, creating a lovely focal point that brings a touch of nature into your cooking space. Alternatively, use it as a centerpiece on your dining table, adding a rustic and elegant touch to your mealtime gatherings.
One of the advantages of decorating with dried flower bouquets in mason jars is their longevity. Unlike fresh flowers, these arrangements require minimal maintenance and can last for an extended period. Simply dust the dried flowers lightly or use a can of compressed air to remove any buildup.
Decorating with dried flower bouquets in mason jars is a simple and cost-effective way to add a touch of rustic charm to your home decor. Whether you display them individually or as a cluster, these beautiful arrangements will bring natural beauty and a cozy vibe to any room.
Making a Dried Flower Wall Hanging
A dried flower wall hanging is a unique and captivating way to bring the beauty of nature into your living space. Not only does it serve as a stunning focal point, but it also adds texture, color, and a touch of whimsy to any wall.
To start, gather your supplies. You’ll need a wooden embroidery hoop, some floral wire, a hot glue gun, and an assortment of dried flowers and foliage. Consider selecting a variety of blooms with different colors, shapes, and sizes to create a visually interesting composition.
Begin by taking apart the embroidery hoop and separating the inner hoop from the outer hoop. Set the outer hoop aside for now. Take the inner hoop and wrap it with twine, ribbon, or fabric to add a decorative touch and create a hanger for your wall hanging.
Next, prepare your dried flowers by trimming their stems to a length that allows them to fit comfortably within the hoop. It’s a good idea to have a rough idea of the arrangement you want to create, as this will guide you in selecting the appropriate lengths for each stem.
Now it’s time to start attaching the dried flowers to the hoop. You can use floral wire or a hot glue gun to secure the flowers in place. The wire method allows for more flexibility and adjustability, while the glue gun provides a stronger hold.
Start by attaching the larger flowers or focal points first. Place them strategically around the hoop to create a visually pleasing arrangement. Then, work your way around the hoop, layering the smaller flowers and foliage to add dimension and texture.
As you attach the dried flowers, consider the balance and composition. Vary the heights and directions of the flowers to create movement and a natural flow. You can also incorporate additional elements like dried grasses, feathers, or seed pods for added interest.
Once you’ve attached all your dried flowers and foliage, carefully inspect the wall hanging to ensure everything is secure. Adjust any flowers or stems as needed to achieve the desired look.
Once you’re satisfied with your creation, it’s time to hang your dried flower wall hanging. Find a prominent spot on your wall where it can be admired and enjoyed. It can be displayed in any room of your home, from the living room to the bedroom or even the hallway.
One of the great benefits of a dried flower wall hanging is that it requires minimal maintenance. Unlike fresh flowers, these arrangements won’t wilt or require water. Simply dust the flowers lightly from time to time to keep them looking their best.
A dried flower wall hanging is a creative and artistic way to incorporate natural beauty into your home decor. With a little time and effort, you can create a stunning piece of art that will be admired for years to come.
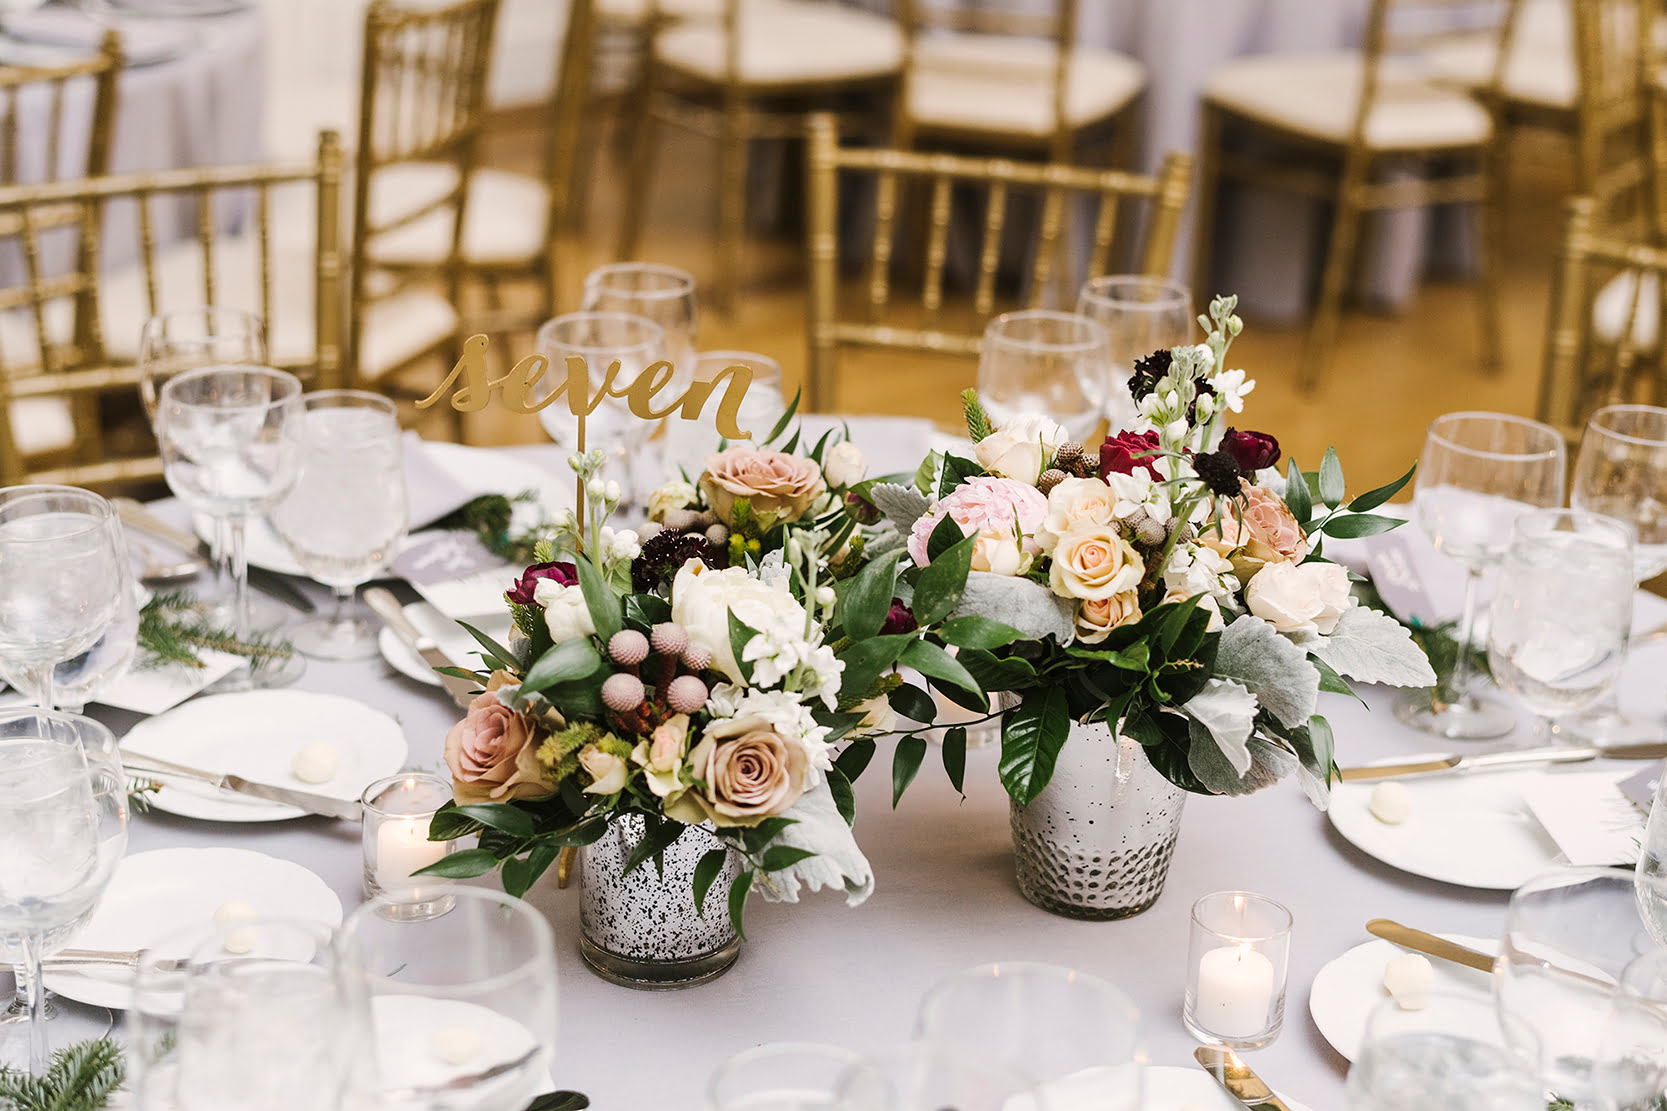
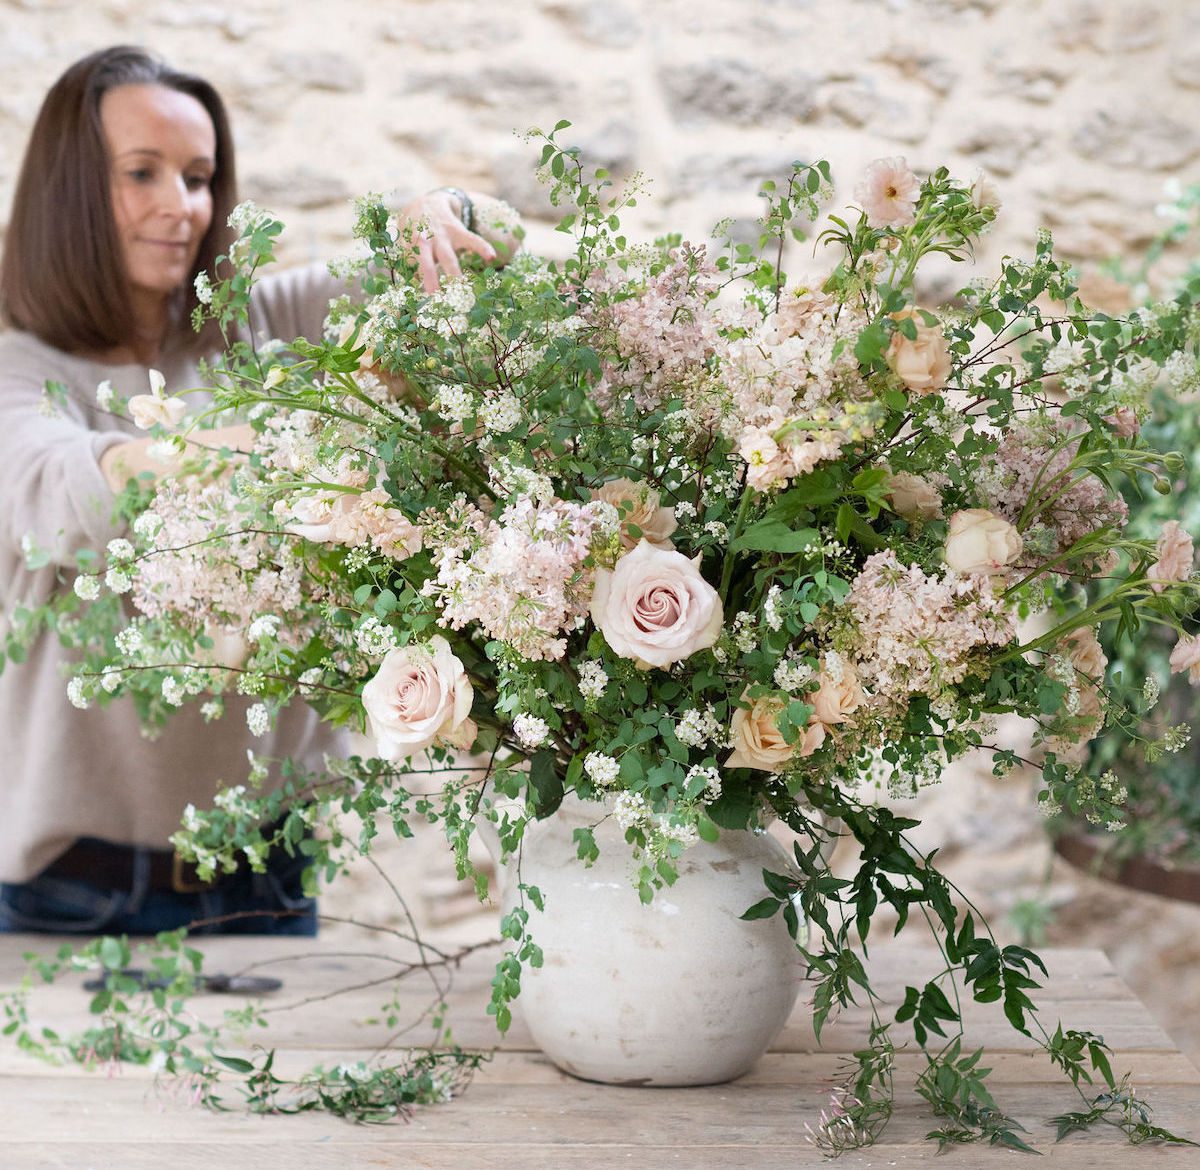
Designing a Dried Flower Centerpiece for the Dining Table
A dried flower centerpiece can be a beautiful and eye-catching addition to your dining table. Not only does it create a captivating focal point, but it also adds a touch of natural elegance to your dining experience. Designing a dried flower centerpiece allows you to showcase the beauty of dried blooms while adding a touch of creativity to your table decor.
To create a stunning dried flower centerpiece, begin by selecting a container or vase that suits your desired style. Consider the size, shape, and color of the container, keeping in mind the overall theme or color palette of your dining room. Popular choices include glass vases, ceramic pots, or even repurposed vintage containers for a rustic look.
Next, choose a variety of dried flowers that coordinate well with your container and dining table decor. Look for blooms with different shapes, sizes, and colors to create visual interest. Consider using a mix of large statement flowers and smaller accent blooms, as well as dried foliage or grasses to add texture.
Before arranging the dried flowers, prepare the container by filling it with decorative elements such as pebbles, sand, or even dried moss. This layer will not only add visual interest but also provide stability for the arrangement.
Start building your centerpiece by placing the larger dried flowers in the center of the container, focusing on creating a balanced and visually appealing arrangement. Then, gradually add the smaller blooms and foliage around the larger flowers, filling in any gaps and creating a harmonious composition.
As you arrange the dried flowers, consider the height and scale of the centerpiece. You want it to be visually striking without obstructing the view of your dining companions across the table. Ensure that the height of the arrangement is appropriate for the size of your dining table, allowing for easy conversation and eye contact.
Don’t be afraid to get creative and experiment with different shapes and forms. You can create a rounded and symmetrical centerpiece, or opt for a more organic and free-flowing arrangement. Let your personal style and creativity guide you as you design your dried flower centerpiece.
Once your centerpiece is complete, place it in the center of your dining table. Adjust the positioning as needed to ensure it doesn’t obstruct the view of your guests. You can further enhance the ambiance by adding candle holders or other table decor elements that complement the dried flower arrangement.
A dried flower centerpiece for your dining table offers the advantage of longevity. Unlike fresh flowers, these dried blooms will retain their beauty for a long time with minimal upkeep. Simply dust the arrangement occasionally to keep it looking fresh and vibrant.
Whether you’re hosting a dinner party or simply enjoying a family meal, a dried flower centerpiece adds a touch of elegance and natural beauty to your dining table. It is a stylish and sustainable way to enhance your dining experience and create a captivating atmosphere for your guests.
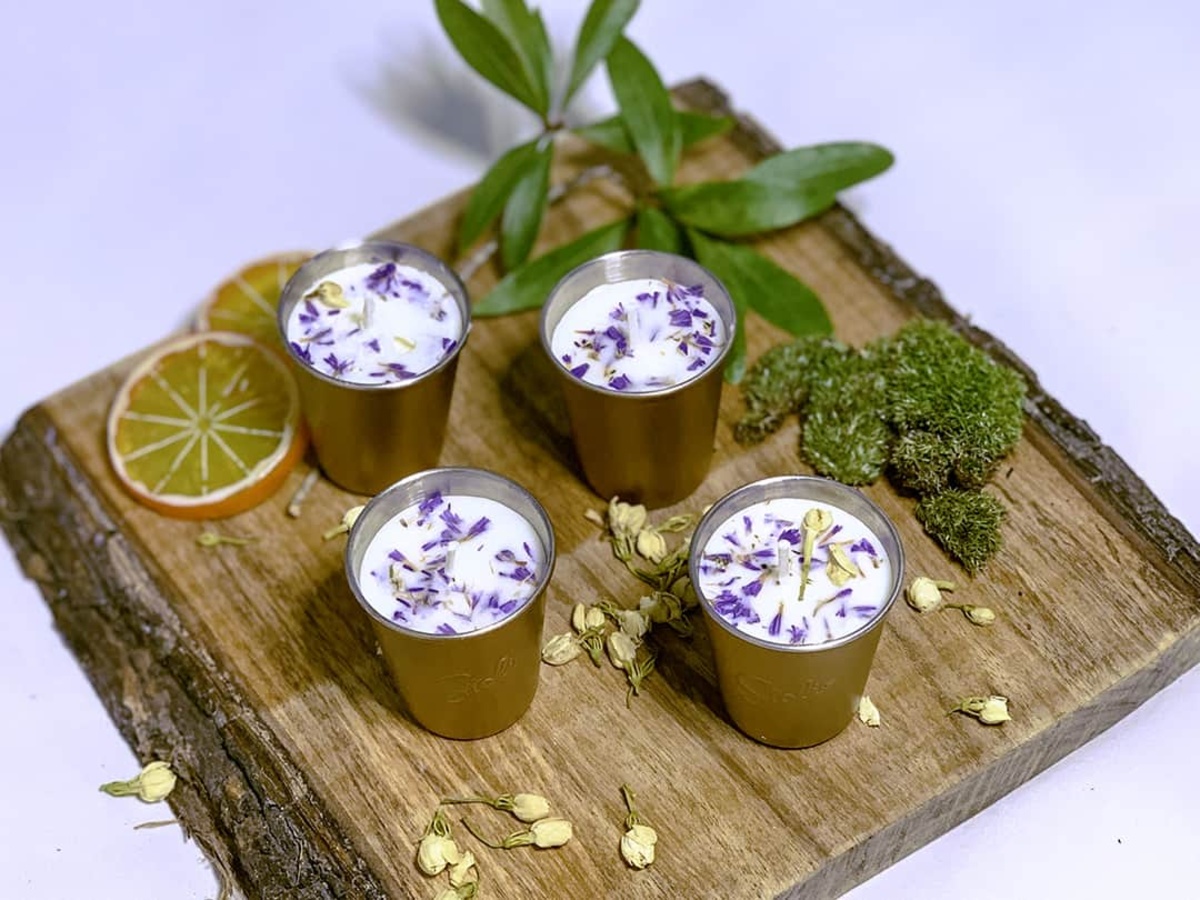
DIY Dried Flower Candle Holders
DIY dried flower candle holders are a charming and unique way to elevate the ambiance of any space. These candle holders combine the warmth and flickering glow of candles with the natural beauty of dried flowers, creating a cozy and romantic atmosphere.
To create your own dried flower candle holders, you’ll need a few supplies: glass candle holders or jars, dried flowers, double-sided tape or adhesive, and tea light or votive candles.
Begin by selecting your glass candle holders or jars. Choose ones that are transparent or semitransparent, as they allow the beauty of the dried flowers to shine through. It’s best to use cylindrical or square-shaped holders, as they provide a stable base for the flowers.
Next, gather an assortment of dried flowers that fit your desired color scheme and aesthetic. Look for blooms with sturdy petals that can withstand the heat of the candles. Roses, lavender, baby’s breath, or dried wildflowers are all great options.
Prepare your dried flowers by trimming their stems to a length that fits the height of the candle holders. Remove any excess leaves or foliage from the stems, leaving only the blooms. This will ensure that the flowers fit securely on the surface of the candle holders.
Now it’s time to attach the dried flowers to the candle holders. Apply double-sided tape or adhesive to the backside of each flower and gently press it onto the glass surface. Arrange the flowers in a pattern or design of your choice, whether it’s a single flower as a focal point or a cluster of blooms covering the entire surface.
Continue attaching the dried flowers until the surface of the candle holder is covered to your satisfaction. Be mindful of the spacing between the flowers, allowing enough room for the candle’s flame to flicker without coming into direct contact with the petals.
Once your dried flowers are securely attached to the candle holders, it’s time to place the tea light or votive candles inside. Ensure that the candles are centered and stable within the holders, and that they are not too close to the dried flowers.
When you light the candles, the warm glow will illuminate the dried flowers, casting a soft and romantic ambiance in the room. The delicate petals and textures of the flowers will create a visually stunning and unique decor element.
Dried flower candle holders make excellent centerpieces for intimate gatherings, cozy evenings at home, or even special occasions like weddings and parties. They add a touch of natural beauty and a hint of nostalgia to your decor.
Remember to exercise caution when using candles and never leave them unattended. If necessary, you can use battery-operated LED candles instead of real flames for a safer alternative.
With a little creativity and a handful of dried flowers, you can transform ordinary glass candle holders into beautiful and enchanting decorative pieces. DIY dried flower candle holders are a delightful project that allows you to bring the beauty of nature indoors and create a warm and inviting atmosphere in your home.
When arranging dried flowers, consider the color, texture, and shape of the blooms to create a visually appealing and balanced arrangement. Group similar flowers together and vary the heights for added interest.
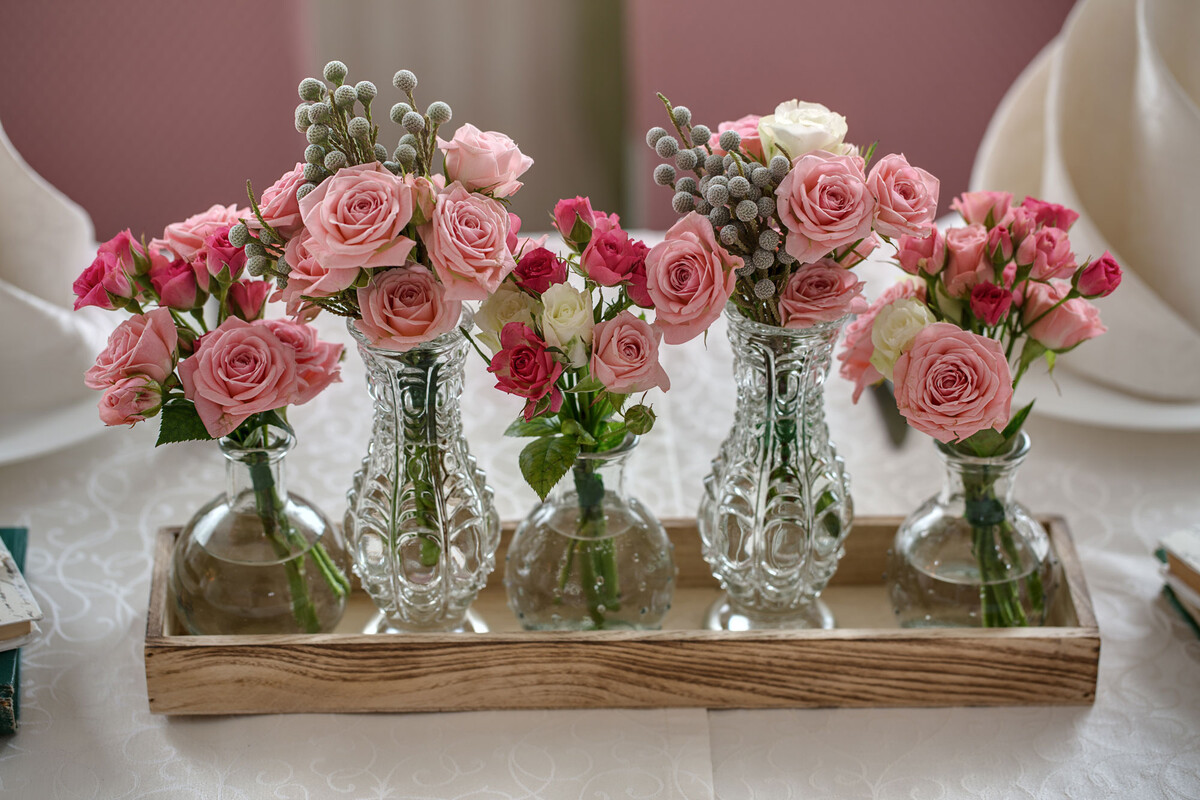
Arranging Dried Flowers in Vintage Teacups
Arranging dried flowers in vintage teacups is a delightful and whimsical way to repurpose these charming vessels and showcase the beauty of dried blooms. This DIY project allows you to combine the elegance of vintage teacups with the timeless appeal of dried flowers, resulting in unique and eye-catching decor pieces.
To start, gather a collection of vintage teacups in various designs and colors. Look for teacups with intricate patterns, delicate handles, and unique shapes to add visual interest to your arrangement. You can find vintage teacups at thrift stores, antique shops, or even inherit them from family members.
Next, select an assortment of dried flowers that complement the color and style of your teacups. Consider choosing blooms with a variety of textures and sizes to create a visually dynamic arrangement. Roses, hydrangeas, lavender, or small clusters of baby’s breath are all wonderful options for this project.
Before arranging the dried flowers in the teacups, ensure that they are clean and free from any dirt or residue. You can gently rinse them with water if needed, making sure to dry them thoroughly before proceeding.
Trim the stems of the dried flowers to a length that fits comfortably within the teacups. It’s best to cut the stems at an angle to allow for better water absorption, even though the flowers are dried. This will help to maintain their appearance and prolong their lifespan.
Now it’s time to arrange the dried flowers in the teacups. Fill each teacup with a small amount of floral foam or use a small piece of floral tape to hold the stems in place. This will help keep the flowers secure and prevent them from shifting or toppling over.
Start by placing the larger dried flowers in the center of the teacup, creating a focal point. Then, add smaller blooms and foliage around the larger flowers, filling in any gaps and creating a visually pleasing composition. Be mindful of the overall balance and visual appeal of each arrangement.
As you arrange the dried flowers, consider mixing different colors and textures to create a harmonious look. You can also include dried grasses, seed pods, or even delicate feathers to add an extra touch of whimsy and charm.
Once your dried flower arrangements are complete, display them on a shelf, mantel, or side table to showcase their beauty. You can group them together for a cohesive display or scatter them throughout your living space for added visual interest.
One of the advantages of arranging dried flowers in vintage teacups is their longevity. These arrangements require minimal maintenance and can last for an extended period. Occasionally dust the flowers lightly to keep them looking fresh and vibrant.
Decorating with dried flowers in vintage teacups adds a touch of elegance and vintage charm to your home decor. It’s a creative and sustainable way to repurpose teacups and bring the beauty of nature indoors. Enjoy the beauty and nostalgia that these charming arrangements bring to your living space.
Creating a Dried Flower Garland for a Bohemian Look
A dried flower garland is a wonderful way to infuse your space with a bohemian vibe and bring the beauty of nature indoors. Whether you hang it on a wall, drape it over a mantel, or use it as a table centerpiece, a dried flower garland adds a touch of whimsy and organic charm to any room.
To create your own dried flower garland, you’ll need a variety of dried flowers, foliage, jute twine or ribbon, scissors, and hot glue if necessary.
Start by gathering an assortment of dried flowers and foliage that reflect the bohemian aesthetic. Look for blooms with rich colors, interesting textures, and unique shapes. Dried roses, sunflowers, eucalyptus, and feathers are all popular choices for a bohemian-inspired garland.
Once you have your dried flowers and foliage ready, begin by preparing the elements. Trim the stems of the dried flowers to the desired length, ensuring they are long enough to create a visually appealing garland. Remove any excess leaves or foliage that may distract from the beauty of the blooms.
Next, decide on the placement and arrangement of the dried flowers and foliage. Lay out your materials and experiment with different combinations to achieve the desired look. Consider mixing different colors, sizes, and textures to create an arrangement that feels organic and eclectic.
If needed, use hot glue to secure any loose petals or stems in place. Be mindful of using hot glue sparingly and in areas that won’t be easily detectable, as it can change the appearance of the dried flowers.
Now it’s time to assemble your garland. Cut a length of jute twine or ribbon that is longer than your desired garland size. Begin by tying a loose knot at one end of the twine or ribbon. This will serve as a stopper to prevent the dried flowers from sliding off.
Start attaching the dried flowers and foliage to the twine or ribbon by gently wrapping the stems around the garland and securing them with small knots or using a dot of hot glue. Repeat this process, spacing out the elements evenly along the garland until you reach the desired length.
As you attach the dried flowers, consider the balance and composition of the garland. Vary the sizes and colors of the blooms, and mix in the foliage for added depth and texture. You can also incorporate additional elements like small embellishments or ribbons to enhance the bohemian look.
Once your dried flower garland is complete, find a suitable place to display it. Hang it on a wall, drape it over a mantel, or use it as a table centerpiece for a bohemian touch. The garland can also be used to decorate special events like weddings or parties, adding a whimsical and natural element to the celebration.
Remember to keep your dried flower garland away from direct sunlight to prevent any fading or discoloration. If you notice any dust or debris on the flowers, gently clean them with a soft brush or use a can of compressed air to remove any buildup.
Creating a dried flower garland for a bohemian look adds warmth and charm to your living space. It’s a creative and sustainable way to bring the beauty of nature indoors, infusing your home with a free-spirited and organic ambiance.
Read more: How To Dry Floral Arrangements
Using Dried Flowers to Decorate Picture Frames
Using dried flowers to decorate picture frames is a creative and unique way to add a touch of natural beauty and personalization to your favorite photographs. Whether it’s a cherished family portrait, a special moment captured in time, or a work of art, incorporating dried flowers into your picture frames can elevate their aesthetic appeal and create a truly enchanting display.
To begin, gather the necessary supplies: a picture frame of your choice, dried flowers, adhesive (such as hot glue or craft glue), scissors, and any additional embellishments you may want to incorporate, such as ribbons or decorative elements.
Start by selecting the dried flowers that fit your desired color scheme and style. Look for blooms that will enhance the overall aesthetic and evoke the emotions you want to convey. Consider the size and shape of the flowers, as well as their color and durability, as they will be part of a long-lasting display.
Prepare your dried flowers by trimming their stems to the appropriate length. Usually, a shorter stem length is best for picture frames to avoid obstructing the view of the photograph or artwork. Remove any excess leaves or foliage to create a clean and polished look.
Now, it’s time to arrange the dried flowers on your picture frame. Lay out the flowers and experiment with different placement options until you find the arrangement that you find most visually appealing. Consider whether you want a symmetric or asymmetric design, and whether you want to cover the entire frame or focus on specific areas.
Once you’re satisfied with the arrangement, use adhesive to attach the dried flowers to the picture frame. Hot glue or craft glue can be used, depending on your preference and the materials of the frame. Apply a small amount of adhesive to the back of each flower or its stem and press it firmly onto the frame, ensuring it is secure.
If you want to add additional embellishments or decorative elements, such as ribbons or beads, now is the time to attach them. Get creative and personalize your picture frame to reflect your unique style and enhance the overall aesthetic.
Allow the adhesive to dry and set according to the instructions provided. Once the flowers and any additional embellishments are securely attached, your decorated picture frame is ready to be displayed.
Place your favorite photograph or artwork into the frame, allowing the beauty of the dried flowers to complement and enhance the image. You can choose to display the framed piece on a shelf, mantel, or wall, creating a visually captivating focal point in any room.
Using dried flowers to decorate picture frames not only adds a unique and personalized touch to your home decor but also allows you to showcase your creativity and connection with nature. The natural beauty and delicate textures of the dried flowers bring a touch of elegance and timelessness to your cherished memories and add a distinctive charm to your living space.
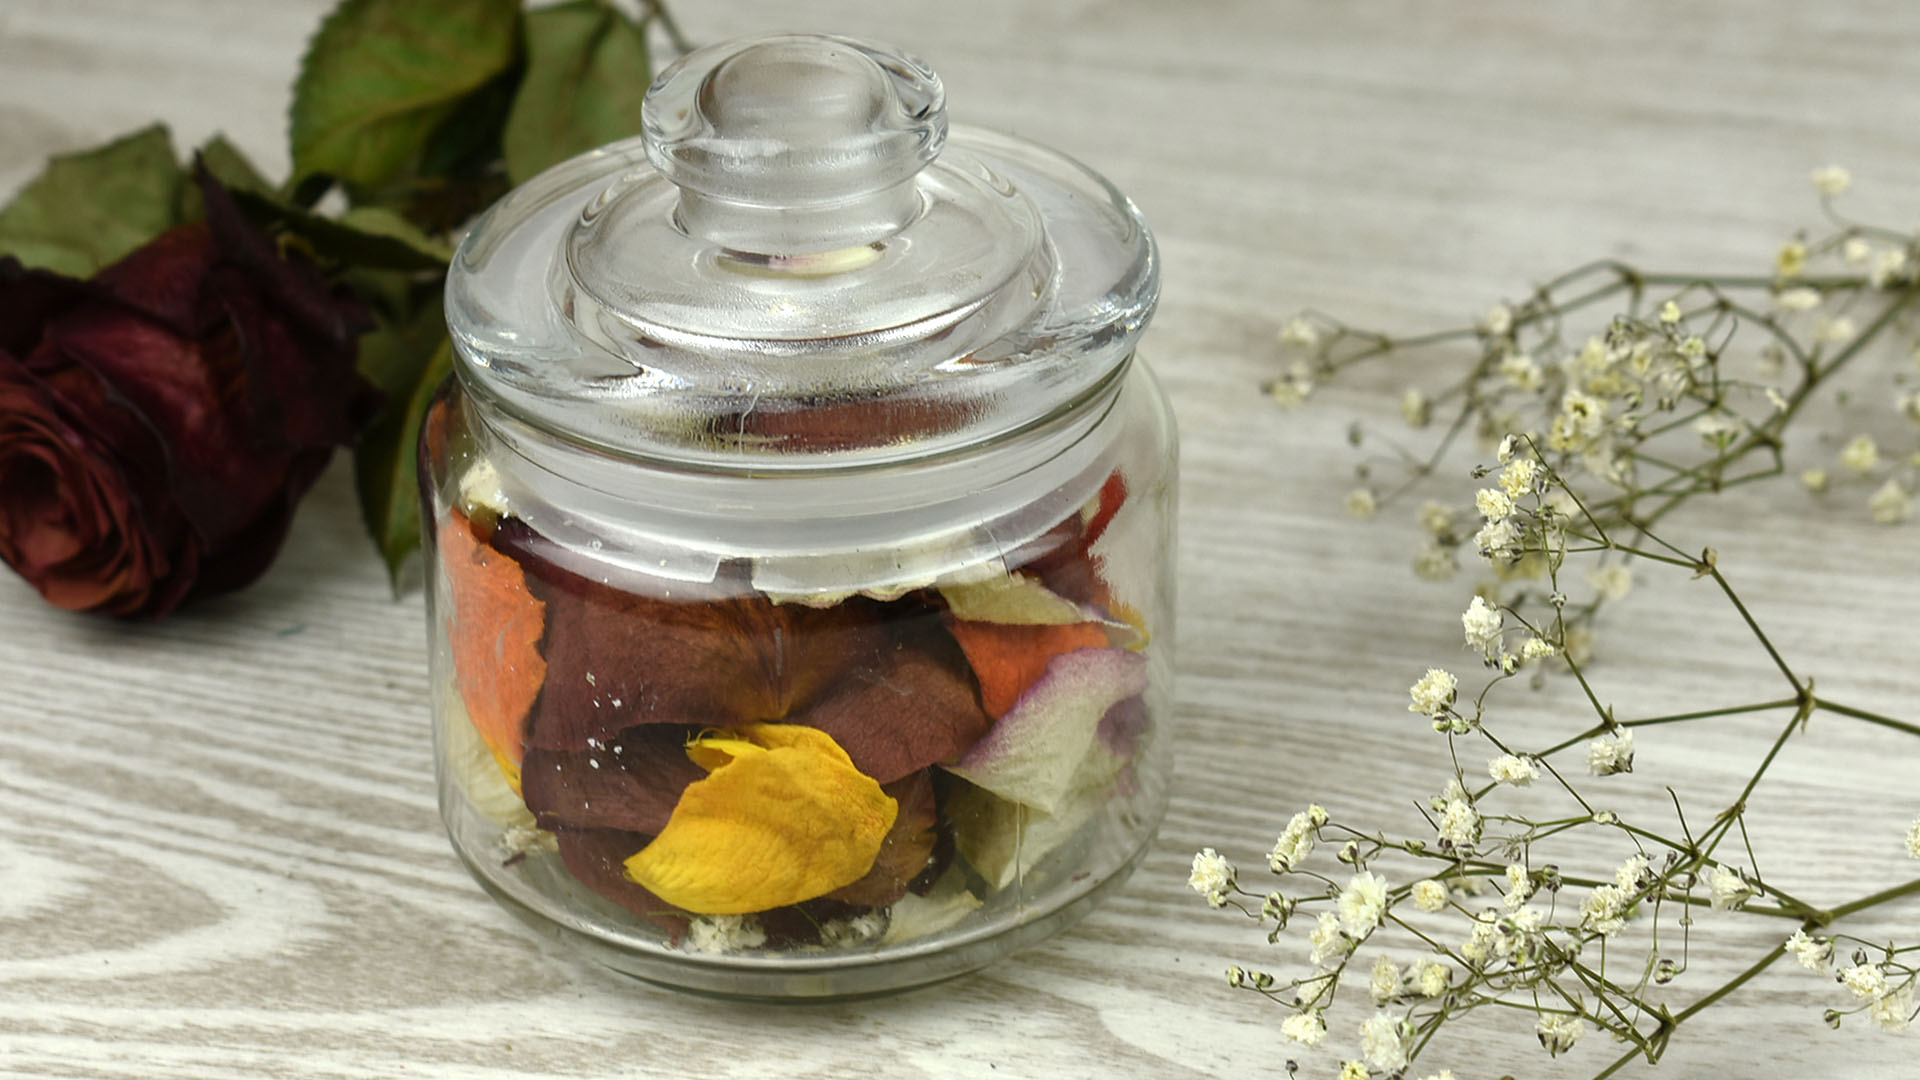
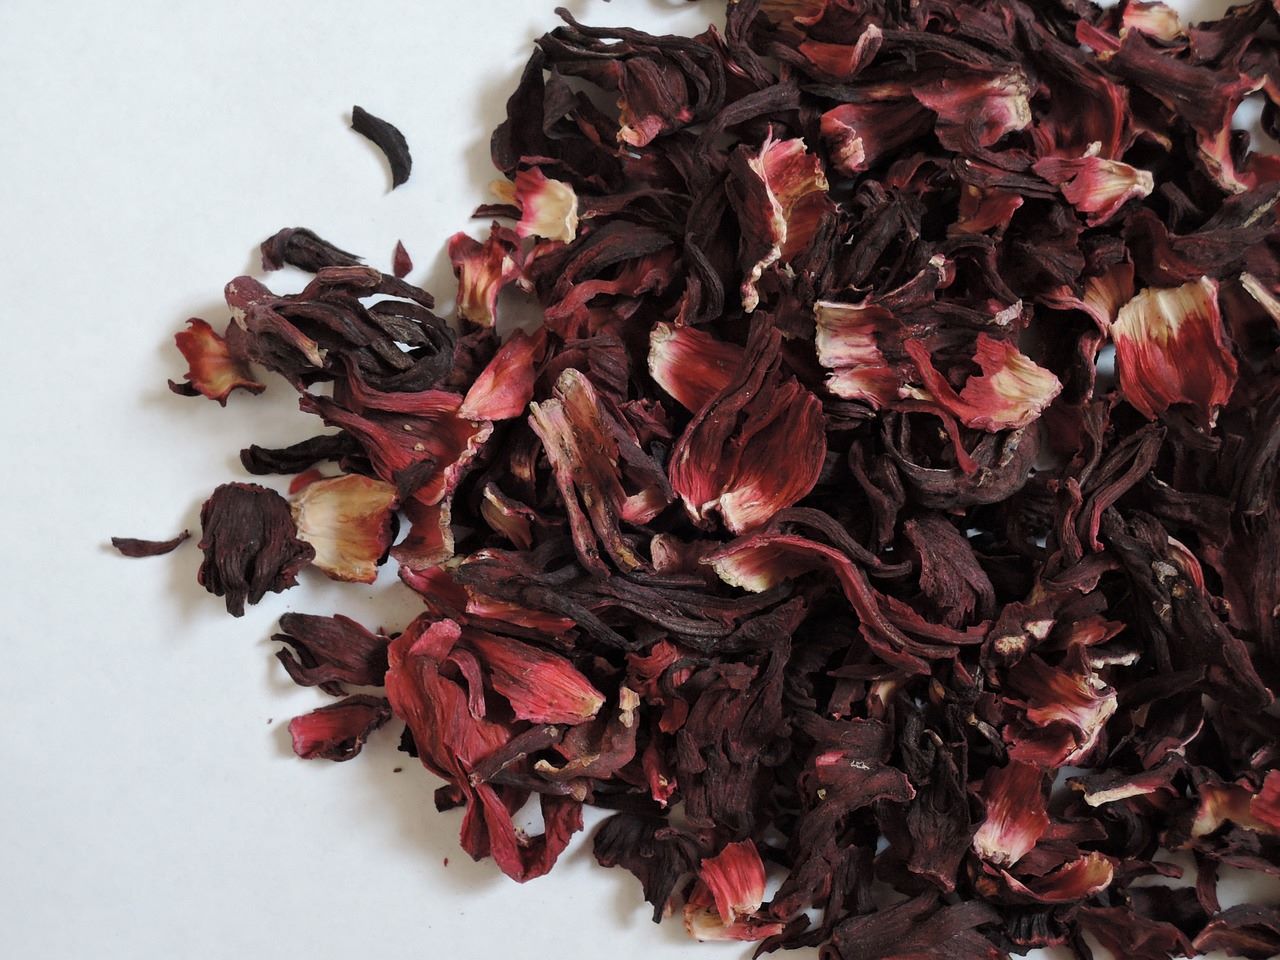
Making Dried Flower Potpourri for a Fragrant Home
Dried flower potpourri is a wonderful way to bring a delightful and natural fragrance into your home. Creating your own potpourri allows you to customize the scents and blend of dried flowers to suit your preferences, as well as add a beautiful and decorative touch to any living space.
To make dried flower potpourri, you’ll need an assortment of dried flowers, herbs, spices, and essential oils. You can choose from a variety of blooms and foliage, such as lavender, rose petals, chamomile, dried citrus peels, cinnamon sticks, and cloves.
Begin by selecting the dried flowers and botanicals that you would like to include in your potpourri blend. Consider the scents and colors that you find appealing and that will create a pleasing aroma when combined. You can experiment with different combinations to find the perfect blend for your home.
Once you have your dried flowers and botanicals ready, you can enhance the scent by adding essential oils. Choose oils that complement the fragrance of the dried flowers and botanicals you’ve selected. Lavender, rose, cinnamon, or citrus essential oils are popular choices.
In a large bowl, combine the dried flowers, botanicals, and a few drops of your chosen essential oil. Mix them well to distribute the scent throughout the mixture. You can also add a few drops of a fixative oil, such as orris root or vetiver, to help the potpourri retain its fragrance for a longer period.
Once the flowers, botanicals, and essential oils are thoroughly mixed, transfer the potpourri to a decorative bowl or container. Place the container in a well-ventilated area, such as a sunny windowsill or near a heat source, to allow the fragrance to develop and circulate.
Occasionally, stir or shake the potpourri to release the fragrance and reinvigorate the scent. Over time, the fragrances of the dried flowers and botanicals will blend together, creating a harmonious and delightful aroma that will fill your home.
To keep your dried flower potpourri looking and smelling fresh, store it in a closed container when not in use. This will prevent dust and moisture from affecting the quality and longevity of the potpourri.
Display your homemade dried flower potpourri in various areas of your home, such as the living room, bathroom, or bedroom. Place it on a coffee table, shelf, or dresser to add a touch of natural beauty and fragrance to the space.
Refresh your potpourri as needed by adding a few more drops of essential oil or replacing the dried flowers and botanicals. Get creative and experiment with different scents and combinations to create new blends that reflect the changing seasons or your personal preferences.
Making dried flower potpourri not only fills your home with a delightful fragrance but also allows you to enjoy the natural beauty of dried flowers and botanicals. It’s a simple and enjoyable DIY project that adds a touch of elegance and calming aroma to your living space.
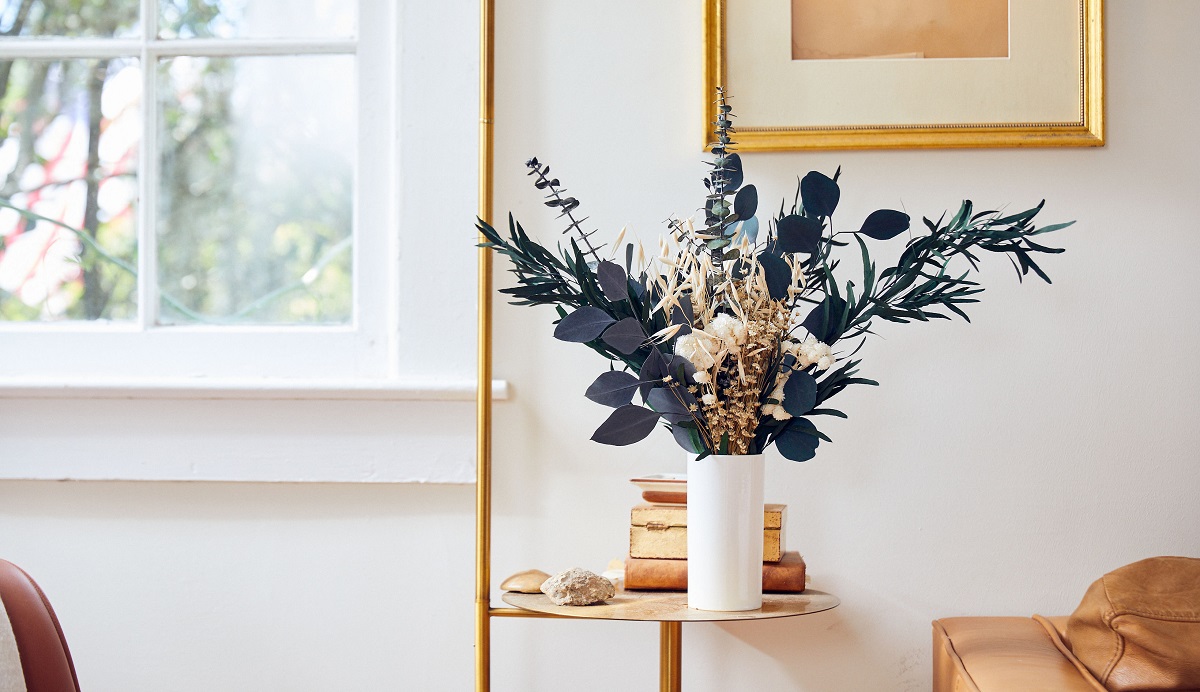
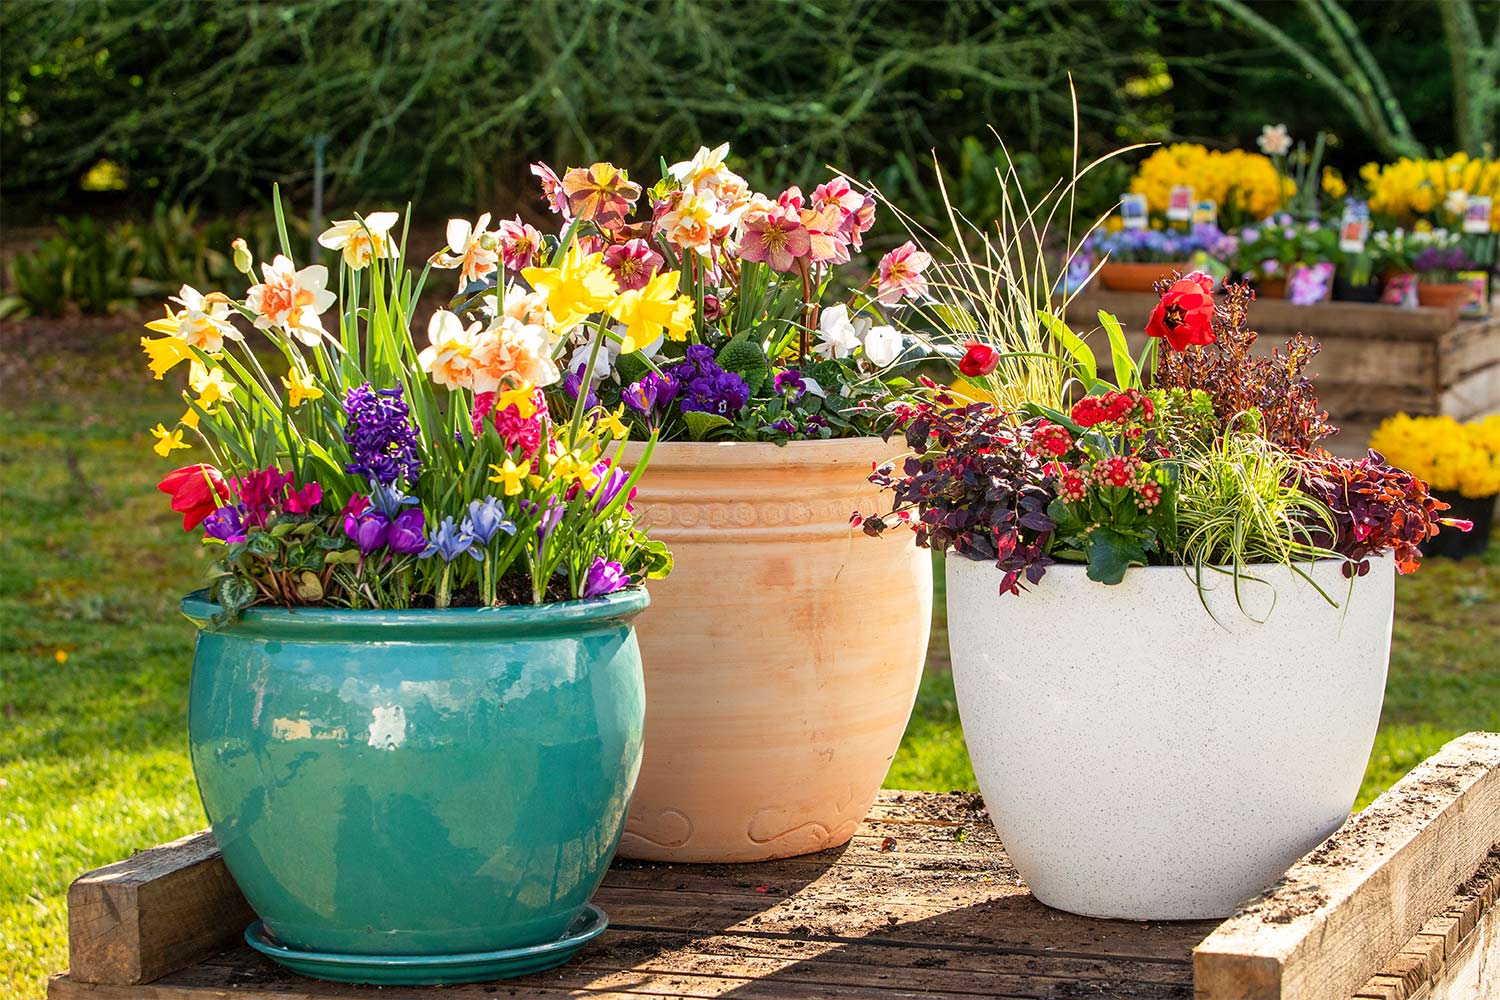
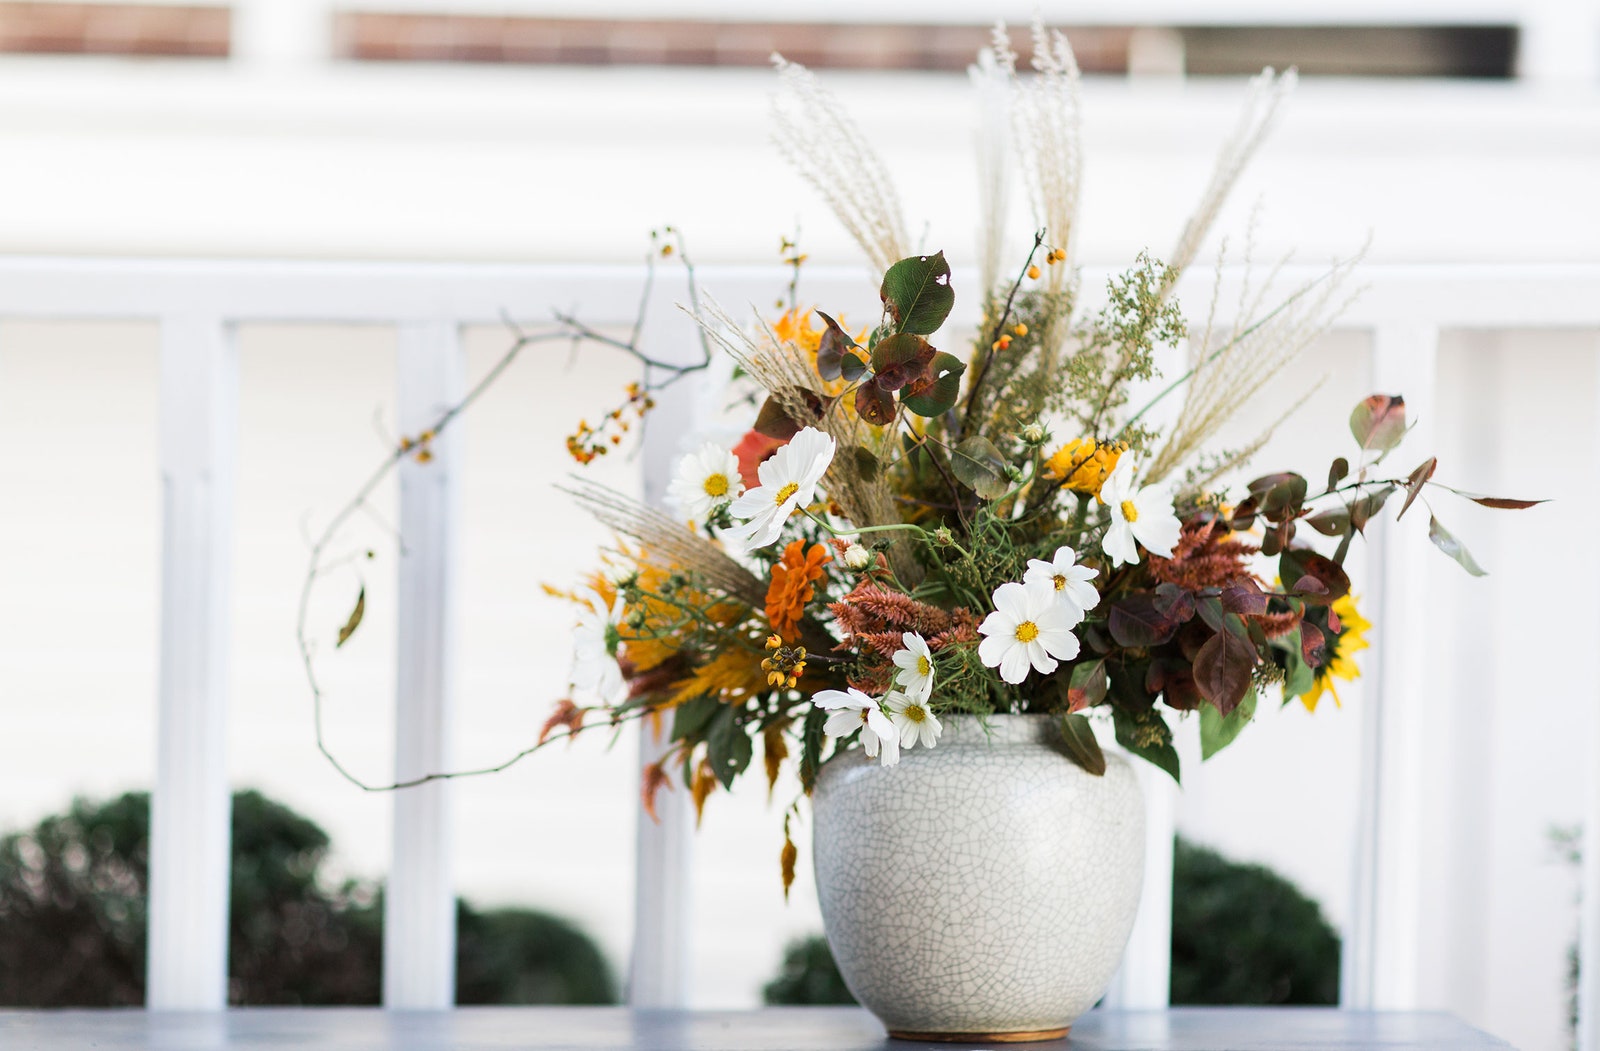
Designing a Dried Flower Arrangement in a Glass Vase
Designing a dried flower arrangement in a glass vase is a versatile and beautiful way to showcase the timeless elegance of dried blooms. It allows you to create a stunning centerpiece or decorative accent that adds natural beauty and texture to any room in your home.
To create a dried flower arrangement in a glass vase, you’ll need a selection of dried flowers, a glass vase of your choice, floral foam or sand for stability, and optionally, decorative elements like ribbon or branches.
Start by selecting a glass vase that suits your desired style and size. Clear glass vases work well for showcasing the natural beauty of dried flowers, but you can also experiment with colored or textured glass vases for a unique look.
Prepare the vase by adding a layer of floral foam or sand to the bottom. This provides stability for the dried flowers and helps to hold them in place. If using floral foam, soak it in water beforehand to ensure it’s moist and ready to hold the stems.
Next, select a variety of dried flowers that complement each other in terms of color, texture, and size. Consider using blooms with different heights and shapes to create visual interest. Popular choices for dried flower arrangements include roses, lavender, delphinium, and strawflower.
Trim the stems of your dried flowers to the appropriate length for your vase. Remove any excess leaves or foliage that may obstruct the view or make the arrangement look cluttered.
Now, it’s time to start arranging the dried flowers in the glass vase. Begin by placing the larger blooms or focal points in the center, creating a visual anchor for the arrangement. Then, work your way outwards, adding smaller flowers and foliage to fill in the gaps and create a balanced composition.
As you arrange the dried flowers, consider the height and layering of the stems. Varying the lengths and positioning of the blooms will create depth and dimension in your arrangement. You can also add branches or dried grasses to add height or a more organic feel.
Once the dried flowers are in place, step back and assess the overall appearance of the arrangement. Make any necessary adjustments to achieve the desired look. Take the opportunity to add decorative elements like ribbons or branches for an extra touch of style.
When designing a dried flower arrangement in a glass vase, keep in mind that less is often more. The beauty of dried flowers lies in their simplicity and natural elegance. Avoid overcrowding the vase and allow each individual bloom to shine.
Once your dried flower arrangement is complete, find the perfect spot to display it. Place it on a mantel, coffee table, or dining table to add visual interest and a touch of natural beauty to your space.
Remember that dried flowers require minimal maintenance. Simply dust the arrangement lightly on occasion to keep it looking fresh.
A dried flower arrangement in a glass vase offers the opportunity to enjoy and admire the beauty of these timeless blooms year-round. It’s a graceful and versatile way to incorporate nature into your home decor, creating an atmosphere of elegance and tranquility.
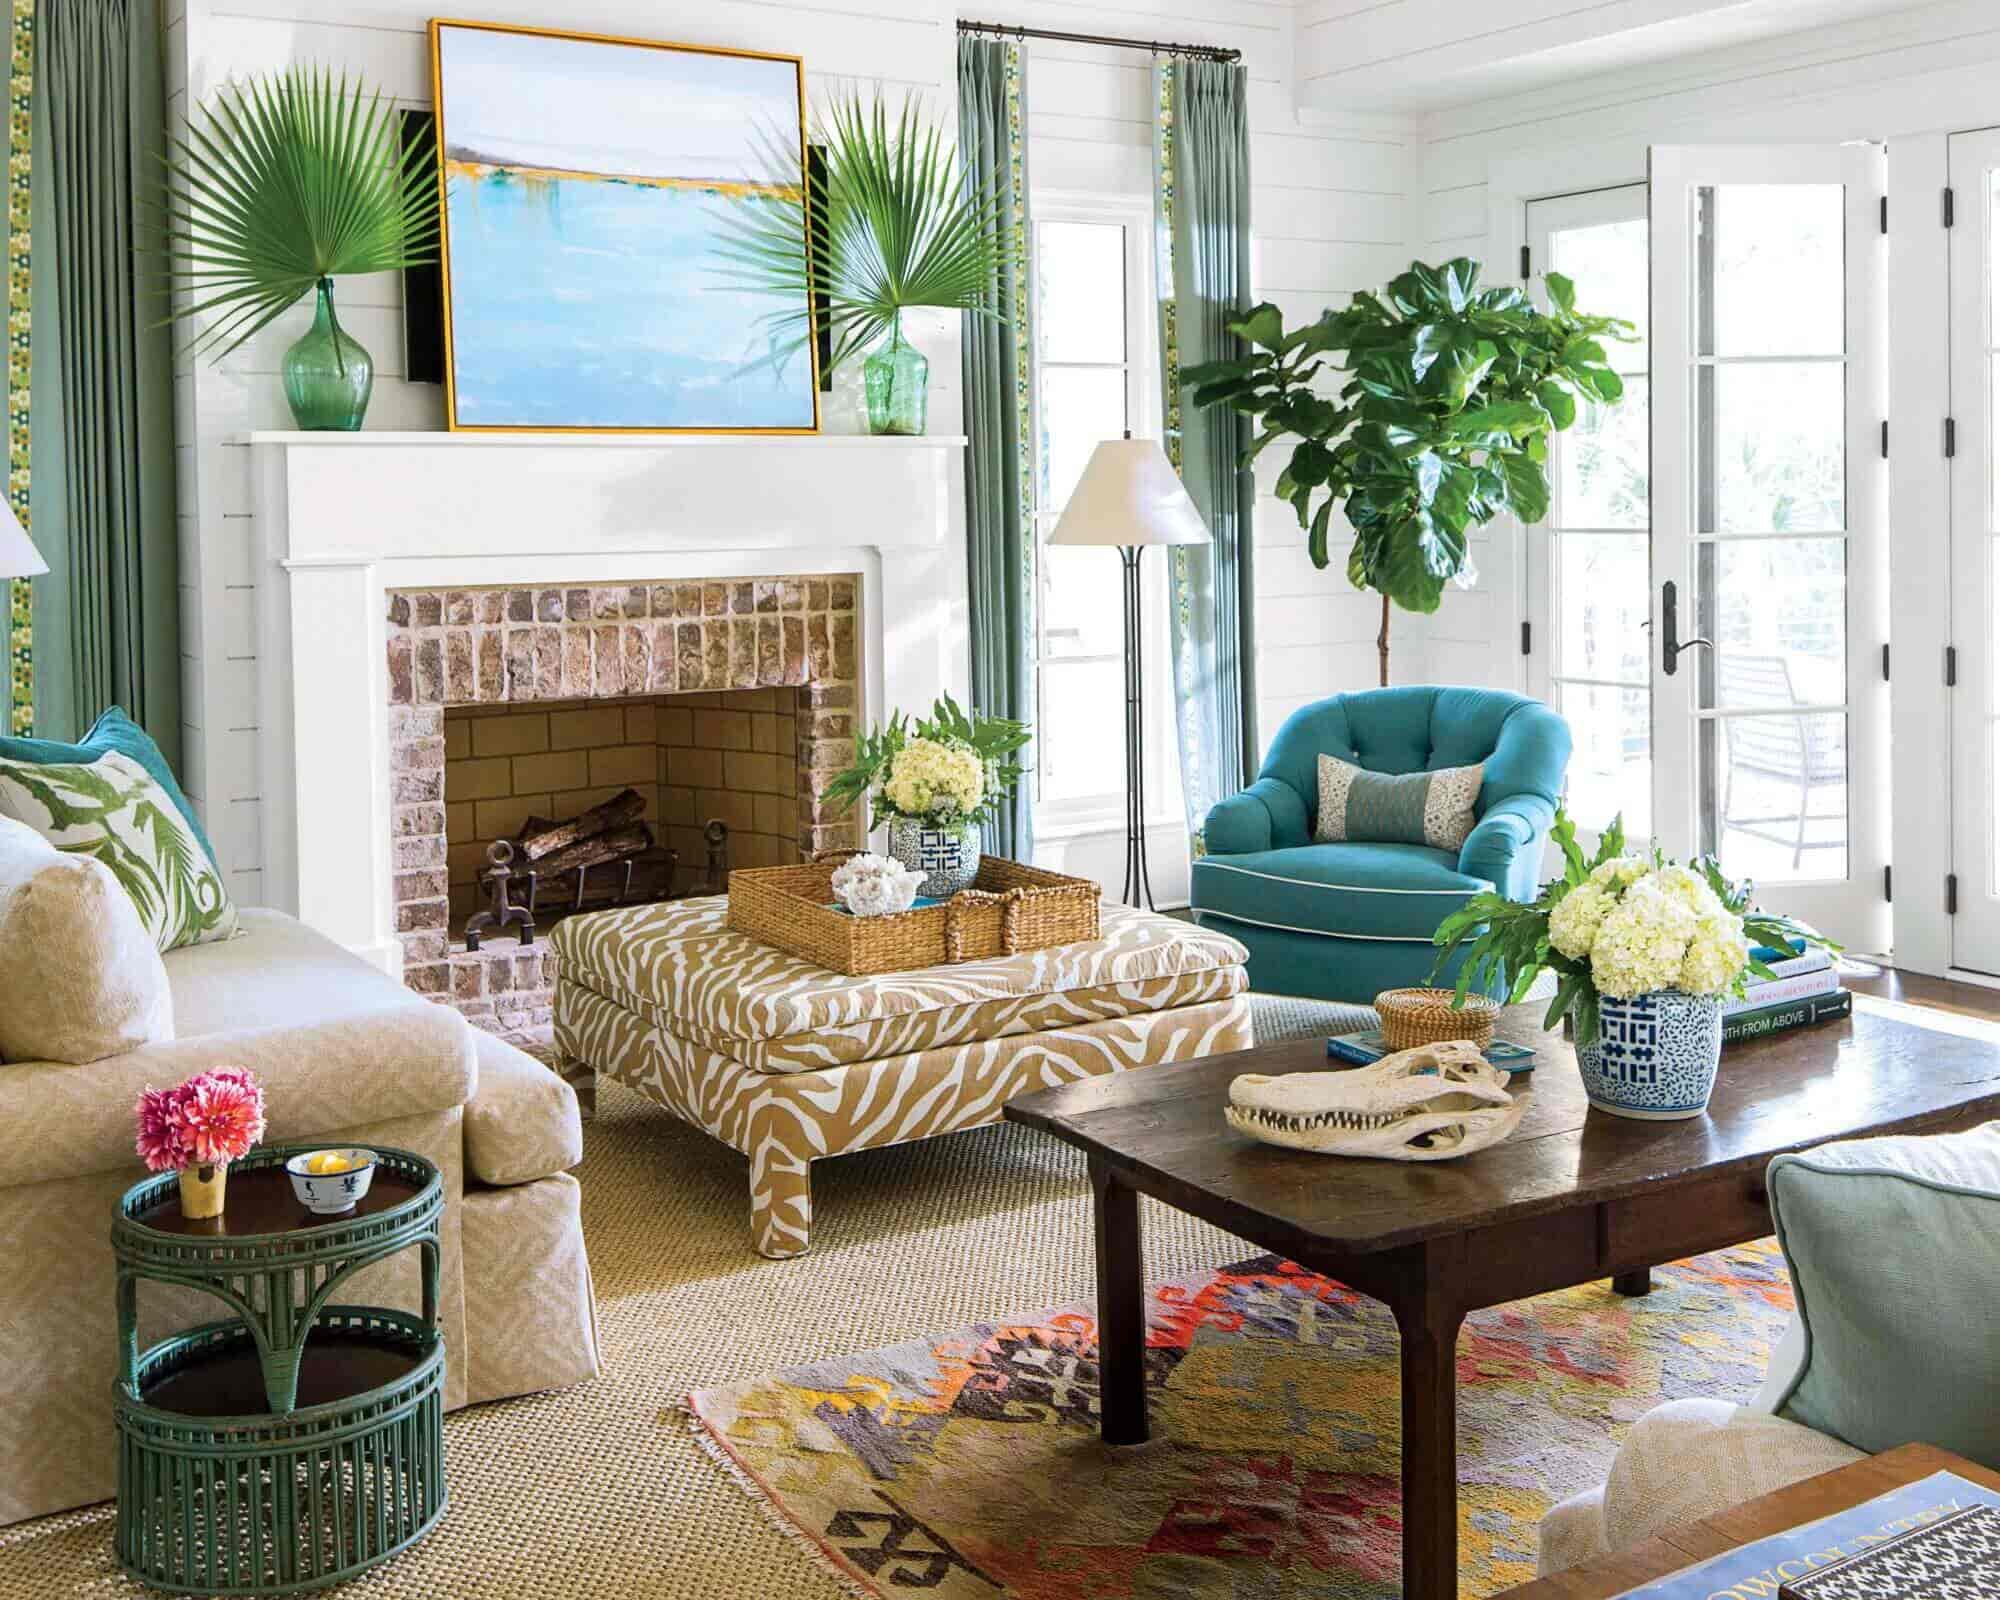
Decorating with Dried Flowers for a Festive Season
When the festive season arrives, incorporating dried flowers into your holiday decor adds a unique and enchanting touch. Dried flowers bring a sense of nostalgia, warmth, and natural beauty to your home, creating a festive ambiance that truly celebrates the season. Here are some ideas for incorporating dried flowers into your holiday decorations:
1. Dried Flower Wreaths: Craft a festive wreath using dried flowers and foliage. Enhance it with elements like pine cones, cinnamon sticks, dried berries, and ribbons for a touch of holiday cheer. Hang it on your front door or above your fireplace to welcome guests and evoke a joyful atmosphere.
2. Dried Flower Centerpieces: Create stunning centerpieces using dried flowers, candles, and seasonal elements like pine branches, holly berries, and dried oranges. Arrange them in a beautiful vase or on a decorative tray to adorn your holiday dining table or mantle.
3. Dried Flower Garlands: Design garlands using dried flowers, leaves, and other natural materials. Hang them on staircases, mantels, or drape them on walls to add a festive and rustic touch to your home. Consider incorporating festive elements like miniature ornaments or twinkling lights for a magical effect.
4. Dried Flower Tree Ornaments: Craft unique tree ornaments using dried flowers. Add a ribbon or string to attach them to your Christmas tree, wreaths, or garlands. These delicate and elegant ornaments will add a touch of charm and a natural feel to your holiday decorations.
5. Dried Flower Advent Calendar: Create an advent calendar using small cloth bags or envelopes filled with dried flowers and handwritten messages. Hang them on a decorative string or use a festive display board to count down the days until Christmas. Each day, open a bag to reveal a beautiful dried flower and a meaningful note.
6. Dried Flower Table Settings: Add a whimsical touch to your holiday table by incorporating dried flowers into your table settings. Use small bouquets of dried flowers as place card holders, or tie dried flower stems with ribbons around napkins for an elegant and festive look.
7. Dried Flower Gift Toppers: Attach dried flowers, twigs, or small bouquets to gift packages as unique and beautiful adornments. These natural embellishments add a personal and festive touch to your presents, making them even more special for your loved ones.
8. Dried Flower Potpourri: Fill bowls or decorative containers with homemade dried flower potpourri. Combine dried flowers, spices like cinnamon, cloves, and star anise, and add a few drops of essential oils in festive scents like pine or citrus. Arrange them throughout your home to create a fragrant and inviting atmosphere.
When decorating with dried flowers for the festive season, keep in mind the importance of proper care. Ensure the dried flowers are kept away from direct sunlight and moisture to preserve their color and shape. Occasionally dust them gently to maintain their beautiful appearance.
Decorating with dried flowers for the festive season adds a unique and charming twist to your holiday decor. It brings nature’s beauty indoors and creates a warm and inviting atmosphere that perfectly captures the spirit of the holiday season.
Frequently Asked Questions about Decorating With Dried Flowers: 12 Pretty Arrangements
Was this page helpful?
At Storables.com, we guarantee accurate and reliable information. Our content, validated by Expert Board Contributors, is crafted following stringent Editorial Policies. We're committed to providing you with well-researched, expert-backed insights for all your informational needs.


0 thoughts on “Decorating With Dried Flowers: 12 Pretty Arrangements”