Home>Kitchen & Cooking>Kitchen Gadgets & Utensils>How To Use Kitchenaid Stand Mixer Attachments

Kitchen Gadgets & Utensils
How To Use Kitchenaid Stand Mixer Attachments
Modified: October 20, 2024
Discover the versatility of KitchenAid stand mixer attachments for effortless meal prep and baking. Explore our range of kitchen gadgets and utensils to elevate your culinary skills. Unlock the potential of your stand mixer today!
(Many of the links in this article redirect to a specific reviewed product. Your purchase of these products through affiliate links helps to generate commission for Storables.com, at no extra cost. Learn more)
Introduction
Welcome to the world of KitchenAid stand mixer attachments, where culinary creativity meets versatile functionality. The KitchenAid stand mixer is a beloved staple in kitchens around the globe, celebrated for its durability, reliability, and impressive range of attachments. These attachments transform the stand mixer into a multifunctional powerhouse, capable of effortlessly tackling an array of culinary tasks, from kneading dough to whipping up fluffy meringues.
KitchenAid stand mixer attachments are designed to streamline and elevate the cooking and baking experience, making it easier to achieve professional-quality results in the comfort of your own kitchen. Whether you are a seasoned home chef or a passionate baking enthusiast, these attachments open up a world of possibilities, allowing you to explore new recipes and techniques with confidence and ease.
In this comprehensive guide, we will delve into the realm of KitchenAid stand mixer attachments, exploring their basic parts, how to attach and detach them, and the various ways to use these attachments to enhance your culinary endeavors. Additionally, we will share invaluable tips and tricks for optimizing the performance of these attachments, as well as essential insights on cleaning and maintaining them to ensure their longevity.
So, whether you are eager to master the art of bread making, eager to whip up decadent frostings and batters, or keen to experiment with a diverse range of recipes, the KitchenAid stand mixer attachments are your trusted allies in the pursuit of culinary excellence. Join us as we embark on a journey to unlock the full potential of these innovative attachments, and discover the countless ways they can revolutionize your culinary adventures.
Key Takeaways:
- Elevate your culinary game with KitchenAid stand mixer attachments, from kneading dough to whipping up airy meringues. These versatile tools streamline tasks and open up a world of culinary possibilities.
- Master the art of using KitchenAid stand mixer attachments with essential tips for optimal performance, cleaning, and maintenance. Preserve their functionality and unleash your culinary creativity with confidence.
Basic Parts of KitchenAid Stand Mixer Attachments
Before delving into the specifics of each attachment, it’s essential to familiarize yourself with the basic parts that comprise KitchenAid stand mixer attachments. Understanding these components will provide a foundational knowledge that will facilitate seamless attachment and operation.
- Attachment Hub: The attachment hub is located at the front of the stand mixer and serves as the connection point for the various attachments. It features a power outlet that enables the attachments to be powered by the stand mixer’s motor.
- Attachment Body: This is the main body of the attachment, housing the specific mechanism or tool designed for a particular culinary task. Each attachment is expertly crafted to optimize performance and deliver exceptional results.
- Attachment Release Lever: The attachment release lever allows for effortless attachment and removal of the accessories. It provides a secure locking mechanism, ensuring that the attachments remain firmly in place during operation.
- Specific Components: Depending on the type of attachment, there are additional specific components such as the dough hook, flat beater, wire whip, pasta roller, food grinder, and more. Each component is tailored to fulfill a distinct function, catering to a wide spectrum of culinary needs.
These fundamental parts collectively contribute to the versatility and functionality of KitchenAid stand mixer attachments, enabling users to seamlessly transition between different culinary tasks with ease. Whether you are preparing a batch of artisanal bread, crafting homemade pasta, or whipping up a velvety cake batter, understanding the basic parts of these attachments is the first step towards harnessing their full potential.
Now that we have familiarized ourselves with the foundational elements of KitchenAid stand mixer attachments, let’s explore the process of attaching and detaching these accessories, paving the way for a seamless and efficient culinary experience.
How to Attach and Detach KitchenAid Stand Mixer Attachments
Attaching and detaching KitchenAid stand mixer attachments is a straightforward process that, when done correctly, ensures optimal performance and safety during use. The following steps outline the simple yet essential procedure for attaching and detaching these versatile accessories:
Attaching KitchenAid Stand Mixer Attachments:
- Ensure the Stand Mixer is Turned Off: Before attaching any accessory, it's crucial to turn off the stand mixer and unplug it from the power source for safety.
- Locate the Attachment Hub: Position the stand mixer so that the attachment hub is easily accessible at the front of the appliance.
- Align and Insert the Attachment: Match the attachment's power shaft with the hub's socket and gently slide the attachment into place. You will feel a slight resistance as the attachment aligns with the hub.
- Secure the Attachment: Once the attachment is inserted, rotate it slightly to the right until you hear a distinct clicking sound. This indicates that the attachment is securely locked in place and ready for use.
- Perform a Safety Check: Give the attachment a gentle tug to ensure it is firmly attached to the hub. If it remains in place without any wobbling or movement, it is ready for operation.
Detaching KitchenAid Stand Mixer Attachments:
- Turn Off and Unplug the Stand Mixer: As with attaching the attachments, it's essential to power off the stand mixer and disconnect it from the power source before detaching any accessory.
- Release the Attachment: Locate the attachment release lever, typically positioned near the attachment hub. Depress the release lever to unlock the attachment.
- Rotate and Remove the Attachment: Once the release lever is engaged, rotate the attachment to the left to release it from the hub. Gently pull the attachment away from the stand mixer to complete the detachment process.
- Store the Attachment Properly: After detaching the accessory, store it in a designated location to prevent misplacement and ensure easy access for future use.
Mastering the art of attaching and detaching KitchenAid stand mixer attachments is a fundamental skill that underpins the seamless integration of these accessories into your culinary repertoire. With these essential steps at your disposal, you are well-equipped to explore the myriad capabilities of each attachment with confidence and ease.
Now that we have established the foundational knowledge of attaching and detaching KitchenAid stand mixer attachments, let’s delve into the specific uses and techniques for some of the most popular attachments, starting with the dough hook attachment.
Using the Dough Hook Attachment
The dough hook attachment for the KitchenAid stand mixer is a game-changer for anyone who loves to bake bread, pizza dough, or any other yeast-based recipes. This attachment is specially designed to knead and mix yeast dough, saving you time and effort while ensuring consistent and thoroughly kneaded results.
Steps for Using the Dough Hook Attachment:
- Prepare the Ingredients: Measure out the ingredients for your yeast-based dough recipe, ensuring accuracy for the best results.
- Attach the Dough Hook: Following the previously outlined steps for attaching KitchenAid stand mixer attachments, secure the dough hook onto the attachment hub.
- Add the Ingredients to the Mixing Bowl: Place the measured ingredients, including flour, yeast, water, and any additional components, into the mixing bowl attached to the stand mixer.
- Begin Mixing on Low Speed: Start the stand mixer on a low speed setting to gradually incorporate the ingredients. This initial mixing phase allows the dough hook to combine the components without overworking the dough.
- Knead the Dough on Medium Speed: Once the ingredients are combined, increase the speed to a medium setting to initiate the kneading process. The dough hook will work its magic, kneading the dough to develop gluten and achieve the desired elasticity.
- Monitor the Dough Consistency: Keep a close eye on the dough’s consistency as it kneads. Depending on the recipe, you may need to adjust the mixing time to achieve the ideal texture and elasticity.
- Transfer and Shape the Dough: Once the dough is thoroughly kneaded, remove it from the mixing bowl and transfer it to a clean, lightly floured surface to shape it according to your recipe’s requirements.
Whether you are crafting a rustic artisan loaf, preparing homemade pizza dough, or experimenting with sweet breads, the dough hook attachment simplifies the often labor-intensive process of kneading yeast dough by hand. It streamlines the preparation of yeast-based recipes, allowing you to achieve professional-quality results with minimal effort.
With the dough hook attachment at your disposal, the art of bread making becomes an accessible and rewarding endeavor, inviting you to explore an array of traditional and innovative recipes with confidence and ease.
Next, we will explore the versatility of the flat beater attachment and its indispensable role in a myriad of culinary creations.
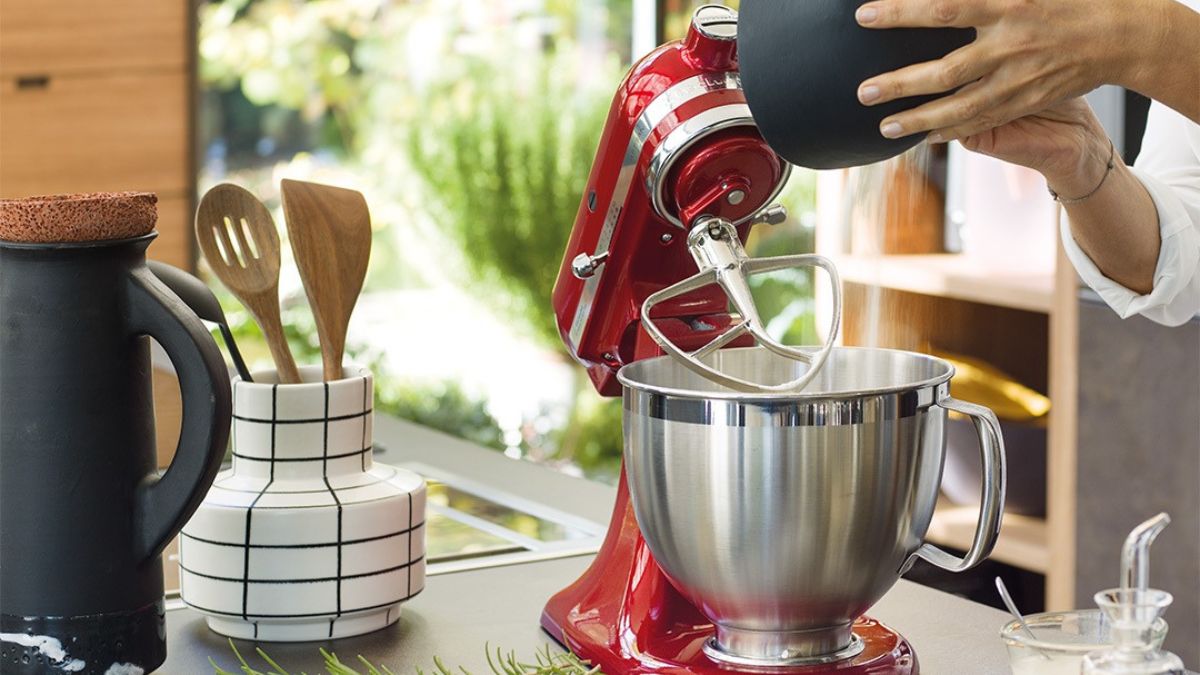
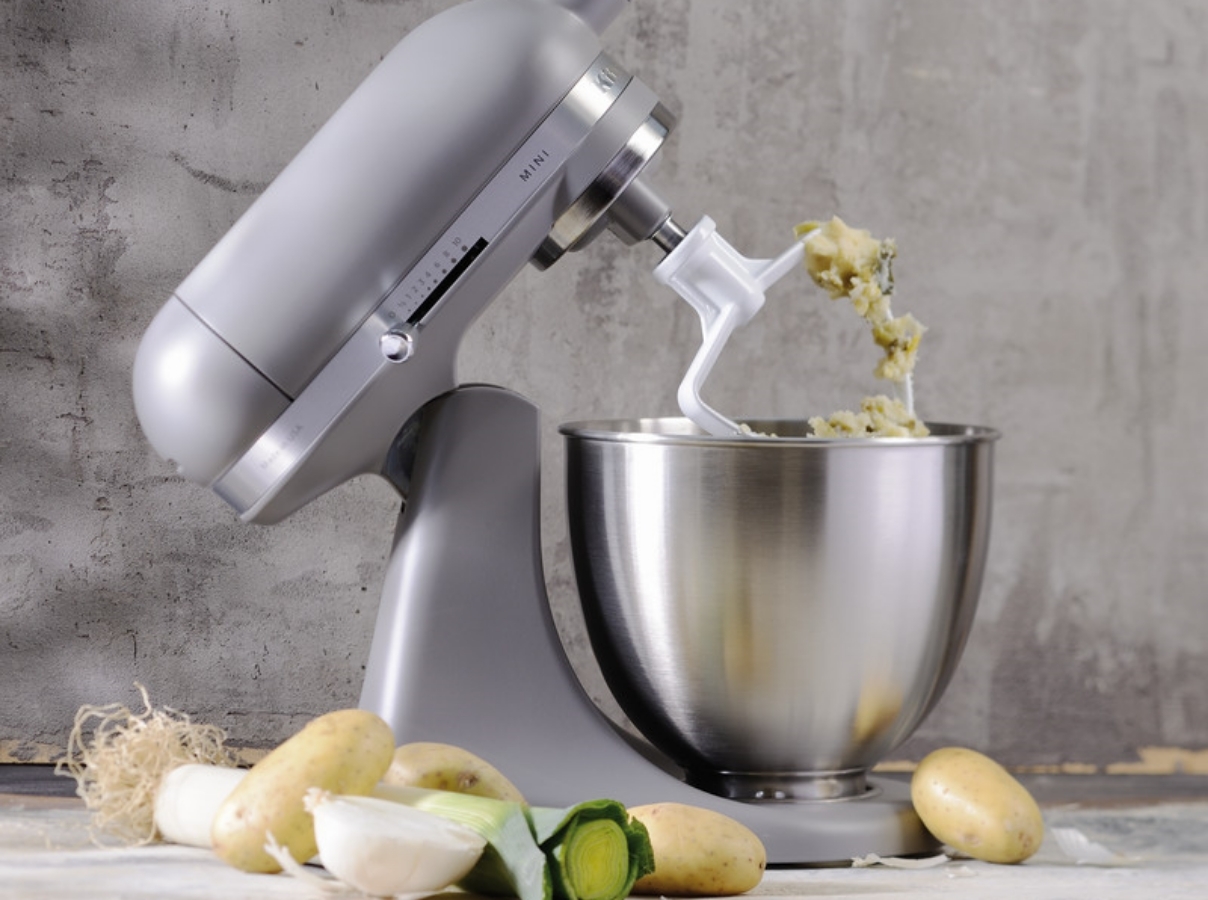
Using the Flat Beater Attachment
The flat beater attachment for the KitchenAid stand mixer is a versatile tool that excels in a wide range of culinary applications, making it an indispensable ally in the kitchen. From creaming butter and sugar to mixing cake batters and cookie dough, this attachment is adept at achieving consistently smooth and thoroughly combined mixtures, saving you valuable time and effort in the preparation of various recipes.
Steps for Using the Flat Beater Attachment:
- Attach the Flat Beater: Following the previously outlined steps for attaching KitchenAid stand mixer attachments, secure the flat beater onto the attachment hub.
- Prepare the Ingredients: Gather and measure the ingredients required for your recipe, ensuring that they are at the appropriate temperature for optimal results.
- Add Ingredients to the Mixing Bowl: Place the ingredients, such as butter, sugar, eggs, flour, and other components, into the mixing bowl attached to the stand mixer.
- Initiate Mixing on Low Speed: Start the stand mixer on a low speed setting to gradually combine the ingredients. This initial mixing phase allows the flat beater to incorporate the components without overmixing.
- Gradually Increase the Speed: Once the ingredients are combined, gradually increase the speed to the specified setting for your recipe, allowing the flat beater to thoroughly mix the ingredients to a uniform consistency.
- Scrape the Bowl as Needed: Pause the mixer periodically to scrape down the sides and bottom of the mixing bowl with a spatula, ensuring that all the ingredients are evenly integrated.
- Monitor the Mixture: Keep a close eye on the mixture’s texture and appearance, adjusting the mixing time as needed to achieve the desired consistency.
Whether you are whipping up a luscious cake batter, preparing a velvety frosting, or creating delectable cookie dough, the flat beater attachment streamlines the mixing process, ensuring that your culinary creations are consistently well-blended and perfectly textured.
With the flat beater attachment as your culinary companion, you can embark on a diverse array of baking and cooking endeavors with confidence, knowing that achieving impeccably mixed and blended ingredients is effortlessly within reach.
Next, we will explore the art of achieving airy, voluminous mixtures with the wire whip attachment and its pivotal role in creating delightful meringues, whipped creams, and more.
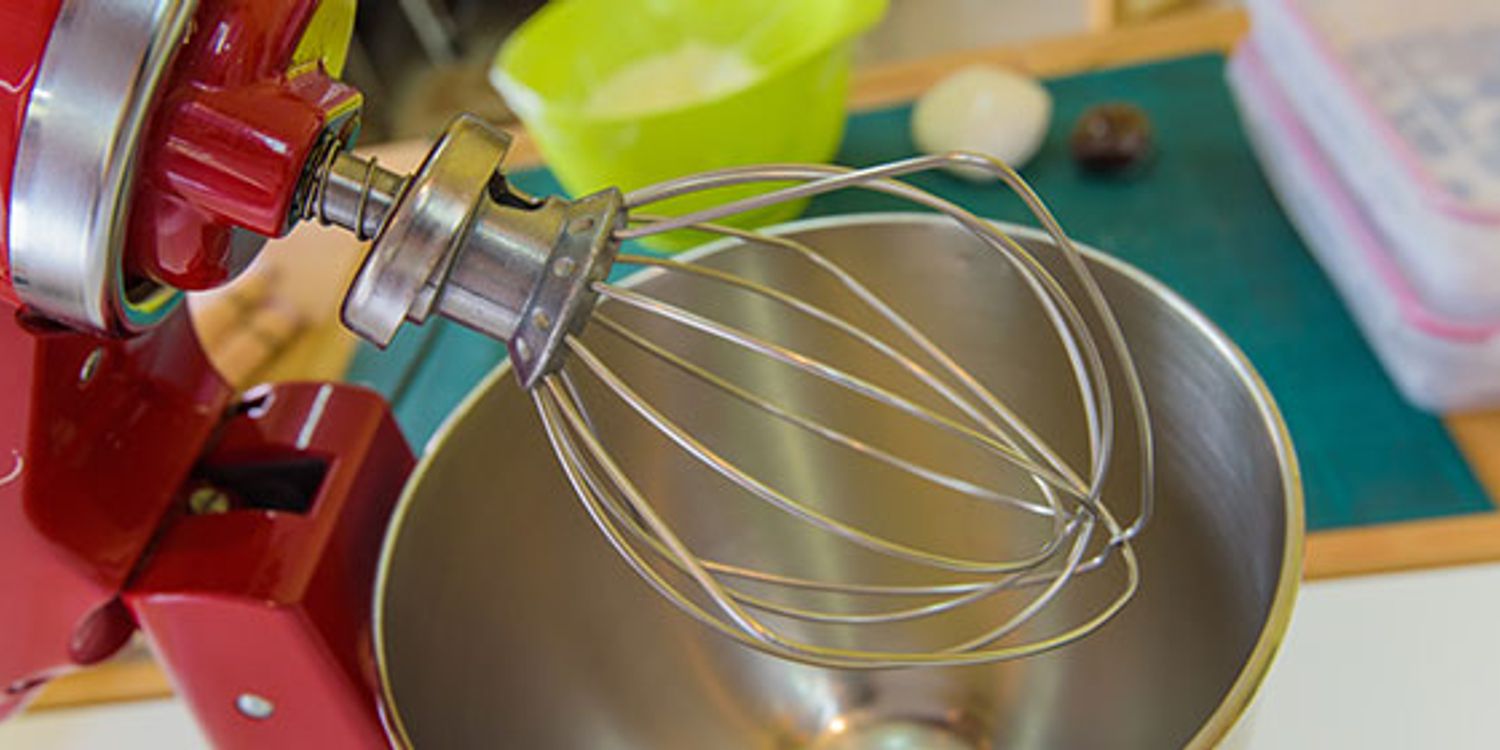
Using the Wire Whip Attachment
The wire whip attachment for the KitchenAid stand mixer is a culinary marvel, renowned for its ability to effortlessly whip, aerate, and emulsify various mixtures, making it an indispensable tool for achieving light, airy, and perfectly blended results. From whipping cream to creating fluffy meringues and delicate frostings, this attachment elevates your culinary creations to new heights of decadence and delight.
Steps for Using the Wire Whip Attachment:
- Attach the Wire Whip: Following the previously outlined steps for attaching KitchenAid stand mixer attachments, secure the wire whip onto the attachment hub.
- Select the Proper Bowl: Use a mixing bowl that provides ample space for the ingredients to expand as they are whipped, ensuring optimal aeration and volume.
- Add the Ingredients to the Bowl: Place the ingredients, such as heavy cream, egg whites, sugar, or other components, into the mixing bowl attached to the stand mixer.
- Initiate Whipping on Low Speed: Start the stand mixer on a low speed setting to gradually begin the whipping process. This gentle start allows the wire whip to incorporate air into the mixture without splattering.
- Gradually Increase the Speed: As the ingredients begin to thicken, gradually increase the speed to the specified setting for your recipe, allowing the wire whip to aerate and whip the mixture to the desired consistency.
- Monitor the Texture: Keep a close eye on the mixture as it whips, observing the texture and volume to ensure that it reaches the desired stage of stiffness or peaks.
- Pause and Scrape the Bowl: Pause the mixer as needed to scrape down the sides and bottom of the mixing bowl with a spatula, ensuring that all the ingredients are evenly whipped and aerated.
Whether you are preparing a sumptuous whipped cream topping, crafting ethereal meringues, or whipping up delicate mousses and frostings, the wire whip attachment empowers you to achieve impeccably airy and voluminous mixtures with ease.
With the wire whip attachment at your disposal, the art of creating light and fluffy culinary masterpieces becomes a seamless and rewarding endeavor, inviting you to explore a myriad of recipes that celebrate the delicate magic of perfectly whipped creations.
Next, we will explore the diverse array of KitchenAid stand mixer attachments, each offering unique capabilities to enrich your culinary repertoire and elevate your cooking and baking adventures.
When using the KitchenAid stand mixer attachments, always make sure to securely attach them to the mixer before turning it on to avoid any accidents or damage to the machine.
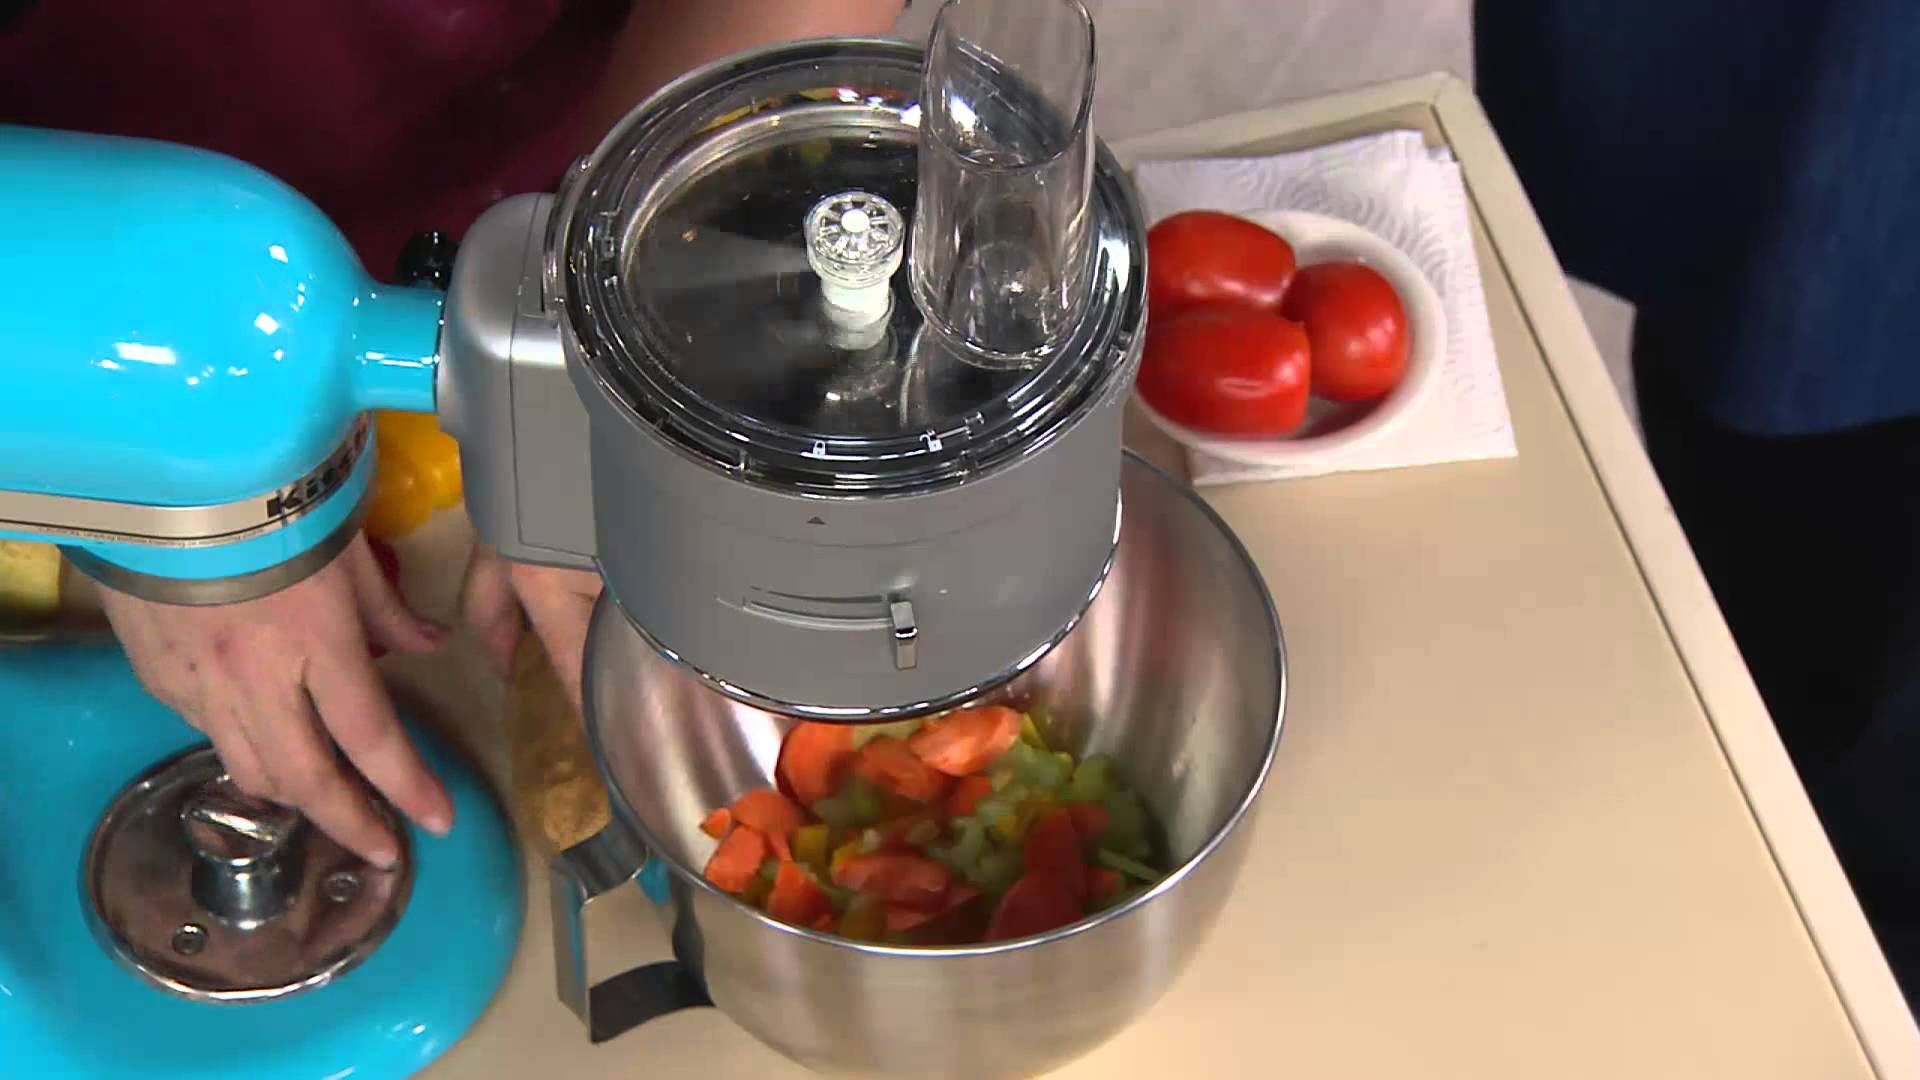
Using Other KitchenAid Stand Mixer Attachments
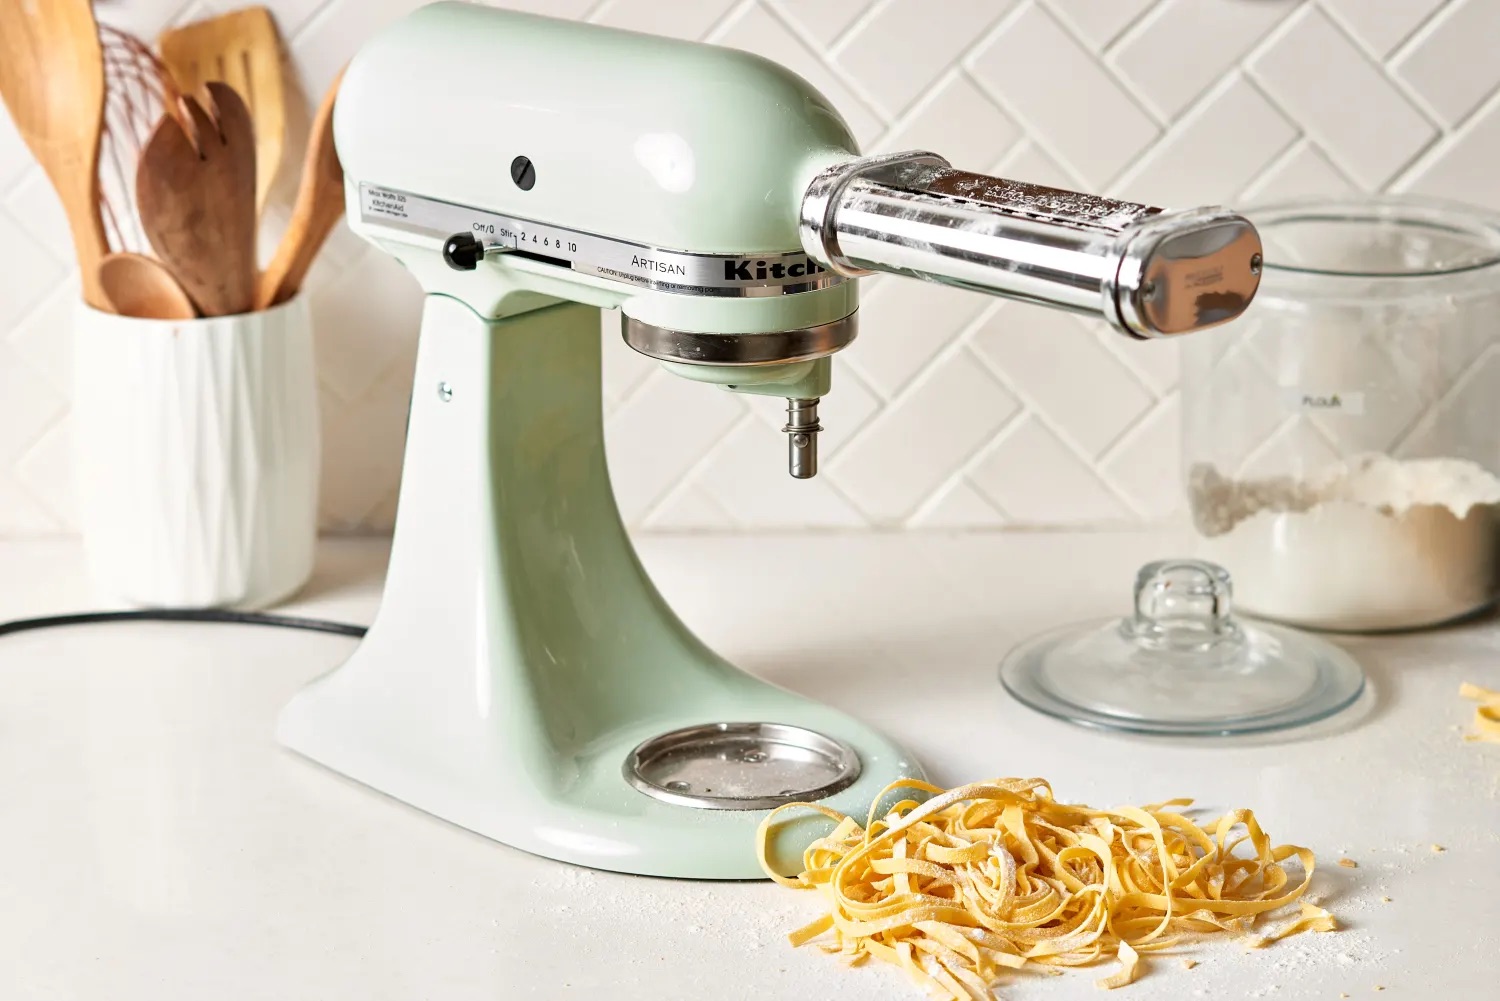
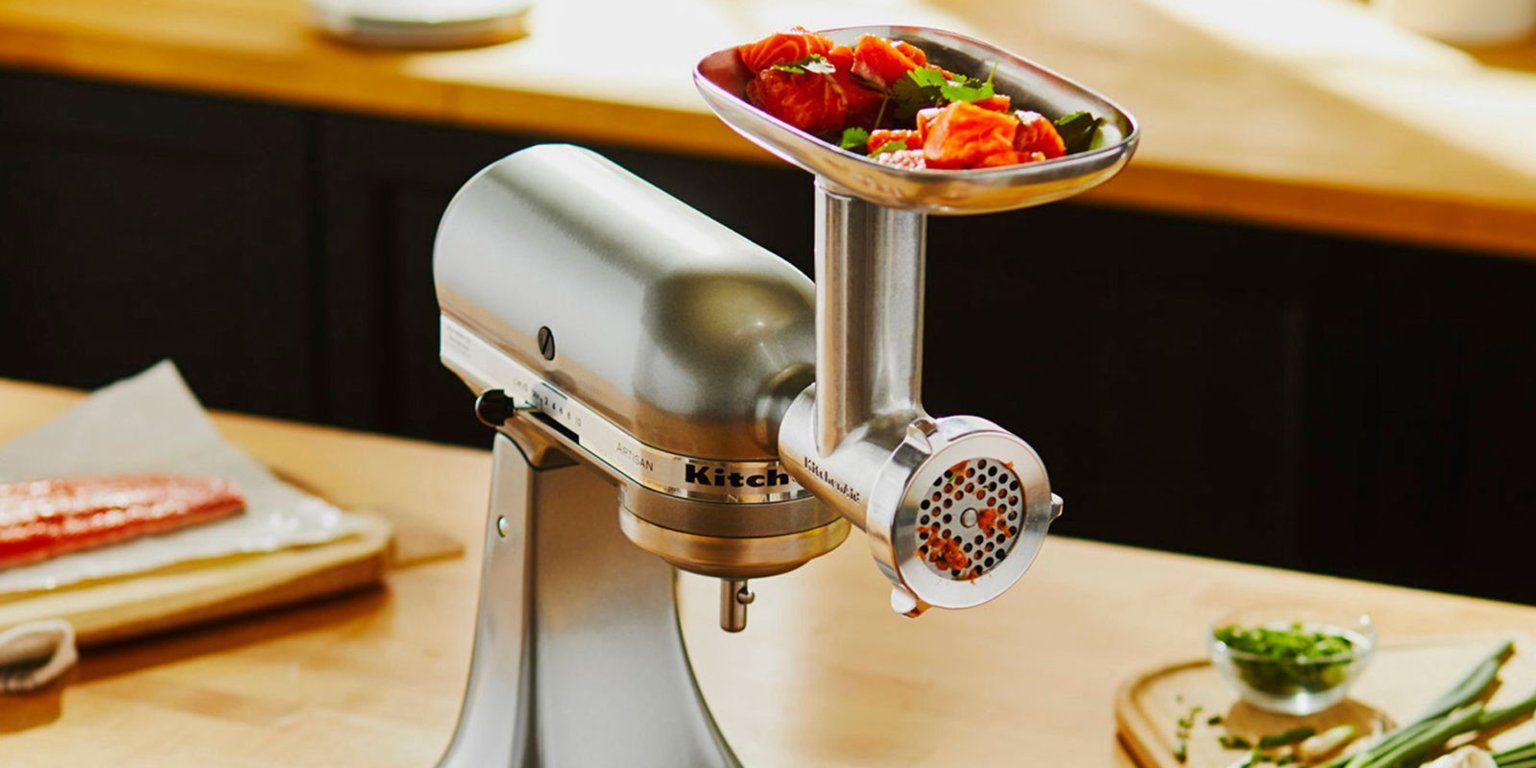
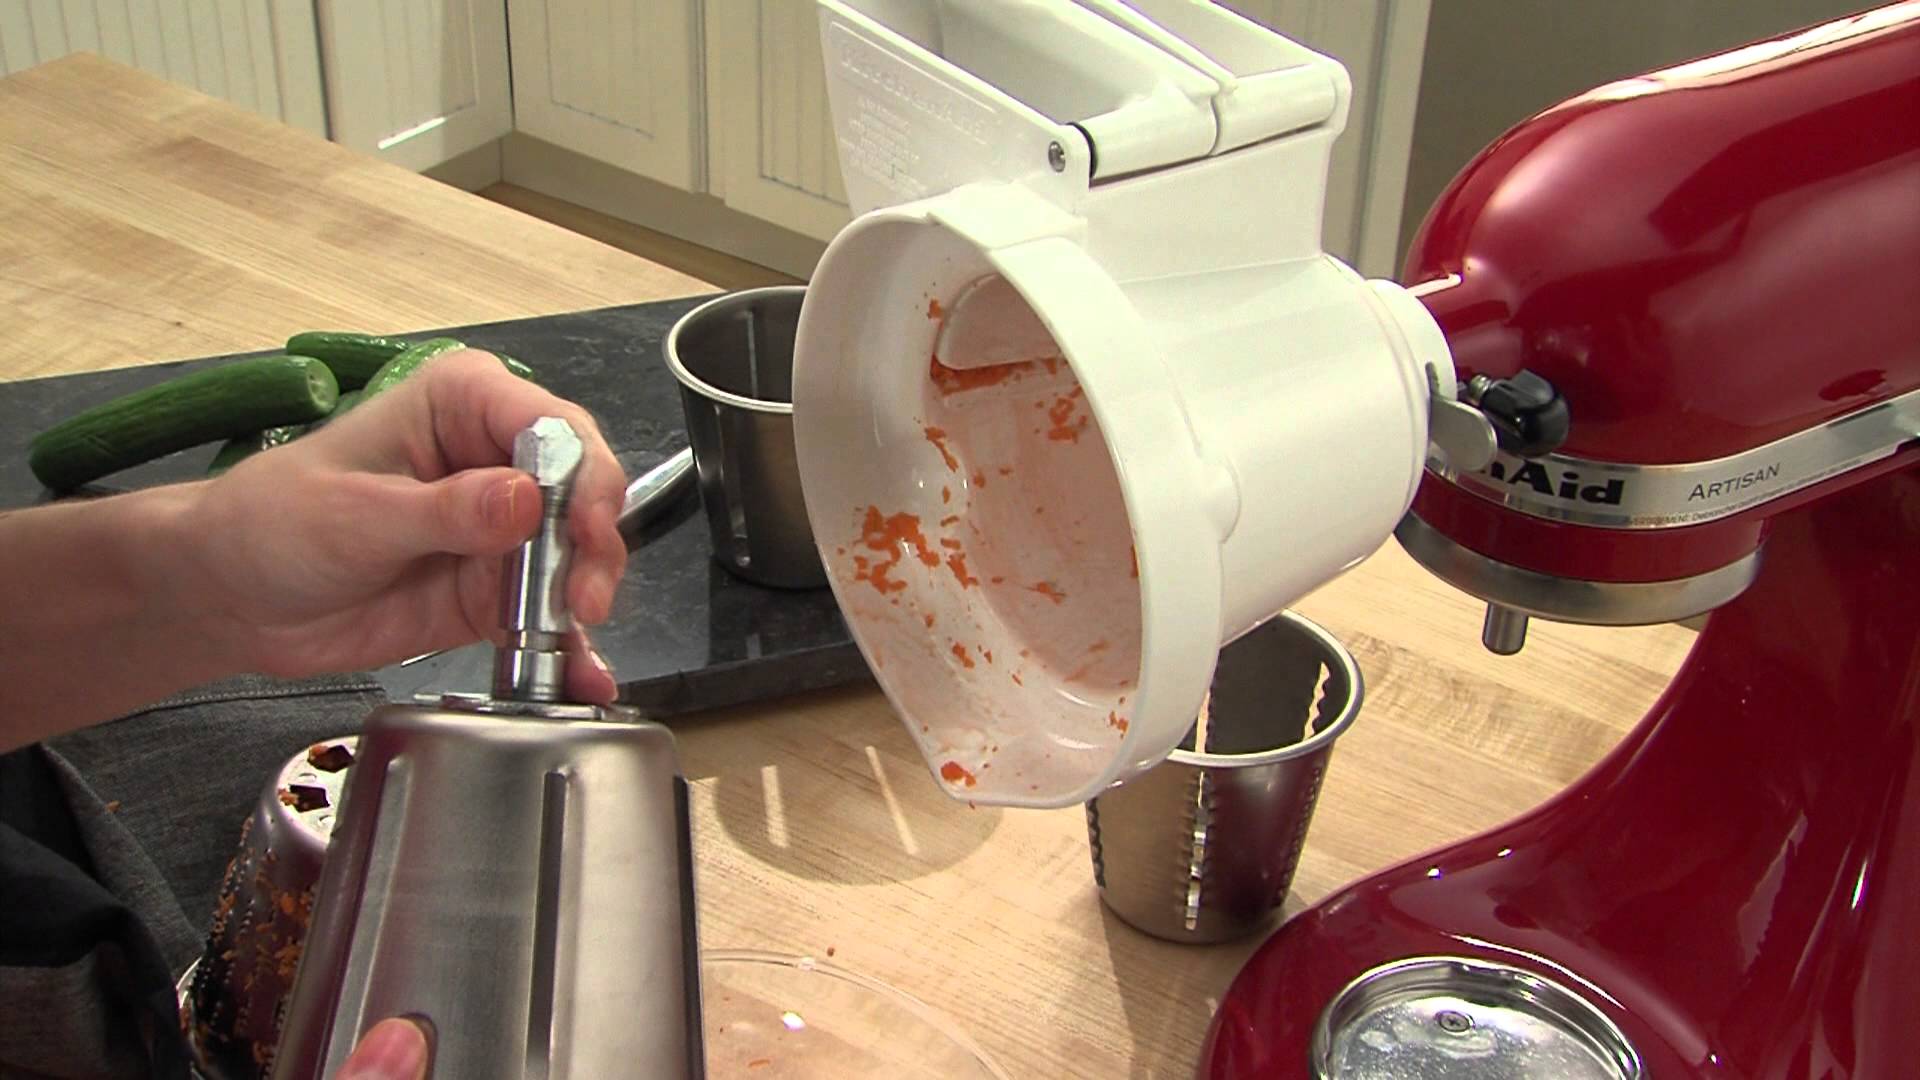
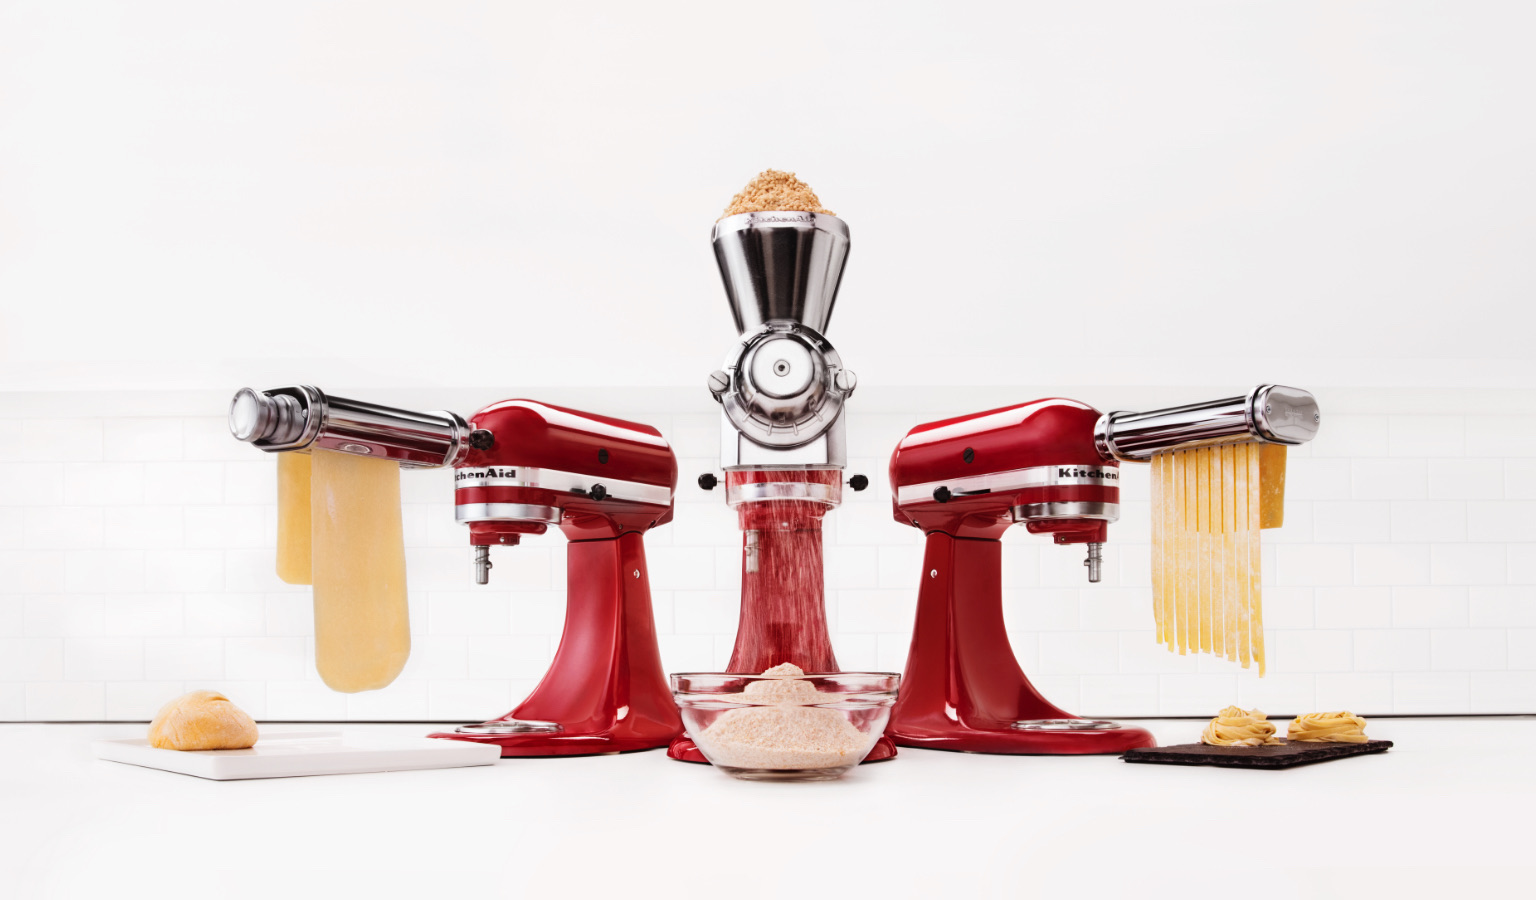
Beyond the essential dough hook, flat beater, and wire whip attachments, the KitchenAid stand mixer offers a diverse array of additional attachments, each designed to expand the culinary capabilities of this iconic appliance. From pasta rollers and cutters to food grinders and citrus juicers, these attachments open up a world of culinary possibilities, allowing you to explore a myriad of recipes and techniques with precision and ease.
Pasta Roller and Cutter Attachments: Elevate your pasta-making endeavors with the pasta roller and cutter attachments, effortlessly transforming dough into exquisite sheets of pasta for lasagna, fettuccine, and more. These attachments enable you to create fresh, homemade pasta with exceptional texture and flavor, elevating your Italian culinary creations to new heights.
Food Grinder Attachment: The food grinder attachment empowers you to grind and mince a variety of ingredients, from meats and vegetables to cheeses and bread for breadcrumbs. This versatile tool enables you to prepare fresh, custom blends of ground ingredients, ideal for crafting flavorful burgers, sausages, meatloaves, and more.
Citrus Juicer Attachment: Harness the zesty essence of citrus fruits with the citrus juicer attachment, designed to extract fresh juice from lemons, limes, oranges, and other citrus varieties. Whether you are crafting refreshing beverages, tangy dressings, or citrus-infused desserts, this attachment ensures that you can effortlessly incorporate the vibrant flavors of citrus into your culinary creations.
Vegetable Sheet Cutter Attachment: Embrace the art of creative culinary presentations with the vegetable sheet cutter attachment, which transforms fresh produce into thin, elegant sheets ideal for crafting vibrant wraps, gluten-free lasagna, and imaginative vegetable-based creations. This attachment adds a touch of artistry and innovation to your culinary repertoire, allowing you to explore inventive ways to showcase seasonal produce.
These additional attachments expand the KitchenAid stand mixer’s functionality, offering a wealth of opportunities to engage in diverse culinary pursuits and experiment with an array of ingredients and techniques. With these attachments at your disposal, you can embark on a culinary journey filled with creativity, innovation, and the joy of crafting exceptional homemade creations.
Next, we will delve into invaluable tips and tricks for optimizing the performance of KitchenAid stand mixer attachments, ensuring that you can harness their full potential in your culinary endeavors.
Tips and Tricks for Using KitchenAid Stand Mixer Attachments
Mastering the art of using KitchenAid stand mixer attachments involves not only understanding their functionalities but also employing valuable tips and tricks to optimize their performance and enhance your culinary creations. Whether you are a seasoned home chef or a passionate baking enthusiast, these insights will elevate your experience with these versatile attachments, allowing you to achieve exceptional results with confidence and ease.
Ensure Proper Fit and Alignment: When attaching the accessories, ensure that they are securely locked in place and aligned with the attachment hub to prevent wobbling or misalignment during operation. This promotes optimal performance and safety.
Utilize the Correct Speed Settings: Familiarize yourself with the recommended speed settings for each attachment and recipe. Using the appropriate speed ensures efficient operation and prevents overworking or undermixing the ingredients.
Monitor Mixing Time: Keep a close eye on the mixing or kneading time, especially when using the stand mixer for the first time with a new recipe. This allows you to achieve the desired consistency without overmixing or undermixing the ingredients.
Scrape Down the Bowl: Periodically pause the mixer to scrape down the sides and bottom of the mixing bowl with a spatula, ensuring that all the ingredients are evenly incorporated and preventing any unmixed pockets.
Adjust Consistency as Needed: If the mixture or dough appears too dry or too wet during mixing, don’t hesitate to adjust the consistency by adding small amounts of liquid or dry ingredients to achieve the ideal texture.
Pre-Chill Attachments and Ingredients: For recipes that require cold ingredients, such as whipping cream or pastry dough, pre-chill the attachments and ingredients to maintain the desired temperature and achieve optimal results.
Follow Manufacturer’s Guidelines: Refer to the manufacturer’s guidelines and recommendations for each attachment, including maintenance, cleaning, and specific usage instructions to ensure longevity and performance.
Experiment and Embrace Creativity: Don’t be afraid to experiment with different attachments and recipes, allowing your culinary creativity to flourish. The versatility of the attachments invites exploration and innovation in the kitchen.
By incorporating these tips and tricks into your culinary endeavors, you can harness the full potential of KitchenAid stand mixer attachments, unlocking a world of culinary possibilities and achieving exceptional results with every recipe.
Next, we will delve into essential insights on cleaning and maintaining these attachments to ensure their longevity and continued performance in your kitchen.
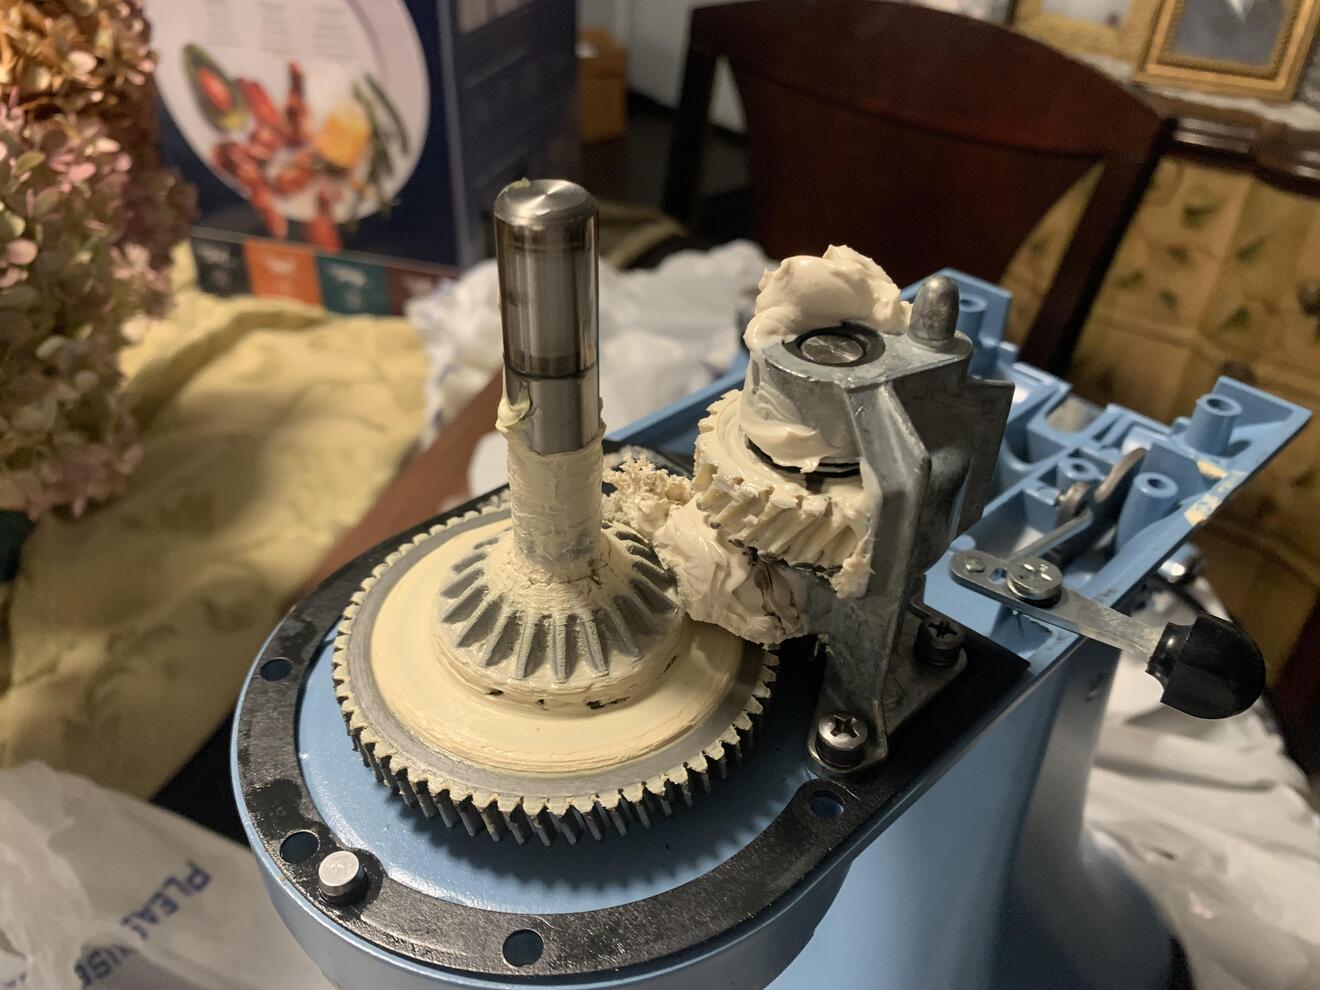
Cleaning and Maintenance of KitchenAid Stand Mixer Attachments
Proper cleaning and maintenance of KitchenAid stand mixer attachments are essential to preserve their performance, longevity, and hygienic integrity. By incorporating diligent care practices into your routine, you can ensure that these versatile attachments continue to deliver exceptional results and remain a steadfast companion in your culinary adventures.
Unplug and Disassemble: Before initiating the cleaning process, always unplug the stand mixer and carefully detach the attachments, ensuring a safe and accessible workspace for cleaning.
Hand Wash with Mild Detergent: Wash the attachments by hand using a mild dishwashing detergent and warm water. Gently scrub the surfaces to remove any food residue or buildup, paying particular attention to crevices and hard-to-reach areas.
Thoroughly Rinse and Dry: After washing, thoroughly rinse the attachments with clean water to remove any soap residue. Towel-dry or air-dry the attachments completely before reassembling or storing them to prevent moisture-related issues.
Inspect for Wear and Tear: Periodically inspect the attachments for any signs of wear, damage, or deterioration. Check for loose components, cracks, or other issues that may affect their performance or safety.
Follow Manufacturer’s Recommendations: Adhere to the manufacturer’s guidelines for specific cleaning instructions and any recommendations for maintaining the attachments in optimal condition. This may include specific care practices for certain materials or components.
Store in a Dry and Safe Location: After cleaning and drying the attachments, store them in a designated, dry area away from direct heat or sunlight. Proper storage prevents damage and ensures that the attachments are readily accessible for future use.
Regular Maintenance of the Stand Mixer: In addition to cleaning the attachments, regularly maintain the stand mixer itself by following the manufacturer’s recommendations for lubrication, motor care, and overall upkeep to ensure its longevity and performance.
Seek Professional Service if Needed: If you encounter any issues or concerns with the attachments that require professional attention, contact the manufacturer or an authorized service provider for guidance and assistance.
By incorporating these cleaning and maintenance practices into your culinary routine, you can uphold the functionality, hygiene, and longevity of your KitchenAid stand mixer attachments, ensuring that they remain reliable companions in your culinary pursuits for years to come.
With a commitment to diligent care and maintenance, your KitchenAid stand mixer attachments will continue to enrich your culinary experiences, empowering you to explore new recipes, techniques, and creative endeavors with confidence and ease.
As we conclude our exploration of the cleaning and maintenance practices, we reflect on the invaluable role that these attachments play in elevating the art of cooking and baking in the modern kitchen.
Conclusion
In the realm of culinary innovation and creativity, KitchenAid stand mixer attachments stand as indispensable tools, empowering home chefs and baking enthusiasts to embark on a journey of culinary excellence. From kneading dough to whipping up delicate meringues, these versatile attachments serve as catalysts for elevating the art of cooking and baking, streamlining tasks, and expanding the possibilities within the kitchen.
By delving into the intricacies of attaching, detaching, and utilizing these attachments, we have unveiled a world of culinary potential, where traditional recipes and innovative creations converge with seamless efficiency. The dough hook attachment simplifies the labor of kneading yeast dough, while the flat beater attachment ensures consistent and thoroughly mixed ingredients for a myriad of recipes. The wire whip attachment, with its ability to aerate and emulsify, brings ethereal lightness to creams, frostings, and more.
Beyond these fundamental attachments, the diverse array of additional accessories, from pasta rollers to food grinders and citrus juicers, invites culinary exploration and innovation, expanding the scope of homemade creations with precision and ease. With each attachment, a new realm of culinary delight unfolds, inviting experimentation and creativity in the kitchen.
As we navigate the essential tips for optimizing performance, cleaning, and maintenance, we reinforce the commitment to preserving the functionality and longevity of these attachments, ensuring that they remain steadfast companions in the pursuit of culinary mastery.
Ultimately, KitchenAid stand mixer attachments embody the convergence of tradition and innovation, where time-honored techniques harmonize with modern convenience, enabling home cooks to achieve professional-quality results with every recipe. They stand as testaments to the artistry and ingenuity that define the culinary landscape, inviting individuals to explore, create, and savor the transformative power of these remarkable attachments.
With each attachment, a new chapter of culinary exploration unfolds, inviting individuals to embrace the joy of creating exceptional homemade creations, one recipe at a time. As we conclude our journey through the realm of KitchenAid stand mixer attachments, we celebrate the enduring legacy of these culinary companions and the countless culinary masterpieces they inspire.
So, whether you are kneading dough for a rustic loaf, crafting delicate pastas, or whipping up luscious creams and frostings, the KitchenAid stand mixer attachments stand as steadfast allies, ready to elevate your culinary adventures to new heights of excellence.
Frequently Asked Questions about How To Use Kitchenaid Stand Mixer Attachments
Was this page helpful?
At Storables.com, we guarantee accurate and reliable information. Our content, validated by Expert Board Contributors, is crafted following stringent Editorial Policies. We're committed to providing you with well-researched, expert-backed insights for all your informational needs.


0 thoughts on “How To Use Kitchenaid Stand Mixer Attachments”