Home>Renovation & DIY>Home Renovation Guides>How To Encapsulate A Crawl Space
Home Renovation Guides
How To Encapsulate A Crawl Space
Modified: February 18, 2024
Learn how to encapsulate a crawl space in your home renovation project with our comprehensive guide. Protect your home from moisture and improve air quality.
(Many of the links in this article redirect to a specific reviewed product. Your purchase of these products through affiliate links helps to generate commission for Storables.com, at no extra cost. Learn more)
Introduction
When it comes to maintaining a healthy and energy-efficient home, the often overlooked crawl space plays a crucial role. A crawl space encapsulation project can significantly improve indoor air quality, prevent moisture-related issues, and enhance energy efficiency. By creating a barrier between the ground and the interior of the home, encapsulation helps to mitigate potential problems such as mold growth, wood rot, and pest infestations.
Encapsulating a crawl space involves a series of strategic steps, each contributing to the overall effectiveness of the encapsulation. From assessing the current condition of the crawl space to installing a vapor barrier and addressing air leaks, this comprehensive guide will walk you through the process, empowering you to transform your crawl space into a clean, dry, and well-insulated area.
By understanding the importance of crawl space encapsulation and following the detailed steps outlined in this guide, you can take proactive measures to protect your home from moisture-related damage and create a healthier living environment for you and your family. So, let's dive into the transformative journey of encapsulating your crawl space and reap the numerous benefits it has to offer.
Key Takeaways:
- Transform your crawl space into a clean, dry, and well-insulated area by following these comprehensive steps. Improve indoor air quality, prevent moisture-related issues, and enhance energy efficiency for a healthier home.
- Take proactive measures to protect your home from moisture-related damage and create a healthier living environment. Clear out debris, install a vapor barrier, insulate, seal air leaks, and install a dehumidifier for long-term benefits.
Step 1: Assessing the Crawl Space
Before embarking on the encapsulation process, it's crucial to conduct a thorough assessment of the crawl space. This initial step provides valuable insights into the current condition of the space and helps in identifying potential issues that need to be addressed. Here's a detailed look at the key aspects to consider during the assessment:
-
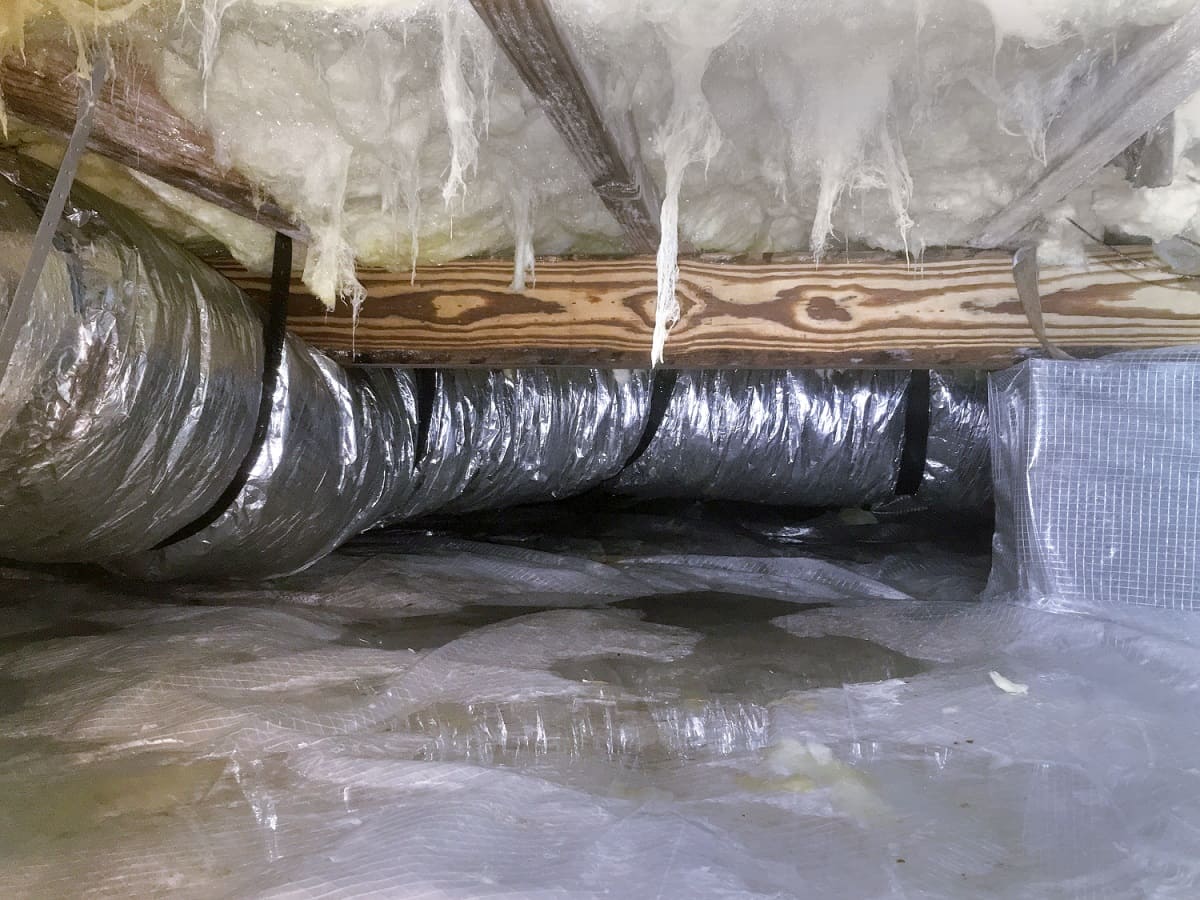
Moisture Levels: Begin by evaluating the moisture levels in the crawl space. Use a moisture meter to measure the relative humidity and moisture content of the area. High moisture levels can lead to mold growth, wood decay, and structural damage, making it essential to address any excessive moisture before proceeding with encapsulation.
-
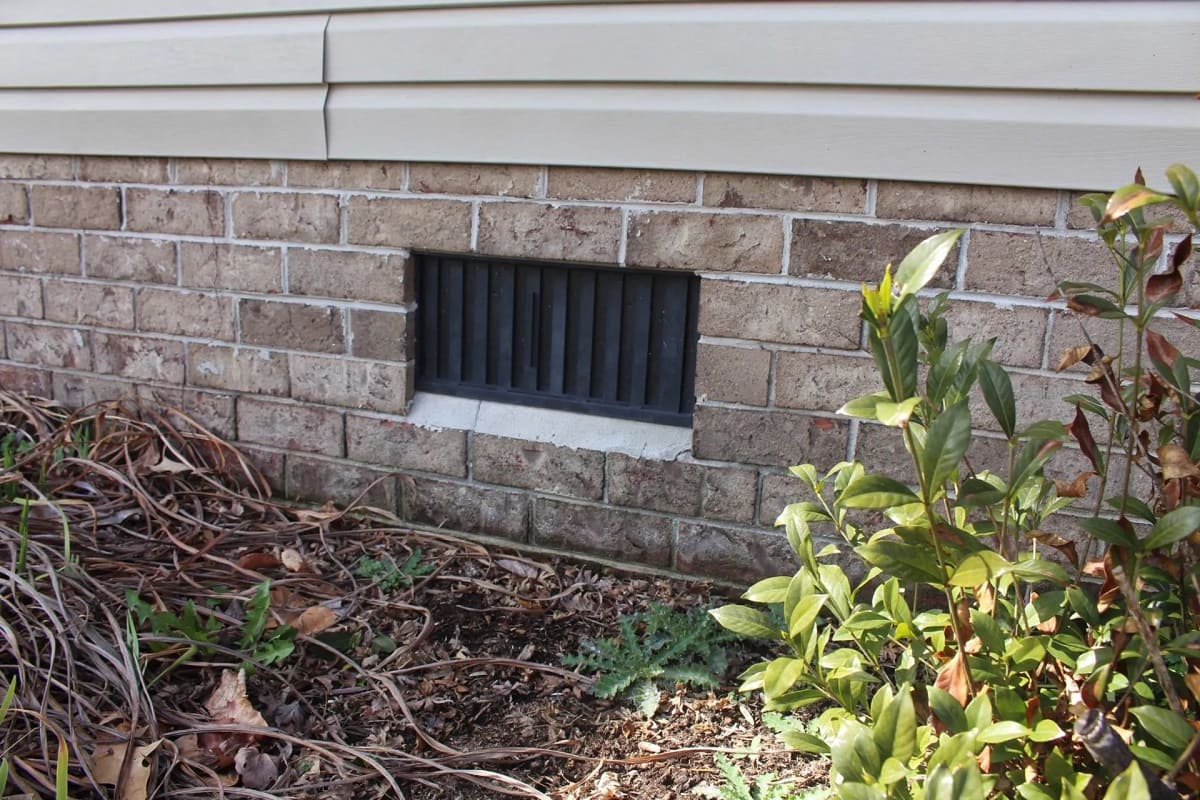
Ventilation: Check the existing ventilation in the crawl space. Assess the number and condition of vents, and determine if they are effectively facilitating air circulation. Inadequate ventilation can contribute to moisture buildup and poor air quality, highlighting the need for potential ventilation improvements as part of the encapsulation process.
-
Insulation Condition: Inspect the condition of any existing insulation in the crawl space. Look for signs of damage, deterioration, or displacement. Proper insulation is crucial for maintaining consistent indoor temperatures and energy efficiency, making it necessary to address any insulation issues during the encapsulation project.
-
Pest and Mold Presence: Look for signs of pest infestations and mold growth. Check for rodent droppings, nesting materials, and visible mold on surfaces. Addressing these issues is essential for creating a clean and healthy crawl space environment.
-
Structural Integrity: Evaluate the structural components of the crawl space, including beams, joists, and foundation walls. Look for signs of water damage, wood rot, or structural compromise. Identifying and addressing structural issues is vital for ensuring the long-term stability and integrity of the crawl space.
By thoroughly assessing these key aspects, you'll gain a comprehensive understanding of the current state of your crawl space. This knowledge will guide the subsequent steps of the encapsulation process, allowing you to address specific issues and create an effective encapsulation strategy tailored to the unique needs of your crawl space.
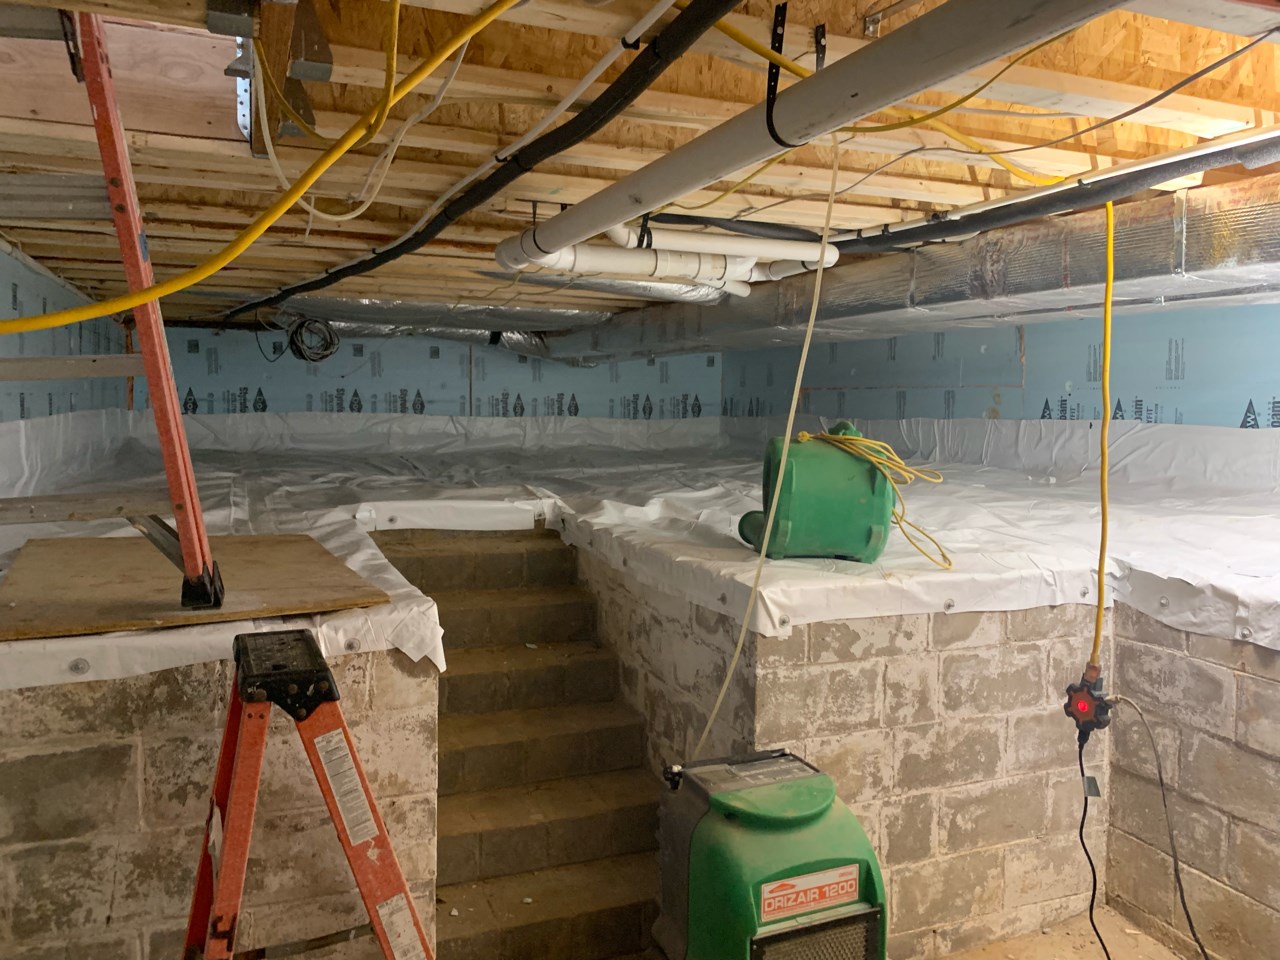
Step 2: Clearing Out Debris and Moisture
Clearing out debris and moisture from the crawl space is a critical step in the encapsulation process, laying the foundation for a clean and healthy environment. This step involves removing accumulated debris, such as leaves, branches, and other organic matter, as well as addressing any existing moisture sources that could compromise the effectiveness of the encapsulation. Here's a detailed look at the essential tasks involved in this crucial phase:
-
Debris Removal: Begin by clearing out any debris that has accumulated in the crawl space. This includes fallen leaves, twigs, and other organic matter that may have found its way into the space. Use a sturdy rake or broom to gather and remove the debris, ensuring that the crawl space is free from any obstructions that could impede the encapsulation process.
-
Standing Water: Address any standing water or pooling moisture in the crawl space. Standing water can be a breeding ground for mold and mildew, posing a threat to the structural integrity of the space and the indoor air quality. Utilize a sump pump or a wet-dry vacuum to remove standing water, taking care to eliminate all sources of excess moisture.
-
Moisture Control: Implement moisture control measures to prevent future moisture buildup. This may involve repairing any plumbing leaks, improving drainage around the foundation, and ensuring that the ground surface within the crawl space is properly graded to direct water away from the area. By addressing moisture sources, you can create a drier environment that is conducive to successful encapsulation.
-
Mold and Mildew Remediation: If mold or mildew is present in the crawl space, it's essential to address this issue before proceeding with encapsulation. Use a solution of water and detergent to scrub visible mold growth from surfaces, and consider applying a mold-inhibiting treatment to prevent regrowth. Proper remediation of mold and mildew is crucial for creating a clean and healthy crawl space environment.
By diligently clearing out debris and addressing moisture-related issues, you set the stage for a successful encapsulation project. This proactive approach not only creates a clean and conducive environment for the subsequent steps but also helps to mitigate potential moisture-related problems in the long run. With the debris cleared and moisture controlled, your crawl space is primed for the next phase of the encapsulation process.
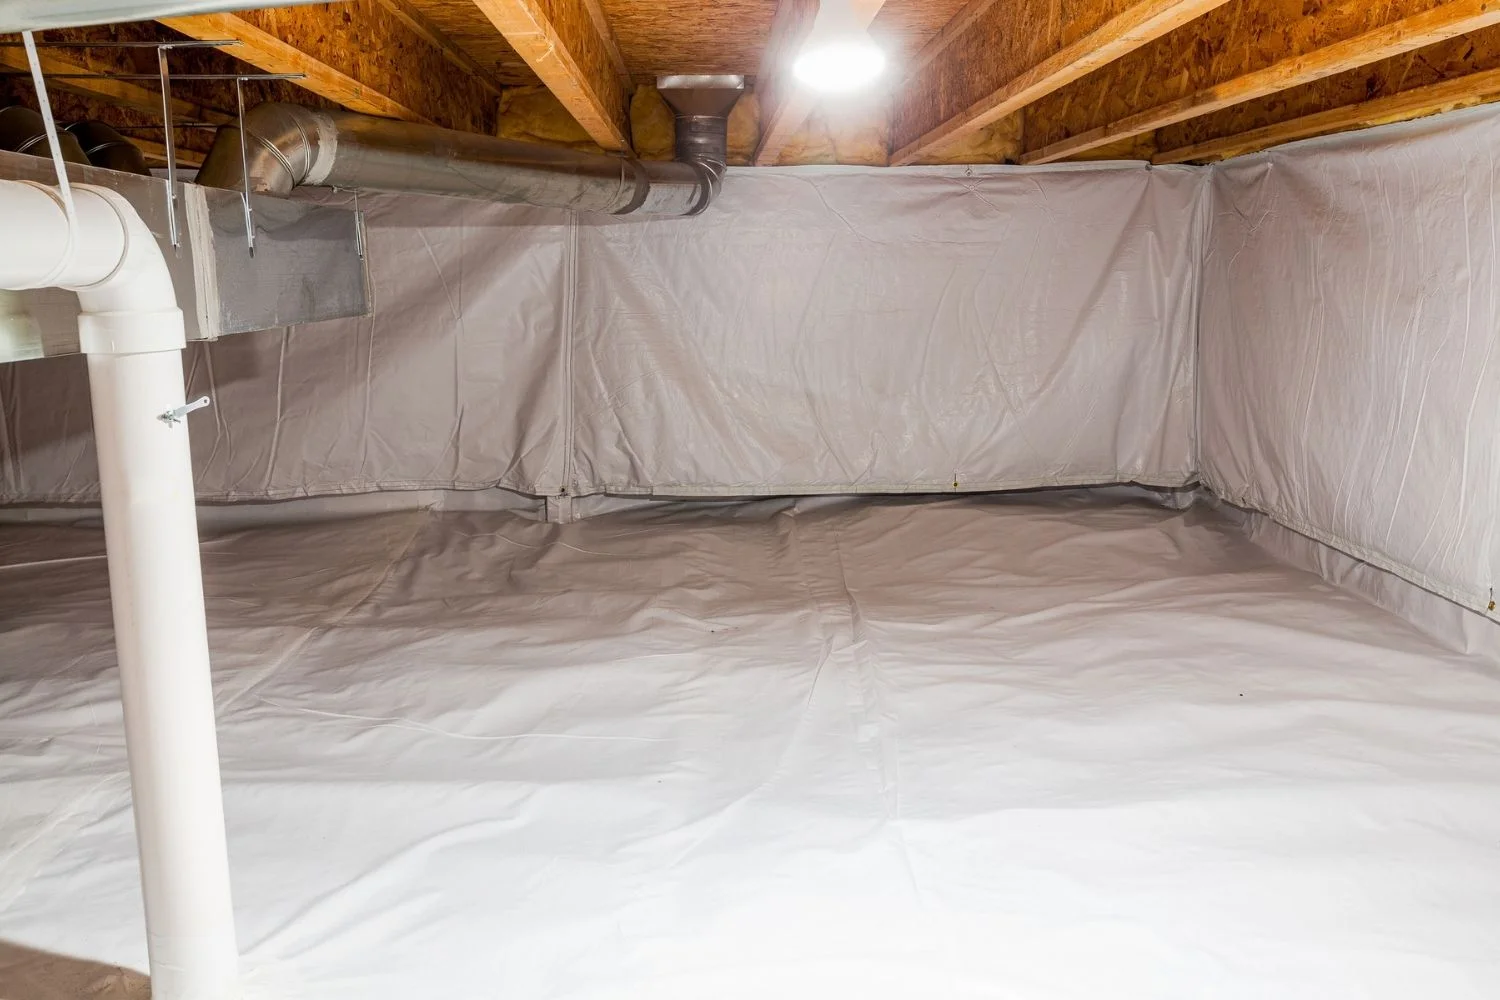
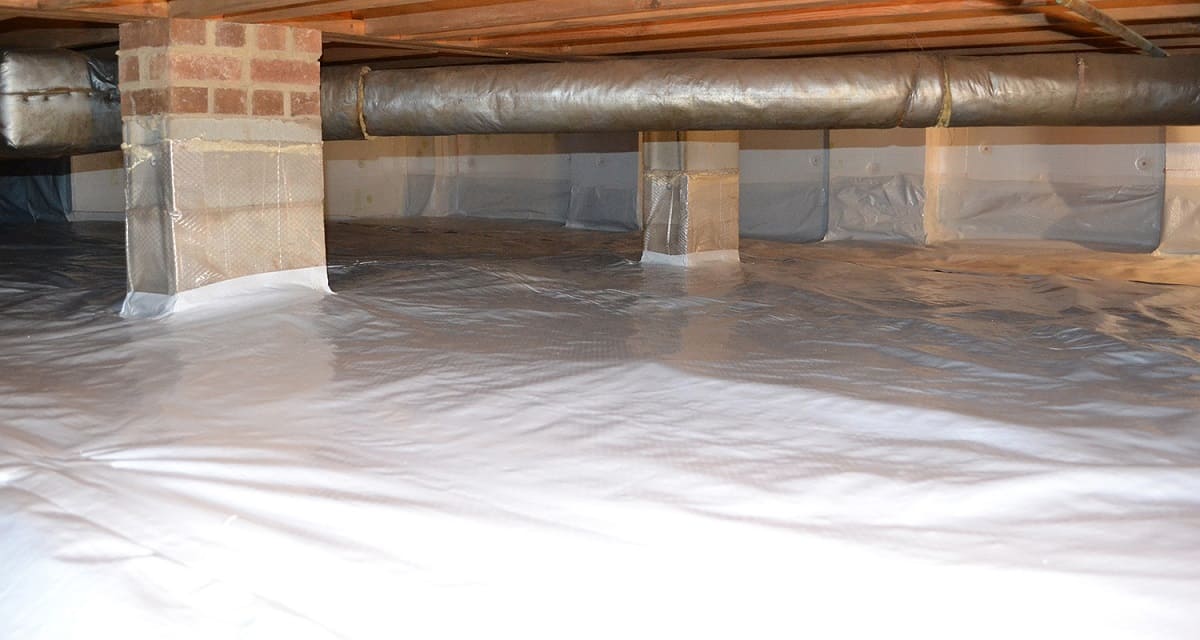
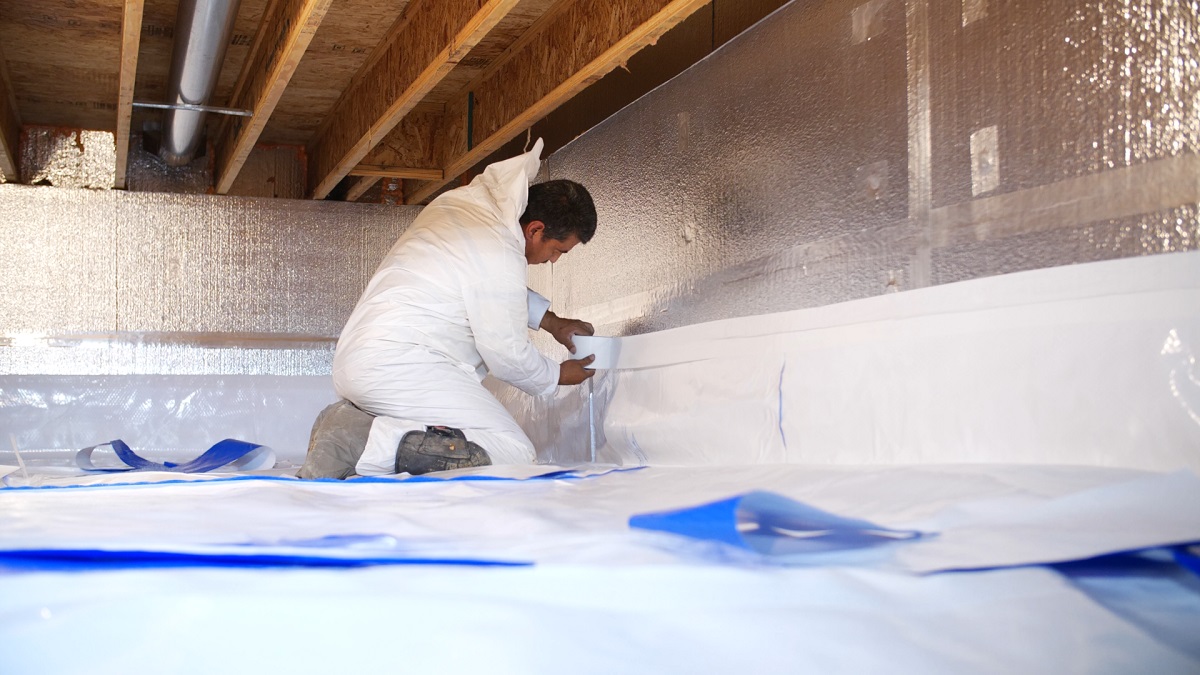
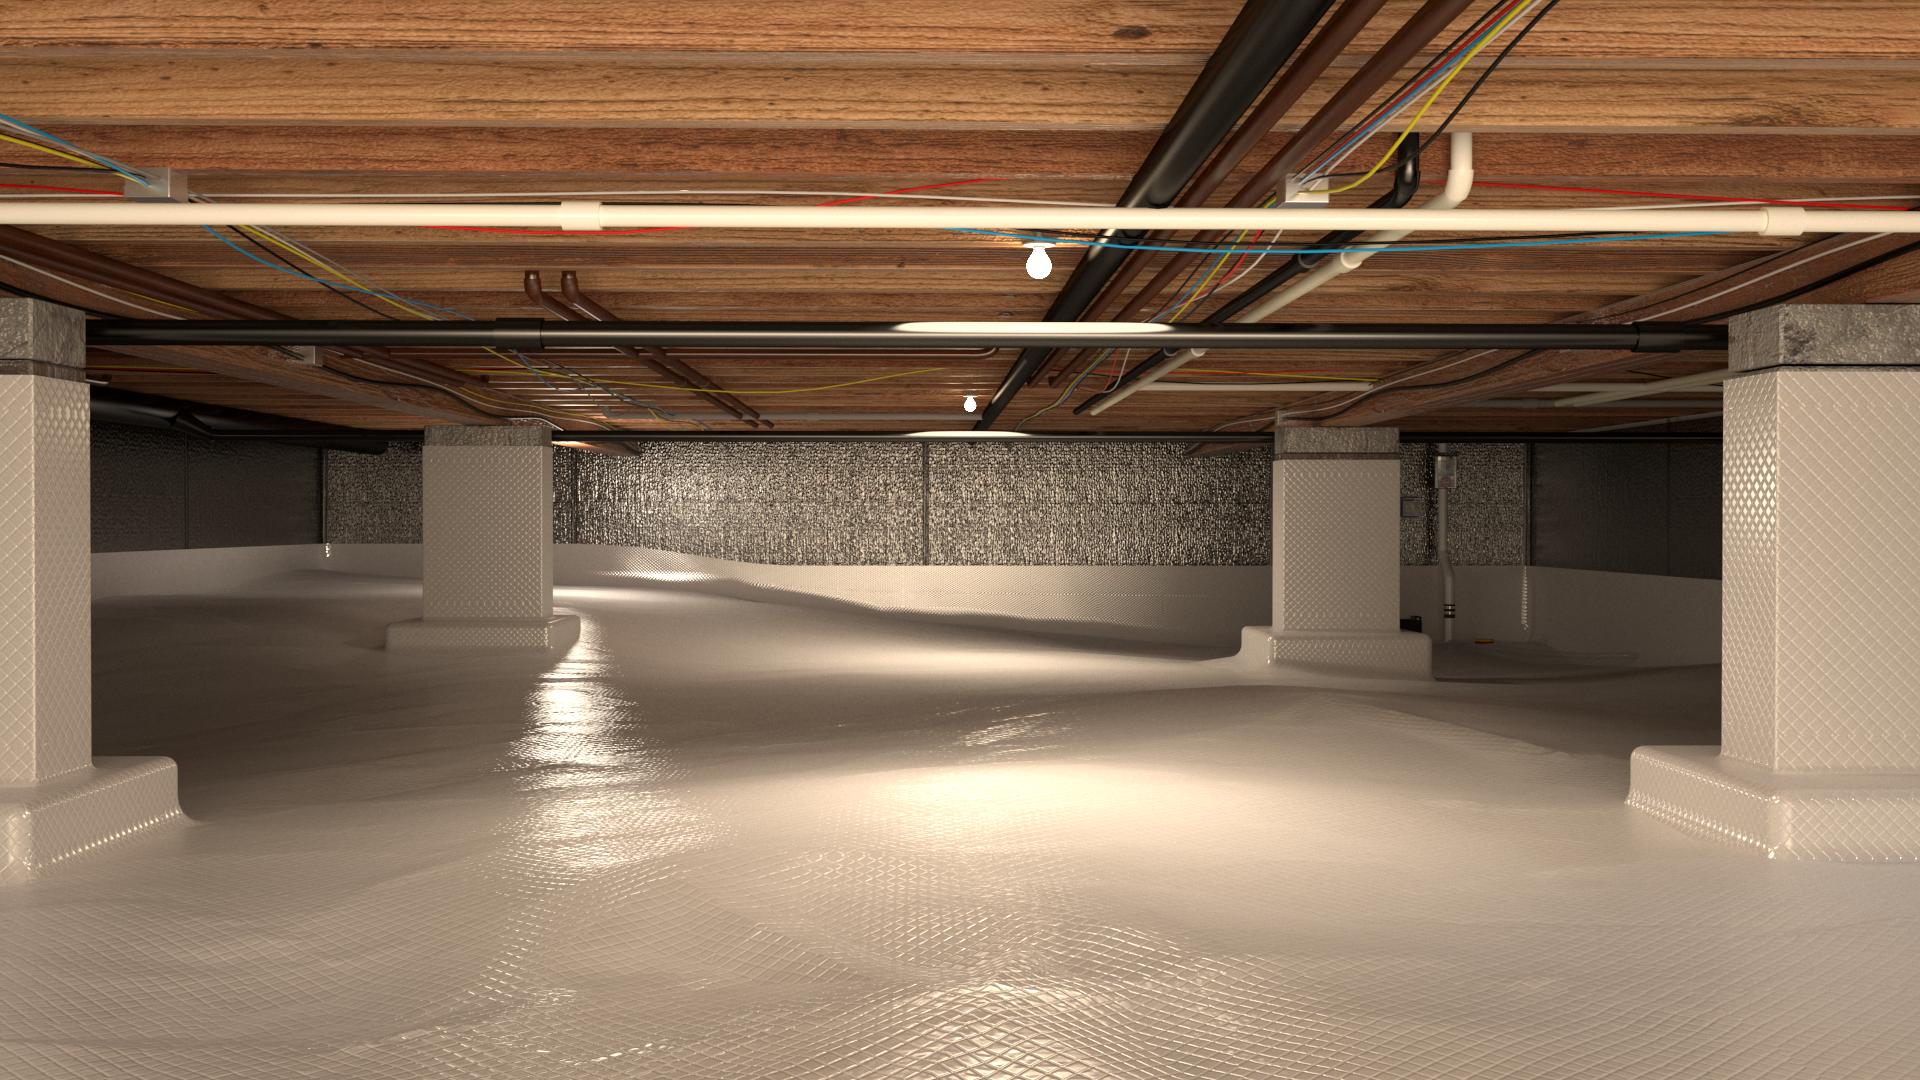
Step 3: Installing Vapor Barrier
Installing a vapor barrier is a pivotal step in the crawl space encapsulation process, serving as a crucial line of defense against moisture intrusion and vapor transmission. A vapor barrier, typically made of polyethylene plastic sheeting, creates a barrier between the ground and the interior of the crawl space, effectively preventing moisture from seeping into the space and impacting the structural integrity of the home. Here's a detailed overview of the essential tasks involved in installing a vapor barrier:
-
Preparation: Begin by thoroughly cleaning and drying the crawl space floor. Remove any remaining debris and ensure that the surface is free from moisture, dirt, and obstructions. This preparatory step is essential for ensuring proper adhesion and effectiveness of the vapor barrier.
-
Material Selection: Select a high-quality vapor barrier material suited for crawl space encapsulation. The vapor barrier should be durable, puncture-resistant, and designed to withstand the conditions present in the crawl space environment. Consider the thickness and strength of the material to ensure long-term effectiveness.
-
Cutting and Placement: Measure the dimensions of the crawl space floor and cut the vapor barrier material to the appropriate size. Lay the vapor barrier across the entire crawl space floor, ensuring that it extends up the walls to create a continuous barrier. Overlapping seams and edges of the vapor barrier help to create a seamless and effective moisture barrier.
-
Securing the Barrier: Secure the vapor barrier in place using a combination of adhesive tape, mechanical fasteners, or specialized sealing products. Pay close attention to sealing the edges and seams to prevent any gaps that could compromise the integrity of the vapor barrier. Properly securing the barrier is essential for long-term performance.
-
Sealing Penetrations: Seal any penetrations or protrusions in the crawl space floor, such as pipes, conduits, and structural elements. Use appropriate sealing materials to ensure that these areas are effectively integrated into the vapor barrier, preventing moisture intrusion through potential entry points.
-
Insulation Compatibility: If insulation is being installed in conjunction with the vapor barrier, ensure that the two components are compatible and properly integrated. Insulation can enhance energy efficiency and temperature control within the crawl space, complementing the moisture control provided by the vapor barrier.
By meticulously following these steps, you can effectively install a vapor barrier that provides reliable moisture control and protection for your crawl space. The vapor barrier serves as a fundamental component of the encapsulation system, creating a dry and stable environment that contributes to the overall health and integrity of your home. With the vapor barrier in place, you are one step closer to achieving a fully encapsulated crawl space that offers long-term benefits for your home and family.
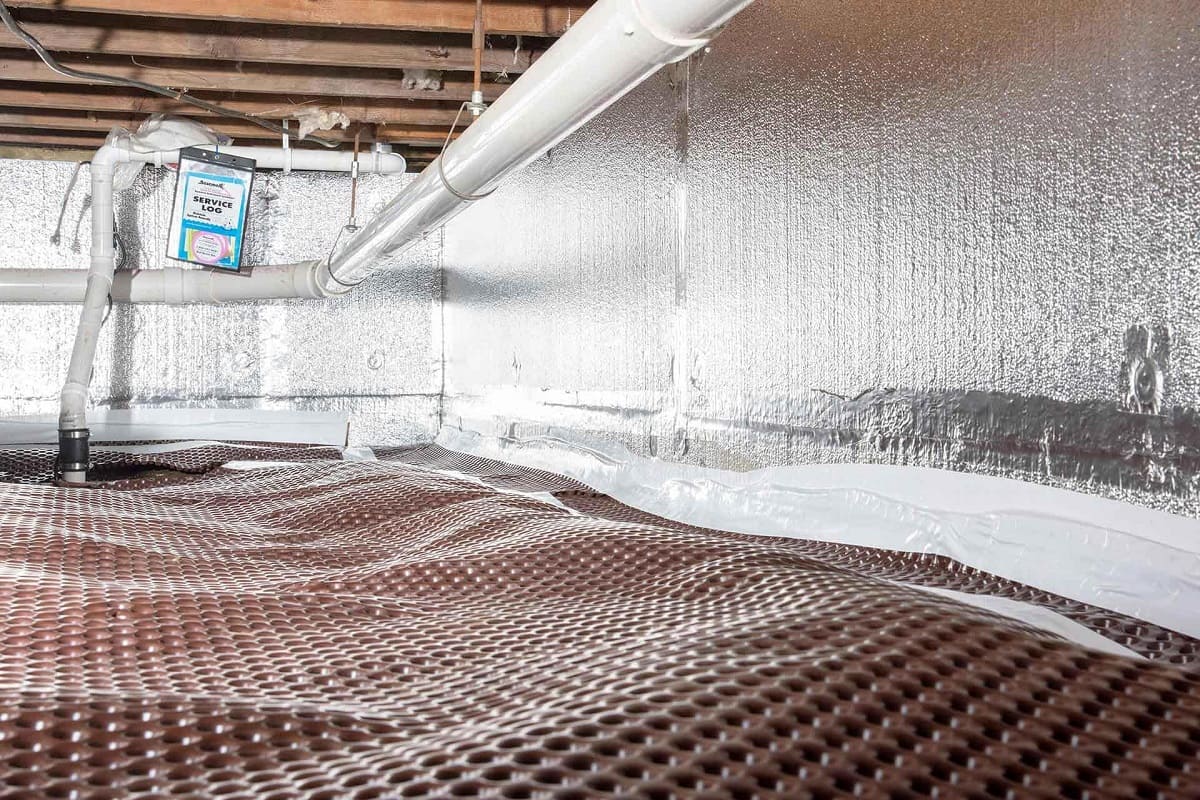
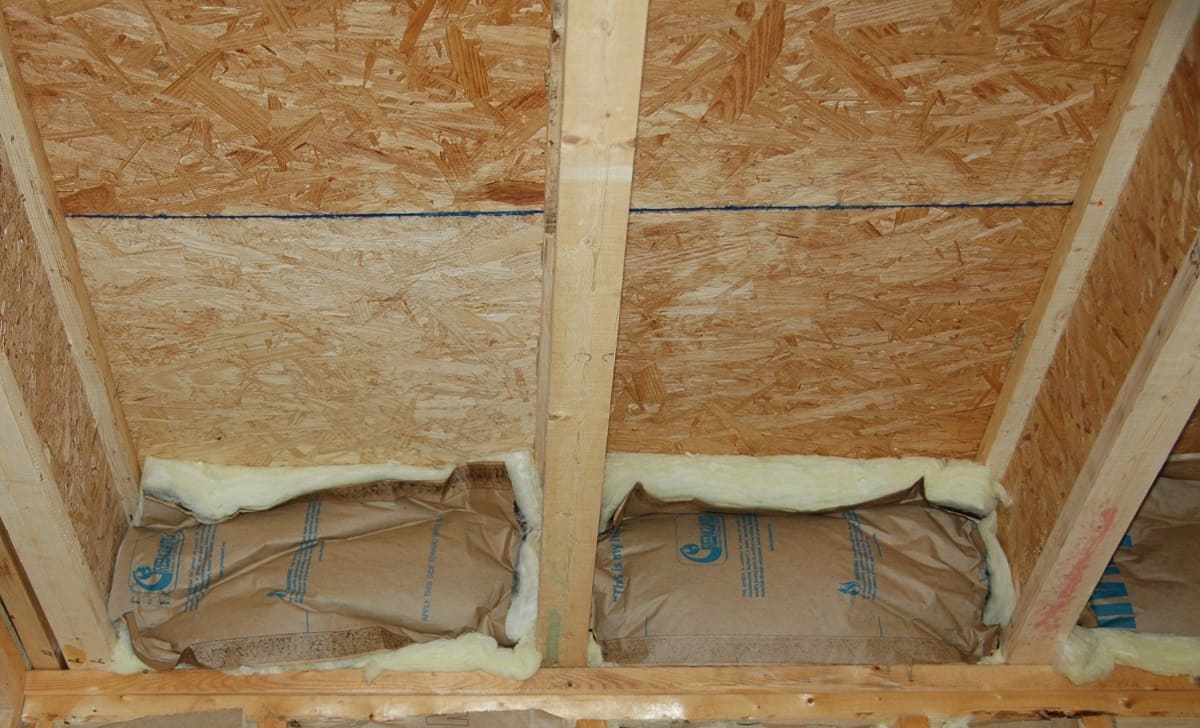
Step 4: Insulating the Walls and Floor
Insulating the walls and floor of the crawl space is a crucial step in the encapsulation process, contributing to improved energy efficiency, temperature control, and overall comfort within the home. Proper insulation helps to create a thermal barrier, reducing heat loss in the winter and heat gain in the summer, while also preventing moisture condensation on surfaces. Here's a detailed overview of the essential tasks involved in insulating the walls and floor of the crawl space:
-
Assessment of Insulation Needs: Begin by assessing the current insulation status in the crawl space. Determine if there is existing insulation that requires replacement or supplementation. Evaluate the insulation R-value needed to achieve optimal energy efficiency and thermal performance in your specific climate zone.
-
Material Selection: Choose high-quality insulation materials suitable for the crawl space environment. Consider factors such as moisture resistance, durability, and compatibility with the encapsulation system. Closed-cell spray foam insulation, rigid foam boards, or fiberglass batts are commonly used for crawl space insulation.
-
Wall Insulation Installation: Install insulation along the interior walls of the crawl space. Ensure that the insulation material is securely attached and properly fitted to cover the entire wall surface. Pay attention to sealing gaps and voids to create a continuous thermal barrier.
-
Floor Insulation Application: Apply insulation to the crawl space floor, providing an additional layer of thermal protection. Depending on the specific conditions and requirements, insulation may be installed directly on the crawl space floor or within the floor joists. Proper installation techniques are essential to maximize the insulation's effectiveness.
-
Vapor Barrier Compatibility: Coordinate the insulation installation with the vapor barrier to ensure compatibility and optimal performance. The insulation and vapor barrier work in tandem to control moisture and temperature, creating a balanced and efficient encapsulation system.
-
Sealing and Airflow Management: Seal any gaps, joints, or penetrations in the insulation to prevent air leakage and maintain thermal integrity. Proper airflow management is essential for preventing energy losses and ensuring consistent temperature control within the crawl space.
By meticulously insulating the walls and floor of the crawl space, you can enhance the overall effectiveness of the encapsulation system, creating a well-insulated and energy-efficient environment beneath your home. The combination of vapor barrier and insulation forms a comprehensive defense against moisture intrusion and temperature fluctuations, contributing to a healthier and more comfortable living space. With the walls and floor effectively insulated, your crawl space encapsulation project is poised to deliver long-term benefits for your home and family.
Read more: How To Inspect A Crawl Space
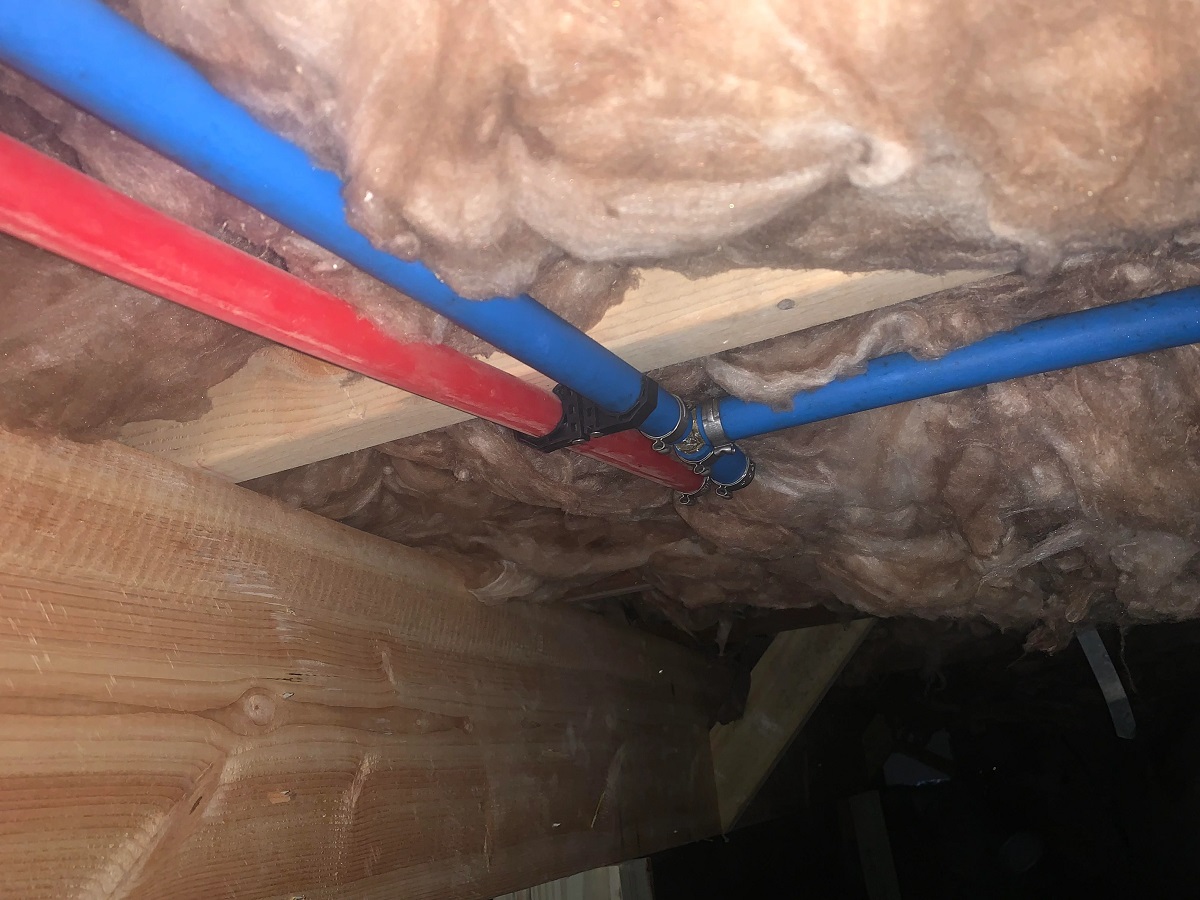
Step 5: Sealing Air Leaks
Sealing air leaks in the crawl space is a critical step in the encapsulation process, as it plays a pivotal role in enhancing energy efficiency, preventing moisture intrusion, and maintaining consistent indoor temperatures. Air leaks, often found in joints, gaps, and penetrations, can allow unconditioned air to enter the crawl space, leading to energy losses and potential moisture-related issues. By effectively sealing air leaks, you can create a tightly sealed environment that complements the vapor barrier and insulation, contributing to a more comfortable and healthier living space.
Identifying Air Leaks
The first step in sealing air leaks involves identifying areas of potential air infiltration within the crawl space. Common sources of air leaks include gaps around pipes, ducts, electrical penetrations, and openings in the crawl space walls and floor. Additionally, poorly sealed access doors and vents can also contribute to air leakage. A thorough inspection of the crawl space is essential to pinpoint these areas and develop a targeted sealing strategy.
Sealing Techniques
Once air leaks are identified, employing effective sealing techniques is crucial to create a comprehensive air barrier. Sealant products such as caulk, foam sealants, and specialized tapes are commonly used to seal gaps and penetrations. These products are applied to the identified areas, creating a durable and airtight seal that prevents uncontrolled air movement. Additionally, sealing materials should be compatible with the crawl space environment, offering resistance to moisture and temperature fluctuations.
Access Door and Vent Sealing
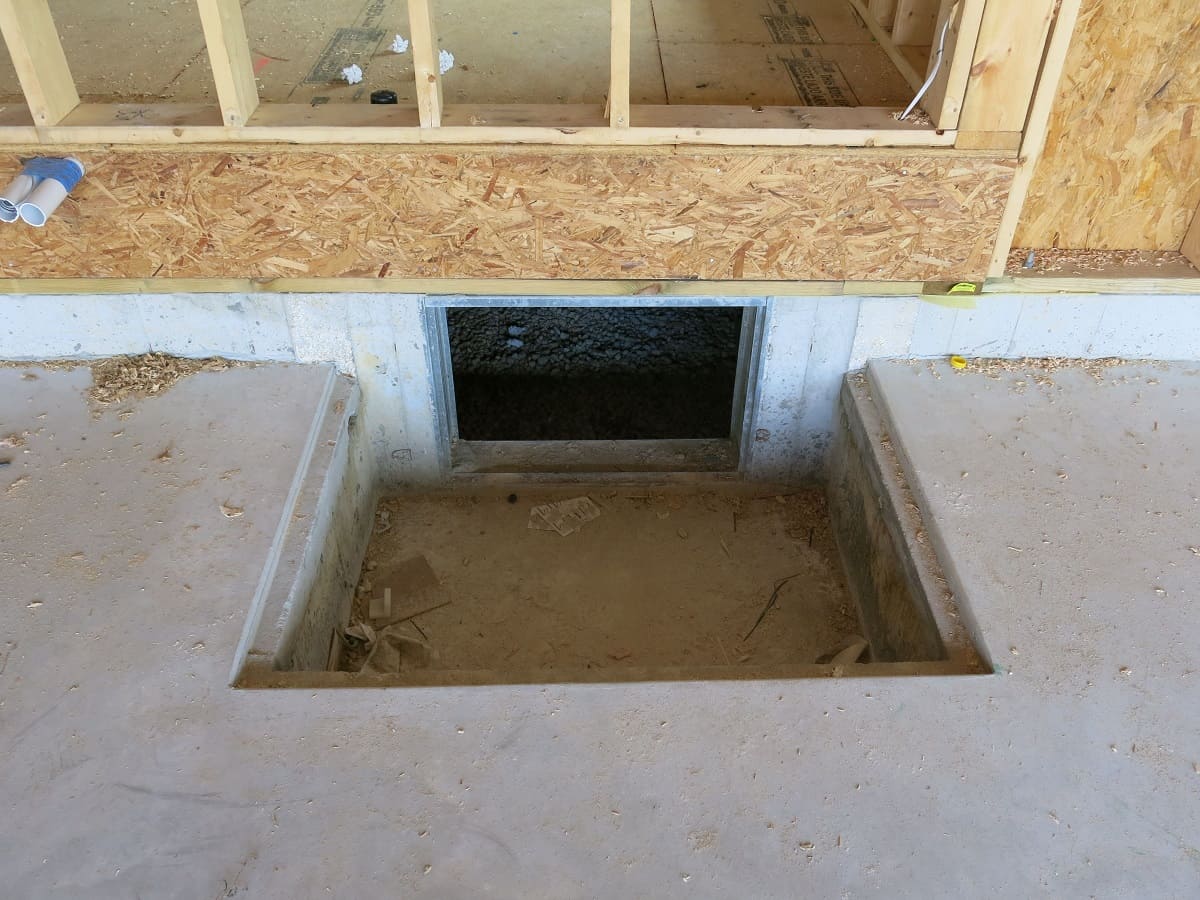
Special attention should be given to sealing access doors and vents in the crawl space. Weather-stripping and sealing gaskets can be utilized to create a tight seal around access doors, preventing air infiltration from the exterior. Vents should be equipped with operable covers or sealed shut if ventilation requirements allow, effectively minimizing air exchange between the crawl space and the outside environment.
Read more: How To Maintain A Crawl Space
Continuous Air Barrier
The ultimate goal of sealing air leaks is to establish a continuous air barrier within the crawl space. This barrier prevents unconditioned air from infiltrating the space, reducing energy losses and maintaining consistent indoor temperatures. By creating a tightly sealed environment, the encapsulation system works in synergy to control moisture, minimize energy consumption, and promote a healthier living environment.
Long-Term Benefits
Sealing air leaks in the crawl space not only contributes to immediate energy savings but also offers long-term benefits for the home. By reducing the infiltration of unconditioned air, the HVAC system operates more efficiently, leading to lower energy bills and reduced wear and tear on heating and cooling equipment. Additionally, a well-sealed crawl space contributes to improved indoor air quality and overall comfort for occupants.
By diligently sealing air leaks, you can optimize the performance of the encapsulation system, creating a well-balanced and energy-efficient crawl space environment. This proactive approach not only enhances the overall effectiveness of the encapsulation but also contributes to long-term energy savings and a healthier living space for you and your family.
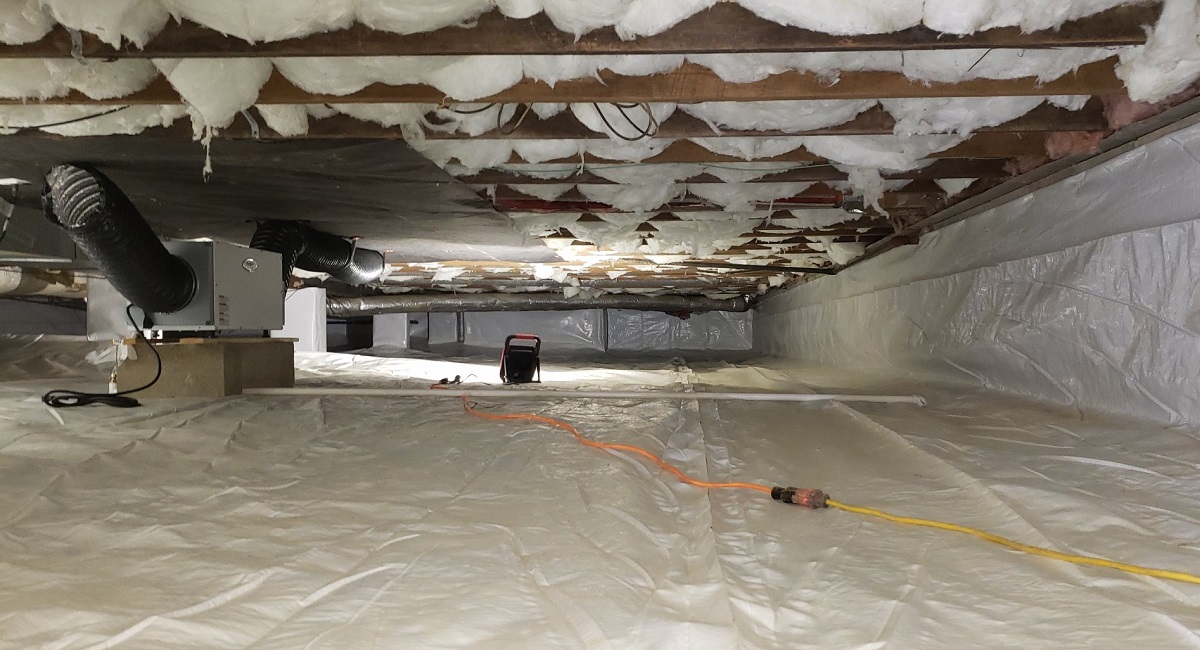
Step 6: Installing a Dehumidifier
Installing a dehumidifier is the final crucial step in the crawl space encapsulation process, playing a pivotal role in maintaining optimal humidity levels and preventing moisture-related issues. A dehumidifier works by extracting excess moisture from the air, effectively controlling humidity levels and creating a drier environment within the crawl space. Here's a detailed overview of the essential aspects involved in installing a dehumidifier:
Assessment of Humidity Levels
Before selecting and installing a dehumidifier, it's essential to assess the current humidity levels in the crawl space. Use a hygrometer to measure the relative humidity, ensuring that it falls within the recommended range of 30-50%. Elevated humidity levels can lead to mold growth, musty odors, and potential structural damage, highlighting the need for effective dehumidification.
Read more: How To Insulate The Floor In A Crawl Space
Dehumidifier Selection
Choose a high-quality dehumidifier specifically designed for crawl space or basement applications. Consider factors such as capacity, energy efficiency, and durability when selecting the appropriate unit for your crawl space. Look for features such as automatic defrost, adjustable humidity settings, and continuous drainage options to ensure optimal performance.
Proper Placement and Installation
Install the dehumidifier in a strategic location within the crawl space to maximize its effectiveness. Position the unit in a central area with good air circulation, ensuring that it can efficiently extract moisture from the entire space. Follow the manufacturer's guidelines for proper installation, including electrical connections, drainage setup, and any necessary adjustments for optimal operation.
Monitoring and Maintenance
Once the dehumidifier is installed, it's essential to monitor its performance and conduct regular maintenance to ensure ongoing effectiveness. Regularly check the unit's settings and empty the collection reservoir as needed. Additionally, clean or replace air filters according to the manufacturer's recommendations to maintain efficient operation.
Long-Term Benefits
Installing a dehumidifier offers numerous long-term benefits for the crawl space and the overall home environment. By controlling humidity levels, the dehumidifier helps to prevent mold growth, wood decay, and pest infestations. Additionally, it contributes to improved indoor air quality, reduced musty odors, and enhanced comfort within the home. The dehumidifier also complements the vapor barrier and insulation, creating a comprehensive moisture control system.
By diligently installing and maintaining a dehumidifier, you can effectively complete the encapsulation process, creating a clean, dry, and well-controlled environment within the crawl space. The dehumidifier serves as a proactive measure to protect your home from moisture-related issues and ensures a healthier living space for you and your family.
Read more: How To Build A Crawl Space Door
Conclusion
In conclusion, the process of encapsulating a crawl space is a transformative endeavor that yields numerous benefits for homeowners. By following the comprehensive steps outlined in this guide, you can effectively create a clean, dry, and well-insulated environment beneath your home, contributing to improved indoor air quality, energy efficiency, and overall comfort.
The initial step of assessing the crawl space provides valuable insights into the specific needs and challenges present in the space, guiding the subsequent phases of the encapsulation process. Clearing out debris and moisture sets the stage for a successful encapsulation, creating a clean and conducive environment for the installation of essential components.
Installing a vapor barrier serves as a fundamental line of defense against moisture intrusion, creating a barrier between the ground and the interior of the crawl space. This crucial step effectively prevents moisture-related issues and contributes to the long-term structural integrity of the home.
Insulating the walls and floor of the crawl space enhances energy efficiency and temperature control, creating a thermal barrier that complements the moisture control provided by the vapor barrier. By effectively insulating the crawl space, homeowners can experience improved comfort and reduced energy consumption.
Sealing air leaks further enhances the effectiveness of the encapsulation system, preventing uncontrolled air movement and maintaining consistent indoor temperatures. This proactive approach contributes to long-term energy savings and improved indoor air quality.
Finally, installing a dehumidifier completes the encapsulation process, ensuring optimal humidity levels and preventing moisture-related issues. The dehumidifier serves as a proactive measure to protect the home from mold growth, wood decay, and pest infestations, creating a healthier living environment for occupants.
In essence, the encapsulation of a crawl space is a comprehensive and proactive approach to safeguarding the home from moisture-related issues, improving energy efficiency, and creating a healthier living environment. By following the detailed steps outlined in this guide, homeowners can embark on a transformative journey to enhance the overall well-being and longevity of their homes.
Frequently Asked Questions about How To Encapsulate A Crawl Space
Was this page helpful?
At Storables.com, we guarantee accurate and reliable information. Our content, validated by Expert Board Contributors, is crafted following stringent Editorial Policies. We're committed to providing you with well-researched, expert-backed insights for all your informational needs.
0 thoughts on “How To Encapsulate A Crawl Space”