Home>Renovation & DIY>Home Renovation Guides>How To Install A Sump Pump In A Crawl Space
Home Renovation Guides
How To Install A Sump Pump In A Crawl Space
Published: January 31, 2024
Learn how to properly install a sump pump in a crawl space with our comprehensive home renovation guide. Ensure a dry and safe environment for your home.
(Many of the links in this article redirect to a specific reviewed product. Your purchase of these products through affiliate links helps to generate commission for Storables.com, at no extra cost. Learn more)
Introduction
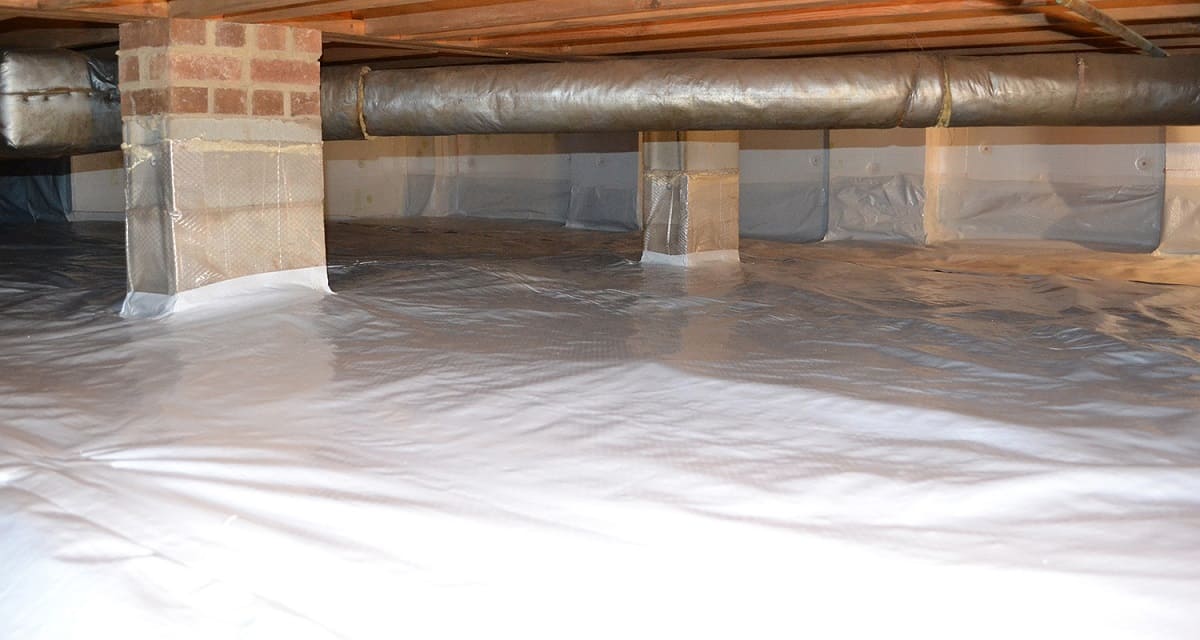
Installing a sump pump in a crawl space can be a crucial step in safeguarding your home from potential water damage. Crawl spaces are particularly vulnerable to moisture buildup, which can lead to mold growth, structural damage, and other costly issues. By installing a sump pump, you can effectively manage excess water and prevent it from causing harm to your home.
In this comprehensive guide, we will walk you through the step-by-step process of installing a sump pump in your crawl space. From gathering the necessary tools and materials to testing the sump pump, we will cover everything you need to know to complete this essential home improvement project.
Whether you're a seasoned DIY enthusiast or a homeowner looking to tackle a new project, this guide will provide you with the knowledge and confidence to install a sump pump in your crawl space effectively. By following these steps, you can take proactive measures to protect your home from water-related issues and ensure a safer, more resilient living environment for you and your family.
Key Takeaways:
- Protect Your Home
Installing a sump pump in your crawl space safeguards your home from water damage, mold, and structural issues. By following the steps in this guide, you can proactively defend your home against potential water-related issues. - Ensure a Safer Living Environment
The sump pump installation not only protects your home but also creates a safer and healthier living environment for you and your family. By taking these proactive measures, you’re investing in the long-term resilience and maintenance of your home.
Read more: How Much To Install Sump Pump In Basement
Step 1: Gather the necessary tools and materials
Before embarking on the installation of a sump pump in your crawl space, it's essential to gather all the required tools and materials. Having the right equipment at your disposal will streamline the installation process and ensure that you can complete the project efficiently. Here's a comprehensive list of the necessary tools and materials you'll need:
Tools:
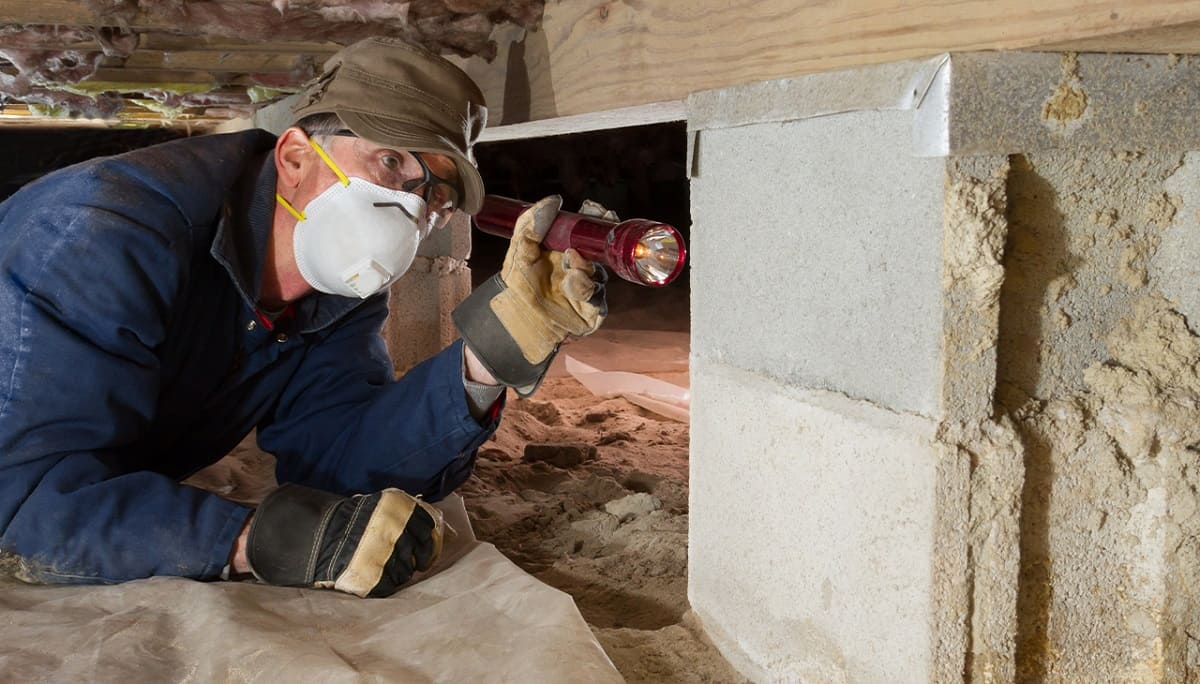
- Safety Gear: Prioritize safety by wearing protective gear, including gloves, safety goggles, and a dust mask, to shield yourself from potential hazards during the installation process.
- Work Light: Since crawl spaces often have limited lighting, a portable work light or headlamp will illuminate the area, making it easier to work effectively.
- Shovel: A sturdy shovel will be indispensable for digging the sump pit in the crawl space. Opt for a durable, ergonomic shovel to facilitate the excavation process.
- Level: To ensure the sump pump is installed correctly and functions optimally, a level will help you align the pump and maintain its proper orientation.
- Adjustable Wrench: This versatile tool will be essential for tightening and securing various components of the sump pump and discharge system.
- Hacksaw or PVC Cutter: Depending on the type of piping you'll be using, a hacksaw or PVC cutter will enable you to cut the discharge pipe to the required length with precision.
- Cordless Drill: A cordless drill equipped with appropriate drill bits will be necessary for securing the sump pump in place and creating openings for the discharge pipe.
- Utility Knife: A sharp utility knife will come in handy for cutting through materials such as the sump pump liner and insulation, ensuring a precise fit for the pump.
- Measuring Tape: Accurate measurements are crucial for the proper placement of the sump pump and the discharge pipe, making a measuring tape an indispensable tool for this project.
Materials:
- Sump Pump: Select a high-quality sump pump that is suitable for crawl space installation, equipped with a reliable float switch and a durable construction to withstand the conditions in the crawl space.
- Sump Liner: Choose a sturdy sump liner that fits the dimensions of the sump pit, providing a secure enclosure for the sump pump and facilitating efficient water collection.
- PVC Piping: Acquire PVC piping of the appropriate diameter to serve as the discharge pipe, enabling the efficient removal of water from the sump pump to a safe location outside the crawl space.
- Gravel: To promote proper drainage and prevent the accumulation of water around the sump pump, gravel will be essential for creating a stable base within the sump pit.
- Check Valve: Install a check valve in the discharge pipe to prevent water from flowing back into the sump pit after the sump pump has expelled it, ensuring optimal pump performance.
- Sump Pump Cover: A durable sump pump cover will help prevent debris from entering the sump pit and enhance safety by minimizing the risk of accidents in the crawl space.
- Fasteners and Sealing Materials: Secure the sump pump and components in place using appropriate fasteners, and ensure watertight connections with sealing materials such as PVC cement and waterproof sealant.
By gathering these essential tools and materials, you'll be well-prepared to proceed with the subsequent steps of installing a sump pump in your crawl space. With careful planning and the right resources at your disposal, you can effectively fortify your home against potential water-related issues and create a more resilient living environment.
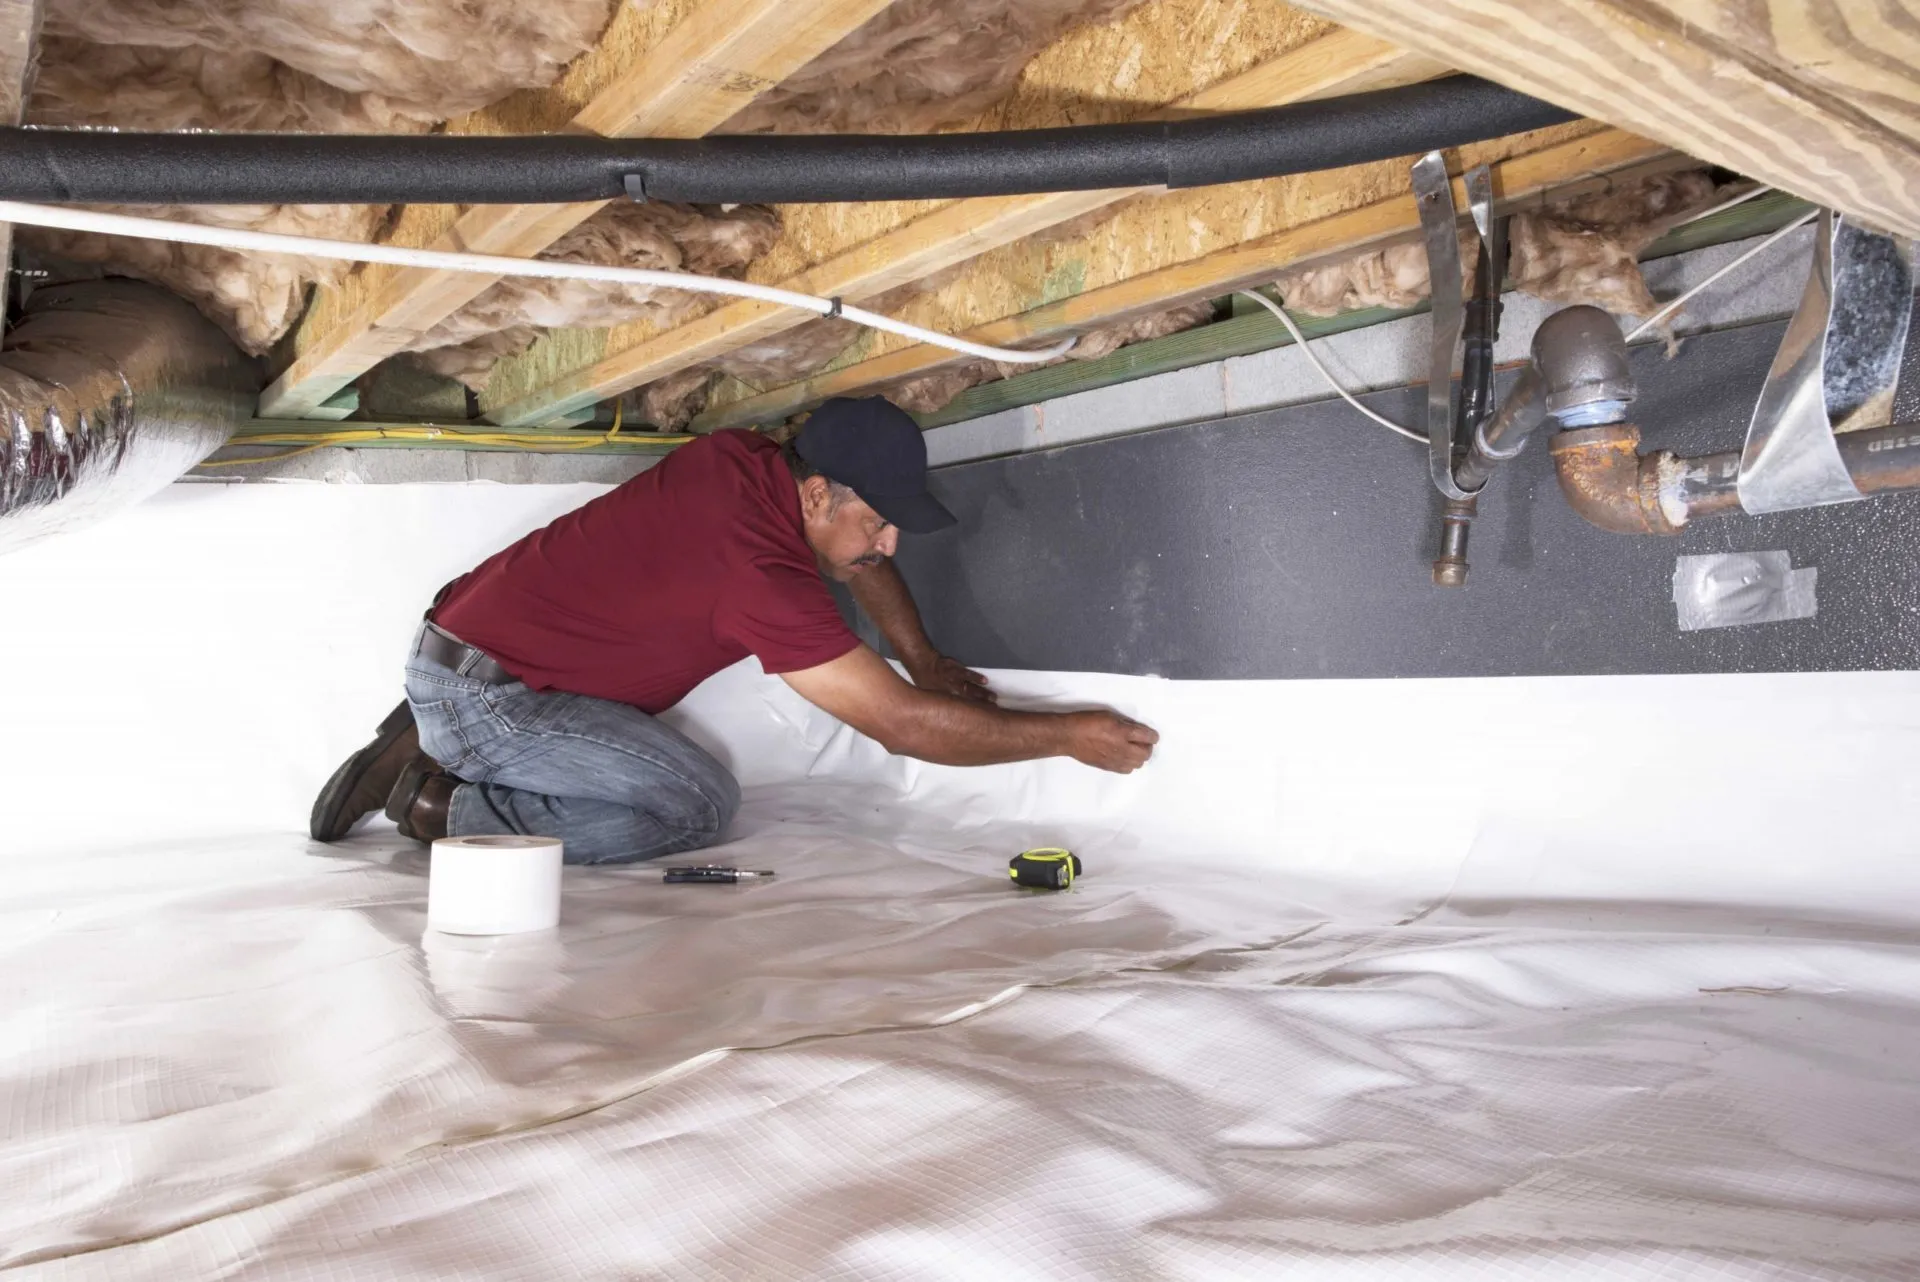
Step 2: Choose the right location for the sump pump
Selecting the optimal location for the sump pump within the crawl space is a critical decision that directly influences its effectiveness in managing excess water. When identifying the right spot for the sump pump, several factors must be taken into consideration to ensure efficient water removal and long-term functionality.
First and foremost, it's essential to assess the layout and topography of the crawl space. Look for the lowest point where water tends to accumulate, as this is the most suitable location for the sump pump. Additionally, consider the accessibility of the chosen spot, as it should allow for convenient maintenance and servicing of the sump pump in the future.
Furthermore, take into account the proximity to the foundation walls when determining the sump pump's placement. Positioning the sump pump near the exterior walls can facilitate the collection of water that seeps through the foundation, effectively intercepting it before it spreads further into the crawl space.
Another crucial aspect to consider is the availability of a power source for the sump pump. Ensure that the chosen location allows for easy access to an electrical outlet, as the sump pump will require a reliable power supply to operate effectively. If necessary, consult a qualified electrician to assess and address any electrical requirements for the sump pump installation.
Moreover, consider the space required for the sump pump and its associated components, such as the sump liner and discharge pipe. Ensure that the chosen location provides ample room for the sump pump to be installed securely, allowing for proper positioning and alignment within the crawl space.
In addition to these considerations, it's important to factor in the overall drainage patterns and water flow within the crawl space. By observing how water accumulates and moves within the space, you can make an informed decision regarding the optimal location for the sump pump, ensuring that it effectively intercepts and removes excess water to prevent potential damage.
By carefully evaluating these factors and selecting the right location for the sump pump, you can lay a solid foundation for a successful installation. Taking the time to assess the crawl space, consider accessibility and power requirements, and analyze water flow patterns will contribute to the long-term effectiveness of the sump pump in managing moisture and safeguarding your home against water-related issues.
Step 3: Dig the sump pit
Digging the sump pit is a pivotal phase in the installation of a sump pump in a crawl space. This process involves excavating a designated area within the crawl space to accommodate the sump pump and sump liner, allowing for efficient water collection and pump operation. Here's a detailed overview of the steps involved in digging the sump pit:
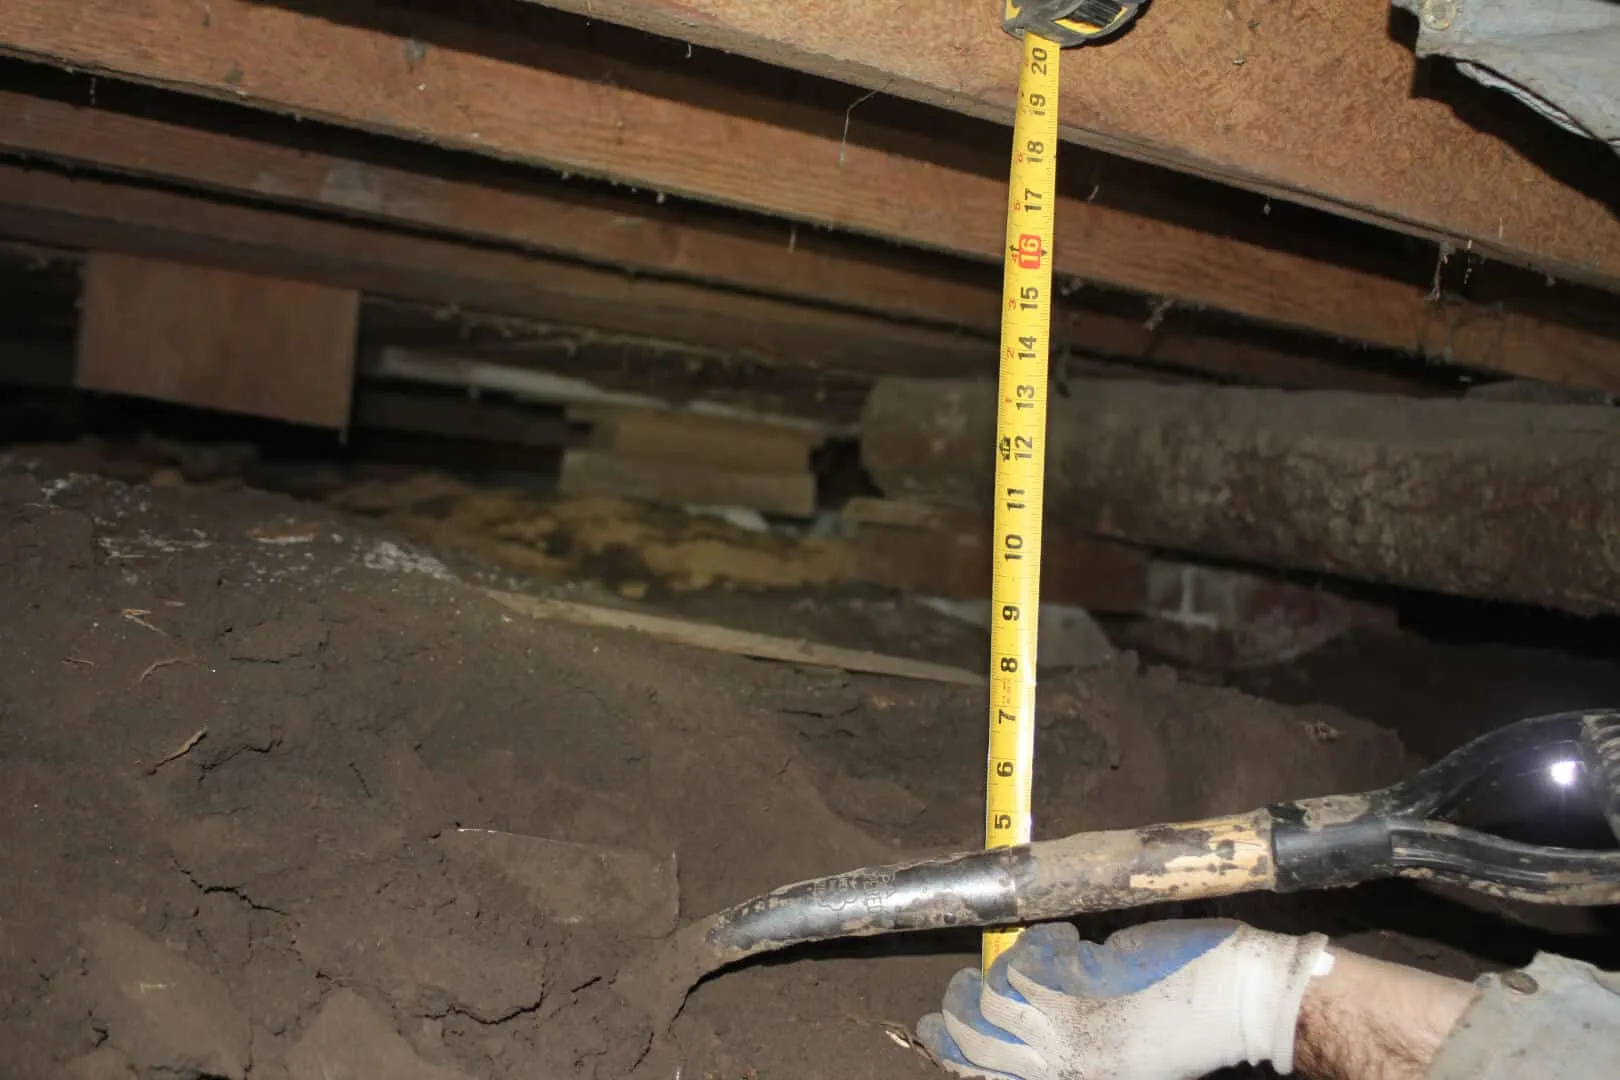
Assess the Dimensions
Before commencing the excavation, carefully measure and mark the dimensions of the sump pit. Typically, a depth of around 2 feet and a diameter of 18 inches to 24 inches are recommended for a standard sump pit. These dimensions may vary based on the specific requirements of the sump pump and the volume of water accumulation in the crawl space.
Prepare the Work Area
Clear the designated area within the crawl space, removing any debris, obstructions, or loose soil that may impede the excavation process. Ensure that the work area is free from any potential hazards and provides sufficient space for maneuvering during the digging process.
Excavate the Sump Pit
Using a sturdy shovel, begin excavating the marked area to the specified depth and diameter for the sump pit. Exercise caution and precision to create a uniform and level excavation, allowing for the proper placement of the sump liner and sump pump.
Read more: How To Install Subfloor Over A Crawl Space
Dispose of Excavated Soil
As the excavation progresses, carefully remove the excavated soil from the crawl space. Depending on the volume of soil and the available space, consider using a bucket or tarp to transport the soil out of the crawl space, ensuring a clear and unobstructed work area for the subsequent installation steps.
Level the Bottom of the Sump Pit
Once the initial excavation is complete, use a level to ensure that the bottom of the sump pit is even and flat. This step is crucial for providing a stable base for the sump liner and sump pump, facilitating proper alignment and functionality within the crawl space.
Inspect and Clean the Sump Pit
After the excavation is finished, thoroughly inspect the sump pit for any remaining debris, rocks, or irregularities. Clean the interior of the sump pit to remove any loose soil or contaminants, ensuring a clean and well-prepared space for the installation of the sump liner and sump pump.
By meticulously following these steps to dig the sump pit, you can lay the groundwork for a successful sump pump installation in your crawl space. Taking the time to accurately measure the dimensions, prepare the work area, and execute the excavation with precision will contribute to the effective operation of the sump pump and its ability to manage excess water, ultimately enhancing the resilience of your home against potential water-related issues.
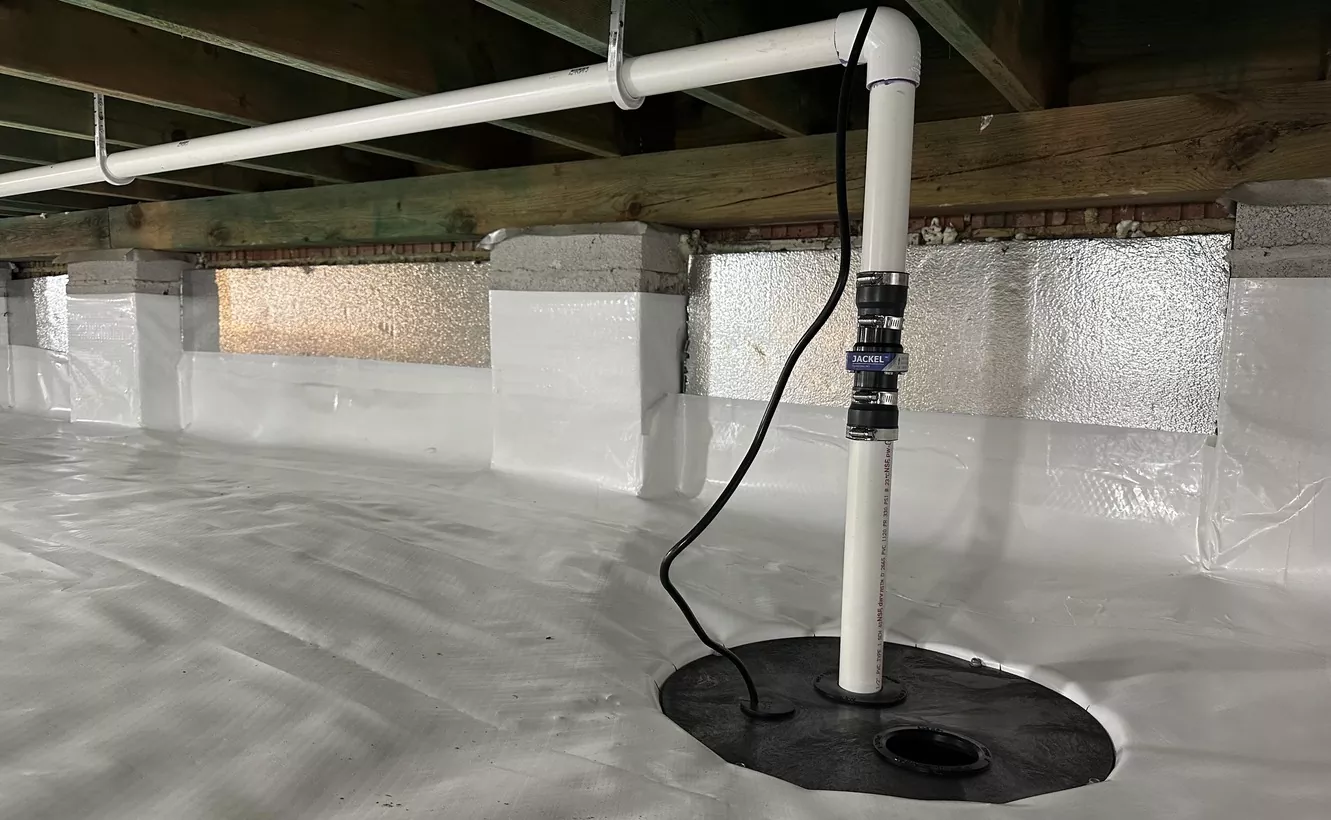
Step 4: Install the sump pump
With the sump pit successfully excavated, it's time to proceed with the installation of the sump pump, a pivotal component in managing excess water within your crawl space. The following steps outline the process of installing the sump pump to ensure optimal functionality and effective water removal:
Read more: How To Install Floor Jacks In A Crawl Space
Position the Sump Pump
Carefully lower the sump pump into the prepared sump pit, ensuring that it is positioned securely at the bottom of the pit. Align the sump pump so that it stands upright and remains stable within the sump pit, allowing for unobstructed operation and efficient water collection.
Connect the Discharge Pipe
Attach the discharge pipe to the outlet port of the sump pump, ensuring a secure and watertight connection. Depending on the type of sump pump and discharge system, use appropriate fittings and sealing materials to prevent any leaks or disconnections, facilitating the smooth flow of water out of the sump pit.
Secure the Sump Pump
Once the sump pump is in place and the discharge pipe is connected, secure the sump pump within the sump pit using the designated fasteners or mounting brackets. This step is crucial for stabilizing the sump pump and preventing movement during operation, ensuring consistent and reliable water removal.
Test the Sump Pump
Before completing the installation, conduct a thorough test of the sump pump to verify its functionality. Fill the sump pit with water to activate the float switch and initiate the pump's operation. Observe the sump pump in action, ensuring that it effectively removes the water from the pit and expels it through the discharge pipe.
Electrical Connection
If not done previously, connect the sump pump to a reliable power source, ensuring that the electrical wiring and connections comply with safety standards. Prioritize safety when handling electrical components, and consider consulting a qualified electrician to address any electrical requirements for the sump pump installation.
Sump Pump Cover
After the sump pump is installed and tested, consider placing a durable sump pump cover over the sump pit. The cover serves as a protective barrier, preventing debris from entering the sump pit and enhancing safety by minimizing the risk of accidents in the crawl space.
By following these steps to install the sump pump, you can effectively integrate this essential component into your crawl space, bolstering your home's resilience against potential water-related issues. With the sump pump in place and operating optimally, you can mitigate the risks associated with excess moisture and ensure a safer, more secure living environment for you and your family.
Step 5: Connect the discharge pipe
Connecting the discharge pipe is a crucial step in the installation of a sump pump in a crawl space, as it facilitates the efficient removal of water from the sump pit to a safe location outside the crawl space. Properly connecting the discharge pipe ensures that the water collected by the sump pump is effectively expelled, preventing potential moisture-related issues and contributing to a drier and more resilient crawl space environment.
To begin this process, carefully assess the length and positioning of the discharge pipe to determine the optimal route for directing the expelled water away from the foundation of the home. It's essential to position the discharge pipe in a manner that directs the water to a location where it can safely drain without causing any potential damage or pooling near the foundation.
Once the route for the discharge pipe is established, proceed to connect it to the outlet port of the sump pump. Depending on the specific configuration of the sump pump and the type of discharge system being utilized, select the appropriate fittings and materials to ensure a secure and watertight connection. This step is crucial for preventing leaks and ensuring that the water flows smoothly from the sump pump to the exterior of the crawl space.
After connecting the discharge pipe to the sump pump, carefully secure the fittings and joints to guarantee a reliable connection. Utilize sealing materials such as PVC cement or waterproof sealant to reinforce the connections and prevent any potential water seepage. Ensuring the integrity of the discharge pipe connection is essential for maintaining the efficiency of the sump pump and preventing any water from re-entering the crawl space.
Once the discharge pipe is securely connected to the sump pump, verify that the entire length of the pipe is properly positioned and supported to facilitate the unobstructed flow of water. Consider utilizing hangers or brackets to secure the discharge pipe along its route, preventing any sagging or misalignment that could impede the water removal process.
By meticulously following these steps to connect the discharge pipe, you can effectively establish a reliable and efficient system for expelling water from the sump pump to safeguard your crawl space against potential moisture-related issues. With the discharge pipe securely connected and positioned to direct water away from the home's foundation, you can enhance the resilience of your crawl space and mitigate the risks associated with excess moisture.
Step 6: Test the sump pump
Testing the sump pump is a critical phase in the installation process, as it allows you to verify the functionality and effectiveness of the system in managing excess water within your crawl space. By conducting a thorough test, you can ensure that the sump pump operates as intended, providing you with the confidence that your home is well-protected against potential water-related issues.
To begin the testing process, fill the sump pit with water to activate the float switch and initiate the pump's operation. This simulates the conditions under which the sump pump would need to remove water from the crawl space, allowing you to observe its performance in real-time. As the water level rises, the float switch triggers the sump pump to activate, demonstrating its ability to respond to increasing water accumulation.
Observe the sump pump in action as it removes the water from the sump pit. Pay close attention to the pump's operation, ensuring that it effectively expels the water through the discharge pipe. Verify that the water is being directed away from the crawl space to a safe location outside the home, preventing any potential pooling or seepage that could lead to moisture-related issues.
During the test, listen for any unusual noises or vibrations that may indicate operational issues with the sump pump. A properly functioning sump pump should operate smoothly and efficiently, without any excessive noise or disruptive vibrations. Any irregularities in the pump's operation should be promptly addressed to ensure its optimal performance.
Additionally, monitor the water removal process to confirm that the sump pump effectively manages the water accumulation within the crawl space. By observing the pump's ability to maintain the water level within the sump pit and expel it in a timely manner, you can assess its capacity to handle varying levels of water intrusion.
Once the sump pump has completed the water removal process, evaluate the area surrounding the sump pit for any signs of leakage or seepage. Inspect the discharge pipe and its connections to ensure that they remain secure and watertight throughout the testing phase. Any indications of leaks or water seepage should be addressed promptly to maintain the integrity of the sump pump system.
By conducting a comprehensive test of the sump pump, you can gain assurance in its ability to effectively manage excess water within your crawl space. This proactive approach allows you to identify and address any potential issues before they escalate, ensuring that your home remains well-protected against the damaging effects of moisture and water intrusion.
Read more: How To Install An Outdoor Sump Pump
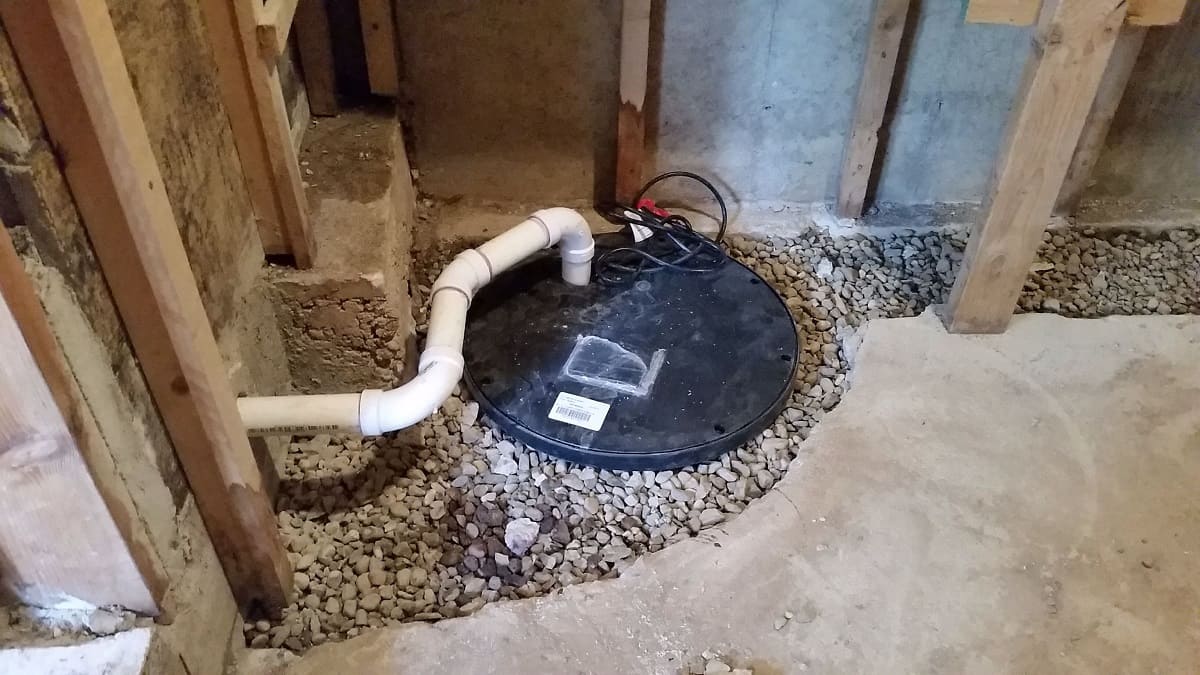
Step 7: Install a sump pump cover
Installing a sump pump cover is a crucial final step in the comprehensive process of setting up a sump pump in a crawl space. The sump pump cover serves as a protective barrier, safeguarding the sump pit and pump from debris, potential contaminants, and accidental interference. By effectively sealing off the sump pit, the cover also minimizes the risk of water evaporation, helping to maintain a consistent water level for the sump pump to manage.
When selecting a sump pump cover, prioritize durability and compatibility with the dimensions of the sump pit. Opt for a cover that provides a secure fit, effectively enclosing the sump pit to prevent foreign objects from entering and interfering with the pump's operation. Additionally, consider a cover with a sealing mechanism to ensure a tight and secure closure, minimizing the risk of air or moisture infiltration into the sump pit.
The installation process begins by carefully placing the sump pump cover over the sump pit, ensuring that it aligns properly and securely encloses the entire pit. Depending on the specific design of the cover, it may feature locking mechanisms or fasteners to secure it in place, providing added stability and protection. Verify that the cover is firmly seated and effectively seals the sump pit to prevent any potential entry of debris or contaminants.
In addition to its protective function, the sump pump cover also contributes to safety within the crawl space. By effectively sealing off the sump pit, the cover reduces the risk of accidents or injuries that may occur due to inadvertent contact with the sump pump or exposure to the water within the pit. This safety measure is particularly important in households with children or pets, minimizing the likelihood of unauthorized access to the sump pit area.
Furthermore, the sump pump cover helps to maintain a cleaner and more organized crawl space environment. By preventing debris and contaminants from entering the sump pit, the cover contributes to the overall cleanliness of the space, reducing the need for frequent maintenance and ensuring that the sump pump operates optimally without obstructions.
By installing a sump pump cover as the final step in the sump pump installation process, you can enhance the functionality, safety, and cleanliness of your crawl space. The cover serves as a reliable protective barrier, safeguarding the sump pit and pump while contributing to a more resilient and secure home environment.
Conclusion
In conclusion, the installation of a sump pump in a crawl space is a proactive and essential measure to protect your home from potential water damage and moisture-related issues. By following the comprehensive steps outlined in this guide, you have gained the knowledge and confidence to effectively install a sump pump, fortifying your crawl space against the detrimental effects of excess water accumulation.
Throughout the installation process, you have learned the importance of gathering the necessary tools and materials, selecting the optimal location for the sump pump, excavating the sump pit, and installing the sump pump and discharge system. Additionally, you have gained insights into testing the sump pump and installing a protective cover, ensuring that the entire system operates efficiently and remains safeguarded against potential hazards.
By meticulously following these steps, you have taken proactive measures to mitigate the risks associated with moisture and water intrusion in your crawl space. The sump pump serves as a reliable defense mechanism, intercepting and removing excess water to maintain a drier and more resilient environment within your home.
Furthermore, the installation of a sump pump contributes to the overall safety and well-being of your household. By effectively managing water accumulation, you have minimized the risk of structural damage, mold growth, and other moisture-related issues, creating a safer and healthier living environment for you and your family.
It's important to recognize that the installation of a sump pump is not only a practical investment in your home's resilience but also a proactive step towards long-term maintenance and protection. By addressing potential water-related issues at their source, you have demonstrated a commitment to preserving the integrity of your home and ensuring its longevity.
In embracing the knowledge and skills presented in this guide, you have empowered yourself to take proactive measures in safeguarding your home against potential water-related issues. The successful installation of a sump pump in your crawl space represents a significant achievement in fortifying your home's resilience and ensuring a safer, more secure living environment for years to come.
Frequently Asked Questions about How To Install A Sump Pump In A Crawl Space
Was this page helpful?
At Storables.com, we guarantee accurate and reliable information. Our content, validated by Expert Board Contributors, is crafted following stringent Editorial Policies. We're committed to providing you with well-researched, expert-backed insights for all your informational needs.

0 thoughts on “How To Install A Sump Pump In A Crawl Space”