Home>Renovation & DIY>Home Renovation Guides>How To Install Subfloor Over A Crawl Space
Home Renovation Guides
How To Install Subfloor Over A Crawl Space
Modified: October 18, 2024
Learn how to properly install a subfloor over a crawl space with our comprehensive home renovation guide. Ensure a sturdy foundation for your flooring project.
(Many of the links in this article redirect to a specific reviewed product. Your purchase of these products through affiliate links helps to generate commission for Storables.com, at no extra cost. Learn more)
Introduction
When it comes to home renovation projects, installing a subfloor over a crawl space is a crucial step in ensuring the stability and longevity of your flooring. Whether you're planning to lay down hardwood, laminate, or any other type of flooring, a well-installed subfloor provides a sturdy and level base for the finished floor. This comprehensive guide will walk you through the step-by-step process of installing a subfloor over a crawl space, equipping you with the knowledge and confidence to tackle this project with ease.
By following the detailed instructions provided in this guide, you'll be able to create a solid foundation for your flooring, effectively addressing potential issues such as moisture, uneven surfaces, and inadequate support. Additionally, installing a subfloor over a crawl space can contribute to improved energy efficiency and enhanced insulation, making it a valuable investment in the overall comfort and durability of your home.
Throughout this guide, you'll discover essential tips and techniques for preparing the crawl space, measuring and cutting subfloor panels, laying down a vapor barrier, and securing the subfloor panels with precision. Furthermore, we'll delve into the importance of insulating the subfloor to optimize thermal performance and minimize heat loss.
By the end of this guide, you'll have a comprehensive understanding of the entire process, empowering you to execute each step with proficiency and achieve a high-quality subfloor installation. So, roll up your sleeves, gather your tools, and let's embark on this rewarding home improvement journey together. It's time to transform your crawl space into a solid foundation that will support and enhance the beauty of your flooring for years to come.
Key Takeaways:
- Transform your crawl space into a sturdy foundation for flooring by meticulously preparing, measuring, cutting, and installing a subfloor. Enhance durability and energy efficiency with a vapor barrier and insulation.
- Attention to detail and precision are key in creating a resilient subfloor. Strategic placement of fasteners, alignment of panels, and insulation contribute to a durable and energy-efficient foundation for your flooring.
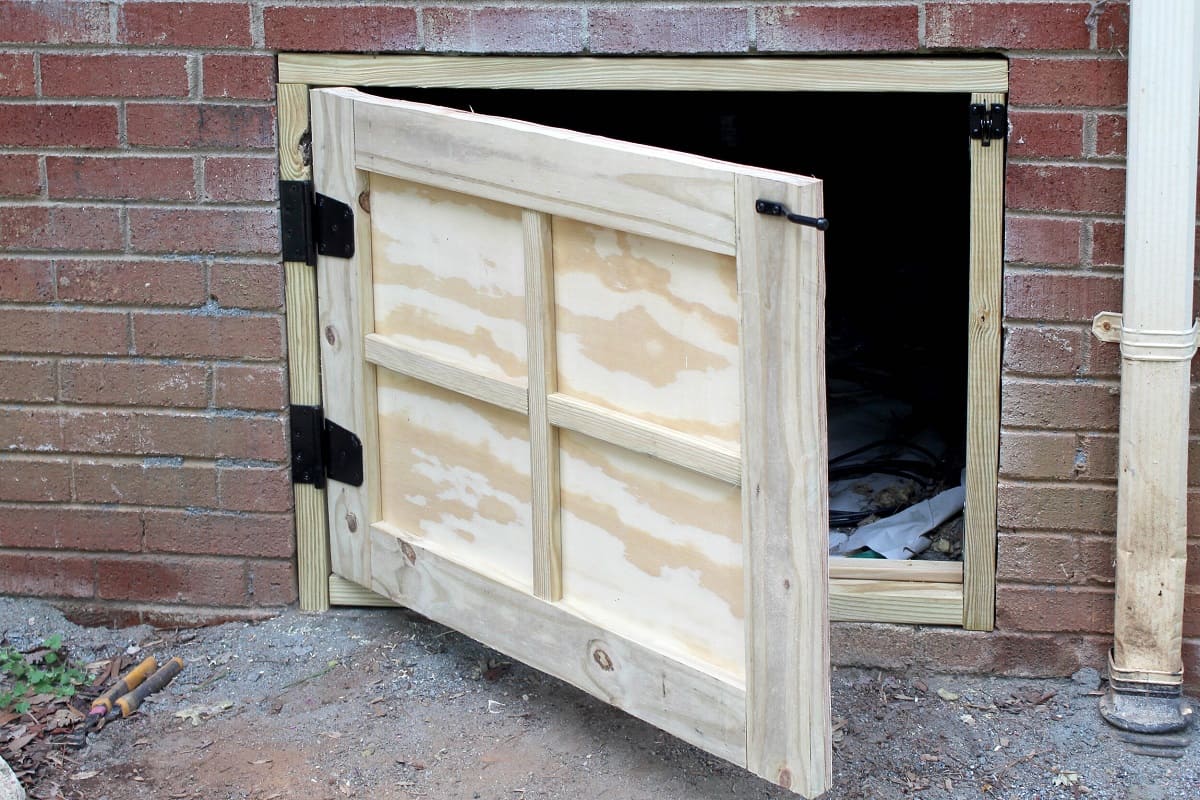
Step 1: Prepare the Crawl Space
Before diving into the installation of a subfloor over a crawl space, it's crucial to ensure that the crawl space is properly prepared to provide a suitable environment for the subfloor. Here's a detailed breakdown of the essential steps involved in preparing the crawl space:
-
Clear Debris and Clean the Area: Begin by removing any debris, such as rocks, branches, and old insulation, from the crawl space. Use a broom or a vacuum to clean the area thoroughly, ensuring that it is free from dust, dirt, and any obstructions that could hinder the installation process.
-
Inspect for Moisture and Mold: Conduct a thorough inspection of the crawl space to identify any signs of moisture or mold. Addressing these issues is crucial for preventing future damage to the subfloor and the overall integrity of the flooring. If moisture or mold is present, it's important to resolve these issues before proceeding with the installation.
-
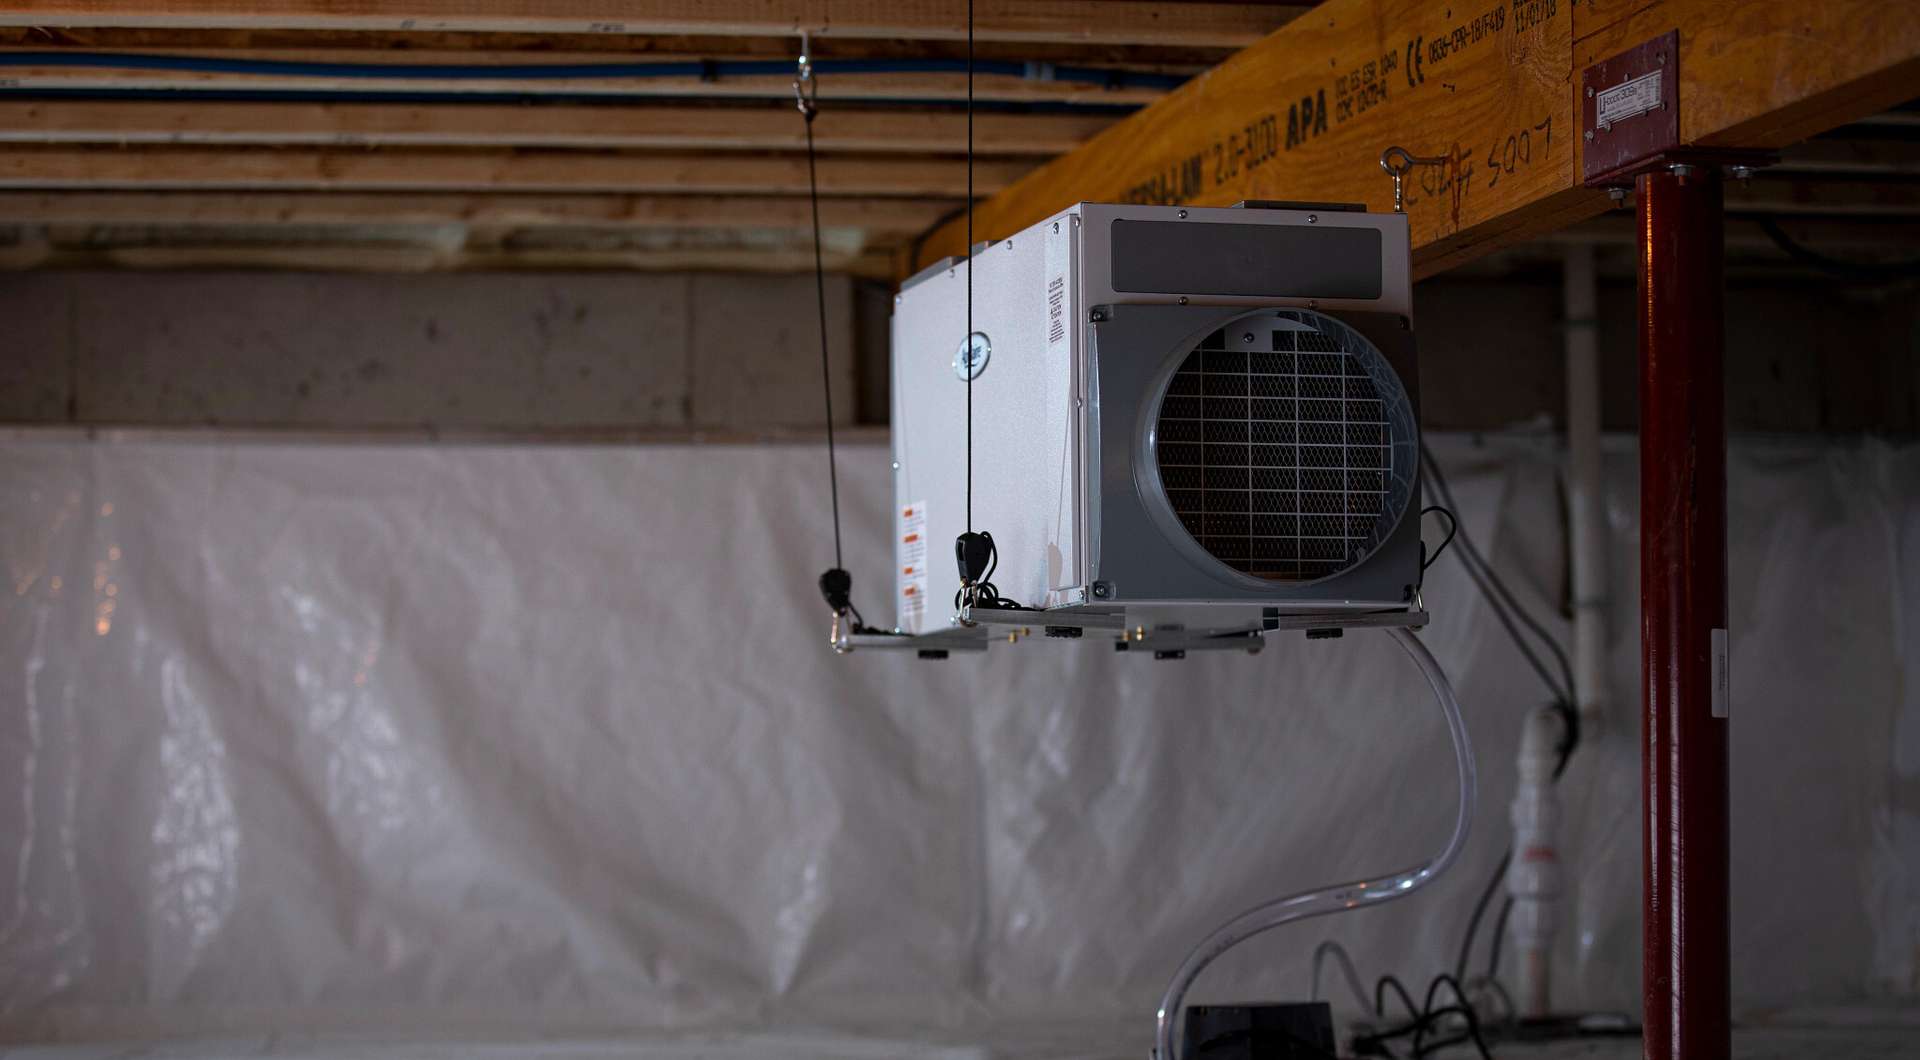
Address Drainage and Ventilation: Proper drainage and ventilation are essential for maintaining a dry and healthy crawl space. Ensure that the area is equipped with adequate drainage systems to prevent water accumulation, and that ventilation openings are unobstructed to promote air circulation and prevent moisture buildup.
-
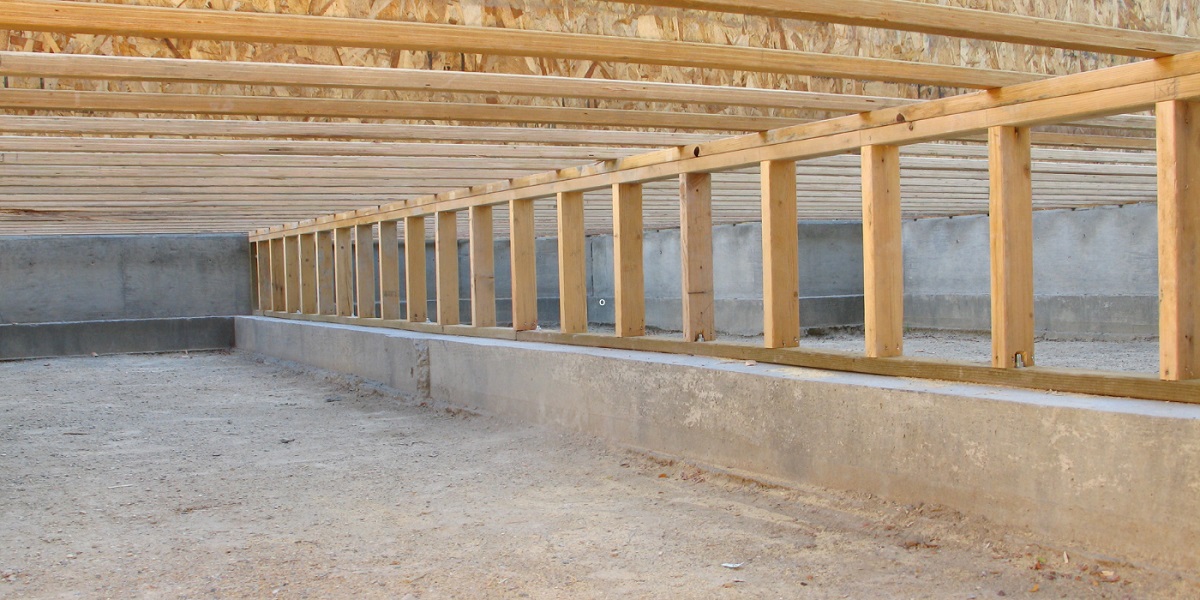
Level the Ground: Use a leveling tool to assess the evenness of the ground in the crawl space. If there are any noticeable dips or uneven areas, consider using a self-leveling compound to create a smooth and level surface. This step is crucial for ensuring the stability and uniformity of the subfloor installation.
-
Treat for Pests: Take proactive measures to address any pest infestations in the crawl space. This may involve using pest control treatments or sealing off potential entry points to prevent pests from compromising the integrity of the subfloor in the future.
By meticulously preparing the crawl space according to these steps, you'll create an optimal foundation for the subsequent installation of the subfloor. This proactive approach sets the stage for a successful and durable subfloor that will effectively support your chosen flooring material.
Step 2: Measure and Cut the Subfloor Panels
Accurate measurement and precise cutting of the subfloor panels are critical steps in ensuring a seamless and secure subfloor installation. Here's a detailed breakdown of the process:
Measure the Crawl Space
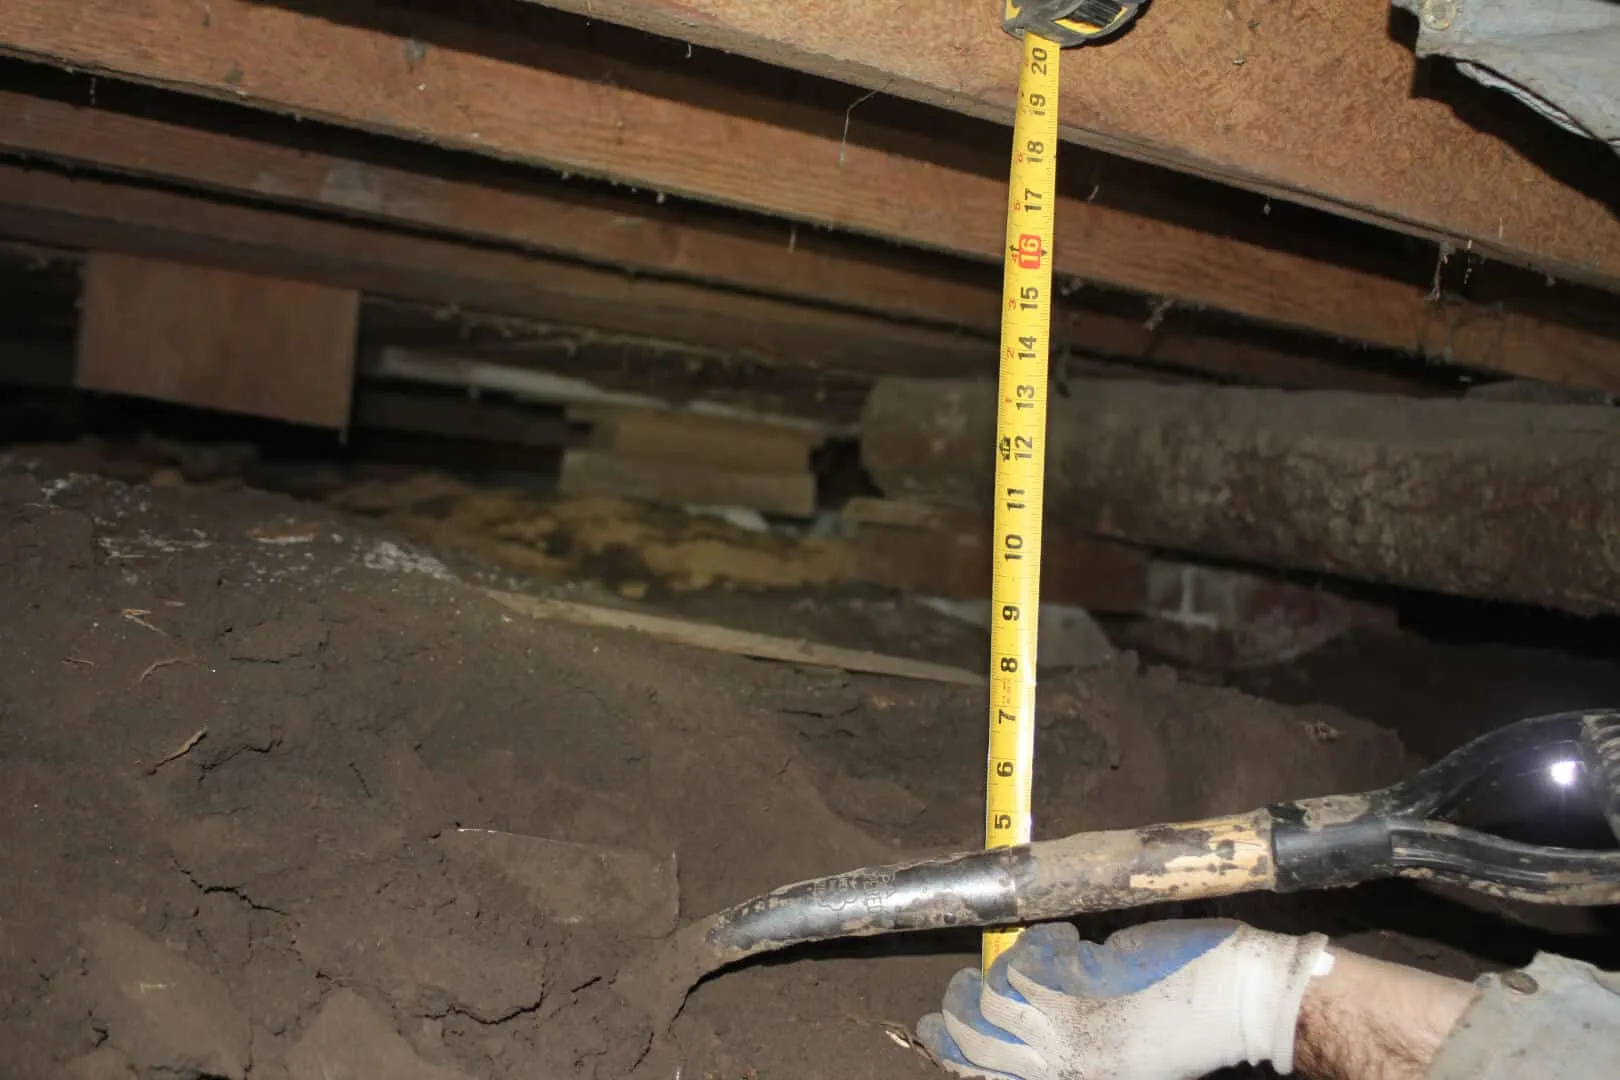
Begin by carefully measuring the dimensions of the crawl space to determine the exact size of the subfloor panels needed. Use a measuring tape to record the length and width of the space, taking into account any irregularities or obstacles that may require custom cuts for the panels.
Select High-Quality Subfloor Panels
Choose high-quality plywood or oriented strand board (OSB) panels for the subfloor, ensuring that they are specifically designed for subfloor applications. Opt for panels with a thickness that aligns with the structural requirements of your flooring system, typically ranging from 19/32 inch to 1 1/8 inch.
Read more: How To Install Floor Jacks In A Crawl Space
Mark and Cut the Panels
Transfer the measurements obtained from the crawl space onto the subfloor panels, marking them with precision to indicate the areas that need to be cut. Use a circular saw or a table saw to make accurate cuts along the marked lines, ensuring clean and straight edges for a precise fit within the crawl space.
Account for Obstacles and Cutouts
If the crawl space features obstructions such as support posts, plumbing, or HVAC components, carefully plan and execute the necessary cutouts on the subfloor panels to accommodate these elements. Take precise measurements and use a jigsaw or a reciprocating saw to create custom cutouts that align with the layout of the crawl space.
Label the Panels
To streamline the installation process, consider labeling the subfloor panels according to their intended placement within the crawl space. Marking the panels with corresponding numbers or letters can help you maintain an organized approach during the installation, ensuring that each panel fits seamlessly into its designated position.
By meticulously measuring and cutting the subfloor panels with precision, you'll lay the groundwork for a successful installation that promotes structural integrity and stability. These meticulous preparations pave the way for the subsequent steps in the subfloor installation process, setting the stage for a durable and reliable foundation for your flooring.
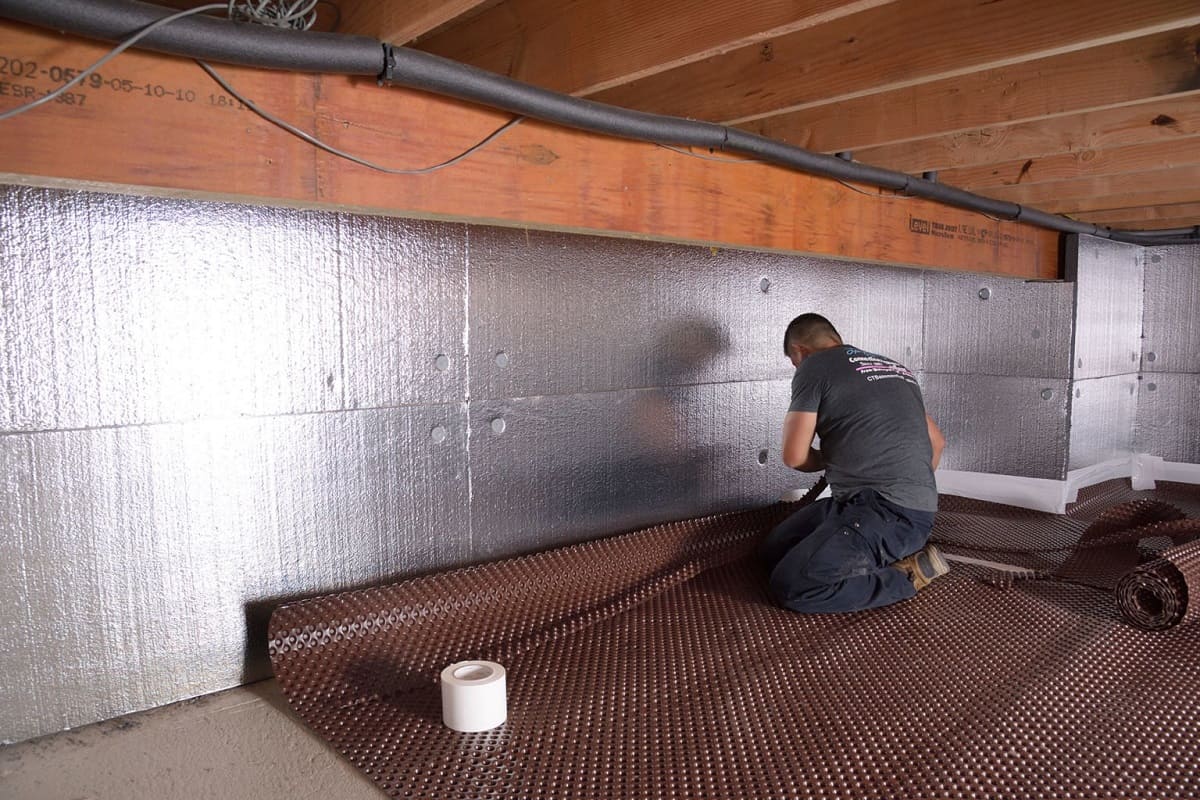
Step 3: Lay Down the Vapor Barrier
The installation of a vapor barrier is a crucial component of the subfloor installation process, serving as a protective layer that helps mitigate moisture-related issues and enhances the overall durability of the flooring system. Here's a comprehensive overview of the steps involved in laying down the vapor barrier:
Read more: How To Install A Sump Pump In A Crawl Space
Select the Appropriate Vapor Barrier Material
Begin by selecting a high-quality vapor barrier material designed specifically for subfloor applications. Common options include polyethylene sheets and moisture-resistant underlayment, both of which are effective in preventing moisture from seeping into the subfloor and compromising its structural integrity.
Measure and Cut the Vapor Barrier
Carefully measure the dimensions of the crawl space to determine the amount of vapor barrier material needed. Allow for a slight overlap at the seams to ensure comprehensive coverage and effective moisture protection. Use scissors or a utility knife to cut the vapor barrier material to the required size, taking care to create precise and clean edges.
Lay Out the Vapor Barrier
With the subfloor panels in place, carefully lay out the vapor barrier material across the entire crawl space, ensuring that it extends to the edges and corners with minimal gaps or overlaps. Smooth out any wrinkles or creases in the material to achieve a flat and uniform surface, maximizing its effectiveness as a moisture barrier.
Secure the Vapor Barrier
Secure the vapor barrier in place using heavy-duty construction tape or adhesive designed for vapor barrier installation. Seal the seams and edges of the vapor barrier with precision, creating a continuous and watertight barrier that prevents moisture from infiltrating the subfloor. Additionally, consider using weighted objects or temporary fasteners to hold the vapor barrier in position during the installation of the subfloor panels.
Inspect for Proper Coverage
Thoroughly inspect the installed vapor barrier to ensure that it provides comprehensive coverage across the entire crawl space, leaving no areas exposed to potential moisture infiltration. Address any gaps, tears, or inadequately secured sections to guarantee the effectiveness of the vapor barrier in safeguarding the subfloor against moisture-related issues.
By meticulously laying down the vapor barrier according to these steps, you'll fortify the subfloor against moisture intrusion, safeguarding its structural integrity and ensuring the long-term stability of your flooring. This proactive measure contributes to the overall resilience and longevity of the subfloor, setting the stage for a successful and enduring flooring installation.
Step 4: Install the Subfloor Panels
With the crawl space meticulously prepared and the vapor barrier securely in place, the next pivotal step in the subfloor installation process is the precise placement of the subfloor panels. This phase demands attention to detail and a methodical approach to ensure a sturdy and level foundation for the finished flooring. Here's a comprehensive breakdown of the subfloor panel installation process:
Begin at a Designated Starting Point
Commence the installation process at a designated starting point within the crawl space, typically near the entrance or a central area. This strategic approach allows for systematic progression and ensures a cohesive alignment of the subfloor panels throughout the installation.
Align the Panels with Precision
Carefully position the first subfloor panel at the starting point, aligning it with the edges of the crawl space and the adjacent panels. Ensure a snug fit without forcing the panels into place, maintaining a uniform gap of approximately 1/8 inch between adjacent panels to accommodate potential expansion.
Read more: How To Insulate A Floor Over A Crawl Space
Nail or Screw the Panels into Position
Secure the subfloor panels to the underlying floor joists using appropriate fasteners, such as nails or screws, to create a firm and stable attachment. Follow the designated spacing and placement guidelines for fasteners, ensuring that they penetrate the panels and securely anchor them to the floor joists.
Stagger Panel Joints for Structural Integrity
Implement a staggered joint pattern when installing subsequent panels to enhance the structural integrity of the subfloor. Offset the panel joints to minimize the concentration of seams in specific areas, distributing the load evenly and fortifying the overall stability of the subfloor.
Maintain Consistent Panel Orientation
Adhere to a consistent panel orientation throughout the installation process, ensuring that the panels are aligned parallel to the longest dimension of the crawl space. This uniform orientation promotes a cohesive and visually appealing subfloor layout while optimizing structural support.
Verify Levelness and Alignment
Regularly assess the levelness and alignment of the installed subfloor panels using a straightedge or level tool. Address any discrepancies or unevenness promptly, making necessary adjustments to maintain a flat and uniform surface that serves as an ideal foundation for the finished flooring.
Read more: How To Maintain A Crawl Space
Continue Methodically Across the Crawl Space
Systematically continue installing the subfloor panels across the entire crawl space, maintaining precision and attention to detail at every stage of the process. Exercise patience and diligence to ensure that each panel is securely installed and seamlessly integrated with the adjacent panels.
By meticulously following these steps, you'll establish a robust and reliable subfloor that forms the cornerstone of a successful flooring installation. The careful execution of the subfloor panel installation process sets the stage for the subsequent steps, culminating in a resilient and enduring foundation that enhances the overall quality and longevity of your flooring.
Step 5: Secure the Subfloor Panels
Once the subfloor panels are accurately positioned within the crawl space, the next critical step is to secure them firmly to the underlying floor joists. This process involves the strategic placement of fasteners to create a stable and resilient subfloor that forms the foundation for the finished flooring. Here's a detailed exploration of the essential aspects involved in securing the subfloor panels:
Choose Appropriate Fasteners
Selecting the right fasteners is paramount to ensuring the secure attachment of the subfloor panels. Common options include ring-shank nails or deck screws, both of which offer exceptional holding power and resistance to withdrawal forces. It's essential to choose fasteners that are specifically designed for subfloor applications, featuring corrosion-resistant coatings to enhance durability and longevity.
Follow Recommended Spacing Guidelines
Adhere to the recommended spacing guidelines for fasteners, as specified by building codes and industry standards. Typically, fasteners should be placed at designated intervals along the edges and seams of the subfloor panels, ensuring comprehensive coverage and uniform support. By following these guidelines, you'll create a robust connection between the subfloor panels and the floor joists, minimizing the risk of movement or shifting over time.
Read more: How To Inspect A Crawl Space
Utilize Nail Guns or Screw Guns
Employing nail guns or screw guns equipped with depth control mechanisms can streamline the process of securing the subfloor panels. These tools facilitate efficient and consistent fastener placement, allowing for rapid installation while maintaining precision and accuracy. When using nail guns, ensure that the nails are driven perpendicular to the subfloor panels, penetrating the floor joists to establish a secure bond.
Consider Edge and Field Fastening
Implement a combination of edge and field fastening to optimize the structural integrity of the subfloor. Edge fastening involves placing fasteners along the perimeter of the subfloor panels, while field fastening focuses on securing the central areas. This dual approach distributes the load evenly and minimizes the potential for panel movement, contributing to a stable and uniform subfloor installation.
Verify Fastener Penetration
Regularly inspect the fasteners to confirm proper penetration into the floor joists and subfloor panels. Inadequate penetration can compromise the strength and stability of the subfloor, potentially leading to squeaks, creaks, or unevenness in the finished flooring. By verifying the integrity of the fastener connections, you'll ensure a solid and reliable subfloor that forms a resilient base for the flooring system.
Exercise Precision and Diligence
Exercise precision and diligence throughout the process of securing the subfloor panels, paying close attention to the placement and alignment of fasteners. Consistent and meticulous execution is essential for creating a subfloor that withstands the demands of daily use and effectively supports the chosen flooring material. By approaching this step with care and attention to detail, you'll lay the groundwork for a successful and enduring subfloor installation.
By meticulously securing the subfloor panels according to these guidelines, you'll establish a robust and reliable foundation that sets the stage for the subsequent phases of the flooring installation. This proactive approach ensures that the subfloor remains steadfast and stable, providing the necessary support for a wide range of flooring materials while enhancing the overall quality and longevity of the flooring system.
Read more: What Is A Crawl Space?
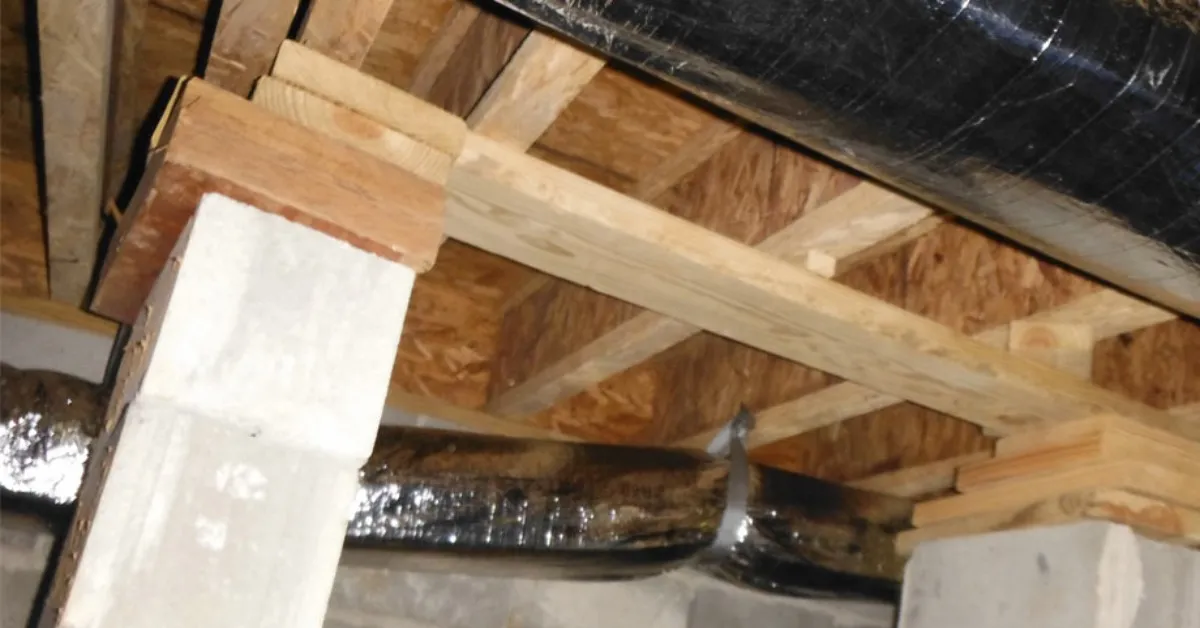
Step 6: Insulate the Subfloor
Insulating the subfloor is a pivotal step that contributes to the overall energy efficiency, thermal performance, and comfort of your home. By effectively insulating the subfloor, you can minimize heat loss, regulate indoor temperatures, and create a more comfortable living environment. Here's a comprehensive exploration of the process involved in insulating the subfloor:
Assess Insulation Options
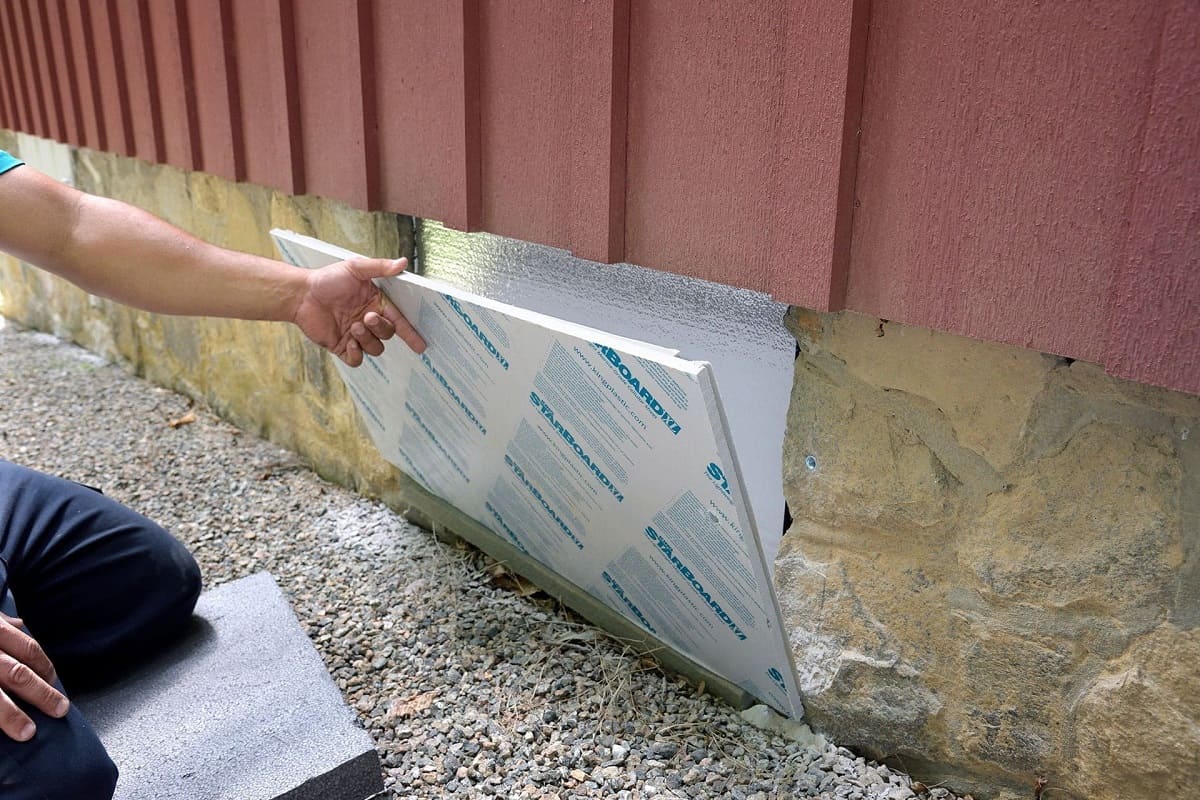
Begin by evaluating the insulation options suitable for subfloor applications. Common choices include fiberglass batts, rigid foam boards, and spray foam insulation. Each option offers unique benefits in terms of thermal resistance, moisture resistance, and ease of installation. Consider the specific requirements of your home and the climate conditions to determine the most suitable insulation material for your subfloor.
Measure and Cut Insulation Material
Carefully measure the dimensions of the crawl space to determine the amount of insulation material needed. Use a utility knife or insulation cutting tool to precisely cut the insulation material to fit within the joist cavities, ensuring a snug and uniform placement. Take care to create clean and accurate cuts that align with the layout of the subfloor.
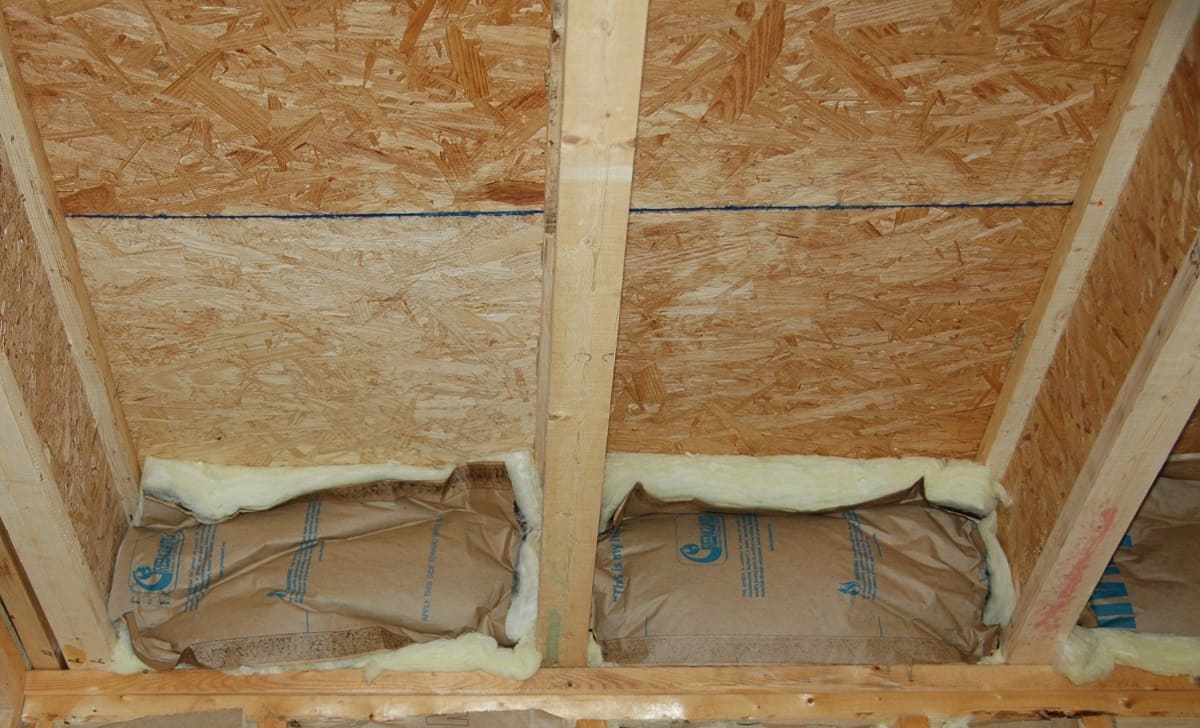
Install Insulation Between Joists
Position the insulation material between the floor joists, ensuring a proper fit that fills the entire cavity without compression. Maintain a consistent alignment and coverage throughout the crawl space, addressing any gaps or irregularities to maximize the insulation's effectiveness. Secure the insulation in place using insulation supports or wire hangers to prevent sagging or displacement over time.
Read more: What Is A Subfloor
Address Vapor Barrier Considerations
In regions prone to high humidity or moisture infiltration, consider incorporating a vapor barrier in conjunction with the insulation. A vapor barrier helps prevent moisture from accumulating within the insulation and subfloor, safeguarding against potential issues such as mold growth and structural damage. Ensure that the vapor barrier is installed with precision and sealed effectively to create a moisture-resistant environment.
Optimize Energy Efficiency
By insulating the subfloor, you contribute to enhanced energy efficiency within your home. The insulation acts as a barrier that reduces heat transfer between the crawl space and the living areas, resulting in lower energy consumption for heating and cooling. This proactive measure not only improves comfort but also contributes to long-term cost savings and environmental sustainability.
Verify Compliance with Building Codes
Before proceeding with the insulation installation, verify that your chosen insulation material and installation methods comply with local building codes and regulations. Adhering to these guidelines ensures that the insulation meets the necessary safety and performance standards, providing you with peace of mind regarding the quality and efficacy of the subfloor insulation.
By meticulously insulating the subfloor according to these steps, you enhance the overall thermal performance and energy efficiency of your home, creating a comfortable and sustainable living environment. This proactive measure contributes to the long-term durability and functionality of the subfloor, complementing the entire flooring system with enhanced insulation and thermal regulation.
Conclusion
In conclusion, the installation of a subfloor over a crawl space is a fundamental aspect of home renovation that significantly impacts the stability, durability, and overall performance of the flooring system. By meticulously following the step-by-step process outlined in this guide, you can transform your crawl space into a solid foundation that effectively supports a wide range of flooring materials, from hardwood and laminate to tile and carpet. The comprehensive approach to subfloor installation presented in this guide empowers you to tackle this essential home improvement project with confidence and precision.
From the meticulous preparation of the crawl space to the precise measurement, cutting, and installation of subfloor panels, each step plays a crucial role in creating a resilient and long-lasting foundation for your flooring. The inclusion of a vapor barrier and insulation further enhances the subfloor's resistance to moisture, thermal regulation, and energy efficiency, contributing to a comfortable and sustainable living environment.
By adhering to industry best practices and leveraging high-quality materials and techniques, you can ensure that your subfloor installation meets the highest standards of structural integrity and performance. The strategic placement of fasteners, the meticulous alignment of subfloor panels, and the thoughtful integration of insulation collectively contribute to a subfloor that not only provides a level and sturdy base for your flooring but also enhances the overall quality and longevity of your home environment.
As you embark on the journey of installing a subfloor over a crawl space, remember that attention to detail, precision, and a methodical approach are key to achieving exceptional results. Whether you're a seasoned DIY enthusiast or a homeowner venturing into the realm of home improvement for the first time, this guide equips you with the knowledge and insights needed to execute a successful subfloor installation that elevates the functionality and aesthetic appeal of your living space.
Ultimately, the investment of time, effort, and meticulous attention to detail in installing a subfloor over a crawl space yields long-term benefits in terms of structural stability, energy efficiency, and the overall quality of your home. By embracing this essential aspect of home renovation, you lay the groundwork for a resilient and enduring flooring system that enhances the comfort, functionality, and value of your living space for years to come.
Frequently Asked Questions about How To Install Subfloor Over A Crawl Space
Was this page helpful?
At Storables.com, we guarantee accurate and reliable information. Our content, validated by Expert Board Contributors, is crafted following stringent Editorial Policies. We're committed to providing you with well-researched, expert-backed insights for all your informational needs.
0 thoughts on “How To Install Subfloor Over A Crawl Space”