Home>Renovation & DIY>Home Renovation Guides>Where Do You Start Tiling A Backsplash
Home Renovation Guides
Where Do You Start Tiling A Backsplash
Published: February 8, 2024
Learn the best starting point for tiling a backsplash in your home renovation project with our comprehensive guide. Expert tips and advice for a successful tiling project.
(Many of the links in this article redirect to a specific reviewed product. Your purchase of these products through affiliate links helps to generate commission for Storables.com, at no extra cost. Learn more)
Introduction
Tiling a backsplash is a fantastic way to add personality and style to your kitchen or bathroom. Whether you're renovating your home or simply looking to refresh the space, a beautifully tiled backsplash can make a significant impact. However, before you dive into this exciting project, it's crucial to understand where to start tiling a backsplash. This initial step sets the foundation for the entire tiling process and can greatly influence the outcome of your project.
When it comes to tiling a backsplash, the starting point is more than just a technical decision; it's a creative one as well. The first tile you lay will determine the overall look and symmetry of the backsplash, making it a crucial aspect of the design. Additionally, choosing the right starting point can simplify the installation process and ensure a professional-looking result.
In this comprehensive guide, we'll explore the essential steps and considerations for starting to tile a backsplash. From selecting the optimal starting point to preparing the surface and applying the adhesive, each stage plays a vital role in achieving a stunning and durable backsplash. By following these guidelines, you'll gain the confidence and knowledge needed to embark on this rewarding home improvement project.
Embarking on a tiling project can be both exciting and daunting, especially if you're new to home renovations. However, with the right guidance and a clear understanding of the process, you can transform your space with a beautifully tiled backsplash. So, let's dive into the details and discover the best practices for starting to tile a backsplash, ensuring that your project unfolds smoothly and results in a stunning addition to your home.
Key Takeaways:
- Choose the right starting point for your backsplash to create a balanced and visually appealing design, while also ensuring a smooth and efficient installation process.
- Prepare the surface meticulously before tiling to promote strong adhesion, prevent issues, and lay the foundation for a stunning and long-lasting backsplash.
Read more: How To Cut Backsplash Tiles
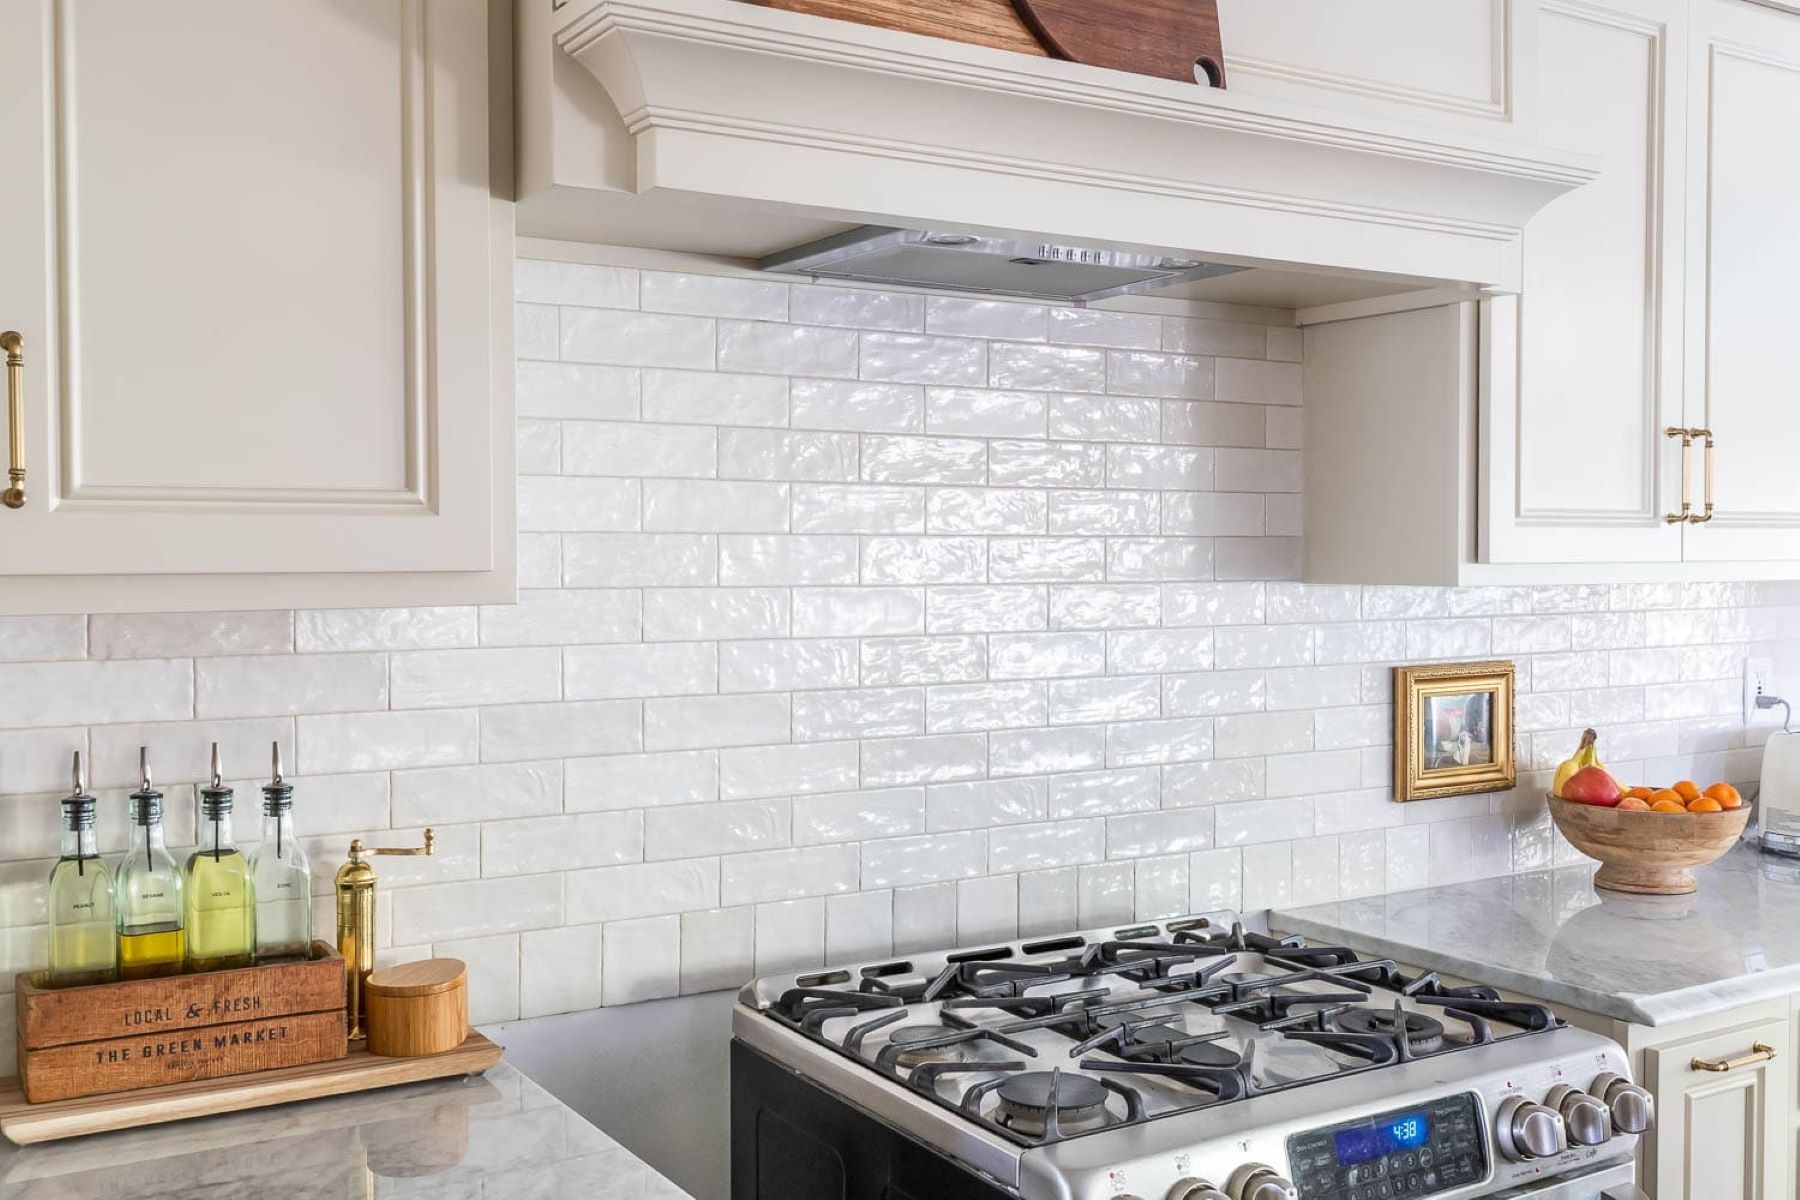
Choosing the Right Starting Point
Selecting the optimal starting point for tiling a backsplash is a crucial decision that significantly influences the overall aesthetics and symmetry of the finished project. When determining the starting point, it's essential to consider the focal points in the room, such as the stove area in a kitchen or the vanity in a bathroom. By aligning the starting point with these key features, you can create a visually appealing and balanced design.
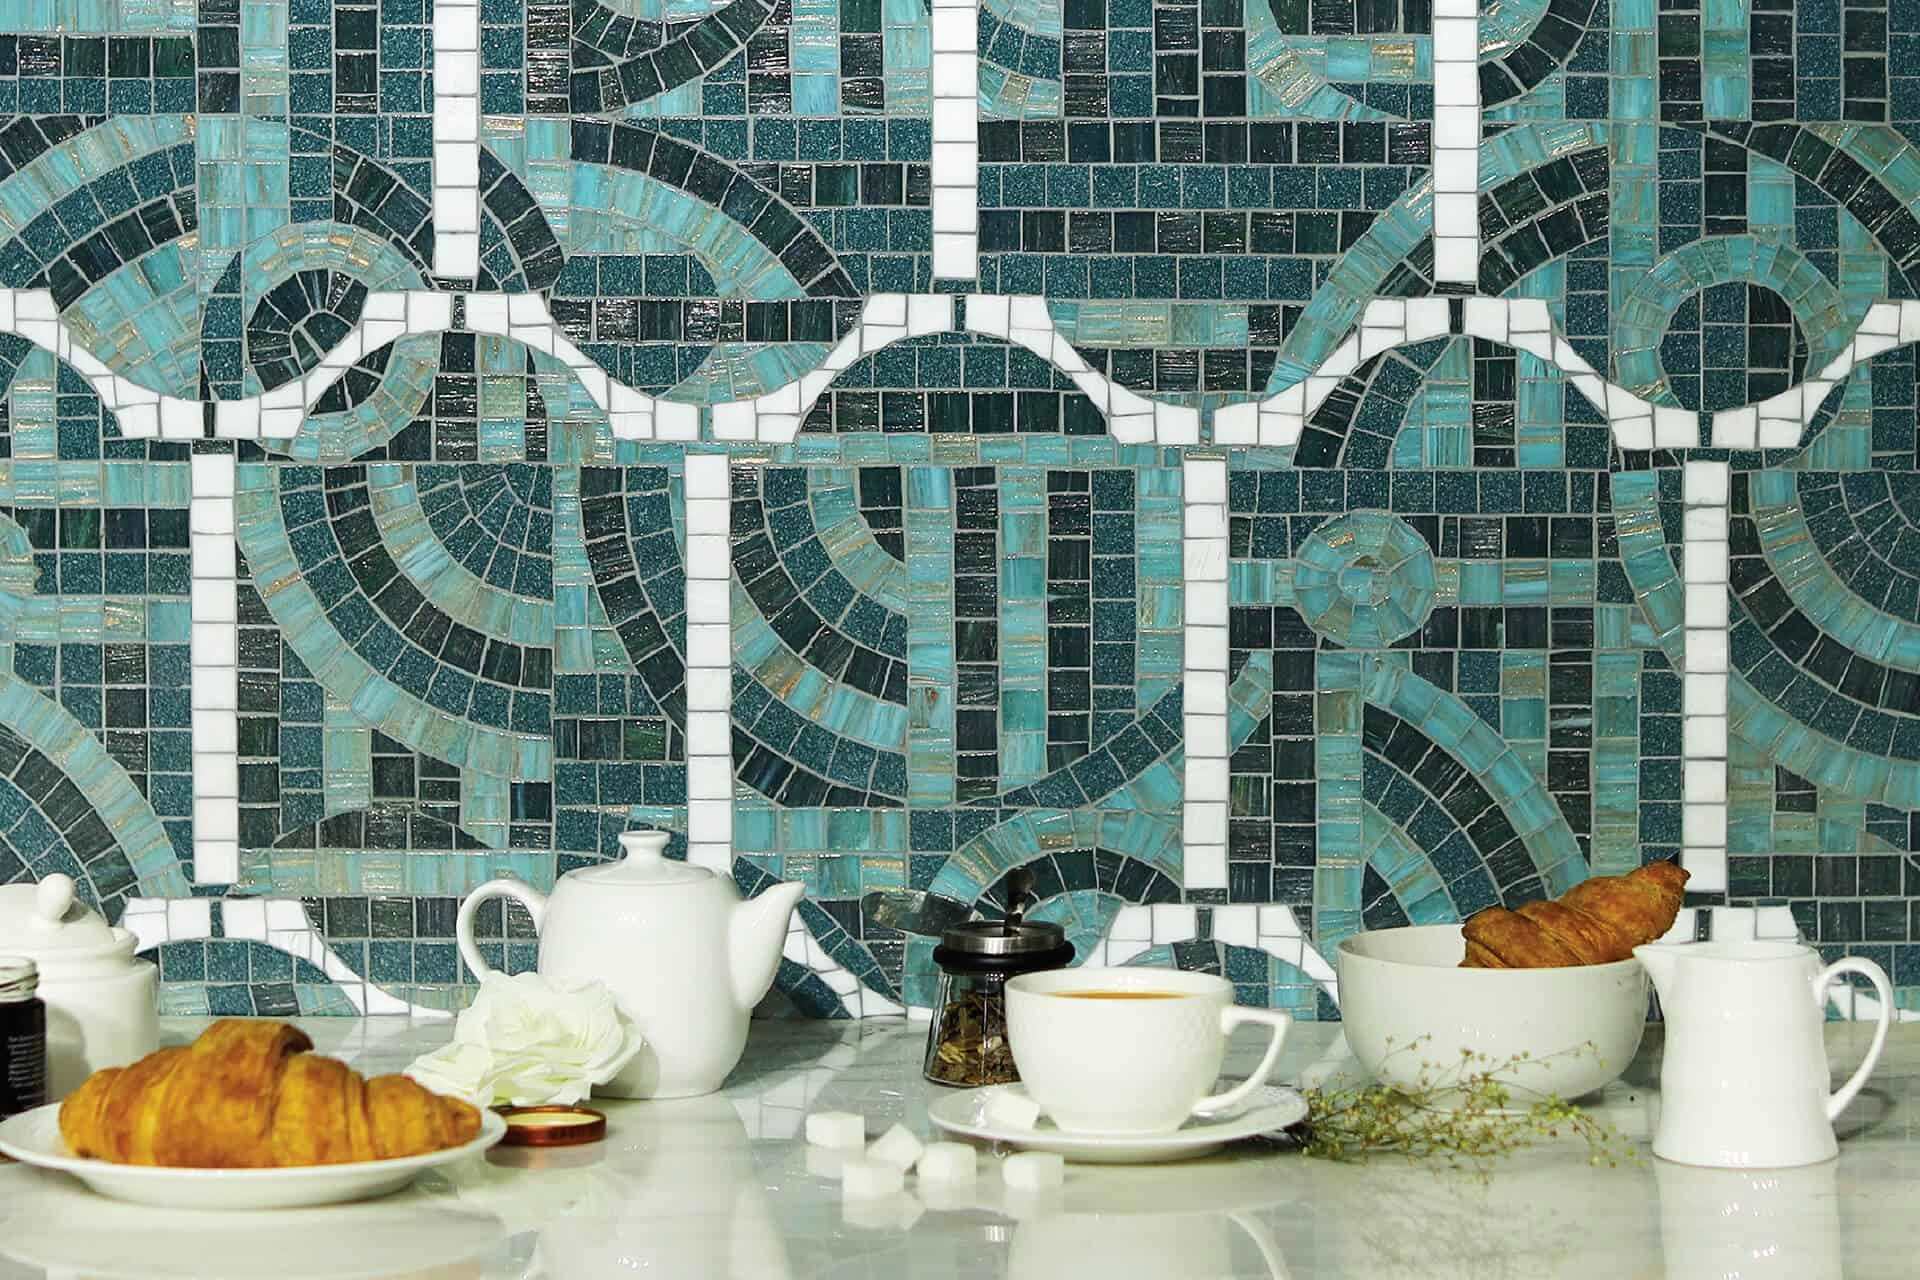
Another vital factor to consider when choosing the starting point is the layout of the tiles. If you're using subway tiles or other rectangular formats, aligning the starting point with the center of the area can help achieve a symmetrical and harmonious look. For more intricate patterns or mosaic designs, identifying the starting point based on the pattern's center or focal point is crucial for maintaining visual balance.
In addition to visual considerations, practical aspects should also guide the selection of the starting point. It's important to assess the condition of the walls and identify any potential obstacles or challenges that may affect the tiling process. By starting in an area that allows for seamless and uninterrupted tiling, you can streamline the installation and minimize the need for complex cuts or adjustments.
Furthermore, when choosing the starting point, it's beneficial to envision the overall layout and how the tiles will interact with other elements in the room. By visualizing the finished backsplash and considering how it complements the surrounding features, you can ensure a cohesive and harmonious design.
Ultimately, the right starting point for tiling a backsplash is one that not only enhances the visual appeal of the space but also facilitates a smooth and efficient installation process. By carefully evaluating the room's layout, focal points, and practical considerations, you can confidently determine the optimal starting point for your backsplash project, setting the stage for a successful and visually stunning outcome.
Preparing the Surface
Before embarking on the exciting task of tiling a backsplash, it's crucial to prepare the surface to ensure a durable and long-lasting installation. Proper surface preparation not only promotes the adhesion of the tiles but also helps prevent potential issues such as uneven surfaces and moisture damage. Here's a detailed look at the essential steps involved in preparing the surface for tiling a backsplash:
-
Clean the Surface: Begin by thoroughly cleaning the wall surface where the tiles will be installed. Remove any dirt, grease, or residues using a suitable cleaner and ensure that the area is free from dust and debris. A clean surface provides a better bonding surface for the adhesive, promoting strong adhesion and a professional finish.
-
Inspect for Imperfections: Carefully inspect the wall for any imperfections, such as cracks, bumps, or uneven areas. Address any irregularities by filling in cracks and smoothing out uneven surfaces using a suitable wall patching compound. This step is crucial for creating a flat and even base for the tiles, ensuring a seamless and polished appearance.
-
Protect Adjacent Surfaces: Take measures to protect adjacent surfaces, such as countertops and cabinets, from potential damage during the tiling process. Use masking tape or protective coverings to shield these areas and prevent adhesive or grout from coming into contact with them.
-
Prime the Surface: Applying a high-quality primer to the prepared surface can enhance the adhesion of the tiles and promote long-term durability. The primer creates a uniform and stable base, allowing the adhesive to bond securely with the wall surface. Be sure to select a primer that is suitable for the specific wall material and follow the manufacturer's instructions for proper application.
-
Allow Sufficient Drying Time: After completing the surface preparation steps, allow sufficient time for the cleaned, repaired, and primed surface to dry thoroughly. Adequate drying time is essential to ensure that the surface is ready to receive the adhesive and tiles, preventing potential issues such as adhesive failure or uneven drying patterns.
By meticulously preparing the surface before tiling, you can lay the foundation for a successful and visually stunning backsplash installation. These preparatory steps not only contribute to the overall quality and longevity of the project but also set the stage for a smooth and efficient tiling process. With a well-prepared surface, you can proceed with confidence, knowing that your backsplash will not only look beautiful but also stand the test of time.
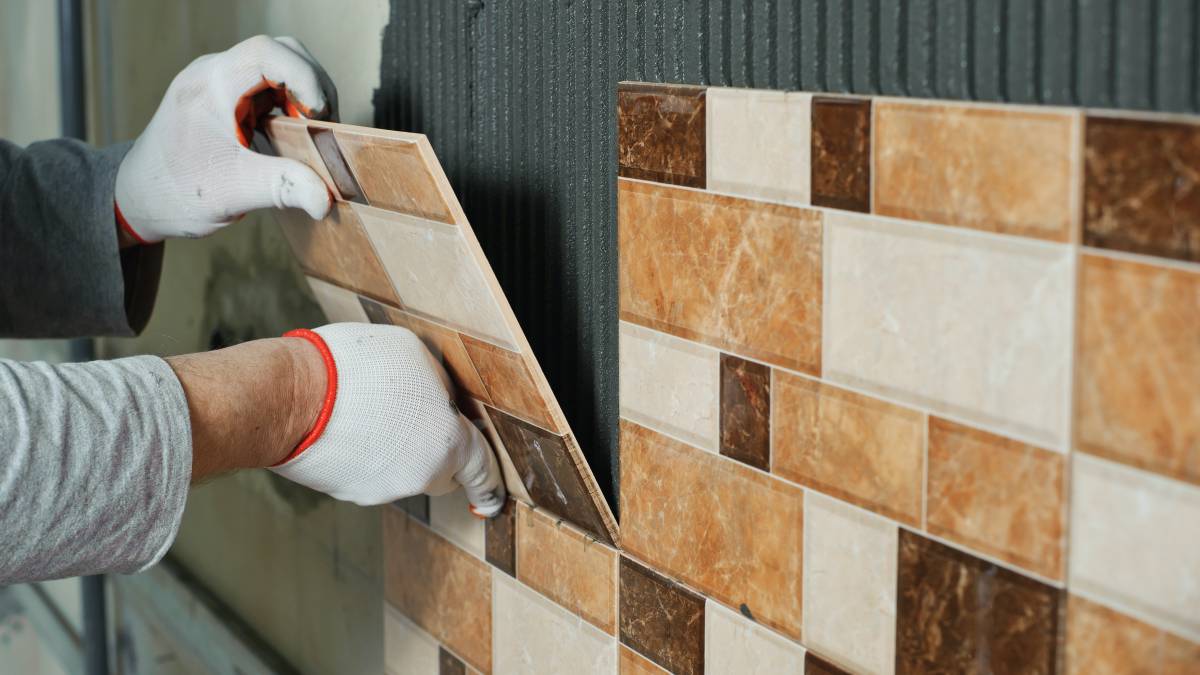
Applying the Adhesive
Once the surface is meticulously prepared, the next critical step in tiling a backsplash is applying the adhesive. The adhesive serves as the bond that secures the tiles to the wall, playing a pivotal role in the overall strength and durability of the installation. Proper application of the adhesive is essential for achieving a professional and long-lasting result. Here's a detailed look at the process of applying the adhesive for tiling a backsplash:
Selecting the Right Adhesive
Before applying the adhesive, it's crucial to select the appropriate type based on the tile material and the specific requirements of the project. For ceramic or porcelain tiles, a thin-set mortar adhesive is commonly used, offering strong adhesion and durability. For glass tiles or other specialty materials, a suitable adhesive recommended by the tile manufacturer should be chosen to ensure compatibility and optimal performance.
Read more: How To Remove Glass Tile Backsplash
Mixing the Adhesive
If using a powdered thin-set mortar adhesive, carefully follow the manufacturer's instructions to mix the adhesive to the correct consistency. Use a clean bucket and a drill with a mixing attachment to achieve a smooth and lump-free consistency. It's essential to mix the adhesive to the proper thickness to ensure optimal bonding strength and workability during the tiling process.
Applying the Adhesive to the Wall
Using a notched trowel, apply the adhesive to the prepared wall surface in small, manageable sections. Hold the trowel at a consistent angle to create uniform ridges in the adhesive, promoting even coverage and strong adhesion. Work methodically to ensure that the adhesive is applied evenly, avoiding excessive buildup or gaps that may affect the tile's bonding.
Back-Buttering the Tiles
For certain tile materials, such as large-format or natural stone tiles, back-buttering may be necessary to ensure proper adhesion. This involves applying a thin layer of adhesive to the back of the tile before setting it in place. Back-buttering helps fill any voids and ensures full contact between the tile and the wall, enhancing the overall bond and stability of the installation.
Allowing for Proper Setting Time
After applying the adhesive and setting the tiles in place, allow sufficient time for the adhesive to set and cure according to the manufacturer's recommendations. Proper setting time is crucial for the adhesive to achieve its full bonding strength, ensuring a secure and long-lasting installation. Avoid disturbing the tiles during this setting period to prevent displacement or uneven bonding.
By following these steps and best practices for applying the adhesive, you can lay the groundwork for a successful and visually stunning backsplash installation. The careful application of the adhesive is a fundamental aspect of the tiling process, contributing to the overall quality, durability, and professional finish of the project. With the adhesive properly applied, you can proceed with confidence, knowing that your beautifully tiled backsplash will not only enhance the aesthetics of your space but also withstand the test of time.
Read more: How To Tile A Backsplash: Step By Step
Placing the First Tile
Placing the first tile when tiling a backsplash is a pivotal moment that sets the tone for the entire installation. This initial step requires precision, careful alignment, and a keen eye for detail to ensure a seamless and visually appealing result. Here's a detailed look at the essential considerations and best practices for placing the first tile when tiling a backsplash:
Assessing the Starting Point
Before placing the first tile, it's crucial to re-evaluate the chosen starting point and ensure that it aligns with the overall design and layout of the backsplash. Double-check the measurements and markings to confirm the precise location for the first tile, taking into account any focal points or visual elements that may influence the placement.
Applying the Adhesive
Once the starting point is confirmed, apply a thin, even layer of adhesive to the prepared surface using a notched trowel. Ensure that the adhesive is spread consistently and covers the area where the first tile will be placed. The adhesive serves as the foundation for the tile, providing the necessary bond for a secure and durable installation.
Aligning the Tile
Carefully position the first tile at the designated starting point, pressing it firmly into the adhesive to establish a strong bond with the wall. Use tile spacers to maintain uniform grout joints and ensure even spacing between the tiles. Pay close attention to the alignment of the tile, ensuring that it is level and properly positioned according to the layout plan.
Read more: How To Clean Glass Backsplash Tiles
Checking for Level and Plumb
Using a level, verify that the first tile is perfectly horizontal and aligned with the adjacent surfaces. Additionally, check for plumb to ensure that the tile is vertically straight and in harmony with the surrounding elements. Making any necessary adjustments at this stage is crucial for maintaining the overall symmetry and visual appeal of the backsplash.
Securing the Position
Once the first tile is in place and properly aligned, gently press it into the adhesive to ensure a secure bond with the wall. Use a clean cloth or tile sponge to remove any excess adhesive that may have squeezed out from the edges of the tile. This step contributes to a clean and professional finish while securing the tile in its designated position.
Continuing the Installation
With the first tile successfully placed, continue the tiling process by adding additional tiles in a consistent pattern and alignment. Use the first tile as a reference point for maintaining the desired layout and spacing, ensuring a cohesive and visually pleasing result as the installation progresses.
By meticulously following these steps and best practices for placing the first tile, you can establish a strong foundation for the entire backsplash installation. The careful alignment, level placement, and attention to detail during this crucial stage set the stage for a visually stunning and professionally executed backsplash. With the first tile in position, you can proceed with confidence, knowing that each subsequent tile will contribute to a beautifully tiled backsplash that enhances the aesthetics of your space.
Continuing the Pattern
After successfully placing the first tile and ensuring its precise alignment and level position, the next crucial phase in tiling a backsplash is continuing the pattern. This stage involves adding additional tiles in a consistent and deliberate manner to create a visually appealing and harmonious design. Here's a detailed exploration of the essential considerations and best practices for continuing the pattern when tiling a backsplash:
-
Maintaining Consistency: As the tiling process progresses, it's essential to maintain a consistent pattern and alignment to achieve a cohesive and polished look. Whether you're working with subway tiles, mosaic designs, or other formats, adhering to a uniform layout ensures visual harmony and symmetry across the entire backsplash.
-
Using Tile Spacers: Employing tile spacers is crucial for achieving even spacing between the tiles and ensuring uniform grout joints. These small, cross-shaped tools help maintain precise distances between the tiles, contributing to a professional and well-executed installation. By consistently using tile spacers, you can create a seamless and polished appearance that enhances the overall aesthetics of the backsplash.
-
Adhering to the Layout Plan: Referencing the layout plan or design scheme throughout the tiling process is vital for staying on track and achieving the intended pattern. Whether you're following a specific arrangement of colors, textures, or shapes, adhering to the predetermined layout plan ensures that the finished backsplash reflects your vision and design preferences.
-
Making Adjustments as Needed: Throughout the tiling process, it's important to assess the placement of each tile and make any necessary adjustments to maintain the desired pattern and alignment. Checking for level, plumb, and consistent spacing between the tiles allows for real-time adjustments, ensuring that the overall design remains visually pleasing and well-balanced.
-
Considering Edge Cuts and Trim Pieces: When reaching the edges or corners of the backsplash, thoughtful consideration of edge cuts and trim pieces is essential for achieving a polished and professional finish. Carefully measuring and cutting tiles to fit the remaining spaces contributes to a seamless and refined appearance, completing the overall pattern with precision and attention to detail.
By meticulously following these best practices and considerations for continuing the pattern, you can ensure that the tiling process unfolds smoothly and results in a visually stunning backsplash. Each tile added in alignment with the established pattern contributes to the overall beauty and impact of the installation, transforming your space with a meticulously crafted and professionally executed backsplash.
Read more: How To Install Glass Tile Backsplash
Grouting the Tiles
Grouting the tiles is a pivotal step that adds the finishing touch to a beautifully tiled backsplash. This process involves filling the spaces between the tiles with grout, enhancing the overall aesthetics, and ensuring the durability of the installation. Here's a detailed exploration of the essential considerations and best practices for grouting the tiles when completing a backsplash project:
Selecting the Right Grout
Before commencing the grouting process, it's crucial to select the appropriate type and color of grout based on the design scheme and functional requirements. Grout comes in various formulations, including sanded and unsanded options, each suited for specific tile materials and joint widths. Additionally, choosing a grout color that complements the tiles and enhances the overall design is essential for achieving a cohesive and visually appealing result.
Mixing and Applying the Grout
When preparing the grout, carefully follow the manufacturer's instructions to achieve the correct consistency and ensure optimal performance. Mix the grout to a smooth, lump-free texture, using a clean bucket and a grout float for thorough blending. Once the grout is properly mixed, apply it to the tiled surface, working it into the joints at a 45-degree angle to ensure full coverage and eliminate air pockets. It's important to work in manageable sections and avoid allowing the grout to dry on the tiles, as this can complicate the cleaning process.
Cleaning Excess Grout
After applying the grout, use a damp grout sponge to remove excess grout from the tile surfaces while smoothing and shaping the grout lines. Rinse the sponge frequently and continue the cleaning process until the tiles are free from grout residue, and the grout lines are uniform and neatly defined. Taking care during this step contributes to a clean and professional finish, enhancing the overall appearance of the backsplash.
Read more: Where To End Backsplash Peninsula
Allowing for Curing Time
Once the grout is applied and excess residue is removed, allow it to cure according to the manufacturer's recommendations. Proper curing time is essential for the grout to achieve its full strength and stability, ensuring long-term durability and resistance to cracking or crumbling. During this curing period, avoid exposing the grout to excessive moisture or heavy use to allow for optimal setting and hardening.
Sealing the Grout (Optional)
In some cases, applying a grout sealer may be recommended to enhance the grout's stain resistance and protect it from moisture and discoloration. If sealing the grout is necessary for your specific tile material and installation, carefully follow the manufacturer's guidelines for proper application and allow sufficient drying time before exposing the backsplash to moisture or cleaning agents.
By meticulously following these best practices for grouting the tiles, you can add the final flourish to your beautifully tiled backsplash, ensuring a visually stunning and durable result. The careful selection, mixing, application, and cleaning of the grout contribute to a polished and professional finish, elevating the overall aesthetics of your space with a meticulously crafted and professionally executed backsplash.
Conclusion
Tiling a backsplash is a transformative and rewarding home improvement project that allows you to infuse your personal style and creativity into your living space. As you reach the conclusion of this comprehensive guide, it's essential to reflect on the key insights and best practices that will guide you towards a successful and visually stunning backsplash installation.
Throughout the tiling process, from choosing the right starting point to grouting the tiles, attention to detail, precision, and a keen eye for design have been instrumental in achieving a professional and polished result. By carefully considering the layout, focal points, and practical aspects when selecting the starting point, you've set the stage for a visually appealing and harmonious design that complements your space.
The meticulous preparation of the surface, including cleaning, inspecting for imperfections, and applying a suitable primer, has ensured a durable and long-lasting foundation for the tiles. This attention to detail not only promotes strong adhesion but also minimizes the risk of potential issues, such as uneven surfaces or moisture damage, ensuring the longevity of your backsplash.
Applying the adhesive with precision and care, aligning the first tile, and continuing the pattern with consistency and attention to detail have been pivotal in creating a visually stunning and professionally executed backsplash. Each step has contributed to the overall quality, durability, and aesthetics of the installation, transforming your space with a meticulously crafted and visually appealing feature.
Finally, grouting the tiles has added the finishing touch, enhancing the overall aesthetics and ensuring the durability of the installation. The careful selection, mixing, application, and cleaning of the grout have contributed to a polished and professional finish, elevating the overall appearance of your space with a beautifully tiled backsplash.
As you embark on your backsplash tiling journey, remember that attention to detail, patience, and a clear vision of the desired outcome are key to achieving a successful and visually stunning result. Whether you're renovating your kitchen or refreshing your bathroom, a beautifully tiled backsplash has the power to elevate the aesthetics of your space and reflect your unique style and personality.
With the knowledge and insights gained from this guide, you are well-equipped to embark on this exciting project with confidence, knowing that each step has been carefully considered to ensure a visually stunning and durable backsplash that enhances the beauty and functionality of your home.
Frequently Asked Questions about Where Do You Start Tiling A Backsplash
Was this page helpful?
At Storables.com, we guarantee accurate and reliable information. Our content, validated by Expert Board Contributors, is crafted following stringent Editorial Policies. We're committed to providing you with well-researched, expert-backed insights for all your informational needs.

0 thoughts on “Where Do You Start Tiling A Backsplash”