Home>Furniture & Design>Bathroom Fixtures>How Do You Install A Shower Tile
Bathroom Fixtures
How Do You Install A Shower Tile
Modified: August 27, 2024
Learn how to install shower tile in your bathroom with our step-by-step guide. Find expert tips and advice on bathroom fixtures installation.
(Many of the links in this article redirect to a specific reviewed product. Your purchase of these products through affiliate links helps to generate commission for Storables.com, at no extra cost. Learn more)
Introduction
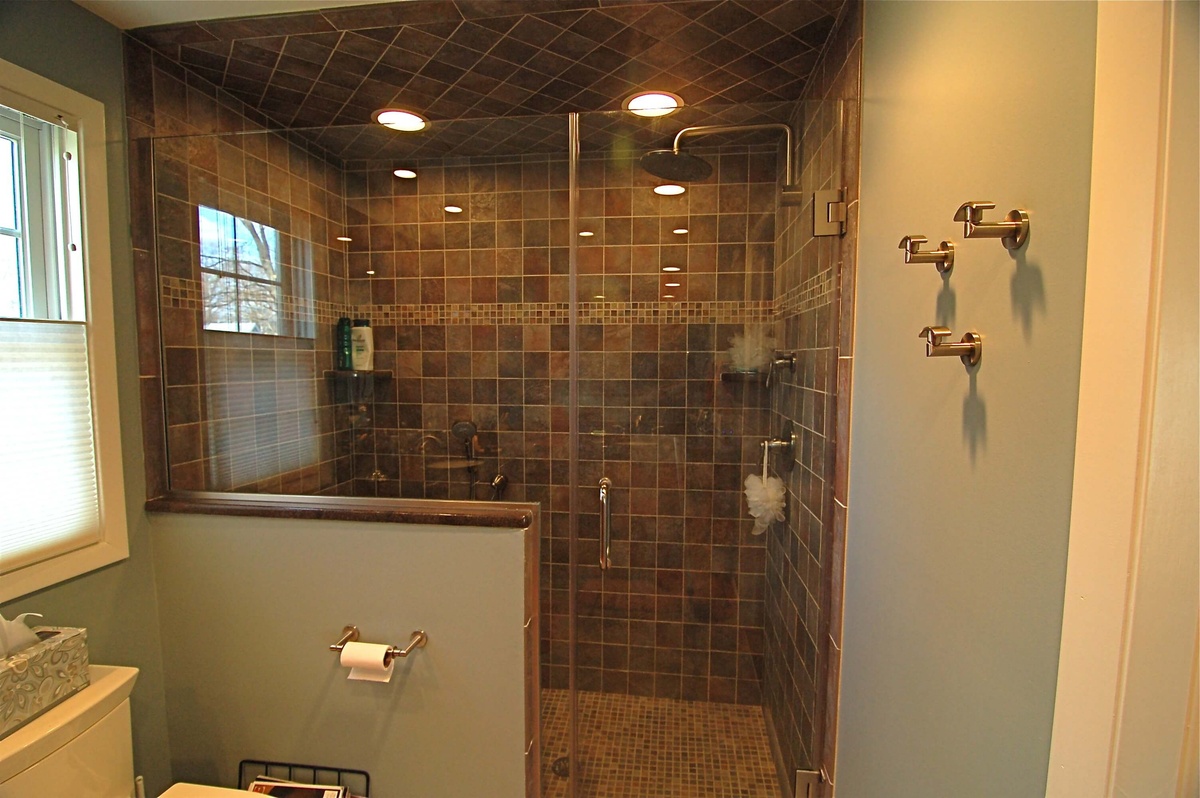
When it comes to upgrading your bathroom, installing new shower tiles can completely transform the space, adding both style and functionality. Whether you’re looking to enhance the aesthetics of your shower or replace damaged tiles, knowing how to install shower tiles is a valuable skill that can save you money and give you the satisfaction of completing a DIY project.
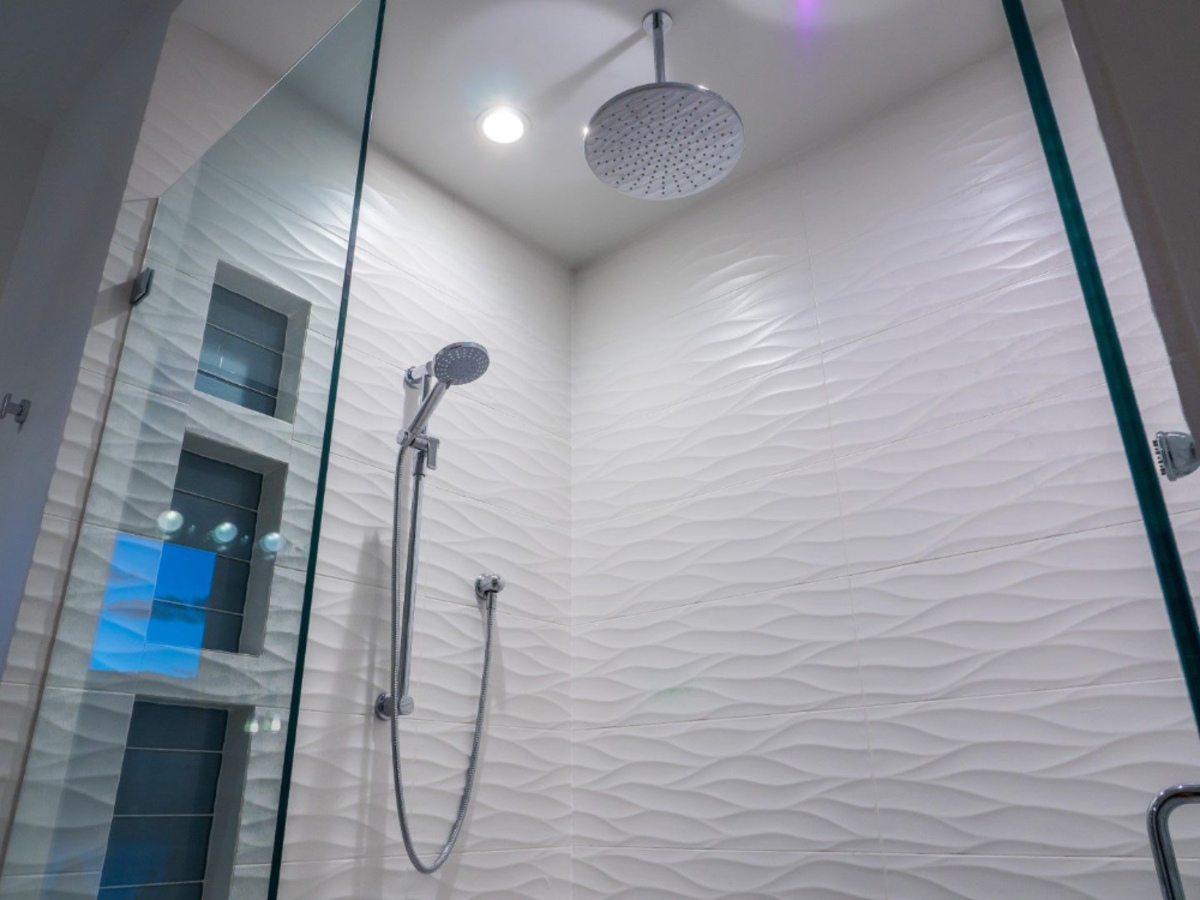
Shower tiles come in a variety of materials, sizes, and designs, allowing you to customize your shower to suit your personal taste and the overall aesthetic of your bathroom. From classic ceramic tiles to modern glass mosaics, the options are virtually endless, offering you the opportunity to create a shower space that reflects your unique style.
In this comprehensive guide, we will walk you through the step-by-step process of installing shower tiles, from preparing the shower area to grouting and sealing the tiles. By the end of this article, you’ll have the knowledge and confidence to tackle this rewarding home improvement project and achieve professional-looking results.
Key Takeaways:
- Transform your bathroom with a DIY shower tile installation, adding style and functionality while saving money. Follow the step-by-step guide for professional-looking results.
- Ensure a successful shower tile installation by meticulously preparing the area, gathering necessary materials and tools, and grouting and sealing tiles for longevity and visual appeal.
Read more: How Do You Install Shower Plumbing
Preparing the Shower Area
Before diving into the tile installation process, it’s crucial to properly prepare the shower area to ensure a successful and long-lasting outcome. Here are the key steps to take when preparing the shower for tile installation:
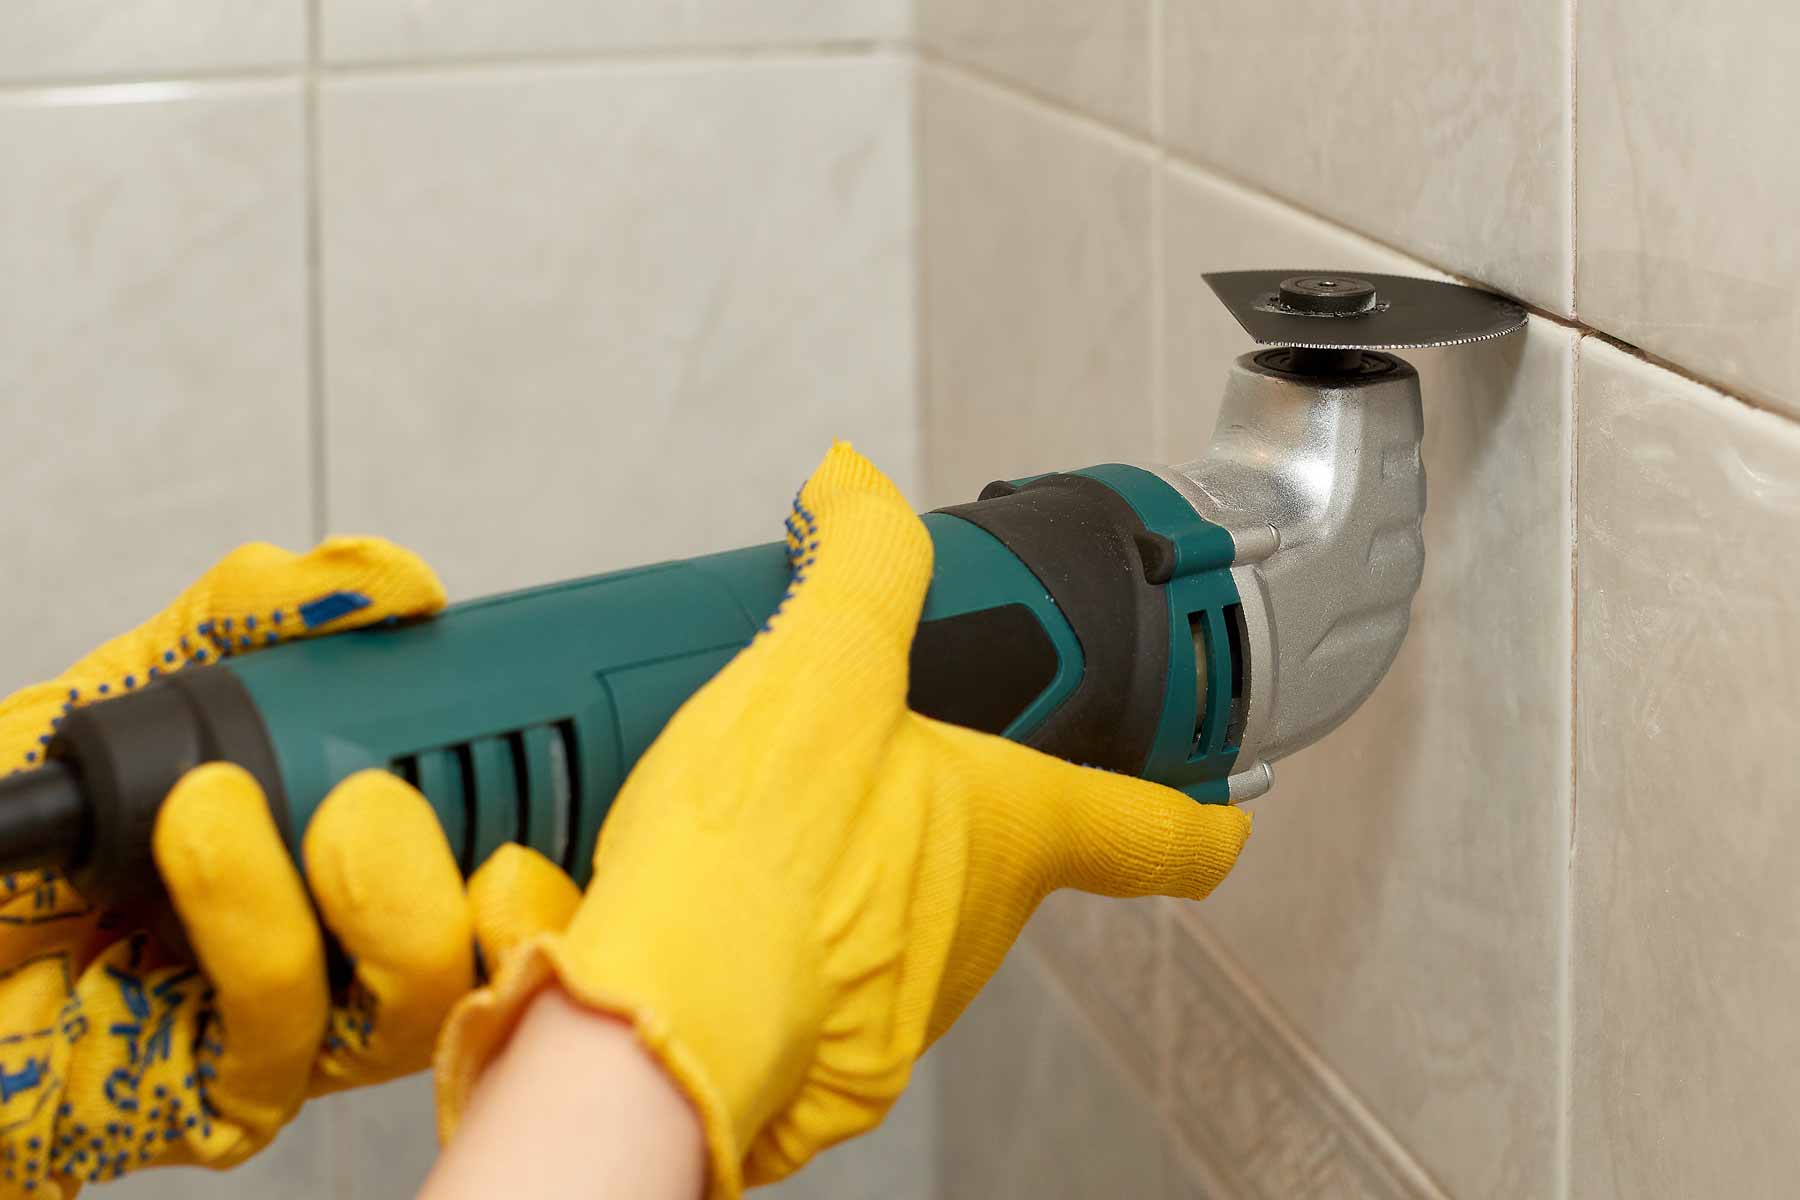
- Clean and Remove Existing Materials: Begin by thoroughly cleaning the shower walls and removing any existing tiles, adhesive, or grout. Use a scraper and a suitable cleaning solution to eliminate any debris, mold, or mildew. Ensure that the surface is smooth and free of any remnants that could affect the new tile installation.
- Inspect and Repair: Take the time to inspect the shower walls for any signs of damage, such as water leaks, cracks, or weakened areas. Address any structural issues and make necessary repairs before proceeding with the tile installation. A sound and stable substrate are essential for the longevity of the new tiles.
- Measure and Plan: Accurately measure the shower walls to determine the amount of tile needed for the project. Consider the layout and design of the tiles, ensuring that the pattern and placement will complement the overall look of the bathroom. Planning the tile layout in advance can help minimize waste and ensure a visually appealing result.
- Protect Surrounding Areas: Safeguard the surrounding areas of the shower, such as the bathtub, flooring, and fixtures, from potential damage during the installation process. Use drop cloths, plastic sheeting, or painter’s tape to cover and secure these areas, preventing any accidental spills or debris from causing harm.
- Ensure Adequate Ventilation: Proper ventilation is crucial during and after the tile installation to facilitate the drying process and prevent moisture-related issues. If necessary, ensure that the bathroom is well-ventilated or consider using fans and dehumidifiers to promote air circulation and expedite the drying of adhesives and grout.
By meticulously preparing the shower area, you set the stage for a smooth and successful tile installation process, laying the foundation for a stunning and durable shower space that you can enjoy for years to come.
Gathering the Necessary Materials and Tools
Before embarking on the installation of shower tiles, it’s essential to gather all the required materials and tools to ensure a seamless and efficient process. Here’s a comprehensive list of the items you’ll need for the project:
Materials:
- Shower Tiles: Select high-quality tiles in the material, color, and size of your choice. Ceramic, porcelain, natural stone, and glass tiles are popular options, each offering unique aesthetics and durability.
- Tile Adhesive: Choose a suitable adhesive or thinset that is compatible with your selected tiles and the shower substrate. Opt for a waterproof adhesive to withstand the moist environment of the shower.
- Grout: Acquire grout in a color that complements your tiles and is suitable for wet areas. Epoxy grout is an excellent choice for showers due to its water-resistant and mold-resistant properties.
- Waterproofing Membrane: If not already present, consider installing a waterproofing membrane to protect the shower walls from moisture and prevent water damage behind the tiles.
- Sealer: Depending on the type of tiles used, you may need a sealer to protect and enhance the appearance of natural stone or porous tiles.
- Backer Board or Cement Board: If the existing substrate is inadequate or damaged, consider installing a backer board or cement board to provide a stable and waterproof surface for the tiles.
- Primer: Use a primer specifically designed for the shower area to promote adhesion and ensure the longevity of the tile installation.
Tools:
- Tile Cutter or Wet Saw: Depending on the type of tiles, you’ll need a tile cutter or a wet saw to accurately cut the tiles to fit the shower walls and corners.
- Trowel: Select a notched trowel appropriate for the size and type of tiles, ensuring proper adhesive coverage during installation.
- Grout Float: A grout float is essential for applying and smoothing the grout into the tile joints, ensuring a professional finish.
- Level: Use a level to ensure that the tiles are installed evenly and straight, preventing any visual imperfections in the final result.
- Spacers: Tile spacers help maintain consistent spacing between the tiles, creating uniform grout lines and a polished appearance.
- Mixing Tools: If using powdered adhesive or grout, have mixing tools such as a bucket, drill mixer, and a margin trowel on hand for proper blending.
- Protective Gear: Prioritize safety by wearing goggles, gloves, and a dust mask when handling tiles, adhesives, and grout to protect yourself from potential hazards.
By ensuring that you have all the necessary materials and tools at your disposal, you can streamline the installation process and minimize interruptions, bringing you one step closer to enjoying your newly tiled shower.
Read more: DIY Guide To Installing A Tile Shower
Installing the Shower Tile
With the shower area prepared and all materials and tools gathered, it’s time to embark on the exciting process of installing the shower tiles. Follow these step-by-step guidelines to achieve a professional and visually stunning result:
1. Apply the Adhesive:
Using a notched trowel, spread the appropriate tile adhesive or thinset onto the shower wall in small, manageable sections. Work methodically, ensuring even coverage and creating ridges in the adhesive to promote strong adhesion between the tiles and the wall.
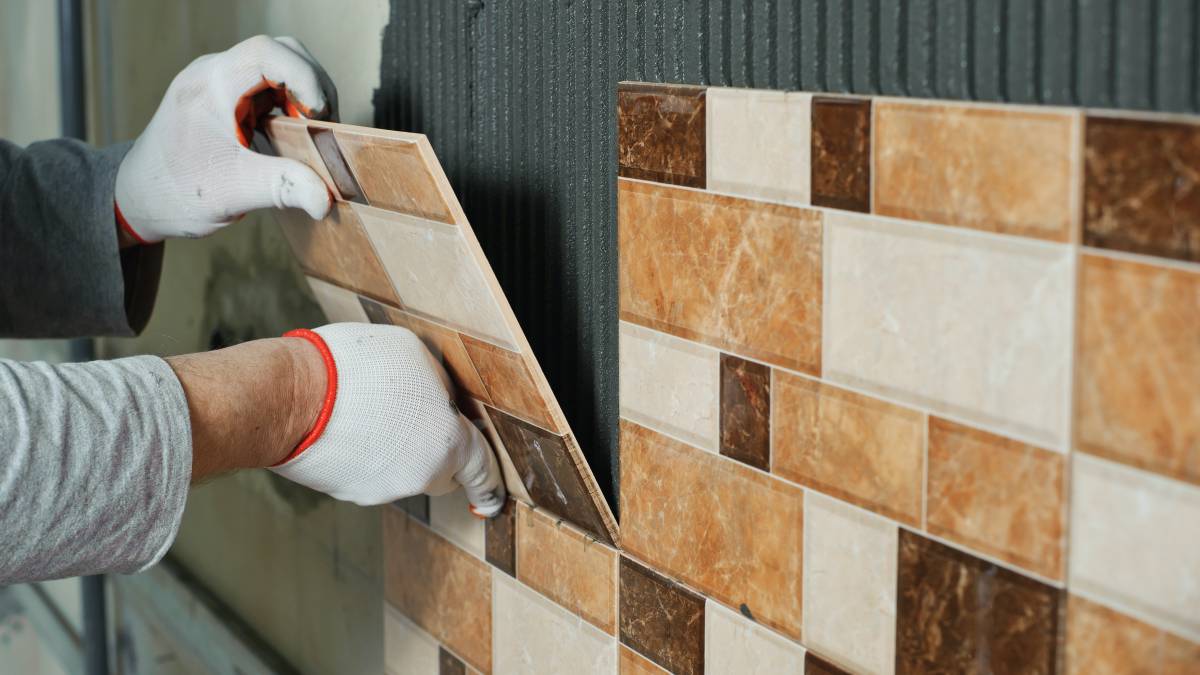
2. Place the Tiles:
Carefully press each tile into the adhesive, using spacers to maintain consistent spacing between the tiles. Check the alignment and level of each tile as you progress to ensure a uniform and visually appealing installation. If necessary, use a tile cutter or wet saw to trim the tiles to fit the edges and corners of the shower.
3. Allow for Setting Time:
After placing the tiles, allow the adhesive to set and cure according to the manufacturer’s instructions. This typically involves waiting for the adhesive to dry and create a strong bond with the tiles and the wall. Avoid disturbing the tiles during this crucial setting period.
Read more: How To Install A Shower Curtain Rod On Tile
4. Grout the Joints:
Once the tiles are firmly set, use a grout float to apply the grout, ensuring that it fills the joints between the tiles completely. Work the grout into the joints at a 45-degree angle, removing any excess grout from the tile surfaces as you progress. Clean the tiles with a damp sponge to achieve a clean and polished finish.
5. Final Cleaning and Inspection:
After the grout has set for the specified time, perform a final cleaning of the tiles to remove any grout haze or residue. Inspect the entire tiled surface, checking for any inconsistencies, loose tiles, or grout imperfections. Make any necessary touch-ups or adjustments before proceeding to the sealing stage.
By meticulously following these steps, you can achieve a professional and durable installation of shower tiles, creating a visually captivating and functional shower space that enhances the overall appeal of your bathroom.
Grouting and Sealing
Once the shower tiles are securely in place, the crucial steps of grouting and sealing come into play, adding the finishing touches to the installation and ensuring the longevity and resilience of the tiled surface.
1. Grouting the Tiles:
Grouting is a critical stage that not only fills the spaces between the tiles but also contributes to the overall aesthetic and durability of the installation. Follow these steps to effectively grout the shower tiles:
- Prepare the Grout: Mix the grout according to the manufacturer’s instructions, ensuring a smooth and lump-free consistency. Use a grout float to apply the grout, working it into the joints at a 45-degree angle to ensure complete coverage.
- Clean the Excess: Once the grout is applied, use a damp sponge to clean the tiles and remove any excess grout from the tile surfaces. Rinse the sponge frequently and avoid applying excessive pressure to prevent dislodging the grout from the joints.
- Final Cleaning: After the initial cleaning, perform a final pass with a clean, damp sponge to ensure that the grout lines are smooth and free of any haze or residue. Allow the grout to cure for the recommended time before proceeding to the sealing stage.
Read more: DIY Guide To Installing A Subway Tile Shower
2. Sealing the Tiles:
Sealing the shower tiles is a crucial step, especially when using natural stone or porous tiles, to protect them from moisture, stains, and mold growth. Here’s how to effectively seal the tiles:
- Select the Appropriate Sealer: Choose a high-quality sealer that is suitable for the type of tiles used in the shower. Penetrating sealers are ideal for natural stone and porous tiles, providing comprehensive protection without altering the appearance of the tiles.
- Apply the Sealer: Using a clean, dry cloth or applicator recommended by the sealer manufacturer, apply the sealer to the tiles in smooth, even strokes. Ensure that the entire surface is covered, allowing the sealer to penetrate the tiles and grout for the specified time.
- Buff and Polish: After the sealer has been absorbed, use a clean, dry cloth to buff the tiles and remove any excess sealer from the surface. This step enhances the luster of the tiles and ensures a uniform appearance throughout the shower area.
By meticulously grouting and sealing the shower tiles, you not only enhance their appearance but also safeguard them against moisture-related issues, ensuring a beautiful and long-lasting shower installation that adds value and elegance to your bathroom.
Conclusion
Embarking on the journey of installing shower tiles is a rewarding endeavor that allows you to personalize and elevate the aesthetics of your bathroom while adding value to your home. By following the step-by-step process outlined in this guide, you can achieve a professional and visually captivating result that will stand the test of time.
From meticulously preparing the shower area to gathering the necessary materials and tools, each stage of the installation process plays a crucial role in ensuring the success of the project. The careful selection of high-quality tiles, adhesives, and grout, coupled with precise installation techniques, sets the foundation for a stunning and durable shower space.
Furthermore, the critical steps of grouting and sealing not only contribute to the visual appeal of the tiles but also provide essential protection against moisture, stains, and mold growth. By grouting the tiles with precision and sealing them effectively, you enhance their longevity and maintain their pristine appearance for years to come.
As you admire the transformation of your shower space, take pride in the knowledge that you have acquired a valuable skill and completed a significant home improvement project. The newly installed shower tiles not only reflect your personal style and attention to detail but also contribute to the overall ambiance and functionality of your bathroom.
With the guidance provided in this comprehensive guide, you are well-equipped to tackle the installation of shower tiles with confidence and precision, creating a striking and inviting shower space that enhances the beauty and comfort of your home.
Embrace the transformative power of shower tile installation, and revel in the satisfaction of a job well done as you enjoy the luxurious and revitalized ambiance of your newly tiled shower.
Frequently Asked Questions about How Do You Install A Shower Tile
Was this page helpful?
At Storables.com, we guarantee accurate and reliable information. Our content, validated by Expert Board Contributors, is crafted following stringent Editorial Policies. We're committed to providing you with well-researched, expert-backed insights for all your informational needs.


0 thoughts on “How Do You Install A Shower Tile”