Home>Furniture & Design>Interior Design Trends>How To Install Glass Tile Backsplash
Interior Design Trends
How To Install Glass Tile Backsplash
Modified: August 20, 2024
Learn how to enhance your kitchen with the latest interior design trends by installing a stunning glass tile backsplash. Discover step-by-step instructions and expert tips. Elevate your space today!
(Many of the links in this article redirect to a specific reviewed product. Your purchase of these products through affiliate links helps to generate commission for Storables.com, at no extra cost. Learn more)
Introduction
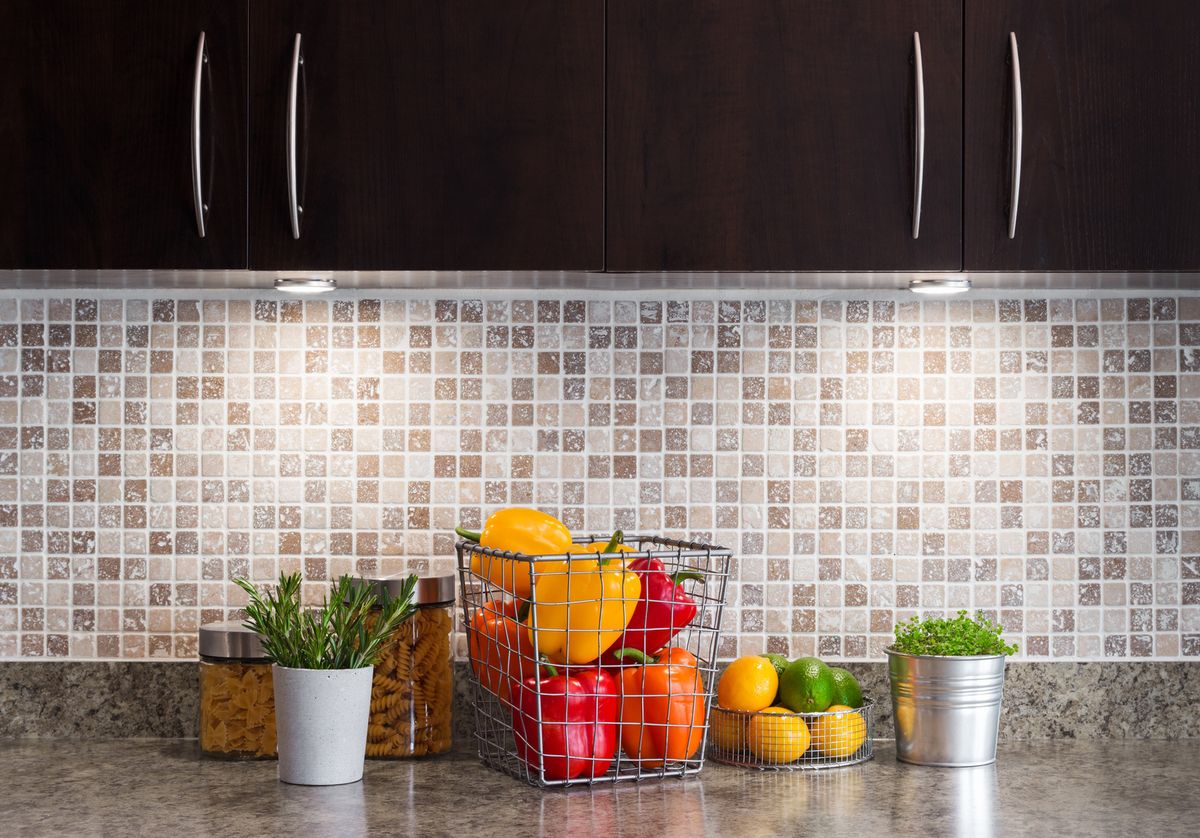
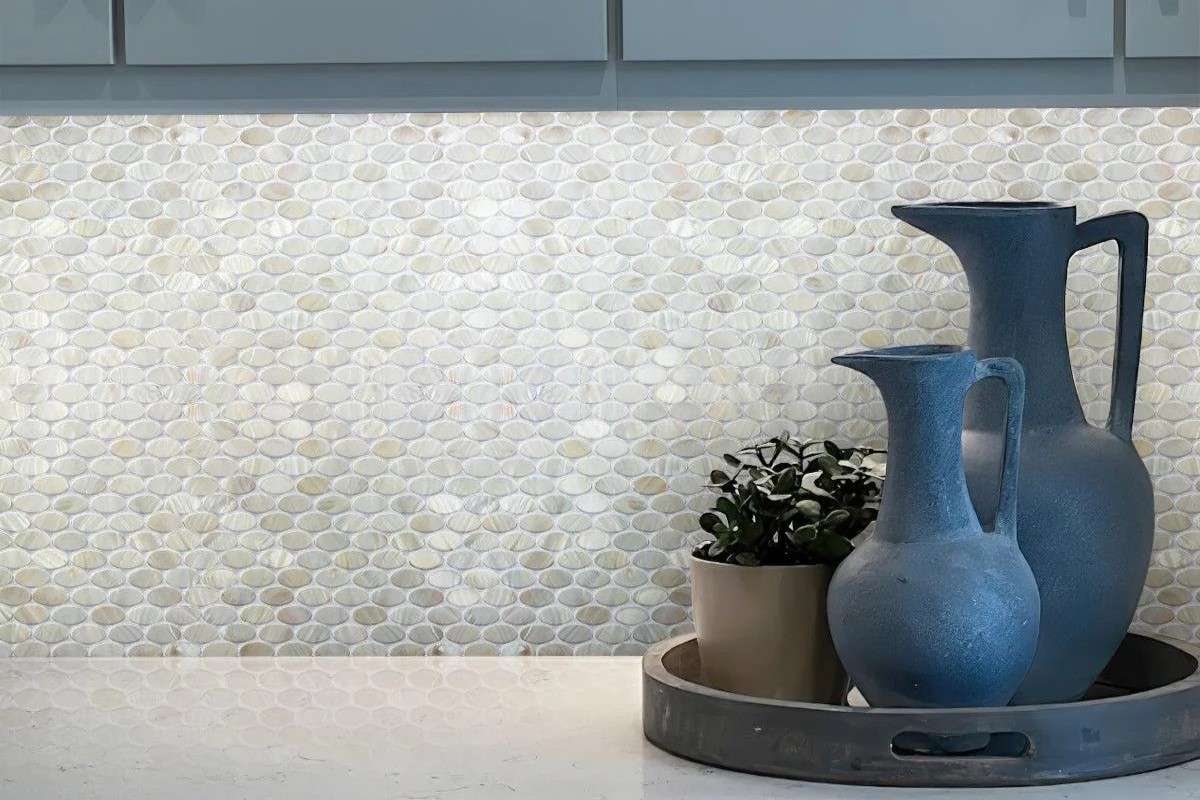
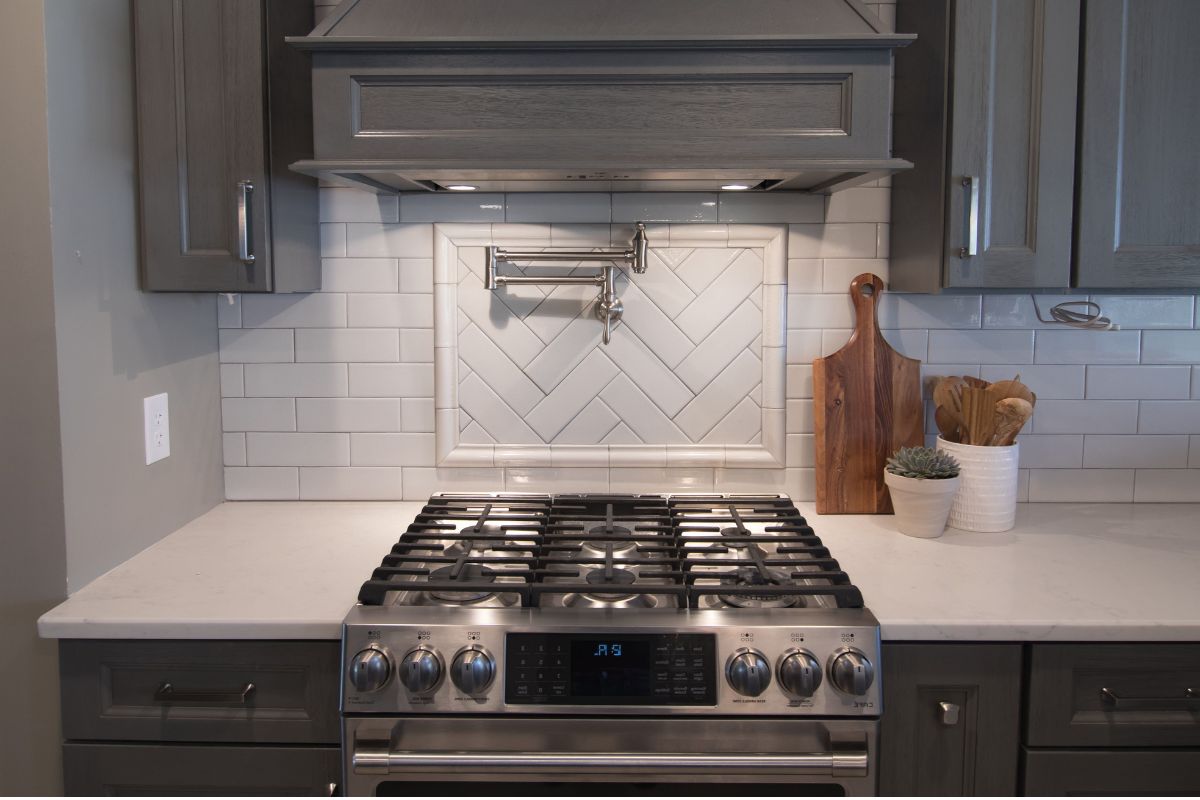
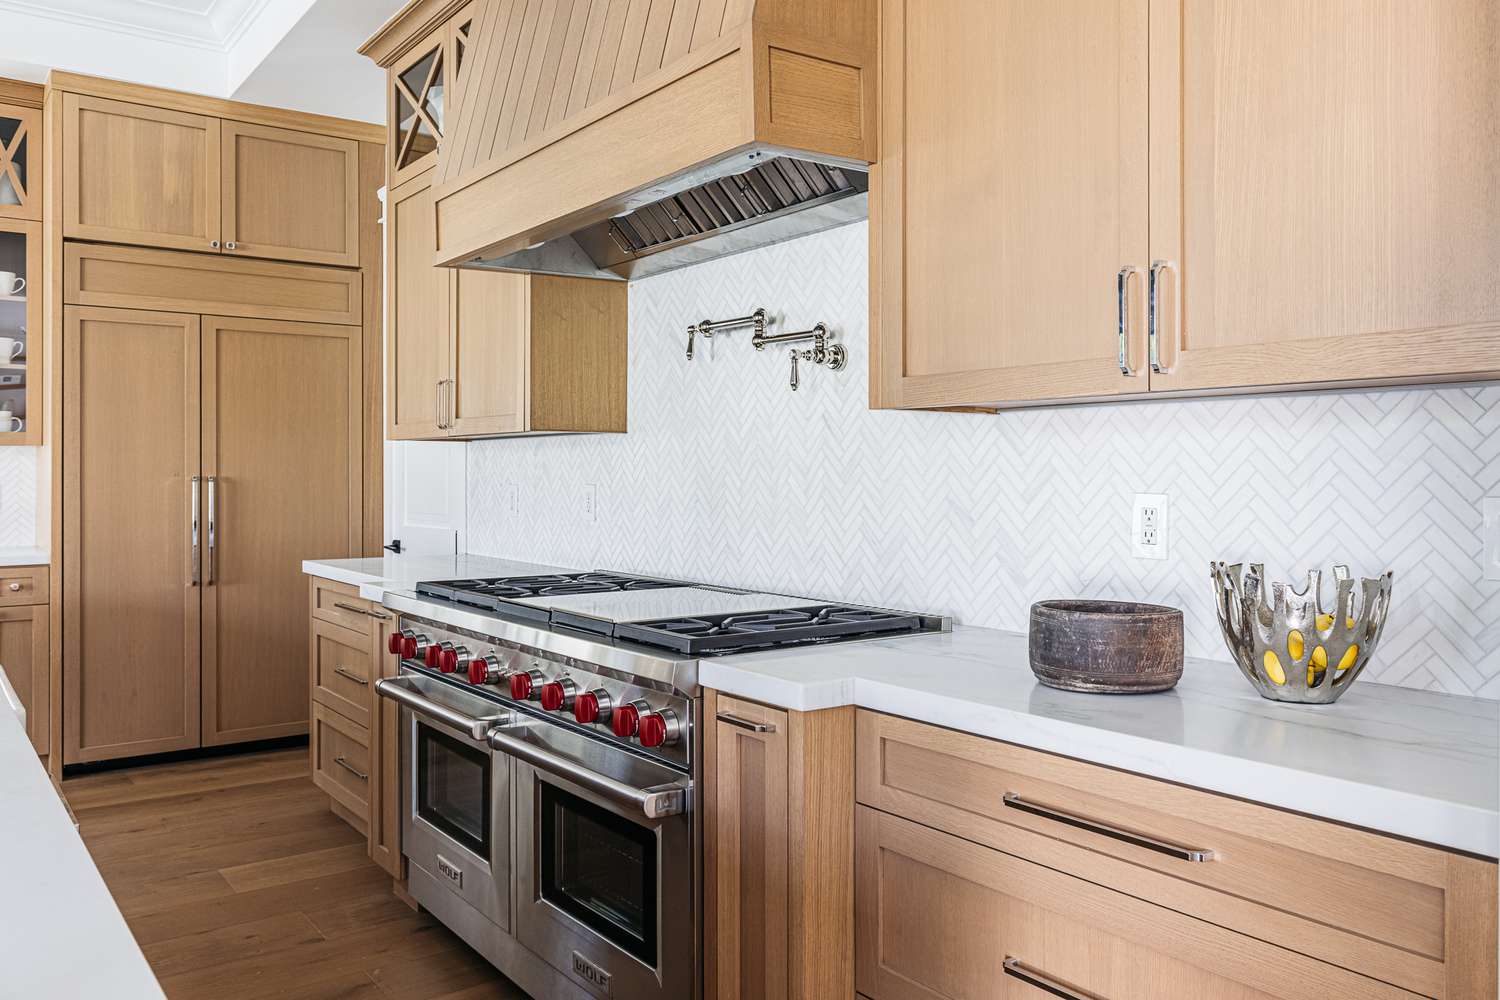
Installing a glass tile backsplash is an excellent way to add a touch of elegance and modernity to your kitchen or bathroom. The sleek and reflective surface of glass tiles can instantly transform the look and feel of the space, creating a stunning focal point that enhances the overall aesthetic appeal. Whether you are a seasoned DIY enthusiast or a novice looking to embark on a home improvement project, installing a glass tile backsplash can be a rewarding and achievable endeavor with the right guidance.
In this comprehensive guide, we will walk you through the step-by-step process of installing a glass tile backsplash, from gathering the necessary materials and tools to grouting and sealing the tiles. By following these instructions, you can elevate the style and functionality of your kitchen or bathroom while adding value to your home.
Embarking on a home improvement project such as installing a glass tile backsplash not only allows you to personalize your living space but also presents an opportunity to unleash your creativity. The versatility of glass tiles offers an array of design possibilities, allowing you to experiment with different patterns, colors, and textures to achieve a look that complements your personal style and existing decor.
Whether you envision a sleek and contemporary design with monochromatic glass tiles or prefer to incorporate vibrant hues for a pop of color, the installation process remains consistent, making it accessible for individuals with varying levels of experience. With careful planning and attention to detail, you can achieve professional-looking results that will leave a lasting impression.
As we delve into the intricacies of installing a glass tile backsplash, it's important to approach the project with patience and precision. Each step plays a crucial role in ensuring a durable and visually appealing outcome, and we will provide valuable insights and tips to help you navigate the process with confidence.
Now, let's embark on this exciting journey of transforming your kitchen or bathroom with the installation of a stunning glass tile backsplash. Get ready to unleash your creativity and elevate the aesthetic appeal of your living space!
Key Takeaways:
- Elevate your kitchen or bathroom with a stunning glass tile backsplash. Follow the step-by-step guide for a rewarding DIY project that adds elegance and value to your home.
- Unleash your creativity and personalize your living space with versatile glass tiles. Achieve professional results with precision and attention to detail, creating a visually striking focal point.
Step 1: Gather Materials and Tools
Before diving into the installation process, it's essential to gather all the necessary materials and tools to ensure a smooth and efficient workflow. Here's a comprehensive list of items you'll need to embark on your glass tile backsplash installation journey:
Materials:
-
Glass Tiles: Select high-quality glass tiles in your preferred color, size, and style. Ensure that the tiles are suitable for use as a backsplash and are designed to withstand the conditions of the installation area.
-
Tile Adhesive: Choose a premium-quality tile adhesive that is compatible with glass tiles. Opt for a non-sagging adhesive to prevent the tiles from slipping during installation.
-
Grout: Select a grout color that complements your glass tiles and enhances the overall aesthetic of the backsplash. Consider using epoxy grout for its durability and stain-resistant properties.
-
Tile Spacers: These small, plastic spacers help maintain consistent spacing between the tiles, ensuring a professional finish.
-
Backer Board or Tile Mat: Depending on the existing surface, you may need a suitable backer board or tile mat to provide a stable and even base for the tiles.
-
Primer: If the installation surface is porous, a primer may be required to promote proper adhesion of the tile adhesive.
-
Sealer: Consider using a high-quality sealer to protect the grout and glass tiles from moisture and stains, especially in areas prone to splashes and spills.
Tools:
-
Tile Cutter or Wet Saw: A tile cutter or wet saw is essential for accurately cutting glass tiles to fit around obstacles and along edges.
-
Notched Trowel: Choose a notched trowel with the appropriate notch size recommended by the adhesive manufacturer for spreading the adhesive evenly.
-
Grout Float: This tool is used to apply and pack the grout into the spaces between the tiles, ensuring a uniform and professional finish.
-
Rubber Mallet: A rubber mallet is handy for gently tapping the tiles into place without causing damage.
-
Tile Nippers: These are useful for making small, precise cuts to accommodate outlets, switches, or other obstructions.
-
Level: Ensure that the tiles are installed straight and level by using a spirit level throughout the installation process.
-
Sponge and Bucket: These are essential for cleaning excess grout and adhesive from the tiles during and after installation.
By gathering these materials and tools, you'll be well-prepared to commence the installation process with confidence and efficiency. With the foundation laid and the necessary resources at your disposal, you're ready to embark on the exciting journey of transforming your space with a stunning glass tile backsplash.
Step 2: Prepare the Surface
Preparing the surface is a critical step that sets the stage for a successful glass tile backsplash installation. The goal is to create a clean, smooth, and stable surface that promotes optimal adhesion and ensures a professional finish. Here's a detailed breakdown of the essential tasks involved in preparing the surface for your glass tile backsplash:
-
Assess the Existing Surface: Begin by thoroughly examining the existing surface where the glass tile backsplash will be installed. Whether it's drywall, plaster, or another material, it's crucial to ensure that the surface is structurally sound and free from any damage or irregularities that could affect the installation.
-
Clean and Remove Debris: Use a mild detergent solution and a sponge to clean the surface, removing any dirt, grease, or residue that could hinder the adhesion of the tiles and adhesive. Additionally, ensure that the surface is completely dry before proceeding to the next steps.
-
Repair Imperfections: Address any imperfections such as cracks, holes, or uneven areas on the surface. Fill in cracks and holes with a suitable patching compound, and use sandpaper to smooth out any rough or uneven spots. This step is crucial for achieving a seamless and professional-looking installation.
-
Apply Primer (If Necessary): If the surface is porous or highly absorbent, applying a primer can help promote better adhesion of the tile adhesive. Follow the manufacturer's instructions for the specific primer product, ensuring thorough coverage and adequate drying time.
-
Install Backer Board or Tile Mat (If Needed): In some cases, particularly when installing the backsplash over a surface that is not suitable for direct tiling, such as drywall, it may be necessary to install a backer board or a tile mat. These materials provide a stable and even base for the tiles, enhancing the longevity and durability of the installation.
By meticulously preparing the surface, you are laying the groundwork for a successful glass tile backsplash installation. Attention to detail during this phase is crucial, as it directly impacts the quality and longevity of the finished installation. With the surface meticulously prepped and ready, you are now poised to move on to the next steps of the installation process, bringing you one step closer to enjoying the stunning transformation that a glass tile backsplash can bring to your space.
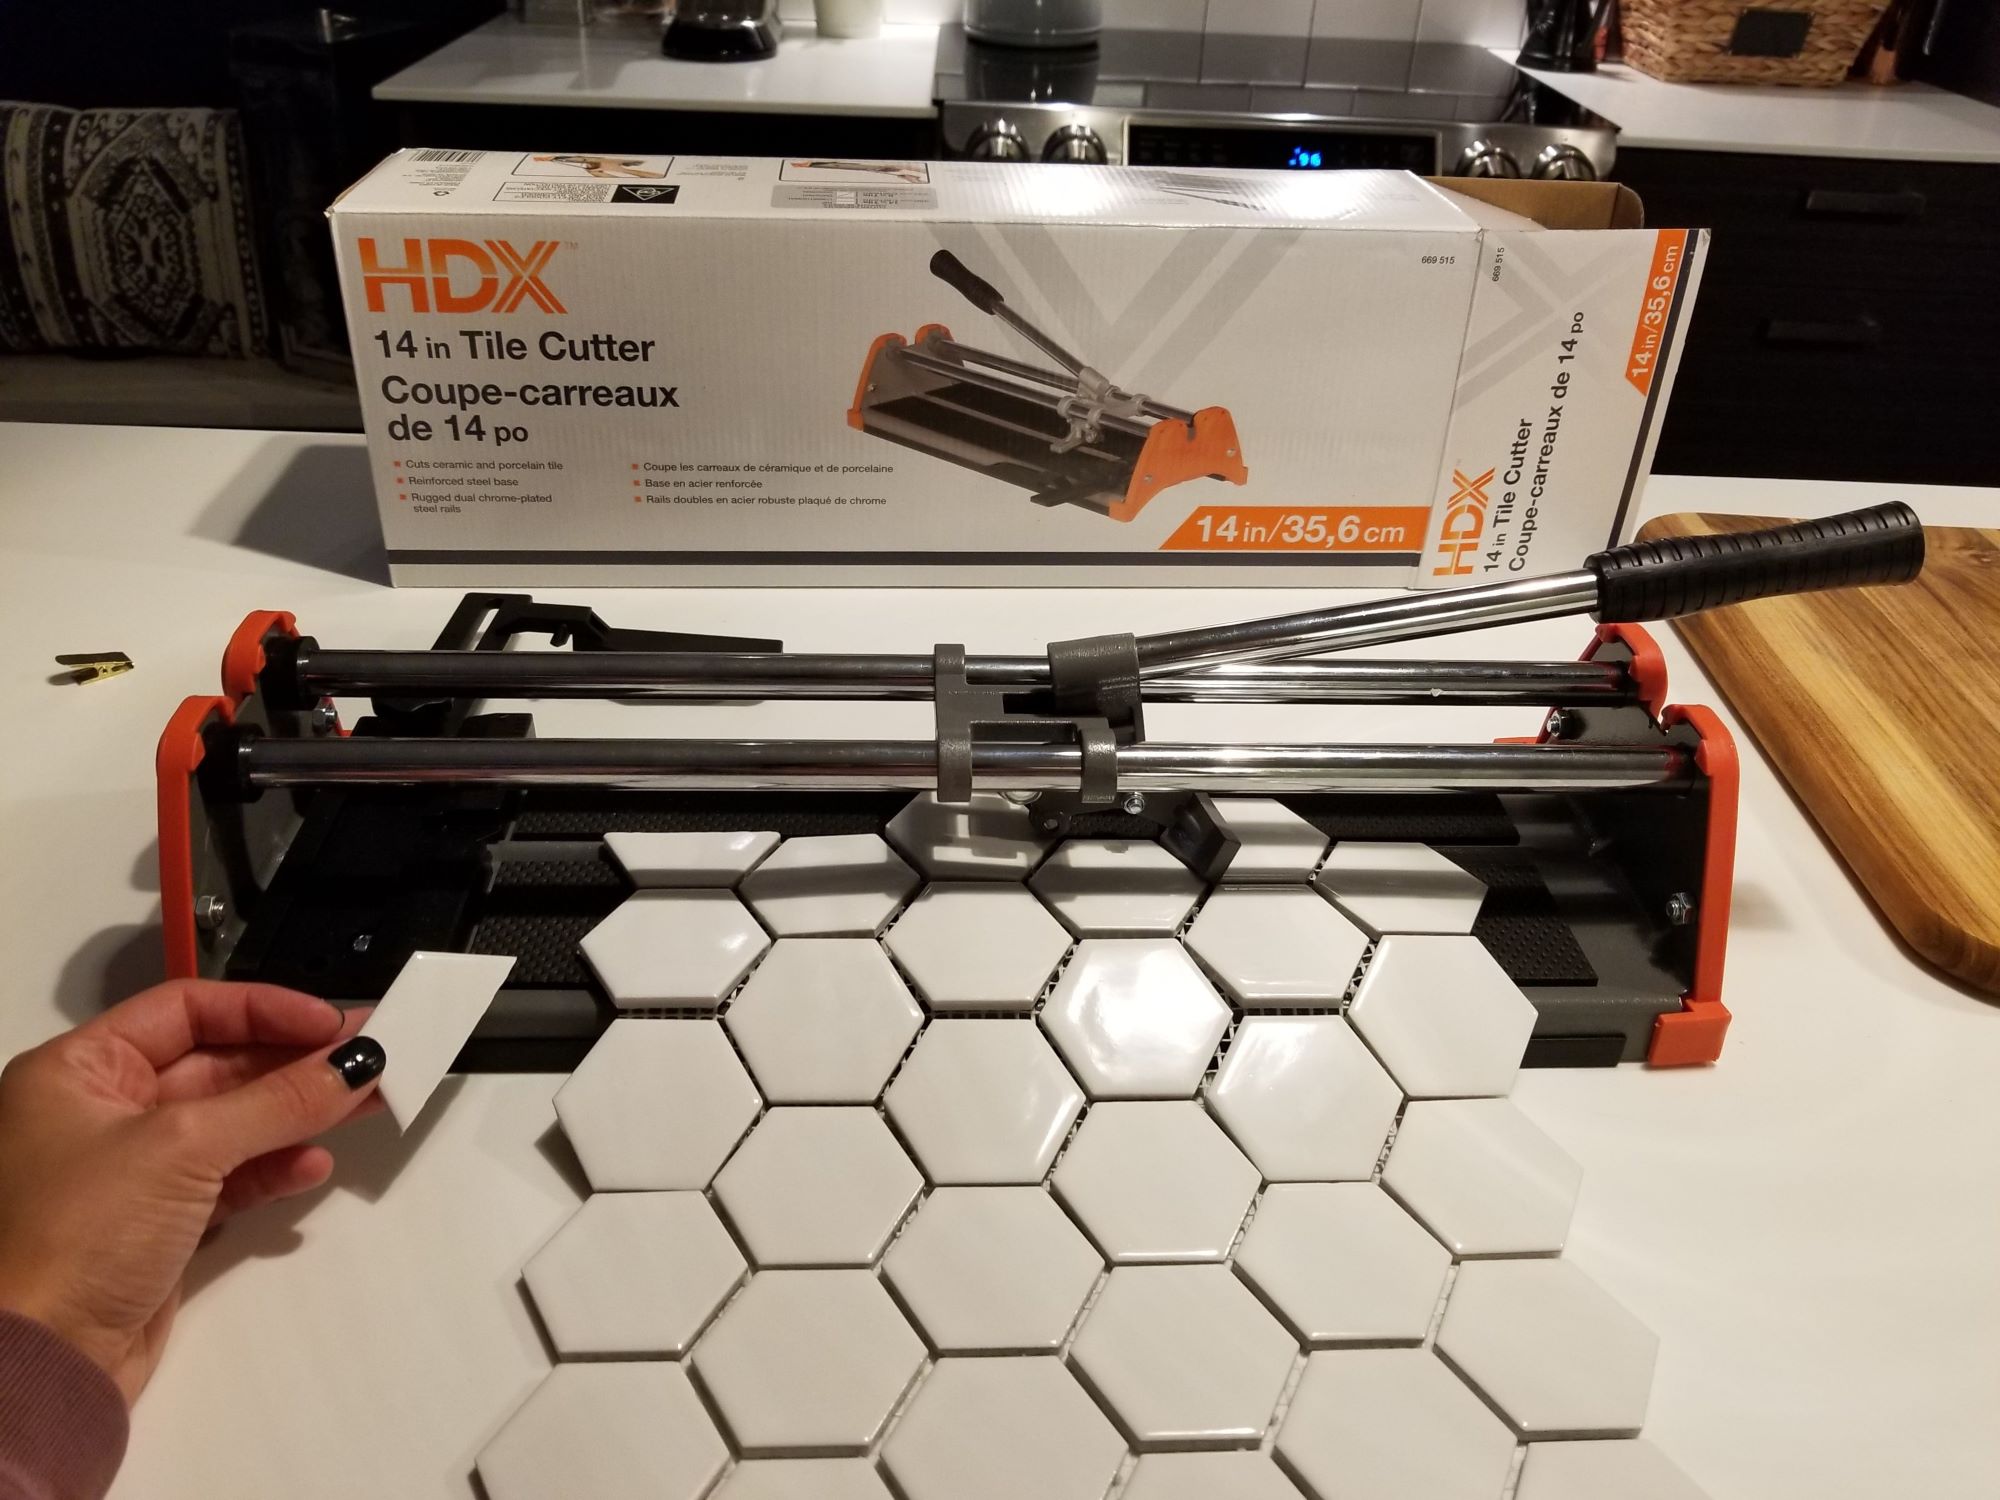
Step 3: Measure and Cut the Tiles
Accurate measurement and precise cutting of the glass tiles are pivotal to achieving a seamless and visually striking glass tile backsplash. This step demands meticulous attention to detail and careful execution to ensure that the tiles fit snugly and align perfectly within the designated space. Here's a comprehensive guide to navigating the process of measuring and cutting the tiles for your glass tile backsplash installation:
Measure the Space
Begin by measuring the area where the glass tile backsplash will be installed. Use a tape measure to determine the dimensions of the space, taking into account any obstacles such as electrical outlets, switches, or other fixtures. It's crucial to measure both the length and height of the installation area to accurately calculate the number of tiles needed and to determine the precise cuts required to fit the tiles around obstacles.
Plan the Layout
Before cutting any tiles, carefully plan the layout of the tiles to ensure a visually appealing and balanced design. Consider the placement of full tiles and the distribution of cuts to achieve a symmetrical and harmonious arrangement. Dry-lay the tiles without adhesive to visualize the layout and make any necessary adjustments before proceeding to the cutting phase.
Mark and Cut the Tiles
Using a glass cutter or a wet saw equipped with a diamond blade, mark the cutting lines on the tiles with a pencil or a marker. When cutting glass tiles, it's essential to wear safety goggles and work in a well-ventilated area to minimize the risk of inhaling glass particles. Score the tiles along the marked lines, applying even pressure to create clean and precise cuts. For curved or irregular cuts, utilize tile nippers to carefully trim the tiles to the desired shape.
Read more: How To Remove Glass Tile Backsplash
Verify the Fit
After cutting the tiles, verify the fit by dry-laying them in the installation area. Ensure that the cuts align seamlessly with any obstacles and that the overall layout maintains a cohesive and balanced appearance. Make any necessary adjustments to the cuts or layout before proceeding to the next phase of the installation process.
By meticulously measuring and cutting the glass tiles, you are laying the groundwork for a visually stunning and professionally executed glass tile backsplash. The precision and attention to detail invested in this phase will contribute to the overall aesthetic impact of the installation, ensuring a seamless and visually captivating result. With the tiles accurately measured and cut, you are now ready to proceed to the next steps of the installation process, bringing you closer to the realization of your vision for a striking glass tile backsplash.
Step 4: Apply Adhesive
Applying the adhesive is a pivotal step in the installation of a glass tile backsplash, as it directly influences the stability and longevity of the tiles. The adhesive serves as the bonding agent that secures the glass tiles to the prepared surface, creating a durable and visually appealing installation. Here's a detailed breakdown of the process of applying adhesive for your glass tile backsplash:
Selecting the Right Adhesive
Choosing the appropriate adhesive is essential for ensuring a strong and lasting bond between the glass tiles and the installation surface. Opt for a high-quality, polymer-modified thin-set mortar that is specifically formulated for use with glass tiles. It's important to follow the manufacturer's recommendations and ensure that the adhesive is suitable for the specific type and size of glass tiles being installed.
Mixing the Adhesive
Prepare the adhesive according to the manufacturer's instructions, ensuring the correct ratio of water to adhesive powder. Use a clean bucket and a drill with a mixing paddle to achieve a smooth and lump-free consistency. Allow the adhesive to slake as recommended, which allows the components to fully combine and activate, ensuring optimal bonding properties.
Read more: How To Clean Glass Backsplash Tiles
Applying the Adhesive
Using a notched trowel, apply a uniform layer of adhesive to a manageable section of the installation area. The size of the section will depend on the setting time of the adhesive and your comfort level working with it. Hold the trowel at a consistent angle to create ridges in the adhesive, which promote proper coverage and adhesion when the tiles are placed.
Back-Buttering the Tiles
To enhance the bond between the glass tiles and the adhesive, consider back-buttering the tiles by applying a thin, even layer of adhesive to the back of each tile before setting it in place. This technique ensures full coverage and eliminates air pockets, resulting in a secure and stable installation.
Setting the Tiles
Carefully press each glass tile into the adhesive, using a slight twisting motion to ensure a strong bond. Insert tile spacers to maintain consistent spacing between the tiles, creating straight grout lines and a professional finish. Continuously check the alignment and level of the tiles as you work to ensure a precise and visually appealing installation.
Allowing for Setting Time
After setting the tiles, allow the adhesive to cure for the recommended period specified by the manufacturer. This setting time is crucial for the adhesive to establish a strong bond with the glass tiles and the installation surface, ensuring the long-term integrity of the backsplash.
By meticulously applying the adhesive according to best practices, you are laying the foundation for a durable and visually striking glass tile backsplash. The precision and care invested in this phase contribute to the overall quality and longevity of the installation, ensuring that your space is enhanced with a stunning and professionally executed glass tile backsplash. With the tiles securely set in place, you are now ready to progress to the next steps of the installation process, bringing you closer to the realization of your vision for a captivating and functional backsplash.
Step 5: Install the Tiles
With the adhesive properly applied and cured, the next crucial step in the installation of a glass tile backsplash is setting the tiles in place. This phase demands precision, attention to detail, and a methodical approach to ensure that the tiles are aligned, level, and securely bonded to the surface. Here's a comprehensive guide to navigating the process of installing the glass tiles for your backsplash:
Setting the Tiles
Begin by carefully placing each glass tile onto the adhesive, pressing it firmly to ensure a strong bond. Use a slight twisting motion as you set the tiles, which helps to secure them in place and ensures optimal contact with the adhesive. Pay close attention to the alignment and spacing of the tiles, using tile spacers to maintain consistent grout lines and a professional finish.
Checking Alignment and Level
As you progress with setting the tiles, continuously check the alignment and level of each tile. A spirit level can be used to verify that the tiles are installed evenly and without any noticeable slopes or deviations. Ensuring that the tiles are level and aligned is essential for achieving a visually appealing and polished result.
Making Adjustments
In the event of any misaligned or unevenly set tiles, make timely adjustments by gently repositioning them before the adhesive sets completely. This proactive approach allows for minor corrections and ensures that the final installation meets the highest standards of precision and craftsmanship.
Read more: How To Put Up A Backsplash With Glass Tiles
Removing Excess Adhesive
Throughout the installation process, be mindful of any adhesive that may seep through the grout lines or accumulate on the surface of the tiles. Promptly remove any excess adhesive using a damp sponge or cloth, taking care not to disturb the position of the tiles.
Allowing for Cure Time
After all the tiles are set in place, allow the adhesive to cure fully according to the manufacturer's recommendations. This curing period is essential for the adhesive to establish a secure bond with the glass tiles and the installation surface, ensuring the long-term stability and durability of the backsplash.
By meticulously installing the glass tiles with precision and care, you are advancing toward the realization of a visually stunning and professionally executed glass tile backsplash. The attention to detail and methodical approach invested in this phase contribute to the overall quality and aesthetic impact of the installation, ensuring that your space is enhanced with a captivating and durable backsplash. With the tiles securely in place, you are now ready to proceed to the subsequent steps of the installation process, bringing you closer to the fulfillment of your vision for a striking and functional glass tile backsplash.
Step 6: Grout the Tiles
Grouting the tiles is a pivotal step that not only enhances the visual appeal of the glass tile backsplash but also contributes to the structural integrity and longevity of the installation. Grout serves as a protective and decorative element, filling the spaces between the tiles, securing them in place, and creating a cohesive and polished finish. Here's a detailed breakdown of the process of grouting the tiles for your glass tile backsplash:
Selecting the Grout
Choose a high-quality grout that complements the color and style of your glass tiles while aligning with your overall design vision. Epoxy grout is an excellent option for glass tile installations due to its durability, stain resistance, and low maintenance properties. Additionally, consider the width of the grout lines and select a grout that is suitable for the spacing between your tiles.
Mixing the Grout
Prepare the grout according to the manufacturer's instructions, ensuring the correct ratio of water to grout powder. Use a clean bucket and a mixing paddle to achieve a smooth and lump-free consistency. Allow the grout to slake as recommended, allowing the components to fully combine and activate, ensuring optimal performance.
Applying the Grout
Using a rubber grout float, apply the grout diagonally across the tiles, ensuring that the spaces between the tiles are completely filled. Work in small sections to prevent the grout from drying before it can be properly worked into the spaces. Hold the grout float at a 45-degree angle to the tiles, pressing the grout firmly into the joints.
Removing Excess Grout
After applying the grout, use the edge of the grout float to remove excess grout from the surface of the tiles. Hold the float at a 90-degree angle and scrape off the excess grout, taking care not to remove grout from the spaces between the tiles. Work diagonally across the tiles to achieve a smooth and even grout surface.
Cleaning the Tiles
Once the grout has set for a specific period as per the manufacturer's instructions, use a damp sponge to gently clean the surface of the tiles, removing any grout haze and smoothing the grout lines. Rinse the sponge frequently and avoid applying excessive pressure to prevent disturbing the grout lines.
Sealing the Grout
After the grout has fully cured, consider applying a high-quality grout sealer to protect the grout from stains, moisture, and discoloration. Follow the manufacturer's recommendations for the application of the sealer, ensuring thorough coverage and allowing adequate drying time.
By meticulously grouting the tiles with precision and care, you are elevating the visual impact and durability of your glass tile backsplash. The attention to detail and methodical approach invested in this phase contribute to the overall quality and aesthetic appeal of the installation, ensuring that your space is enhanced with a captivating and long-lasting backsplash. With the grout expertly applied and sealed, you have successfully completed a crucial phase of the installation process, bringing you closer to the realization of your vision for a striking and functional glass tile backsplash.
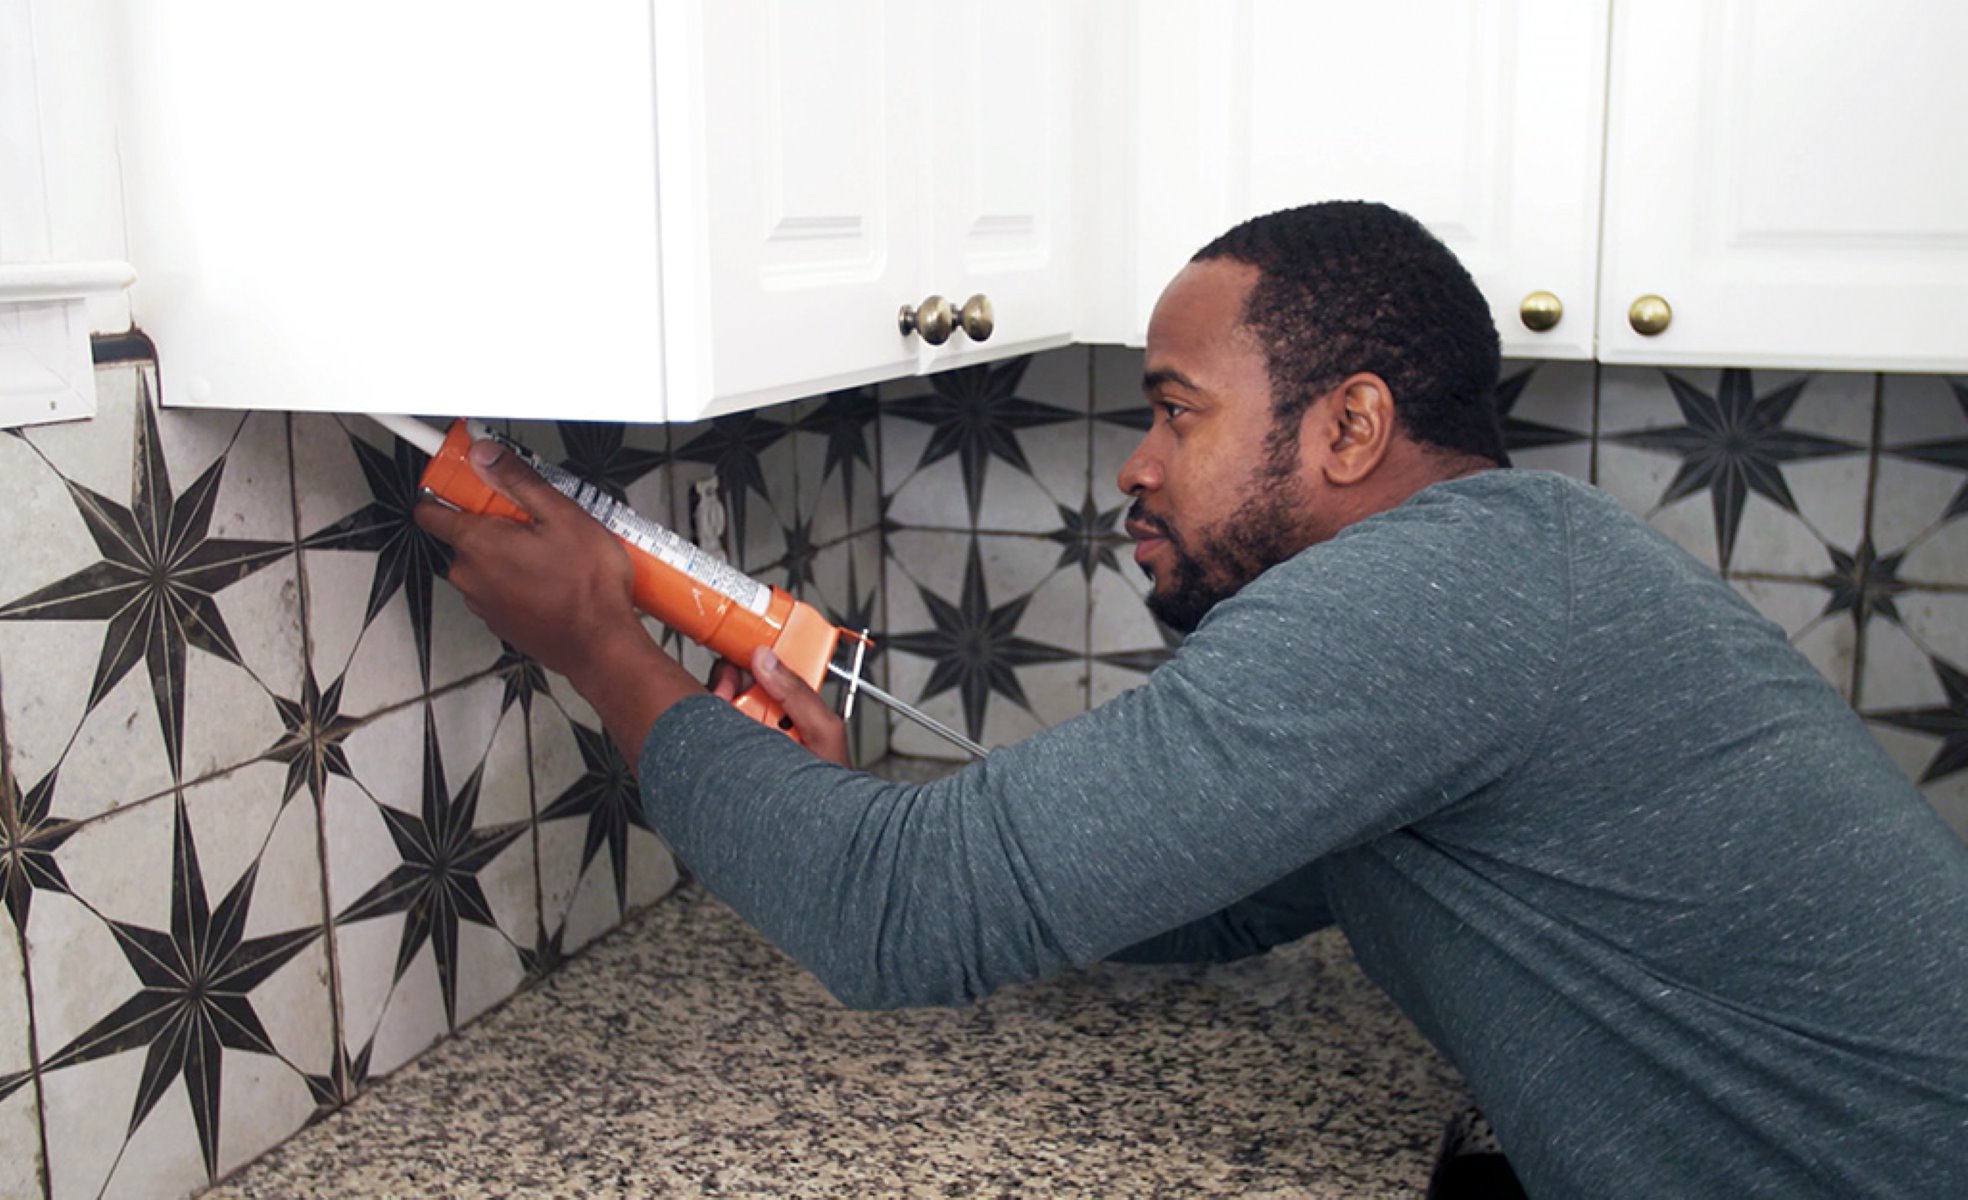
Step 7: Clean and Seal the Backsplash
Cleaning and sealing the glass tile backsplash are the final steps in the installation process, essential for ensuring the longevity, resilience, and visual allure of the completed installation. This phase involves meticulous cleaning to remove any residual grout haze, adhesive, or debris from the tiles, followed by the application of a high-quality sealer to protect the grout and glass tiles from stains, moisture, and discoloration.
Cleaning the Tiles
Begin by inspecting the installed glass tiles for any remaining grout haze, adhesive residue, or other blemishes that may have accumulated during the installation process. Using a clean, damp sponge, gently wipe the surface of the tiles to remove any lingering grout haze or adhesive. Rinse the sponge frequently and avoid applying excessive pressure to prevent damage to the grout lines or tiles. Thoroughly clean the entire surface of the backsplash, ensuring that the tiles are free from any visible residues.
Final Inspection
After cleaning the tiles, conduct a comprehensive visual inspection of the entire backsplash to verify that the surface is pristine and free from any imperfections. Address any remaining blemishes or residues promptly to ensure that the glass tiles are showcased in their full splendor.
Sealing the Grout and Tiles
Once the tiles are thoroughly cleaned and dried, consider applying a premium grout and tile sealer to safeguard the grout lines and glass tiles from potential stains and moisture infiltration. The sealer forms a protective barrier, enhancing the durability and longevity of the installation while preserving the aesthetic appeal of the glass tiles. Follow the manufacturer's guidelines for the application of the sealer, ensuring comprehensive coverage and allowing sufficient drying time for optimal protection.
Final Polish
After the sealer has been applied and allowed to cure, gently buff the glass tiles with a soft, dry cloth to achieve a radiant and polished finish. This final touch accentuates the luster and translucence of the glass tiles, elevating the overall visual impact of the backsplash.
By meticulously cleaning and sealing the glass tile backsplash, you are ensuring that the installation remains resilient, visually captivating, and easy to maintain. The combination of thorough cleaning and strategic sealing enhances the longevity and aesthetic allure of the backsplash, allowing you to enjoy a stunning and enduring enhancement to your living space. With the final cleaning and sealing completed, you have successfully concluded the installation process, bringing your vision for a striking and functional glass tile backsplash to fruition.
Conclusion
In conclusion, the installation of a glass tile backsplash is a transformative and rewarding endeavor that elevates the aesthetic appeal and functionality of any kitchen or bathroom. By following the comprehensive step-by-step guide outlined in this article, you have gained valuable insights and practical knowledge to embark on this exciting home improvement project with confidence and precision.
Throughout the installation process, meticulous attention to detail and a methodical approach are essential for achieving professional results. From gathering the necessary materials and tools to meticulously measuring, cutting, and setting the glass tiles, each step plays a crucial role in ensuring a visually stunning and durable installation.
The process of applying adhesive, grouting the tiles, and meticulously cleaning and sealing the backsplash underscores the importance of precision and care in every phase of the installation. By adhering to best practices and leveraging high-quality materials and tools, you have set the stage for a visually captivating and long-lasting glass tile backsplash that will serve as a focal point in your living space.
As you stand back and admire the completed installation, take pride in the craftsmanship and attention to detail that have gone into creating a stunning and functional glass tile backsplash. The versatility of glass tiles allows for endless design possibilities, enabling you to personalize your space and infuse it with your unique style and creativity.
Whether you have chosen a sleek and contemporary design with monochromatic glass tiles or opted for vibrant hues to add a pop of color, the installation process remains consistent, offering accessibility to individuals with varying levels of experience. The result is a visually striking and durable backsplash that enhances the overall ambiance of your kitchen or bathroom.
As you revel in the beauty and functionality of your newly installed glass tile backsplash, take pride in the accomplishment and the impact it has made on your living space. The installation process has not only added value to your home but has also provided an opportunity to unleash your creativity and personalize your environment.
With the completion of the installation, you have not only enhanced the visual appeal of your space but have also created a focal point that reflects your unique style and attention to detail. Embrace the elegance and modernity of your glass tile backsplash, knowing that it stands as a testament to your dedication to craftsmanship and the pursuit of a beautiful living environment.
Frequently Asked Questions about How To Install Glass Tile Backsplash
Was this page helpful?
At Storables.com, we guarantee accurate and reliable information. Our content, validated by Expert Board Contributors, is crafted following stringent Editorial Policies. We're committed to providing you with well-researched, expert-backed insights for all your informational needs.
0 thoughts on “How To Install Glass Tile Backsplash”