Articles
What To Clean Refrigerator With
Modified: October 28, 2024
Discover the best articles on what to clean your refrigerator with, including effective cleaning solutions and tips to keep your fridge fresh and odor-free.
(Many of the links in this article redirect to a specific reviewed product. Your purchase of these products through affiliate links helps to generate commission for Storables.com, at no extra cost. Learn more)
Introduction
Welcome to the comprehensive guide on how to clean your refrigerator and keep it sparkling fresh. Keeping your refrigerator clean is not only essential for maintaining optimal food safety and hygiene but also for ensuring its efficiency and longevity. A clean refrigerator not only keeps your food fresh but also prevents the growth of bacteria and foul odors.
By regularly cleaning your refrigerator, you can prevent cross-contamination, eliminate foodborne pathogens, and maintain a pleasant smell in your kitchen. In this article, we will discuss the importance of cleaning your refrigerator, common household products for cleaning, natural cleaning solutions, and steps to help you achieve a spotless and germ-free refrigerator.
Whether you are a professional cleaner or simply seeking tips for household maintenance, this article will guide you through the process of effectively cleaning your refrigerator, from top to bottom, inside and out. So, let’s dive in and discover the best techniques for keeping your refrigerator in pristine condition.
Key Takeaways:
- Regularly cleaning your refrigerator with household products like baking soda, vinegar, and lemon juice ensures food safety, odor control, and energy efficiency, creating a clean and hygienic kitchen environment.
- Natural cleaning solutions such as white vinegar, lemon juice, and essential oils offer an eco-friendly and effective way to maintain a fresh and germ-free refrigerator, promoting a healthier kitchen environment.
Read more: How To Clean A Samsung Refrigerator
Importance of Cleaning the Refrigerator
When it comes to maintaining a clean and healthy kitchen, few tasks are as crucial as regularly cleaning your refrigerator. A clean refrigerator not only ensures the longevity and efficiency of the appliance but also plays a critical role in food safety and hygiene. Let’s explore the key reasons why cleaning your refrigerator is of utmost importance.
1. Food Safety: One of the primary reasons to clean your refrigerator is to ensure food safety. Over time, leftovers, expired products, and spilled liquids can accumulate, leading to the growth of harmful bacteria such as Salmonella and E. coli. Regular cleaning helps prevent cross-contamination and eliminates any potential health hazards caused by spoiled or contaminated food.
2. Odor Control: We’ve all experienced that unpleasant smell emanating from the refrigerator. This is often a result of food residues, spills, or expired items. Regular cleaning removes these sources of odor, leaving your refrigerator smelling fresh and clean.
3. Efficiency and Energy Savings: A clean refrigerator runs more efficiently, reducing energy consumption and prolonging the lifespan of the appliance. Dust, debris, and food residues can obstruct vents and decrease airflow, forcing your refrigerator to work harder to maintain the desired temperature. By keeping the interior and components clean, you can optimize the appliance’s performance and save on energy costs in the long run.
4. Organization and Visibility: Regular cleaning allows you to organize your refrigerator better and easily locate items. By removing expired products, rearranging shelves, and wiping down spills, you create a more functional and visually appealing space.
5. Prevention of Mold and Mildew: Moisture and food particles in a neglected refrigerator can lead to the growth of mold and mildew, which not only affects the taste and quality of food but also poses health risks. By regularly cleaning and drying the interior, you can prevent the development of these unwanted guests.
6. Aesthetics and Kitchen Hygiene: A clean and well-maintained refrigerator contributes to an overall clean and hygienic kitchen environment. It reflects your commitment to cleanliness and sets the tone for the rest of your cooking and food preparation area.
Now that we understand the importance of cleaning the refrigerator, let’s explore the various household products and natural cleaning solutions you can use to achieve a spotless and fresh-smelling appliance.
Common Household Products for Cleaning Refrigerators
When it comes to cleaning your refrigerator, you don’t always need to rely on expensive and specialized cleaning products. Many common household items can be effective in removing dirt, grime, and food stains. Here are some widely available household products you can use to clean your refrigerator:
1. Baking Soda: Baking soda is a versatile cleaning agent that can deodorize and remove stubborn stains. Create a paste by mixing baking soda with water and apply it to soiled areas. Allow it to sit for a few minutes before wiping it clean with a damp cloth. Baking soda also helps eliminate unpleasant odors in your refrigerator.
2. Vinegar: Vinegar is known for its cleaning and disinfecting properties. Mix equal parts of vinegar and water in a spray bottle and use it to clean the interior and exterior surfaces of your refrigerator. Vinegar is particularly effective in removing grease and hard water stains.
3. Lemon Juice: The acidic nature of lemon juice makes it an excellent natural cleaner. Dilute lemon juice with water and use a sponge or cloth to wipe down the refrigerator. Lemon juice not only cleans but also leaves a refreshing scent behind.
4. Dish Soap: Dish soap is a staple in every household and can be used to clean your refrigerator. Mix a few drops of dish soap with warm water and use a sponge or cloth to scrub the interior and exterior surfaces. Rinse with clean water and wipe dry.
5. Microfiber Cloth: Microfiber cloths are gentle yet highly effective in removing dirt and grime from surfaces. They are particularly useful for wiping down the interior of the refrigerator, as they trap and hold onto dust particles more efficiently than traditional cotton cloths.
6. Rubbing Alcohol: Rubbing alcohol is a disinfectant that can effectively kill bacteria. Use a cloth or cotton swab soaked in rubbing alcohol to clean and disinfect door handles, shelves, and other high-touch areas in your refrigerator.
7. Warm Water: For regular maintenance cleaning, warm water alone can often do the trick. Simply dampen a cloth or sponge with warm water and wipe down the surfaces of your refrigerator, making sure to pay attention to spills, stains, and handles.
Remember to always read and follow the manufacturer’s instructions for cleaning your specific refrigerator model. Avoid abrasive cleaners, bleach, or ammonia-based products, as they can damage the surfaces or leave behind harmful residues.
Next, let’s explore some natural cleaning solutions that you can use to clean your refrigerator and eliminate chemical residues.
Natural Cleaning Solutions for Refrigerators
For those who prefer to use natural and chemical-free cleaning solutions, there are several options available that are safe, effective, and environmentally friendly. These natural ingredients can help you achieve a clean and fresh refrigerator without any harsh chemicals. Here are some natural cleaning solutions you can use:
1. White Vinegar: White vinegar is a versatile natural cleaner that can effectively remove stains, grease, and odors from your refrigerator. Mix equal parts of white vinegar and water in a spray bottle. Spray the solution onto the surfaces of your refrigerator and wipe clean with a cloth or sponge. Vinegar’s acidity helps to break down dirt and grime, while its antimicrobial properties help kill germs and bacteria.
2. Lemon Juice: Lemon juice not only leaves a pleasant scent but also works as a natural disinfectant. Squeeze fresh lemon juice into a bowl and dilute it with water. Use a cloth soaked in the mixture to wipe down the interior and exterior surfaces of your refrigerator. Lemon juice is particularly effective in removing tough stains and eliminating odors.
3. Baking Soda: Baking soda is well-known for its odor-absorbing qualities. To remove unwanted smells from your refrigerator, place an open container filled with baking soda inside. The baking soda will absorb odors while freshening up the air. Additionally, you can create a paste by mixing baking soda with water and use it to scrub away stains or spills in your refrigerator.
4. Saltwater Solution: A saltwater solution is another natural and cost-effective cleaning option. Dissolve two tablespoons of salt in a cup of warm water. Dip a cloth or sponge into the solution and use it to wipe down the surfaces of your refrigerator. The saltwater solution helps to remove sticky residue and disinfect the refrigerator.
5. Essential Oils: Essential oils not only add a pleasant fragrance but also have antibacterial properties. Add a few drops of essential oil, such as tea tree oil or lavender oil, to a spray bottle filled with water. Shake well and use the solution to clean and freshen your refrigerator. Essential oils not only clean but also leave behind a natural scent without the use of artificial fragrances.
6. Steam Cleaning: Steam cleaning is an effective and chemical-free method to deep clean your refrigerator. Use a handheld steam cleaner to sanitize the interior by killing bacteria and removing stubborn stains. The high temperature of the steam helps to loosen dirt and grime, making it easier to wipe away with a cloth or sponge.
These natural cleaning solutions offer a safe and eco-friendly alternative to conventional cleaning products. They are gentle yet effective in removing dirt, grime, and odors from your refrigerator while promoting a healthier kitchen environment.
Now, let’s move on to the practical steps you can take to clean your refrigerator thoroughly.
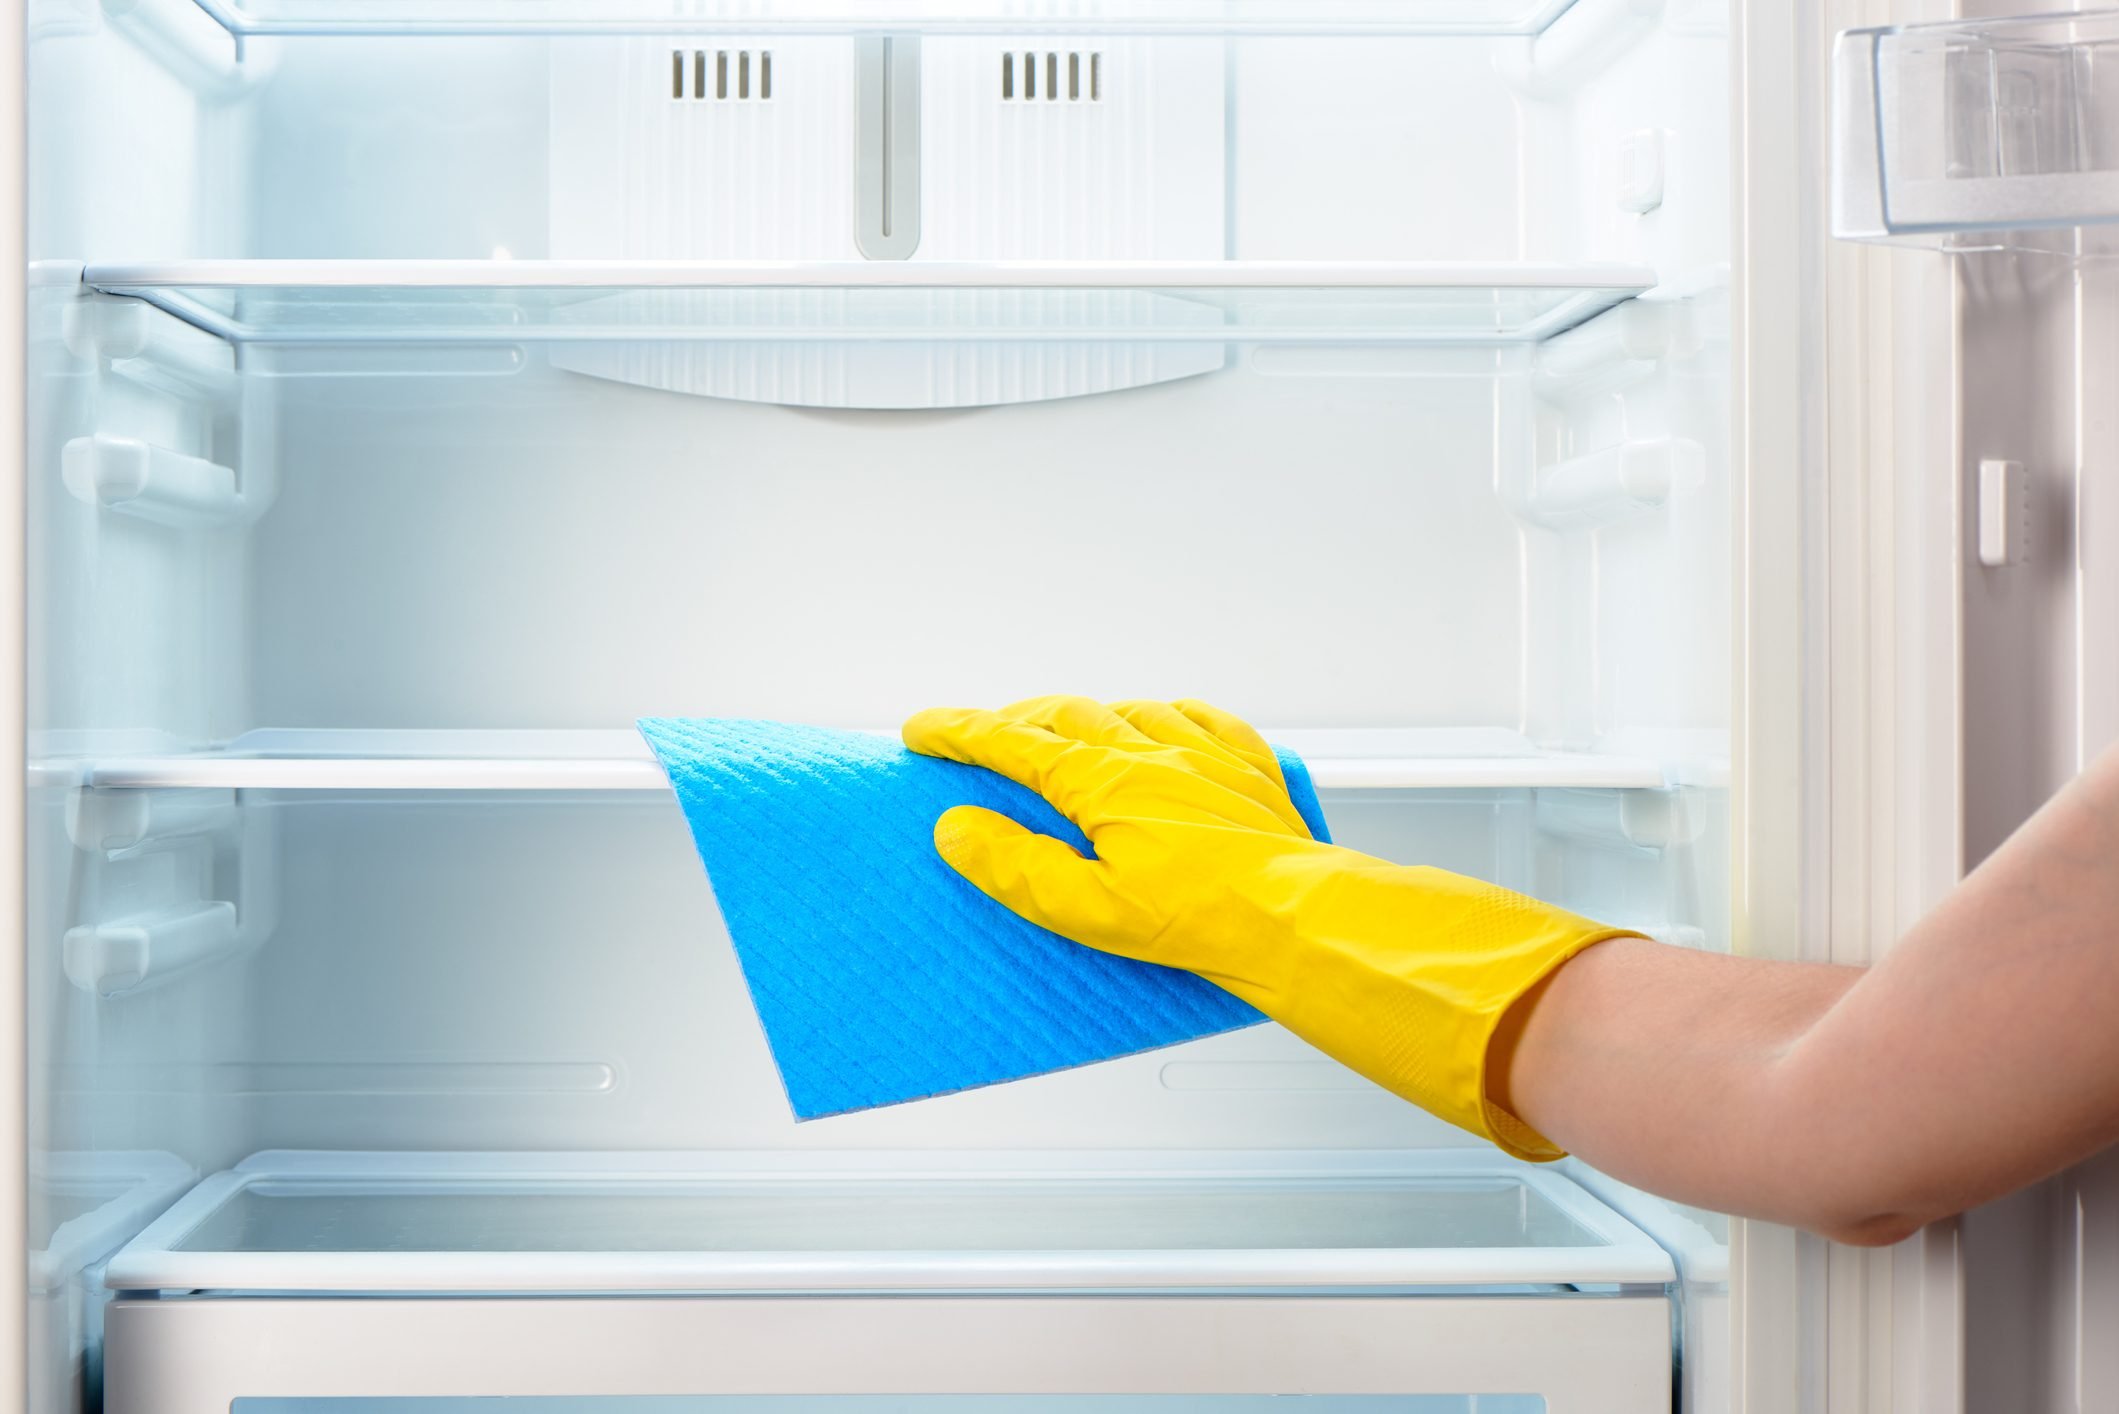
Use a mixture of warm water and mild dish soap to clean the interior of the refrigerator. For tough stains, make a paste with baking soda and water. Wipe down with a clean, damp cloth and dry thoroughly.
Steps to Clean a Refrigerator
Cleaning your refrigerator may seem like a daunting task, but by breaking it down into simple steps, you can tackle the job efficiently and effectively. Follow these steps to achieve a sparkling clean refrigerator:
1. Empty the Refrigerator: Start by removing all the food items from your refrigerator. Dispose of any expired or spoiled food. Place perishable items in a cooler to keep them fresh while you clean.
2. Remove Shelves and Drawers: Take out the shelves, drawers, and any removable parts from the refrigerator. This will make it easier to clean them separately.
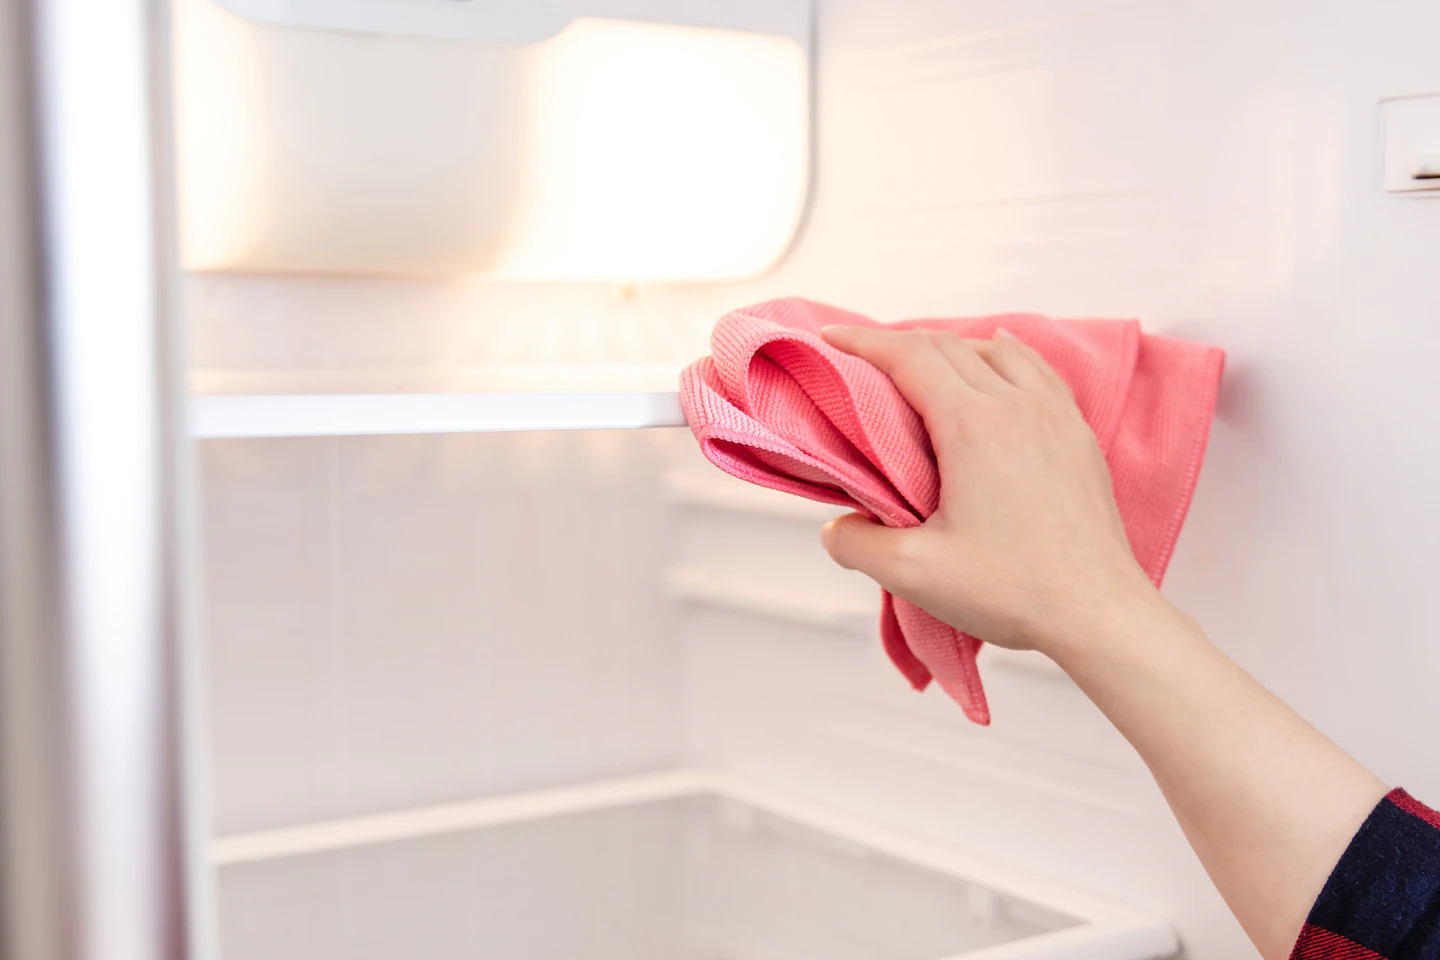
3. Wipe Down Surfaces: Using a damp cloth or sponge, wipe down the interior surfaces of the refrigerator. Pay close attention to spills, stains, and sticky residues. For stubborn stains, use a natural cleaning solution, such as vinegar or lemon juice, to help break them down.
4. Clean Shelves and Drawers: Wash the shelves, drawers, and removable parts with warm, soapy water. Rinse them thoroughly and allow them to air dry before placing them back in the refrigerator. If needed, use a natural cleaning solution to remove any stains or residues.
5. Clean Door Gaskets: The door gaskets help create an airtight seal, so it’s important to keep them clean and free from debris. Use a cloth or sponge soaked in warm soapy water to wipe down the gaskets. Rinse and dry them thoroughly.
6. Clean Exterior Surfaces: Wipe down the exterior surfaces of the refrigerator, including the doors, handles, and control panel. Use a mild cleaner or a natural cleaning solution to remove fingerprints, smudges, and dirt. Dry the surfaces with a clean cloth.
7. Defrost the Freezer: If your refrigerator has a freezer compartment, defrost it if necessary. Follow the manufacturer’s instructions on how to defrost the freezer safely. Once defrosted, wipe down the interior of the freezer with a cloth or sponge soaked in warm soapy water.
8. Clean and Disinfect High-Touch Areas: Use a disinfectant, such as rubbing alcohol or a natural cleaning solution, to clean high-touch areas such as door handles, control knobs, and buttons. This will help prevent the spread of bacteria and germs.
9. Dry and Reorganize: Once all the surfaces are clean and dry, place the shelves, drawers, and food items back into the refrigerator. Ensure that the items are properly organized and easily accessible. Dispose of any old or unused food products.
10. Freshen the Air: To keep your refrigerator smelling fresh, place an open box of baking soda or a natural air freshener inside. This will help absorb any odors and maintain a pleasant smell.
By following these steps regularly, you can ensure that your refrigerator remains clean, hygienic, and efficient. Remember to refer to the manufacturer’s instructions for any specific cleaning recommendations for your refrigerator model.
Now that your refrigerator is clean, let’s explore some useful tips for maintaining its cleanliness and efficiency.
Read more: How To Clean Mold In Refrigerator
Tips for Maintaining a Clean Refrigerator
Once you’ve gone through the process of cleaning your refrigerator, it’s important to maintain its cleanliness and ensure its optimal performance. Here are some practical tips to help you keep your refrigerator in top condition:
1. Regularly Clean Spills: Clean up spills and food debris as soon as they occur. This will prevent them from drying and becoming more challenging to remove later. Wipe down any spills immediately with a damp cloth or sponge.
2. Practice First-In, First-Out (FIFO): When storing food in your refrigerator, follow the FIFO principle—use older items first before newer ones. This helps prevent food waste and keeps track of expiration dates, ensuring that you are using fresh ingredients.
3. Keep Food Covered: Place food in airtight containers or wrap them tightly to prevent spills and odors. This not only keeps the refrigerator clean but also helps maintain the quality and freshness of the food.
4. Clean and Rotate Refrigerator Contents: Regularly check the contents of your refrigerator and discard any expired or spoiled items. Take the opportunity to wipe down containers, bottles, and jars to eliminate any accumulated residue. Properly rotating and organizing your food will help prevent forgotten items and reduce food waste.
5. Maintain Temperature and Humidity Levels: Set your refrigerator’s temperature to the recommended level (typically between 35-38°F or 1-3°C) and the freezer to 0°F or -18°C. Maintaining proper temperature and humidity levels helps prolong the shelf life of food and prevents the growth of bacteria.
6. Avoid Overcrowding: Overcrowding the refrigerator can restrict airflow and cause uneven cooling. Allow enough space between items for proper air circulation. This will not only help maintain the refrigerator’s temperature but also make it easier to clean and organize.
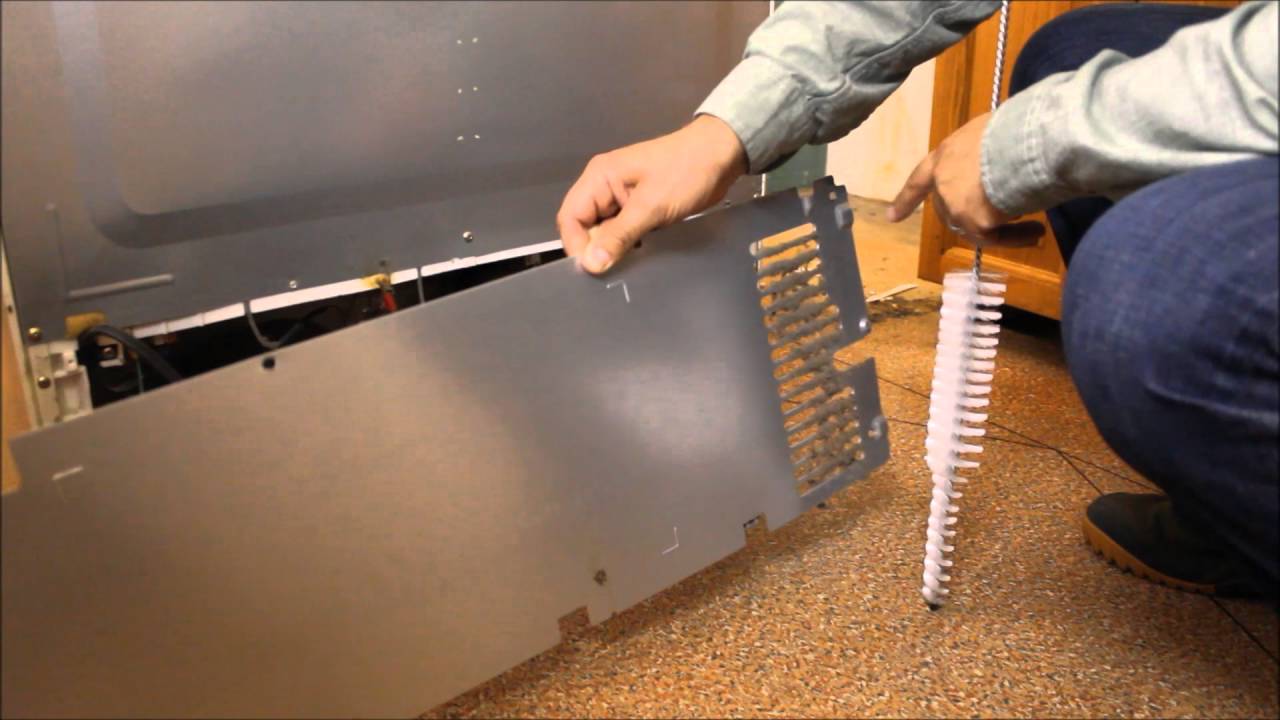
7. Regularly Check and Clean the Condenser Coils: The condenser coils on the back or beneath your refrigerator can accumulate dust, dirt, and debris over time. Clean them every three to six months using a vacuum cleaner or a brush to ensure efficient cooling and prevent unnecessary strain on the appliance.
8. Check the Door Seal: Periodically inspect the door seal, or gasket, for any signs of wear or damage. A faulty seal can cause cold air leakage, making the refrigerator less efficient. If needed, replace the door seal to maintain proper insulation.
9. Avoid Placing Hot Food in the Refrigerator: Allow hot food to cool down to room temperature before placing it in the refrigerator. Placing hot food directly into the refrigerator can raise the internal temperature and affect the efficiency of cooling.
10. Clean the Exterior Regularly: Wipe down the exterior surfaces of your refrigerator, including the doors and handles, regularly. This not only keeps the appliance looking clean and presentable but also helps prevent the accumulation of dirt and fingerprints.
By following these tips, you can maintain a clean, organized, and efficient refrigerator that will keep your food fresh and safe for consumption.
Now that you have all the information you need, it’s time to put these tips into action and enjoy a clean and well-maintained refrigerator!
Conclusion
Cleaning and maintaining a refrigerator is vital for ensuring food safety, hygiene, and the optimal performance of the appliance. Regular cleaning helps prevent cross-contamination, eliminates odors, and maintains the longevity of the refrigerator. By following the steps outlined in this guide, you can achieve a sparkling clean refrigerator that keeps your food fresh and your kitchen free from bacteria and contaminants.
Whether you choose to use common household products or natural cleaning solutions, there are plenty of options available to effectively clean your refrigerator without harsh chemicals. From white vinegar and lemon juice to baking soda and warm water, these ingredients can tackle stains, remove odors, and disinfect surfaces.
Remember to empty your refrigerator, remove shelves and drawers, and wipe down all surfaces thoroughly. Pay attention to high-touch areas, such as door handles, and regularly clean and rotate the contents of your refrigerator to prevent wasted food and maintain an organized space.
Additionally, maintaining proper temperature and humidity levels, checking and cleaning condenser coils, and avoiding overcrowding your refrigerator are crucial for its efficient operation and longevity.
By implementing these tips and incorporating regular cleaning and maintenance into your routine, you can ensure that your refrigerator remains clean, hygienic, and efficient for years to come.
So, roll up your sleeves, gather your cleaning supplies, and give your refrigerator the attention it deserves. Your efforts will be rewarded with fresh food, a clean kitchen, and the satisfaction of knowing you’re taking important steps towards a healthier and safer environment.
Frequently Asked Questions about What To Clean Refrigerator With
Was this page helpful?
At Storables.com, we guarantee accurate and reliable information. Our content, validated by Expert Board Contributors, is crafted following stringent Editorial Policies. We're committed to providing you with well-researched, expert-backed insights for all your informational needs.


0 thoughts on “What To Clean Refrigerator With”