Home>Articles>How Do You Clean The Water Dispenser On A Refrigerator
Articles
How Do You Clean The Water Dispenser On A Refrigerator
Modified: January 21, 2024
Learn the best methods to clean the water dispenser on your refrigerator with our informative articles. Maintain the hygiene of your appliance for a healthy home!
(Many of the links in this article redirect to a specific reviewed product. Your purchase of these products through affiliate links helps to generate commission for Storables.com, at no extra cost. Learn more)
Introduction
A water dispenser on a refrigerator is a convenient feature that provides you with chilled and filtered water at your fingertips. However, over time, the dispenser can accumulate dirt, bacteria, and mineral deposits, affecting the taste and quality of the water. Regular cleaning of the water dispenser is crucial to ensure safe and refreshing drinking water.
In this article, we will guide you through the step-by-step process of how to clean the water dispenser on a refrigerator. By following these simple instructions, you can keep your water dispenser in optimal condition and enjoy clean and delicious water every time.
Key Takeaways:
- Regular cleaning of your refrigerator’s water dispenser is crucial to ensure safe and refreshing drinking water. Follow the step-by-step guide to maintain the hygiene and functionality of the dispenser.
- By incorporating the cleaning routine into your regular maintenance schedule, you can extend the lifespan of your water dispenser and continue to enjoy clean and refreshing drinking water.
Read more: How To Clean Ge Refrigerator Water Dispenser
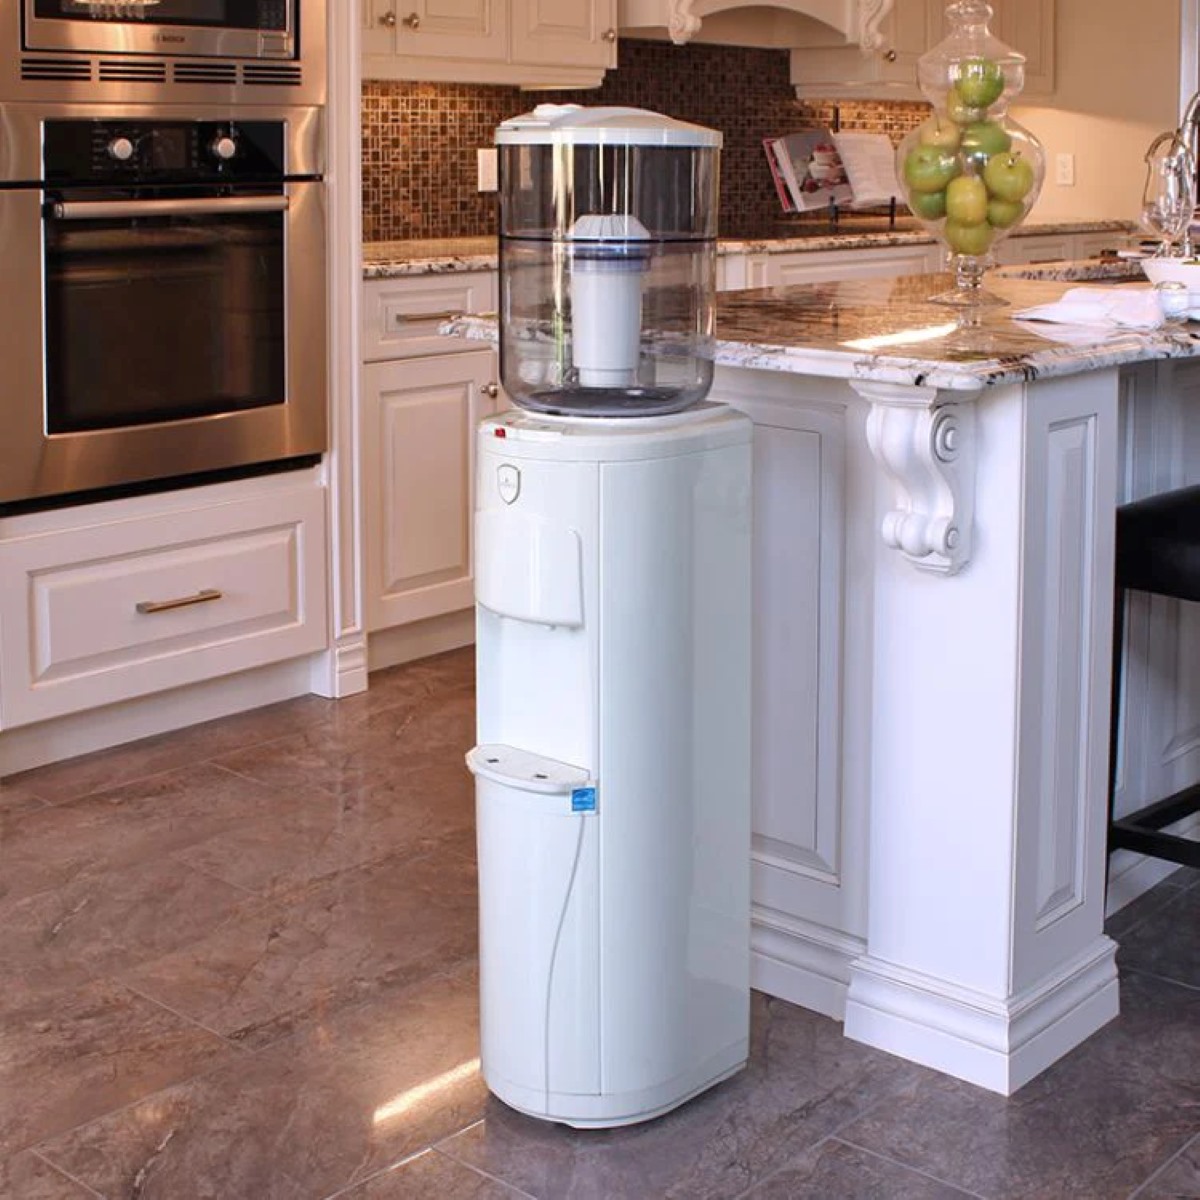
Step 1: Unplug the refrigerator and locate the water reservoir
The first step in cleaning the water dispenser is to ensure your safety by unplugging the refrigerator from the power source. This will prevent any potential accidents while you work on the dispenser.
Next, you need to locate the water reservoir. The water reservoir is the container that holds the water before it is dispensed through the refrigerator. The location of the reservoir may vary depending on the model of your refrigerator, but it is typically found at the back of the refrigerator.
To locate the water reservoir, carefully move the refrigerator away from the wall, ensuring that you have enough space to work comfortably. Once you have access to the back of the refrigerator, look for a small, rectangular or cylindrical container connected to the water supply line.
Take your time to familiarize yourself with the layout of the back of the refrigerator, as you will need to disconnect the water reservoir for cleaning purposes. If you are unsure about the location of the water reservoir, refer to the refrigerator’s user manual or consult the manufacturer’s website for more specific instructions.
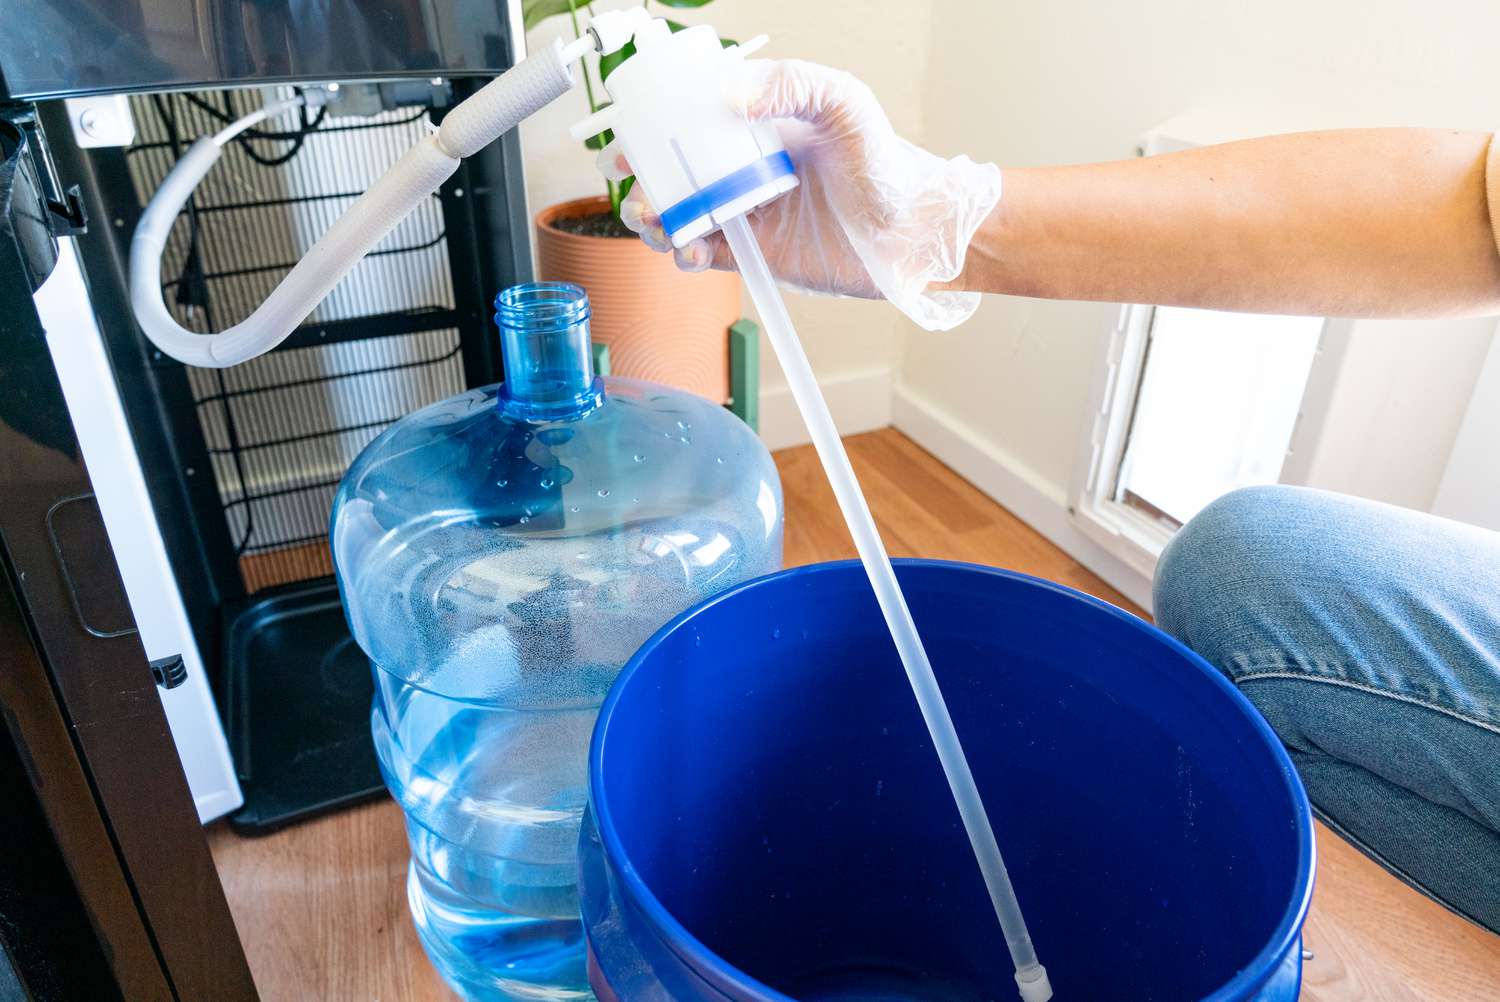
Step 2: Empty the water reservoir
Once you have located the water reservoir, the next step is to empty it completely. This is important to ensure that any old or stagnant water is removed before the cleaning process begins.
To empty the water reservoir, you will need a small container or a large bowl to collect the water. Place the container below the water reservoir to catch any water that may spill out.
Now, depending on the design of your refrigerator, there are different methods to empty the water reservoir:
- Manual Dispensing: Some refrigerators are equipped with a manual dispenser lever or button. To empty the water reservoir, simply press and hold the dispenser lever or button until all the water has been dispensed into the container below.
- Automatic Dispensing: If your refrigerator has an automatic dispenser, you may need to refer to the user manual for specific instructions on how to empty the water reservoir. In most cases, you will either find a drain tube or a drain plug at the bottom of the water reservoir. Remove the drain tube or plug and let the water flow into the container below.
Make sure to empty the water reservoir completely to prevent any residual water from causing mold or bacterial growth. Once the water has been emptied, discard it properly and proceed to the next step.
Step 3: Prepare a cleaning solution
Now that the water reservoir is empty, it’s time to prepare a cleaning solution that will effectively remove any build-up or impurities from the dispenser.
To create a cleaning solution, you will need the following ingredients:
- Warm water
- Mild dish soap or a mixture of equal parts white vinegar and water
Here are two different methods you can choose from:
- Dish Soap Method:
- Fill a bowl or sink with warm water.
- Add a few drops of mild dish soap and mix well until it creates a soapy solution.
- Vinegar Method:
- In a bowl or container, mix equal parts of white vinegar and water.
Both of these methods work effectively to clean and disinfect the water dispenser. Dish soap helps to remove dirt and grime, while vinegar has natural antibacterial properties.
Choose the method that suits your preference and the materials you have available. Once you have prepared the cleaning solution, move on to the next step to start cleaning the dispenser nozzle and surrounding area.
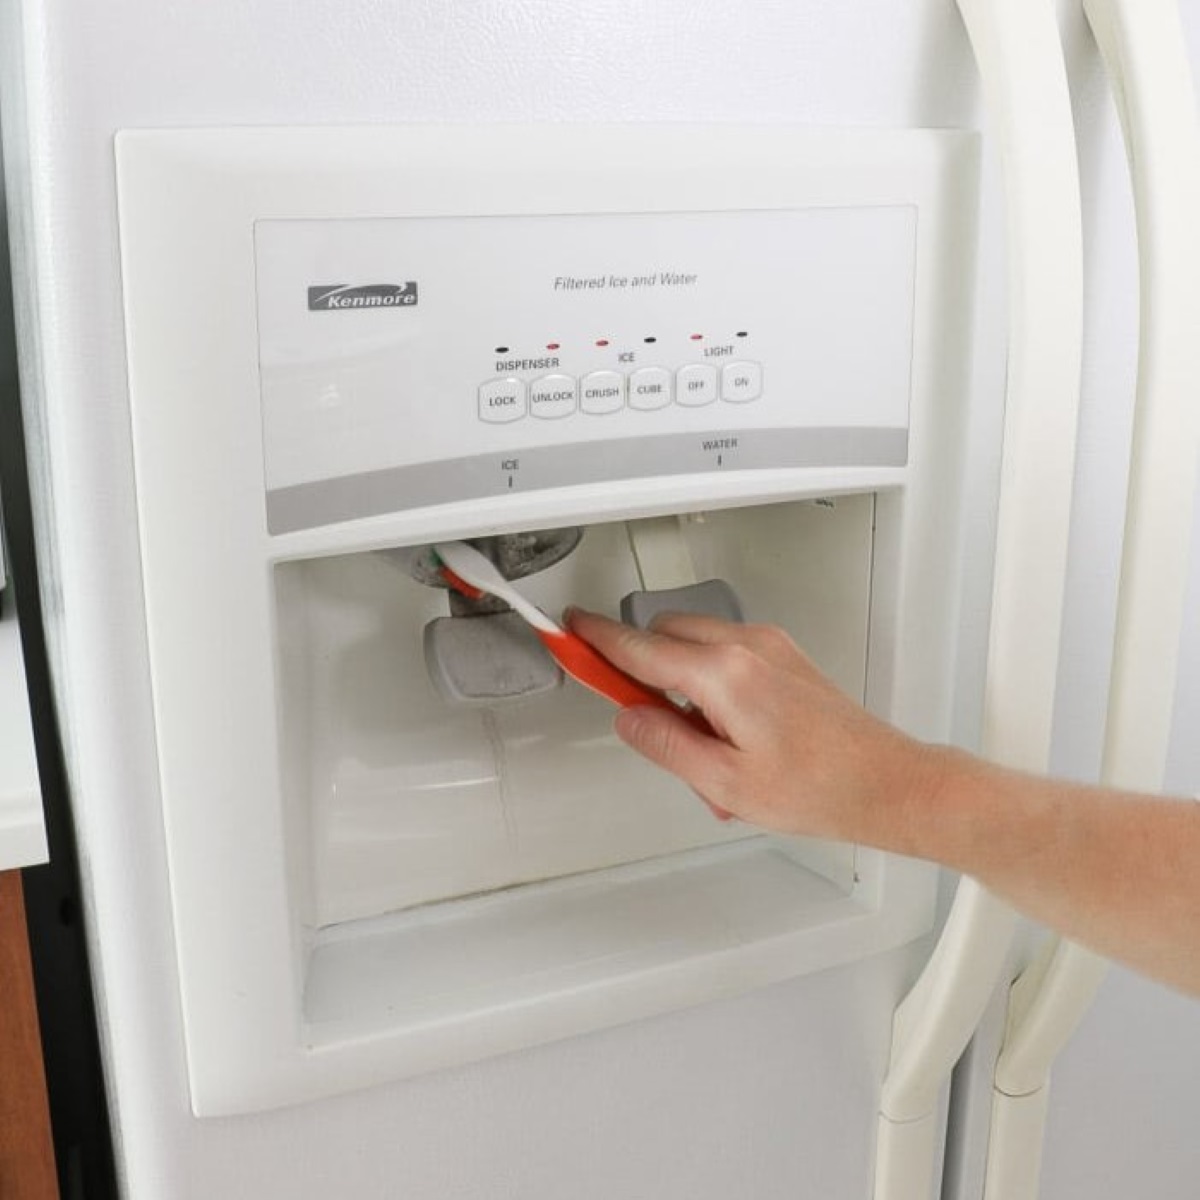
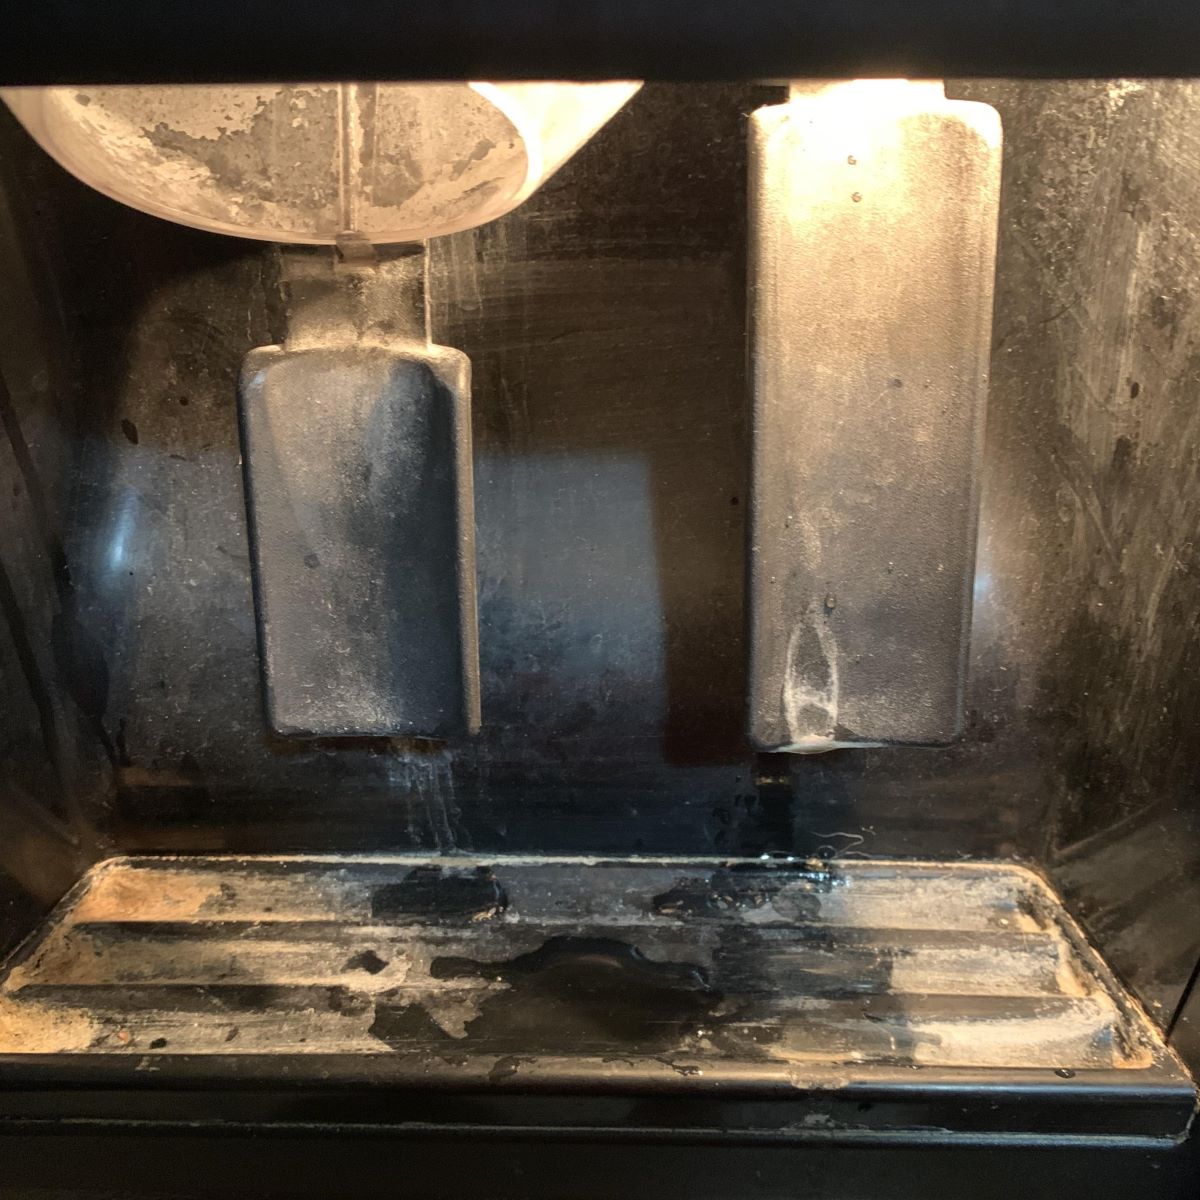
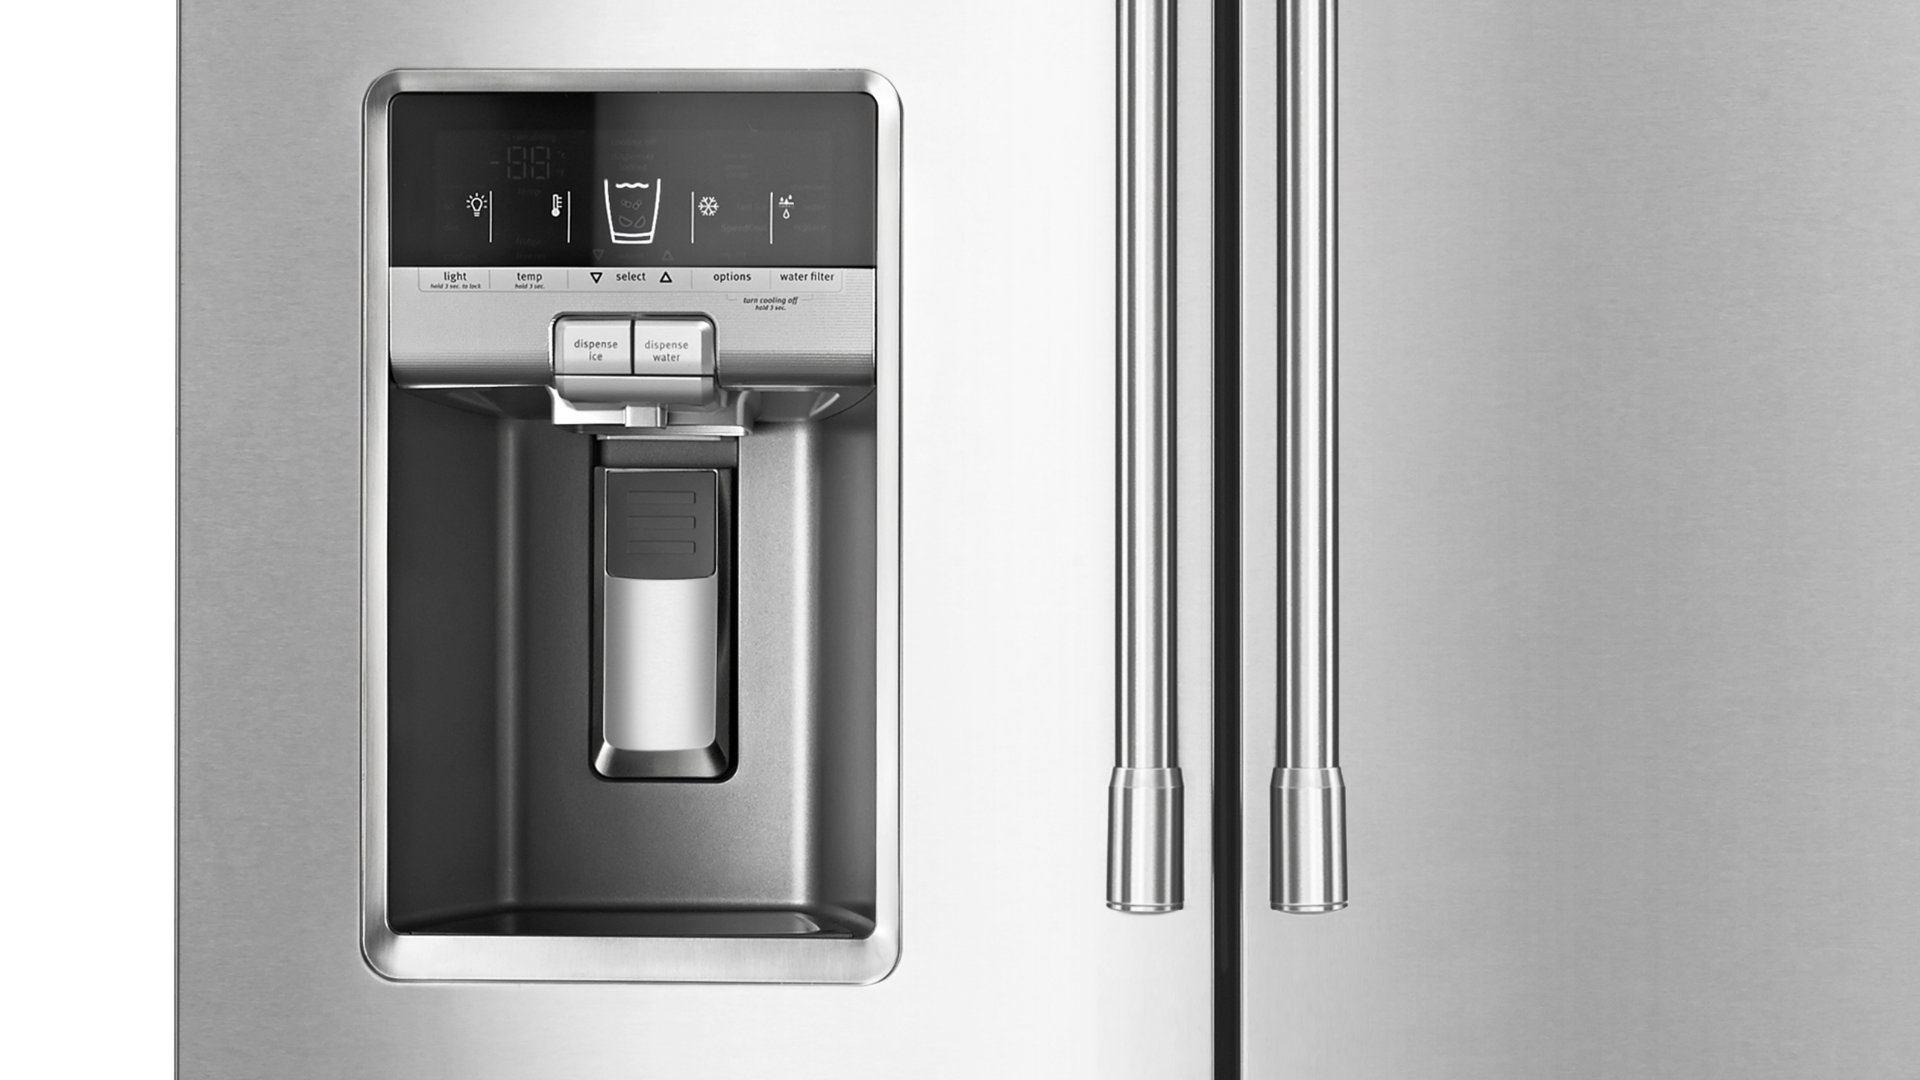
Step 4: Clean the dispenser nozzle and surrounding area
Now that you have prepared the cleaning solution, it’s time to focus on cleaning the dispenser nozzle and the surrounding area.
Start by dipping a clean sponge or cloth into the cleaning solution. Make sure the sponge is damp, but not dripping wet.
Gently scrub the dispenser nozzle with the damp sponge or cloth. Pay special attention to any visible dirt or residue that may have accumulated on the nozzle. Use circular motions and apply gentle pressure to remove any stubborn stains or build-up.
As you clean the dispenser nozzle, take the time to clean the surrounding area as well. Wipe down any surfaces or crevices near the nozzle that may have come into contact with water, such as the drip tray or the edges of the dispenser opening.
If there are any removable parts, such as a nozzle cover or a drip tray, remove them and clean them separately. This will allow for a more thorough cleaning and prevent any hidden dirt or bacteria from spreading.
Once you have thoroughly cleaned the dispenser nozzle and the surrounding area, rinse the sponge or cloth with clean water to remove any soap or vinegar residue. Wipe down the nozzle and the surrounding area again to ensure that all cleaning solution residue is removed.
Now that the dispenser nozzle and surrounding area are clean, move on to the next step to address the water filter (if applicable).
Mix equal parts of white vinegar and water, then use a clean cloth to wipe down the water dispenser and its surrounding area. Be sure to run a few cycles of water through the dispenser to rinse out any remaining vinegar.
Step 5: Remove and clean the water filter (if applicable)
If your refrigerator has a water filter connected to the water dispenser, it is important to regularly clean and maintain it to ensure optimal filtration and water quality.
Here are the steps to remove and clean the water filter:
- Refer to the refrigerator’s user manual to locate the water filter. It is typically located either inside the refrigerator compartment or at the back of the appliance.
- Once you have located the water filter, carefully remove it according to the manufacturer’s instructions. Depending on the model, you may need to twist it counterclockwise or press a release button to detach it.
- After removing the water filter, check for any visible debris or contaminants on the filter. If you notice any, rinse the filter under lukewarm water to remove the debris. Avoid using soap or detergents, as they may damage the filter.
- Inspect the filter for any signs of wear or damage. If the filter is beyond cleaning or has reached its recommended lifespan, it may need to be replaced with a new one.
- If the filter is still in good condition, reinsert it back into the refrigerator according to the manufacturer’s instructions.
By cleaning or replacing the water filter regularly, you can ensure that your water dispenser provides clean, filtered water that is free from impurities.
Now that you have cleaned the water filter (if applicable), it’s time to move on to the next step and clean the water reservoir.
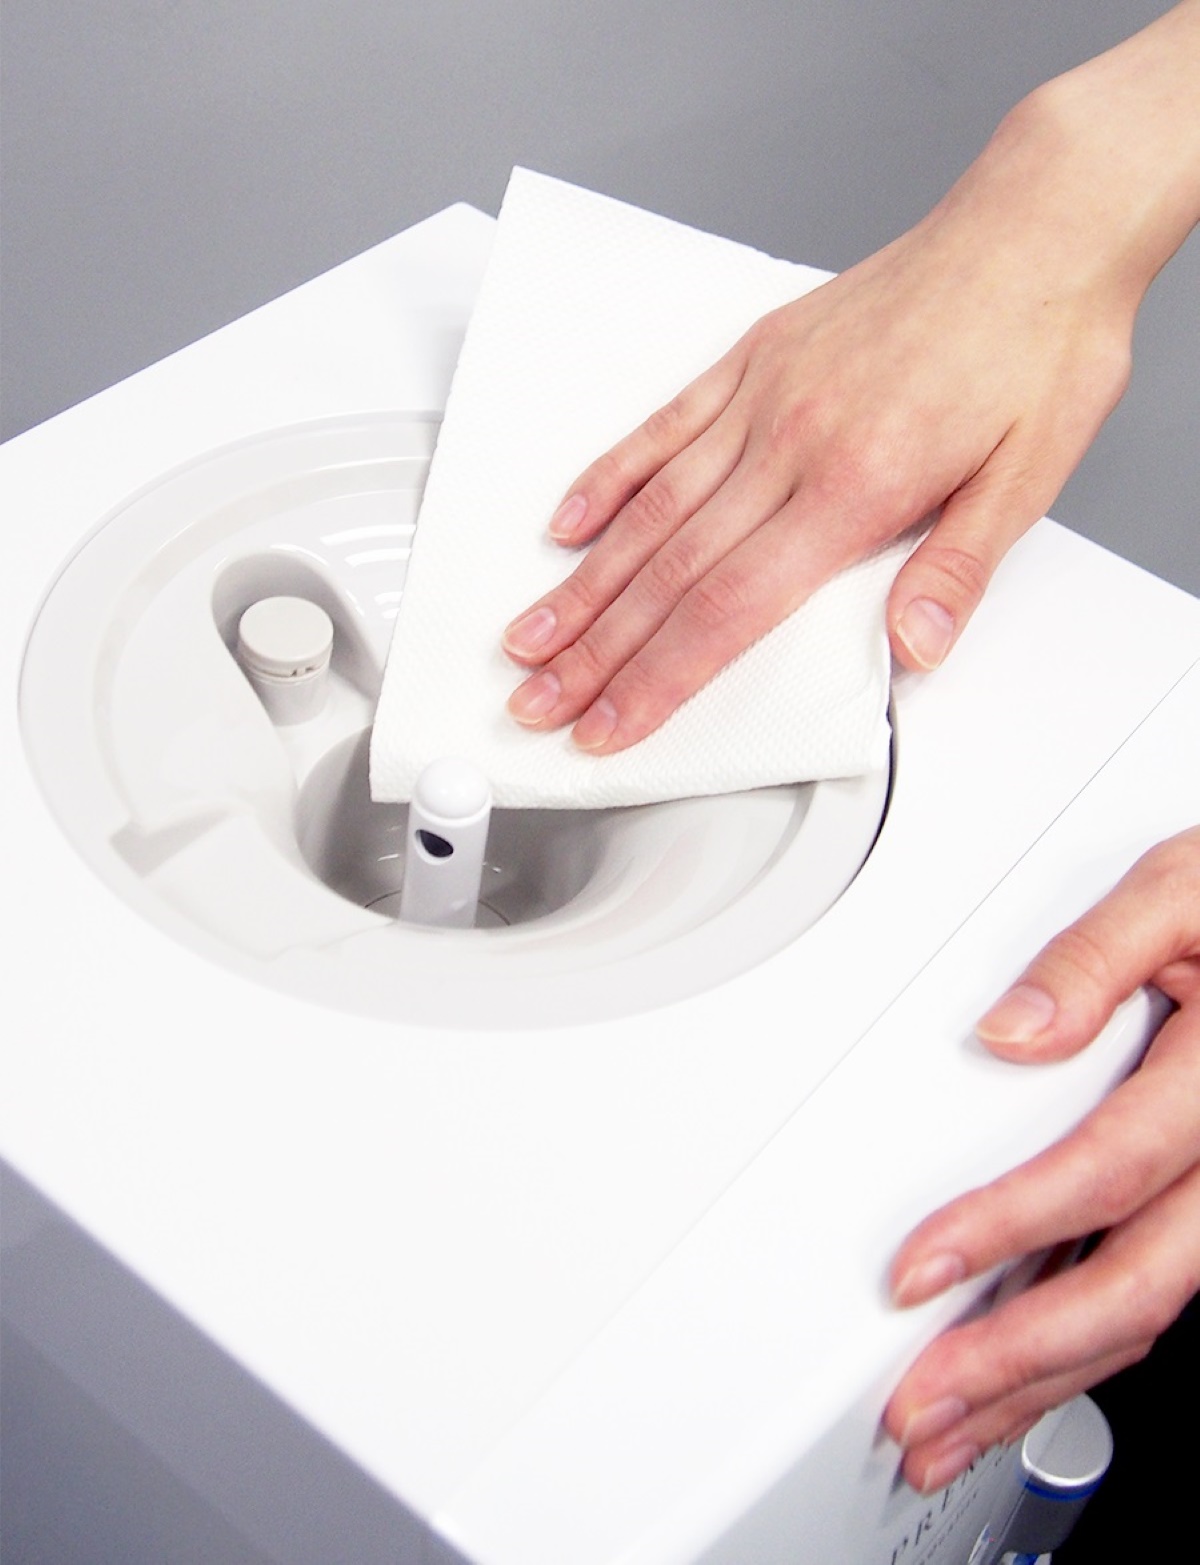
Step 6: Clean the water reservoir
Cleaning the water reservoir is essential to remove any build-up or contaminants that may have accumulated over time. Follow these steps to effectively clean the water reservoir:
- Locate the water reservoir, which is usually situated at the back of the refrigerator.
- If there is any access panel or cover over the water reservoir, remove it according to the manufacturer’s instructions.
- Using a sponge or cloth soaked in the cleaning solution you prepared earlier (dish soap or vinegar solution), wipe down the walls and surfaces of the water reservoir. Pay close attention to any visible stains or residue and scrub gently to remove them.
- If there are any stubborn stains or mineral deposits that don’t come off easily, you can use a soft-bristled brush or a toothbrush to gently scrub the affected areas. Be careful not to apply too much force, as this could damage the reservoir.
- Once you have thoroughly cleaned the water reservoir, rinse it with clean water to remove any remaining cleaning solution or residue.
- Dry the water reservoir with a clean towel or allow it to air dry completely before moving on to the next step.
- If there was an access panel or cover, reattach it securely according to the manufacturer’s instructions.
By cleaning the water reservoir, you ensure that the water dispenser operates optimally and delivers clean and refreshing water.
With the water reservoir cleaned, it’s time to move on to the next step and rinse and dry the dispenser components.
Step 7: Rinse and dry the dispenser components
After cleaning the water reservoir, it’s important to rinse and dry the dispenser components thoroughly. This step ensures that no cleaning solution or residue remains, providing you with clean and safe drinking water.
Follow these steps to rinse and dry the dispenser components:
- Take the dispenser nozzle, drip tray, and any other removable parts and rinse them under clean running water. This will remove any remaining cleaning solution or debris.
- Inspect the dispenser components for any lingering dirt or stains. If necessary, use a soft brush or cloth to gently scrub away any stubborn residue.
- After rinsing, pat the dispenser components dry with a clean towel or allow them to air dry completely. Make sure there is no moisture left on the surfaces, as this can promote bacterial growth.
- Once the dispenser components are fully dry, reattach them to their respective places in the refrigerator. Make sure they are secured properly and fit tightly to prevent any leaks or contamination.
By rinsing and drying the dispenser components, you ensure that no cleaning solution or moisture remains, maintaining the hygiene and functionality of your refrigerator’s water dispenser.
With the dispenser components rinsed and dried, it’s time to move on to the final step and reassemble the water dispenser.
Step 8: Reassemble the water dispenser
Now that you have thoroughly cleaned and dried all the components of the water dispenser, it’s time to reassemble them and restore the dispenser to its proper functioning state.
Follow these steps to reassemble the water dispenser:
- If you had removed any access panels or covers during the cleaning process, carefully reattach them according to the manufacturer’s instructions.
- Take the dispenser nozzle and align it with the opening in the refrigerator’s dispenser area. Push it firmly and make sure it is securely in place.
- If there were any other removable parts, such as a drip tray, ice chute, or water filter, reattach them properly to their designated spots.
- Once all the components are reassembled, plug the refrigerator back into the power source and ensure that it is functioning correctly.
- Dispense a few cups of water to flush out any remaining traces of the cleaning solution and to ensure that the water is flowing smoothly from the dispenser.
By reassembling the water dispenser properly, you ensure that it is functioning correctly and ready to provide you with clean and refreshing water.
Congratulations! You have successfully cleaned the water dispenser on your refrigerator. Regular maintenance and cleaning will help keep your water dispenser in optimal condition and ensure that you always have fresh and clean drinking water.
Remember to consult your refrigerator’s user manual for specific instructions or contact the manufacturer if you have any doubts or concerns about cleaning your water dispenser.
Enjoy the convenience of a clean and well-maintained water dispenser in your refrigerator!
Conclusion
Cleaning the water dispenser on your refrigerator is a simple yet essential task to ensure that you have access to clean and refreshing water at all times. By following the step-by-step process outlined in this article, you can maintain the hygiene and functionality of your water dispenser.
Remember to always start by unplugging the refrigerator for your safety and locate the water reservoir. Emptying the reservoir and preparing a cleaning solution are the initial steps in the process. Cleaning the dispenser nozzle and surrounding area, as well as removing and cleaning the water filter if applicable, are important for maintaining the quality of the water being dispensed.
Next, cleaning the water reservoir thoroughly removes any build-up or contaminants. Rinse and dry all the dispenser components before reassembling them to ensure that the dispenser operates correctly. By reassembling the water dispenser properly, you can avoid leaks and ensure a steady flow of clean water.
Regular cleaning of your water dispenser will not only maintain the quality of the water but also extend the lifespan of the dispenser itself. Consider incorporating this cleaning routine into your regular maintenance schedule to ensure that your water dispenser operates optimally and continues to provide you with clean and refreshing drinking water.
Always follow the specific instructions provided by your refrigerator’s manufacturer and consult the user manual if you have any doubts or concerns about cleaning your water dispenser.
With a clean and well-maintained water dispenser, you can enjoy the convenience of chilled and filtered water, knowing that it is not only delicious but also safe to consume.
So go ahead, take the necessary steps to clean your water dispenser and enjoy the best tasting water straight from your refrigerator!
Frequently Asked Questions about How Do You Clean The Water Dispenser On A Refrigerator
Was this page helpful?
At Storables.com, we guarantee accurate and reliable information. Our content, validated by Expert Board Contributors, is crafted following stringent Editorial Policies. We're committed to providing you with well-researched, expert-backed insights for all your informational needs.


0 thoughts on “How Do You Clean The Water Dispenser On A Refrigerator”