Home>Storage Ideas>Kitchen Storage>How To Clean Grout Using Pantry Staples You Probably Already Have
Kitchen Storage
How To Clean Grout Using Pantry Staples You Probably Already Have
Modified: December 7, 2023
Learn how to clean grout in your kitchen using pantry staples you probably already have. Discover effective kitchen storage ideas to keep your space organized and clutter-free.
(Many of the links in this article redirect to a specific reviewed product. Your purchase of these products through affiliate links helps to generate commission for Storables.com, at no extra cost. Learn more)
Introduction
Keeping your kitchen clean and organized is essential for efficient meal preparation and a pleasant cooking environment. One area that often gets neglected in kitchen cleaning routines is the grout between tiles. Over time, grout can become discolored and dirty, detracting from the overall aesthetic appeal of your kitchen. But fret not! With a few simple pantry staples and some elbow grease, you can easily restore the sparkle to your grout and make your kitchen shine.
In this article, we will explore various kitchen storage ideas to help you optimize your kitchen space and keep it tidy. From clever cabinet organizers to space-saving pantry solutions, we will cover a wide range of tips and tricks to make the most of every inch in your kitchen.
So grab your cleaning supplies and let’s dive into the world of kitchen storage ideas!
Key Takeaways:
- Easily restore the sparkle to your kitchen grout using common pantry staples like vinegar, baking soda, and lemon juice. Keep your kitchen clean, hygienic, and aesthetically appealing with these simple and effective DIY cleaning solutions.
- Follow safe and effective grout cleaning techniques, such as gentle scrubbing, proper rinsing, and thorough drying. Test cleaning solutions, protect colored grout, and seek professional help for heavily stained or damaged grout.
Why Clean Grout?
Grout is the material that fills the gaps between tiled surfaces in your kitchen. While it may seem like a small and insignificant detail, clean grout can make a huge difference in the overall appearance of your kitchen. Here are a few reasons why it’s important to keep your grout clean:
- Aesthetic appeal: Clean grout enhances the overall appearance of your kitchen. With regular cleaning and maintenance, you can maintain the original color and brightness of your grout, giving your kitchen a fresh and inviting look.
- Hygiene and cleanliness: Dirty grout can become a breeding ground for bacteria, mold, and mildew. This can pose a health risk to you and your family, especially in the kitchen where food is prepared. Regularly cleaning your grout helps eliminate these potential health hazards.
- Prolonged lifespan: Neglected grout can deteriorate over time, leading to cracks and gaps between tiles. This not only compromises the structural integrity of your tiled surfaces but can also result in water seepage, causing damage to the underlying structure. By keeping your grout clean, you can extend its lifespan and prevent costly repairs.
- Easy maintenance: Clean grout is much easier to maintain and keep clean in the long run. Regular cleaning prevents the buildup of dirt and grime, making subsequent cleaning sessions quicker and more effortless.
Now that we understand the importance of clean grout, let’s explore some common pantry staples that can help you achieve sparkling grout in your kitchen.
Common Pantry Staples for Cleaning Grout
When it comes to cleaning grout, you don’t need fancy and expensive cleaners. In fact, you can find effective cleaning solutions right in your own pantry. Here are some common pantry staples that can help you tackle grout stains and dirt:
- Vinegar: Vinegar is known for its powerful cleaning properties. Its acidity helps dissolve dirt and grime on grout lines. You can use white vinegar or apple cider vinegar for cleaning grout.
- Baking soda: Baking soda is a gentle yet effective abrasive agent that helps lift stains and odors from grout. Its fine texture makes it ideal for scrubbing without damaging the grout or tiles.
- Lemon juice: Lemon juice is a natural acidic cleaner that can help remove stubborn stains and discoloration from grout. It also leaves a fresh citrus scent behind.
- Hydrogen peroxide: Hydrogen peroxide is a powerful disinfectant and stain remover. It can effectively clean and brighten grout, especially when combined with other pantry staples.
- Salt: Salt is an excellent natural abrasive that can help scrub away grime from grout. It works well when combined with other cleaning agents.
By harnessing the cleaning power of these pantry staples, you can create cost-effective and eco-friendly solutions to clean your grout effectively. In the following sections, we will discuss different cleaning solutions using these ingredients.
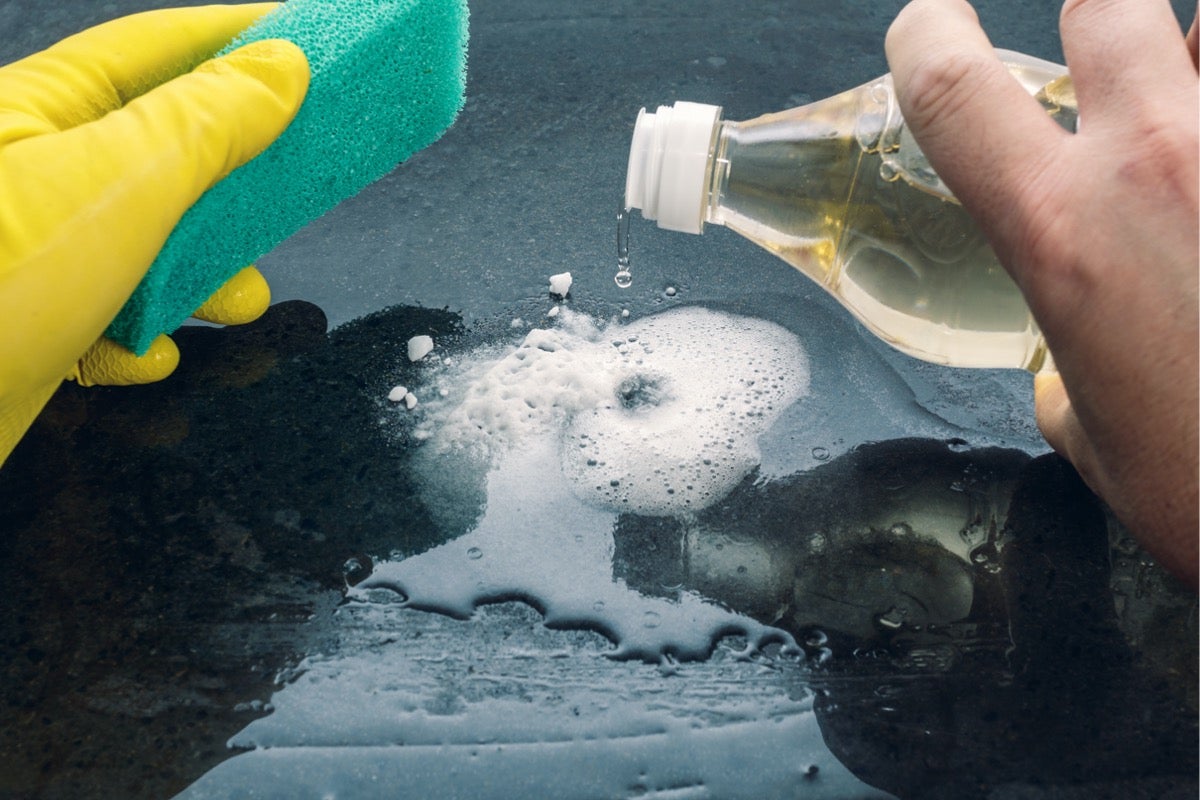
Vinegar and Baking Soda Solution
The combination of vinegar and baking soda is a dynamic duo when it comes to cleaning grout. Vinegar’s acidity helps break down tough stains and dirt, while baking soda acts as a gentle abrasive to scrub away grime. Here’s how you can create and use this solution:
- Mix equal parts white vinegar and water in a spray bottle. For example, you can mix 1 cup of vinegar with 1 cup of water.
- Spray the vinegar solution onto the grout lines and let it sit for about 5-10 minutes. This allows the vinegar to penetrate the grime and loosen it.
- In a small bowl, create a paste by mixing baking soda with a small amount of water. The consistency should be similar to toothpaste.
- Apply the baking soda paste directly onto the grout lines. Use a small brush or an old toothbrush to scrub the grout in a circular motion. The baking soda acts as a gentle abrasive to lift away stains and dirt.
- Let the baking soda paste sit on the grout for a few minutes, allowing it to work its magic.
- Afterward, spray the vinegar solution once again on the grout lines. The foaming reaction between vinegar and baking soda helps further loosen dirt and stains.
- Scrub the grout once more with the brush, focusing on any stubborn spots. You may need to add more baking soda paste if needed.
- Rinse the grout thoroughly with clean water to remove all traces of vinegar and baking soda.
Remember to wear gloves and work in a well-ventilated area when using vinegar and baking soda. This solution can be highly effective against common stains and grime on grout. However, it may not work as effectively on tougher stains or heavily discolored grout. In such cases, you can try other pantry staple solutions we will discuss next.
Lemon Juice and Baking Soda Paste
If you prefer a natural and citrusy approach to cleaning your grout, lemon juice combined with baking soda can be a powerful and aromatic solution. Lemon juice contains citric acid, which acts as a natural bleaching agent to remove stains and brighten grout. Here’s how you can create and use this paste:
- In a small bowl, mix equal parts lemon juice and baking soda to create a paste. You can start with 1/4 cup of each and adjust the quantities as needed.
- Apply the lemon juice and baking soda paste directly onto the grout lines. Use a brush or an old toothbrush to scrub the grout in a circular motion. The baking soda acts as a gentle abrasive, while the citric acid in the lemon juice helps break down stains.
- Allow the paste to sit on the grout for about 10 minutes. This gives the lemon juice and baking soda ample time to work their magic on the grime.
- Scrub the grout lines once more, paying extra attention to any stubborn stains or discoloration.
- Rinse the grout with clean water to remove any residue. If needed, use a damp cloth or sponge to wipe away any excess paste.
The combination of lemon juice and baking soda not only cleans your grout effectively but also leaves behind a fresh citrus scent. This solution is excellent for regular maintenance and mild stains. However, keep in mind that lemon juice contains natural bleaching properties, so it’s best to avoid using it on colored grout or surfaces that may be sensitive to acid.
Next, let’s explore another pantry staple solution using hydrogen peroxide and baking soda.
Hydrogen Peroxide and Baking Soda Mixture
When it comes to tackling tough stains on grout, the combination of hydrogen peroxide and baking soda can be highly effective. Hydrogen peroxide acts as both a disinfectant and a gentle bleaching agent, making it ideal for removing stubborn stains and brightening grout. Here’s how you can create and use this mixture:
- In a small bowl, mix equal parts hydrogen peroxide and baking soda. For example, you can start with 1/4 cup of each and adjust the quantities as needed.
- Apply the hydrogen peroxide and baking soda mixture directly onto the grout lines. Use a brush or an old toothbrush to scrub the grout, focusing on the areas with tough stains or discoloration.
- Allow the mixture to sit on the grout for approximately 15 minutes. This gives the hydrogen peroxide time to break down the stains and penetrate the grout.
- Scrub the grout lines once more, using a bit more elbow grease for stubborn spots.
- Rinse the grout thoroughly with clean water to remove any residue.
Hydrogen peroxide is a versatile cleaning agent, but it’s important to use caution when working with it. Wear gloves and work in a well-ventilated area. Additionally, avoid using hydrogen peroxide on colored grout or surfaces that may be sensitive to bleaching agents.
If the stains persist even after using the hydrogen peroxide and baking soda mixture, it may be necessary to consult a professional or consider regrouting the affected areas.
Now that we’ve covered some effective pantry staple solutions, let’s explore one more option using salt and vinegar.
Mix equal parts of baking soda and water to create a paste. Apply it to the grout, let it sit for 10-15 minutes, then scrub with a brush and rinse. Repeat if necessary.
Salt and Vinegar Paste
For those stubborn grout stains that just won’t seem to budge, a paste made from salt and vinegar can be a powerful solution. Salt acts as a natural abrasive, while vinegar helps dissolve tough grime and stains. Here’s how you can create and use this paste:
- In a small bowl, mix equal parts salt and vinegar. You can start with 1/4 cup of each and adjust the quantities as needed.
- Apply the salt and vinegar paste directly onto the stained grout lines. Use a brush or an old toothbrush to scrub the grout, focusing on the areas with stubborn stains.
- Gently scrub the grout lines for a few minutes, allowing the salt and vinegar mixture to work its magic on the stains.
- Rinse the grout thoroughly with clean water to remove any residue.
The salt in this paste acts as a mild abrasive, helping to lift stains and grime from the grout. Meanwhile, the vinegar works to dissolve tough stains, leaving your grout looking cleaner and brighter. It’s important to note that while vinegar is safe for most types of grout, it’s always a good idea to test a small, inconspicuous area before applying the paste to the entire grout surface.
If the stains persist even after using the salt and vinegar paste, you may need to consider seeking professional help or exploring alternative methods for cleaning or replacing the grout.
Now that you’re armed with these effective pantry staple solutions, it’s time to put them to use and enjoy sparkling grout in your kitchen!
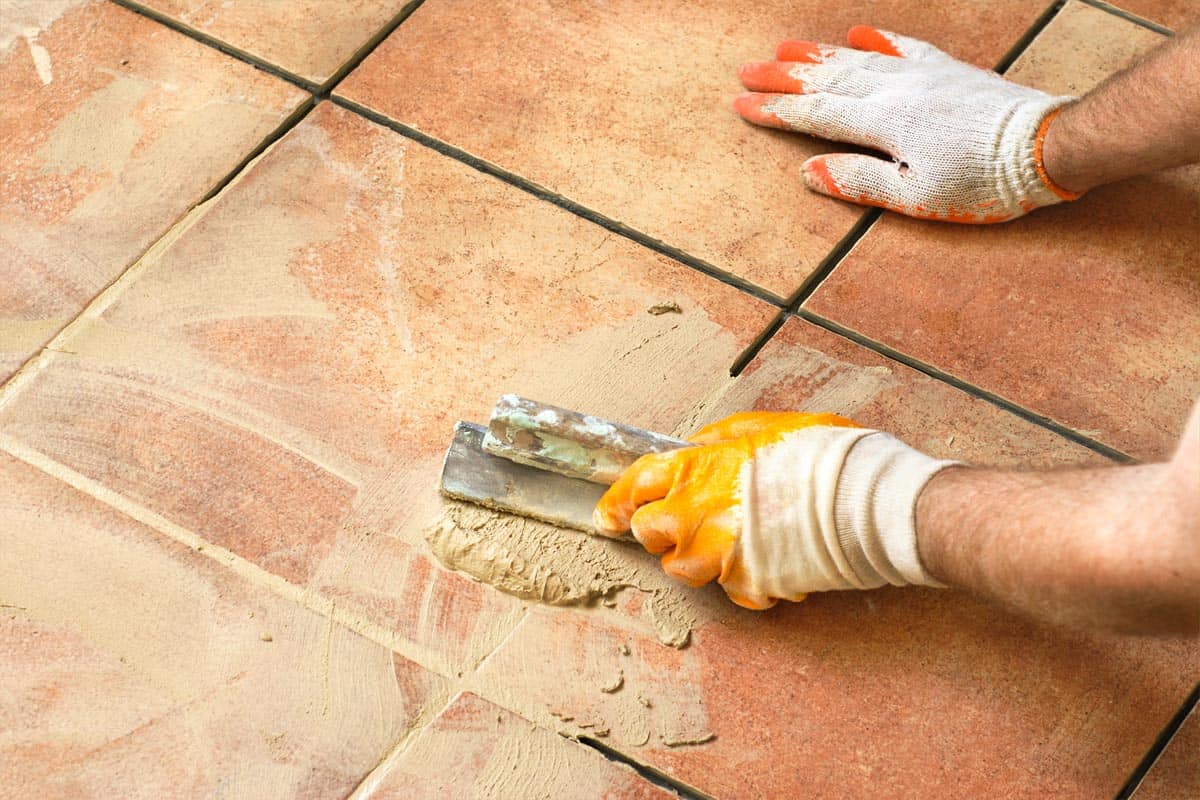
How to Apply the Cleaning Solution
Now that you have your chosen pantry staple cleaning solution ready, it’s time to apply it to the grout. Follow these steps to ensure an effective and efficient cleaning process:
- Start by preparing the cleaning solution as per the instructions mentioned earlier. Whether it’s the vinegar and baking soda solution, lemon juice and baking soda paste, hydrogen peroxide and baking soda mixture, or salt and vinegar paste, make sure you have the right consistency.
- Before applying the cleaning solution, it’s a good idea to remove any loose dirt or debris from the grout lines. Use a soft brush or a vacuum cleaner with a brush attachment to gently remove any surface dust or particles.
- Using either a spray bottle or your hands, apply the cleaning solution directly onto the grout lines. Be generous and ensure that the grout is thoroughly coated with the solution.
- Allow the cleaning solution to sit on the grout for the recommended amount of time. This can vary depending on the solution you are using, but most commonly, it ranges from 5 to 15 minutes. This allows the solution to penetrate and break down the stains and dirt.
- While the solution is working its magic, you can use a grout brush, an old toothbrush, or a scrub brush to agitate and scrub the grout lines. Scrub in a circular motion, applying gentle pressure to remove stubborn stains. This step helps to dislodge any dirt or grime that the cleaning solution has loosened.
- If using a paste or mixture, you can reapply a small amount of the solution to the grout lines as you scrub. This ensures that the grout remains adequately saturated during the cleaning process.
- For larger areas or multiple sections of grout, it’s a good idea to work in smaller sections. This will prevent the cleaning solution from drying out before you have a chance to scrub it properly.
- Once you have scrubbed the grout lines thoroughly, rinse them with clean water. You can use a damp cloth, sponge, or even a spray bottle to rinse away the cleaning solution and any remaining residue. Repeat the rinsing process a few times to ensure all traces of the solution are removed.
- Finally, use a clean, dry cloth or towel to dry the grout lines. This step is essential to prevent moisture from seeping into the grout, which can lead to mold or mildew growth over time.
By following these steps, you can effectively apply the cleaning solution to your grout and achieve sparkling results. Remember to read and follow any specific instructions or precautions for the cleaning solution you choose. Now, let’s move on to scrubbing and cleaning techniques to get the best results.
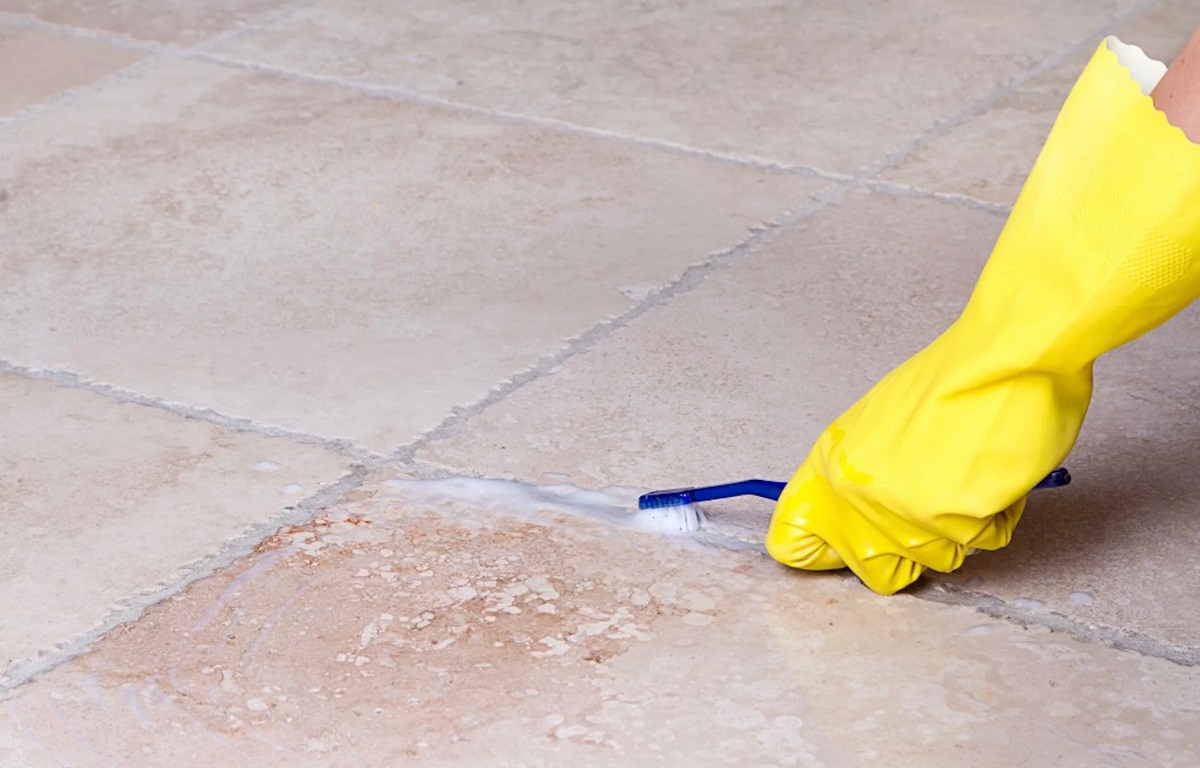
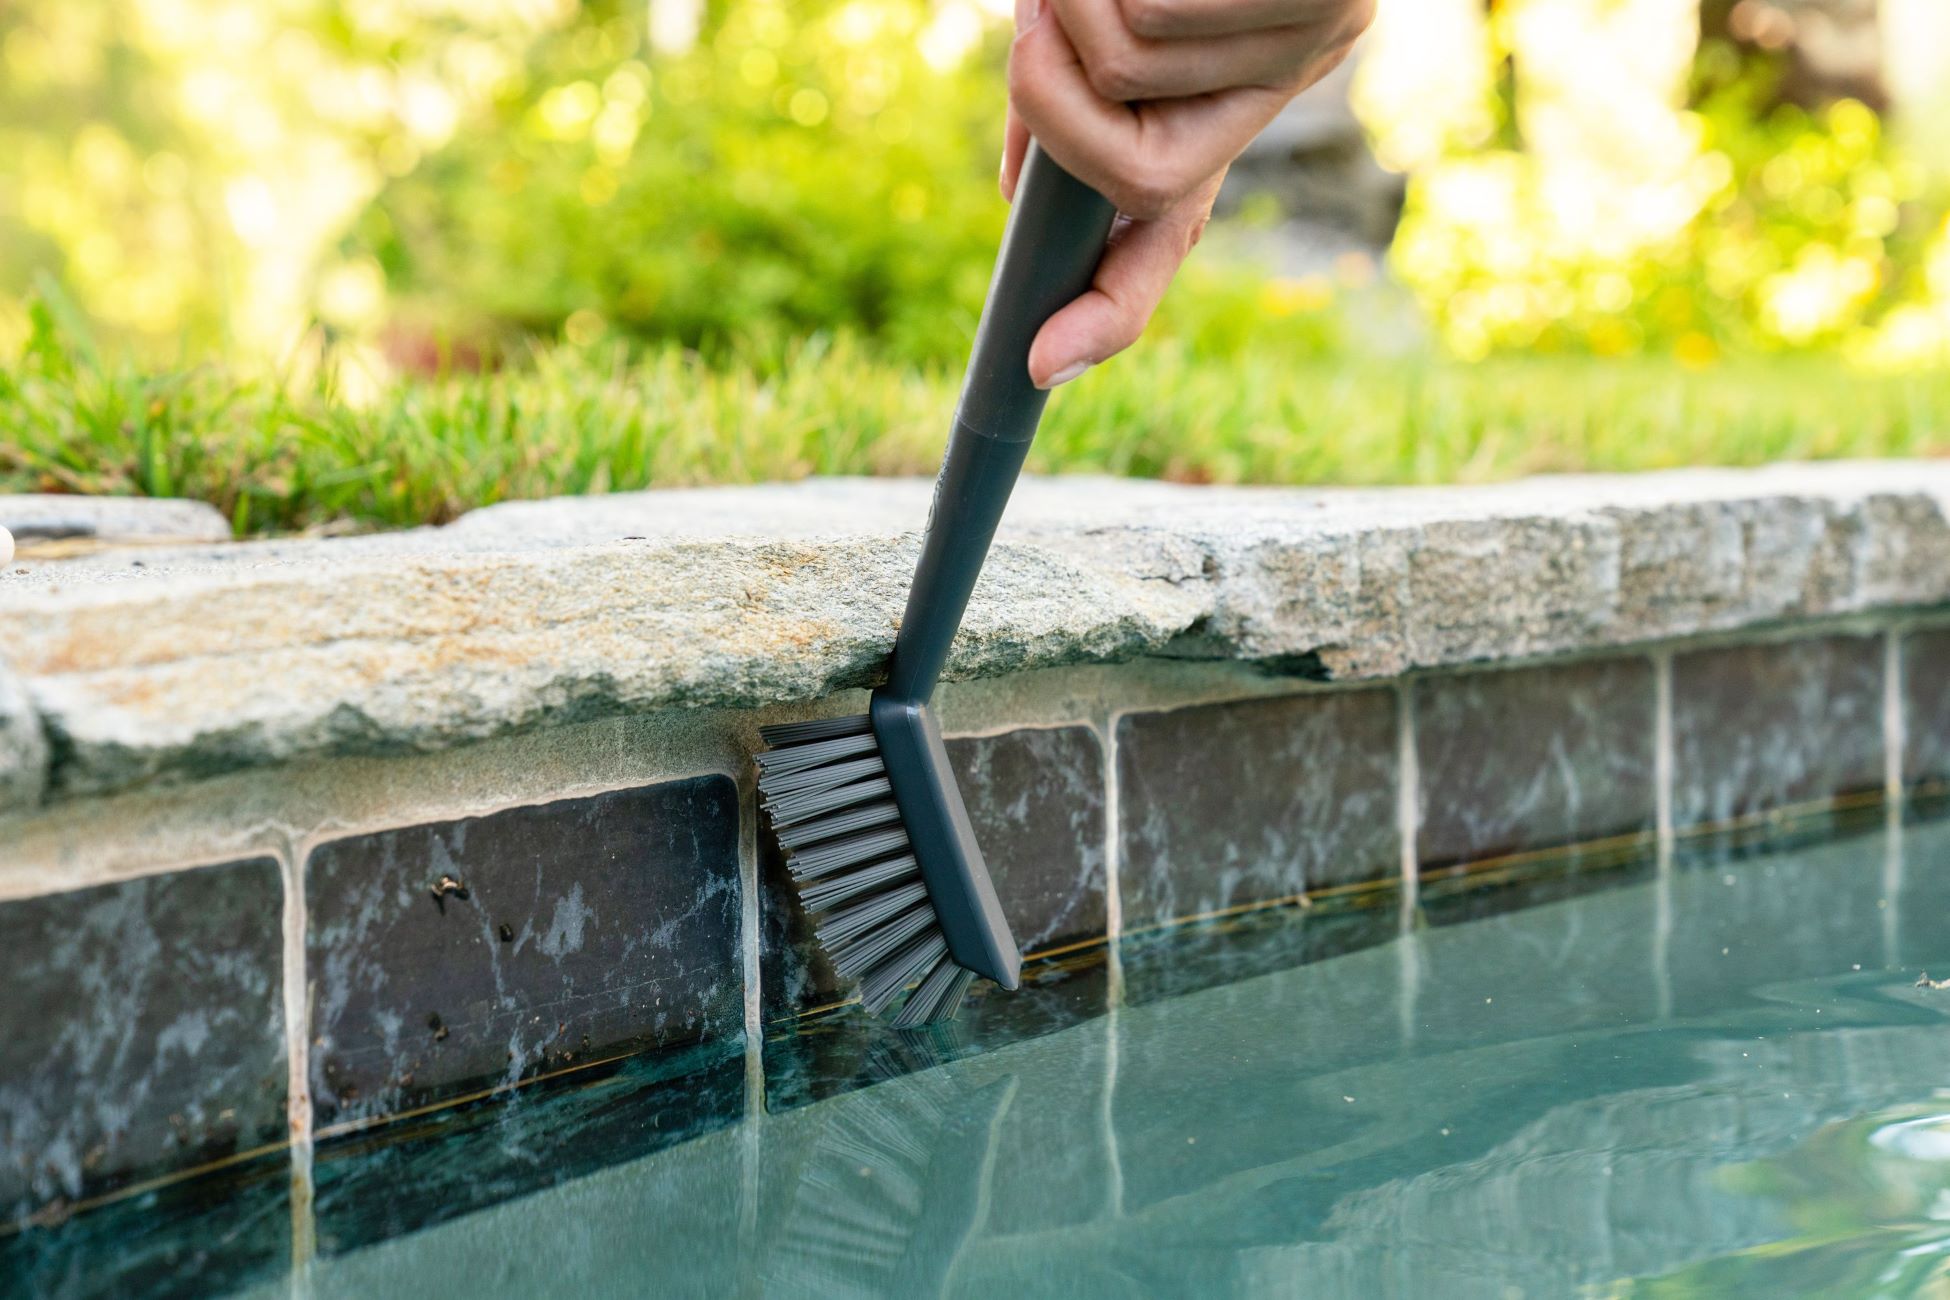
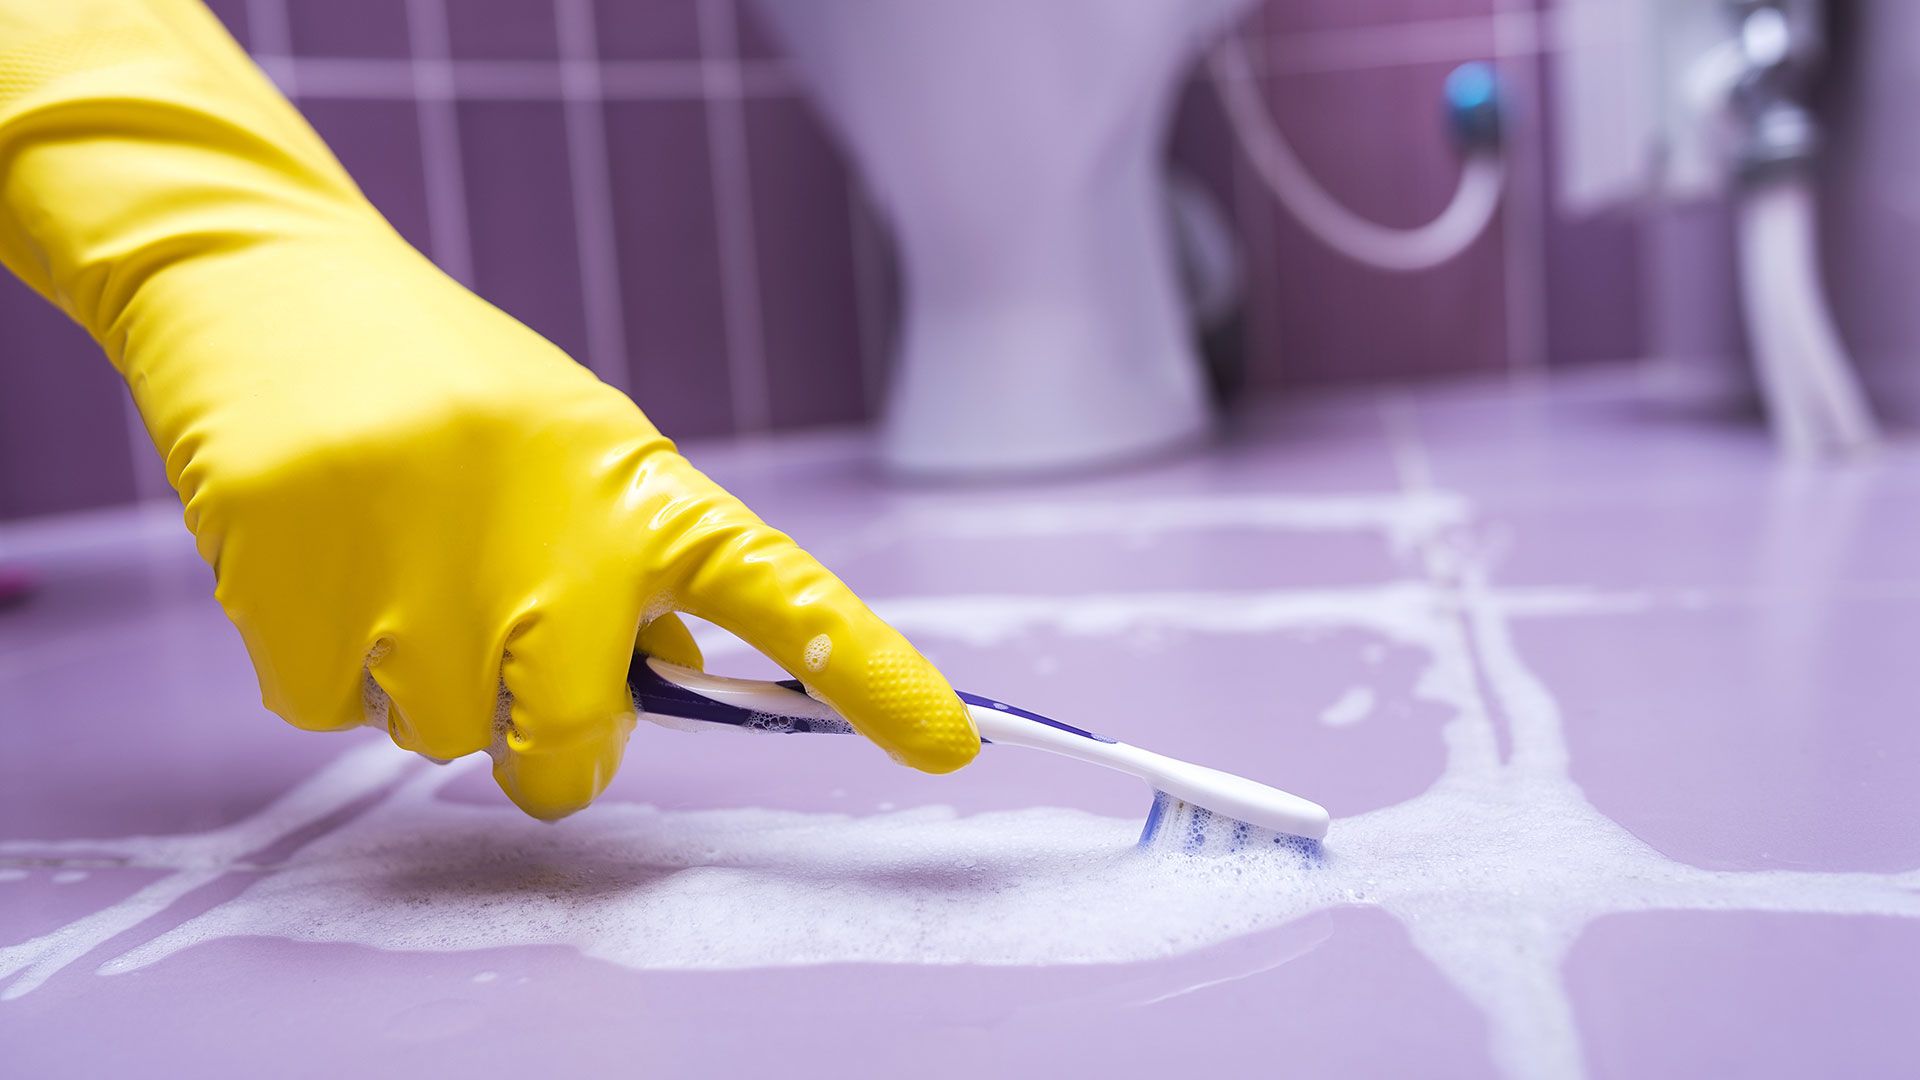
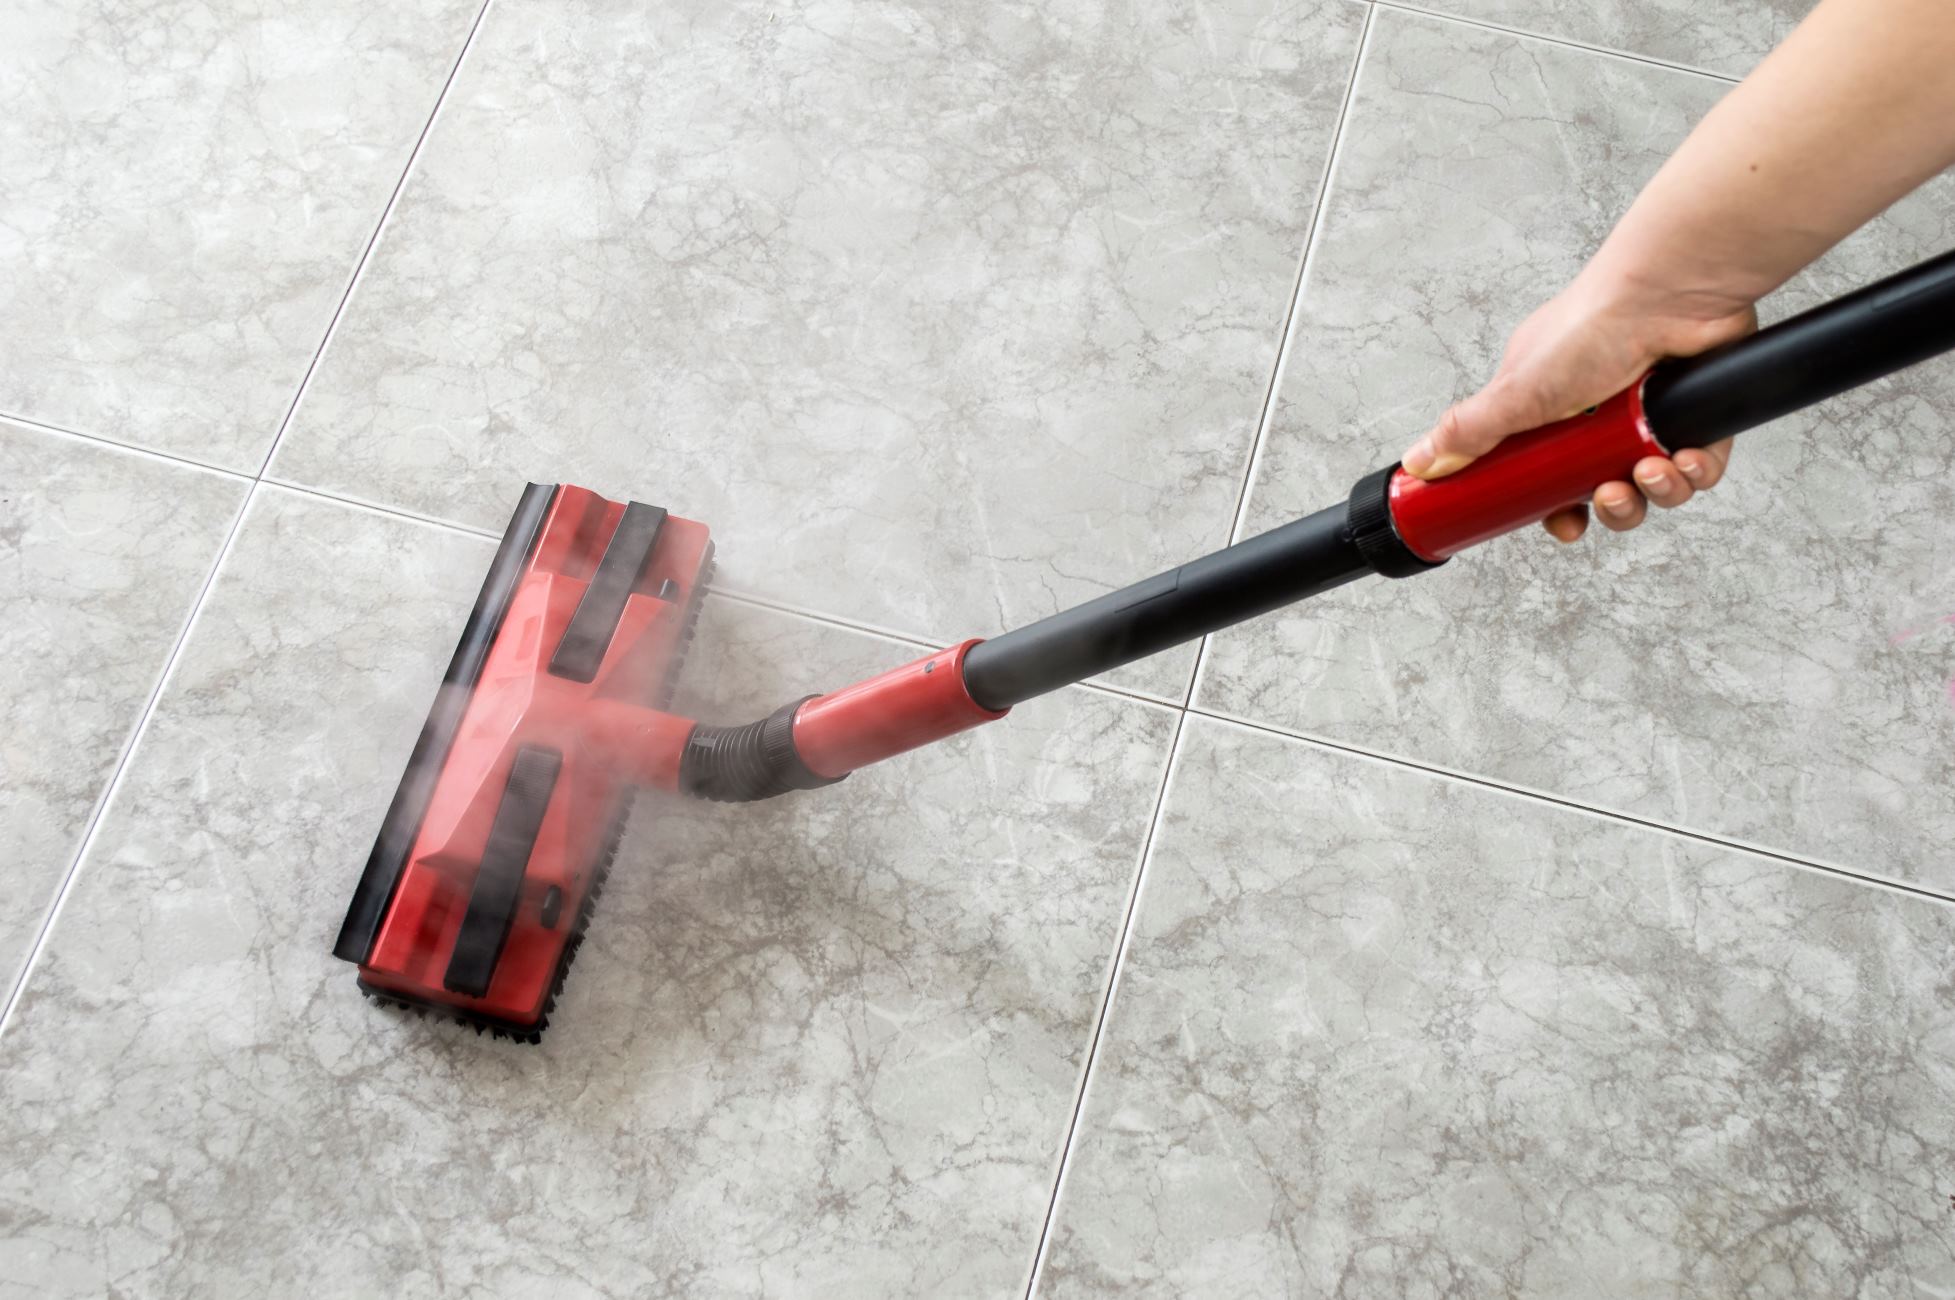
Scrubbing and Cleaning Techniques
When it comes to scrubbing and cleaning grout, using the right techniques can make all the difference in achieving a thorough and effective clean. Here are some techniques to help you get the best results:
- Use a grout brush or an old toothbrush: These small, narrow brushes are perfect for scrubbing the grout lines. The bristles can reach into the crevices and remove dirt and stains effectively. Alternatively, you can also use a scrub brush with stiff bristles for larger areas.
- Apply gentle pressure: While it may be tempting to use excessive force to remove stubborn stains, applying too much pressure can damage the grout or even the adjacent tiles. Instead, focus on using steady and controlled strokes with moderate pressure to avoid unnecessary damage.
- Scrub in a circular motion: Scrubbing in circular motions helps to dislodge dirt, stains, and grime from the grout lines. This motion allows the cleaning solution to penetrate and lift the debris more effectively.
- Work in small sections: If you have a large area of grout to clean, it’s best to work in small sections. This ensures that the cleaning solution does not dry out before you’ve had a chance to scrub it thoroughly. It also allows you to focus on one area at a time, ensuring a more meticulous clean.
- Be patient with tough stains: Some stains may require extra time and effort to remove completely. If you come across a particularly stubborn stain, apply the cleaning solution and let it sit for a longer period, allowing the solution to work its magic. You may need to scrub the area multiple times or apply additional cleaning solution for better results.
- Regularly rinse the brush: As you scrub, dirt and grime can accumulate on the brush, reducing its effectiveness. Rinse the brush periodically to remove any buildup and ensure that you’re working with a clean brush for optimal cleaning power.
- Take breaks if needed: Cleaning grout can be a labor-intensive task. If you find yourself getting tired or frustrated, take breaks as needed. Pace yourself and allow yourself time to rest and recharge before continuing the cleaning process. This will help ensure that you maintain focused and consistent scrubbing throughout.
By following these scrubbing and cleaning techniques, you’ll be able to effectively remove dirt, stains, and grime from your grout lines. Remember to adjust the techniques based on the specific cleaning solution and the condition of your grout. Now, let’s move on to the next step, which is rinsing and drying the grout.
Read more: How To Use Fence Staples
Rinse and Dry the Grout
After scrubbing and cleaning the grout, it’s important to thoroughly rinse away any residue and moisture to ensure a clean and dry surface. Here are the steps to effectively rinse and dry the grout:
- Start by filling a clean bucket or basin with clean water.
- Dip a clean sponge or cloth into the water, and wring it out to remove excess moisture. You want the sponge or cloth to be damp but not dripping wet.
- Gently wipe the grout lines with the damp sponge or cloth, removing any remaining cleaning solution or residue. Rinse the sponge or cloth frequently in the water to avoid spreading the dirt or residue back onto the grout.
- As you rinse, pay close attention to the grout lines to ensure they are thoroughly clean. You may need to revisit any stubborn spots that require additional rinsing.
- Once the grout has been rinsed, use a clean, dry cloth or towel to gently blot the grout lines. This helps to absorb any remaining moisture.
- Allow the grout to air dry completely. Avoid walking on the wet grout surface to prevent any dirt or debris from being tracked onto the freshly cleaned grout.
It’s important to ensure that the grout is completely dry before resuming normal use of the area where the grout is located. This helps to prevent any moisture-related issues, such as mold or mildew growth.
If you’re in a hurry or want to expedite the drying process, you can use a fan or open windows to increase air circulation in the room. Just be sure the area is well-ventilated to aid in the drying process.
By following these steps to rinse and dry the grout, you’ll be able to complete the cleaning process and admire the refreshed appearance of your grout lines. Now, let’s move on to some valuable tips and precautions to keep in mind when cleaning grout.
Tips and Precautions
When it comes to cleaning grout, there are some important tips and precautions to keep in mind to ensure a safe and effective cleaning process. Consider the following tips and precautions:
- Test the cleaning solution: Before applying any cleaning solution to your grout, it’s essential to test it on a small, inconspicuous area first. This will help you determine if the solution is compatible with your grout and whether it produces the desired results.
- Protect yourself: Wear gloves and eye protection when handling cleaning solutions, especially those with strong or acidic ingredients. This will help protect your skin and eyes from potential irritation.
- Ensure proper ventilation: When working with cleaning solutions, ensure that the area is well-ventilated by opening windows or using fans. This will help dissipate any fumes and maintain good air quality.
- Avoid using abrasive tools: While it’s important to scrub the grout lines, avoid using harsh or abrasive tools that can damage the grout or tiles. Stick to soft brushes, old toothbrushes, or grout brushes designed specifically for grout cleaning.
- Regular maintenance: To prevent heavy staining and buildup, establish a regular cleaning routine for your grout. Regularly wiping the grout lines with a damp cloth or sponge can help minimize the accumulation of dirt and grime.
- Protect colored grout: If you have colored grout, be cautious with strong cleaning agents or acidic solutions as they may cause discoloration. Always test on a small area first and consider using milder cleaning methods to avoid damaging or fading the color.
- Avoid bleach: While bleach can be effective for cleaning certain surfaces, it’s best to avoid using it on grout. Bleach can weaken the grout and cause it to crack or deteriorate over time.
- Maintain sealant: If your grout has been sealed, it’s important to maintain the sealant to protect it from stains and damage. Follow the manufacturer’s recommendations for sealant maintenance and reapplication if necessary.
- Seek professional help if needed: If your grout is severely stained, damaged, or in need of extensive repair, it’s best to seek professional help. A professional grout cleaning or regrouting service can ensure a thorough and long-lasting solution.
By following these tips and precautions, you can navigate the grout cleaning process with confidence and achieve impressive results. Now, let’s wrap up this article.
Conclusion
Cleaning grout doesn’t have to be a daunting task, especially when you have common pantry staples at your disposal. With vinegar, baking soda, lemon juice, hydrogen peroxide, salt, and a little bit of elbow grease, you can restore the sparkle to your grout and revive the overall appearance of your kitchen.
In this article, we explored various pantry staple solutions and techniques for cleaning grout. From the versatile vinegar and baking soda solution to the refreshing lemon juice and baking soda paste, these pantry staples proved to be effective in removing stains and dirt from grout lines. The hydrogen peroxide and baking soda mixture provided a powerful solution for tougher stains, and the salt and vinegar paste proved useful for those stubborn areas.
We also discussed the importance of rinsing and drying the grout thoroughly to prevent any moisture-related issues. By following the recommended steps, you can ensure a clean and dry surface for your grout to stay in optimal condition.
Additionally, we provided tips and precautions to keep in mind throughout the grout cleaning process. From testing cleaning solutions to protect yourself with gloves and proper ventilation, these tips will help you navigate the task safely and efficiently.
Remember, maintaining a regular cleaning routine and taking preventive measures can help keep your grout looking fresh and extend its lifespan. If you encounter heavily stained or damaged grout, it’s wise to seek professional assistance to ensure a thorough and expert restoration.
So, grab those pantry staples, put on your cleaning gloves, and get ready to transform your kitchen by giving your grout the attention it deserves. With the right techniques and pantry staple solutions, you can enjoy sparkling grout and a kitchen that shines.
Frequently Asked Questions about How To Clean Grout Using Pantry Staples You Probably Already Have
Was this page helpful?
At Storables.com, we guarantee accurate and reliable information. Our content, validated by Expert Board Contributors, is crafted following stringent Editorial Policies. We're committed to providing you with well-researched, expert-backed insights for all your informational needs.


0 thoughts on “How To Clean Grout Using Pantry Staples You Probably Already Have”