Home>Storage Ideas>Storage Bins>How To Build A Potato Storage Bin (100% Effective)
Storage Bins
How To Build A Potato Storage Bin (100% Effective)
Modified: December 6, 2023
Quickly make your very own potato storage bin with our step-by-step guide! Have yourself a delicious potato-based dish any time you want.
(Many of the links in this article redirect to a specific reviewed product. Your purchase of these products through affiliate links helps to generate commission for Storables.com, at no extra cost. Learn more)
Unlike several other types of crops, potatoes may not do well when they are kept just anywhere. Without the proper care required, they are likely to sprout or turn rotten within short periods of time. Enter the potato storage bin: an easy fix to your potato storage challenges.
People Who Search For Potato Storage Bin Also Search For


Read more: How To Plant Potatoes In A Garden
Why Potato Storage Bins?
Naturally, potatoes are best stored away from sunlight and liquid, in well-ventilated and cool containers. They are also best preserved at any temperature between 45 and 50 degrees F. However, it may be a little bit difficult to find the ideal place that suits this description in your home.

Image via Hoppip from GIPHY
Well-ventilated paper bags or cardboard boxes may be close to offering the ideal environment for your potato storage. Nevertheless, the best way to store potatoes is to engage the use of a potato storage bin that is built for the primary purpose of storing them. One of the best things about potato storage bins is the fact that they are neither expensive nor difficult to build. Simply follow the instructions listed below to build one that suits you.
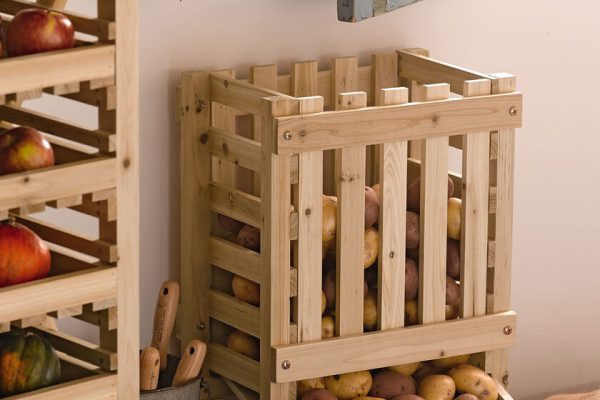
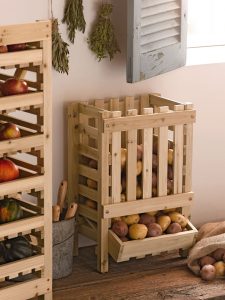
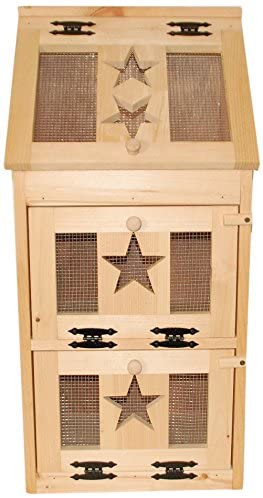
The Perfect Potato Storage Bin
The wooden potato storage bin proves to be just the perfect answer to the question of where to store potatoes to keep them fresh for an extended period. They are known to provide just the perfect atmosphere your potatoes require to stay fresh. The fact that they are typically cool and dark helps to prevent your potatoes from going bad or sprouting.
Potato Storage Bin – Version 1 (For Beginners)
While a more advanced method may prove a little bit difficult for people with little carpentry skills, the following process is straightforward and a lot easier for just anyone to build. However, this unit is much smaller and less attractive. But it is still an excellent answer to the question, “How to keep potatoes fresh?”
Required Tools and Materials For Easy Potato Storage Bin
Here is a list of the tools required for this project:
● Hammer
● 3-inch nails
● Hinges
● Screwdrivers
● 2-inch Screws
The materials needed for this project are:
● 2 pieces of 1 x 1 ft. lumber (2 inches thick)
● 4 pieces of 1 x 2 ft lumber (2 inches thick)
Read more: How To Store Storage Bins
Easy Potato Storage Bin Building Process
1) Place a 2-inch edge of one of the 4 pieces of lumber with the face of another to form a right angle. Attach these two boards with 3-inch nails by hammering the nails through the face of the edge of the 2-inch piece of lumber.
2) At this point, form a U shape by adding yet another piece of the 4 pieces to the other side of the already made structure. Also, nail this new plank to the horizontally placed plank. Once this is done, close up the open space at the top with the last piece of the 4 pieces of lumber so that you now have an open box shape. Nail the structure together to ensure some level of firmness.
3) Here, place one of the two pieces of lumber at one of the open bottom portions of the structure you have now. Once is done, drive the nails through the faces of the plank into the edges of the four structure.
4) At this juncture, attach three hinges to the other open side of the structure with a screwdriver and a 2-inch screw. Attach one hinge at the extreme right, one at the extreme left, and one in the middle. Once it is done, attach the remaining piece of lumber to the structure with the already affixed hinges.
Potato Storage Bin – Version 2 (For Experts)
While this is not the easiest or cheapest of structures to build, it offers you a lot more comfort and more durability. Besides, it could add some beauty to your kitchen.
Required Tools and Materials For Advanced Potato Storage Bin
It is important to note that you do not need to be a professional to build a proper potato storage box. With just basic carpentry skills, you are good to go! Here are the tools you’ll be needing through the process:
● Hammer
● Screwdriver
● Hinge
● Tape Measure
● Framing Square
● Safety Gloves
● Safety Glasses
● Filler
● Glue
● Nails
● 2 to 3-inch screws
Note that the quality of the lumber you buy will go a long way in determining the quality of the potato bin. It is important to ensure that the planks you buy are straight and without any decay or cracks. Also, ensure that the pieces of plywood are in proper shape. Here is a plan of the woods you would require:
● 1 piece of ¾ inches of plywood (13 ¼ x 18 inches long) – For the top
● 1 piece of ¼ inches plywood (16 ½ x 38 inches long) – For the back
● 2 pieces of 1 x 2 lumber (38 inches long), 4 piece (13 ½ inches) – For the trims
● 2 pieces of ¾ inches plywood (11 ½ x 38 inches long) – For the partitions.
● 1 piece of ¾ inches plywood (11 ½ x 15 ¼ inches long) – For the shelf
● 6 pieces of 1 x 1 lumber (11 ½ inches long) – This will serve as cleats
● 2 pieces of ½ lumber – (7 ½ inches long), another 2 pieces (10 ¼ inches long), 1 piece of ¼ inches plywood (5 x 10 ¾ inches long) – For the door
● 2 pieces of ½ lumber (11 ½ inches long), another 2 pieces (10 ¼ inches long), 1 piece of ¾ inches plywood (10 ¼ x 12 inches long), 1 piece of ¼ inches plywood (9 x 10 ¾ inches long) – For the units
● Some extra pieces of plywood and lumber will also come in handy
The measurements listed here may not be applicable to you. Depending on the size of the potato storage bin you are looking at, your measurements may vary. If, for instance, you’d prefer a potato storage bin that would also suffice for vegetable storage, you might require to build something that is slightly larger.
Also, if you are particular about conserving space, you can opt for a smaller measurement. However, it is important that you keep the bin compact enough to keep it from excess light, and enough ventilation to allow airflow.
Read more: How Long Do Potatoes Last In Pantry
Advanced Potato Storage Bin Building Process
Having ensured that you are equipped with the required tools and supplied with the required woods for the required plan, you can proceed with the building processes. The whole process should be completed within 5 to 10 hours, depending on how skillful you are.
1) The first step to begin with here is to build the side panels by cutting some components from ¾ inches of plywood sheets. You may also need to spend some time to smoothen the edges if needed. Then, you attach the 1 x 1 cleats to it. Now, so much attention is required here. Without proper measurement, you are likely to get a poor result. It is important to ensure that cleats fit perfectly to the side panels. To attach the cleats to the side panels, you can use just nails. However, it is safer to use both glue and 1 ¼ brad nails.
2) Once the side panels have been prepared, the next step is to attach them to the back of the potato bin – that is, the piece of ¼ inches plywood (16 ½ x 38 inches long). To do this, 1 ¼ inches finishing nails will be just appropriate. However, it is important to ensure that the edges are perfectly aligned, and that the corners are square. Without getting the corners completely square, it’ll be difficult to get the unit perfectly aligned and vice versa.
3) Once you have perfectly aligned edges and squared corners (from step 2), the next step is to attach the 1 x 2 limbers for trims to the front of the frame you have now. To do this, you simply have to cut them to fit the measurement of the frame. Then, drill at both ends of the pieces so that you can use pieces of 1¼ screws to lock the components together. Make sure the corners are square and carefully align the edges.
4) At this juncture, you can create the top of the storage bin. Simply center the piece of ¾ inches of plywood (13 ¼ x 18 inches long) to the top of the frame. Center it properly to the top and seal it with a combination of the appropriate nails and glue. To add a professional touch to it, use a sandpaper to smoothen its edges.
5) At this point, you can proceed to begin to build the bins. First, you begin with its sides. You can make use of a jigsaw to make curved cuts and smoothen edges with sandpaper. You can also build the frame for the front face of the bins with the 1×2 lumber. Simply drill pocket holes at the two ends of the horizontal lumber pieces, attach them to the vertical supports with the aid of 1¼ screws.
By adding glues to the joints, you can ensure that the corners are firmly right-angled. Also, add ¼ inch rabbets to its interiors, using a router. Then, join the frame to the side of the bin with glue and appropriate nails. Attach a piece of plywood (3/4 inches) to the back of the bins with glue and brad nails.
6) At this point, make the bottom of the bins with the ¾ inches plywood. You do this by drilling pocket holes along its four edges, ensuring that it perfectly fits into the frame of the bins. You can use 1¼ inch screws to ensure that the bottom is perfectly secured to the frame of the bins. However, it is important to note that there are tendencies for there to be gaps between the components if utmost attention isn’t paid.
7) Here, attach a ¼ inch panel to the front face of the structures. Use glue and the appropriate nails to do this. Once this is done, you should fit in the bins you have built to the opening of the storage unit built earlier. Ensure they are well centered. Lock the bins to the trims with two hinges. At this juncture, fit a piece of ¾ inches plywood to the upper cleats.
8) At this point, what is important is the building of the door of the whole unit. To do this, simply make use of the 1×2 lumber (earlier earmarked for the door structure) to build the fitting frame for the door. With this done, you have to drill pocket holes at the endings of the horizontal components, while you insert 2 ½ inch screws into the vertical components as appropriate so that they can be combined together. Once this is done, you can proceed to align the edges by inserting the screws and the holes to ensure that they are tightly locked together. With this done, you should proceed to attach ¼ inches rabbets into the interior of the frame.
9) With the frame of the door now ready, simply attach a ¼ inch plywood panel to the frame of the door. Ensure that no gap is left between the components. You can then make use of glue or/and the appropriate nails to ensure it is locked into place. It is important that you note that glue may not be efficient for long term use. Hence, making use of the appropriate size of nails will definitely guarantee you more tightness. Once you are through with this whole process, your potato storage bin door is ready.
10) Here, you’ll have to fit the door to the opening of your storage unit. To do this, simply make use of hinges. This allows you to be able to open and/or close it at will. Also, at this stage, you’ll have to install a latch into the top of the door to lock it into place.
With these steps, your wooden potato storage bin is ready. You can fill the holes and dents drilled (in the process of building the unit) with wood putty and keep them somewhere they can dry out quickly enough. Then, your storage bin is ready.
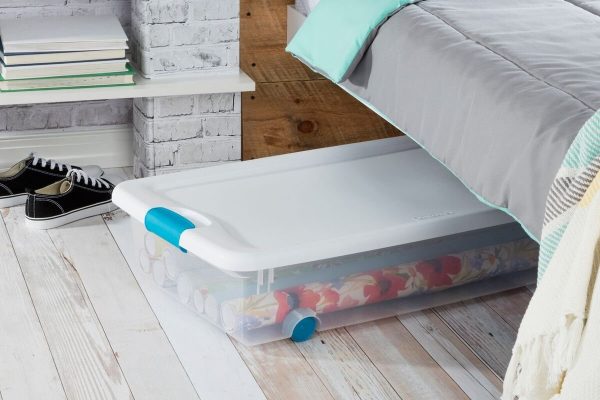
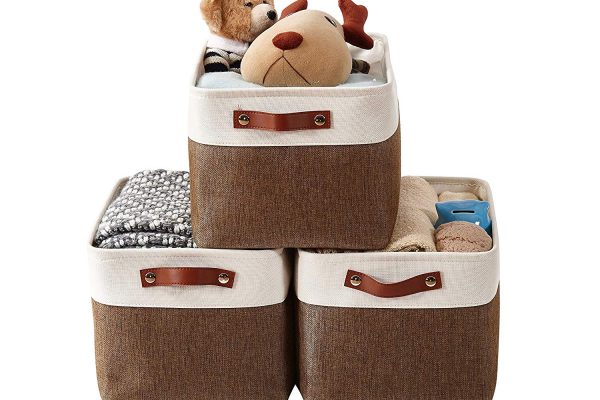
If you’ve read what we’ve written so far and decided you’re too lazy to build a potato storage bin from scratch, worry not! Check out the awesome (and very affordable) storage bin below.
The ideal potato storage bin is versatile and also able to preserve other types of food like vegetables, bread, etc. With proper potato storage bin in place, you would be able to save your potatoes for long periods of time. Choose the option that suits you best from the above, and let us know how it goes!
Was this page helpful?
At Storables.com, we guarantee accurate and reliable information. Our content, validated by Expert Board Contributors, is crafted following stringent Editorial Policies. We're committed to providing you with well-researched, expert-backed insights for all your informational needs.


0 thoughts on “How To Build A Potato Storage Bin (100% Effective)”