Articles
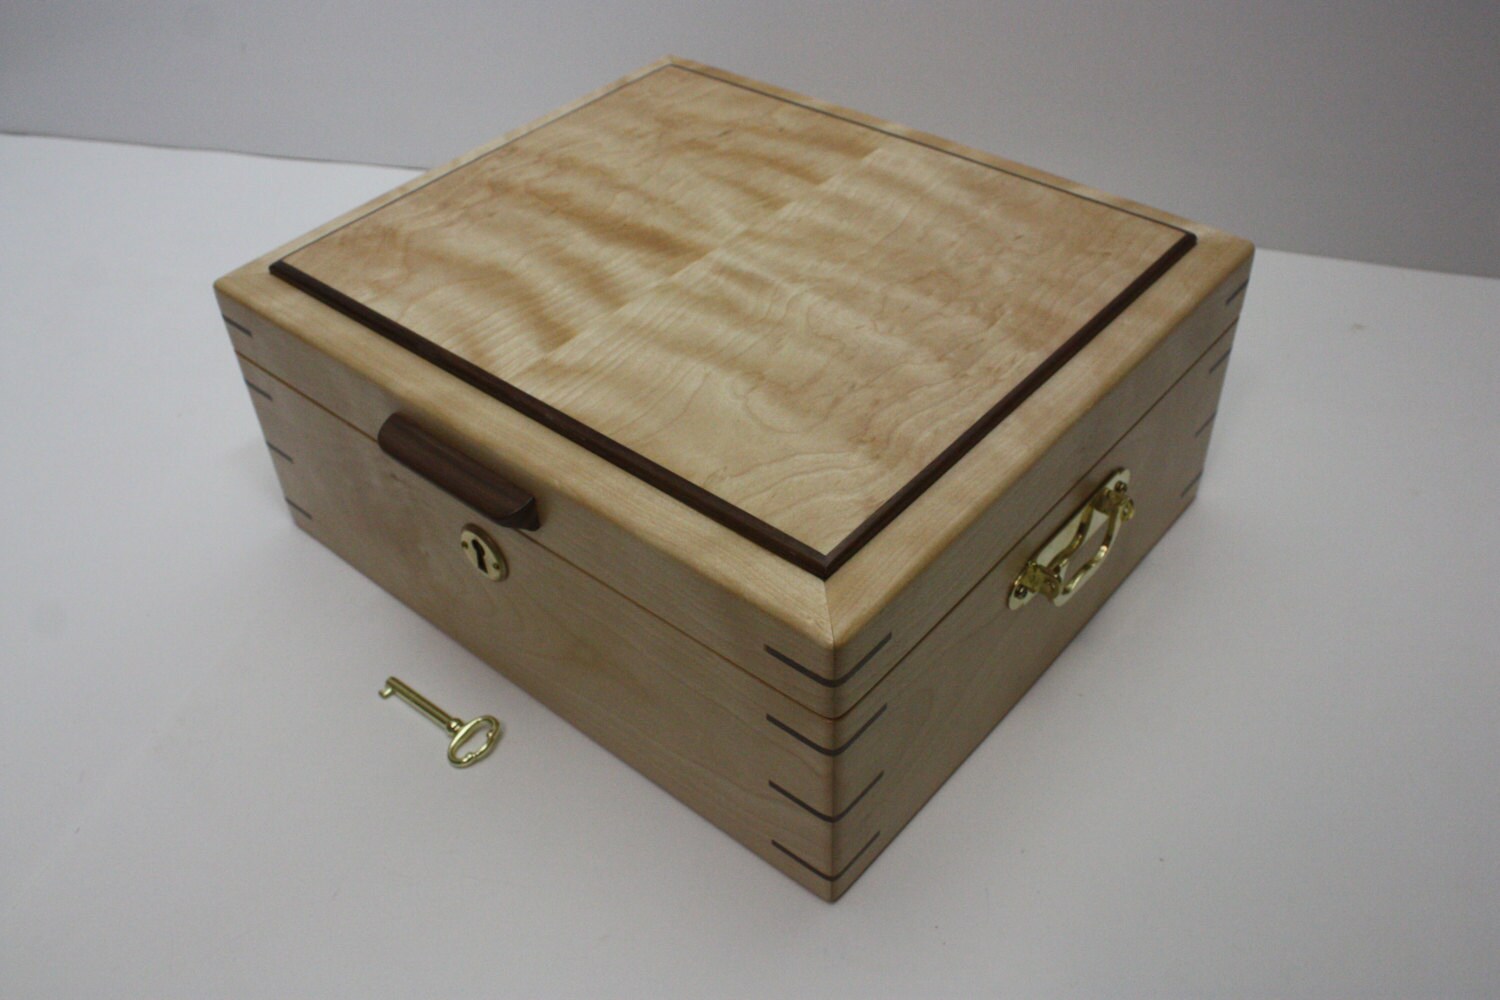
How To Make A Birch Box With Hand Tools
Modified: October 18, 2024
Learn how to make a birch box using only hand tools with our informative articles. Discover step-by-step instructions and expert tips for a successful woodworking project.
(Many of the links in this article redirect to a specific reviewed product. Your purchase of these products through affiliate links helps to generate commission for Storables.com, at no extra cost. Learn more)
Introduction
Welcome to this article on how to make a birch box with hand tools! If you’re a DIY enthusiast or simply looking for a creative project, making your own birch box can be a fulfilling and rewarding experience. Birch wood is known for its durability, strength, and beautiful natural grain pattern, making it a perfect choice for crafting a sturdy and aesthetically pleasing box. Plus, creating a birch box with hand tools adds an extra level of craftsmanship and personal touch to your project.
In this step-by-step guide, we’ll walk you through the process of making a birch box using only hand tools. You don’t need any fancy power tools or expensive machinery; just a few basic tools and a willingness to engage in some manual labor. Whether you’re a beginner or an experienced woodworker, this project is suitable for anyone looking to explore the world of woodworking.
Before we dive into the steps, let’s go through the list of materials and tools you’ll need to complete the project:
Key Takeaways:
- Crafting a birch box with hand tools is a fulfilling woodworking project that allows for personalization, creativity, and the satisfaction of creating a functional and visually appealing item.
- From selecting high-quality birch wood to adding finishing touches, making a birch box involves precise measurements, careful assembly, and the opportunity to customize the box’s appearance for lasting durability and beauty.
Read more: How To Make A Perfect Box With Hand Tools
Materials and Tools Needed
Before you embark on your birch box project, it’s important to gather all the necessary materials and tools. Here’s what you’ll need:
Materials:
- Birch wood panels – Look for high-quality birch plywood or solid birch boards. The thickness of the panels depends on your desired box size.
- Wood glue – Choose a strong, fast-drying wood glue for secure joints.
- Sandpaper – Different grits (coarse to fine) for smoothing surfaces and edges.
- Wood stain or finish – Select a stain or finish that suits your desired aesthetic.
- Wood sealer – Optional, but recommended for added protection.
Tools:
- Measuring tape – For accurate measurements.
- Pencil – To mark measurements and cut lines.
- Miter saw or handheld saw – For cutting the birch wood panels.
- Square – To ensure precise right angles.
- Sanding block or sanding machine – For smoothing surfaces and edges.
- Clamps – To hold the wood pieces together during assembly.
- Chisel – For clean and precise cuts.
- Hammer – To aid in chiseling or minor adjustments.
- Paintbrush – For applying wood stain or finish.
Make sure you have all the materials and tools handy before starting your birch box project. This ensures a smooth workflow and minimizes any interruptions as you progress through the steps.
Step 1: Choosing the Birch Wood
The first step in making a birch box is to select the right type of birch wood for your project. When choosing the birch wood, consider the following factors:
Read more: Who Makes Milwaukee Hand Tools?
Quality:
Opt for high-quality birch wood panels or solid birch boards. Check for any visible defects, such as warping, knots, or cracks. The wood should be smooth and free of blemishes to ensure a clean and professional-looking final product.
Thickness:
Choose the appropriate thickness of the birch wood panels based on the desired size of your box. Thicker panels will result in a more sturdy and durable box, while thinner panels may be suitable for smaller or decorative boxes.
Grain Pattern:
Birch wood is known for its beautiful natural grain pattern. Consider whether you want a more pronounced or subtle grain appearance on your box. This is a matter of personal preference and will contribute to the overall aesthetic of the finished product.
Sourcing:
Look for reputable suppliers or local lumberyards that specialize in quality woodworking materials. You can also consider online marketplaces that offer a wide range of birch wood options. Ensure that the supplier has a good track record and positive customer reviews.
Once you’ve chosen your birch wood, it’s time to move on to the next step: measuring and marking the wood panels.
Read more: How To Make A Bow With Hand Tools
Step 2: Measuring and Marking
After selecting the birch wood for your box, it’s time to move on to the next step: measuring and marking the wood panels. This step is crucial for ensuring accurate cuts and proper box dimensions. Here’s how to proceed:
1. Determine the Box Dimensions:
Decide on the size of your birch box. Consider its purpose and the items you plan to store inside. Measure the length, width, and height you want for your box. Write down these measurements as a reference for cutting the wood panels.
2. Mark the Wood Panels:
Using a measuring tape and a pencil, measure and mark the dimensions onto the birch wood panels. Ensure that the markings are clear and easily visible for accurate cuts. Make sure to label each panel accordingly, specifying which piece belongs to the box base, sides, and lid.
3. Consider Joinery:
If you plan to use joinery techniques such as dovetail joints or finger joints, take these into account when marking the wood panels. Allow for extra material to accommodate the joints, ensuring a snug and secure fit when assembling the box.
Read more: How To Make Beams With Hand Tools
4. Double-check Measurements:
Before proceeding to the cutting stage, double-check your measurements to avoid any errors. Measure twice, cut once. Accuracy at this stage will save you time and prevent wastage of materials.
Once you’ve measured and marked the wood panels, you’re ready to move on to the next step: cutting the birch wood panels.
Step 3: Cutting the Birch Wood Panels
With your birch wood panels measured and marked, it’s time to move on to the cutting stage. This step requires careful precision to ensure clean and accurate cuts. Follow these steps to cut the birch wood panels for your box:
1. Set up your Workstation:
Find a suitable workspace with enough room to accommodate your birch wood panels. Ensure that you have ample lighting and a stable surface to work on. Secure the panels in place using clamps or holdfasts to prevent any movement during the cutting process.
2. Choose the Right Saw:
Depending on your preference and the availability of tools, you can use a miter saw, a panel saw, or a handheld saw to make the cuts. Ensure that the saw blade is appropriate for cutting wood, with enough teeth to produce a clean and smooth cut.
Read more: How To Make A Tobacco Pipe With Hand Tools
3. Cutting the Panels:
Align the saw blade with the marked cutting line on the birch wood panel. For straight cuts, use a square or guide to ensure a precise 90-degree angle. Start the saw and slowly guide it along the marked line, applying gentle and consistent pressure. Take your time and make steady movements to achieve accurate cuts.
4. Repeat for Each Panel:
Repeat the cutting process for each birch wood panel as per your markings. Remember to maintain a steady hand, keeping the saw aligned with the cutting line. Take breaks as needed and make any necessary adjustments to achieve the desired dimensions for your box.
5. Test the Fit:
Once all the panels are cut, test their fit by assembling them together without glue. Ensure that the edges align properly and the box takes shape according to your measurements. If any adjustments are needed, use a sanding block or a chisel to trim the edges as required.
With the birch wood panels cut to size, we can now move on to the next step: sanding the edges to ensure a smooth finish.
Step 4: Sanding the Edges
Once you have cut the birch wood panels for your box, it’s important to sand the edges to ensure a smooth and polished finish. Sanding not only enhances the overall appearance of the box but also removes any roughness or splinters that may be present. Here’s how to sand the edges of the birch wood panels:
Read more: How To Make A Knife Handle With Hand Tools
1. Gather Your Sanding Supplies:
Collect sandpaper of various grits, ranging from coarse to fine. You’ll need a sanding block or sanding machine to hold the sandpaper securely and provide steady pressure while sanding. Additionally, consider using a sanding sponge for hard-to-reach areas or curved edges.
2. Sand the Edges:
Start with the coarsest grit of sandpaper and gradually work your way to a finer grit. Hold the sandpaper firmly and use long, even strokes along the edges of the birch wood panels. Apply consistent pressure, but be careful not to remove too much material.
3. Smooth Out Irregularities:
Pay close attention to any rough spots, splinters, or uneven edges. Use the sandpaper to smooth them out, creating a uniform and sleek edge on each panel. Be patient and take your time to achieve the desired smoothness.
4. Transition to Finer Grits:
As you progress, switch to a finer grit of sandpaper to refine the edge further. This will help remove any visible scratches left by the coarse sandpaper and leave a smoother surface. Repeat this process with increasingly finer grits until you achieve a desired level of smoothness.
Read more: Who Makes Kobalt Hand Tools
5. Check for Consistency:
After sanding, inspect all the edges of the birch wood panels to ensure they are smooth and consistently sanded. Run your hand along the edges to feel for any rough patches. If necessary, go back with a finer grit of sandpaper to touch up any areas that require additional smoothing.
Now that the edges of the birch wood panels are sanded smooth, we can move on to the next step: assembling the panels to form the birch box.
Step 5: Assembling the Birch Wood Panels
Now that you have prepared the birch wood panels by measuring, cutting, and sanding, it’s time to bring them together and assemble your birch box. This step will involve using wood glue and clamps to secure the panels in place. Here’s how to assemble the birch wood panels:
1. Apply Wood Glue:
Before joining the panels together, apply a thin and even layer of wood glue to the edges of the birch wood. Use an appropriate wood glue that provides a strong bond and quick drying time. Ensure that you cover the entire surface where the panels will be joined.
2. Align the Panels:
Carefully align the edges of the birch wood panels, ensuring that they are flush and the corners are square. Take your time to achieve a precise fit, using a square or a right-angle tool to double-check the alignment.
Read more: Who Makes Cat Hand Tools
3. Clamp the Panels:
Once the panels are aligned, use clamps to hold them together. Place the clamps evenly spaced along the edges of the birch wood panels, applying enough pressure to ensure a tight bond. Wipe off any excess glue that may squeeze out with a damp cloth to prevent it from drying and affecting the finish.
4. Let the Glue Dry:
Allow the wood glue to dry for the recommended time as specified by the manufacturer. This typically ranges from a few hours to overnight. During this time, avoid moving or disturbing the clamped birch wood panels to ensure a strong and secure bond.
5. Remove the Clamps:
Once the glue has fully dried, carefully remove the clamps from the birch wood panels. Inspect the joints to ensure they are sturdy and securely bonded. If there are any visible gaps or unevenness, use sandpaper or a chisel to make minor adjustments to achieve a seamless fit.
With the birch wood panels assembled and the glue dried, we’re now ready to move on to the next step: attaching the lid to the birch box.
Step 6: Attaching the Lid
With the main body of the birch box assembled, it’s time to focus on attaching the lid. The lid not only adds functionality but also completes the overall look of the box. Follow these steps to effectively attach the lid to your birch box:
Read more: Who Makes Bostitch Hand Tools
1. Measure the Lid:
Measure the dimensions of the assembled birch box to determine the size of the lid. Ensure that the lid has enough clearance to fit snugly on top of the box without being too loose or too tight.
2. Cut the Lid Panel:
Using the same birch wood panels as before, measure and mark the dimensions for the lid panel. Use a saw to cut the panel to the desired size, ensuring that the edges are straight and aligned.
3. Sand the Lid Panel:
Just like with the main body of the box, sand the edges and surfaces of the lid panel to achieve a smooth finish. This will enhance the overall appearance and ensure a comfortable grip when opening and closing the box.
4. Position the Lid:
Place the lid panel on top of the birch box, aligning it with the edges and ensuring a proper fit. Take a moment to check if it sits evenly and is centered on the box.
Read more: Who Makes Dewalt Hand Tools
5. Install Hinges or Fasteners:
Decide on the type of hinges or fasteners you’d like to use to secure the lid to the birch box. Position the hinges or fasteners at appropriate locations on both the back of the lid and the back of the box. Mark the screw hole locations and pre-drill if necessary.
6. Attach the Lid:
Securely attach the hinges or fasteners to both the lid and the box using appropriate screws. Ensure that everything is aligned and the lid opens and closes smoothly. Test the functionality and make any necessary adjustments if the lid doesn’t fit properly or is too tight.
7. Finishing Touches:
Inspect the lid and box for any rough edges or imperfections. Use sandpaper or a chisel to carefully smooth out any areas that require touch-ups. Once you’re satisfied with the overall look, you can apply a wood stain or finish to enhance and protect the birch wood.
Congratulations! You have successfully attached the lid to your birch box. The final step is to add some finishing touches to complete your project.
Step 7: Finishing Touches
Now that you’ve assembled the birch box and attached the lid, it’s time to add some finishing touches to enhance the overall appearance and protect the wood. These final steps will give your birch box a polished and professional look. Follow these tips for adding those finishing touches:
Read more: Who Makes Husky Hand Tools
1. Sanding:
Give the entire birch box a final sanding to ensure all surfaces are smooth and free of any rough spots or imperfections. Use a fine-grit sandpaper to achieve a silky finish. Be thorough but gentle, and remember to remove any dust or debris after sanding.
2. Wood Stain or Finish:
Consider applying a wood stain or finish to enhance the natural beauty of the birch wood. Choose a stain or finish that complements your aesthetic preferences. Test the stain or finish on a small, inconspicuous area of the box first to ensure you achieve the desired color or finish.
3. Sealing:
If you want to provide extra protection to the birch box, consider applying a wood sealer. A sealer will help guard against moisture, dirt, and potential damage. Follow the manufacturer’s instructions for proper application and allow sufficient drying time before handling the box.
4. Add Personalization:
If you’d like to add a personal touch, consider engraving or adding decorative elements to the birch box. You can use wood-burning tools, woodcarving techniques, or even attach personalized nameplates or embellishments. Let your creativity shine.
Read more: Who Makes Masterforce Hand Tools
5. Cleaning and Maintenance:
Finally, don’t forget to clean and maintain your birch box regularly. Dust it gently with a soft cloth and avoid using harsh chemicals or abrasive materials that could damage the wood. If necessary, you can reapply a light coat of wood finish periodically to keep it looking fresh and vibrant.
By following these finishing touches, your birch box will be complete and ready to be used or gifted. Take pride in your craftsmanship and enjoy the beauty and functionality of your handmade creation.
Now that you’ve completed all the steps, you have a beautiful birch box that you can use for a variety of purposes. Whether it’s for storing jewelry, keepsakes, or as a decorative piece, your handmade birch box is sure to be a cherished item for years to come.
Congratulations on completing your birch box project!
Conclusion
In conclusion, creating a birch box with hand tools can be a satisfying and rewarding woodworking project. By following the steps outlined in this guide, you can transform birch wood panels into a functional and visually appealing box.
Starting with selecting high-quality birch wood, measuring and marking the panels, and making precise cuts, each step contributes to the overall construction of the box. Sanding the edges ensures a smooth finish, while the careful assembly and attachment of the lid bring the box together.
Adding the finishing touches, such as sanding, applying a wood stain or finish, and personalizing the box, allows you to customize its appearance and protect the wood for lasting durability.
Throughout this process, it’s important to remember that your creativity and attention to detail play a significant role in creating a birch box that is unique and reflective of your craftsmanship.
Whether you’re a woodworking enthusiast or a beginner looking to explore a new hobby, making a birch box with hand tools is a great project that allows you to develop your skills and create something functional and beautiful.
So, gather your materials and tools, immerse yourself in the world of woodworking, and embark on this journey of crafting a birch box with your own hands. Enjoy the process and take pride in the finished result – a stunning birch box that can be used for storage, organizing, or even as a memorable gift.
Now, go on and start your birch box project – the possibilities are endless!
Frequently Asked Questions about How To Make A Birch Box With Hand Tools
Was this page helpful?
At Storables.com, we guarantee accurate and reliable information. Our content, validated by Expert Board Contributors, is crafted following stringent Editorial Policies. We're committed to providing you with well-researched, expert-backed insights for all your informational needs.
0 thoughts on “How To Make A Birch Box With Hand Tools”