Home>Technology>Home Entertainment Systems>How To Know If A Projector Bulb Is Bad
Home Entertainment Systems
How To Know If A Projector Bulb Is Bad
Modified: October 19, 2024
Learn how to identify a bad projector bulb and troubleshoot issues with your home entertainment system. Discover tips for diagnosing and replacing projector bulbs.
(Many of the links in this article redirect to a specific reviewed product. Your purchase of these products through affiliate links helps to generate commission for Storables.com, at no extra cost. Learn more)
Introduction
Welcome to the world of home entertainment systems, where the magic of cinema comes alive in the comfort of your living room. Projectors play a pivotal role in creating an immersive viewing experience, but like all electronic devices, they require maintenance and occasional troubleshooting. One of the common issues that projector owners encounter is a failing or burnt-out projector bulb.
A projector bulb, also known as a lamp, is the heart of your projector. It provides the essential light source that enables the projection of images onto the screen. Over time, projector bulbs degrade and lose their brightness, eventually reaching the end of their lifespan. Understanding the signs of a failing projector bulb and knowing how to address the issue is crucial for maintaining optimal performance and prolonging the life of your projector.
In this comprehensive guide, we will delve into the various symptoms that indicate a bad projector bulb, explore methods for testing the bulb to confirm its condition, and discuss the process of replacing the bulb. By the end of this journey, you will be equipped with the knowledge and confidence to assess and address projector bulb issues, ensuring that your home entertainment system continues to deliver stunning visuals for years to come. So, let's embark on this enlightening exploration of projector maintenance and troubleshooting.
Key Takeaways:
- Keep an eye out for signs of a bad projector bulb, like dimness, flickering, or color distortion, to ensure your movie nights or presentations stay visually stunning.
- Test and replace your projector bulb with care and precision to maintain optimal performance and prolong its lifespan, ensuring captivating visuals for every viewing experience.
Read more: How To Know If Thyme Is Bad
Symptoms of a Bad Projector Bulb
Before delving into the technical aspects of projector maintenance, it’s essential to recognize the telltale signs that indicate a failing or faulty projector bulb. Identifying these symptoms early on can prevent unexpected interruptions during your movie nights or presentations. Let’s explore the common indicators of a bad projector bulb:
- Diminished Brightness: One of the primary signs of a failing projector bulb is a noticeable decrease in brightness. If you observe that the projected images appear dimmer than usual, especially in a darkened room, it’s a strong indication that the bulb’s luminance has diminished. This reduction in brightness can significantly impact the visual quality and overall viewing experience.
- Image Flickering: When a projector bulb nears the end of its lifespan, the projected images may exhibit flickering or intermittent brightness fluctuations. This flickering effect can be distracting and disruptive, detracting from the smooth and consistent display of visuals.
- Color Distortion: A deteriorating projector bulb can manifest color irregularities in the projected images. You may notice a shift in color balance, with certain hues appearing distorted or muted. This can lead to an inaccurate representation of the intended colors and compromise the integrity of the visuals.
- Unusual Noise: In some cases, a failing projector bulb may produce abnormal sounds, such as buzzing or humming, during operation. These unusual noises can be indicative of internal issues within the bulb, signaling the need for prompt attention and potential replacement.
- Extended Warm-up Time: As a projector bulb ages, it may require a longer warm-up period to reach its optimal brightness level. If you notice a significant delay in the time it takes for the projected images to achieve full brightness after powering on the projector, it could be a sign that the bulb is approaching the end of its usable life.
Recognizing these symptoms empowers you to take proactive measures to address potential projector bulb issues before they escalate. Whether you enjoy movie marathons with friends or rely on your projector for professional presentations, being attuned to these signs enables you to uphold the visual excellence of your projector and ensure uninterrupted viewing pleasure.
Testing the Projector Bulb
Once you’ve identified the potential symptoms of a failing projector bulb, the next step is to verify its condition through systematic testing. This process allows you to confirm whether the bulb is indeed the source of the issues you’ve observed. Here’s a comprehensive guide to testing the projector bulb:
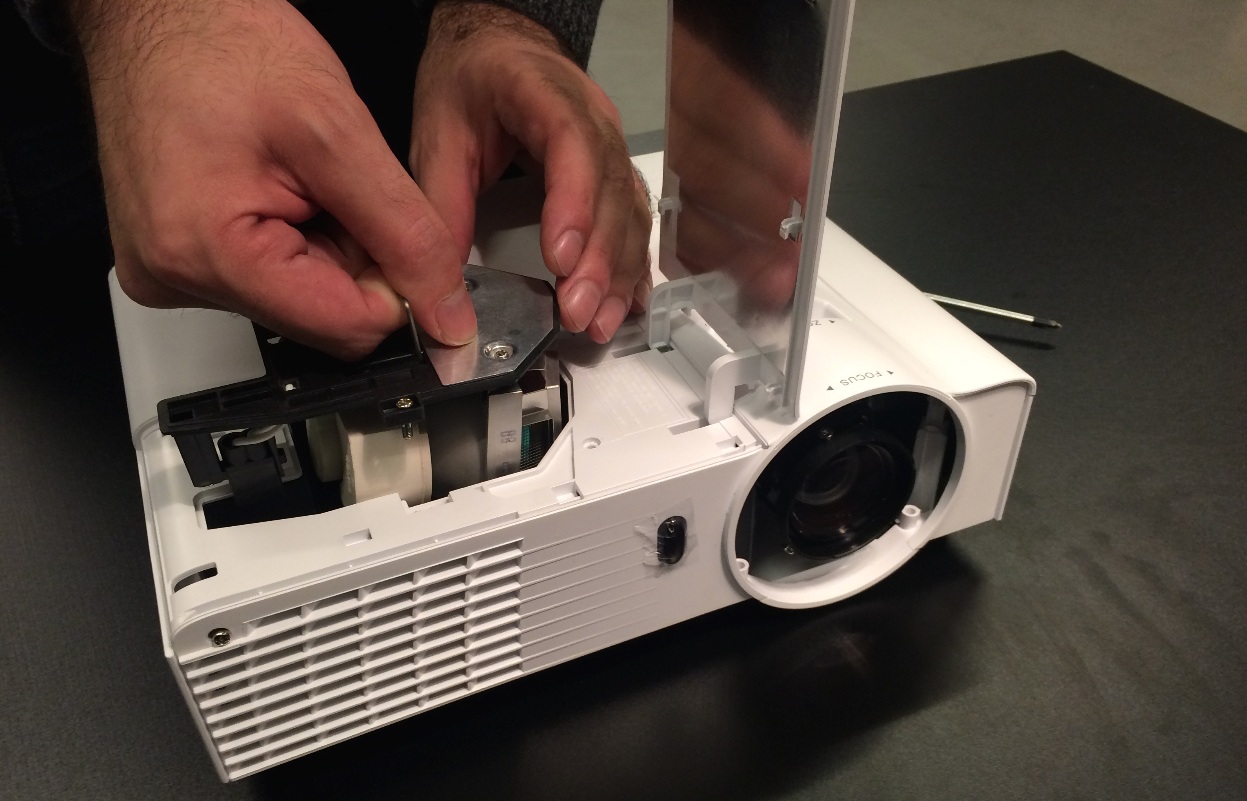
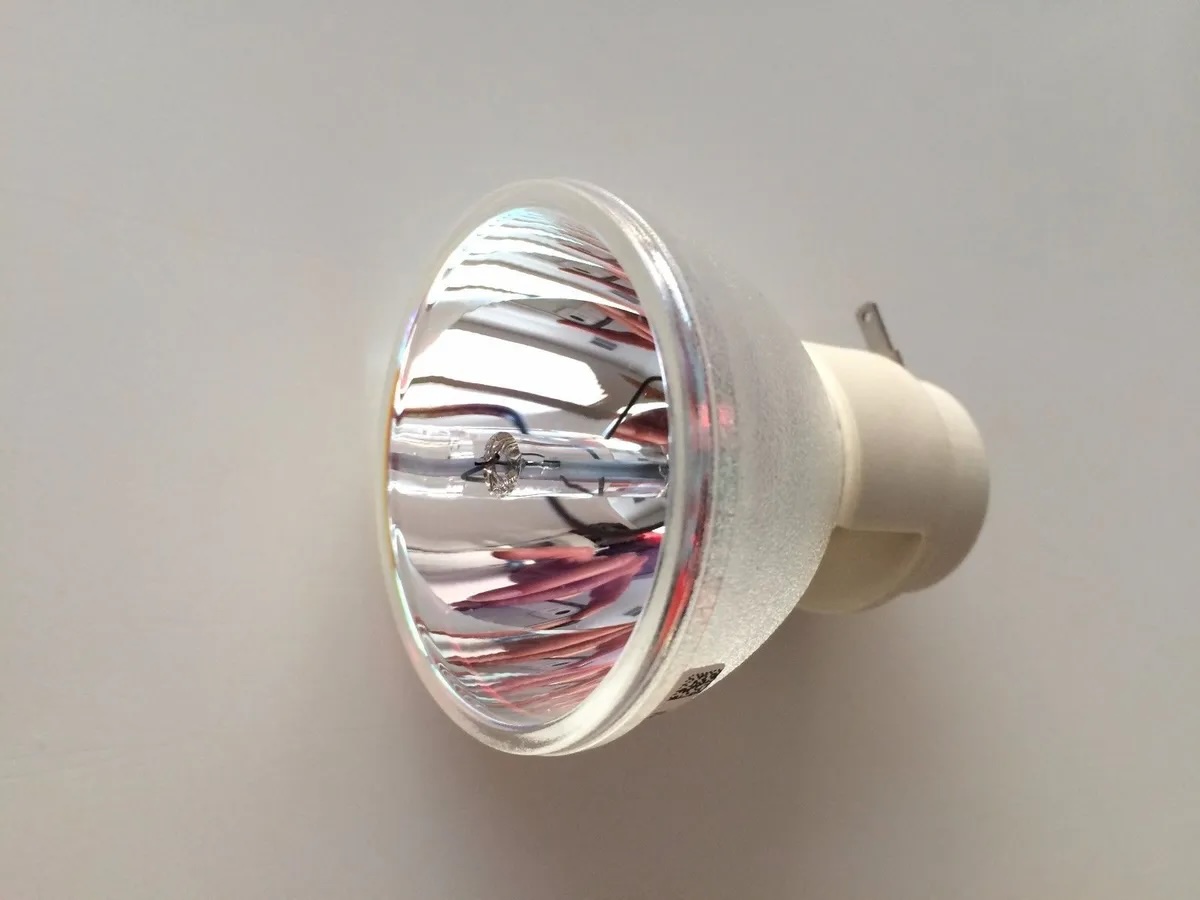
- Visual Inspection: Begin by conducting a visual examination of the projector bulb. Power off the projector and allow the bulb to cool down. Carefully remove the bulb cover or access panel, following the manufacturer’s guidelines. Inspect the bulb for any visible signs of damage, such as cracks, dark spots, or a cloudy or discolored appearance. These visual cues can provide valuable insights into the bulb’s health.
- Resetting the Lamp Timer: Many projectors are equipped with a lamp timer that tracks the cumulative hours of use. Resetting the lamp timer can help you monitor the actual operating hours of the bulb. Refer to the projector’s manual or menu settings to reset the lamp timer, providing a more accurate assessment of the bulb’s usage.
- Utilizing Built-in Diagnostics: Some projectors feature built-in diagnostic tools that allow you to access detailed information about the bulb’s status and performance. Check the projector’s menu options for diagnostic or status indicators related to the bulb. This can include data on the total lamp hours, temperature readings, and any error codes or warnings.
- Replacement Bulb Testing: If you have a replacement bulb on hand, consider installing it temporarily to assess its performance. This comparative testing can help you determine if the original bulb is indeed the source of the issues. Be sure to follow proper safety procedures and consult the projector’s manual for guidance on bulb replacement.
- Professional Inspection: If you’re uncertain about performing the tests yourself or if the projector exhibits complex symptoms, seeking the expertise of a professional technician or service center is advisable. Professional inspection can provide a comprehensive evaluation of the projector’s components, including the bulb, ensuring accurate diagnosis and resolution of any underlying issues.
By diligently conducting these tests and evaluations, you can gain valuable insights into the condition of your projector bulb and make informed decisions regarding its maintenance or replacement. Whether you’re a seasoned home theater enthusiast or a business professional relying on a projector for presentations, a proactive approach to testing the projector bulb safeguards the optimal performance of your cherished entertainment or professional equipment.
If your projector is displaying a dim or flickering image, it may be a sign that the bulb is going bad. Check the projector’s manual for specific instructions on how to check the bulb’s condition.
Replacing the Projector Bulb
When the time comes to replace a failing or exhausted projector bulb, it’s essential to approach the process with care and precision. Properly installing a new bulb ensures optimal performance and longevity for your projector. Here’s a comprehensive guide to replacing the projector bulb:
- Identifying the Compatible Bulb: Before purchasing a replacement bulb, ascertain the specific model and type compatible with your projector. Consult the projector’s manual, documentation, or the manufacturer’s website to obtain accurate information about the compatible bulb specifications, including wattage, voltage, and any specific installation instructions.
- Preparing the Workspace: Create a clean and well-lit workspace for the replacement procedure. Power off the projector and allow it to cool down completely. If applicable, disconnect the power cord and any other cables connected to the projector to ensure a safe and unobstructed workspace.
- Removing the Old Bulb: Follow the manufacturer’s guidelines to access the old bulb within the projector. This typically involves removing the bulb cover or access panel. Exercise caution and patience when handling the old bulb, as it may be fragile. Carefully detach the bulb from its housing, taking note of any securing mechanisms or connectors.
- Installing the New Bulb: Unpack the new bulb from its packaging, being mindful not to touch the glass surface with bare hands. Align the new bulb with the projector’s housing, ensuring that it fits securely and aligns with any corresponding connectors or pins. Follow the specific installation instructions provided by the manufacturer to ensure proper seating and alignment of the new bulb.
- Securing the Bulb and Cover: Once the new bulb is in place, reattach any securing mechanisms or connectors as per the manufacturer’s instructions. Carefully replace the bulb cover or access panel, ensuring that it is firmly secured to prevent dust or debris from entering the projector’s interior.
- Resetting the Lamp Timer: After installing the new bulb, reset the lamp timer on the projector to accurately track the usage hours of the replacement bulb. This step ensures that you have an accurate reference for monitoring the bulb’s lifespan and performance.
- Testing and Calibration: Power on the projector and verify that the new bulb functions as expected. Take note of the brightness, color accuracy, and overall performance of the projected images. If necessary, access the projector’s menu settings to adjust any brightness or color calibration options for optimal visual quality.
By following these steps meticulously and adhering to the manufacturer’s guidelines, you can seamlessly replace the projector bulb and restore the brilliance of your home entertainment system or professional presentation setup. Embracing the maintenance and care of your projector ensures that it continues to deliver captivating visuals and enriching experiences for your audience, whether it’s a movie night with loved ones or a compelling business presentation.
Conclusion
Congratulations on embarking on this illuminating journey through the realm of projector maintenance and troubleshooting. By familiarizing yourself with the symptoms of a failing projector bulb, mastering the art of testing and verifying its condition, and confidently replacing the bulb when necessary, you’ve taken proactive steps to preserve the visual excellence of your home entertainment system or professional projector setup.
As you navigate the world of projector maintenance, remember that attentiveness and care are the cornerstones of ensuring a seamless viewing experience. Whether you’re reveling in the cinematic splendor of your favorite films with friends and family or captivating your audience with compelling presentations, the reliability and performance of your projector play a pivotal role in shaping these experiences.
By recognizing the subtle signs of a bad projector bulb, such as diminished brightness, flickering images, or color irregularities, you’ve empowered yourself to intervene before these issues compromise the visual quality. Through systematic testing and evaluation, you’ve honed your ability to assess the health of the projector bulb, enabling informed decisions regarding maintenance or replacement.
When the time comes to replace the projector bulb, remember the importance of selecting a compatible bulb, preparing a conducive workspace, and adhering to the manufacturer’s installation instructions. Your diligence in this process ensures that your projector continues to deliver captivating visuals, enriching every viewing experience with its brilliance and clarity.
As you bid adieu to this enlightening guide, carry forth your newfound knowledge with confidence, knowing that you possess the skills to safeguard the luminous charm of your projector. Whether it’s the allure of a blockbuster movie or the impact of a compelling presentation, your projector stands as a beacon of visual splendor, made possible through your dedication to its maintenance and care.
May your future viewing experiences be adorned with the captivating brilliance of a well-maintained projector, enriching every moment with its enchanting visuals. Here’s to the seamless continuity of cinematic magic and professional prowess, all illuminated by the radiance of your cherished projector.
Frequently Asked Questions about How To Know If A Projector Bulb Is Bad
Was this page helpful?
At Storables.com, we guarantee accurate and reliable information. Our content, validated by Expert Board Contributors, is crafted following stringent Editorial Policies. We're committed to providing you with well-researched, expert-backed insights for all your informational needs.


0 thoughts on “How To Know If A Projector Bulb Is Bad”