Home>Technology>Home Entertainment Systems>How To Use Elmo Projector
Home Entertainment Systems
How To Use Elmo Projector
Modified: August 28, 2024
Learn how to use an Elmo projector to enhance your home entertainment system. Find tips and tricks for setting up and optimizing your projector for the best viewing experience.
(Many of the links in this article redirect to a specific reviewed product. Your purchase of these products through affiliate links helps to generate commission for Storables.com, at no extra cost. Learn more)
Introduction
Welcome to the world of Elmo projectors, where seamless integration of cutting-edge technology and user-friendly design transforms your presentations and entertainment experiences. Whether you're a teacher, presenter, or home theater enthusiast, the Elmo projector offers a versatile and powerful tool for showcasing your content in vivid detail.
The Elmo projector is renowned for its exceptional image quality, intuitive controls, and seamless connectivity, making it a popular choice for a wide range of applications. From classrooms and boardrooms to home theaters and art studios, the Elmo projector delivers stunning visuals that captivate audiences and elevate your content to new heights.
In this comprehensive guide, we'll delve into the intricacies of setting up, using, and troubleshooting the Elmo projector, empowering you to harness its full potential with confidence. We'll explore the seamless process of connecting devices, adjusting settings, and leveraging the projector's advanced features to create an immersive and engaging viewing experience. Whether you're a novice or a seasoned user, this guide will equip you with the knowledge and skills to make the most of your Elmo projector.
So, buckle up and get ready to embark on a journey through the fascinating world of Elmo projectors. By the end of this guide, you'll be equipped with the expertise to unleash the full capabilities of your Elmo projector and elevate your presentations, lessons, and entertainment to a whole new level. Let's dive in and unlock the potential of this remarkable device!
Key Takeaways:
- Master your Elmo projector by setting it up, connecting devices, and adjusting settings to create captivating visuals for presentations and entertainment.
- Troubleshoot common issues with your Elmo projector to ensure uninterrupted and reliable performance, empowering you to overcome technical hiccups with confidence.
Read more: Optoma Projector: How To Use
Setting Up the Elmo Projector
Setting up your Elmo projector is a straightforward process that ensures seamless integration with your existing devices and optimal display performance. Whether you’re preparing for a presentation or gearing up for a movie night, these simple steps will have your Elmo projector ready to deliver stunning visuals in no time.
1. Choosing the Ideal Location: Select a suitable location for your Elmo projector, ensuring that it’s positioned on a stable surface and has ample space for ventilation. Consider factors such as screen visibility, accessibility to power outlets, and minimal obstructions to create an optimal viewing environment.
2. Powering Up the Projector: Connect the power cord to the projector and plug it into a reliable power source. Once powered on, the projector will undergo a brief initialization process before being ready for use.
3. Adjusting the Projection Distance: Position the projector at an appropriate distance from the screen or projection surface to achieve the desired image size. Refer to the projector’s manual for recommended projection distances based on your screen size preferences.
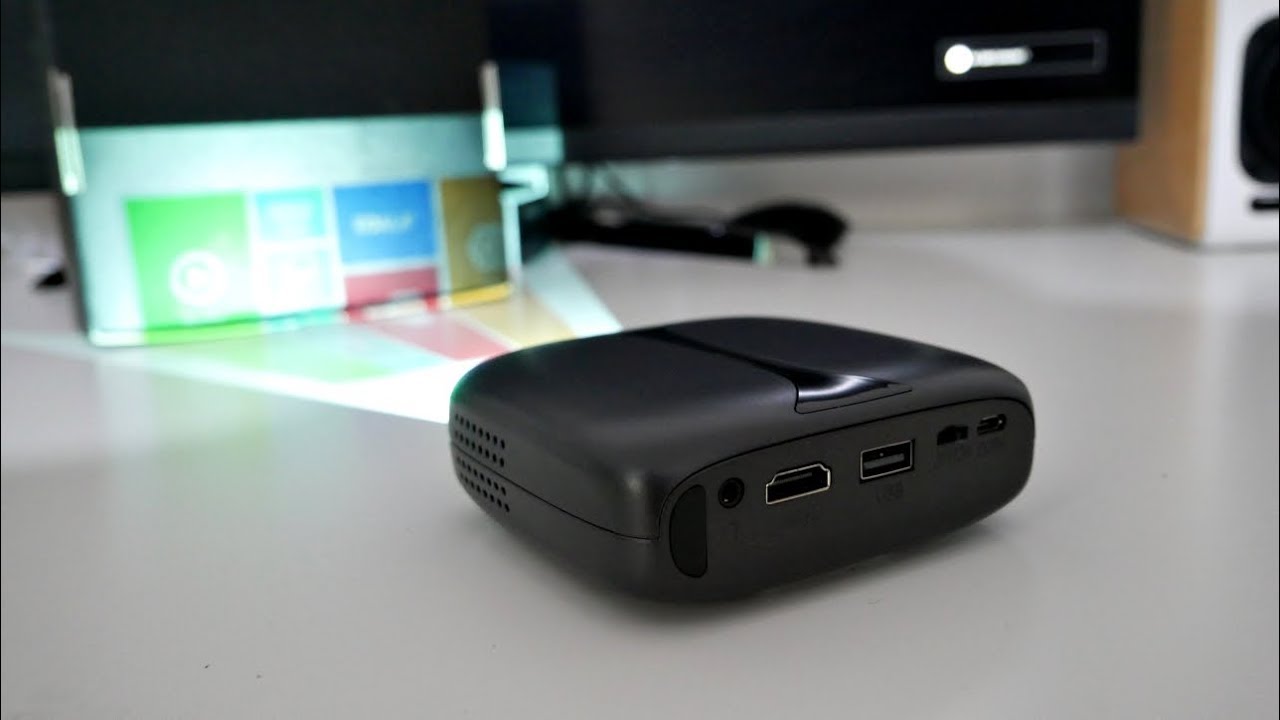
4. Connecting External Devices: If you plan to connect external devices such as laptops, DVD players, or gaming consoles, ensure that the necessary cables are available and compatible with the projector’s input ports. Familiarize yourself with the available input options, including HDMI, VGA, and USB connections.
5. Securing the Projection Surface: Whether you’re using a dedicated projection screen or a blank wall, ensure that the surface is clean and free from any obstructions that may affect the image quality. Adjust the screen or wall to align with the projector’s position for optimal viewing.
By following these steps, you’ll have your Elmo projector set up and ready to deliver captivating visuals for your presentations, movies, or any other content you wish to showcase. With the groundwork laid, it’s time to explore the seamless process of connecting devices to your Elmo projector and unlocking its full potential.
Connecting Devices to the Elmo Projector
Connecting external devices to your Elmo projector opens up a world of possibilities, allowing you to seamlessly display content from various sources with stunning clarity and detail. Whether you’re integrating multimedia presentations, streaming videos, or gaming experiences, the Elmo projector offers versatile connectivity options to accommodate your diverse needs.
1. HDMI Connection: The HDMI input on the Elmo projector provides a high-definition digital connection for devices such as laptops, Blu-ray players, and streaming media players. Simply connect one end of the HDMI cable to the output port of your device and the other end to the HDMI input on the projector. This enables seamless transmission of high-quality audio and video signals, ensuring a captivating viewing experience.
2. VGA Connection: For devices that feature VGA output, such as older laptops and desktop computers, the Elmo projector’s VGA input serves as a reliable interface for video transmission. Connect the VGA cable from your device to the projector, ensuring a secure and snug connection to facilitate the transfer of video signals.
3. USB Connectivity: Some Elmo projectors support USB connectivity, allowing you to directly access multimedia content from USB flash drives or external hard drives. Simply plug the USB storage device into the projector’s USB port to access and display a wide range of media files, including photos, videos, and presentations, without the need for additional devices.
4. Audio Input: In addition to video connections, the Elmo projector features audio input options for transmitting sound from connected devices. Whether it’s the audio output from a laptop, DVD player, or gaming console, the projector’s audio input ensures synchronized audio-visual playback for a complete and immersive viewing experience.
By leveraging these connectivity options, you can seamlessly integrate a diverse array of devices with your Elmo projector, unlocking its potential to showcase an extensive range of content with exceptional clarity and vibrancy. With devices connected and ready, it’s time to explore the intuitive controls and features of the Elmo projector, empowering you to navigate your content with ease and precision.
Using the Elmo Projector Controls
The Elmo projector is equipped with intuitive controls that empower users to navigate through settings, adjust display preferences, and optimize the viewing experience with ease. Whether you’re fine-tuning the image quality, toggling between input sources, or accessing advanced features, mastering the projector’s controls ensures seamless operation and optimal performance.
1. Power and Source Selection: The projector’s power button allows for quick activation and shutdown, while the source selection button enables users to switch between connected devices effortlessly. Whether you’re transitioning from a laptop to a DVD player or a gaming console, the source selection control streamlines the process of accessing different content sources.
2. Keypad Navigation: The projector’s keypad facilitates intuitive navigation through menus, settings, and on-screen controls. With directional buttons for up, down, left, and right movements, as well as an “OK” or “Enter” button, users can effortlessly navigate through the projector’s interface and make adjustments as needed.
3. Image Adjustment: The projector’s image adjustment controls, including options for keystone correction, aspect ratio, and focus, allow users to fine-tune the projected image to suit the specific viewing environment. Keystone correction compensates for image distortion caused by angled projection surfaces, while aspect ratio settings ensure proper scaling of content. The focus control enables precise adjustments to achieve sharp and clear visuals.
4. Menu Navigation: Accessing the projector’s menu system provides users with a comprehensive array of settings and features to customize the viewing experience. From image presets and color adjustments to input source management and system configurations, the menu navigation controls empower users to tailor the projector’s performance to their preferences.
5. Remote Control Functionality: Many Elmo projectors come with a remote control that mirrors the functionality of the onboard controls, offering convenient operation from a distance. The remote control allows for quick access to essential functions, including power management, input selection, and menu navigation, enhancing the overall user experience.
By familiarizing yourself with the projector’s controls and their respective functions, you’ll gain mastery over the device’s operation, enabling you to optimize display settings, seamlessly switch between content sources, and access advanced features with confidence. With the controls at your command, it’s time to explore the process of adjusting settings and leveraging the projector’s advanced features to elevate your viewing experience.
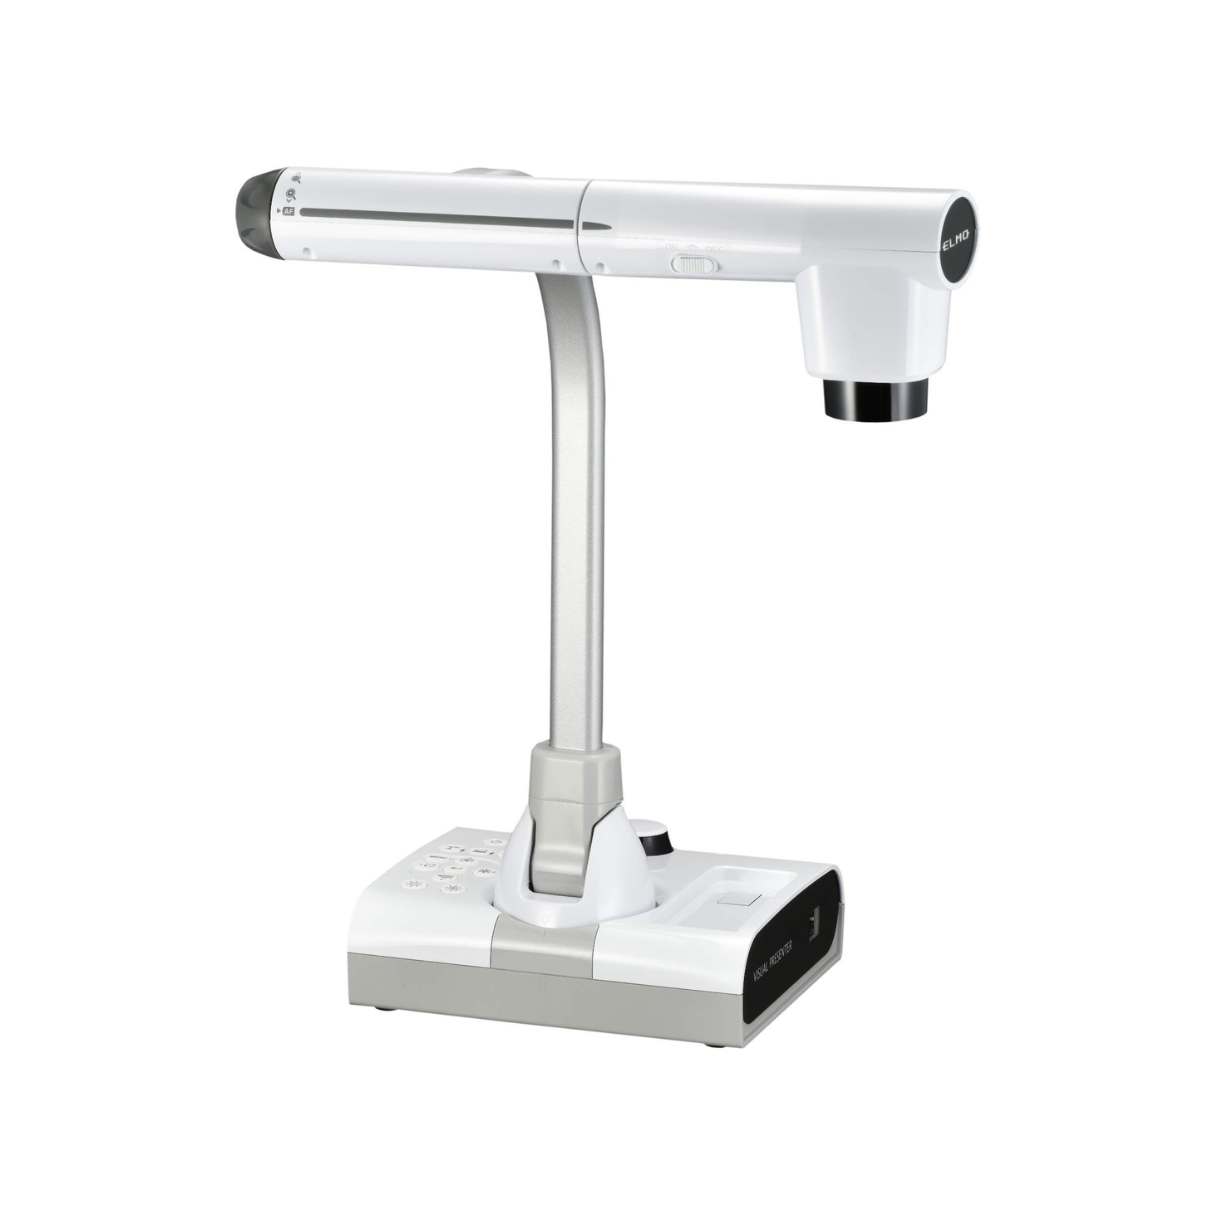
When using an Elmo projector, make sure to properly align the document or object on the projector stage for clear visibility. Adjust the focus and zoom to ensure the image is sharp and in focus.
Adjusting Settings and Features
Delving into the settings and features of your Elmo projector unveils a realm of customization and advanced capabilities, allowing you to tailor the viewing experience to your preferences and optimize visual performance. From fine-tuning color reproduction to accessing advanced display modes, the projector’s settings and features empower users to create immersive and captivating visuals that resonate with their audience.
1. Color and Image Presets: The projector offers a range of pre-configured color and image presets, enabling users to select optimized settings for various content types, such as presentations, movies, and photographs. These presets streamline the process of achieving vibrant and accurate color reproduction without the need for manual adjustments.
2. Display Modes: Explore the projector’s display modes, which may include options such as standard, dynamic, cinema, and eco modes. Each mode is tailored to specific viewing scenarios, allowing users to prioritize brightness, color accuracy, or energy efficiency based on their preferences and environmental conditions.
3. Advanced Image Adjustments: Dive into the projector’s advanced image adjustment settings, which offer precise control over parameters such as contrast, brightness, saturation, and color temperature. These adjustments enable users to fine-tune the visual output to achieve the desired balance of contrast, color vibrancy, and overall image quality.
4. Digital Keystone Correction: The projector’s digital keystone correction feature compensates for image distortion caused by angled projection surfaces, ensuring that the projected image maintains proper proportions and alignment. By adjusting the keystone settings, users can rectify trapezoidal distortion and achieve a visually accurate display.
5. Input Source Management: The projector’s input source management settings allow users to customize how connected devices are prioritized and displayed. Whether it’s configuring automatic input detection, labeling input sources, or managing multiple connected devices, these settings streamline the process of accessing and switching between content sources.
6. Network and Connectivity Settings: For network-enabled projectors, explore the connectivity settings that facilitate wireless presentations, remote management, and integration with smart devices. These settings empower users to leverage the projector’s network capabilities to enhance collaboration and streamline content sharing.
By delving into these settings and features, users can unleash the full potential of their Elmo projector, customizing the viewing experience to align with their specific requirements and preferences. Whether it’s optimizing image quality, streamlining input management, or leveraging advanced display modes, the projector’s settings and features offer a wealth of options to elevate the visual presentation of content.
Read more: How To Use An RCA Projector
Troubleshooting Common Issues
Encountering technical hiccups with your Elmo projector can be a frustrating experience, but armed with the knowledge to troubleshoot common issues, you can swiftly address challenges and restore seamless operation. From addressing connectivity issues to resolving display anomalies, the following troubleshooting tips will empower you to overcome common projector-related concerns with confidence.
1. No Signal or Display: If the projector fails to detect or display content from connected devices, ensure that the input source is selected correctly. Verify that the cables are securely connected and that the device outputting the signal is active. Additionally, check the projector’s input settings and source detection functionality to ensure proper connectivity.
2. Image Distortion or Alignment Issues: Should you encounter image distortion or misalignment, consider adjusting the projector’s keystone correction settings to rectify trapezoidal distortion caused by angled projection surfaces. Ensure that the projector is positioned squarely in front of the projection surface and that the lens is focused and aligned for optimal image clarity.
3. Color or Image Quality Concerns: If the projected image exhibits color inaccuracies or diminished image quality, review the projector’s color and image presets to select a suitable display mode for the content being showcased. Additionally, fine-tune the projector’s advanced image adjustment settings to optimize color reproduction, contrast, and overall visual performance.
4. Audio Playback Issues: When encountering audio playback issues, such as distorted sound or lack of audio output, verify that the audio input source is correctly connected to the projector. Ensure that the volume settings on both the projector and the connected device are adjusted appropriately, and consider testing alternative audio sources to isolate the root cause of the issue.
5. Overheating and Ventilation: If the projector exhibits signs of overheating or automatic shutdown due to thermal issues, assess the ventilation around the projector to ensure unobstructed airflow. Clear any dust or debris that may impede the projector’s cooling system, and avoid operating the projector in excessively hot or humid environments.
6. Remote Control Troubleshooting: In the event of remote control malfunctions, replace the batteries with fresh ones and ensure that there are no obstructions between the remote and the projector’s infrared sensor. If the issue persists, consider resetting the remote control or checking for any potential interference from other electronic devices.
By employing these troubleshooting strategies, users can effectively address common issues that may arise during the operation of their Elmo projector, ensuring uninterrupted and reliable performance. Whether it’s resolving connectivity challenges, optimizing image quality, or addressing technical anomalies, a proactive approach to troubleshooting enhances the overall user experience and maximizes the projector’s potential.
Conclusion
Congratulations on embarking on a journey through the fascinating realm of Elmo projectors, where cutting-edge technology converges with user-centric design to deliver captivating visual experiences. As you’ve navigated through the process of setting up, connecting devices, mastering controls, adjusting settings, and troubleshooting common issues, you’ve gained invaluable insights into harnessing the full potential of your Elmo projector.
The seamless integration of external devices, such as laptops, media players, and gaming consoles, has empowered you to showcase a diverse array of content with stunning clarity and vibrancy. By mastering the projector’s intuitive controls, you’ve gained the proficiency to navigate through settings, fine-tune image quality, and access advanced features with ease, ensuring a tailored and immersive viewing experience.
As you’ve delved into the intricacies of adjusting settings and features, you’ve unlocked a realm of customization and optimization, enabling you to tailor the visual presentation of content to align with your preferences and environmental conditions. Furthermore, by familiarizing yourself with troubleshooting strategies, you’ve equipped yourself with the knowledge to swiftly address common projector-related concerns, ensuring uninterrupted and reliable performance.
Armed with this comprehensive guide, you’re well-prepared to elevate your presentations, lessons, and entertainment experiences to new heights, captivating audiences and immersing yourself in the captivating world of visual storytelling. Whether you’re a teacher engaging students with dynamic educational content, a presenter captivating audiences with compelling visuals, or a home theater enthusiast seeking cinematic immersion, the Elmo projector stands as a versatile and powerful tool to bring your content to life.
As you continue to explore the endless possibilities of your Elmo projector, remember that the fusion of technology and creativity holds the key to unlocking transformative visual experiences. Embrace the seamless connectivity, intuitive controls, and advanced features of your Elmo projector, and unleash the full spectrum of its capabilities to immerse yourself in a world of captivating visuals and engaging storytelling.
With your newfound expertise and the boundless potential of the Elmo projector at your fingertips, you’re poised to embark on a captivating journey through the art of visual communication and entertainment. Embrace the power of the Elmo projector, and let your creativity and imagination shine through every captivating projection.
Frequently Asked Questions about How To Use Elmo Projector
Was this page helpful?
At Storables.com, we guarantee accurate and reliable information. Our content, validated by Expert Board Contributors, is crafted following stringent Editorial Policies. We're committed to providing you with well-researched, expert-backed insights for all your informational needs.


0 thoughts on “How To Use Elmo Projector”