Home>Articles>How Do You Put A New Plug On An Electrical Cord
Articles
How Do You Put A New Plug On An Electrical Cord
Modified: March 1, 2024
Learn how to replace a plug on an electrical cord with step-by-step instructions in this informative article. Get expert tips and ensure safety.
(Many of the links in this article redirect to a specific reviewed product. Your purchase of these products through affiliate links helps to generate commission for Storables.com, at no extra cost. Learn more)
Introduction
When it comes to electrical cords, wear and tear can often result in a damaged plug. Fortunately, replacing a plug on an electrical cord is a relatively simple task that can be done at home with a few basic tools. Whether you’re dealing with a frayed wire, a loose connection, or a broken plug, knowing how to put a new plug on an electrical cord is a valuable skill that can save you time and money.
In this article, we will guide you through the step-by-step process of replacing a plug on an electrical cord. By following these instructions, you’ll be able to restore your cord to full functionality in no time. So let’s dive in and learn how to safely and effectively put a new plug on an electrical cord.
Before we begin, it is important to note that working with electricity can be dangerous if proper precautions are not taken. Make sure to follow safety guidelines and consult a professional if you have any concerns or uncertainties. Now, let’s gather the necessary tools and materials to get started.
Key Takeaways:
- Safely and confidently replace damaged plugs on electrical cords at home using basic tools and step-by-step instructions. Prioritize safety, secure connections, and test functionality for peace of mind.
- Save time and money by learning DIY plug replacement. Ensure proper insulation, secure connections, and thorough testing for reliable electrical cord functionality.
Tools and Materials Needed
Before you begin the process of replacing a plug on an electrical cord, make sure you have the following tools and materials on hand:
- Wire cutters
- Wire strippers
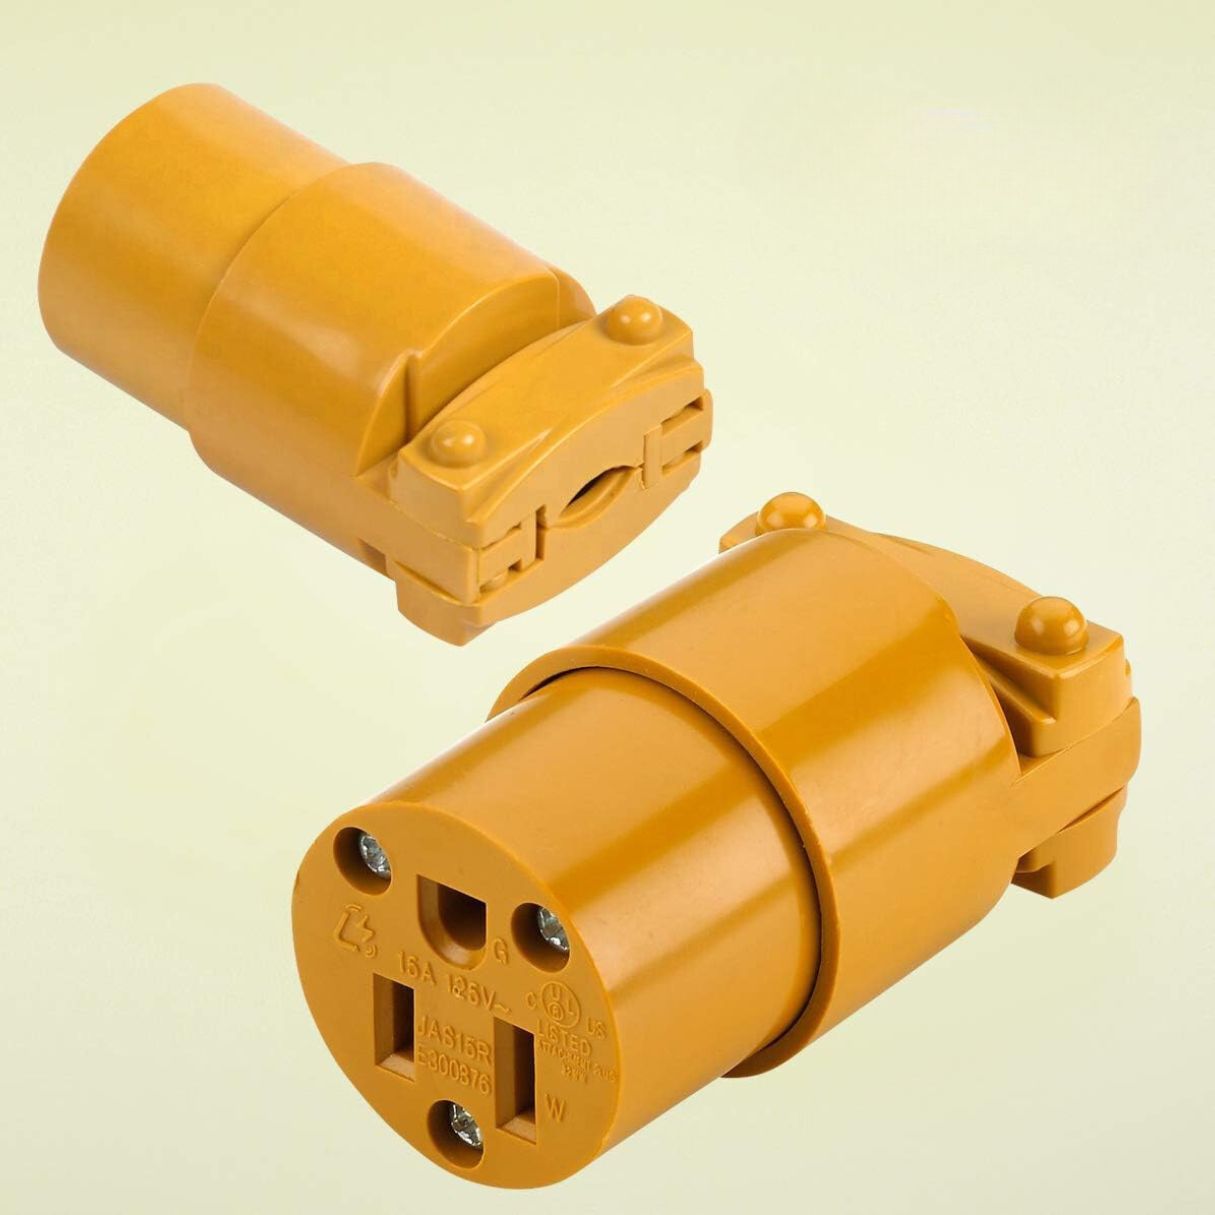
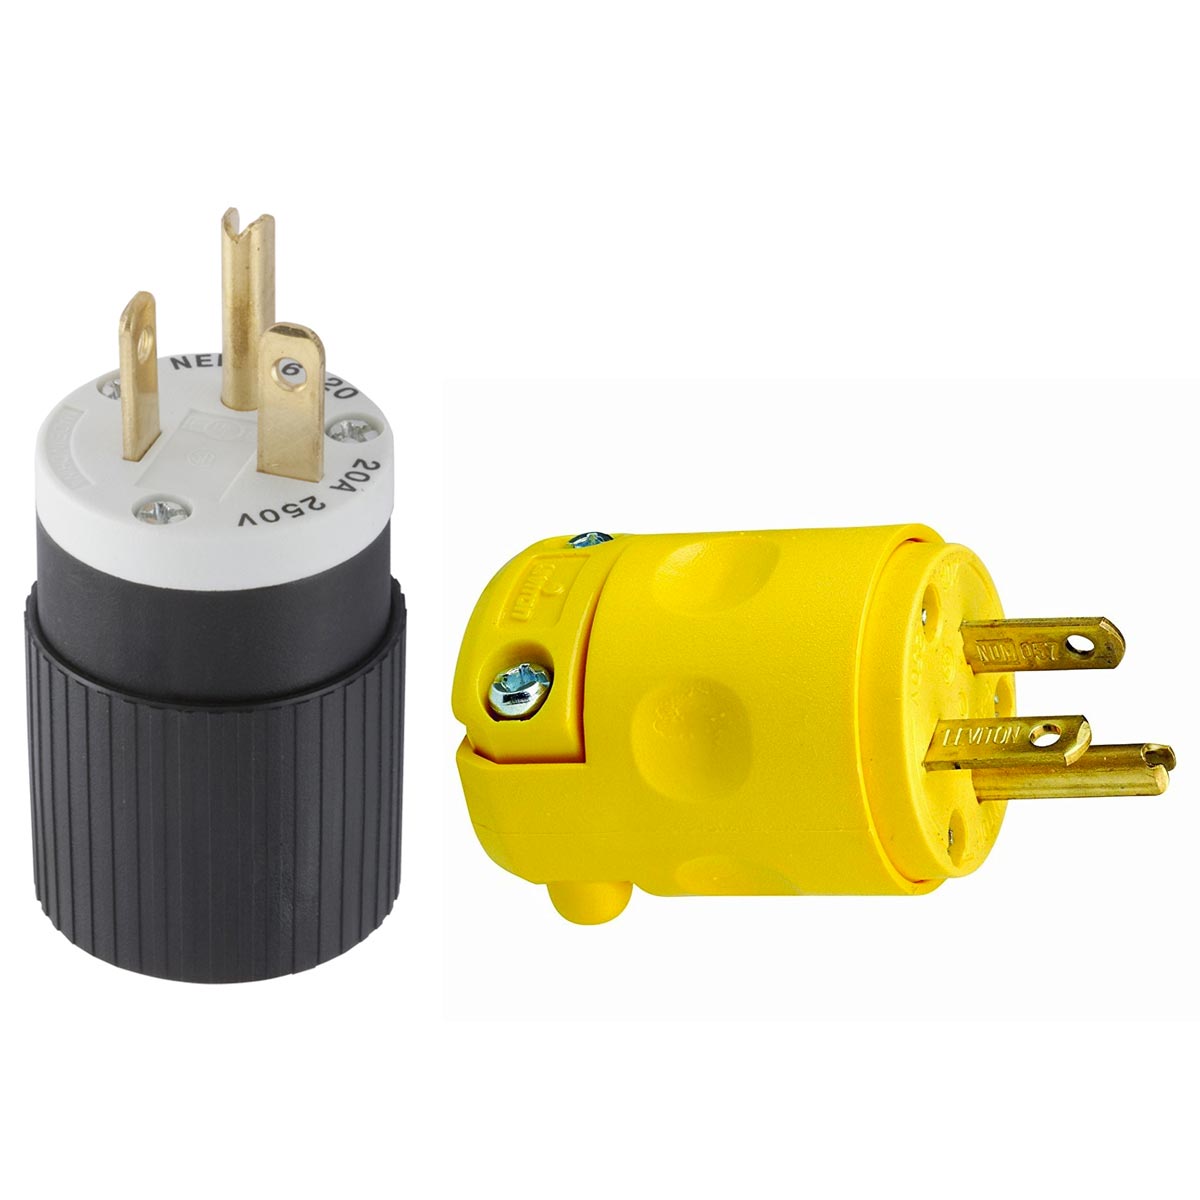
- New plug (compatible with your electrical cord)
- Screwdriver (flathead or Phillips, depending on the type of plug)
- Electrical tape
- Marker or pen
- Optional: Heat shrink tubing
These tools and materials are necessary for safely removing the damaged plug and connecting the new plug to the wires of your electrical cord. Now that you have everything you need, let’s move on to the step-by-step instructions.
Step 1: Gather Safety Equipment
Before you begin the process of replacing a plug on an electrical cord, it is essential to prioritize safety. Make sure you have the necessary safety equipment on hand to protect yourself from electrical hazards. Here are a few items you should have:
- Gloves: Wear rubber gloves to insulate yourself from any potential electric shock. This will provide an extra layer of protection while handling the wires.
- Safety goggles: Protect your eyes from any sparks or debris that may be generated during the process of cutting and stripping the wires.
- Work area: Choose a well-lit and properly ventilated space to work in. Clear away any clutter or potential obstacles to ensure a safe and organized work area.
Once you have gathered the necessary safety equipment, you can proceed with confidence knowing that you have taken the necessary precautions to protect yourself during the process. Safety should always be a top priority when working with electricity.
Now that you are equipped with the necessary safety equipment, it’s time to move on to the next step: cutting the damaged plug from the electrical cord.
Step 2: Cut the Damaged Plug
Now that you have gathered the necessary safety equipment, it’s time to remove the damaged plug from the electrical cord. Follow these steps:
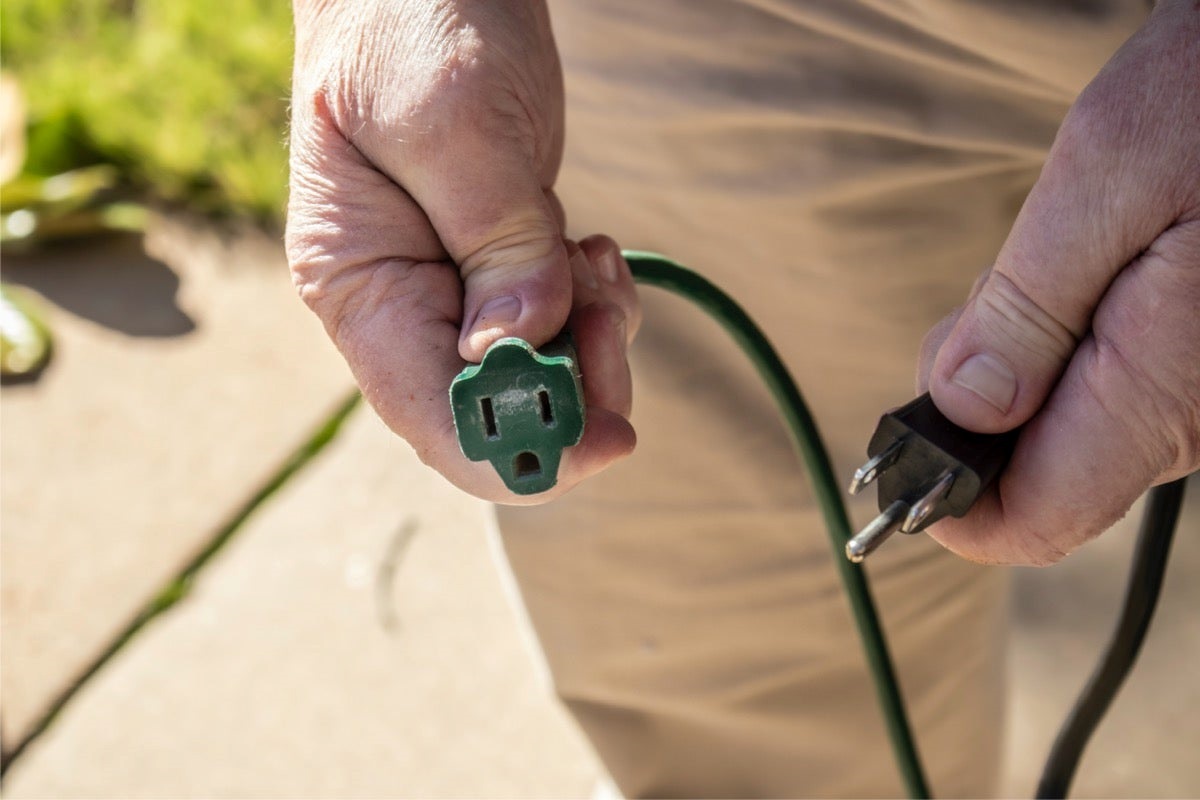
- Unplug the cord: Before you begin cutting the plug, make sure the electrical cord is unplugged from the outlet to prevent any potential accidents or electric shocks.
- Examine the plug: Inspect the plug for any visible signs of damage such as frayed wires, exposed conductors, or loose connections. This will help you determine the extent of the damage and guide you in the next steps.
- Identify the strain relief: The strain relief is a small rubber or plastic component located near the base of the plug. It is designed to provide support and prevent the wires from being tugged or pulled out of the plug. Look for any screws or clips securing the strain relief to the plug.
- Remove the strain relief: Use a screwdriver to unscrew any screws or release any clips securing the strain relief to the plug. This will allow you to access the wires connected to the plug.
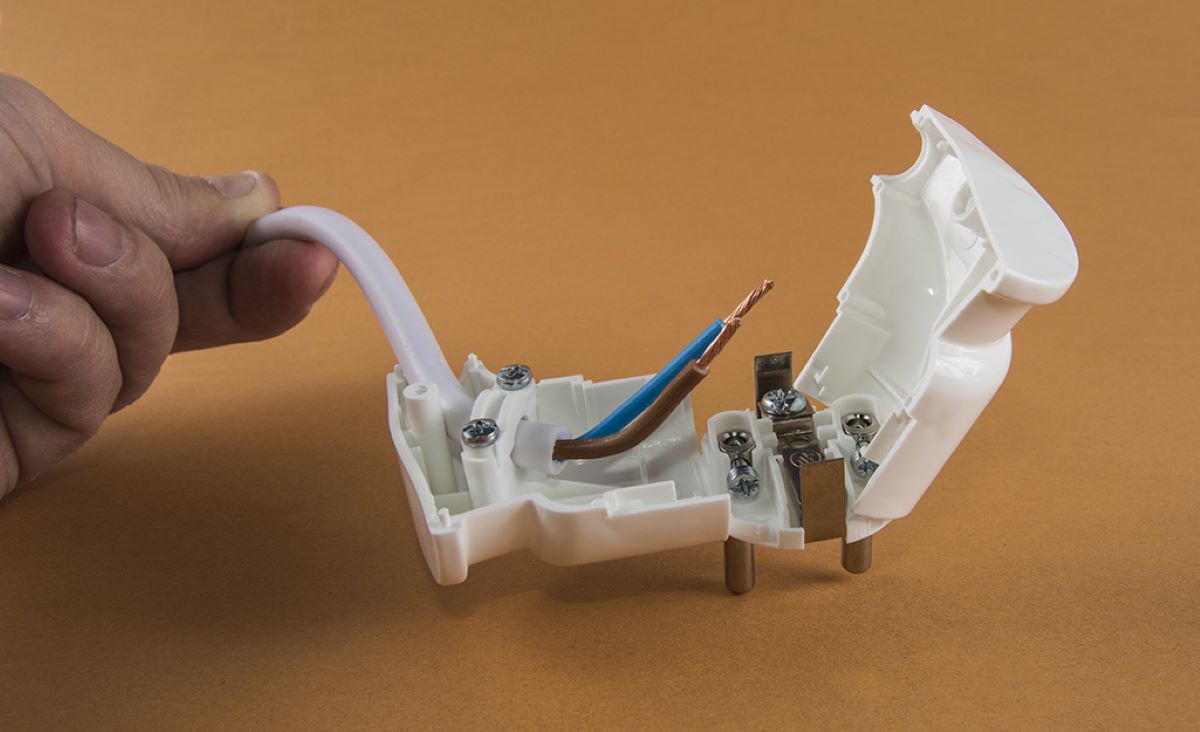
- Identify the wires: Examine the wires coming out of the cord and identify their color-coding. Typically, electrical cords have three wires: a hot wire (typically black), a neutral wire (typically white or gray), and a ground wire (typically green or copper).
- Cut the damaged plug: Using wire cutters, carefully cut the damaged plug off the end of the cord. Make the cut as close to the plug as possible, ensuring you don’t accidentally cut the wires.
By following these steps, you have successfully removed the damaged plug from the electrical cord. In the next step, we will learn how to strip the wires in preparation for connecting the new plug.
Step 3: Strip the Wires
After cutting the damaged plug, the next step is to strip the insulation from the wires. This will expose the bare copper wires, allowing you to connect them to the new plug. Follow these steps to strip the wires:
- Inspect the wires: Take a close look at the cut end of the cord and identify the three wires – hot wire, neutral wire, and ground wire. Verify that the wires are in good condition with no visible damage or fraying.
- Prepare the wire strippers: Choose wire strippers that are appropriate for the gauge of your wires. Adjust the strippers’ jaws according to the size of the wire you are working with. Note that wire strippers typically have multiple gauge options labeled on the tool.
- Strip the wires: Hold the wire strippers perpendicular to the wire and squeeze the handles firmly. Pull the strippers towards the end of the wire, removing approximately 1 inch of insulation. Be careful not to cut into the wire strands while stripping.
- Repeat for each wire: Strip the insulation from each of the three wires – hot, neutral, and ground – following the same process. Ensure that the stripped sections of each wire are roughly the same length.
- Trim any excess: If there are any pieces of insulation left on the wires after stripping, use wire cutters to trim them off. This will help ensure a clean and proper connection when attaching the new plug.
By following these steps, you have successfully stripped the insulation from the wires of your electrical cord. Now that the wires are prepared, you can move on to the next step: preparing the replacement plug.
When putting a new plug on an electrical cord, make sure to match the wire gauge with the appropriate plug size. Strip the cord, connect the wires to the plug terminals, and secure them tightly. Use a cable clamp to relieve strain on the connections. Always double-check your work for safety.
Read more: How To Replace Electrical Cord Plug
Step 4: Prepare the Replacement Plug
With the wires stripped and ready, the next step is to prepare the replacement plug that will be connected to your electrical cord. Follow these steps to properly prepare the replacement plug:
- Inspect the replacement plug: Take a close look at the replacement plug to ensure it is suitable for your electrical cord. Verify that it is compatible with the wire gauge and the type of cord you are working with (such as a two-prong or three-prong plug).
- Identify the terminals: Look for the terminals inside the replacement plug. They are typically labeled or color-coded, indicating the hot wire (often brass or black terminal), the neutral wire (often silver or white terminal), and the ground wire (often green terminal).
- Loosen the screws: Use a screwdriver to loosen the screws on the replacement plug’s terminals. This will allow you to connect the wires to the designated terminals.
- Prepare the wires: Twist the strands of each wire tightly to prevent any loose strands or fraying. This will ensure a solid and secure connection.
- Connect the wires: Insert the stripped end of the hot wire into the terminal labeled for the hot wire and tighten the screw. Repeat this process for the neutral wire and the ground wire, connecting them to their corresponding terminals.
It’s important to ensure that the wires are properly connected to their respective terminals, and the screws are tightened securely. This will provide a reliable and safe connection in the replacement plug. In the next step, we will secure the connection to ensure it remains stable over time.
Step 5: Connect the Wires
With the replacement plug prepared, it’s time to connect the stripped wires from the electrical cord to their respective terminals in the plug. Follow these steps to properly connect the wires:
- Identify the terminals: Take a close look at the replacement plug and identify the terminals labeled or color-coded for the hot wire, neutral wire, and ground wire. Ensure that the terminals are correctly labeled and match the corresponding wires.
- Insert the wires: Insert the stripped end of the hot wire into the terminal designated for the hot wire. Ensure that the bare copper wire is fully inserted into the terminal, and there are no strands or wires protruding outside.
- Tighten the screws: Use a screwdriver to tighten the screw of the terminal, securing the hot wire in place. Make sure the connection is firm and the wire is held snugly within the terminal.
- Repeat for remaining wires: Repeat the process for the neutral wire and the ground wire, connecting them to their corresponding terminals and tightening the screws. Double-check all the connections to ensure they are secure.
It’s crucial to ensure a proper and secure connection between the wires and the terminals in the replacement plug. A loose or faulty connection can lead to poor electrical conductivity, which may result in issues such as intermittent power, sparks, or electric shocks. Take your time to ensure each wire is correctly connected and tightened securely.
In the next step, we will secure the connection and provide additional protection to prevent any potential hazards.
Step 6: Secure the Connection
Now that the wires are properly connected to the terminals in the replacement plug, it’s important to secure the connection and provide additional protection. Follow these steps to ensure a stable and safe connection:
- Inspect the connection: Take a close look at the connections between the wires and the terminals. Verify that all the wires are securely fastened and there is no exposed bare wire outside the terminals.
- Use electrical tape: Wrap electrical tape tightly around each individual connection, covering the exposed metal parts of the terminal and the bare wire. This will provide insulation, protect against accidental contact, and help prevent the wires from coming loose.
- Optional: Heat shrink tubing: For added protection, you can use heat shrink tubing. Slide a piece of heat shrink tubing over each individual connection, ensuring it covers the terminal and part of the wire. Use a heat source, such as a heat gun or a lighter, to apply heat evenly to the tubing, causing it to shrink and form a tight seal around the connection.
By securing the connection with electrical tape and optional heat shrink tubing, you are adding an extra layer of protection and ensuring the stability of the connection. This will reduce the risk of electrical hazards and maintain a reliable connection over time.
In the final step, we will test the newly replaced plug to ensure everything is functioning correctly.
Step 7: Test the New Plug
After completing the process of replacing the plug on your electrical cord, it’s crucial to test the new plug to ensure everything is functioning correctly. Follow these steps to perform a quick and safe test:
- Double-check the connections: Before plugging the cord into an outlet, verify that all the connections are secure and there are no loose wires or exposed conductors.
- Find a power source: Locate a nearby outlet or power source that is suitable for testing. Ensure that it is a properly functioning outlet and does not have any issues.
- Plug in the cord: Insert the new plug into the chosen outlet firmly and fully. Check for any resistance or difficulty in plugging it in.
- Switch on the power: Turn on the power to the outlet or flip the switch to supply electricity to the cord. It’s important to observe any abnormal behavior or signs of malfunction.
- Check for functionality: Verify that the electrical device or appliance connected to the cord is receiving power and functioning as expected. Test the device by turning it on and ensuring that it operates correctly.
- Observe for any issues: Pay attention to any unusual sparks, smoke, or strange noises indicating a problem. If you notice any issues, immediately unplug the cord and reassess the connections.
By thoroughly testing the new plug, you can confirm that the replacement was successful and that the electrical cord is functioning properly. This will ensure the safety and reliability of the cord when used with electrical devices or appliances.
If you encounter any problems during the test or notice any issues, it is recommended to disconnect the cord from the power source immediately and reevaluate the connections. If necessary, consult a professional electrician for assistance.
Congratulations! You have successfully learned how to put a new plug on an electrical cord. By following these steps, you can now confidently repair damaged plugs and ensure the continued use of your electrical cords.
Remember to always prioritize safety and follow proper procedures when working with electricity. If you’re unsure or uncomfortable with the process, it’s best to seek assistance from a qualified professional.
Now you can enjoy the convenience and peace of mind of having a properly functioning plug on your electrical cord!
Read more: Why Are There Holes In Electrical Cord Plugs
Conclusion
Replacing a damaged plug on an electrical cord may seem like a daunting task, but with the right tools and knowledge, it can be a straightforward and rewarding DIY project. By following the step-by-step instructions outlined in this article, you have learned how to put a new plug on an electrical cord safely and effectively.
Throughout the process, it is crucial to prioritize safety. Remember to gather the necessary safety equipment, such as gloves and safety goggles, to protect yourself from potential electrical hazards. Take your time to carefully cut the damaged plug, strip the wires, and connect them to the replacement plug’s terminals. Ensure that all connections are secure and properly insulated with electrical tape or heat shrink tubing.
Once the new plug is securely connected, conduct a thorough test to verify its functionality. Plug the cord into a suitable power source and observe that the connected device operates as expected. If any issues arise, promptly disconnect the cord from the power source and assess the connections for any deficiencies.
By learning how to replace a plug on an electrical cord, you can save time and money by avoiding the need for professional assistance. However, always exercise caution and seek professional help if you feel unsure or uncomfortable with any aspect of the process.
Remember that safety should always be your top priority. Working with electricity requires a combination of knowledge, skill, and attention to detail. By equipping yourself with the appropriate tools and following the steps outlined in this article, you can confidently and effectively put a new plug on an electrical cord.
Now you have the skills to maintain and repair electrical cords, ensuring their continued functionality and your peace of mind. So go ahead, tackle those damaged plugs, and enjoy the convenience of safely repairing your electrical cords!
Frequently Asked Questions about How Do You Put A New Plug On An Electrical Cord
Was this page helpful?
At Storables.com, we guarantee accurate and reliable information. Our content, validated by Expert Board Contributors, is crafted following stringent Editorial Policies. We're committed to providing you with well-researched, expert-backed insights for all your informational needs.


0 thoughts on “How Do You Put A New Plug On An Electrical Cord”