Articles
How Do You Remove Scratches From Mirrors
Modified: September 1, 2024
Learn effective methods to remove scratches from mirrors with our informative articles. Restore your mirror's pristine appearance easily and affordably!
(Many of the links in this article redirect to a specific reviewed product. Your purchase of these products through affiliate links helps to generate commission for Storables.com, at no extra cost. Learn more)
Introduction
Welcome to our comprehensive guide on how to remove scratches from mirrors. Mirrors are an essential part of our daily lives, serving functional and aesthetic purposes. However, over time, mirrors can become scratched, affecting their clarity and overall appearance.
Whether these scratches are the result of accidental impacts, cleaning mishaps, or simply wear and tear, knowing how to effectively remove them can save you the cost and hassle of replacing the mirror altogether.
In this article, we will explore various methods and techniques to remove scratches from mirrors. From evaluating the severity of the scratch to implementing different cleaning and polishing methods, we’ll guide you step-by-step through the process of restoring your mirror’s pristine condition.
Before we begin, it’s important to understand that not all mirrors are created equal. The type of mirror you have will determine the best approach to remove the scratches. Additionally, the severity of the scratches can impact the effectiveness of the methods used. It’s crucial to take the appropriate safety precautions and choose the method that suits your specific situation.
So, if you’re tired of looking through scratched mirrors and want to restore their clarity and brilliance, let’s dive into the world of mirror scratch removal and learn how to bring back the shine to your favorite reflective surfaces.
Key Takeaways:
- DIY methods like toothpaste and baking soda paste can effectively remove minor mirror scratches, saving you the cost of replacement and restoring your mirror’s clarity and appearance.
- Safety precautions, surface cleaning, and evaluating scratch severity are crucial steps before attempting any DIY scratch removal method. Professional assistance may be necessary for deeper scratches.
Read more: Why Do Cats Scratch On Mirrors
Understanding Mirror Scratches
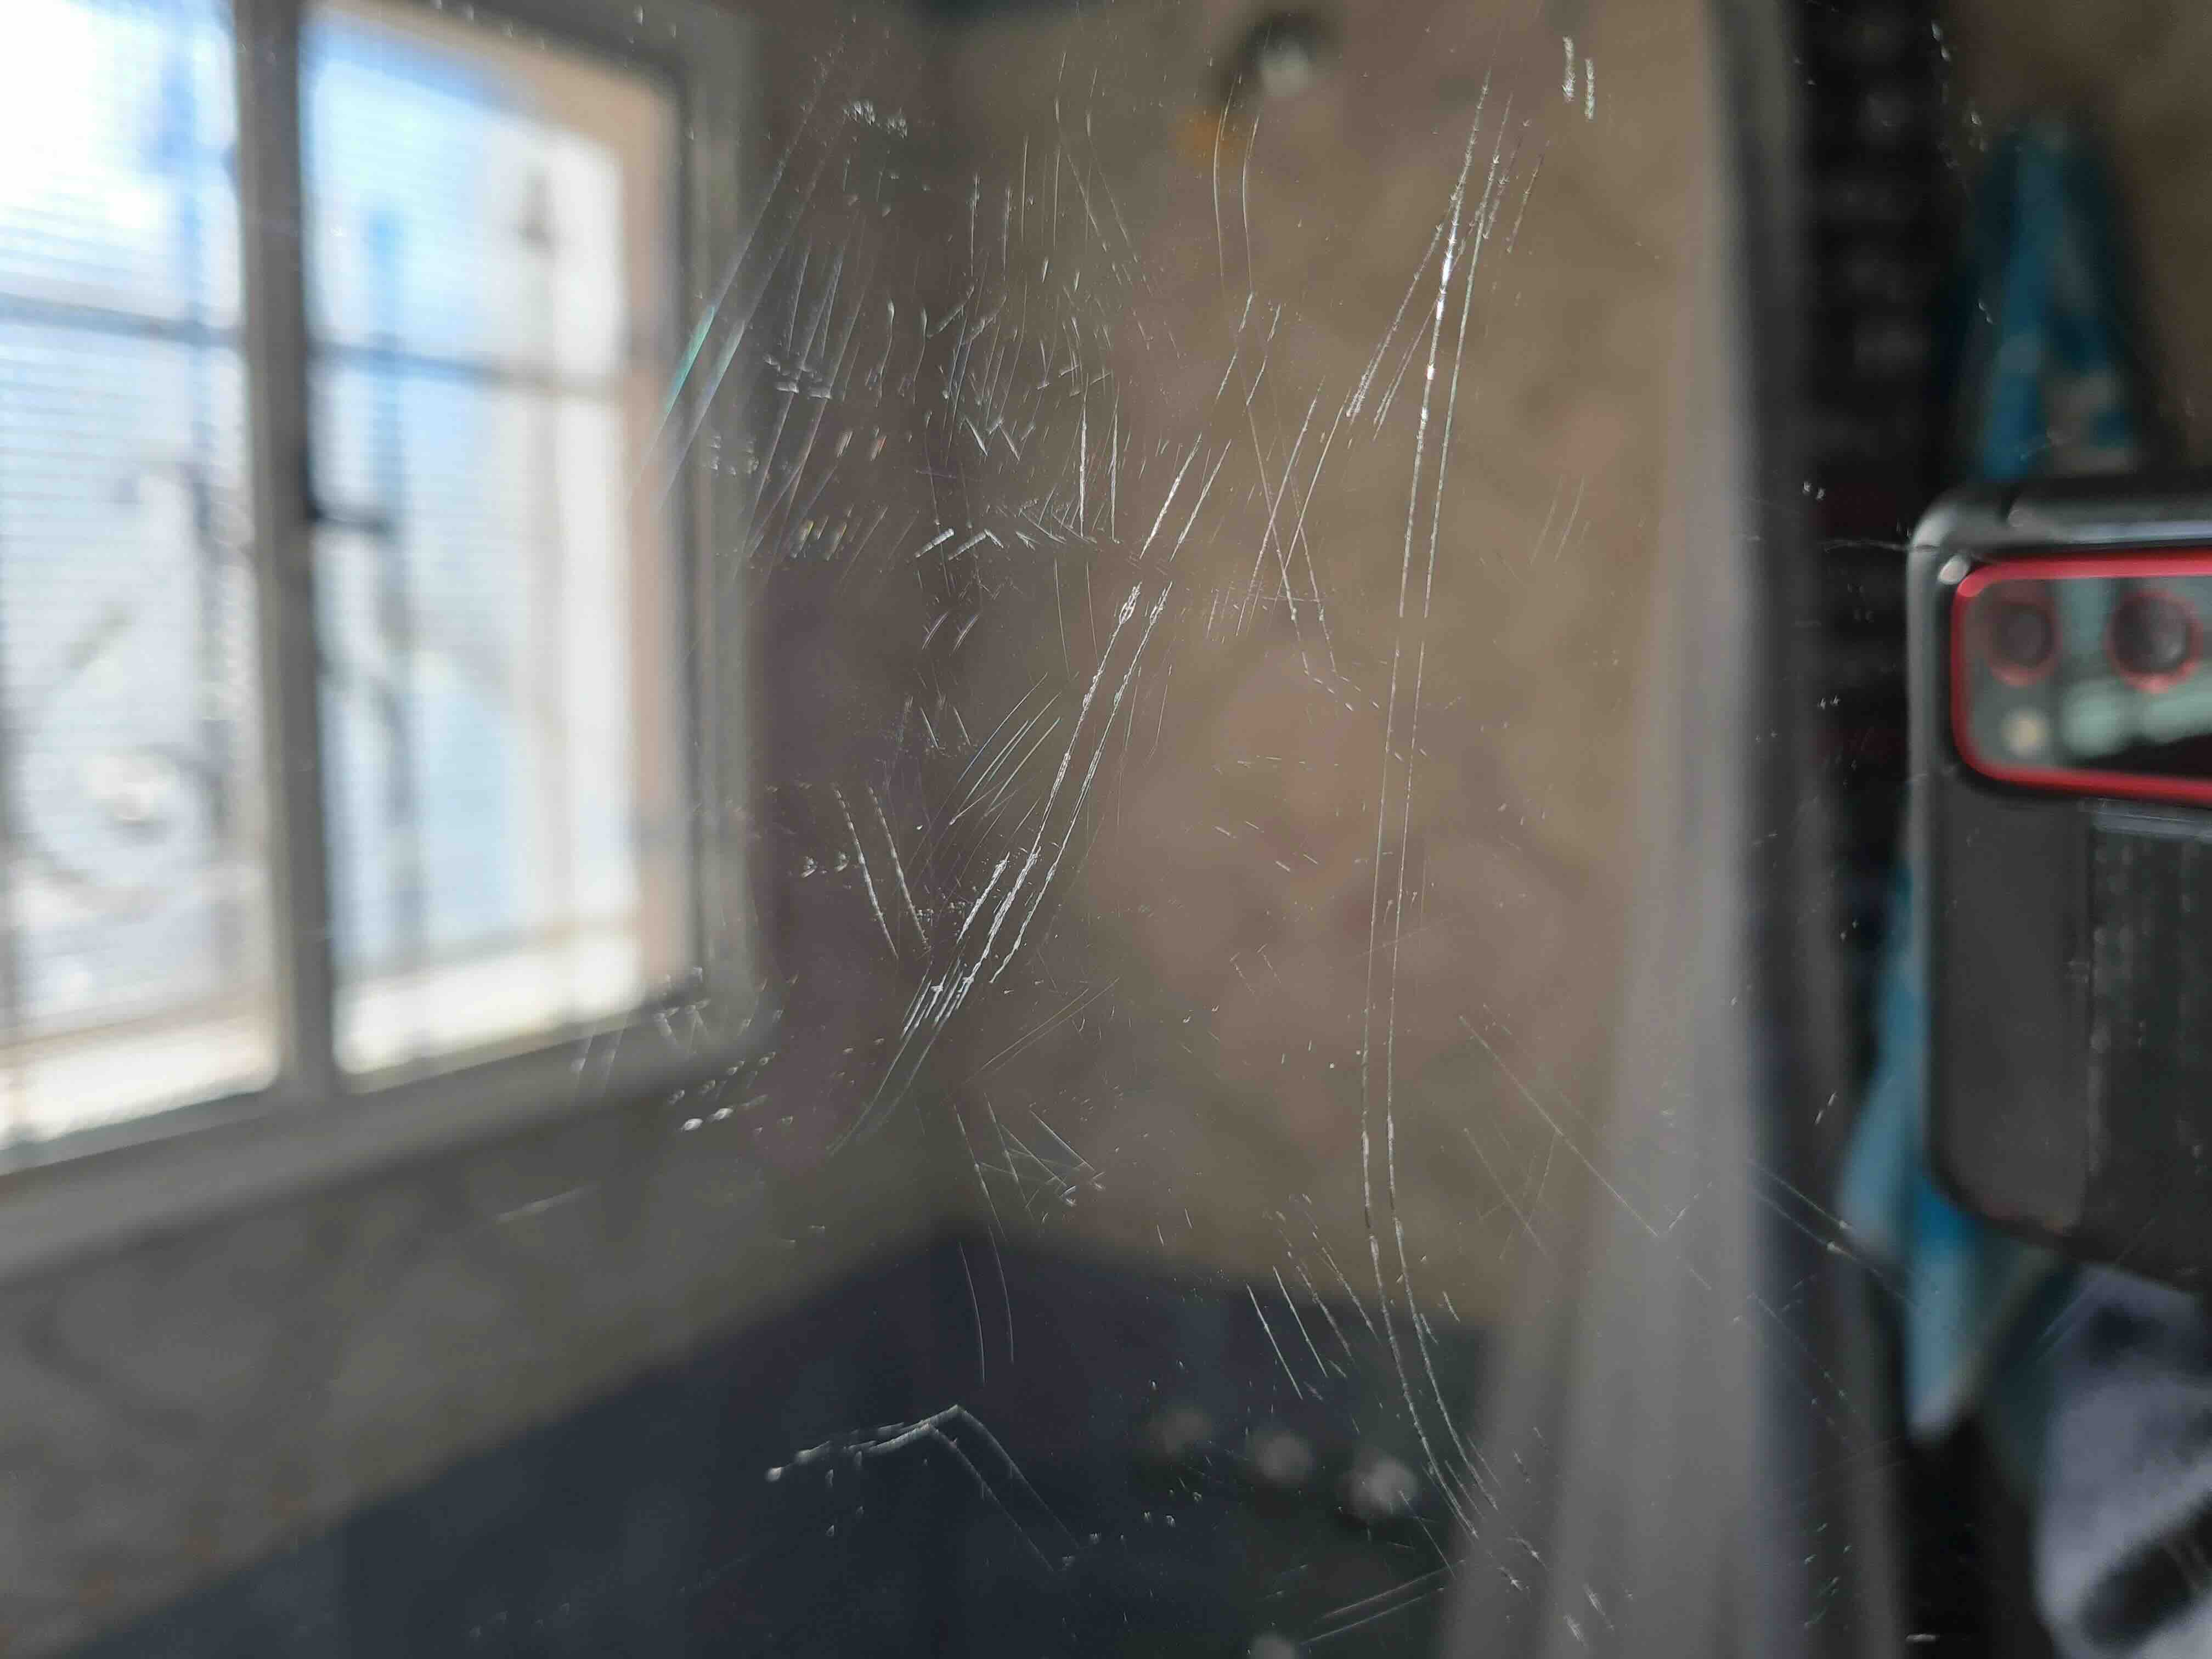
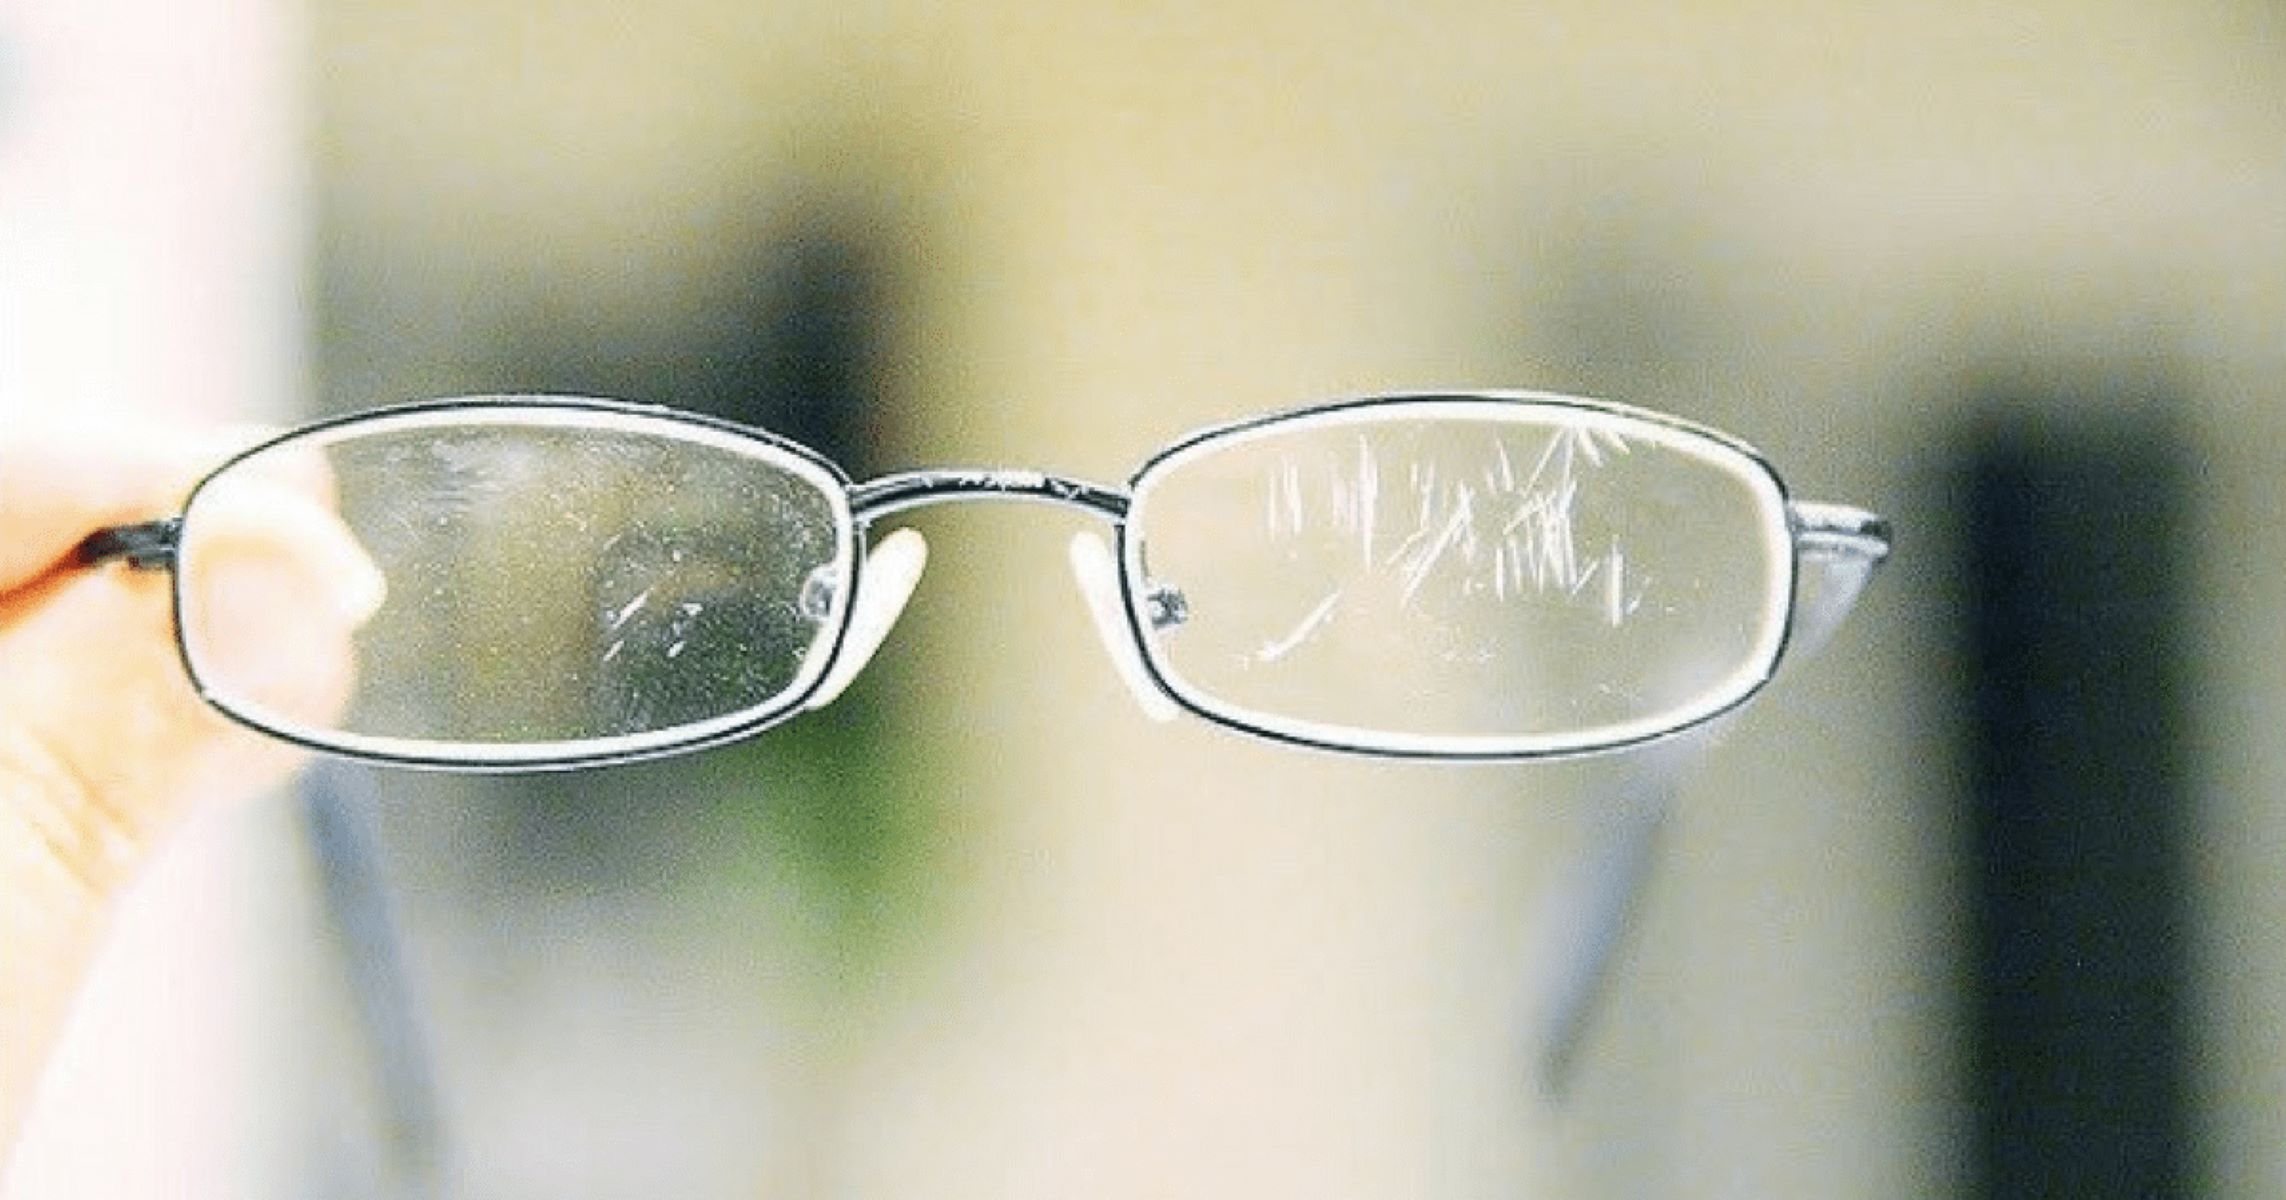
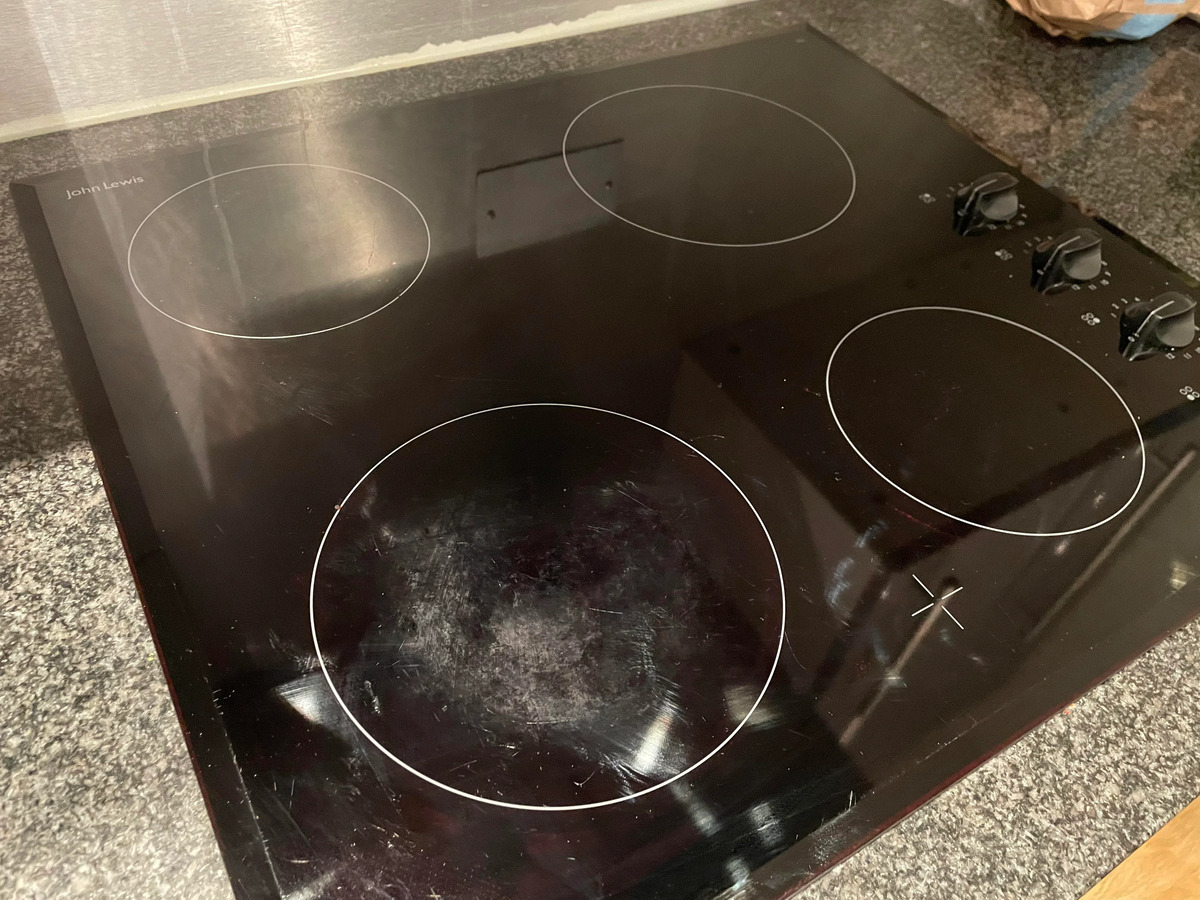
Before diving into the techniques for removing mirror scratches, it’s essential to understand the nature of these scratches. Mirror scratches can range from superficial and minor to deep and severe.
Superficial scratches are often caused by light cleaning mishaps or the use of abrasive cleaning materials. These scratches are usually shallow and do not penetrate the reflective coating of the mirror, making them easier to remove.
Deeper scratches, on the other hand, can occur from accidentally bumping into the mirror or using sharp objects near it. These scratches can be more challenging to remove as they may penetrate the reflective coating and even reach the glass surface of the mirror.
It’s essential to evaluate the severity of the scratch before proceeding with any method. This will help you determine the most appropriate technique to use and ensure the best chances of successful removal.
Keep in mind that there is a difference between scratches and cracks. While scratches can often be repaired, cracks in mirrors typically require professional assistance or complete replacement.
Now that you have a better understanding of mirror scratches and their varying degrees of severity, let’s explore the different types of mirrors and how they can impact the scratch removal process.
Types of Mirrors
Not all mirrors are made with the same materials or have the same coating, which can affect the scratch removal process. Here are some common types of mirrors:
- Glass Mirrors: Glass mirrors are the most common type of mirrors found in homes. They consist of a glass sheet with a reflective coating on one side. Glass mirrors are generally more durable and easier to repair compared to other types.
- Antique Mirrors: Antique mirrors can add a touch of charm and elegance to any space. These mirrors usually have a unique design and may be adorned with intricate frames. It’s important to handle antique mirrors with care, as the reflective coating may be more delicate and prone to damage.
- Acrylic Mirrors: Acrylic mirrors are lighter and more flexible than glass mirrors. They are often used as a safer alternative in environments where there is a risk of breakage, such as in children’s rooms. However, acrylic mirrors are more susceptible to scratching and may require different methods for scratch removal.
- Tinted Mirrors: Tinted mirrors, also known as smoked mirrors, have a colored film applied to the glass, giving them a unique and stylish appearance. When it comes to removing scratches from tinted mirrors, it’s important to ensure that the method used does not damage or remove the tinted coating.
- Framed Mirrors: Framed mirrors come in various designs, shapes, and sizes. The frames can be made from different materials, including wood, metal, or plastic. When dealing with scratches on framed mirrors, it’s essential to consider both the frame and the mirror surface.
Understanding the type of mirror you have will help you choose the appropriate method for scratch removal. Additionally, certain types of mirrors may require extra caution or specific products to ensure the best results.
Now that you have an overview of the various types of mirrors, let’s move on to the next step: evaluating the severity of the scratches.
Evaluating the Scratch Severity
Before attempting any method to remove scratches from your mirror, it’s crucial to assess the severity of the scratches. This evaluation will help you determine the appropriate approach and increase the chances of successful removal.
Here are some steps to follow when evaluating the scratch severity:
- Observe the Scratch: Carefully examine the scratch on your mirror. Determine its length, depth, and width. Superficial scratches may appear as thin lines on the surface, while deeper scratches may be more visible or even feel rough when touched.
- Check Reflection Distortion: Stand in front of the mirror and observe your reflection. Pay attention to any distortion or disruption caused by the scratch. If the scratch is shallow and doesn’t significantly affect the reflection, it may be easier to remove than deeper scratches that cause noticeable distortion.
- Run Your Fingernail over the Scratch: Gently run your fingernail across the scratch. If your nail catches or gets stuck, it indicates a deeper scratch that may require more extensive repair methods. If your nail glides smoothly over the surface, the scratch may be more superficial and easier to address.
- Consider the Location: The location of the scratch can also affect the severity and your approach to removal. Scratches near the edges or corners may require more caution, as they can spread or cause further damage if not handled properly.
- Document the Scratch: It can be helpful to take a photo or make a note of the scratch’s characteristics and location. This documentation will serve as a reference point when choosing the appropriate method and tracking the progress of the repair.
By evaluating the scratch severity, you can determine the most suitable course of action. While some minor scratches can be easily resolved with DIY methods, deeper or more extensive scratches may require professional assistance or even mirror replacement.
Now that you have assessed the severity of the scratches, let’s move on to the next section: safety precautions to keep in mind before starting the scratch removal process.
Safety Precautions
When it comes to removing scratches from mirrors, safety should always be a top priority. Before you begin any repair or restoration work, it’s important to take the following safety precautions:
- Protective Eyewear: Wear safety goggles or protective eyewear to shield your eyes from any potential debris or particles that may be dislodged during the scratch removal process.
- Gloves: Consider wearing gloves to protect your hands from any sharp edges or from coming into direct contact with chemicals or cleaning agents. Disposable gloves or latex gloves can provide an extra layer of protection.
- Ventilation: Ensure proper ventilation in the area where you’ll be working. Some cleaning agents or products used for scratch removal may emit fumes or have strong odors. Open windows or doors, or use fans, to keep the air circulating and prevent the buildup of potentially harmful gases.
- Avoid Hazardous Chemicals: Be cautious when using chemicals or abrasive substances. Read and follow the instructions provided by the manufacturer, wear appropriate protective gear, and keep these substances out of reach of children or pets.
- Work in a Well-Lit Area: Make sure the area where you’ll be working is well-lit. Proper lighting will help you see the scratch and monitor your progress during the removal process. Adequate lighting also reduces the risk of accidents or mishandling of tools.
- Handle Mirrors with Care: Whether you’re working with a small handheld mirror or a large wall-mounted mirror, always handle them with caution. Avoid dropping or forcefully moving the mirror, as this can cause further damage or injury.
- Follow Instructions: Lastly, carefully read and follow the instructions provided with any scratch removal product or method you choose. Different techniques may have specific guidelines or recommended application times. Adhering to these instructions will help ensure your safety and achieve optimal results.
It’s crucial to approach the scratch removal process with care and take necessary safety precautions. By doing so, you can minimize the risk of accidents, injury, or further damage to the mirror or yourself.
Now that you’re aware of the safety precautions, we can proceed to the next section: surface cleaning to prepare the mirror for scratch removal.
Read more: How To Remove Scratches From Toilet Seat
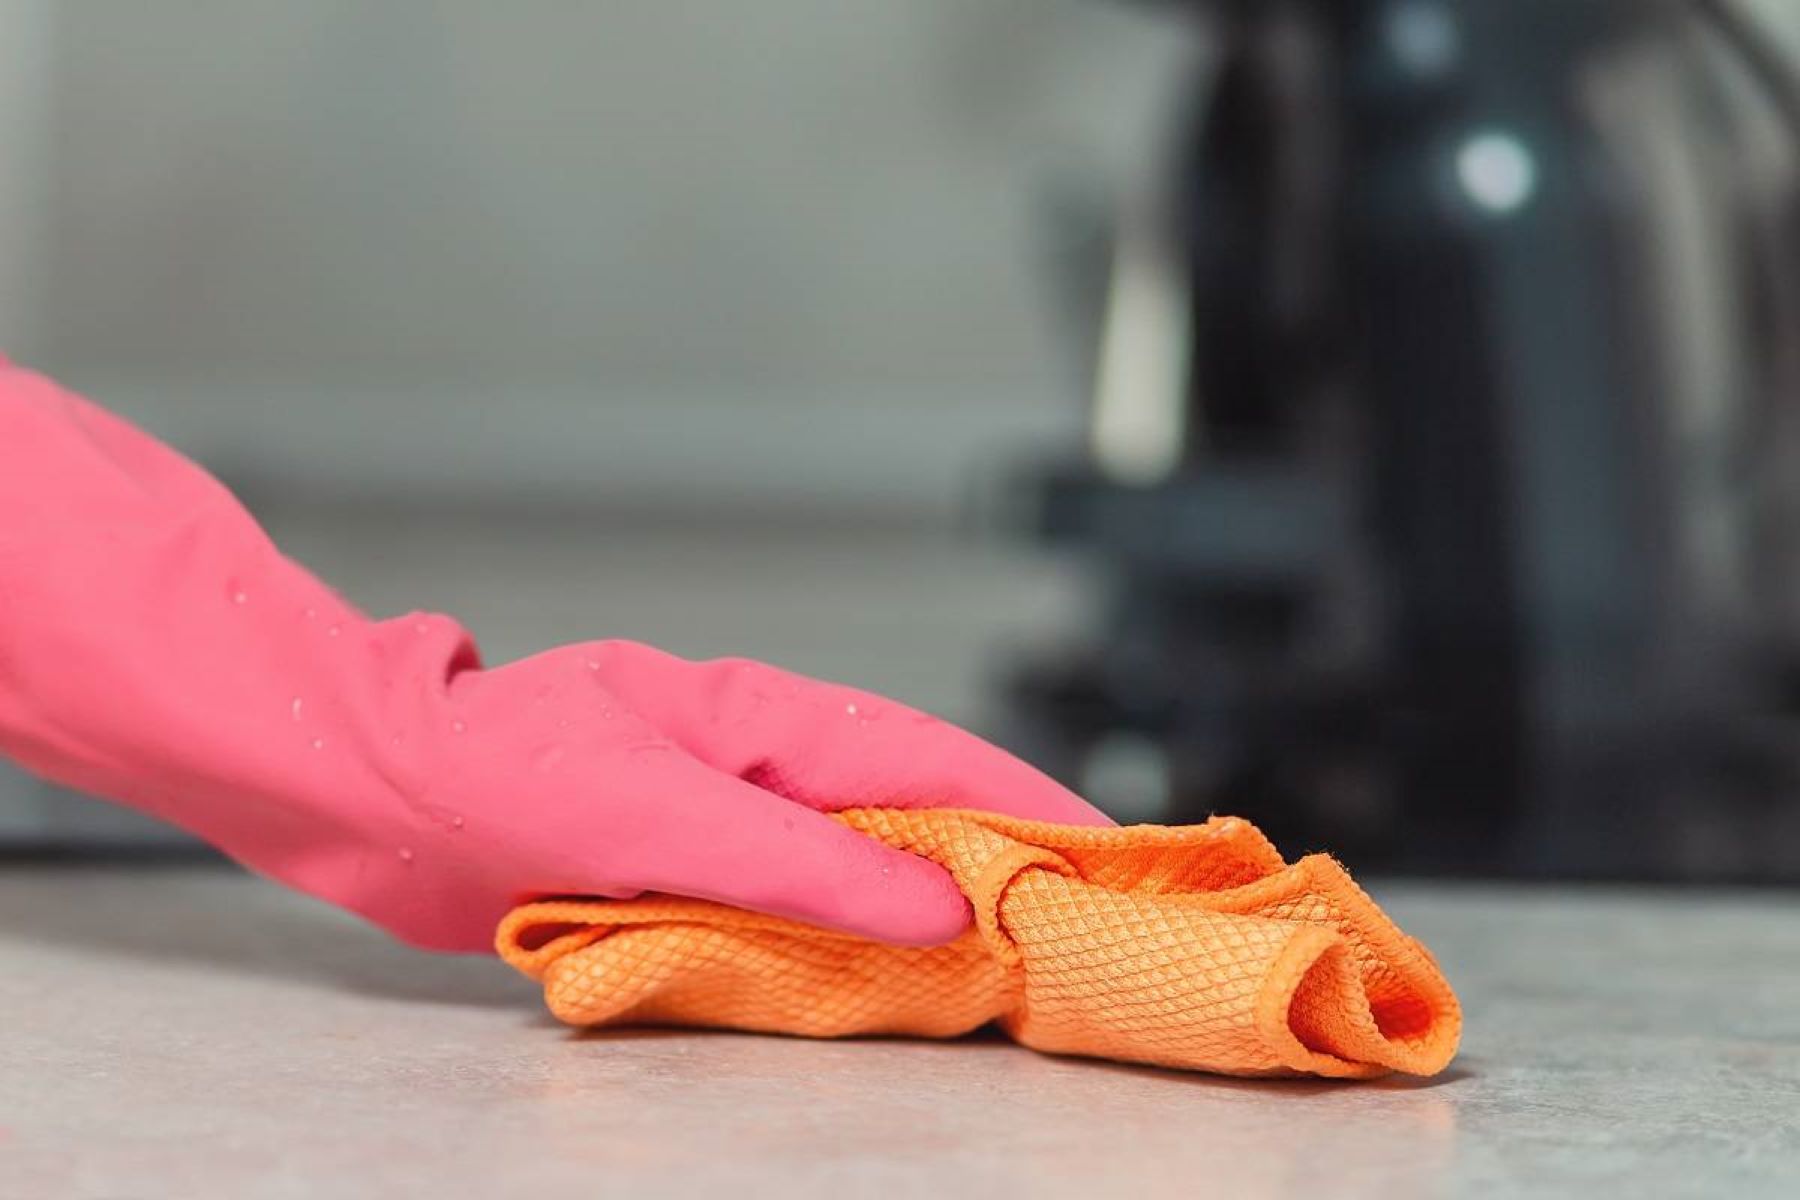
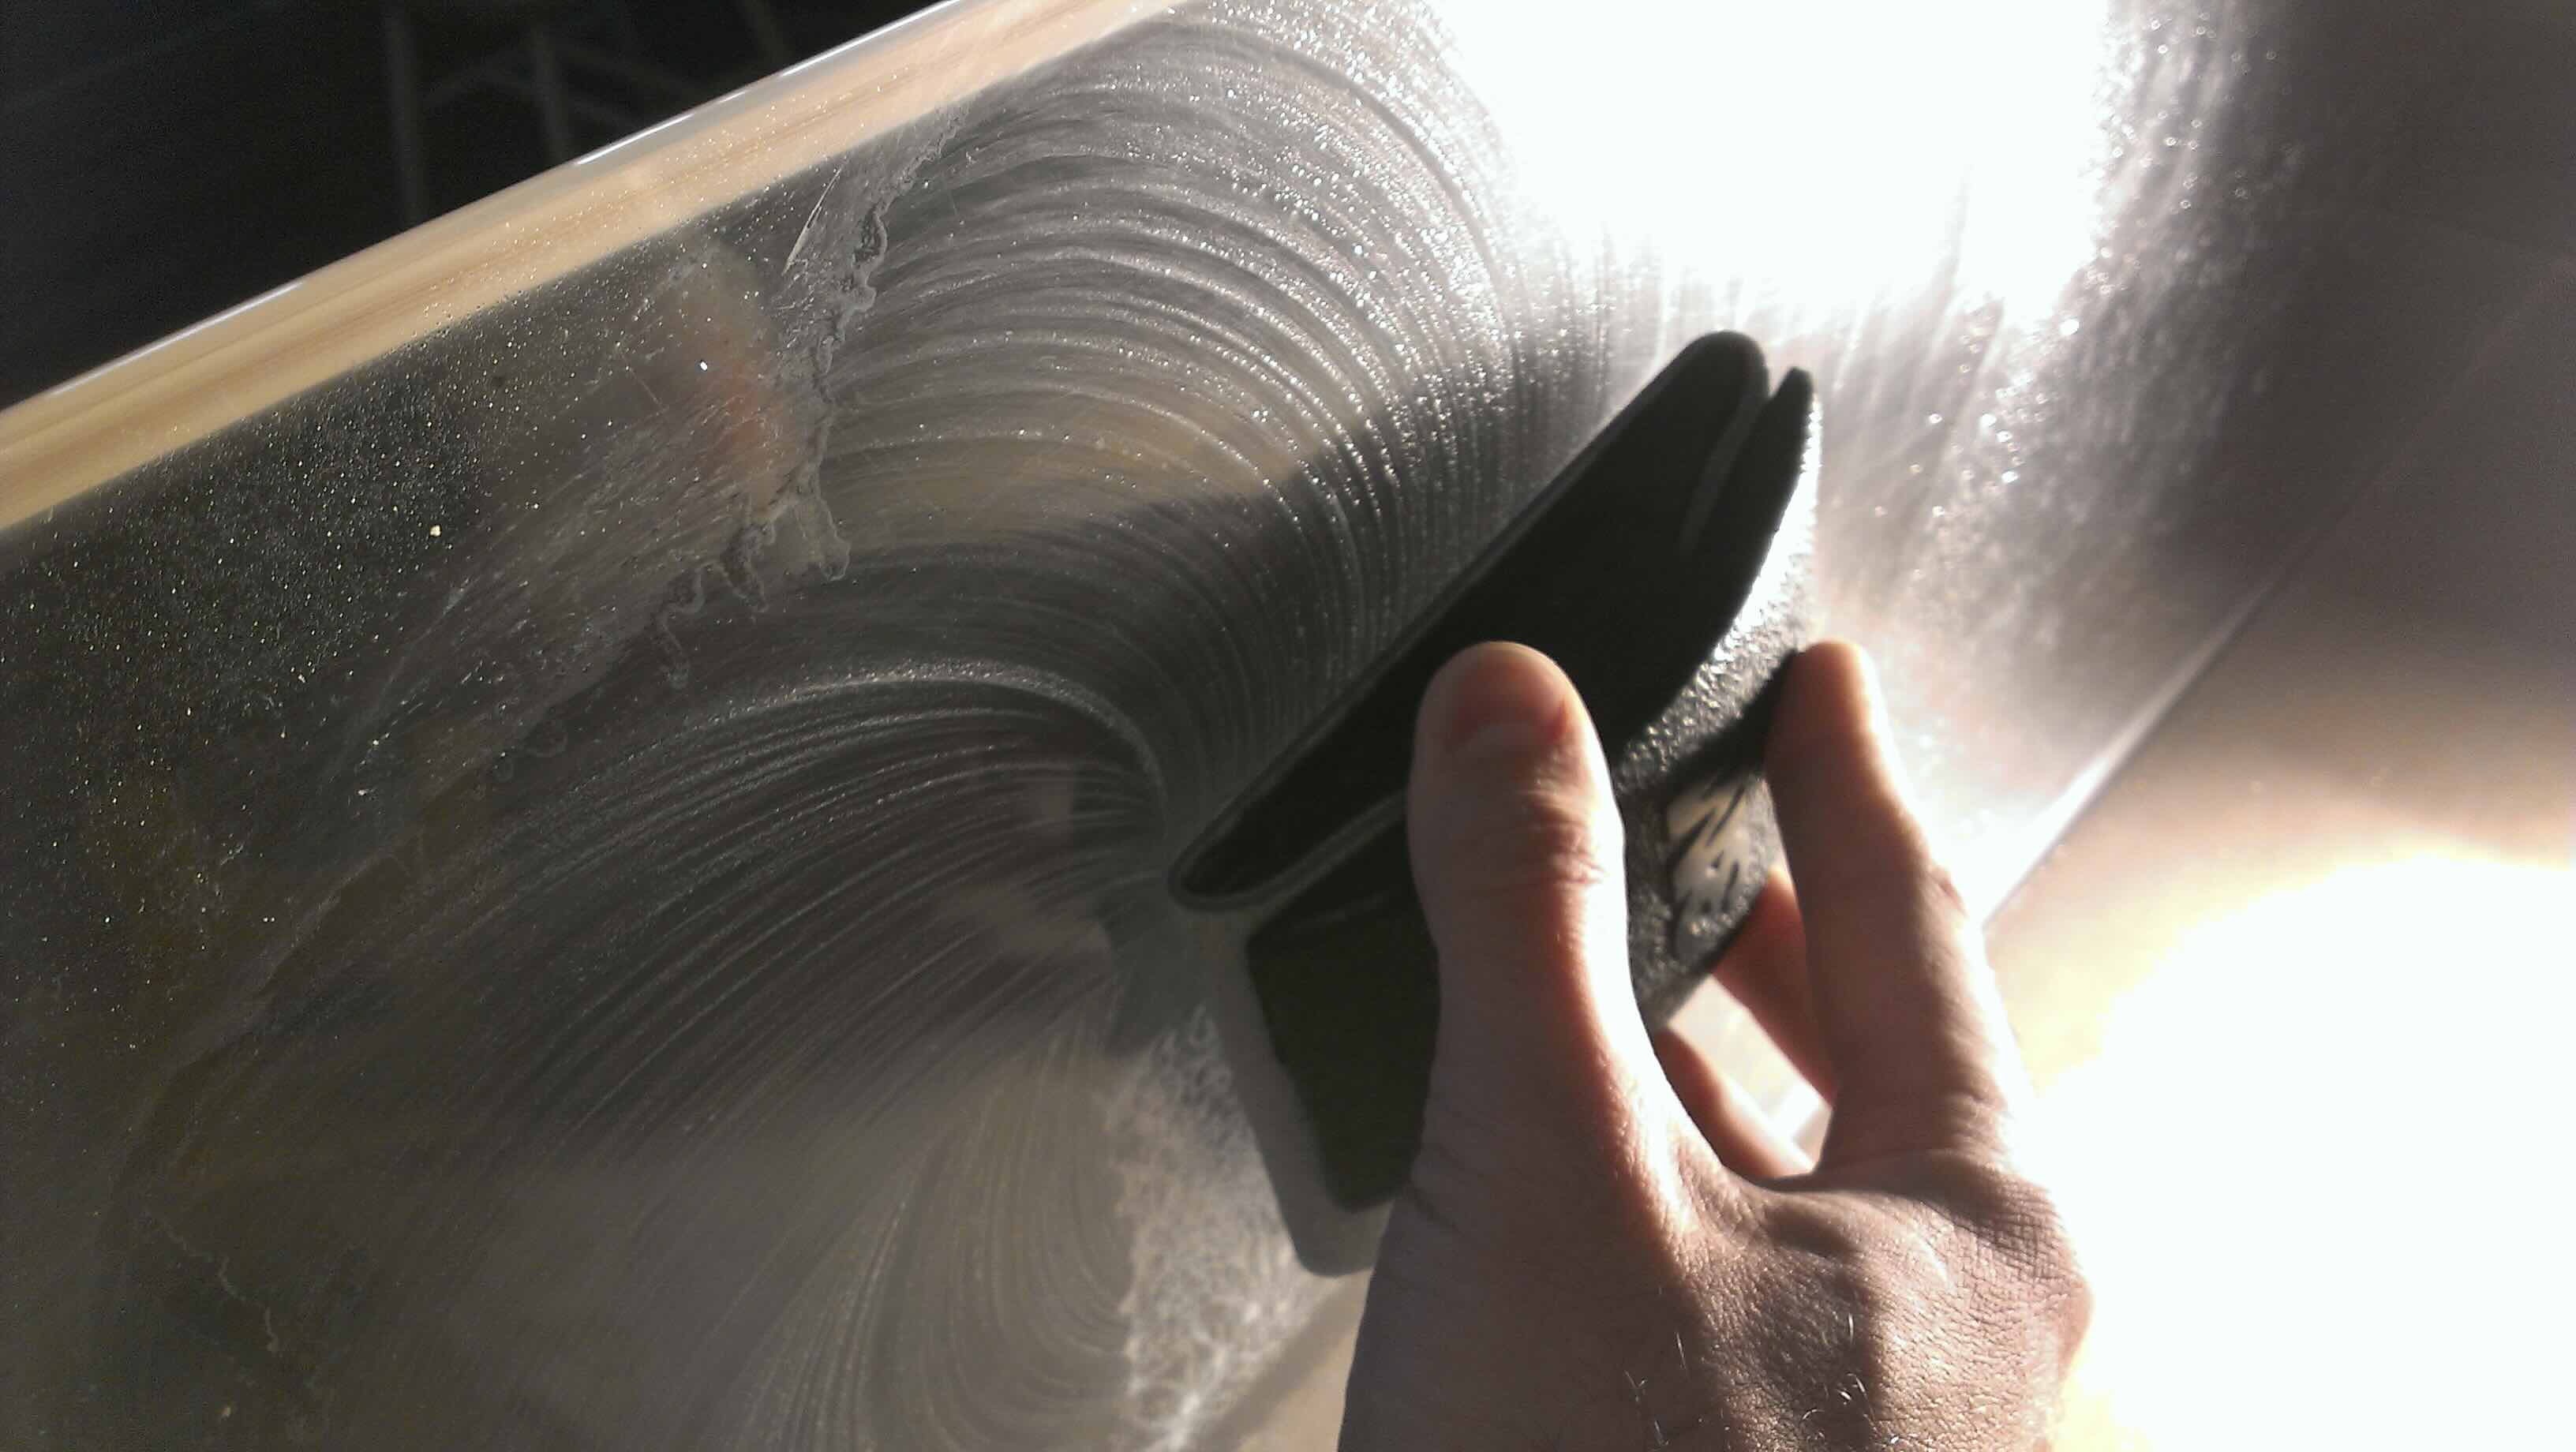
Surface Cleaning
Before you begin the process of removing scratches from your mirror, it’s essential to clean the surface thoroughly. Surface cleaning helps remove dirt, grime, and any residue that may hinder the effectiveness of the scratch removal methods.
Here’s a step-by-step guide on how to clean the surface of your mirror:
- Gather the Necessary Supplies: Prepare a soft microfiber cloth, mild glass cleaner, and a spray bottle filled with water.
- Dust the Mirror: Start by dusting the mirror with a dry, lint-free cloth or a feather duster. This step helps remove any loose particles or debris that may scratch the mirror’s surface during cleaning.
- Mist the Mirror: Lightly mist the mirror with the water from the spray bottle. Be careful not to oversaturate the mirror, as excessive moisture can seep into the frame or backing and cause damage.
- Apply Glass Cleaner: Spray a small amount of mild glass cleaner onto the microfiber cloth. Avoid spraying the cleaner directly onto the mirror, as it can leave streaks or drips that are difficult to remove.
- Wipe the Mirror: Gently wipe the mirror in a circular motion, working your way from the top to the bottom. Pay attention to any stubborn stains or spots and apply a bit more pressure if necessary.
- Dry the Mirror: Once you’ve cleaned the entire mirror surface, use a clean, dry microfiber cloth to dry it. This step helps prevent streaks and ensures a clear, spotless finish.
- Inspect the Surface: Take a moment to inspect the mirror’s surface for any remaining dirt, smudges, or streaks. If needed, repeat the cleaning process using the same gentle technique.
By following these steps, you’ll have a clean and clear mirror surface ready for the scratch removal process. Remember to always use gentle motions and avoid using abrasive materials or harsh chemicals, as they can potentially damage the mirror.
Now that the mirror is clean, we can explore different methods for removing scratches. In the next section, we’ll discuss the toothpaste method, a popular DIY approach.
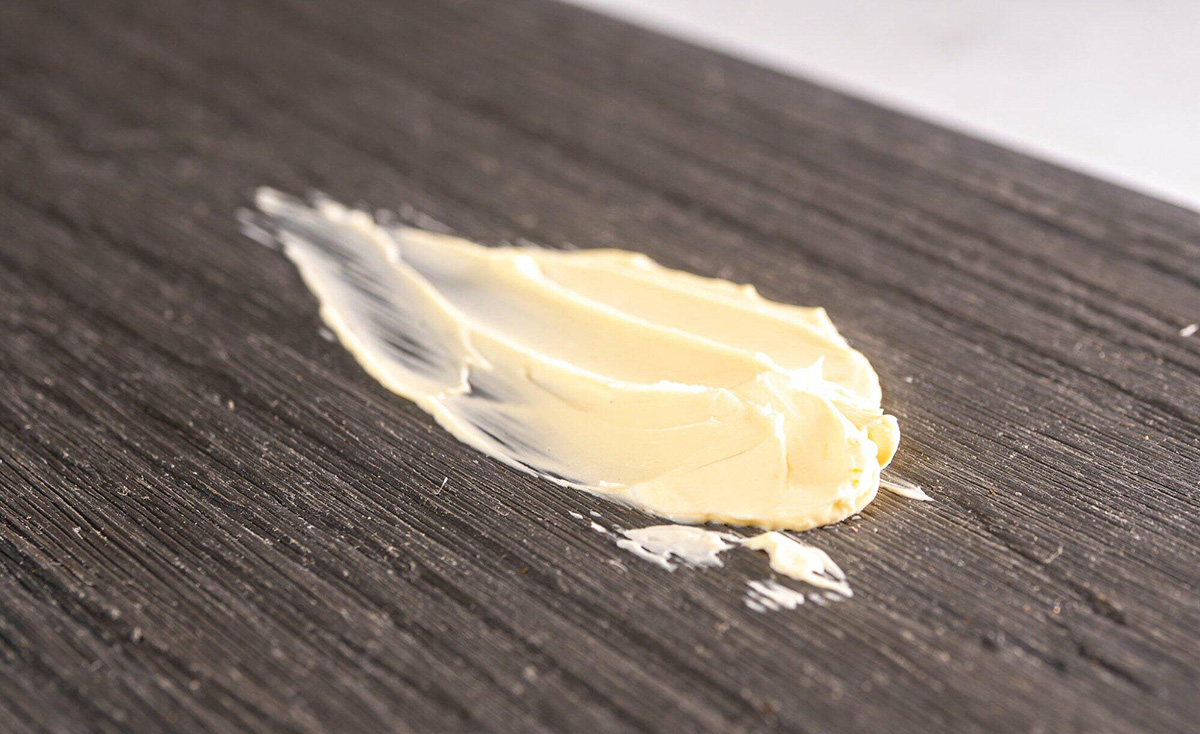
To remove scratches from mirrors, try using a non-gel toothpaste or metal polish. Apply a small amount to a soft cloth and gently rub the scratched area in a circular motion. Wipe off the residue with a clean cloth and repeat if necessary.
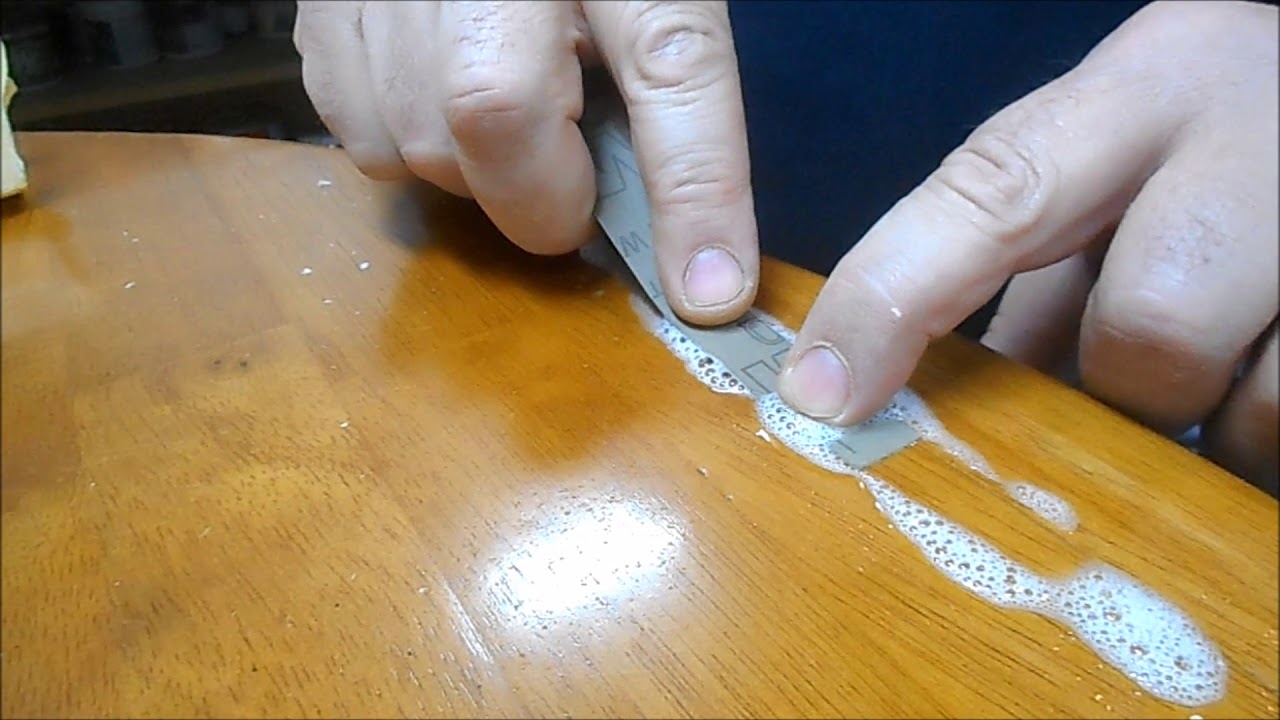
Using Toothpaste Method
The toothpaste method is a popular DIY technique for removing minor scratches from mirrors. Toothpaste contains mild abrasives that can help polish the surface and reduce the visibility of small scratches. Here’s how you can use the toothpaste method:
- Gather the Necessary Supplies: You’ll need non-gel toothpaste (preferably a white, non-whitening variety), a soft cloth or sponge, and water.
- Clean the Mirror: Before applying the toothpaste, ensure that the mirror surface is clean and dry. Follow the surface cleaning steps mentioned earlier in this guide.
- Apply Toothpaste: Squeeze a small amount of toothpaste onto the scratch, or dab a bit of toothpaste onto a clean, damp cloth or sponge. Using gentle circular motions, rub the toothpaste into the scratch for about one minute.
- Wipe and Rinse: After rubbing the toothpaste into the scratch, use a clean, damp cloth to wipe away the excess toothpaste. Rinse the area with water and pat it dry with a clean cloth.
- Inspect the Scratch: Assess the scratch by looking at it from different angles and lighting conditions. If the scratch is less visible or has significantly improved, continue with the next step. If not, you may need to repeat the process or explore other methods.
- Apply Glass Cleaner: Once the toothpaste method has been successful in reducing the scratch’s visibility, clean the mirror surface one more time using mild glass cleaner and a soft cloth. This will remove any residue left behind by the toothpaste method.
- Buff the Mirror: To achieve a polished finish, gently buff the mirror surface with a dry microfiber cloth. This helps remove any remaining streaks or smudges and enhances the mirror’s clarity.
Note that the toothpaste method is most effective for shallow scratches. Deeper or more severe scratches may require other methods or professional assistance.
Remember to always use non-gel toothpaste and conduct a spot test in an inconspicuous area before applying it to the scratch directly. This helps ensure that the toothpaste does not cause any unwanted damage or leave residue on the mirror surface.
Now that you’re familiar with the toothpaste method, let’s explore another popular DIY approach: using baking soda paste to remove mirror scratches.
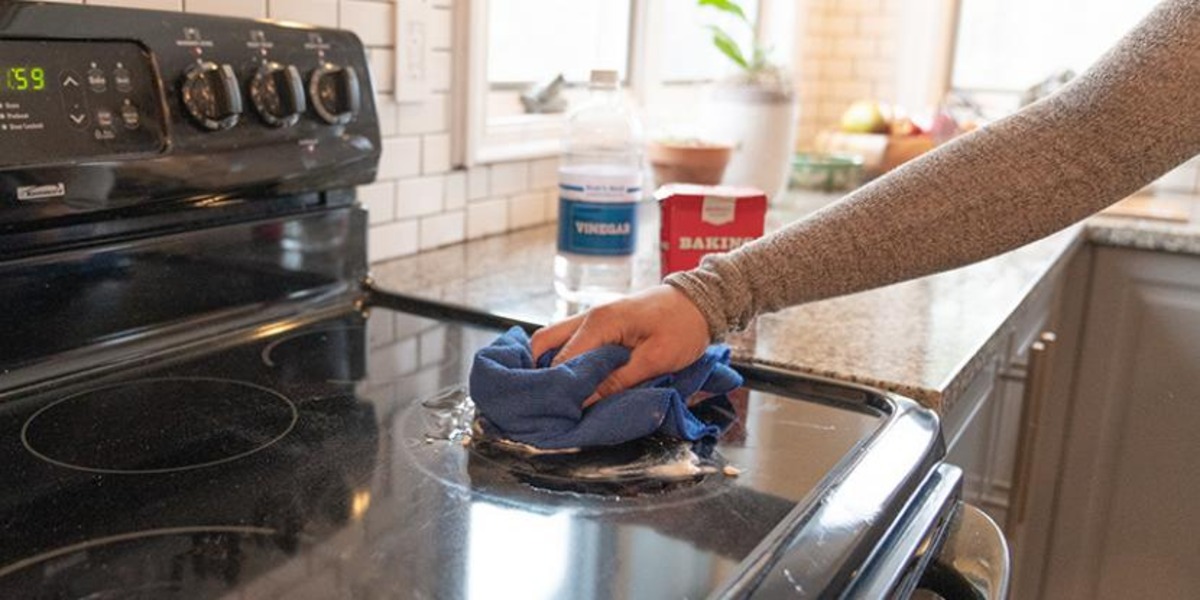
Applying Baking Soda Paste
Another effective DIY method for removing scratches from mirrors is by using a baking soda paste. Baking soda is a mild abrasive that can help smoothen the surface and reduce the visibility of scratches. Here’s how you can apply the baking soda paste:
- Gather the Necessary Supplies: You’ll need baking soda, water, a soft cloth or sponge, and a clean towel.
- Clean and Dry the Mirror: Ensure that the mirror surface is clean and dry before applying the baking soda paste. This ensures that there is no dirt or residue that could potentially further scratch the mirror.
- Create the Baking Soda Paste: In a small bowl, mix equal parts baking soda and water to create a paste-like consistency. Adjust the amounts as needed to achieve a paste that is easy to work with.
- Apply the Paste: Using a clean cloth or sponge, apply the baking soda paste directly onto the scratch. Gently rub the paste into the scratch using circular motions. Be sure to cover the entire scratch area.
- Let it Sit: Allow the baking soda paste to sit on the scratch for about 5-10 minutes. This gives the baking soda time to work on the scratch and help reduce its visibility.
- Rinse and Dry: After the allotted time, rinse the area with water to remove the baking soda paste. Use a clean towel to dry the mirror surface thoroughly.
- Inspect and Repeat if Necessary: Assess the scratch by examining it from different angles and lighting conditions. If the scratch has become less visible, you can proceed to the final step. If the scratch is still noticeable, you may need to repeat the process for better results.
- Polish the Mirror: To achieve a polished finish, use a dry microfiber cloth to gently buff the mirror surface. This will help remove any remaining residue and leave your mirror looking clean and clear.
The baking soda paste method is effective for minor to moderate scratches. However, for deeper or more severe scratches, it’s recommended to seek professional assistance or explore other repair options.
Remember to conduct a spot test in an inconspicuous area before applying the baking soda paste to the scratch directly. This ensures that the baking soda does not cause any undesired damage or leave marks on the mirror surface.
Now that you’re familiar with the baking soda paste method, let’s explore another technique using jewelry polish to remove mirror scratches.
Polish with Jewelry Polish
If you’re dealing with shallow scratches on your mirror, another effective method to consider is using jewelry polish. Jewelry polish contains gentle abrasives that can help buff out surface imperfections and restore the mirror’s smoothness. Here’s how you can polish the mirror using jewelry polish:
- Gather the Necessary Supplies: You’ll need jewelry polish (preferably a non-abrasive one), a soft cloth or sponge, and a clean towel.
- Clean the Mirror: Begin by cleaning the surface of the mirror using mild glass cleaner and a soft cloth. Ensure that the mirror is free from dust, dirt, or any other particles that can interfere with the polishing process.
- Apply Jewelry Polish: On a clean cloth or sponge, apply a small amount of jewelry polish. Rub the polish onto the scratched area of the mirror using gentle circular motions. Be sure to cover the entire scratch and surrounding area.
- Buff the Polish: Using the same cloth or a separate clean cloth, buff the polish into the surface of the mirror. Apply light pressure and continue in circular motions. This helps the polish work its way into the scratch and smooth out any imperfections.
- Wipe Away Excess Polish: Once you’ve sufficiently buffed the area, use a clean, dry towel to wipe away any excess polish. This ensures that no residue is left behind on the mirror.
- Inspect the Scratch: Take a close look at the scratch and assess its visibility. If the scratch has noticeably improved or is no longer visible, you can proceed to the final step. If the scratch is still visible, you may need to repeat the process or try alternative methods.
- Polish the Entire Mirror (Optional): If desired, you can choose to polish the entire mirror surface using the same jewelry polish. This helps achieve a uniform appearance and gives the mirror an extra shine.
- Clean and Dry: Once you are satisfied with the results, give the mirror one final cleaning using a mild glass cleaner and a soft cloth. This removes any remaining residue and leaves your mirror looking pristine.
Keep in mind that jewelry polish is most effective for addressing shallow scratches. For deeper or more severe scratches, it’s recommended to seek professional help or consider other repair options.
As with any scratch removal method, it’s always a good idea to conduct a spot test in an inconspicuous area before applying the jewelry polish to the scratch directly. This allows you to ensure compatibility and avoid any unexpected side effects on the mirror’s surface.
Now that you’re familiar with the jewelry polish method, let’s move on to the next technique: filling scratches with a repair kit.
Read more: How To Remove Scratches From A Coffee Table
Filling Scratches with a Kit
If you’re dealing with deeper scratches on your mirror, using a scratch repair kit can be a viable option. These kits contain specialized materials that help fill in the scratches and restore the mirror’s smooth surface. Here’s how you can fill scratches using a repair kit:
- Gather the Necessary Supplies: You’ll need a scratch repair kit specifically designed for mirrors, which typically includes a filler compound, applicator, and polishing compound.
- Prepare the Area: Clean the scratched area of the mirror using a mild glass cleaner and a soft cloth. Make sure there is no dust, dirt, or debris that can interfere with the repair process.
- Apply the Filler Compound: Follow the instructions provided with the repair kit to apply the filler compound onto the scratch. Typically, you’ll use the applicator or a small brush to fill in the scratch with the compound. Use caution and ensure that the compound is evenly applied across the scratch.
- Let the Compound Dry: Allow the filler compound to dry completely. This typically takes a few hours but may vary depending on the specific kit. Follow the recommended drying time mentioned in the kit’s instructions.
- Buff and Polish: Once the compound is dry, use a clean, soft cloth to gently buff and smooth the surface. Apply the included polishing compound or a mild abrasive cream recommended by the kit and follow the provided instructions for best results.
- Inspect the Result: Carefully inspect the repaired area to assess the scratch’s visibility. If the scratch is no longer visible or significantly reduced, you can proceed to the next step. If the scratch is still visible, you may need to repeat the process or consider seeking professional assistance.
- Clean the Mirror Surface: After completing the repair, clean the entire mirror surface using mild glass cleaner and a soft cloth. This ensures that the mirror is free from any residue or excess polishing compound.
Scratch repair kits can be effective for addressing deeper scratches on mirrors. However, it’s crucial to carefully read and follow the instructions provided with the kit. Each kit may have unique application processes and specific drying times.
Keep in mind that while a repair kit can significantly reduce the visibility of scratches, it may not completely eliminate deep scratches or cracks. In such cases, professional assistance or mirror replacement may be necessary.
Now that you’re familiar with the process of filling scratches using a repair kit, let’s conclude our guide on removing scratches from mirrors.
Conclusion
Removing scratches from mirrors can be a rewarding DIY task that saves you the cost and hassle of replacing the mirror. Whether you’re dealing with superficial scratches caused by cleaning mishaps or deeper scratches from accidental impacts, there are various methods available to help restore your mirror’s clarity and appearance.
In this comprehensive guide, we explored different approaches for removing mirror scratches. We discussed understanding the nature of mirror scratches and evaluating their severity before proceeding with any repair method. We also highlighted the importance of taking safety precautions, such as wearing protective eyewear and gloves, ensuring proper ventilation, and handling mirrors with care.
We delved into surface cleaning techniques using mild glass cleaners and soft cloths to prepare the mirror for scratch removal. We then discussed popular DIY methods, including using toothpaste as a mild abrasive, creating a baking soda paste for smoothening scratches, applying jewelry polish for surface buffing, and utilizing repair kits to fill in deeper scratches.
Each method offers its own benefits and is suitable for different types and severities of mirror scratches. It’s crucial to understand the nature of your mirror, evaluate the scratches, and choose the most appropriate method accordingly. Remember to conduct spot tests, follow instructions carefully, and repeat the process if necessary for optimal results.
If you’re unsure or dealing with deeper or more severe scratches, it’s always advisable to seek professional assistance or consider mirror replacement to ensure the best outcome.
By following the techniques outlined in this guide, you can restore the brilliance and clarity of your mirrors and enjoy the reflection they provide. Remember to handle mirrors with care, keep them clean regularly, and implement preventive measures to minimize the risk of future scratches.
Thank you for joining us on this journey of learning how to remove scratches from mirrors. With the knowledge and techniques you’ve gained, you’re now equipped to tackle those unsightly scratches and bring back the shine to your beloved mirrors.
Frequently Asked Questions about How Do You Remove Scratches From Mirrors
Was this page helpful?
At Storables.com, we guarantee accurate and reliable information. Our content, validated by Expert Board Contributors, is crafted following stringent Editorial Policies. We're committed to providing you with well-researched, expert-backed insights for all your informational needs.


0 thoughts on “How Do You Remove Scratches From Mirrors”