Articles
How Long Does Carpet Installation Take
Modified: October 20, 2024
Learn how long carpet installation typically takes and get expert advice and articles on all aspects of the carpet installation process.
(Many of the links in this article redirect to a specific reviewed product. Your purchase of these products through affiliate links helps to generate commission for Storables.com, at no extra cost. Learn more)
Introduction:
Carpet installation is a crucial step in transforming the look and feel of your home. Whether you’re replacing an old carpet or installing one for the first time, it’s important to understand how long the process will take. The duration of carpet installation can vary depending on various factors, such as the size of the area, the complexity of the project, and the professionals you hire.
In this article, we will explore the different factors that can affect the duration of carpet installation and provide you with a comprehensive guide to help you plan and prepare for the process. By understanding the steps involved and the potential challenges that may arise, you can ensure a smooth and efficient installation experience.
Key Takeaways:
- Proper carpet installation requires attention to detail and thorough preparation. Factors like area size, complexity, and carpet type impact the timeline. Investing in quality installation ensures long-term satisfaction with your new carpet.
- The final stages of carpet installation, including trimming, finishing, and clean-up, are crucial for achieving a polished and professional look. Attention to detail and proper maintenance will ensure the longevity and beauty of your newly installed carpet.
Read more: How Long Does It Take To Clean A Carpet
Factors Affecting the Duration of Carpet Installation:
The duration of carpet installation can vary based on several factors. Understanding these factors will help you have a realistic expectation of the timeline for your project. Here are some key factors that can affect the duration of carpet installation:
- Area Size: The size of the area where the carpet needs to be installed plays a significant role in determining how long the installation will take. Larger areas will naturally require more time to complete compared to smaller rooms.
- Complexity of the Project: The complexity of the installation project can also influence the duration. A straightforward installation in a square room will be quicker than one that involves irregularly shaped spaces, multiple rooms, or staircases.
- Preparation Requirements: The condition of the floor before the installation can impact the duration. If the subfloor requires repairs or leveling, it will add time to the process. Additionally, if the area needs to be cleared of furniture and existing flooring, it will contribute to the overall timeline.
- Carpet Type: Different types of carpet require varying installation techniques. For example, wall-to-wall carpet installation involves cutting and seaming, while carpet tiles may require intricate patterns or specialized installation methods. The type of carpet you choose can affect the time needed for installation.
- Installer Experience: The experience and expertise of the carpet installer can influence the speed and efficiency of the installation process. Experienced professionals will be more familiar with the techniques and can complete the job in a shorter timeframe.
It’s important to note that while these factors can impact the duration, it is always best to prioritize quality over speed. Rushing the installation process can lead to mistakes or subpar results. Therefore, it is recommended to work with reputable professionals who prioritize both efficiency and craftsmanship.
Pre-installation Preparation:
Before the carpet installation process begins, there are some essential pre-installation preparations that need to be done. These preparations ensure a smooth and successful installation. Here are the key steps involved in pre-installation preparation:
- Clean the Area: Start by thoroughly cleaning the area where the carpet will be installed. Remove any furniture, fixtures, or debris. This will help create a clean and clear workspace for the installation.
- Measure the Area: Accurate measurements are crucial for ordering the right amount of carpet. Measure the dimensions of the room or area, taking into account any alcoves, closets, or irregular spaces. It is recommended to add a little extra to account for possible waste or errors.
- Select and Purchase the Carpet: Choose the type, style, and color of the carpet that suits your aesthetic preferences and functional needs. Visit a reputable carpet store and consult with their experts to find the best carpet for your space. Once selected, purchase the carpet, ensuring that you have enough for the measured area.
- Acclimate the Carpet: It is important to allow the carpet to acclimate to the room’s temperature and humidity for at least 24 hours before installation. This helps prevent any issues such as expanding or contracting after installation.
- Discuss Installation Details with the Professionals: If you have hired professionals for the installation, communicate with them regarding any specific requirements or preferences. Discuss the timeline, installation techniques, and any additional services that may be needed, such as carpet padding or removal of the existing flooring.
- Prepare for the Installation Day: On the day of the installation, ensure easy access to the area by moving furniture out of the way. Clear the path that the installers will take to bring in the carpet and equipment. If you have pets, make arrangements to keep them in a separate area during the installation process.
By completing these pre-installation preparations, you can help create a conducive environment for the installation and streamline the overall process.
Removing Old Carpet (If Applicable):
If you’re replacing an existing carpet, the first step in the carpet installation process is removing the old carpet. While this step may not be necessary for a new carpet installation, it is crucial to ensure a clean and smooth surface for the new carpet. Here are the key points to consider when removing old carpet:
- Gather the Required Tools: Before you begin, gather the necessary tools for removing the old carpet. These may include a utility knife, pliers, pry bar, and a carpet stapler if the carpet is stapled down.
- Clear the Area: Remove all furniture and other items from the area where the old carpet is installed. This will make the removal process easier and prevent any damage to the furniture.
- Start at a Corner: Start by locating a corner of the carpet. Use pliers or a utility knife to grip the carpet edge and pull it up. Once you have a grip on the carpet, start rolling it up towards the center of the room.
- Work in Sections: If the room is too large to remove the entire carpet in one piece, divide it into smaller sections. Cut the carpet into manageable portions using a utility knife. Roll up each section as you go along.
- Remove the Carpet Padding: Once the carpet is removed, check if there is any carpet padding underneath. If so, remove it as well. Carpet padding is usually stapled or glued to the floor. Use pliers or a pry bar to detach it carefully.
- Dispose of the Old Carpet: Properly dispose of the old carpet and padding. Many local waste management facilities accept carpets for disposal. Alternatively, you can contact a carpet recycling center to inquire about recycling options.
- Clean the Subfloor: After removing the old carpet and padding, thoroughly clean the subfloor to ensure a smooth surface for the new carpet. Remove any adhesive residue, dust, or debris. Carefully inspect the subfloor for any damage or imperfections that may need to be repaired before carpet installation.
Removing the old carpet is an important step in the carpet installation process. It allows for a fresh start and ensures the new carpet is installed on a clean and properly prepared surface.
Floor Preparation:
Once the old carpet has been removed, the next step in the carpet installation process is floor preparation. Proper floor preparation is essential to ensure a smooth and stable surface for the new carpet. Here are the key points to consider during floor preparation:
- Inspect and Repair the Subfloor: Carefully inspect the subfloor for any damage, including cracks, unevenness, or moisture issues. Address any necessary repairs before proceeding with the installation. Fill in cracks, level uneven areas, and address any moisture issues to prevent future damage to the new carpet.
- Clean the Subfloor: Thoroughly clean the subfloor to remove any dust, debris, or adhesive residue left from the old carpet. Use a vacuum cleaner or broom to sweep the floor, followed by a damp mop to ensure it is clean and free of any particles that could affect the carpet’s installation and longevity.
- Install Vapor Barrier (If Required): In some cases, particularly in areas with high moisture levels, it may be necessary to install a vapor barrier. A vapor barrier helps prevent moisture from seeping through the subfloor and damaging the carpet. Follow the manufacturer’s instructions to install the vapor barrier properly.
- Smooth Out Uneven Areas: If there are any noticeable uneven areas on the subfloor, such as high spots or low dips, it is essential to address them before carpet installation. Use floor leveling compound or plywood underlayment to even out these areas. Follow the manufacturer’s instructions for the specific product you’re using.
- Remove Baseboards (Optional): If you prefer a cleaner installation look, you can choose to remove the baseboards before carpet installation. This allows the carpet to be tucked underneath the baseboards for a seamless appearance. If you decide to remove the baseboards, make sure to label and keep them safely for reinstallation after the carpet is installed.
- Trim Door Jambs and Casings: If the new carpet’s thickness will be different from the previous flooring, it may be necessary to trim the bottom of door jambs and casings to ensure a proper fit. Use a handsaw or jamb saw to carefully trim the necessary areas, allowing room for the carpet to slide underneath.
- Final Inspection: Once the subfloor is repaired, clean, and properly prepared, conduct a final inspection to ensure everything is in order. Address any last-minute repairs or adjustments, if needed, to ensure a smooth installation process.
Proper floor preparation is crucial for a successful carpet installation. It helps create a stable and clean surface that will enhance the durability and longevity of the new carpet. Taking the time to prepare the floor properly will contribute to the overall quality of the installation.
Read more: How Long Does A Carpet Cleaning Take
Carpet Measurement and Cutting:
Accurate measurement and cutting of the carpet are essential steps in ensuring a seamless and well-fitted installation. Proper measurements help determine the amount of carpet needed and reduce the chances of running short or having excessive waste. Here’s what you need to know about the carpet measurement and cutting process:
- Measure the Area: Measure the dimensions of the room or area where the carpet will be installed. Use a tape measure to measure the length and width, accounting for any alcoves, closets, or irregular spaces. It’s crucial to measure precisely to avoid any inaccuracies.
- Add On for Waste and Pattern Matching: Allow for additional carpet to account for waste and pattern matching. Depending on the complexity of the area and the carpet’s pattern, it is recommended to add around 10% to 15% of the measured carpet area.
- Consider Carpet Orientation: Determine the orientation of the carpet based on the area’s shape and available carpet widths. You may need to adjust the carpet’s orientation to minimize the number of seams or ensure better alignment with the room structure.
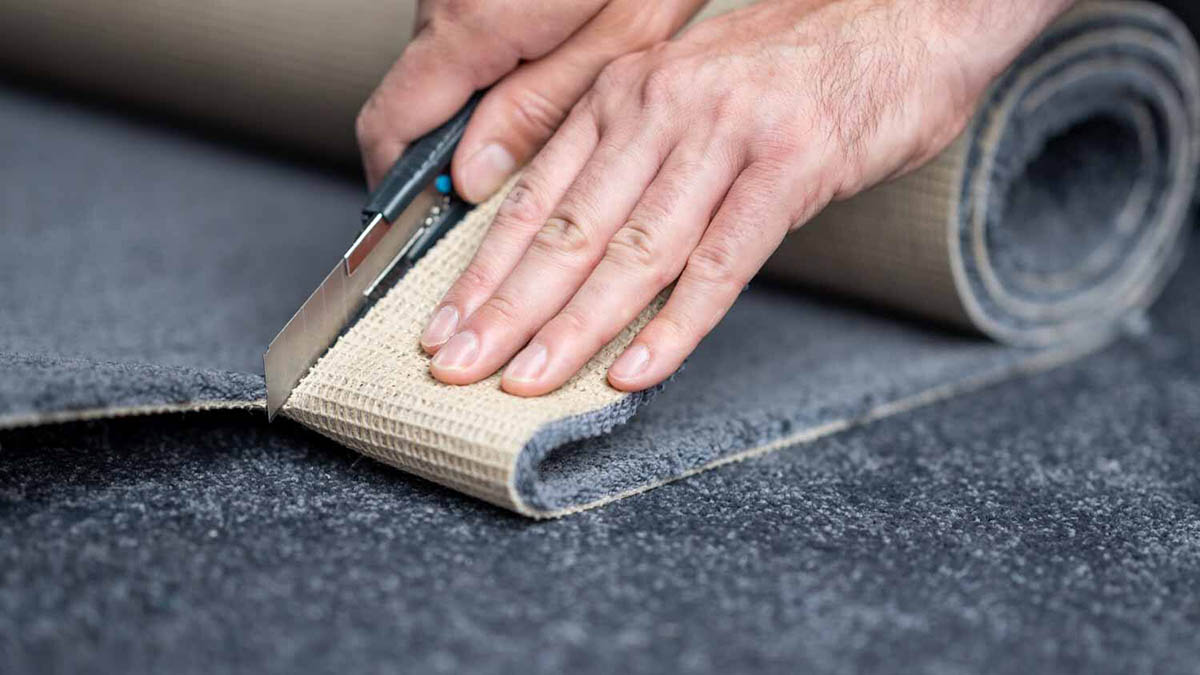
- Mark and Cut the Carpet: Use a chalk line or masking tape to mark the carpet based on the measurements and orientation determined. Double-check the markings to ensure accuracy. Then, using a sharp utility knife, carefully cut along the marked lines. Make clean, straight cuts to achieve precise dimensions.
- Pattern Matching (If Applicable): If your carpet has a pattern or design that needs to be matched, take extra care during cutting to align the pattern correctly. This is particularly important in areas where multiple pieces of carpet will meet or where a seam is required.
- Check the Fit: After cutting the carpet, lay it out in the installation area to check the fit and alignment. Ensure that the carpet covers the entire floor properly, including any corners or alcoves. Make any necessary adjustments before moving on to the installation process.
Accurate measurement and precise cutting are crucial for a successful carpet installation. Taking the time to measure carefully and cut the carpet accurately will result in a better fit and a visually appealing finished product.
Carpet Installation Techniques:
Proper carpet installation techniques are crucial to ensure the longevity and visual appeal of your carpet. Here are the key techniques used during the carpet installation process:
- Tackless Strip Installation: Tackless strips are wooden strips with sharp pins that are installed around the perimeter of the room. These strips hold the carpet in place and eliminate the need for adhesives or nails. The carpet is stretched and secured onto the pins, ensuring a tight and secure fit.
- Double-Glue Installation: Double-glue installation is commonly used for areas with high foot traffic or commercial applications. It involves applying adhesive to both the subfloor and the back of the carpet. This technique creates a stronger bond between the carpet and the floor, reducing the chances of the carpet shifting or wrinkling.
- Carpet Tiles Installation: Carpet tiles are a popular alternative to traditional broadloom carpets. They are easy to handle and install, making them ideal for DIY projects. Carpet tiles are typically installed using adhesive or a peel-and-stick backing system. They allow for easy replacement of individual tiles in case of damage or staining.
- Berber Installation: Berber carpet, known for its looped construction, requires specific installation techniques. To install Berber carpet correctly, installers use a power stretcher to stretch and secure the carpet, ensuring it is adequately taut to prevent unraveling or buckling of the loops.
- Patterned Carpet Installation: Patterned carpet requires extra care and attention during installation to ensure proper alignment and seamless pattern matching. Installers use specialized techniques and tools to ensure precise cuts and alignment of the pattern at seams, corners, and transitions between rooms.
- Stair Carpet Installation: Installing carpet on stairs requires specific techniques to achieve a safe and aesthetically pleasing result. Installers may use a combination of tackless strips, adhesive, and carefully cut carpet pieces to ensure a secure fit on each step.
Choosing the appropriate installation technique depends on the type of carpet, the specific requirements of the area, and the desired outcome. It is recommended to hire professional installers who are experienced in the specific technique required for your carpet and installation area.
Carpet installation typically takes 1-2 days for a standard-sized room. However, larger or more complex installations may take longer. Be sure to discuss the timeline with your installer before starting the project.
Carpet Seaming:
Carpet seaming is a crucial step in the installation process that involves joining two or more pieces of carpet together to create a seamless and visually appealing look. Proper seaming ensures that the carpet appears as one continuous piece, without visible seams or gaps. Here’s what you need to know about carpet seaming:
- Prepare the Edges: Before seaming, ensure that the edges of the carpet pieces are straight and properly cut. Trim any loose fibers and make clean cuts to the edges to ensure a precise fit and alignment.
- Lay Out the Carpet Pieces: Lay out the carpet pieces in their desired positions, ensuring they overlap slightly. This overlapping allows for proper placement and alignment during the seaming process.
- Apply Seaming Tape: Place seaming tape under the edges of the carpet, ensuring it is centered between the two pieces. The seaming tape has an adhesive side that holds the carpet together. It reinforces the seam and prevents unraveling or separation.
- Apply Heat-Activated Adhesive: After positioning the seaming tape, apply heat-activated adhesive to the top side of the tape. The heat activates the adhesive, creating a strong bond between the carpet pieces.
- Use a Carpet Seaming Iron: With the adhesive in place, use a carpet seaming iron to heat the seaming tape. The heat from the iron activates the adhesive, causing it to bond the carpet pieces together securely. Move the seaming iron slowly and smoothly along the seam, ensuring even and consistent heating.
- Seam Rolling: Once the adhesive has been activated, use a carpet seam roller to firmly press down on the seam. This helps ensure proper adhesion and removes any air bubbles or wrinkles. Roll the seam slowly and firmly from one end to the other, applying consistent pressure.
- Trim Excess Carpet: After the seam has been securely bonded, trim any excess carpet along the seam line. Use a sharp utility knife and a straightedge to make clean, straight cuts. Take care not to cut into the seaming tape or damage the carpet fibers.
- Finishing Touches: Inspect the seam to ensure it is smooth and hardly noticeable. Brush or vacuum the carpet to blend in the seam and remove any loose fibers or debris.
Proper carpet seaming requires attention to detail, precise cutting, and careful execution. It is recommended to hire professional installers who have experience in carpet seaming techniques. Their expertise will ensure a seamless and visually appealing result.
Carpet Padding Installation:
Carpet padding, also known as carpet underlay, is a layer of cushioning material that is installed beneath the carpet. It provides numerous benefits, including enhanced comfort, noise reduction, insulation, and increased carpet longevity. Here are the key steps involved in carpet padding installation:
- Select the Right Padding: Choose the appropriate type of carpet padding based on your carpet’s requirements and the specific needs of the installation area. Consider factors such as thickness, density, and material composition to ensure optimal performance.
- Prepare the Subfloor: Ensure that the subfloor is clean, dry, and free of any debris. Remove any existing padding or adhesive residue from the subfloor. Smooth out any uneven areas or repair any damage before proceeding with the padding installation.
- Roll Out the Padding: Start by unrolling the carpet padding across the installation area. Align the padding along the edges of the room, leaving a slight gap between the padding and the walls to allow for expansion and contraction.
- Secure the Padding: If necessary, use adhesive or double-sided carpet tape to secure the padding to the subfloor. This will prevent it from shifting or moving during carpet installation and everyday use. Follow the manufacturer’s instructions for the recommended adhesive or tape application.
- Trim the Excess Padding: Once the padding is secured, use a sharp utility knife to trim any excess padding along the edges of the room. Cut the padding carefully to achieve clean and straight edges.
- Seam the Padding (if needed): If the installation area requires multiple pieces of padding, overlap the edges slightly and use duct tape or carpet seaming tape to secure the seams. This will ensure a smooth and seamless transition between the padding pieces.
- Perform a Final Inspection: Before proceeding with the carpet installation, conduct a thorough inspection of the padding. Ensure that it is properly installed, evenly distributed, and free from any wrinkles or folds.
Carpet padding installation is a crucial step in maximizing the comfort and durability of your carpet. Proper installation ensures that the padding provides the desired cushioning and support, enhancing the overall performance of your carpet.
Read more: How Long Does It Take To Install Blinds
Stretching and Securing the Carpet:
Proper stretching and securing of the carpet are essential to achieve a smooth, wrinkle-free, and long-lasting installation. The stretching process helps remove any slack or tension in the carpet, ensuring a tight fit and preventing future issues. Here are the key steps involved in stretching and securing the carpet:
- Start in the Center: Begin the stretching process from the center of the room. Position a power stretcher or knee kicker, depending on the size of the installation area and the equipment available.
- Attach the Stretcher: Attach one end of the stretcher to the carpet, usually by using a head gripper or spike attachment. The other end of the stretcher will be anchored against the opposite wall or a secure point.
- Apply Tension: Use the power stretcher or knee kicker to apply tension to the carpet. The goal is to stretch it evenly and gradually across the room. Work methodically from one side to another, maintaining even tension throughout the process.
- Secure the Carpet: As the carpet stretches, use a carpet kicker to secure it to the tackless strips or adhesive around the edges of the room. Kick the carpet with force using your knee to hook it onto the tackless strips and secure it firmly in place.
- Trim Excess Carpet: Once the carpet is stretched and secured along the edges, trim any excess carpet using a sharp utility knife. Cut along the baseboard or wall, ensuring clean and straight cuts.
- Repeat for Other Edges: Repeat the stretching and securing process for the remaining sides of the room, working methodically and ensuring consistent tension and a secure fit along each edge.
- Check for Wrinkles or Bulges: While stretching and securing the carpet, continuously check for any wrinkles, bulges, or creases. If you notice any, release tension, reposition the carpet, and re-secure it to eliminate the imperfections. Use a knee kicker or carpet stretcher to make any necessary adjustments.
- Final Inspection: Once the carpet has been stretched and secured, conduct a final inspection. Smooth out any remaining imperfections, ensure the carpet is properly aligned with the walls, and trim any loose or excess fibers if necessary.
Proper stretching and securing of the carpet are crucial to achieving a smooth, professional-looking installation. Taking the time and care to stretch the carpet correctly will help prevent future issues such as wrinkles, bulges, or uneven wear, ensuring a visually appealing and long-lasting result.
Trimming and Finishing:
The trimming and finishing stage of carpet installation involves the final touches that give your newly installed carpet a polished and professional appearance. This step ensures that the carpet is neatly trimmed, transitions are smooth, and any necessary finishing touches are completed. Here are the key steps involved in trimming and finishing the carpet:
- Trim Excess Carpet: Using a sharp utility knife and a straightedge, carefully trim any excess carpet along the walls or baseboards. Make sure to leave a slight gap between the trimmed carpet edge and the wall to allow for expansion and prevent buckling.
- Create Clean Edges: After trimming, take extra care to create clean and straight edges. Run a carpet awl, or a similar tool, along the edge to tuck any loose carpet fibers into the gap between the carpet and the wall. This helps achieve a neat and finished look.
- Install Transition Strips: If the carpet installation area transitions to another type of flooring, such as tile or hardwood, install transition strips to create a smooth and visually appealing transition. Use adhesive or nails to secure the transition strips in place, following the manufacturer’s instructions.
- Secure Loose Seams: Inspect the carpet seams and ensure they are secure and tight. If any seams are loose or have small gaps, apply carpet seam adhesive along the seam line to secure and bond the edges together. Use a seam roller to press the seam firmly and remove any excess adhesive.
- Check for Loose Edges: Inspect the edges of the carpet to ensure they are securely attached to the tackless strips or adhesive. If any edges are loose, use a knee kicker or a carpet stretcher to re-tighten and secure them, ensuring a snug fit.
- Address Carpet Buckling: If any areas of the carpet appear to be buckling or have noticeable wrinkles, re-stretch those areas using a power stretcher or knee kicker. Apply tension and secure the carpet properly to eliminate any buckles or folds.
- Clean and Vacuum: Once the trimming and finishing touches are complete, thoroughly clean and vacuum the newly installed carpet. This helps remove any dirt, debris, or loose fibers left behind during the installation process, leaving your carpet looking fresh and presentable.
- Final Inspection: Step back and conduct a final inspection of the installed carpet. Check for any remaining imperfections, address them if necessary, and ensure that the overall appearance is clean, neat, and visually appealing.
Proper trimming and finishing are essential to completing the carpet installation process and achieving a professional-looking result. Taking the time and care to address the smallest details will ensure that your newly installed carpet enhances the overall aesthetic of your space.
Clean-up and Final Inspection:
Once the carpet installation is complete, it’s important to thoroughly clean up the work area and conduct a final inspection to ensure the quality of the installation. This stage ensures that your space is tidy, the carpet is in perfect condition, and everything meets your expectations. Here are the key steps involved in the clean-up and final inspection process:
- Remove Debris: Start by removing any leftover debris, such as scraps of carpet, padding, or packaging materials. Use a broom or a vacuum cleaner to thoroughly clean the installation area. Pay special attention to corners, crevices, and hard-to-reach spots.
- Check for Loose Objects: Inspect the area for any loose objects or tools left behind during the installation. Ensure that all equipment, such as power stretchers or carpet knives, is removed from the installation area and safely stored away.
- Inspect the Carpet: Conduct a thorough visual inspection of the installed carpet. Check for any visible seams, bumps, or wrinkles. Look for any loose fibers or tufts and trim them if necessary. Ensure that the carpet is securely attached to the tackless strips or adhesive along the edges.
- Review the Details: Double-check all the details of the installation, such as transition strips, baseboard alignment, and seam integrity. Verify that the carpet is properly stretched and the pattern (if applicable) is aligned seamlessly.
- Verify Warranty and Guarantees: Familiarize yourself with the warranty and guarantees provided by the carpet manufacturer and installation professionals. Ensure that all stipulated conditions for maintaining warranties (such as routine cleaning and maintenance) are understood and documented.
- Make Note of any Concerns: If you notice any areas of concern during the final inspection, such as loose seams or visible defects, make note of them and communicate them to the installation professionals. Addressing any issues promptly will help resolve them and ensure your satisfaction with the installation.
- Enjoy Your Newly Installed Carpet: Once the clean-up and final inspection are complete, take a moment to appreciate your newly installed carpet. Enjoy the enhanced comfort, aesthetics, and functionality it brings to your space. Take the time to familiarize yourself with the manufacturer’s recommendations for maintenance and care, and follow them to keep your carpet looking its best.
Completing the clean-up and final inspection is the final step in the carpet installation process. It ensures that everything is in order and that the installation meets your expectations. Taking the time to address any concerns and maintain your carpet will ensure its longevity and the best possible performance.
Conclusion:
Carpet installation is a significant project that can enhance the aesthetics, comfort, and functionality of your home or space. By understanding the factors that affect the duration of the installation process and following the proper techniques, you can ensure a successful and seamless installation.
Factors such as area size, complexity of the project, and the type of carpet you choose can impact the timeline of the installation. Pre-installation preparation, removing old carpet (if applicable), floor preparation, and accurate carpet measurement and cutting are crucial steps to set the stage for a smooth installation.
The carpet installation process involves techniques such as stretching and securing the carpet, seaming, padding installation, and trimming and finishing. Each of these steps requires attention to detail and skill to ensure the carpet is properly fitted, securely attached, and visually appealing.
Completing the installation with a thorough clean-up and final inspection allows you to appreciate the freshly installed carpet and address any final details or concerns. Following the carpet manufacturer’s maintenance guidelines and regularly cleaning and caring for your carpet will help maintain its beauty and longevity.
Whether you choose to hire professional installers or embark on a DIY project, understanding the steps involved and the techniques used in carpet installation will empower you to make informed decisions and ensure a successful outcome.
By investing time and effort into proper installation techniques, you can enjoy a beautifully installed carpet that enhances the comfort and aesthetic appeal of your space for years to come.
Frequently Asked Questions about How Long Does Carpet Installation Take
Was this page helpful?
At Storables.com, we guarantee accurate and reliable information. Our content, validated by Expert Board Contributors, is crafted following stringent Editorial Policies. We're committed to providing you with well-researched, expert-backed insights for all your informational needs.