Home>Articles>How Long Does It Take To Install Garage Door Opener
Articles
How Long Does It Take To Install Garage Door Opener
Modified: October 20, 2024
"Discover the average time required to install a garage door opener with our informative articles. Find out more about the process and get expert tips today!"
(Many of the links in this article redirect to a specific reviewed product. Your purchase of these products through affiliate links helps to generate commission for Storables.com, at no extra cost. Learn more)
Introduction
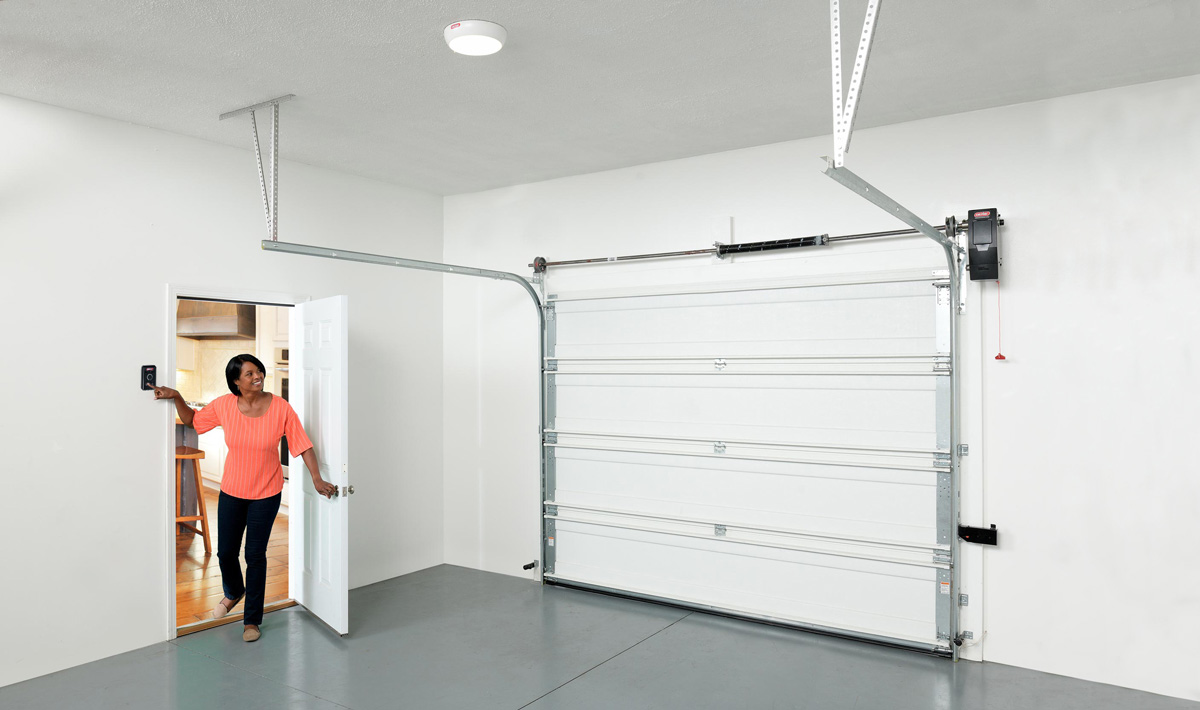
Installing a garage door opener can be a great convenience for homeowners, providing an effortless way to open and close the garage door with just a push of a button. Whether you’re replacing an old, malfunctioning opener or installing a brand new one, understanding the installation process is essential. In this article, we will guide you through the step-by-step process of installing a garage door opener.
Before we dive into the installation process, it’s important to note that the time it takes to install a garage door opener can vary depending on factors such as your level of experience, the complexity of the installation, and the type of opener you have. On average, it can take anywhere from 2 to 4 hours to complete the installation.
But don’t worry if you’re not a seasoned DIY expert – we will walk you through each step of the process, ensuring that you have a clear understanding of what needs to be done. So let’s get started!
Key Takeaways:
- Installing a garage door opener takes 2 to 4 hours on average, but following the step-by-step process can make it manageable even for DIY beginners. Proper preparation and thorough testing are key to a successful installation.
- The installation process involves preparing, assembling, mounting, attaching, wiring, and testing the garage door opener. Following the manufacturer’s instructions and taking necessary safety precautions is crucial. Regular maintenance ensures longevity and proper functionality.
Read more: How Long Does A Garage Door Opener Last
Step 1: Preparing for Installation
Before you begin the installation process, it’s important to properly prepare for the task at hand. Here are the key steps to follow:
- Read the Instruction Manual: Start by carefully reading the instruction manual provided by the manufacturer. This will give you a clear understanding of the installation process and any specific requirements for your particular opener model.
- Gather the Necessary Tools: Make sure you have all the tools you’ll need for the installation. These may include a ladder, a power drill, screwdrivers, pliers, and a wrench. Refer to the instruction manual to see if there are any additional tools required.
- Clear the Area: Before you begin, ensure that the garage door area is clear of any obstacles or debris. This will provide you with a safe and clutter-free workspace.
- Disconnect the Power: For safety purposes, disconnect the power to the garage door opener and unplug it from the electrical outlet. You may also need to disconnect any existing wiring or control panels connected to the previous opener.
- Inspect the Garage Door: Take a close look at the garage door itself. Ensure that it is in good condition and functioning properly. If you notice any issues, such as damaged panels or misaligned tracks, it’s recommended to address those before proceeding with the installation.
- Check the Ceiling Space: Measure the ceiling space in your garage to ensure that there is enough room for the opener unit and the rail assembly. This will help you determine the appropriate positioning and mounting of the opener.
By properly preparing for the installation process, you will help ensure a smooth and efficient installation. With all the necessary tools in place and a clear understanding of the steps involved, you’ll be ready to move on to the next phase of the installation – assembling the opener unit.
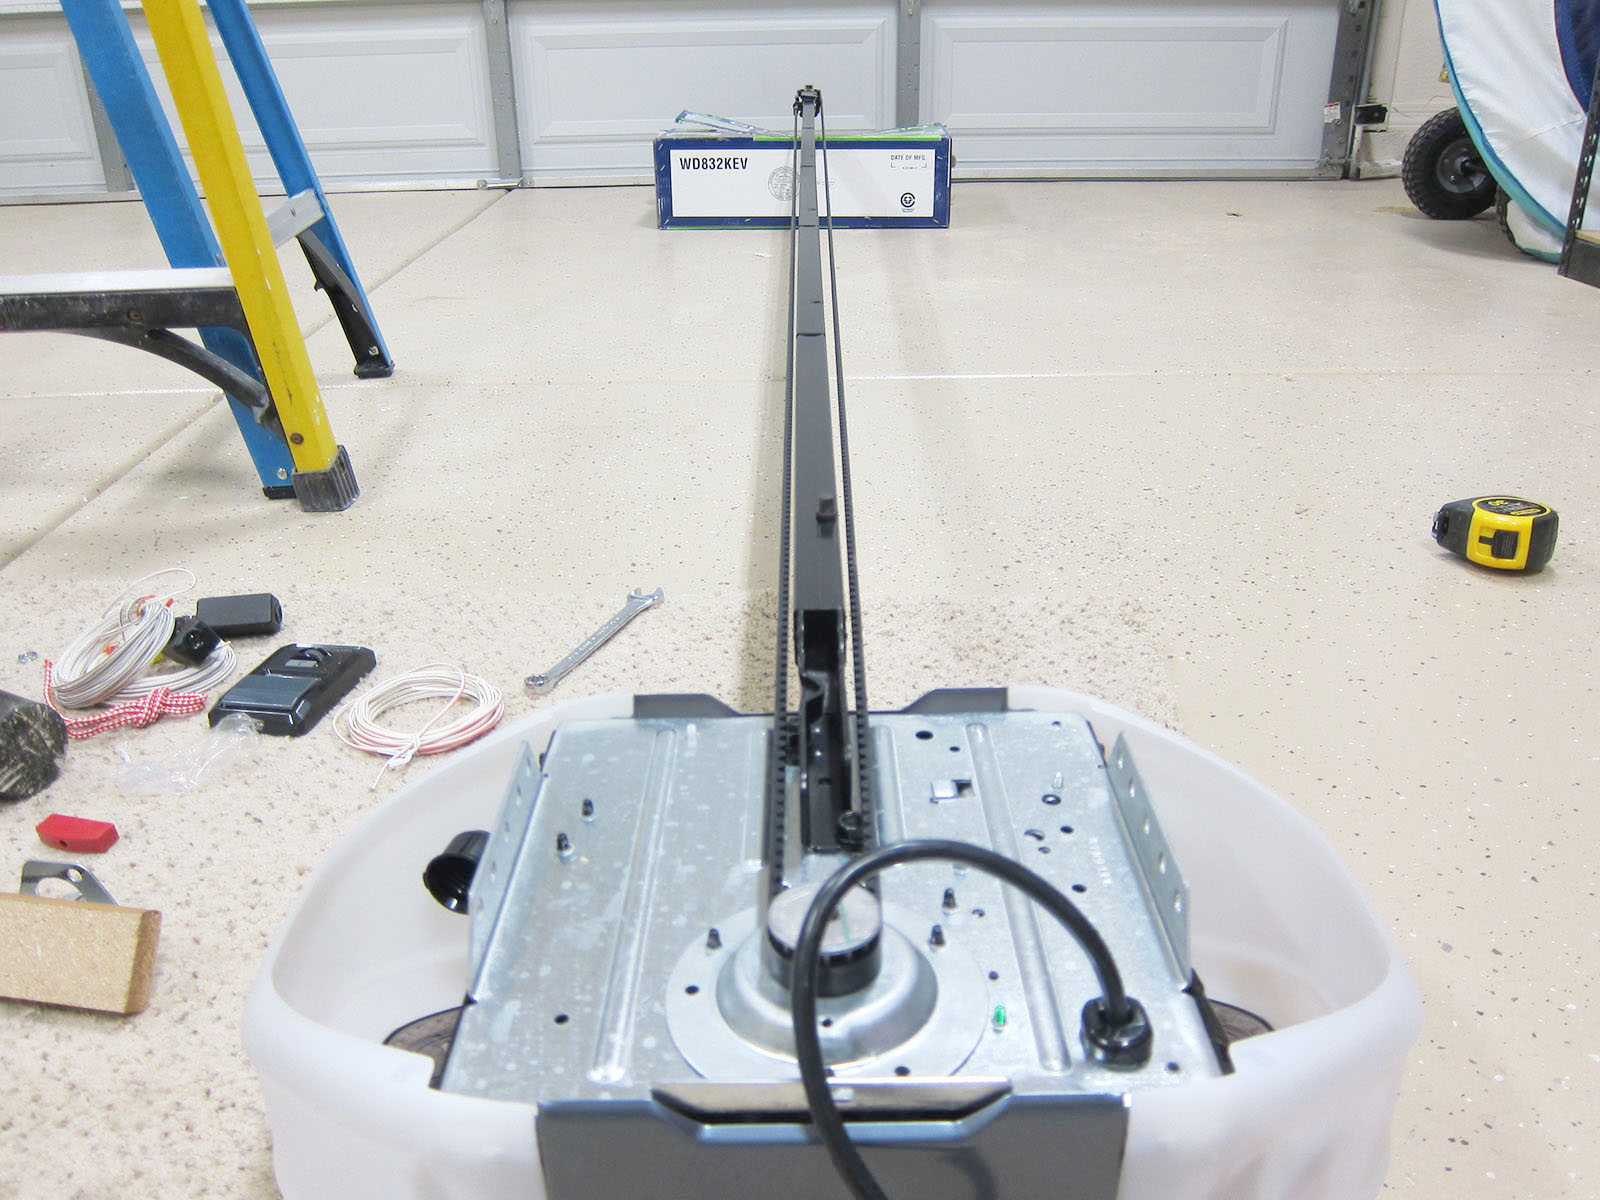
Step 2: Assembling the Opener
Once you have prepared the area and gathered the necessary tools, it’s time to begin assembling the garage door opener. Follow these steps to ensure a successful assembly:
- Refer to the Instruction Manual: As with any assembly process, it’s important to refer to the instruction manual provided by the manufacturer. This will guide you through the specific steps for assembling your particular opener model.
- Identify the Opener Components: Lay out all the components of the opener, including the motor unit, rail assembly, trolley, and other necessary parts. Familiarize yourself with the different pieces, as this will make the assembly process easier.
- Attach the Trolley: Begin by attaching the trolley to the rail assembly. This piece will be responsible for moving the garage door as the opener operates.
- Secure the Chain or Belt: If your opener uses a chain or belt drive system, follow the manufacturer’s instructions to properly secure it to the trolley. This will allow the opener to effectively transmit the motion to the garage door.
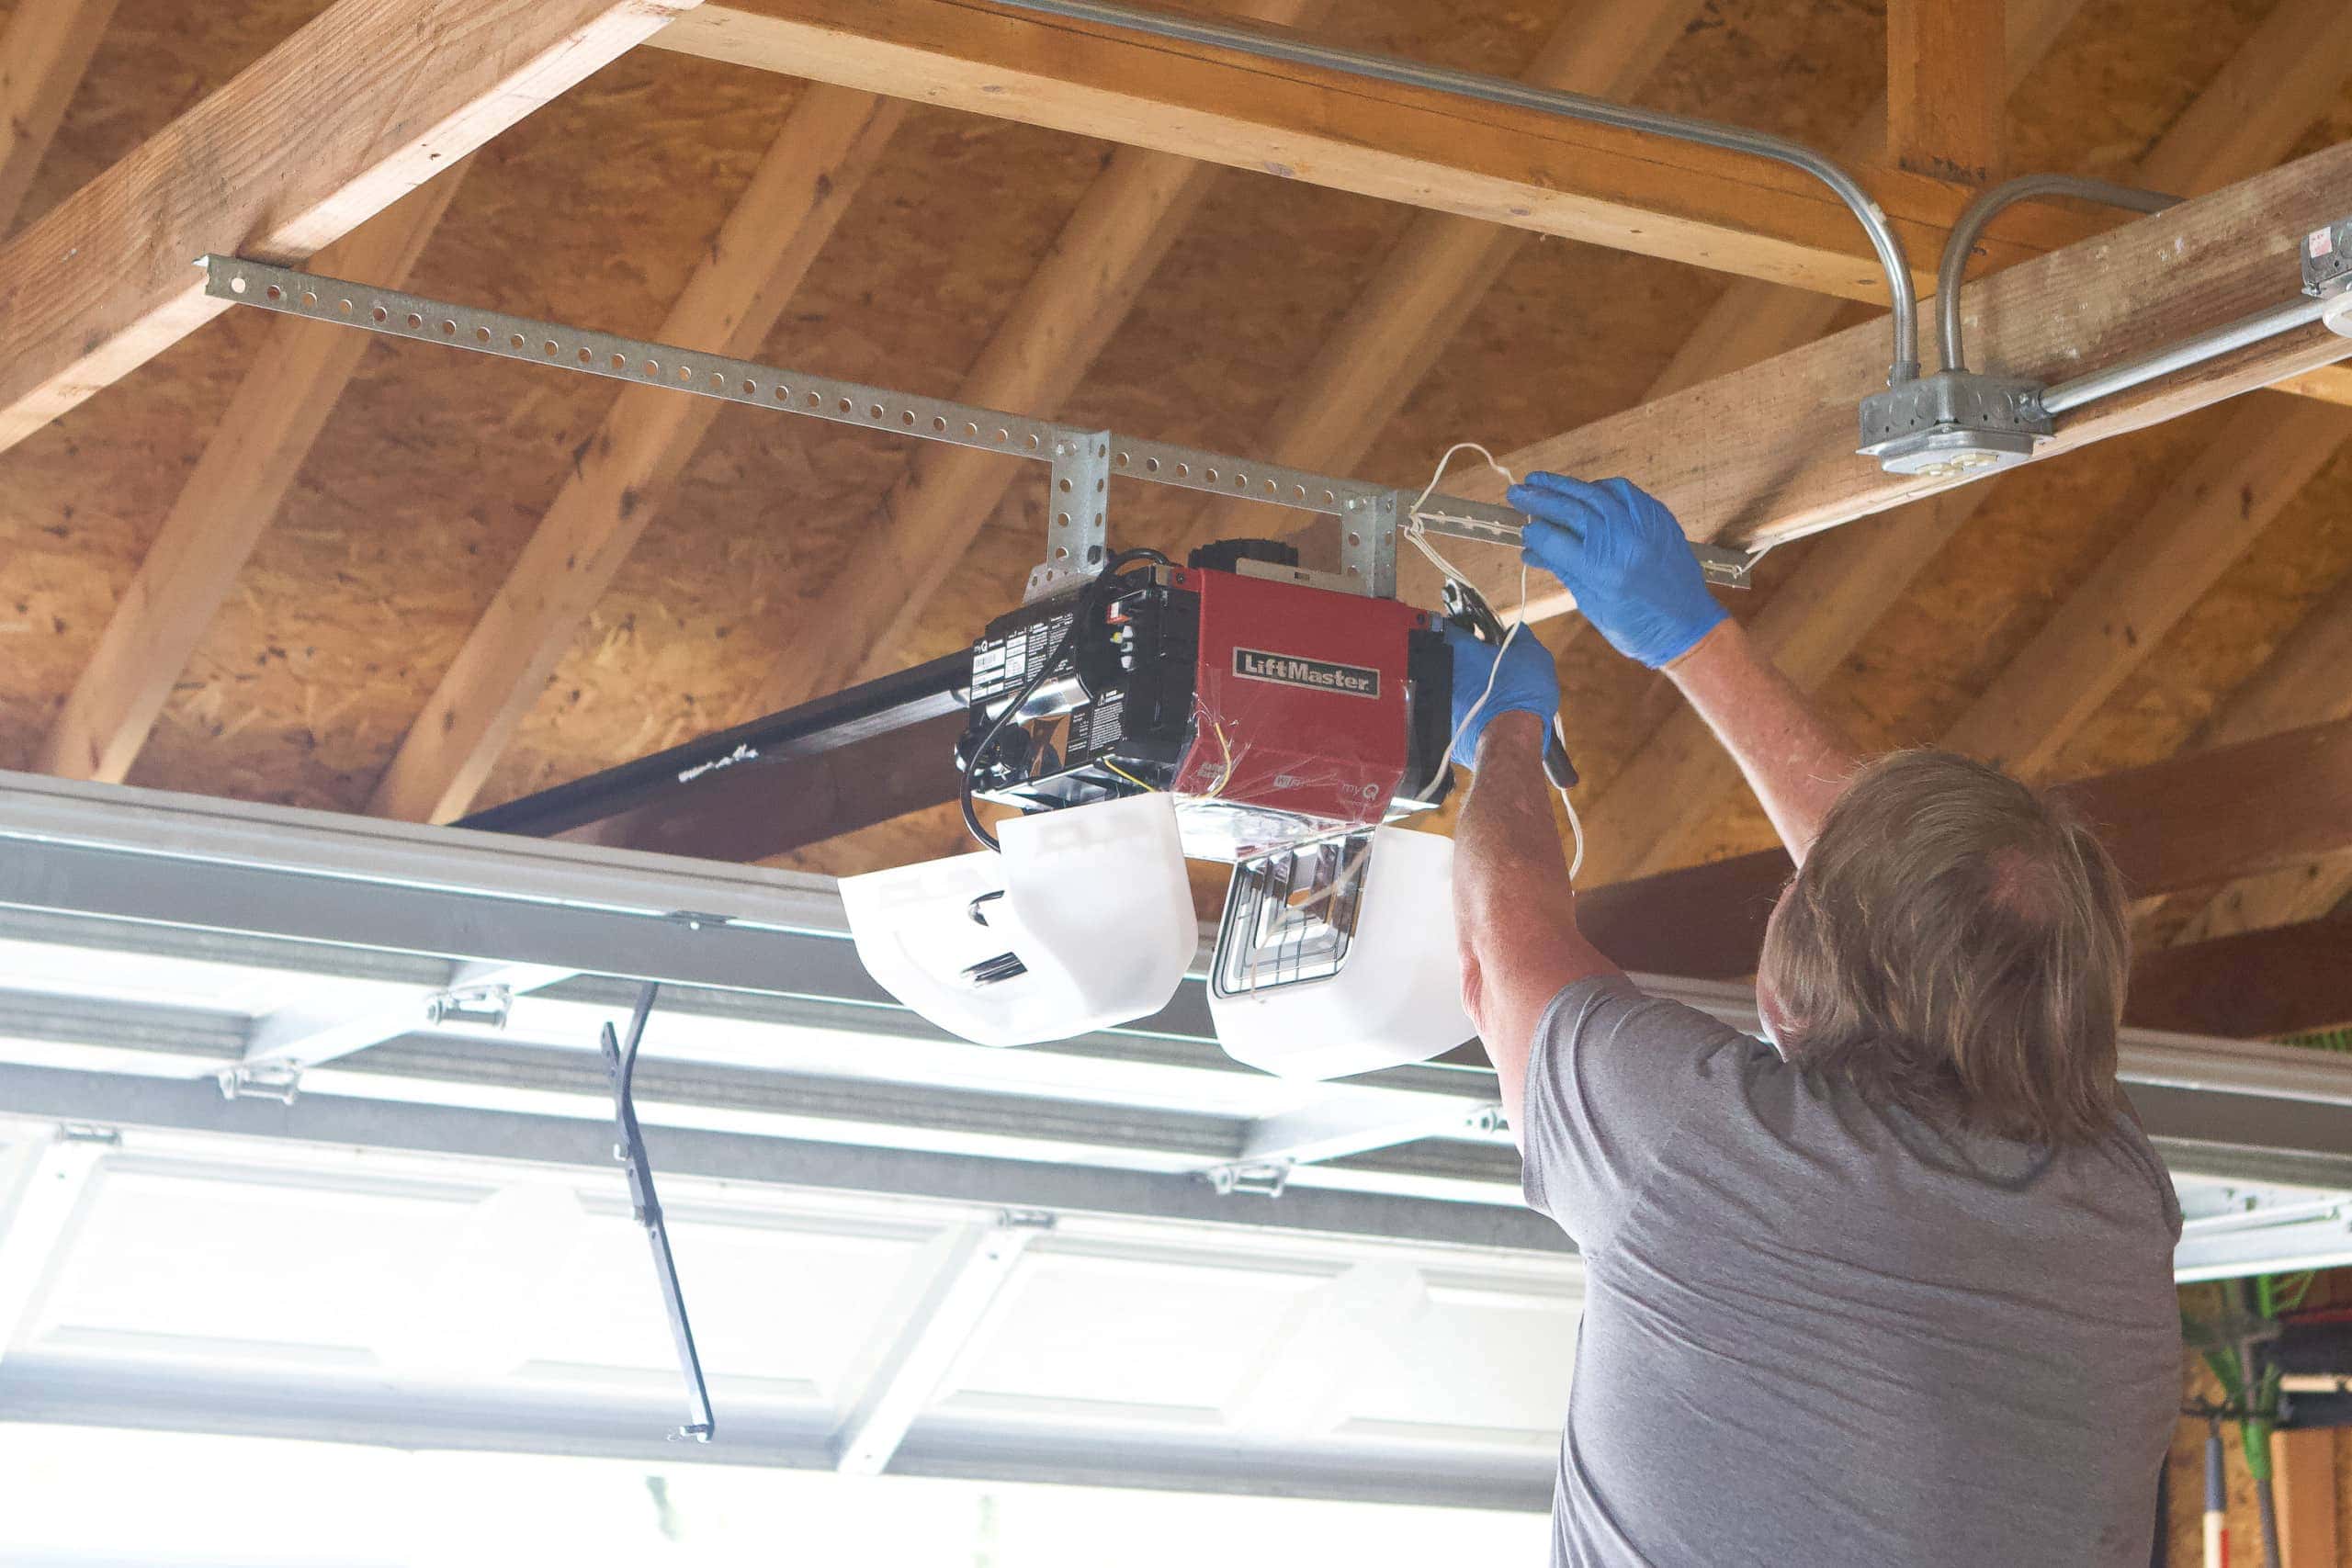
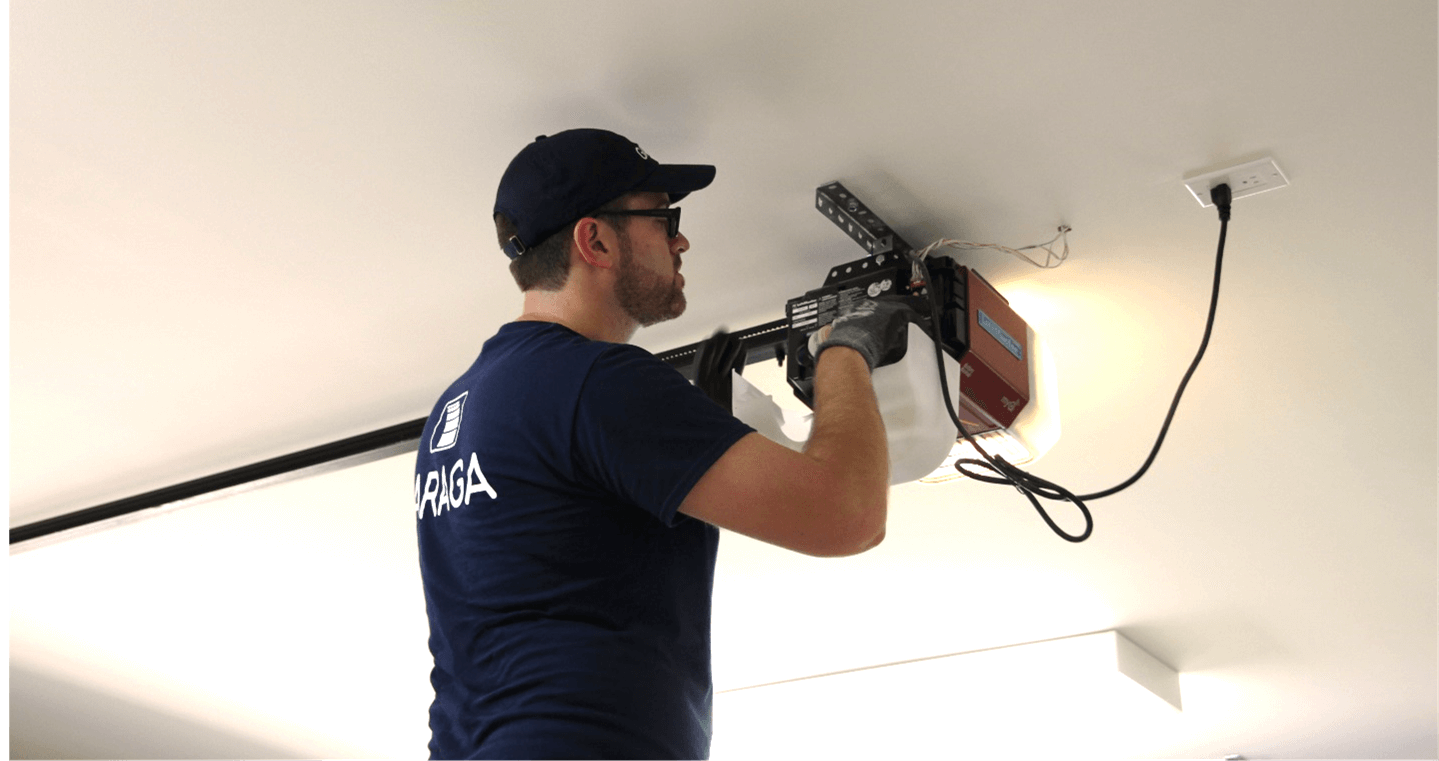
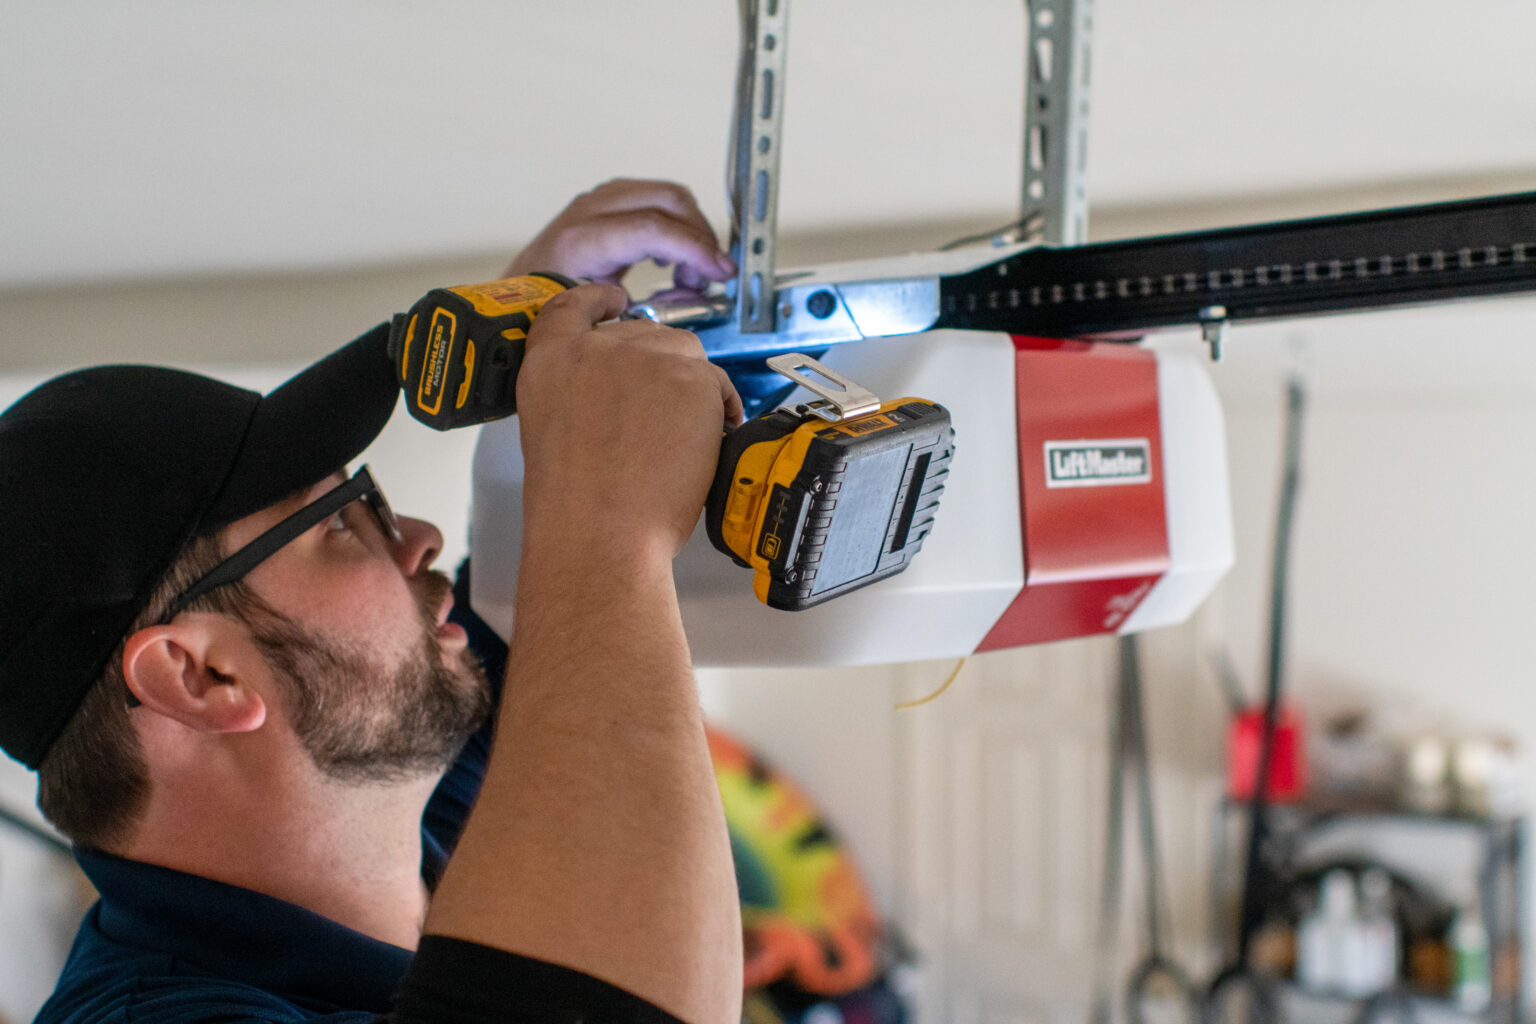
- Mount the Motor Unit: Once the trolley and drive system are in place, mount the motor unit to the ceiling. Use the provided brackets and screws to securely fasten the opener to the ceiling joist.
- Connect the Trolley to the Motor Unit: Attach the trolley to the motor unit using the appropriate mechanism. This will allow the trolley to move along the rail as the opener operates.
- Secure any Additional Components: Depending on your specific opener model, there may be additional components that need to be attached or secured. This could include safety sensors, control panels, or remote receivers. Follow the manual’s instructions to install these components properly.
As you assemble the opener, pay close attention to the details and follow the instructions precisely. Double-check all connections and ensure that everything is securely fastened. By taking the time to assemble the opener correctly, you’ll lay the foundation for a smoothly functioning system.
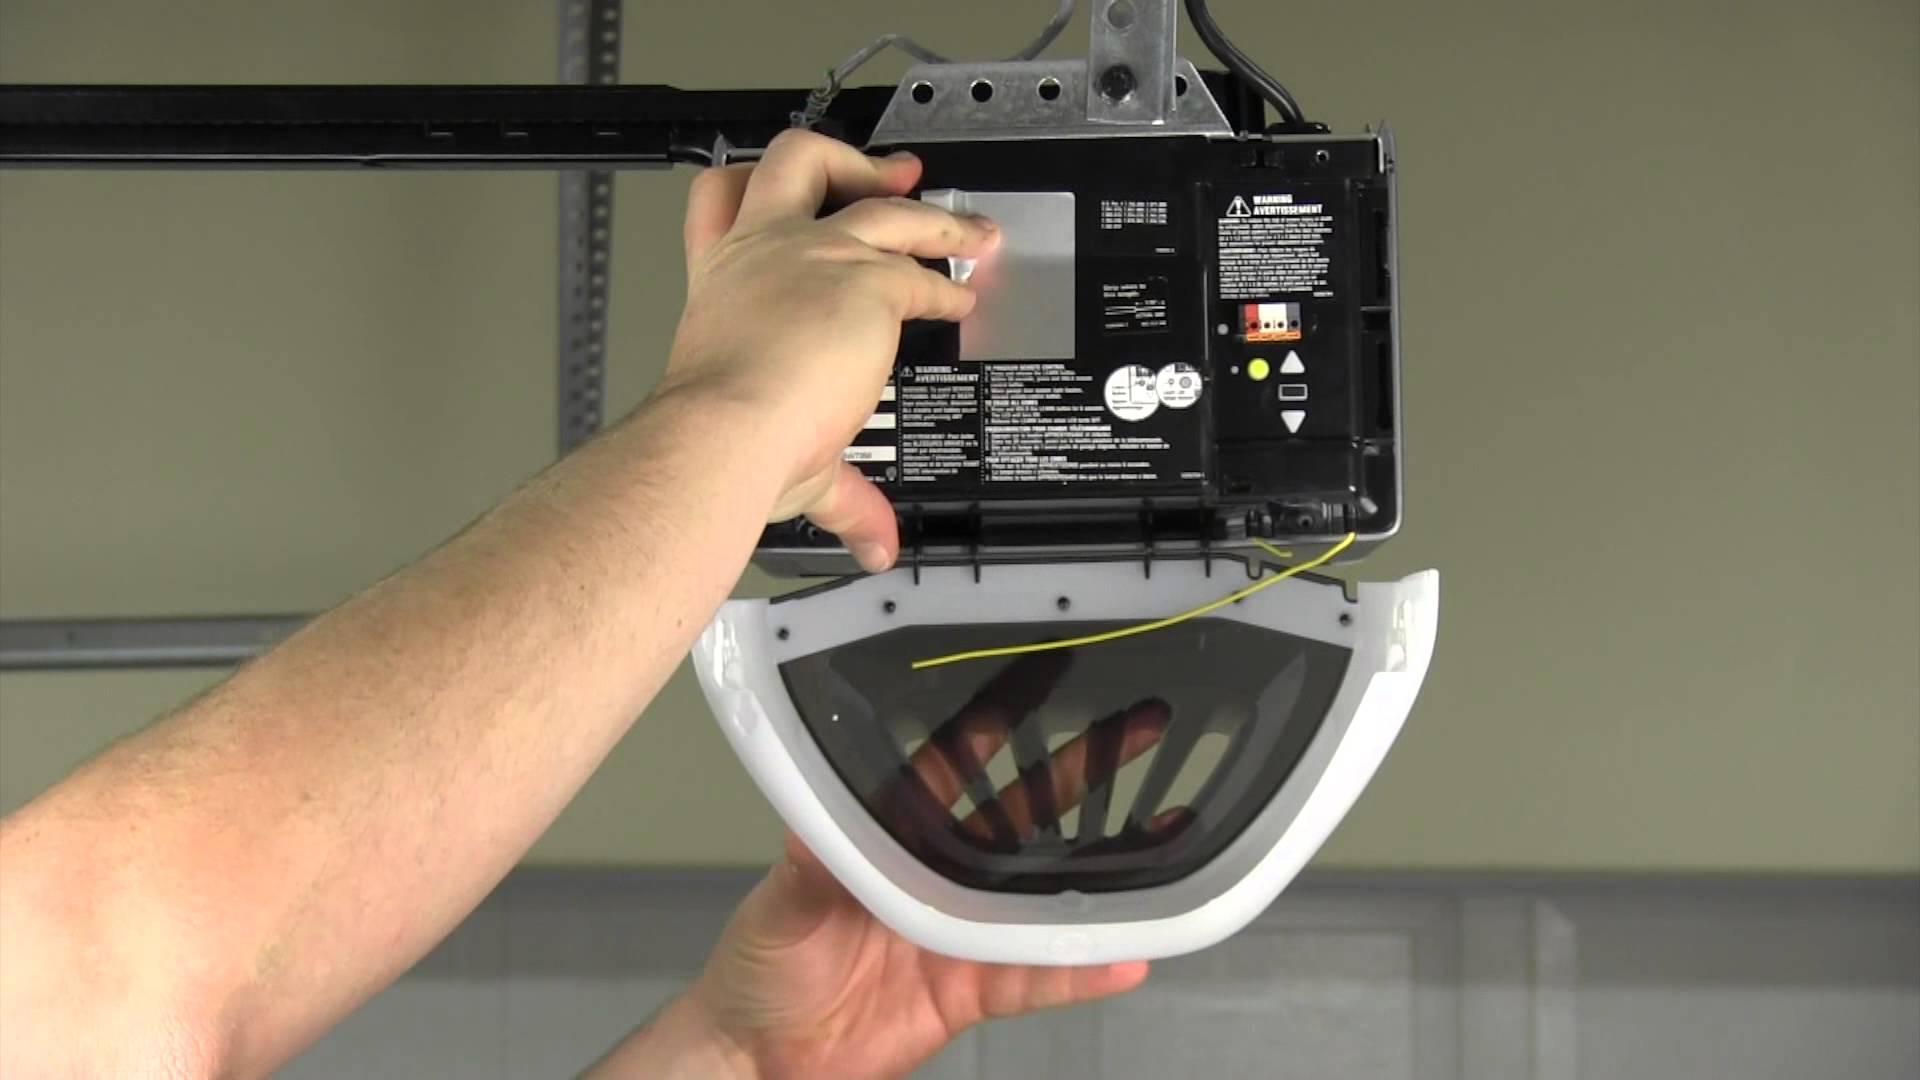
Step 3: Mounting the Opener Unit
After assembling the garage door opener, the next step is to mount it in the appropriate location. Follow these steps to ensure proper mounting:
- Determine the Mounting Position: Refer to the instruction manual to determine the recommended location for mounting the opener unit. This will typically be on the ceiling, near the center of the garage door.
- Mark the Mounting Points: Use a pencil or marker to mark the mounting points on the ceiling. These marks will serve as a guide during the installation process.
- Attach the Support Bracket: Securely attach the support bracket to the ceiling using the provided screws and anchors. Make sure the bracket is level and aligned with the marked mounting points.
- Hang the Opener Unit: With the support bracket in place, carefully hang the opener unit on it. Follow the manufacturer’s instructions to ensure proper alignment and positioning.
- Check for Stability: Once the opener unit is hanging, check for stability. Make sure it is securely attached to the support bracket and does not wobble or move excessively.
When mounting the opener unit, it’s crucial to follow the manufacturer’s recommendations and guidelines. This will help ensure that the unit is securely attached and positioned correctly. Improper mounting can lead to issues with functionality and safety, so take your time to get it right.
Once the opener unit is mounted, you can move on to the next step – attaching the rail to the opener.
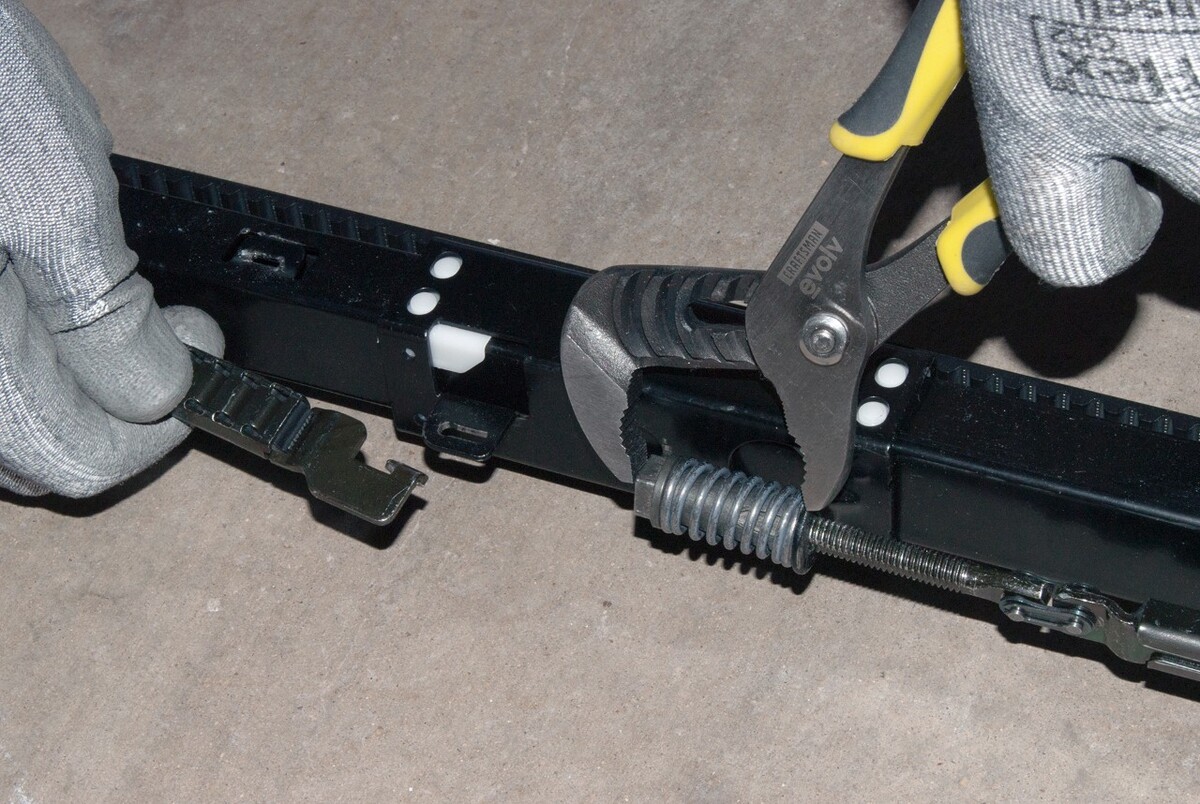
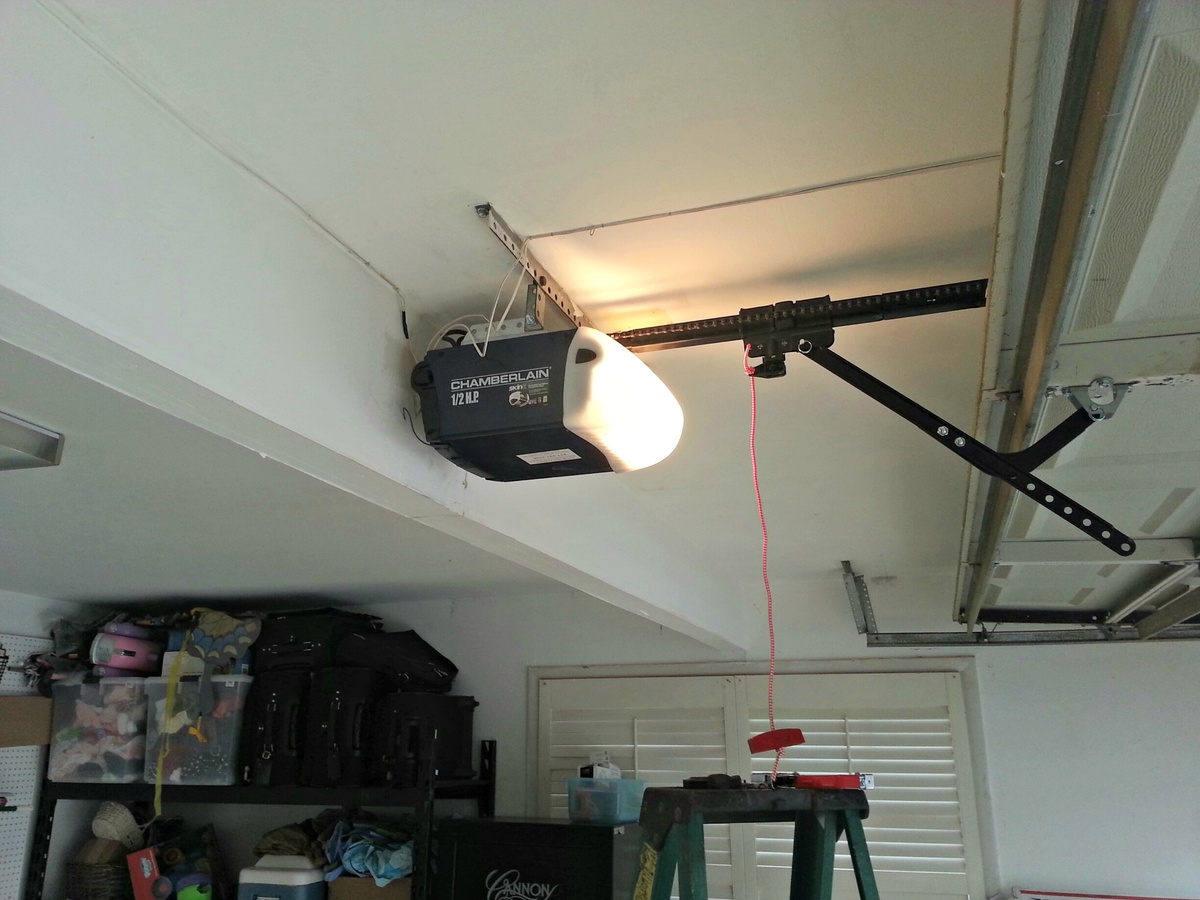
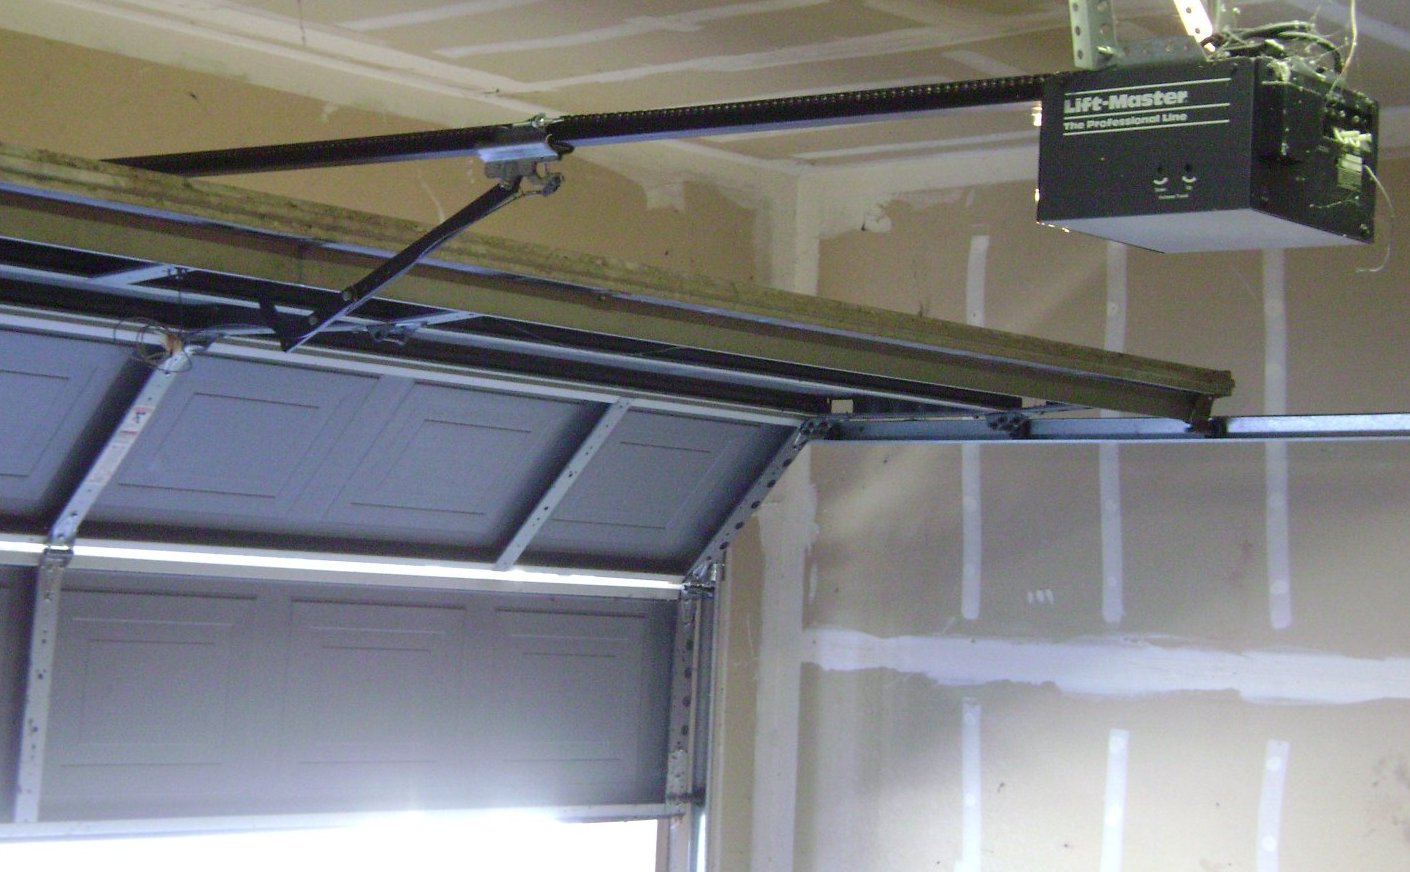
Step 4: Attaching the Rail
With the opener unit mounted, the next step is to attach the rail assembly. This will guide the trolley and provide the necessary support for the garage door’s movement. Follow these steps to properly attach the rail:
- Position the Rail: Position the rail assembly on the opener unit in accordance with the manufacturer’s instructions. It should align with the trolley and extend towards the garage door.
- Secure the Rail to the Opener Unit: Use the provided screws or brackets to securely attach the rail assembly to the opener unit. Ensure that it is firmly in place and properly aligned.
- Align the Rail with the Garage Door: Align the rail assembly with the center of the garage door. This will ensure that the trolley moves smoothly along the rail during operation.
- Mark the Mounting Points: Using a pencil or marker, mark the mounting points on the garage door frame. These marks will guide you when attaching the rail brackets.
- Attach the Brackets: Securely attach the rail brackets to the marked mounting points on the garage door frame. Use the provided screws or anchors to ensure a secure and stable connection.
- Connect the Rail Sections: If your rail assembly consists of multiple sections, follow the manufacturer’s instructions to properly connect them together. This will ensure a seamless and smooth rail for the trolley to travel along.
Attaching the rail properly is essential for the smooth operation of the garage door opener. Take the time to align the rail and securely attach it to both the opener unit and the garage door frame. This will ensure reliable and efficient movement of the garage door.
Now that the rail is in place, we can move on to the next step – installing the garage door opener motor.
When installing a garage door opener, it typically takes around 2-4 hours for a professional and 4-6 hours for a DIYer. Be sure to carefully follow the manufacturer’s instructions and have all the necessary tools on hand before starting the installation process.
Read more: How To Install Meross Garage Door Opener
Step 5: Installing the Garage Door Opener Motor
With the rail securely attached, it’s time to install the garage door opener motor. This motor will power the movement of the trolley along the rail. Follow these steps to properly install the motor:
- Position the Motor: Position the motor unit at the end of the rail assembly, closest to the garage door. Make sure it is aligned and properly seated on the rail.
- Secure the Motor: Use the provided brackets and screws to securely attach the motor unit to the mounting bracket or the rail itself. Ensure that it is firmly in place and properly aligned.
- Connect the Motor to the Rail: Follow the manufacturer’s instructions to properly connect the motor to the trolley on the rail assembly. This connection will allow the motor to drive the trolley along the rail.
- Adjust the Motor Position: If necessary, adjust the position of the motor unit to ensure proper clearance and alignment with the trolley. This will ensure smooth operation of the garage door opener.
- Secure any Loose Wires: Check for any loose wires or cables connected to the motor unit. Use cable ties or clips to secure them in place, preventing them from interfering with the garage door’s movement.
- Double-check the Connections: Before proceeding, double-check all the connections between the motor, trolley, and rail. Ensure that they are secure and properly aligned for reliable operation.
Installing the garage door opener motor correctly is crucial for the overall functionality of the system. Take the time to securely attach and align the motor unit, ensuring that it is properly connected to the rail and trolley. By doing so, you’ll be one step closer to enjoying the convenience of an automated garage door opener.
Now that the motor is installed, we can move on to the next step – the wiring and power connection.
Step 6: Wiring and Power Connection
Once the garage door opener motor is installed, it’s time to handle the wiring and power connection. Follow these steps to ensure a safe and proper installation:
- Turn Off the Power: Before working with any electrical connections, make sure to turn off the power to the garage or the specific circuit that powers the opener. This will help prevent any accidents or electrical shocks.
- Identify the Wiring Connections: Refer to the instruction manual to identify the wiring connections on the motor unit. You will typically find terminals labeled for power, ground, and control wires.
- Connect the Power Wires: Begin by connecting the power wires to the designated terminals on the motor unit. Ensure that the wires are securely fastened and that there is no exposed wiring.
- Connect the Ground Wire: Attach the ground wire to the grounding terminal on the motor unit. This will help protect against electrical shock and ensure proper grounding of the system.
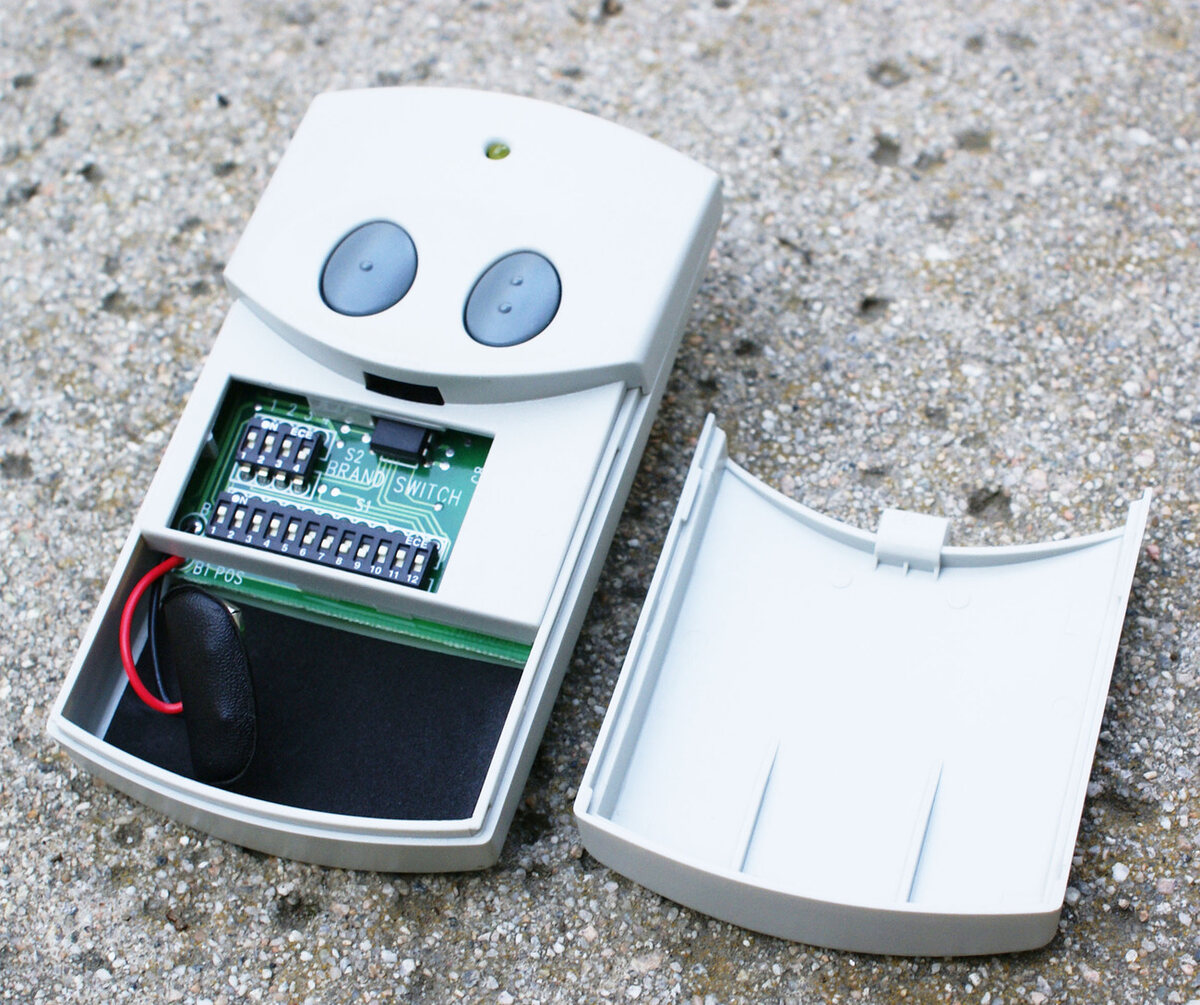
- Connect the Control Wires: Depending on the type of control system you have, connect the appropriate control wires to the motor unit. This may involve connecting the wall control panel, safety sensors, and remote control receivers.
- Secure the Wires: After making all the necessary connections, use wire clips or zip ties to secure the wires along the rail or other designated areas. This will prevent them from getting tangled or interfering with the garage door’s movement.
- Turn on the Power: Once all connections are securely made, turn on the power to the garage or the circuit. Test the opener to ensure that it powers up and responds to the control inputs.
It is important to handle the wiring and power connection with care and attention to detail. If you are unfamiliar with electrical work, it may be worth consulting a professional to ensure that everything is connected correctly and to avoid any potential safety hazards.
With the wiring and power connections complete, we are now ready for the final step – testing and adjustments.
Step 7: Testing and Adjustments
After completing the installation of the garage door opener, it’s essential to thoroughly test the system and make any necessary adjustments. Follow these steps to ensure proper functionality:
- Close the Garage Door: Lower the garage door completely using the existing manual controls or by hand.
- Test the Safety Features: Test the safety features of the garage door opener, such as the auto-reverse mechanism. Place an object, such as a block of wood, in the path of the closing door. The door should automatically reverse if it comes in contact with the object.
- Test the Remote Controls: Test the remote controls that come with the garage door opener. Ensure that they are working correctly and able to open and close the garage door from a distance.
- Check the Door Alignment: Observe the movement of the garage door. Ensure that it opens and closes smoothly, without any jerking or sticking. If necessary, make adjustments to the track alignment or tension springs to ensure proper operation.
- Adjust the Open and Close Limits: Use the controls on the garage door opener motor to adjust the open and close limits. This will determine how far the door opens and closes, ensuring it stops at the desired positions.
- Test the Force Settings: Test the force settings of the garage door opener to ensure that they are properly adjusted. The force settings control the amount of force exerted by the opener when opening and closing the door. Make sure it’s not too strong or too weak.
- Perform Regular Maintenance: Lastly, establish a regular maintenance routine for your garage door opener. This can include lubricating moving parts, checking the safety sensors, and tightening any loose hardware.
By thoroughly testing the garage door opener and making any necessary adjustments, you can ensure that it is functioning properly and safely. Regular maintenance will also help prolong the lifespan of the opener and minimize the need for repairs in the future.
Congratulations! You have successfully installed and tested your garage door opener. Enjoy the convenience and ease of operating your garage door with just a push of a button.
Conclusion
Installing a garage door opener can greatly enhance the convenience and ease of accessing your garage. While the installation process may seem intimidating at first, following a step-by-step approach can make it much more manageable. By properly preparing, assembling the opener, mounting it, attaching the rail, installing the motor, wiring and making necessary adjustments, you can successfully complete the installation.
Remember to always refer to the manufacturer’s instructions and take necessary safety precautions throughout the process. Understand that the time it takes to install a garage door opener can vary depending on factors such as your level of experience, the complexity of the installation, and the type of opener you have.
Once the installation is complete, thoroughly test the opener and make any necessary adjustments to ensure proper functionality. Regular maintenance is also important for the longevity of the opener and to minimize the need for future repairs.
By following the steps outlined in this article and taking the time to properly install and maintain your garage door opener, you can enjoy the convenience and peace of mind that comes with it. Open and close your garage door effortlessly with the push of a button, saving you time and effort in the process.
So go ahead, install your garage door opener and experience the convenience it brings to your everyday life!
Frequently Asked Questions about How Long Does It Take To Install Garage Door Opener
Was this page helpful?
At Storables.com, we guarantee accurate and reliable information. Our content, validated by Expert Board Contributors, is crafted following stringent Editorial Policies. We're committed to providing you with well-researched, expert-backed insights for all your informational needs.


0 thoughts on “How Long Does It Take To Install Garage Door Opener”