
Articles
How Long To Install A Toilet
Modified: October 18, 2024
Looking for articles on how long it takes to install a toilet? Find expert advice and step-by-step guides to complete your toilet installation project efficiently.
(Many of the links in this article redirect to a specific reviewed product. Your purchase of these products through affiliate links helps to generate commission for Storables.com, at no extra cost. Learn more)
Introduction:
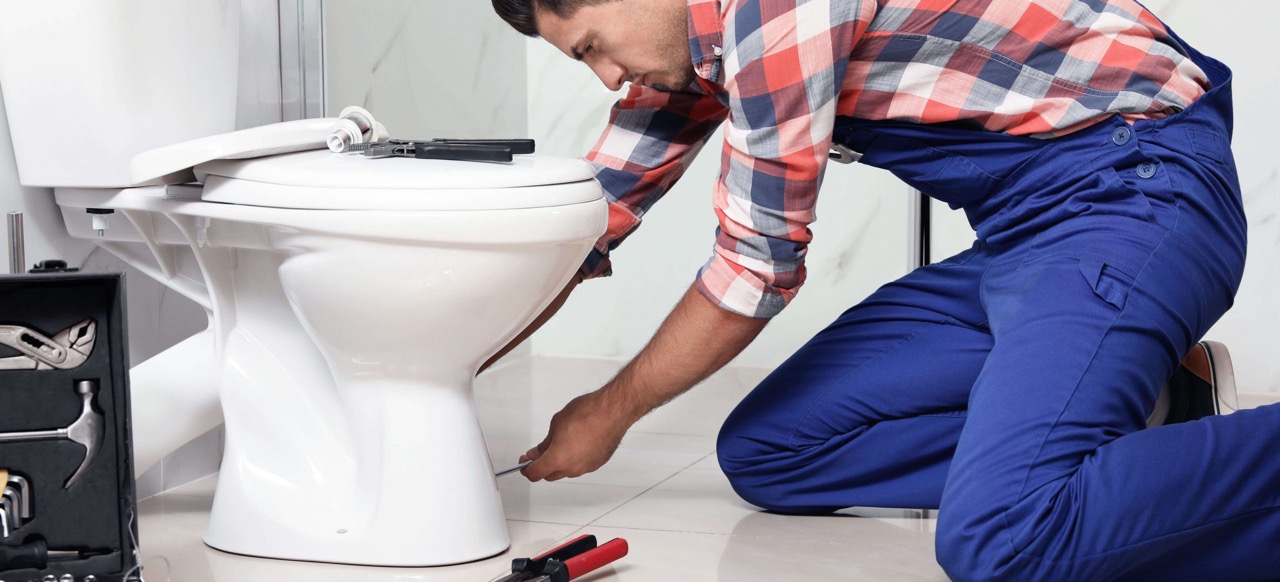
Installing a toilet may seem like a simple task, but it requires careful planning and execution to ensure a successful and long-lasting installation. Whether you’re replacing an old toilet or installing a new one, understanding the process and the factors that can affect the installation time is crucial. From preparing the area to connecting the water supply, each step plays a vital role in the overall installation process. In this article, we will explore the various factors that can impact the time it takes to install a toilet and provide helpful tips to streamline the process.
Before diving into the installation process, it’s important to note that the specific timeline for installing a toilet can vary depending on the level of experience, the type of toilet being installed, and the condition of the existing plumbing. Factors such as accessibility, the complexity of the installation, and any unexpected complications can also influence the overall installation time. However, by following a systematic approach and being prepared, you can minimize any potential delays and complete the installation efficiently.
Throughout the article, we will cover the key steps involved in installing a toilet, including removing the old toilet, preparing the area, installing the new toilet, connecting the water supply, and testing and adjusting. We will also highlight additional considerations to keep in mind during the installation process.
Installing a toilet can be a rewarding DIY project or something best left to professional plumbers. By taking the time to understand the fundamental aspects of the installation process and considering the factors that affect installation time, you can ensure a smooth and successful toilet installation in your home.
Key Takeaways:
- Proper preparation, including gathering necessary tools, reading the instruction manual, and turning off the water supply, is crucial for a smooth and efficient toilet installation process. Neglecting preparation can lead to delays and potential errors.
- Thorough testing and adjustments after installing the new toilet are essential to ensure proper operation and identify potential issues. Taking the time to make necessary adjustments will optimize the toilet’s performance and longevity.
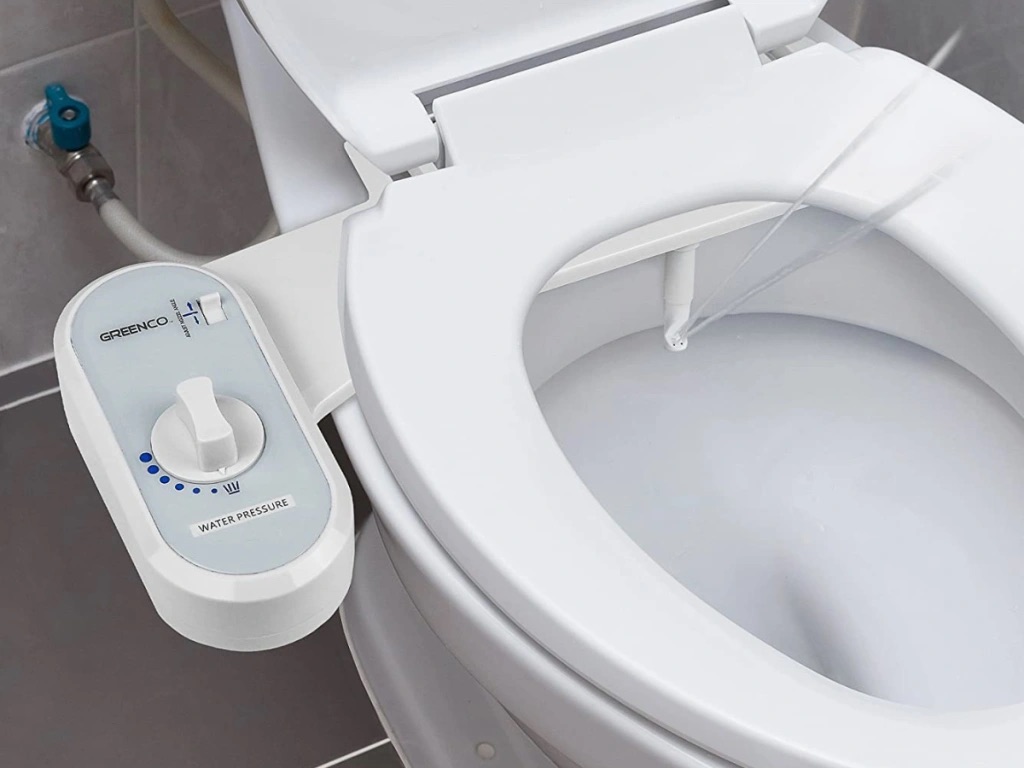
Read more: Bidet Toilet: How To Install
Factors Affecting Installation Time:
Several factors can influence the time it takes to install a toilet. Understanding these factors can help you plan accordingly and set realistic expectations for the installation process. Here are some key factors to consider:
- Type of Toilet: The type of toilet being installed can impact the installation time. The complexity of the toilet design and any additional features, such as bidets or fancy flushing mechanisms, can increase the installation time.
- Plumbing Condition: If the existing plumbing infrastructure is in good condition and meets the requirements for the new toilet, the installation process will likely be quicker. However, if there are plumbing issues, such as leaks or outdated pipes, additional time may be needed to address these issues before proceeding with the installation.
- Accessibility: The accessibility of the installation area can also affect the installation time. If the toilet is located in a tight or hard-to-reach space, it may take longer to maneuver and complete the installation. On the other hand, if the area is spacious and easily accessible, the installation process can be faster.
- Experience and Skill Level: The experience and skill level of the installer can significantly impact the installation time. If you have prior experience installing toilets or have a good understanding of plumbing basics, you may be able to complete the installation more efficiently. However, if you’re a novice or unfamiliar with the process, it may take longer to troubleshoot and navigate through the installation steps.
- Preparation: Proper preparation can save time during the installation process. This includes having all the necessary tools and materials ready, reading the instruction manual thoroughly, and ensuring that the area is clean and free from any obstructions. Skipping or neglecting the preparation phase can lead to delays and potential errors.
Keep these factors in mind when planning to install a toilet to better estimate the potential installation time. While these factors can impact the overall timeline, it’s important to prioritize quality workmanship and ensure that all steps are followed correctly to avoid future issues or complications.
Preparing for Installation:
Before you begin installing a new toilet, it’s important to properly prepare the area to ensure a smooth and efficient installation process. Taking the time to prepare will help avoid any complications or delays along the way. Here are some essential steps to follow when preparing for a toilet installation:
- Gather the Necessary Tools and Materials: Before starting the installation, gather all the tools and materials you’ll need. This may include an adjustable wrench, screwdriver, wax ring, bolts, and a putty knife. Having everything on hand will prevent interruptions during the installation process.
- Read the Instruction Manual: Carefully read and understand the instruction manual that comes with the new toilet. Each toilet model may have specific installation requirements, so it’s crucial to familiarize yourself with the instructions before proceeding.
- Turn Off the Water Supply: Locate the shut-off valve that controls the water supply to the toilet. Typically, this valve is located near the base of the toilet or on the wall nearby. Turn the valve clockwise to shut off the water supply.
- Drain the Existing Toilet: To drain any remaining water in the toilet bowl and tank, flush the toilet and hold down the handle until the water is completely drained. Use a sponge or towel to soak up any remaining water.
- Remove Obstructions: Clear the area around the toilet, removing any mats, rugs, or other items that may obstruct the installation process. This will provide a clear working space and prevent any potential hazards.
- Protect the Floor: Lay down a drop cloth or old towel to protect the floor from any damage or spills during the installation process. This will help to catch any water or debris that may be dislodged during the removal of the old toilet.
By following these preparation steps, you will ensure that you have all the necessary tools and materials, understand the installation instructions, and have a clear working space to proceed with the installation. Taking the time to prepare will make the installation process smoother and minimize any potential issues or delays.
Removing the Old Toilet:
Once you have properly prepared the area, it’s time to remove the old toilet. This step is crucial and requires careful attention to ensure a clean and smooth removal process. Follow these steps to remove the old toilet:
- Disconnect the Water Supply: Locate the water supply line connected to the bottom of the toilet tank. Use an adjustable wrench to loosen the nut and disconnect the water supply line. Have a towel or bucket ready to catch any water remaining in the line.
- Remove the Tank Lid: Carefully lift off the tank lid and set it aside in a safe place. Some tank lids may require unscrewing bolts or clips to remove them. Refer to the instruction manual for your specific toilet model if needed.
- Drain the Toilet Tank: To empty the toilet tank, hold down the flush lever until all the water is drained. Use a sponge or towel to soak up any remaining water in the tank.
- Disconnect the Tank from the Bowl: Locate the bolts that secure the toilet tank to the bowl. These are typically located on the inside of the tank near the base. Use a screwdriver or adjustable wrench to unscrew the bolts and disconnect the tank from the bowl.
- Remove the Toilet Bowl: With the tank disconnected, it’s time to remove the toilet bowl. Firmly grip the bowl with both hands and gently rock it from side to side to break the seal between the bowl and the floor. Once the seal is broken, lift the bowl straight up and remove it from the area. Be careful not to tip the bowl and spill any remaining water.
- Scrape off the Old Wax Ring: After removing the toilet bowl, you’ll notice a wax ring residue on the floor flange. Use a putty knife to scrape off any remnants of the old wax ring and ensure a clean surface for the installation of the new toilet.
Properly removing the old toilet is essential to prepare the area for the installation of the new toilet. Take your time during this step to prevent any damage or leaks. Once the old toilet is removed, you can move on to preparing the area for the installation of the new toilet.
Preparing the Area:
Before you can install the new toilet, it’s crucial to properly prepare the area to ensure a secure and leak-free installation. Taking the time to prepare the area will help maintain the integrity of the toilet and minimize any potential issues down the line. Here are the steps to prepare the area:
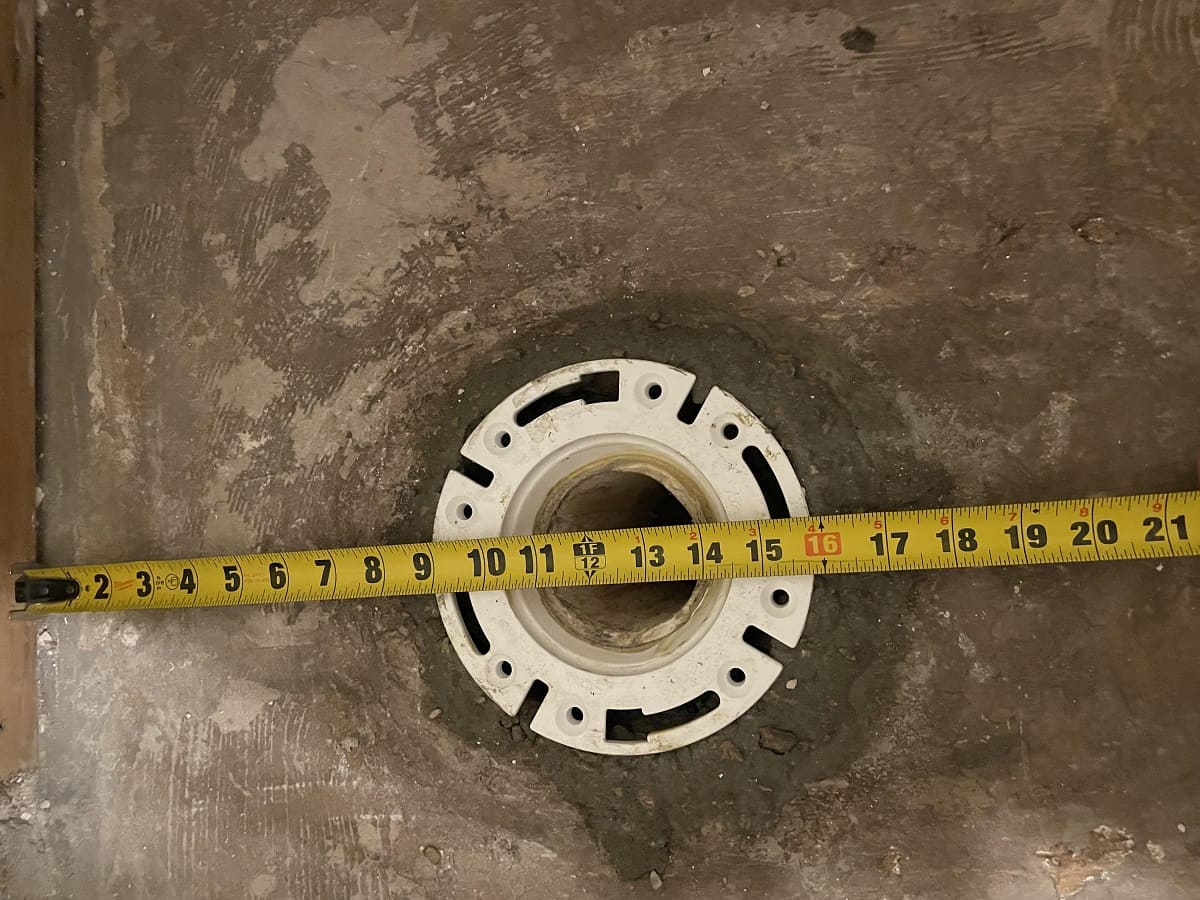
- Clean and Level the Floor: First, thoroughly clean the floor around the toilet flange to remove any debris or residue left from the old wax ring. Use a disinfectant cleaner and a scrub brush to ensure a sanitary surface. Additionally, check that the floor is level. If needed, use shims to level the floor before proceeding.
- Replace the Wax Ring: Insert a new wax ring onto the toilet flange. The wax ring creates a watertight seal between the toilet and the waste pipe. Ensure that the wax ring is centered properly on the flange and sits flat.
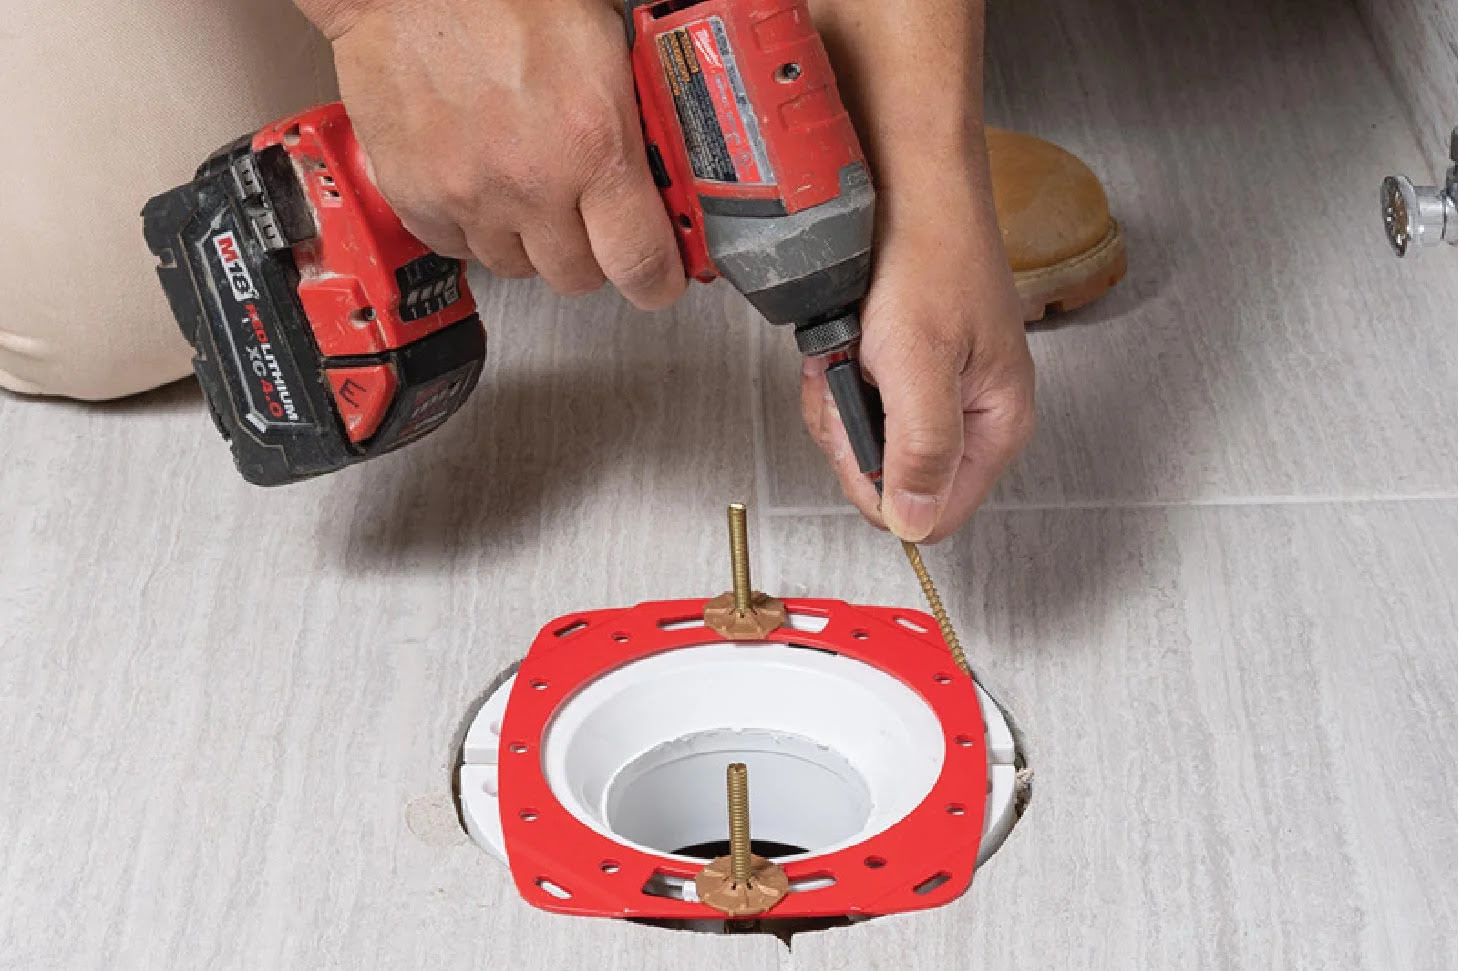
- Set the Toilet Bolts: Position the toilet bolts or closet bolts on the toilet flange. These bolts will secure the toilet to the floor. Make sure they are positioned evenly and aligned with the bolt holes on the base of the toilet.
- Place a Toilet Bowl Gasket (Optional): If your toilet model requires a toilet bowl gasket, place it over the wax ring on the toilet flange. This gasket provides an extra layer of protection against leaks.
- Inspect the Toilet: Before placing the toilet onto the wax ring, inspect it for any defects or damage. Check for cracks, chips, or any irregularities that could affect the integrity of the toilet.
- Position the Toilet: Carefully lift the new toilet and position it over the wax ring and toilet bolts. Align the holes in the base of the toilet with the toilet bolts.
- Lower the Toilet: Slowly lower the toilet onto the wax ring, making sure the bolts fit through the corresponding holes in the toilet base. Apply even pressure while lowering the toilet to ensure a proper seal.
By following these steps, you will properly prepare the area for the installation of the new toilet. Taking the time to clean, level the floor, and ensure a secure seal with a new wax ring will go a long way in preventing leaks and ensuring a stable toilet installation. Once the area is properly prepared, you can proceed with installing the new toilet.
When installing a toilet, make sure to have all the necessary tools and materials ready beforehand. This includes a wax ring, bolts, a wrench, and a level. Proper preparation can help streamline the installation process and ensure a secure and leak-free fit.
Read more: How To Install A Toilet In A Shed
Installing the New Toilet:
Now that the area has been prepared, it’s time to install the new toilet. Proper installation of the toilet is crucial to ensure its stability and functionality. Follow these steps to install the new toilet:
- Lower the Toilet onto the Wax Ring: Gently lower the toilet onto the wax ring and align it with the toilet bolts. Apply even pressure to ensure a proper seal.
- Align the Toilet Bolts: Make sure the toilet bolts fit through the holes in the base of the toilet. Align the toilet so that it sits straight and level on the floor.
- Tighten the Nuts: Once the toilet is aligned, tighten the nuts onto the toilet bolts. Use an adjustable wrench to alternate tightening the nuts in a crisscross pattern. This will help distribute the pressure evenly and prevent damage to the toilet base.
- Secure the Toilet Tank: If your toilet has a separate tank, align it with the base and secure it using the provided bolts. Follow the manufacturer’s instructions for tightening the bolts to avoid over-tightening and damaging the tank.
- Attach the Toilet Seat: Install the toilet seat according to the manufacturer’s instructions. Position it securely and ensure that it is aligned and level.
- Connect the Water Supply: Reconnect the water supply line to the bottom of the toilet tank. Use an adjustable wrench to tighten the nut, ensuring a secure connection.
- Turn on the Water Supply: Once everything is securely connected, turn on the water supply valve to allow water to fill the tank. Check for any leaks around the connections. If you notice any leaks, tighten the connections or replace any faulty parts as necessary.
- Test the Flush: With the water supply turned on, flush the toilet a few times to ensure proper flushing and refilling. Check for any unusual noises or water leaks during the flushing process.
By following these steps, you will effectively install the new toilet and ensure its stability and functionality. Take your time during the installation process to ensure each step is done correctly. If you encounter any issues or have any concerns, consult the manufacturer’s instructions or consider seeking professional assistance.
Connecting the Water Supply:
Once the new toilet is installed, the next step is to connect the water supply. Ensuring a proper connection is essential for the toilet to function efficiently and prevent any leaks. Here are the steps to connect the water supply:
- Check the Water Supply Line: Inspect the water supply line for any damage or wear. If the existing supply line is in good condition, you can reuse it. However, if it is damaged or old, it is recommended to replace it with a new one.
- Apply Thread Seal Tape: Wrap a few layers of thread seal tape around the threaded end of the water supply line. This will create a secure seal when connecting it to the toilet tank.
- Connect the Water Supply Line: Insert the threaded end of the water supply line into the water inlet valve on the bottom of the toilet tank. Tighten the nut by hand and then use an adjustable wrench to give it a quarter turn further to ensure a snug fit. Be careful not to overtighten, as it could damage the water inlet valve.
- Turn on the Water Supply: Once the water supply line is securely connected, turn on the water supply valve fully to allow water to fill the toilet tank. Check for any leaks around the connection. If you notice any leaks, tighten the connection slightly or use a small amount of thread seal tape.
- Inspect for Leaks: Carefully inspect the entire water supply connection for any signs of leaks. Check the water inlet valve, the threaded connection, and the nut for any dripping or water seepage. If you notice any leaks, make the necessary adjustments or consider replacing the water supply line.
Properly connecting the water supply is crucial to ensure the toilet operates smoothly and without any leaks. Take the time to check for leaks and ensure a secure connection before moving on to the next step.
Once the water supply is connected and there are no leaks, you can proceed to the final steps of testing and adjusting the toilet.
Testing and Adjusting:
After connecting the water supply, it’s time to test and adjust the newly installed toilet. This step is crucial to ensure that the toilet is functioning properly and to make any necessary adjustments for optimal performance. Here’s what you should do:
- Fill the Tank: Allow the toilet tank to fill completely by turning on the water supply valve. You will hear the water filling the tank. Keep an eye on the water level to ensure it is properly filling without any overflowing.
- Check for Leaks: While the tank is filling, inspect the entire toilet area, including the base, connections, and water supply line, for any signs of leaks. Look for water pooling or drips. If you notice any leaks, tighten the connections or address any issues immediately to prevent further damage.
- Flush the Toilet: Once the tank is filled, press the flush lever to flush the toilet. Observe the flushing mechanism and check for any irregularities, such as weak flushing or incomplete water flow. If necessary, adjust the chain or other components inside the toilet tank to ensure proper flushing action.
- Check for Proper Refilling: After flushing, wait for the tank to refill. Verify that it refills to the appropriate water level without any overflowing or continuous running. Adjust the float or other components inside the tank if necessary to control the water level.
- Ensure a Secure Seat: Double-check that the toilet seat is securely fastened and does not shift or wobble. Tighten the seat bolts if necessary to ensure stability.
- Test Multiple Flushes: Test the toilet by flushing it multiple times to ensure consistent performance. Pay attention to any unusual noises, slow refilling, or weak flushes. Address any issues or concerns promptly.
By thoroughly testing and adjusting the new toilet, you can ensure its proper operation and identify any potential issues before they become major problems. Taking the time to make necessary adjustments will help optimize the toilet’s performance and longevity.
If you encounter any persistent issues or if you’re unsure about the adjustments needed, it’s advisable to consult a professional plumber for guidance and assistance to ensure your toilet is working at its best.
Additional Considerations:
While the main steps of installing a toilet have been covered, there are some additional considerations to keep in mind to ensure a successful installation and long-term functionality:
- Proper Ventilation: Ensure that the bathroom has adequate ventilation to prevent moisture build-up and potential damage to the toilet and surrounding areas. Consider installing a bathroom exhaust fan if necessary.
- Regular Maintenance: Proper maintenance is essential to keep your toilet in optimal condition. Clean the toilet regularly using non-abrasive cleaners and a soft cloth. Check the water supply lines periodically for any signs of wear or leaks and replace them as needed.
- Water Efficiency: Consider installing a water-efficient toilet to conserve water and reduce utility costs. Look for toilets with a WaterSense label, which indicates that they meet the Environmental Protection Agency’s water-saving standards.
- Proper Disposal: Dispose of the old toilet responsibly. Check with your local waste management facility for guidelines on how to properly dispose of large items like toilets. Consider recycling options if available.
- Seek Professional Help if Needed: If you’re uncertain about any aspect of the installation process or encounter difficulties along the way, it’s best to seek assistance from a professional plumber. They have the knowledge and experience to handle complex installations and ensure everything is done correctly.
- Verify Local Building Codes: Before starting the installation, familiarize yourself with local building codes and regulations. Ensure that your installation complies with all applicable codes to avoid any legal or safety issues.
By considering these additional factors and taking the necessary precautions, you can ensure a successful and trouble-free toilet installation. It’s important to prioritize quality workmanship and follow best practices to prevent future issues and maintain the longevity of your toilet.
Read more: How To Install Toilet Plumbing
Conclusion:
Installing a toilet may seem like a straightforward task, but it requires careful planning, preparation, and execution to ensure a successful and long-lasting installation. Understanding the factors that can affect installation time, such as the type of toilet, plumbing condition, accessibility, experience level, and preparation, is key to estimating the timeline for the installation process. By following a systematic approach and being prepared, you can minimize any potential delays and complete the installation efficiently.
Throughout the installation process, it’s important to prioritize quality workmanship and attention to detail. Take the time to properly prepare the area, remove the old toilet, and clean the installation area. When installing the new toilet, ensure a proper seal with a new wax ring, secure connections, and test for any leaks before proceeding. Adjustments may be necessary to optimize the flushing mechanism and water flow.
Additionally, consider additional factors such as ventilation, regular maintenance, water efficiency, and compliance with local building codes. Proper disposal of the old toilet and seeking professional help if needed are also important considerations to keep in mind.
Whether you choose to tackle the toilet installation as a DIY project or enlist the help of a professional plumber, being well-informed and prepared will contribute to a successful and efficient installation process. By taking the time to understand and follow the necessary steps, you can enjoy a fully functional and reliable toilet in your home for years to come.
Remember that if you’re unsure about any aspect of the installation process or encounter difficulties, it’s always best to consult a professional plumber who can offer guidance and ensure a proper installation.
Frequently Asked Questions about How Long To Install A Toilet
Was this page helpful?
At Storables.com, we guarantee accurate and reliable information. Our content, validated by Expert Board Contributors, is crafted following stringent Editorial Policies. We're committed to providing you with well-researched, expert-backed insights for all your informational needs.


0 thoughts on “How Long To Install A Toilet”