
Articles
How Long Does Insulation Take To Install
Modified: October 31, 2024
Looking for articles on how long insulation takes to install? Discover the average installation time and factors that may affect the duration.
(Many of the links in this article redirect to a specific reviewed product. Your purchase of these products through affiliate links helps to generate commission for Storables.com, at no extra cost. Learn more)
Introduction
Insulation is a vital component of any building, helping to regulate temperature, minimize energy loss, and provide soundproofing. Whether you are insulating a residential or commercial property, one question that often arises is how long it takes to install insulation. The duration of insulation installation can vary depending on several factors, including the type of insulation and the size of the project. In this article, we will explore the factors that affect insulation installation time, the different types of insulation and their installation durations, and some tips to ensure a timely installation process.
Before we dive into the details, it’s important to note that the time required for insulation installation can vary significantly. Factors such as the size and complexity of the project, the accessibility of the installation area, and the experience and skill level of the installation crew can all impact the overall installation time. Additionally, weather conditions and the availability of equipment and materials can also play a role in determining how long the process takes.
Now that we have a general understanding of the factors affecting installation time, let’s explore the different types of insulation and their installation durations.
Key Takeaways:
- Factors such as project size, insulation type, and installer experience impact installation time. Proper planning, skilled installers, and efficient workflow are crucial for timely completion.
- Preparation, proper communication, and cooperation with other contractors are essential for a smooth insulation installation process. Selecting the right insulation material and completing post-installation tasks ensure long-term benefits.
Read more: How Long Does Foam Insulation Take To Dry
Factors Affecting Insulation Installation Time
Several factors can influence the time it takes to complete an insulation installation project. It is essential to consider these factors to ensure a realistic timeline and avoid any unnecessary delays. Here are some key factors that can affect insulation installation time:
- Size and Complexity of the Project: The size and complexity of the area to be insulated play a significant role in determining installation time. Larger spaces or buildings with intricate designs may require more time and effort to install insulation properly. Complex architectural features, such as vaulted ceilings or irregularly shaped rooms, can also increase the complexity of the installation process.
- Type of Insulation Material: Different insulation materials have varying installation requirements. Some materials, like loose-fill insulation, may take longer to install due to the need for proper placement and distribution of the material. On the other hand, rigid foam insulation may be quicker to install because it comes in pre-cut panels or boards that can be easily fitted into place.
- Accessibility of the Installation Area: The ease of access to the installation area can impact installation time. If the area is hard to reach, such as in tight crawl spaces or high attic ceilings, the installation crew may require additional time to navigate and work in those spaces safely.
- Preparation Requirements: Preparing the installation area before insulation can also affect the overall installation time. This includes cleaning and clearing the space, removing any existing insulation, sealing gaps and cracks, and ensuring proper ventilation. Neglecting these preparation steps can lead to complications and delays during the insulation installation process.
- Weather and External Factors: External factors such as weather conditions can impact installation time, especially for exterior insulation projects. Extreme temperatures, high winds, or excessive moisture can hinder the installation process and require additional precautions or delays.
- Experience and Skill Level of Installers: The experience and skill level of the insulation installation crew can significantly impact the efficiency and speed of the installation process. Experienced installers are familiar with proper techniques, safety protocols, and efficient workflows, which can help expedite the installation process.
These factors should be carefully considered when planning an insulation installation project to ensure an accurate estimation of the time required. Now that we understand the factors influencing installation time, let’s explore the different types of insulation and how long each type typically takes to install.
Types of Insulation and Their Installation Duration
There are various types of insulation materials available, each with its own installation requirements and duration. The choice of insulation material will depend on factors such as budget, insulating needs, and the specific characteristics of the building. Here are some common types of insulation and their estimated installation durations:
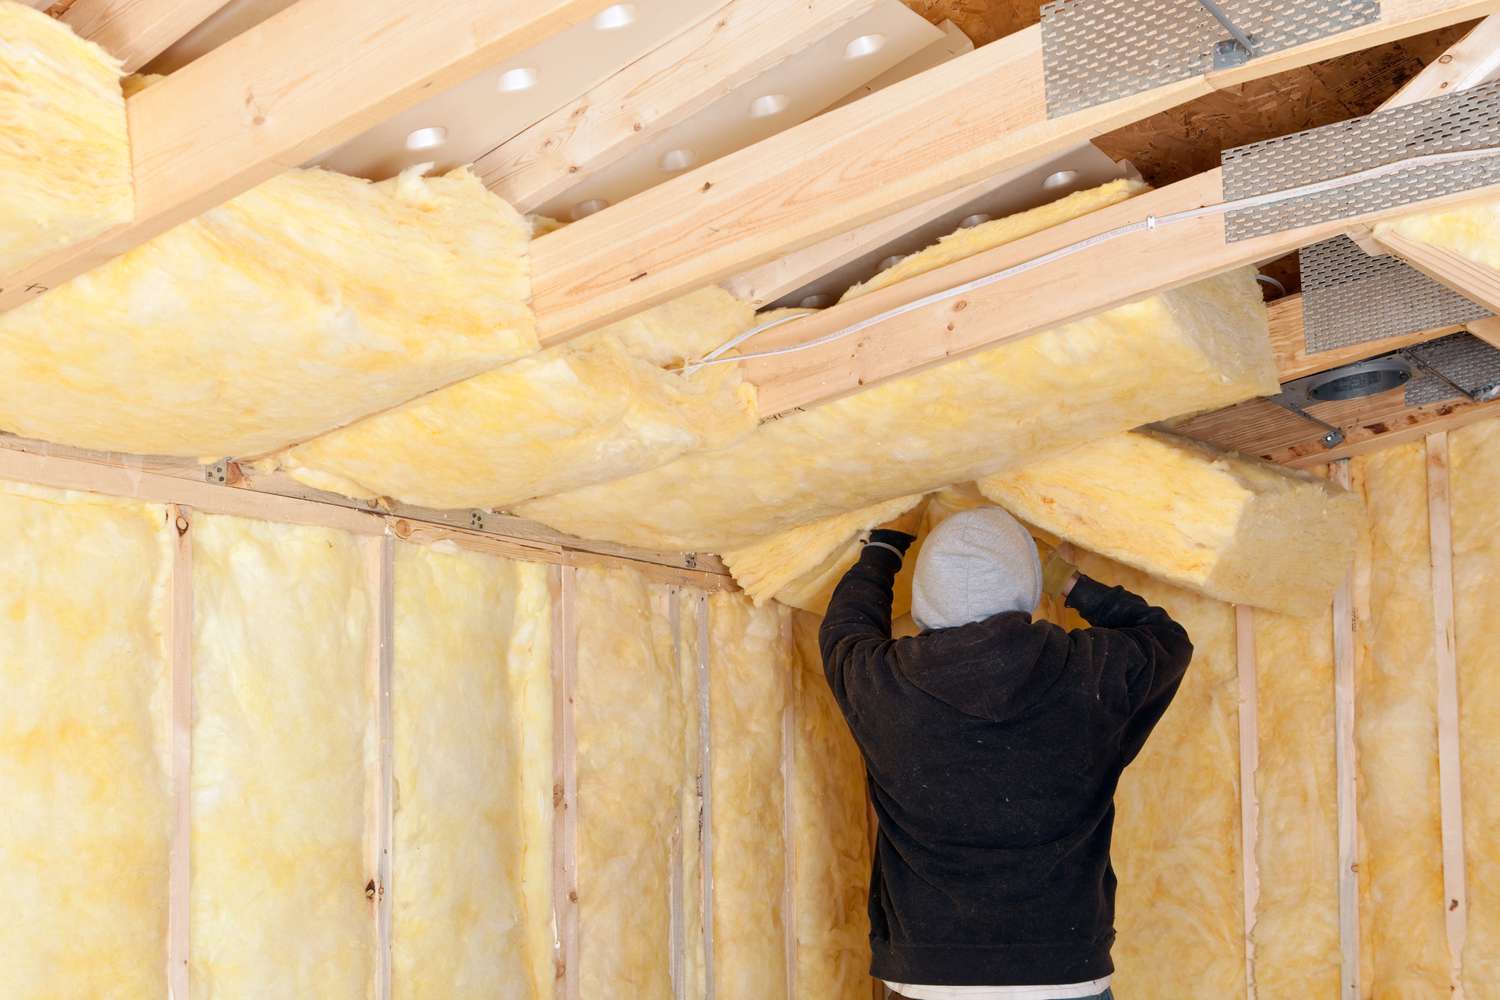
- Fiberglass Insulation: Fiberglass insulation, which comes in the form of batts or rolls, is a popular choice due to its affordability and ease of installation. Installation typically involves cutting the insulation to fit between wall studs, floor joists, or attic rafters. The installation duration for fiberglass insulation can vary depending on the size of the project, but a professional installer can typically install fiberglass insulation in a residential home within a few days.
- Spray Foam Insulation: Spray foam insulation is a versatile option that provides an airtight and moisture-resistant seal. It is applied directly onto the surface as a liquid and expands to fill gaps and cavities. The installation process requires specialized equipment and trained professionals. The installation duration for spray foam insulation can vary depending on the complexity of the project, but it is generally quicker than traditional insulation methods. In most cases, a professional installation crew can complete the installation within a week.
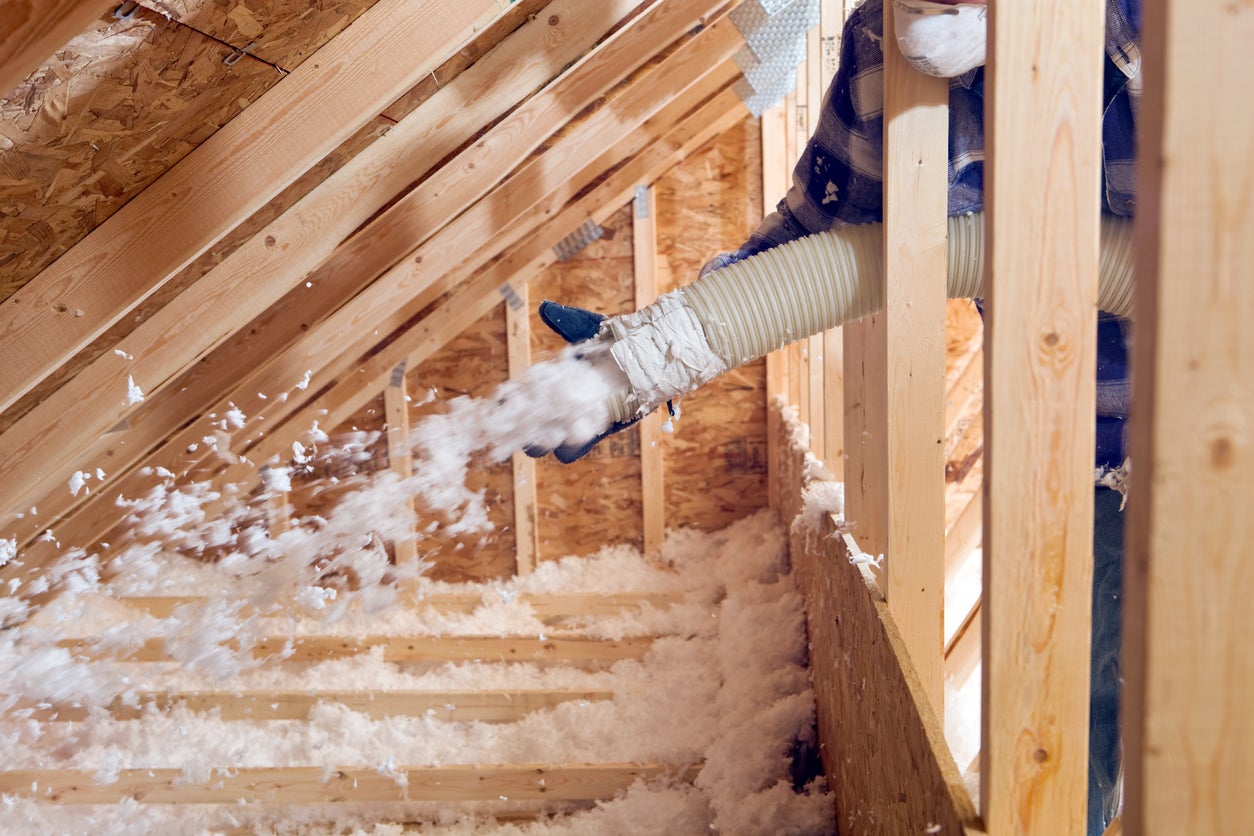
- Cellulose Insulation: Cellulose insulation consists of recycled paper fibers treated with fire retardants. It is commonly used in attics and wall cavities. The installation process involves blowing or spraying the cellulose material into the desired area. The installation duration for cellulose insulation depends on the size of the project and the accessibility of the installation area. A professional installation crew can usually complete the installation within a few days.
- Rigid Foam Insulation: Rigid foam insulation comes in the form of pre-cut foam boards that can be easily fitted into place. It is commonly used in walls, roofs, and foundations. The installation process involves cutting and fitting the boards in the desired area and securing them with adhesives or fasteners. The installation duration for rigid foam insulation is generally quicker compared to other methods, as the pre-cut boards simplify the process. A professional installation crew can typically complete the installation within a few days.
While these estimates provide a general idea of the installation duration for different types of insulation, it is important to remember that the actual time needed may vary based on the factors mentioned earlier, such as the size and complexity of the project and the experience of the installation crew.
Now that we have explored the types of insulation and their typical installation durations, let’s move on to the preparation steps required before the actual installation process.
Preparing for Insulation Installation
Proper preparation is crucial for a smooth and efficient insulation installation process. Taking the time to prepare the installation area will help ensure the quality and effectiveness of the insulation and minimize any potential issues during installation. Here are some essential steps to take when preparing for insulation installation:
- Clean and Clear the Installation Area: Before installing insulation, it is important to clean and clear the area of any debris, old insulation, or obstructions. This includes removing furniture, fixtures, and personal belongings, as well as vacuuming or sweeping to create a clean workspace for the installation crew.
- Inspect for Gaps and Cracks: Inspect the walls, ceilings, and floors for any gaps, cracks, or openings that may allow air leakage. Seal these gaps using caulk or weatherstripping to ensure that the insulation can provide maximum energy efficiency.
- Address Ventilation and Moisture Issues: It is crucial to ensure proper ventilation and address any moisture issues before installing insulation. Inadequate ventilation or moisture accumulation can lead to mold growth and damage the insulation. Install proper vents or fans, and address any moisture-related problems, such as leaks or condensation, before proceeding with the insulation installation.
- Create Access Points: If the installation area includes crawl spaces or attic access points, ensure that they are easily accessible for the installation crew. Clear any obstacles or clutter that may hinder their ability to move freely and work efficiently.
- Provide Safety Measures: Insulation installation may involve working in confined spaces, climbing ladders, or using tools and equipment. Ensure that the installation area is safe for the crew by providing proper lighting, stable platforms, and necessary safety equipment.
By taking the time to properly prepare the installation area, you can ensure a smoother and more efficient insulation installation process. Addressing any potential issues upfront will help minimize delays and ensure the longevity and effectiveness of the insulation.
With the preparation steps completed, let’s move on to understanding the actual insulation installation process.
The time it takes to install insulation depends on the size of the area and the type of insulation. For example, blown-in insulation can be installed quickly, while foam insulation may take longer due to the curing process.
Actual Installation Process
The actual installation process of insulation involves following specific steps to ensure proper coverage and effectiveness. While the exact process may vary depending on the type of insulation material being used, here is a general overview of the insulation installation process:
- Measure and Cut: The first step is to measure and cut the insulation material to fit the installation area accurately. This may involve cutting fiberglass batts or rolls to fit between wall studs or attic rafters or cutting rigid foam boards to the desired size.
- Fit and Secure: The cut insulation pieces are then fitted into place, ensuring a snug and secure fit. For materials like fiberglass or cellulose, the insulation is placed and pressed between wall studs, floor joists, or attic rafters. Adhesive or fasteners may be used to secure rigid foam boards in place.
- Seal Gaps and Joints: It is important to seal any gaps or joints between insulation pieces to prevent air leakage and maximize energy efficiency. This can be done using special insulation tape or by applying caulk or foam sealant.
- Insulate Unfinished Areas: Insulation is also applied to unfinished or exposed areas, such as crawl spaces or basement walls, to minimize energy loss and create a more comfortable environment.
- Ensure Proper Ventilation: During the insulation installation, it is crucial to maintain proper ventilation. Ventilation channels or baffles may be installed to allow for the flow of air and prevent moisture buildup.
- Inspect for Coverage: After the insulation is installed, it is essential to inspect the area to ensure proper coverage and address any gaps or missed spots. This helps to ensure that the insulation can provide the desired thermal and acoustic performance.
It is important to note that the actual insulation installation process should be carried out by experienced professionals who are familiar with the specific requirements of the insulation material being used. They will have the necessary tools, knowledge, and expertise to complete the installation correctly and efficiently.
With the insulation installation process complete, there are a few final steps to consider to wrap up the project.
Read more: How Long Does It Take To Install Blinds
Completing the Insulation Installation
Completing the insulation installation involves a few final steps to ensure that the project is finished properly and ready for use. Here are some essential tasks to consider when wrapping up the insulation installation:
- Clean Up: After the insulation is installed, it’s important to clean up the installation area. Remove any debris or leftover insulation materials, and dispose of them properly according to local regulations.
- Check for Proper Installation: Take the time to inspect the insulation installation to ensure that it has been done correctly. Check for any gaps or areas that may require additional insulation. Address any issues promptly to maintain the effectiveness of the insulation.
- Perform Post-Installation Tests: Consider conducting post-installation tests, such as a blower door test, to assess the airtightness of the building. This can help identify any areas of air leakage that may require further sealing or insulation.
- Verify Code Compliance: Ensure that the insulation installation meets the local building codes and regulations. Compliance with these standards helps ensure the safety, efficiency, and legality of the insulation project.
- Document the Installation: Keep a record of the insulation installation, including the date, insulation materials used, and any relevant documentation or certifications. This documentation can be valuable for future reference, warranty claims, or property resale.
By completing these final tasks, you can wrap up the insulation installation process and enjoy the benefits of a well-insulated space. Remember, proper maintenance and periodic inspections in the future will help maximize the performance and lifespan of the insulation.
Now that we have covered the completion of the insulation installation process, let’s move on to some factors that are important to consider for timely insulation installation.
Factors to Consider for Timely Insulation Installation
Timely insulation installation is crucial to ensure a smooth and efficient process without unnecessary delays. Here are some factors to consider that can help expedite the insulation installation:
- Proper Planning and Scheduling: Plan and schedule the insulation installation in advance to ensure availability of materials, equipment, and qualified installers. Proper planning helps allocate resources efficiently and minimizes delays.
- Clear Communication: Maintain clear and open communication with the insulation installation crew to ensure everyone is aware of the project’s timeline, specific requirements, and any potential challenges.
- Cooperation with Other Contractors: If other contractors are involved in the project, such as electricians or plumbers, coordinate and communicate with them to ensure that their work aligns with the insulation installation schedule. This can help avoid conflicts and minimize disruptions.
- Availability of Materials and Equipment: Ensure that all necessary insulation materials and equipment are readily available to prevent delays. Coordinate with suppliers to ensure timely delivery of materials and have any required equipment on-site before the installation begins.
- Skilled and Experienced Installers: Choose a reputable insulation installation company with experienced and skilled installers. Skilled installers can efficiently handle the installation process, reducing the time required and ensuring a quality result.
- Optimal Weather Conditions: Schedule the insulation installation during favorable weather conditions, especially for exterior insulation projects. Extreme temperatures, high winds, or excessive moisture can inhibit effective installation and lead to delays.
- Efficient Workflow: Establish an efficient workflow during the installation process, optimizing the sequence and procedures to minimize downtime and speed up the installation. This can include organizing materials, prioritizing specific areas, and utilizing time-saving techniques.
- Regular Project Monitoring: Continuously monitor the progress of the insulation installation to identify any potential issues or bottlenecks. Addressing these issues promptly can help keep the project on track and prevent unnecessary delays.
By considering these factors, you can ensure a timely insulation installation process, minimizing setbacks and maximizing efficiency. Remember, a well-planned and executed installation will provide long-lasting benefits in terms of energy savings, comfort, and soundproofing.
Now, let’s summarize the key points discussed in this article.
Conclusion
Insulation installation plays a pivotal role in maintaining energy efficiency, temperature regulation, and soundproofing in buildings. The duration of insulation installation can vary depending on various factors, including the type of insulation, size and complexity of the project, accessibility of the installation area, and the experience and skill level of the installation crew.
Factors such as proper planning and scheduling, clear communication, cooperation with other contractors, availability of materials and equipment, skilled installers, optimal weather conditions, efficient workflow, and regular project monitoring all contribute to the timely completion of insulation installation.
It is important to select the appropriate type of insulation material based on the insulation needs and characteristics of the building. Fiberglass, spray foam, cellulose, and rigid foam insulation are common options, with varying installation durations and techniques.
Preparing the installation area by cleaning and clearing the space, sealing gaps and cracks, addressing ventilation and moisture issues, and providing safety measures contribute to a successful installation process.
The actual installation process involves measuring and cutting insulation materials to fit the desired areas, securing the insulation in place, sealing gaps and joints, ensuring proper ventilation, and inspecting for coverage and accuracy.
Completing the insulation installation includes cleaning up the installation area, checking for proper installation, performing post-installation tests, verifying code compliance, and documenting the installation for future reference.
By considering these factors and following the proper steps, the insulation installation process can be completed efficiently and effectively, providing the desired thermal and acoustic performance for the building.
Remember, proper insulation not only enhances energy efficiency but also contributes to a more comfortable and sustainable living or working environment. Prioritizing timely insulation installation ensures the immediate benefits and long-term advantages of a well-insulated space.
Keep these guidelines in mind when planning your insulation installation project to optimize its efficiency, effectiveness, and timely completion.
Frequently Asked Questions about How Long Does Insulation Take To Install
Was this page helpful?
At Storables.com, we guarantee accurate and reliable information. Our content, validated by Expert Board Contributors, is crafted following stringent Editorial Policies. We're committed to providing you with well-researched, expert-backed insights for all your informational needs.



0 thoughts on “How Long Does Insulation Take To Install”