Articles
How Long To Boil Steamer Clams
Modified: February 20, 2024
Looking for articles on how long to boil steamer clams? Discover helpful tips and guidelines for cooking perfect steamer clams in this informative article.
(Many of the links in this article redirect to a specific reviewed product. Your purchase of these products through affiliate links helps to generate commission for Storables.com, at no extra cost. Learn more)
Introduction
Welcome to the world of steamer clams, where delicious seafood treasures await! Whether you are a seasoned chef or a culinary enthusiast looking to try something new, boiling steamer clams is a fantastic way to tantalize your taste buds with their delicate and briny flavor. In this article, we will guide you through the process of boiling steamer clams to perfection.
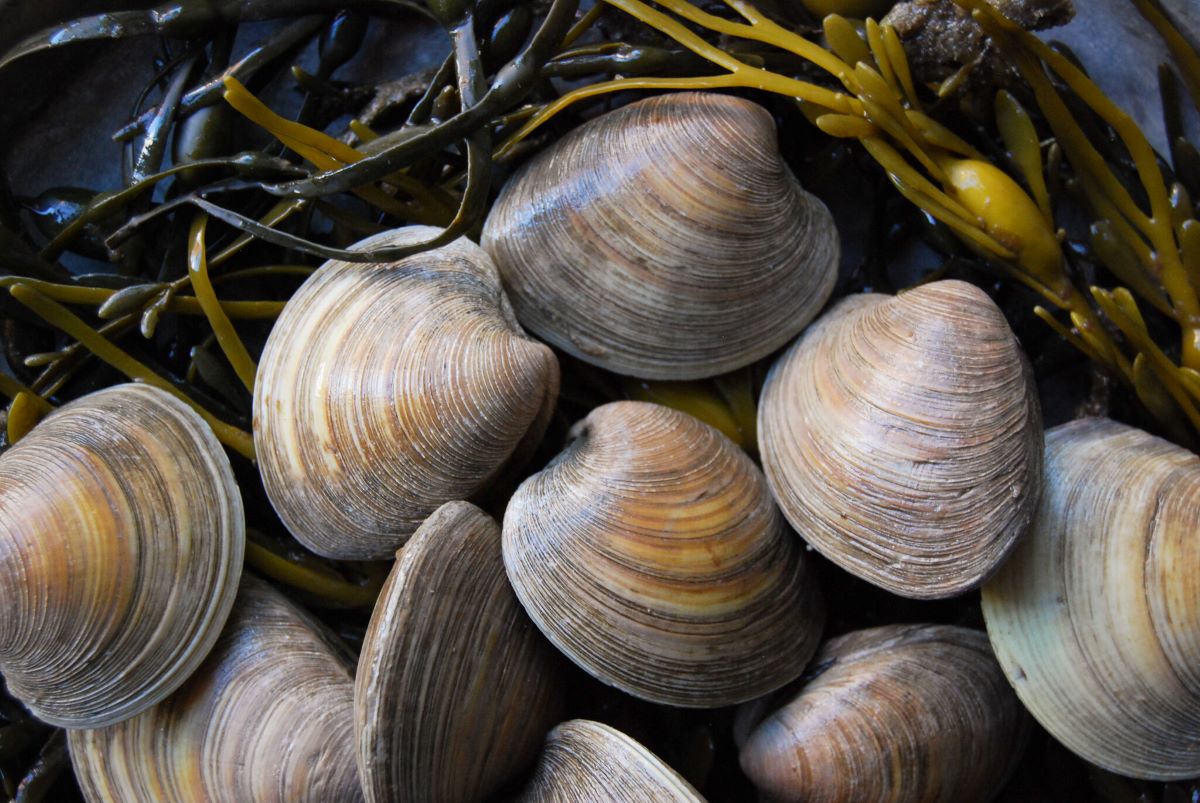
Steamer clams, also known as soft-shell clams or longnecks, are a popular choice among seafood lovers for their tender texture and rich taste. They are found along the sandy coastal areas of North America and are versatile enough to be enjoyed in various dishes, including chowders, pasta, and steamed clam platters.
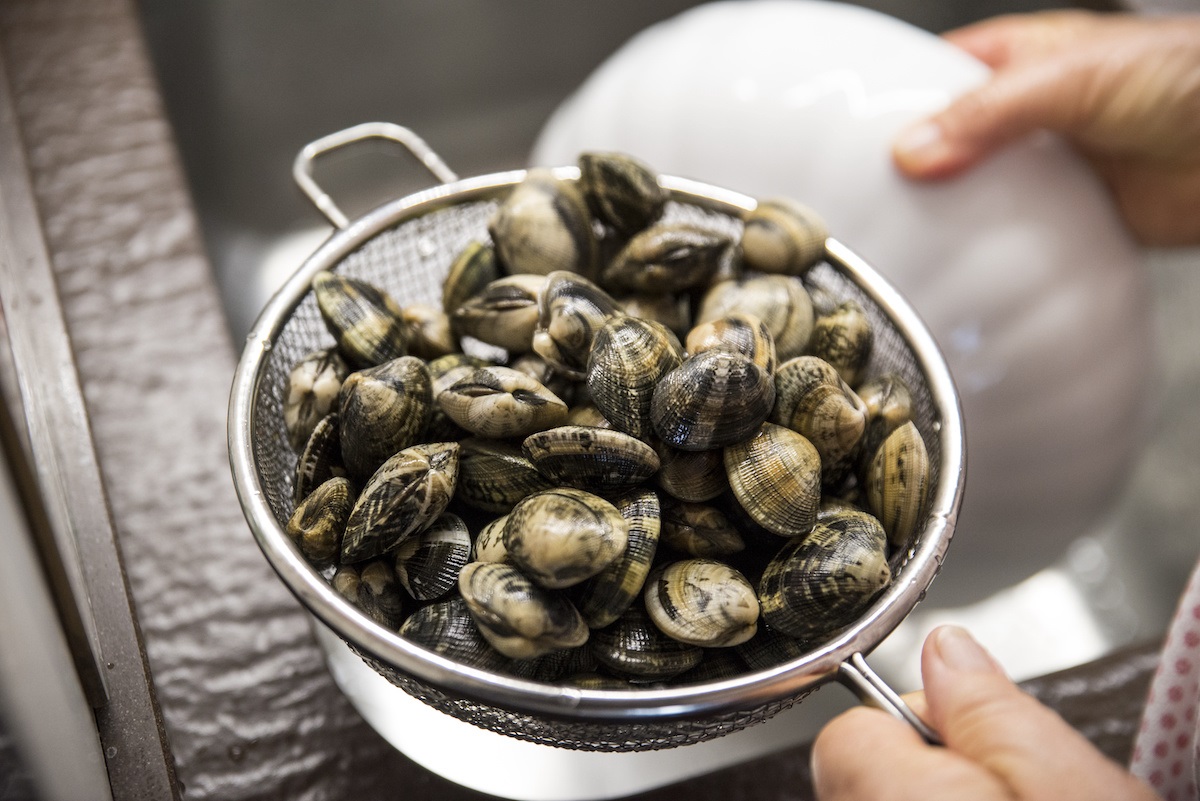
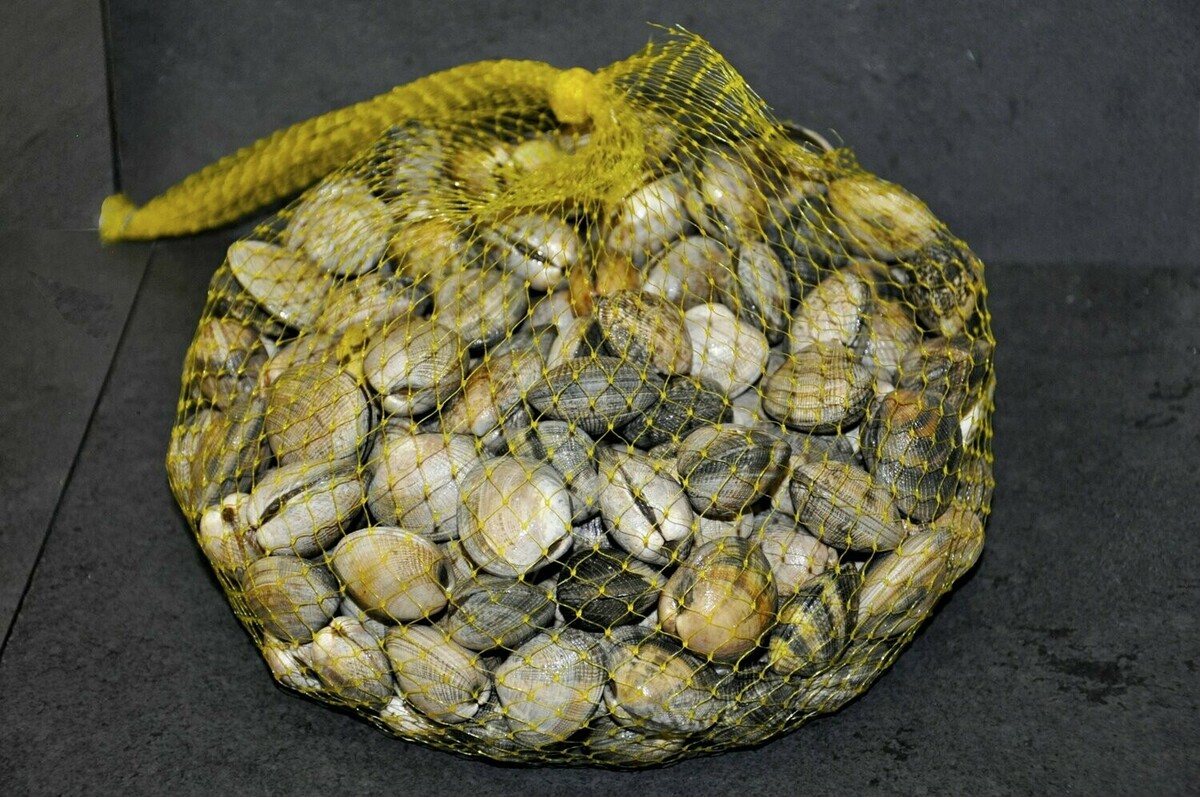
Before we dive into the cooking process, it’s important to note that selecting fresh and high-quality steamer clams is crucial. Look for clams with tightly closed shells or those that close when tapped lightly. Avoid clams with cracked or broken shells, as they may indicate spoilage. Once you have selected your clams, it’s time to clean and prepare them for cooking.
Key Takeaways:
- Master the art of boiling steamer clams by selecting fresh, live clams, infusing the cooking liquid with aromatic flavors, and ensuring perfect doneness through careful observation and testing. Enjoy the oceanic essence of these delectable seafood treasures!
- Elevate your culinary experience with steamer clams by experimenting with different seasonings, enhancing the broth, adding veggies or sausage, and exploring various cooking methods. Embrace the versatility of steamer clams and savor their briny, tender goodness in diverse culinary creations.
Read more: What Is A Steamer Clam
Selecting and Cleaning Steamer Clams
When it comes to cooking with steamer clams, freshness is key. Follow these steps to select and clean your steamer clams:
- Choose live clams: Look for clams that are alive and have tightly closed shells. Give the clams a gentle tap, and if they close, it signifies that they are still alive and safe to consume. Avoid clams with cracked or open shells, as they may be dead and pose a health risk.
- Inspect the shells: Take a closer look at the shells of the clams. They should be intact and free from cracks or chips. Cracked shells may indicate that the clam is no longer alive or may have been compromised.
- Rinse the clams: Before cooking, rinse the clams thoroughly under cold running water. This helps remove any sand, grit, or debris that may be present on the surface of the shells.
- Remove barnacles or seaweed: Occasionally, you might find barnacles or small pieces of seaweed attached to the shells. Gently scrub the shells with a brush to remove any visible debris. Take care not to apply too much pressure and cause damage to the clams.
- Check for “clam juice”: As you handle the clams, pay attention to any liquid that may be released. This “clam juice” is a good sign and indicates that the clams are healthy and alive.
- Discard damaged or open clams: Once you have cleaned your clams, inspect them again. If any clams remain open or have significantly damaged shells, it’s best to discard them. They may not be safe to consume.
By following these steps, you can ensure that your steamer clams are fresh, clean, and ready to be cooked to perfection.
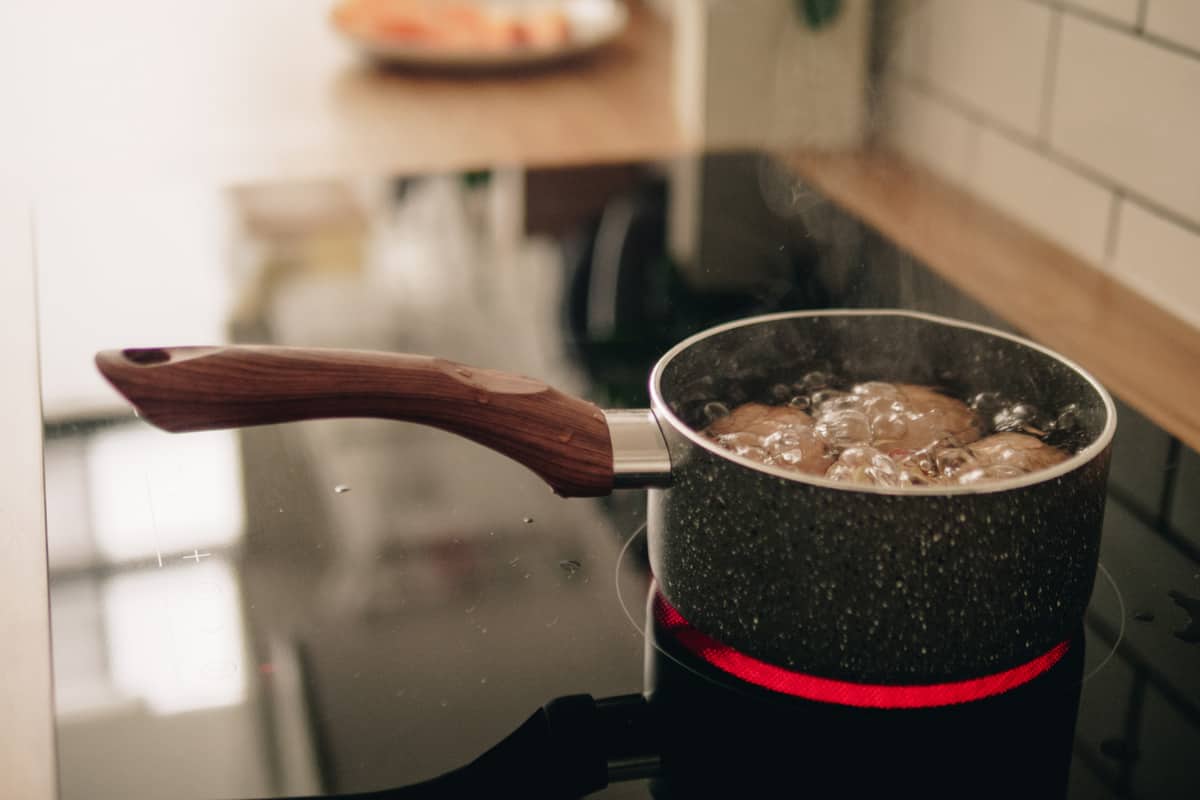
Preparing the Cooking Pot and Ingredients
Before diving into the boiling process, it’s important to prepare your cooking pot and gather all the necessary ingredients. Follow these steps to ensure a smooth cooking experience:
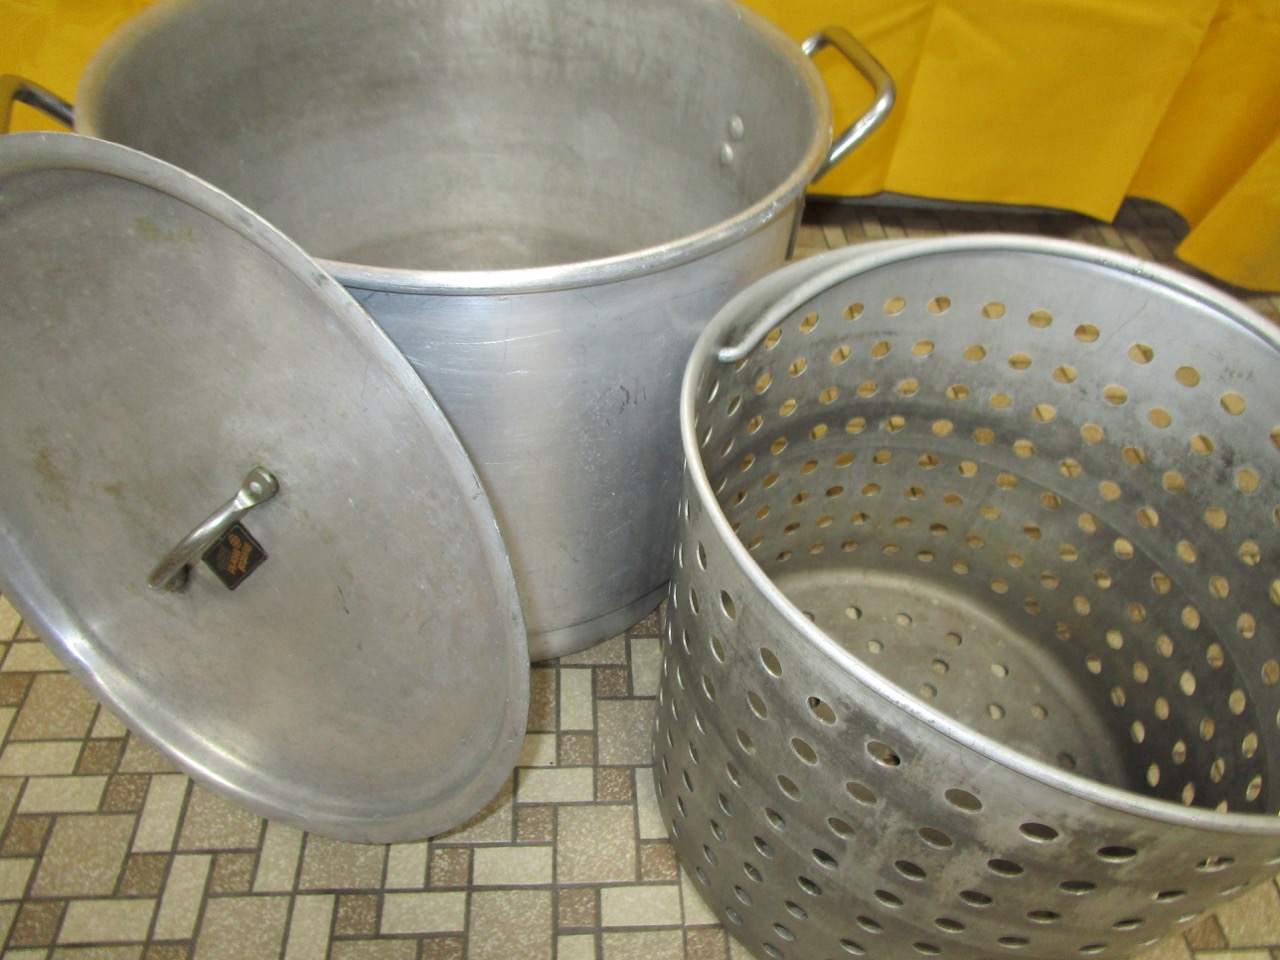
- Choose the right pot: For boiling steamer clams, it’s best to use a large pot with a tight-fitting lid. This allows the steam to circulate and cook the clams evenly. The pot should be deep enough to accommodate the clams and provide ample space for them to open up during cooking.
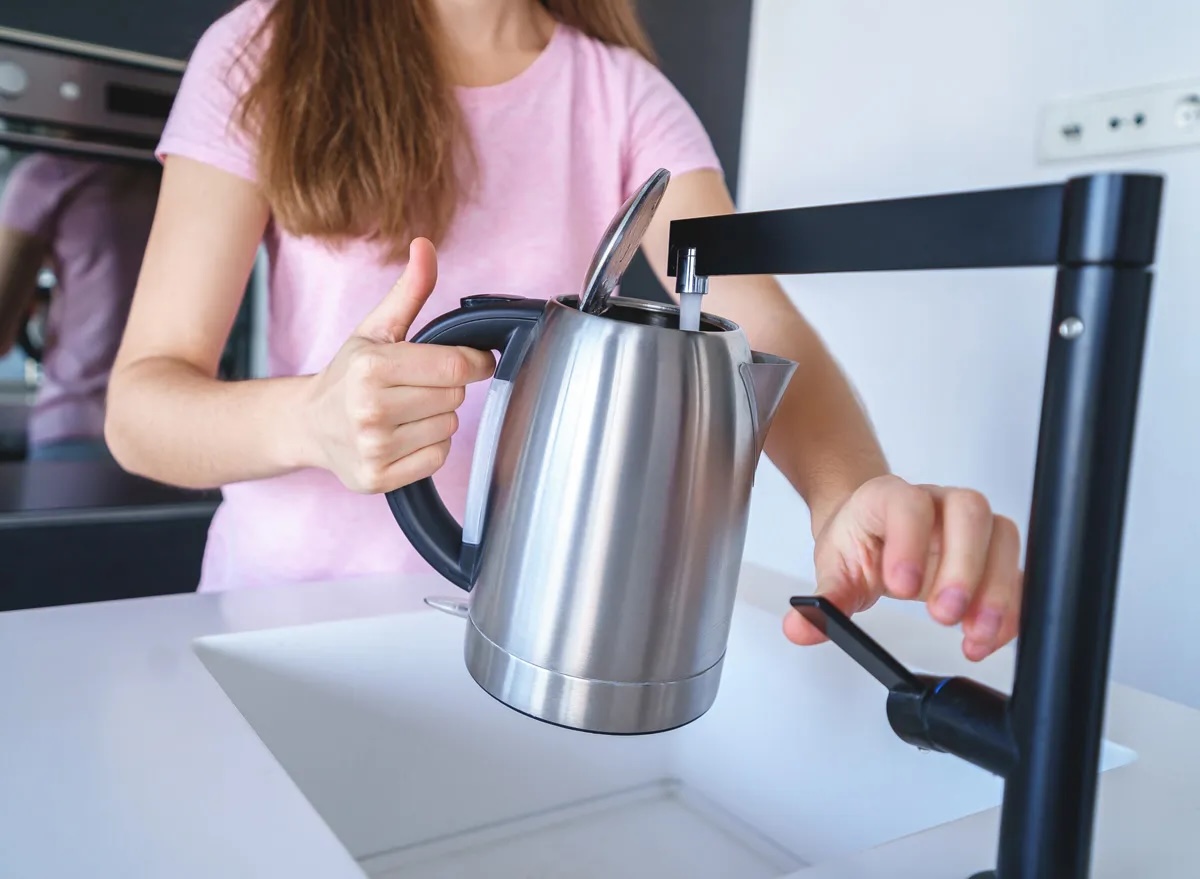
- Fill the pot with water: Fill the pot with enough water to cover the clams. The water should be about 1-2 inches above the clams to allow for the expansion of steam as they cook.
- Add flavorings: To enhance the flavor of the steamer clams, consider adding aromatics such as garlic, shallots, onions, or herbs like thyme or parsley. This infuses the clams with delicious flavors during the boiling process. Experiment with different combinations of seasonings to suit your taste preferences.
- Season with salt: Salt plays a crucial role in bringing out the natural flavors of the clams. Add a generous amount of salt to the water, keeping in mind that the clams will absorb some of the salt during cooking.
- Optional additions: If you want to add an extra depth of flavor, you can also include ingredients like white wine, beer, or clam broth to the cooking liquid. These additions impart a subtle richness to the clams.
- Prepare the serving dish: As the clams cook, it’s helpful to have a large bowl or platter ready to transfer them once they are done. This allows you to serve them immediately while keeping them warm.
With the pot prepared and the ingredients gathered, you are now ready to embark on the boiling process and create a mouthwatering dish of steamer clams.
Boiling Steamer Clams
Boiling steamer clams is a straightforward process that requires careful timing to ensure they are cooked to perfection. Follow these steps to boil your steamer clams:
- Add the clams to the pot: Gently place the cleaned steamer clams into the pot with the prepared boiling liquid. Make sure the clams are arranged in a single layer for even cooking.
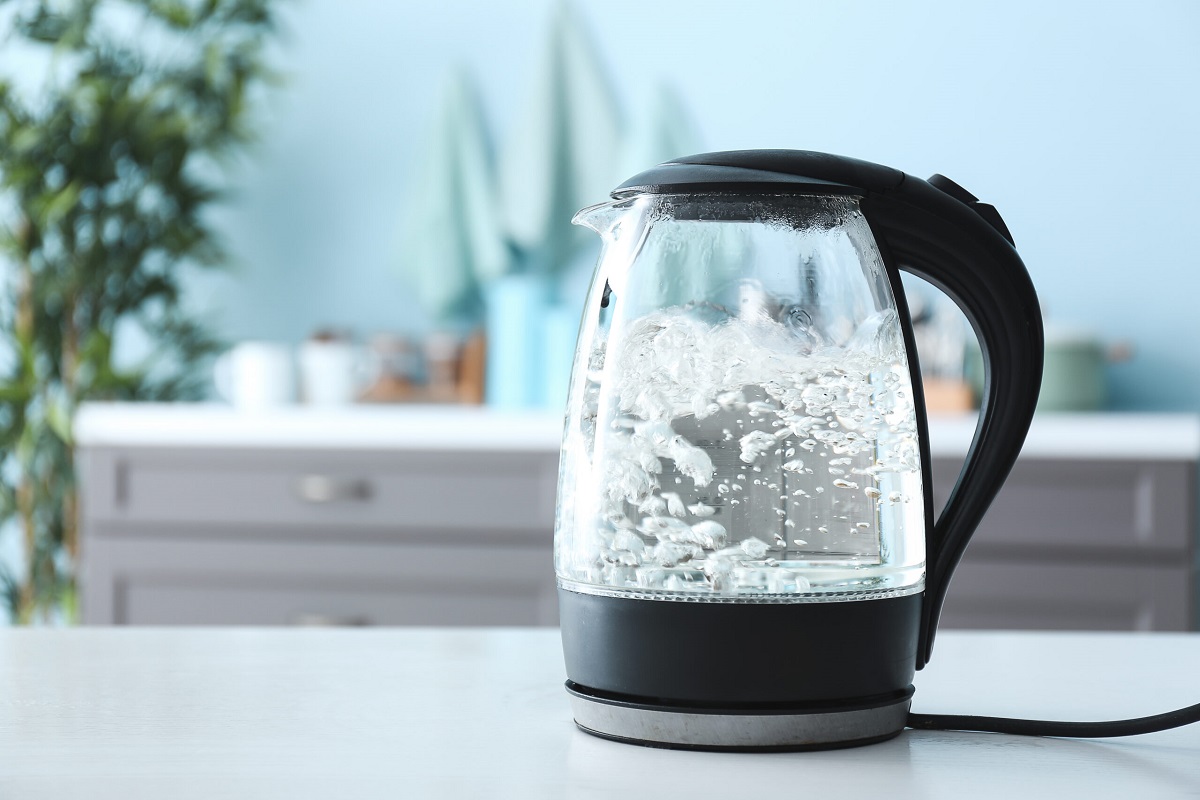
- Bring the liquid to a boil: Increase the heat to high and bring the liquid to a rolling boil. This will create steam that will cook the clams. As the steam builds up inside the pot, it will cause the clams to open up.
- Cover the pot: Once the liquid has come to a boil, cover the pot with the lid. This helps to trap the steam inside and speeds up the cooking process.
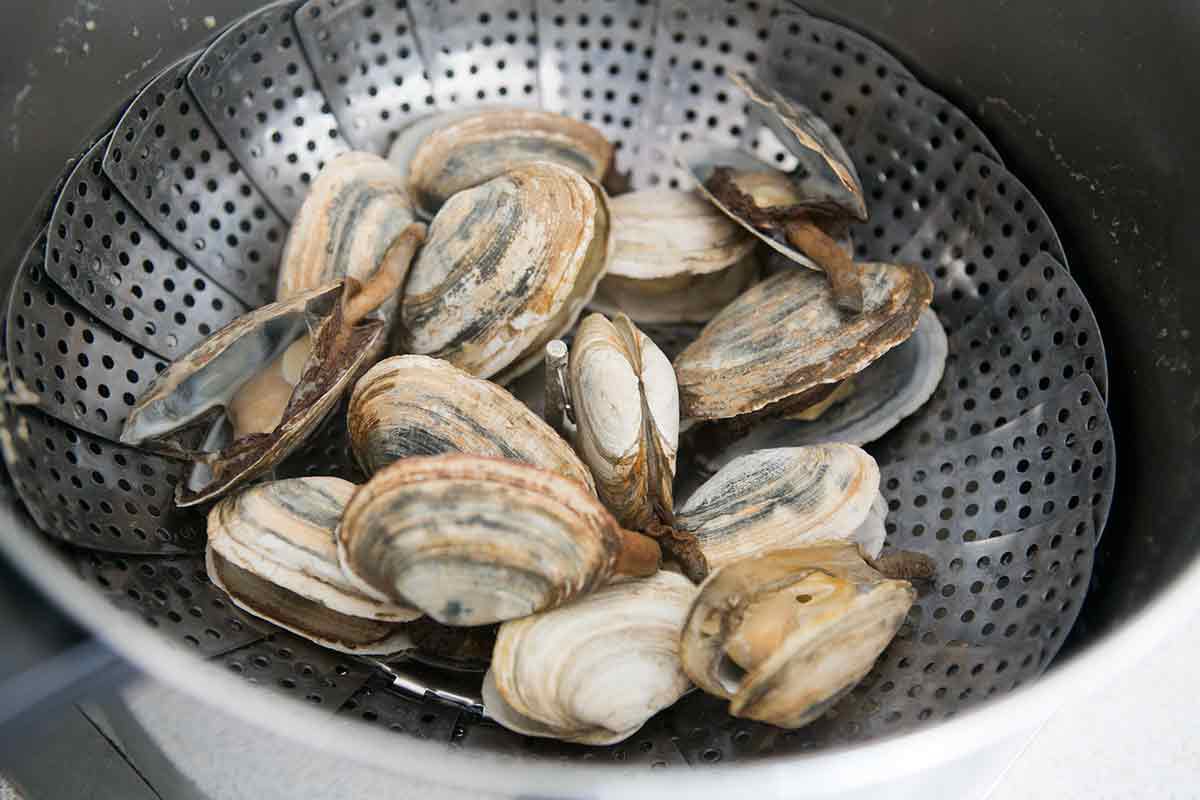
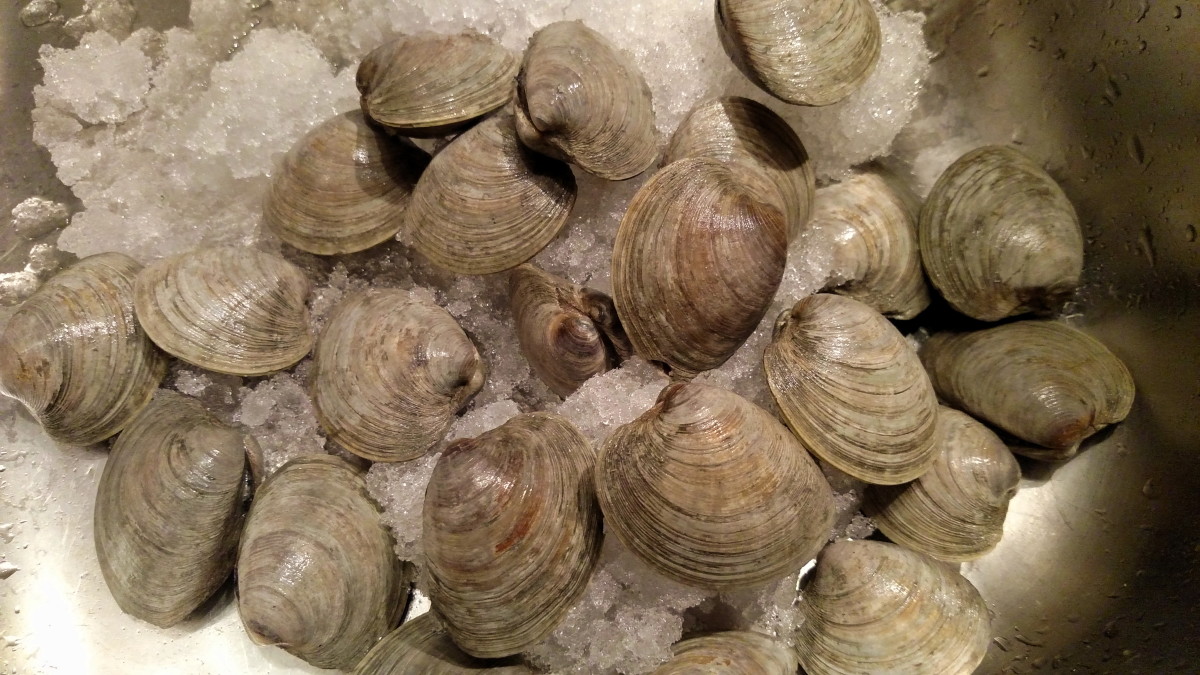
- Monitor the cooking time: Steam the clams for approximately 5-7 minutes, depending on their size. Since clams vary in size, it is essential to keep an eye on them to prevent overcooking. The clams are ready when their shells have fully opened.
- Discard unopened clams: After the recommended cooking time, remove the lid and carefully inspect the clams. Any clams that have not opened during cooking should be discarded, as they may be unsafe to consume. The opened clams with fully exposed meat should be perfectly cooked and tender.
It’s important not to overcook the clams, as they can become tough and rubbery. Once you have determined that the clams are cooked, it’s time to move on to the next step: checking for doneness.
Steamer clams should be boiled for about 5-7 minutes, or until the shells open. Overcooking can make them tough, so keep an eye on them.
Checking for Doneness
Checking the doneness of steamer clams is crucial to ensure they are cooked to perfection and safe to eat. Follow these steps to check if your steamer clams are done:
- Observe the open shells: Look closely at the shells of the cooked clams. They should be fully opened, allowing you to see the tender meat inside. Any clams that remain partially closed or have only slight openings may indicate that they are not fully cooked.
- Test the meat: Gently pull the meat out of one of the fully opened clams using a small fork or tong. The meat should be plump, tender, and easily slide out of the shell. If the meat is tough or chewy, it may require additional cooking time.
- Check for clarity: As you inspect the meat, it should be opaque and free from any translucent or jelly-like appearance. Clams that appear translucent may not be fully cooked and should be returned to the pot for further steaming.
- Discard uncooked clams: If you come across any clams that are not fully cooked, with closed or partially opened shells, it’s best to discard them. They may be undercooked or inedible.
- Perform a sniff test: Take a whiff of the cooked clams. They should have a fresh, briny aroma. If you detect any unpleasant odors, it could be a sign of spoilage, and the clams should be discarded.
By following these simple steps, you can determine if your steamer clams are cooked to perfection and ready to be served. Remember, it’s better to slightly undercook the clams than to overcook them, as overcooked clams can become rubbery and lose their delicate flavor.
Read also: 12 Amazing Clam Steamer for 2024
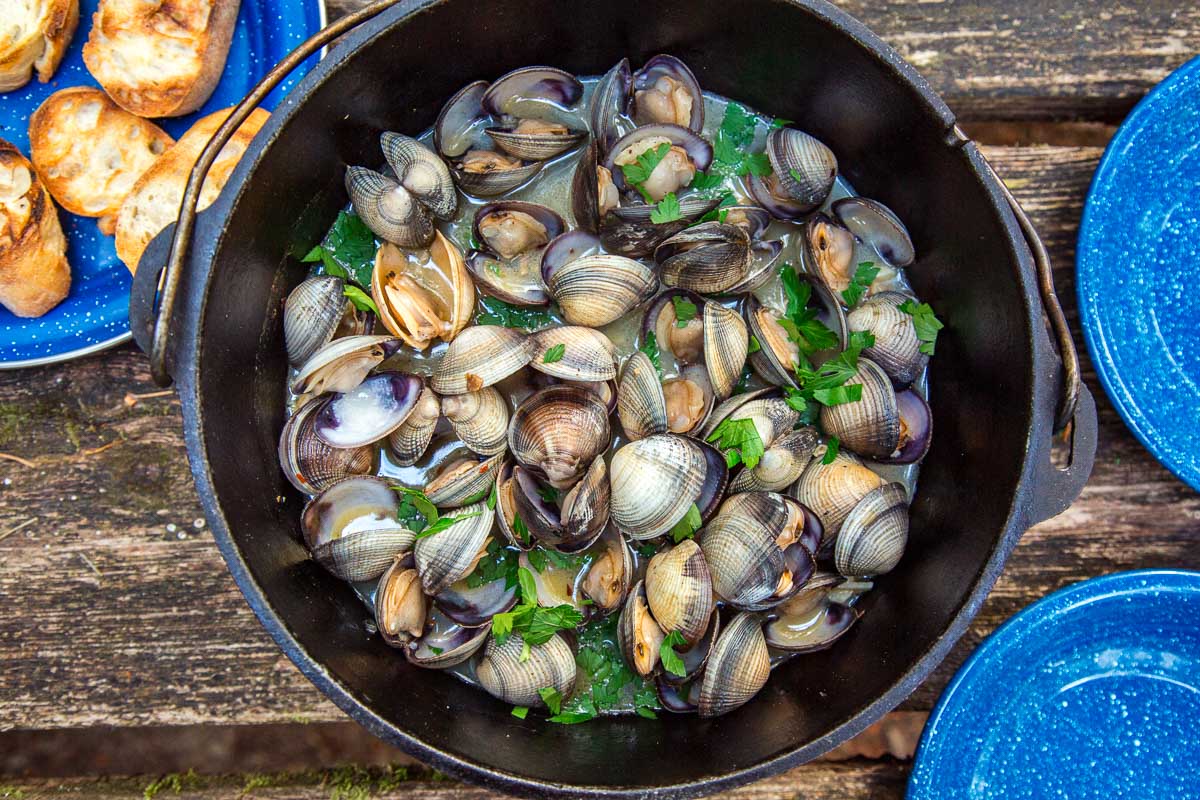
Serving and Enjoying Steamer Clams
Now that your steamer clams are perfectly cooked, it’s time to serve and enjoy these delectable seafood treats. Follow these steps to present and savor the deliciousness of steamer clams:
- Transfer the clams: Using a slotted spoon or tongs, carefully transfer the cooked clams from the pot to a large serving bowl or platter. Allow any excess cooking liquid to drain off before placing them in the serving dish.
- Garnish for presentation: For an added touch, you can sprinkle some freshly chopped parsley or cilantro over the cooked clams. This not only adds a pop of color but also enhances the visual appeal of the dish.
- Serve immediately: Steamer clams are best enjoyed hot and fresh. Serve them immediately after cooking, while they are still steaming. Accompany the clams with warm, crusty bread or slices of lemon for a refreshing burst of citrus.
- Dip or sauce options: Steamer clams are incredibly flavorful on their own, but you can elevate the experience by offering dipping sauces on the side. Classic options include melted butter, garlic butter, or cocktail sauce. These sauces complement the natural sweetness of the clams and add an extra layer of richness.
- Eat and savor: To eat the steamer clams, use a small fork or your fingers to gently pry the meat out of the shell. Dip the meat in the sauce of your choice, if desired, and take pleasure in the succulent, briny flavors. Eat the clams as a standalone dish or use them as a delectable addition to soups, pasta dishes, or seafood platters.
Enjoy the experience of savoring the tender meat and the oceanic essence of steamer clams. Don’t forget to share this delightful seafood dish with family and friends!
Tips and Variations for Cooking Steamer Clams
When it comes to cooking steamer clams, there are a few tips and variations that can help elevate your culinary experience. Here are some suggestions to consider:
- Try different seasonings: While salt is the traditional seasoning for steamer clams, feel free to experiment with other herbs and spices. Consider adding a pinch of red pepper flakes for a hint of heat, or a squeeze of fresh lemon juice for a citrusy twist.
- Enhance the broth: Instead of plain water, you can create a flavorful broth for boiling the clams. Use a combination of clam juice, white wine, or seafood stock to infuse extra flavors. This will result in a more robust and aromatic broth, which can be enjoyed as a soup base or used for cooking other seafood dishes.
- Add veggies or sausage: For a heartier meal, you can include vegetables such as sliced onions, celery, or bell peppers to the pot along with the clams. This adds a delicious dimension to the dish and creates a one-pot meal. You can also consider adding cooked sausage, such as chorizo or andouille, for added smokiness and complexity.
- Experiment with different cooking methods: While boiling is a popular cooking method for steamer clams, you can also try steaming or grilling them. Steaming helps retain more of the natural juices and flavors, while grilling provides a smoky and charred taste. Explore these methods to discover your preferred way of preparing steamer clams.
- Serve with accompaniments: Steamer clams make an excellent addition to pasta dishes, salads, or even as a topping on pizzas. Incorporate them into your favorite recipes to enjoy their unique flavor and texture in different culinary creations. Their natural brininess adds depth and character to a wide range of dishes.
- Be mindful of cooking times: The cooking time for steamer clams may vary based on their size, so it’s essential to monitor them closely. Overcooking can result in chewy and tough clams, while undercooking may leave them raw. Practice and experience will help you achieve the perfect cooking time for your desired texture.
Remember to source your steamer clams from reputable seafood vendors and ensure they are fresh and safe to consume. With these tips and variations, you can explore new flavors and techniques to enhance your enjoyment of steamer clams.
Conclusion
Boiling steamer clams is a delightful culinary experience that allows you to indulge in the flavors of the sea. With a few simple steps, you can transform these humble bivalves into a mouthwatering dish that will impress your family and friends. From selecting fresh clams to cleaning and cooking them to perfection, each step contributes to the overall success of the dish.
By following the tips and variations provided, you have the opportunity to experiment and tailor the flavor profile of the steamer clams to your liking. Whether you prefer a classic preparation with salt and garlic or want to explore different seasoning combinations or cooking methods, the versatility of steamer clams allows for endless possibilities.
Remember to prioritize freshness when selecting steamer clams, ensuring that you choose clams with tightly closed shells and vibrant aromas. Cleaning the clams thoroughly before cooking helps remove any grit or debris, ensuring a clean and enjoyable dining experience.
Once the clams are perfectly cooked, serve them immediately and savor the delicate meat that effortlessly slides out of the shells. Pair them with warm, crusty bread and your favorite dipping sauces to enhance the flavors even further.
Whether you’re enjoying steamer clams as a standalone dish or incorporating them into other recipes, their briny and tender nature is sure to please your taste buds. Explore the variations, get creative with seasonings, and don’t hesitate to try different cooking methods to find your perfect steamer clam preparation.
So, next time you have a craving for seafood, consider boiling steamer clams. Embrace the simplicity and elegance of this cooking technique, and let the flavors of the sea take center stage in your culinary creation.
Enjoy the journey of cooking and savoring steamer clams, and happy feasting!
Frequently Asked Questions about How Long To Boil Steamer Clams
Was this page helpful?
At Storables.com, we guarantee accurate and reliable information. Our content, validated by Expert Board Contributors, is crafted following stringent Editorial Policies. We're committed to providing you with well-researched, expert-backed insights for all your informational needs.

0 thoughts on “How Long To Boil Steamer Clams”