
Articles
How To Adjust Kitchenaid Lift Mixer
Modified: January 7, 2024
Discover step-by-step instructions and helpful tips in our informative articles on how to adjust your Kitchenaid lift mixer for optimal performance.
(Many of the links in this article redirect to a specific reviewed product. Your purchase of these products through affiliate links helps to generate commission for Storables.com, at no extra cost. Learn more)
Introduction
Welcome to this comprehensive guide on how to adjust your Kitchenaid lift mixer. If you’ve noticed that your mixer’s beater is not hitting the bowl properly, or if you simply want to fine-tune the height of the beater, then this tutorial is for you. The Kitchenaid lift mixer is a versatile and powerful appliance that can handle various mixing and blending tasks in the kitchen. However, over time, the beater may require adjustment to ensure optimal performance.
In this article, we will walk you through the step-by-step process of adjusting the height of the beater on your Kitchenaid lift mixer. By following these instructions, you’ll be able to achieve the perfect clearance between the beater and the bowl, providing you with consistent and efficient mixing every time.
Before we dive into the steps, it’s important to gather the necessary tools for this adjustment. You will need a flathead screwdriver, which will be used to adjust the beater height. Additionally, make sure to unplug the mixer before starting any adjustments to ensure your safety.
Now that you have the tools ready, let’s move on to the first step of the process: unplugging the mixer.
Key Takeaways:
- Ensure safety by unplugging the mixer before adjusting the beater height. Use a flathead screwdriver to make small, precise adjustments to achieve optimal beater clearance for efficient mixing.
- Regularly test and fine-tune the beater clearance to prevent scraping and interference. Enjoy flawlessly mixed ingredients with a properly adjusted Kitchenaid lift mixer for effortless culinary creations.
Read more: How To Lift The Head Of A Kitchenaid Mixer
Step 1: Gather The Necessary Tools
Before you begin adjusting the height of the beater on your Kitchenaid lift mixer, it’s important to have the right tools on hand. Here’s what you’ll need:
- Flathead screwdriver: This tool will be used to adjust the beater height. Make sure to choose an appropriate size that fits the adjustment screw on your specific model of Kitchenaid lift mixer.
It’s crucial to have the correct tools to ensure a smooth and effective adjustment process. Using the wrong screwdriver may damage the adjustment screw or make it difficult to properly adjust the beater height. So, take a moment to ensure you have the required tools before proceeding.
Once you have the flathead screwdriver ready, you’re prepared to move on to the next step: unplugging the mixer. It’s essential to unplug the appliance from the power source before making any adjustments to ensure your safety.
Step 2: Unplug The Mixer
Before you begin adjusting the height of the beater on your Kitchenaid lift mixer, it’s crucial to prioritize safety. For your own protection, always remember to unplug the mixer from the power source before making any adjustments.
Unplugging the mixer not only ensures your safety but also prevents the risk of accidentally turning on the machine while you are working on it. This step may seem obvious, but it is of utmost importance and should never be ignored.
So, take a moment to locate the power cord of your Kitchenaid lift mixer and unplug it from the electrical outlet. By doing so, you can proceed with the adjustment process with peace of mind, knowing that there is no chance of the mixer turning on unexpectedly.
Remember, safety is always a top priority when working with any electrical appliance, and the Kitchenaid lift mixer is no exception. So be sure to unplug the mixer before moving on to the next step.
Step 3: Locate The Adjustment Screw
Now that you have unplugged the Kitchenaid lift mixer and ensured your safety, it’s time to locate the adjustment screw. The adjustment screw is the key component that allows you to adjust the height of the beater.
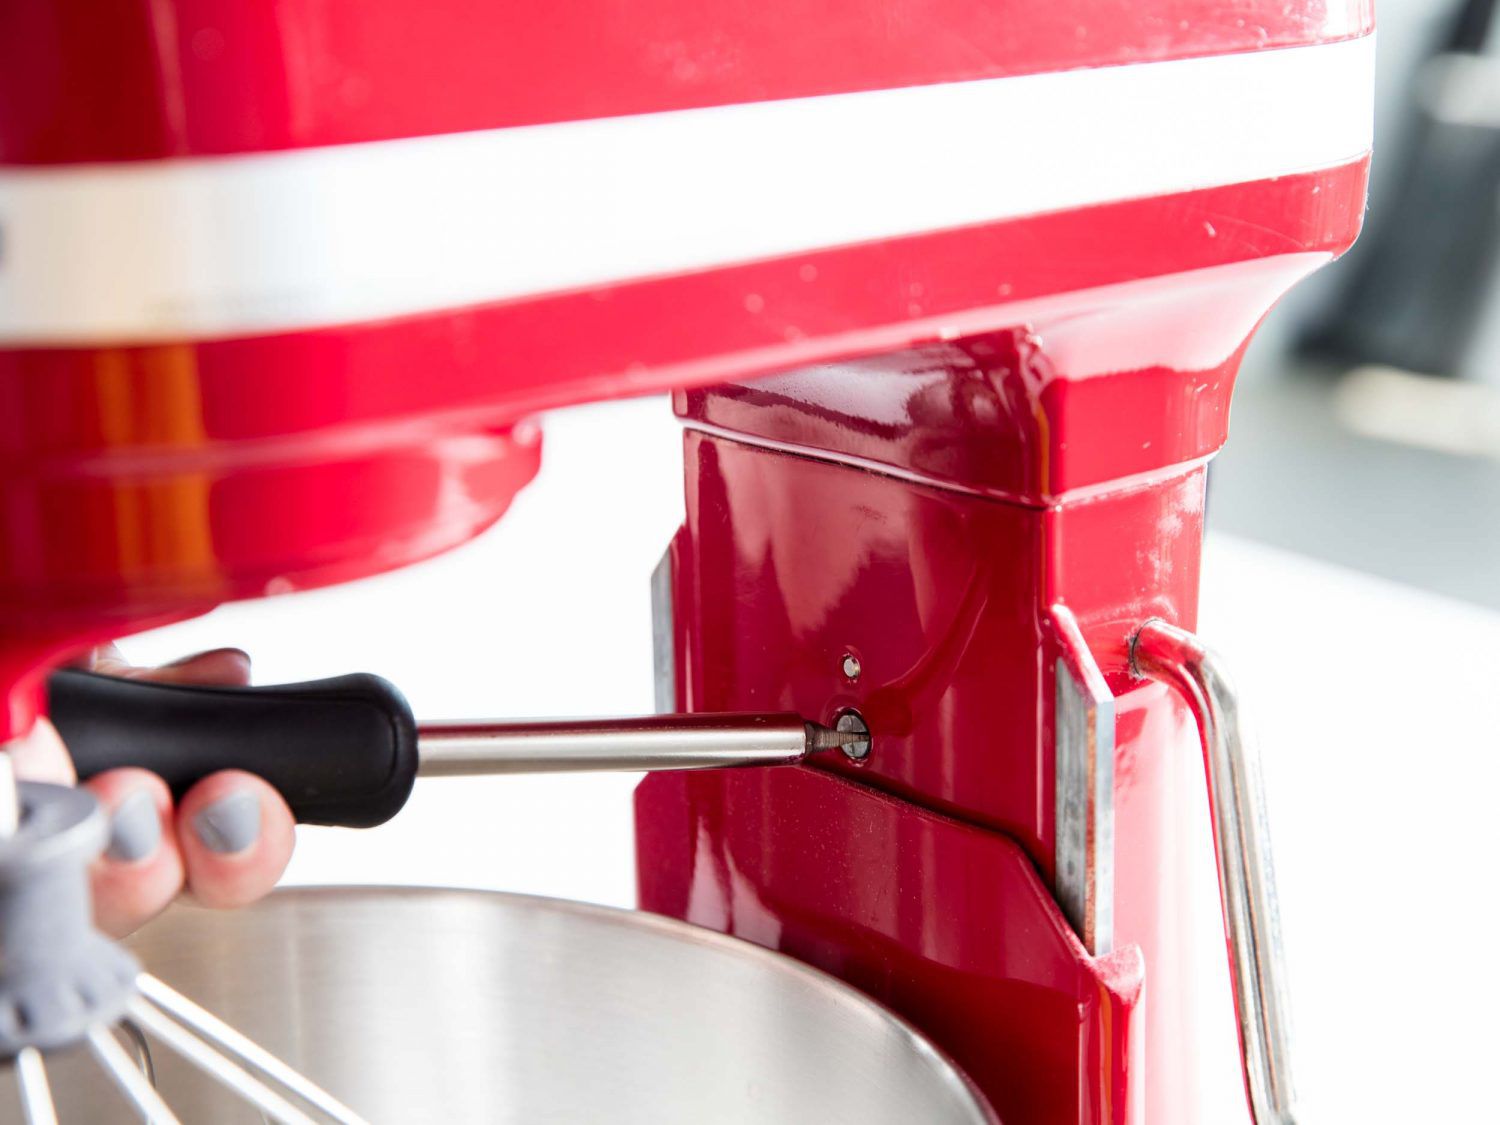
On most Kitchenaid lift mixers, the adjustment screw can be found on the neck of the mixer, just below the motor head. It is typically a small screw that can be turned with a flathead screwdriver.
Take a close look at the neck of the mixer and locate the screw. It may be a small protruding screw or may be recessed under a small cover. If there is a cover, gently remove it using your flathead screwdriver to reveal the adjustment screw.
Once you have located the adjustment screw, you are ready to move on to the next step: adjusting the height of the beater. Keep your flathead screwdriver handy, as it will be used to make precise adjustments to the screw.
Take your time to familiarize yourself with the location and appearance of the adjustment screw. This will ensure that you have a clear understanding of where to focus your adjustments in the next step.
With the adjustment screw now located, let’s proceed to step 4: adjusting the height of the beater on your Kitchenaid lift mixer.
When adjusting the height of the beater on a KitchenAid lift mixer, make sure to turn off and unplug the mixer before making any adjustments. Use the adjustment screw located near the base of the mixer to raise or lower the beater to the desired height.
Step 4: Adjust The Height of The Beater
Now that you have located the adjustment screw, it’s time to adjust the height of the beater on your Kitchenaid lift mixer. This step is crucial for ensuring that the beater properly clears the bowl and provides efficient mixing performance.
Here’s how to adjust the height of the beater:
- Take your flathead screwdriver and carefully insert it into the adjustment screw. Make sure the screwdriver is securely seated in the screw.
- Gently turn the screwdriver clockwise to lower the beater or counterclockwise to raise it. Start with small adjustments, about a quarter turn at a time, to achieve the desired height.
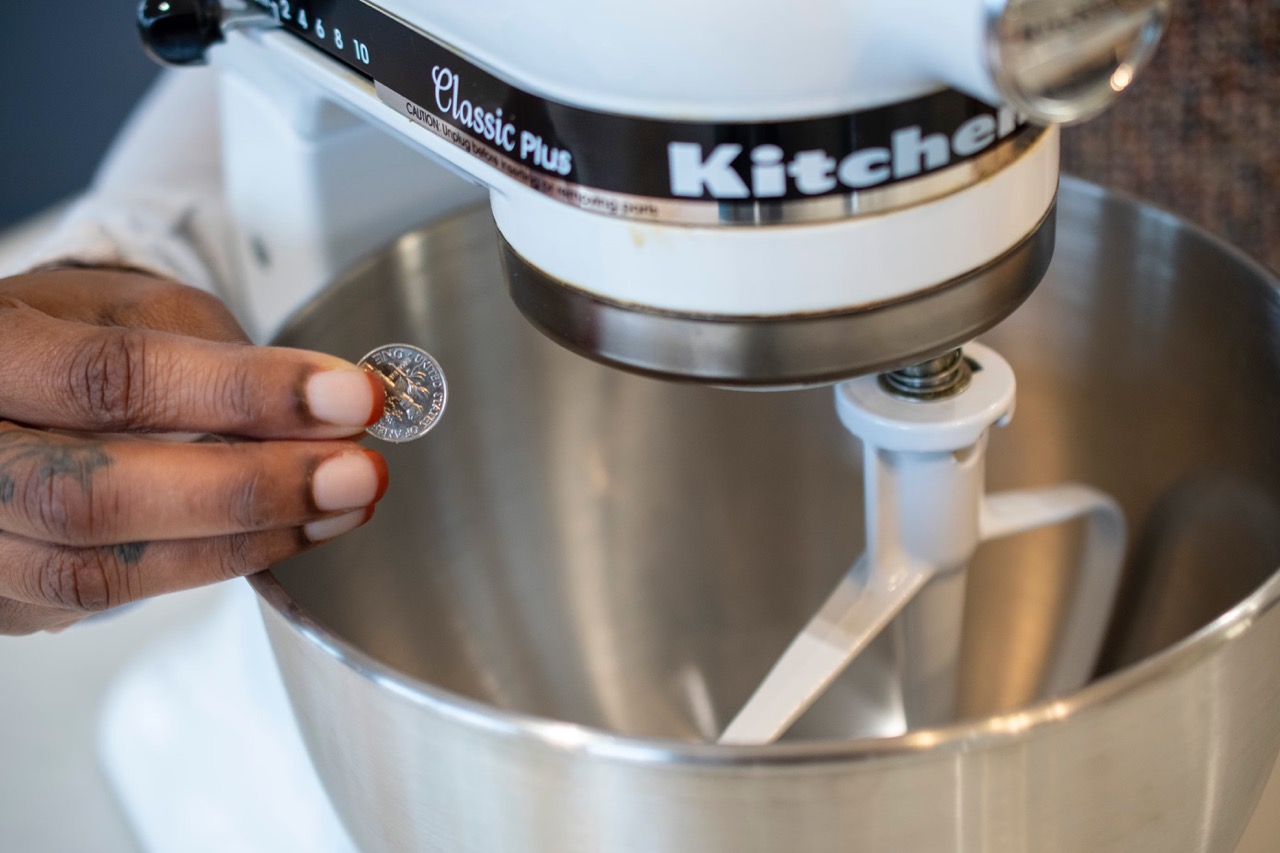
- As you make adjustments, periodically stop and test the beater clearance. Turn the mixer on to the lowest speed and observe the beater’s position relative to the bowl. The beater should just lightly touch the bottom of the bowl without scraping against it.
- Continue making adjustments and testing the beater clearance until you achieve the ideal height. Remember to make small incremental changes to avoid going too low or too high with the beater.
It’s important to note that the adjustment process may differ slightly depending on the model of your Kitchenaid lift mixer. Always refer to the manufacturer’s instructions for specific guidance on adjusting the beater height.
Take your time during this step to ensure precise adjustments. Carefully observe the beater’s position in relation to the bowl and make necessary tweaks to achieve the optimal clearance for efficient mixing.
With the beater height properly adjusted, let’s move on to the next step: testing the beater clearance.
Read more: How Do You Adjust A Kitchenaid Mixer
Step 5: Test The Beater Clearance
After adjusting the height of the beater on your Kitchenaid lift mixer, it’s crucial to test the beater clearance to ensure optimal performance. This step will help you verify that the beater is at the correct height and properly clears the bowl while mixing.
Here’s how to test the beater clearance:
- Plug the mixer back into the power source and turn it on to the lowest speed setting. Allow the mixer to run for a few seconds to get the beater moving.
- Observe the beater’s movement inside the bowl. It should rotate freely without hitting the sides of the bowl or dragging along the bottom.
- If you notice any contact or scraping between the beater and the bowl, stop the mixer and make further adjustments to the beater height. Use your flathead screwdriver to fine-tune the height by making small clockwise or counterclockwise adjustments to the adjustment screw.
- Repeat the testing process by running the mixer on the lowest setting and observing the beater’s movement. Continue making adjustments as needed until the beater operates smoothly without touching the bowl.
Testing the beater clearance is crucial to ensure that your Kitchenaid lift mixer performs optimally. The goal is to achieve a clearance that allows the beater to effectively mix ingredients without any interference or scraping against the bowl’s sides or bottom.
Remember to make small, incremental adjustments to the beater height using the adjustment screw. Take your time during the testing process to fine-tune the clearance and achieve the best results.
With the beater clearance successfully tested, let’s proceed to the final step: plugging the mixer back in.
Step 6: Plug The Mixer Back In
Now that you have adjusted the height of the beater on your Kitchenaid lift mixer and tested the beater clearance, it’s time to plug the mixer back in and get ready to enjoy flawlessly mixed ingredients.
Here’s how to plug the mixer back in:
- Make sure the mixer is turned off and in the “Off” position.
- Locate the power cord and insert it into a nearby electrical outlet.
- Ensure that the power cord is securely connected and that there are no loose or exposed wires.
- Once the power cord is securely plugged in, turn on the mixer and test its functionality. Gradually increase the speed to your desired setting and observe the beater’s movement in the bowl. It should now operate smoothly, thanks to the adjusted beater height.
By plugging the mixer back in, you are ready to enjoy the benefits of a properly adjusted Kitchenaid lift mixer. Whether you’re mixing dough, whipping cream, or creating your favorite recipes, the mixer’s performance should be optimized with the correct beater height.
Remember, if you ever need to readjust the beater height in the future, simply follow the steps outlined in this guide. Regularly checking and adjusting the beater height will ensure consistent and efficient mixing results over time.
Congratulations! You have successfully adjusted the height of the beater on your Kitchenaid lift mixer. Now, it’s time to unleash your culinary creativity and enjoy the effortless mixing power of your appliance.
Thank you for following this step-by-step guide. Happy mixing!
Conclusion
Adjusting the height of the beater on your Kitchenaid lift mixer is a simple yet essential task that can greatly enhance your mixing experience in the kitchen. By following the steps outlined in this guide, you can ensure that your mixer operates at optimal performance, providing you with consistent and efficient results every time.
Remember, safety should always be a priority when working with electrical appliances. Always unplug the mixer before making any adjustments, and take your time to locate the adjustment screw and make precise changes to the beater height.
Regularly testing the beater clearance and making necessary adjustments will help you achieve the perfect balance between the beater and the bowl, preventing unnecessary scraping or interference during the mixing process.
With your properly adjusted Kitchenaid lift mixer, you can confidently tackle various mixing tasks, from kneading dough to whipping cream, with ease and efficiency.
We hope this comprehensive guide has been helpful in guiding you through the process of adjusting the height of the beater on your Kitchenaid lift mixer. Now, it’s time to plug the mixer back in, unleash your culinary creativity, and enjoy the delicious results.
Thank you for reading, and happy mixing!
Frequently Asked Questions about How To Adjust Kitchenaid Lift Mixer
Was this page helpful?
At Storables.com, we guarantee accurate and reliable information. Our content, validated by Expert Board Contributors, is crafted following stringent Editorial Policies. We're committed to providing you with well-researched, expert-backed insights for all your informational needs.



0 thoughts on “How To Adjust Kitchenaid Lift Mixer”