
Articles
How To Balance Kegerator
Modified: February 28, 2024
Learn how to balance your kegerator with our informative articles. Get expert tips and tricks to ensure the perfect pour every time.
(Many of the links in this article redirect to a specific reviewed product. Your purchase of these products through affiliate links helps to generate commission for Storables.com, at no extra cost. Learn more)
Introduction
Welcome to the world of kegerators! If you’ve found yourself here, chances are you’re either a beer enthusiast looking to turn your home into a mini pub, or you’re a business owner in need of a reliable way to dispense beer. Either way, you’ve made a great choice!
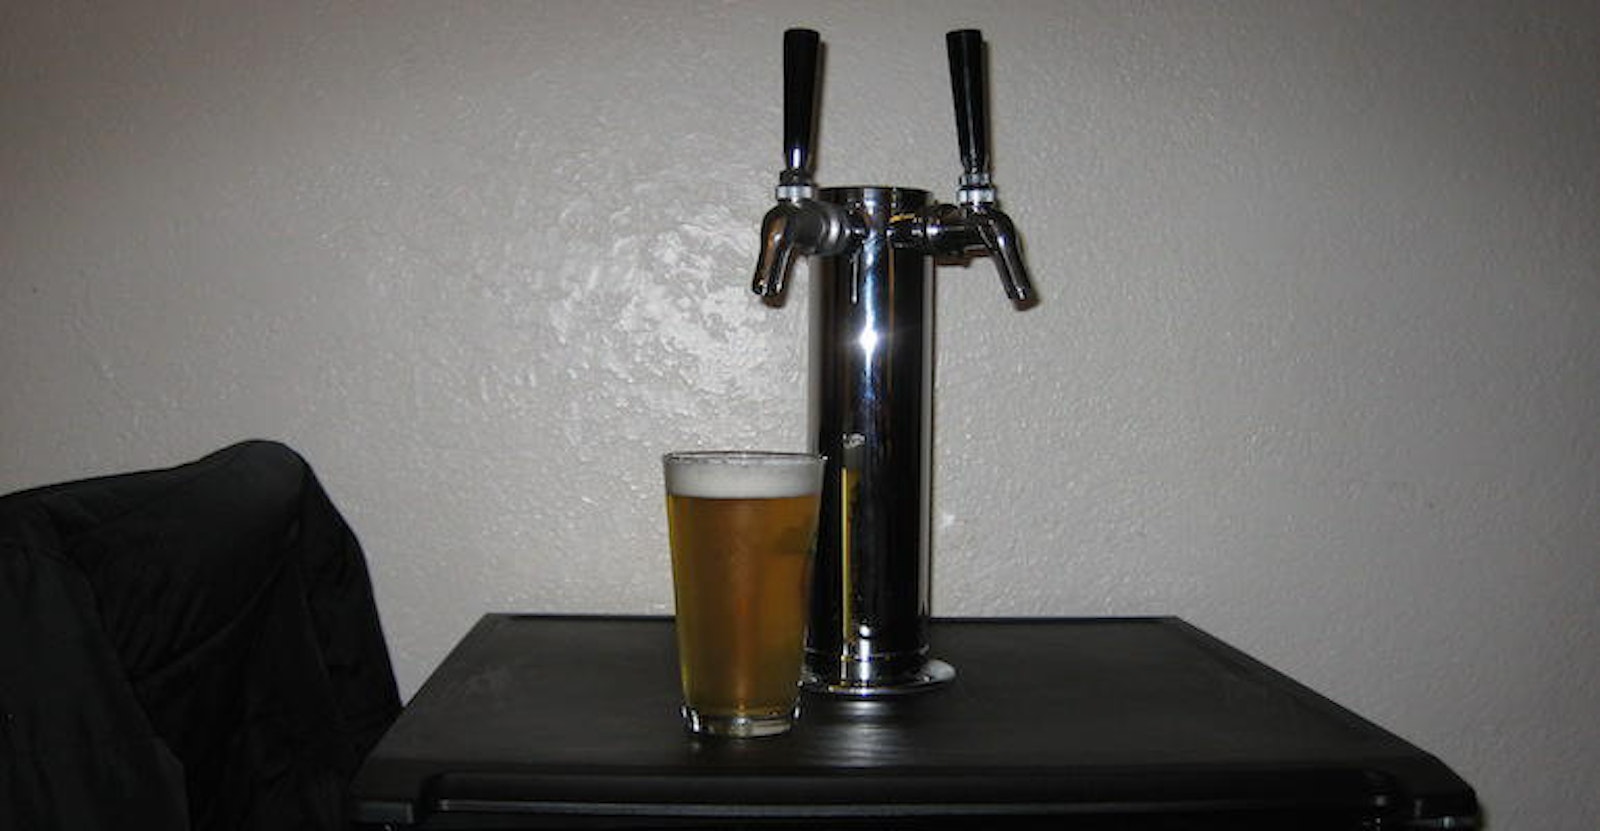
A kegerator is a refrigerated unit that is specifically designed for storing and dispensing kegs of beer. It’s a fantastic addition to any home bar or commercial setting, offering the convenience of having draft beer on tap. But simply owning a kegerator isn’t enough; in order to ensure the best tasting beer every time, it’s crucial to properly balance your kegerator.
What exactly does it mean to balance a kegerator? Essentially, it’s the process of establishing the perfect equilibrium between the pressure of the carbon dioxide (CO2) and the resistance of the beer lines. When a kegerator is properly balanced, it ensures that the beer flows smoothly and at the right carbonation level, resulting in a consistently great pour.
In this article, we’ll guide you through the steps to balance your kegerator, ensuring that you can enjoy a perfect pint every time. So let’s dive in and get started!
Key Takeaways:
- Balancing a kegerator is essential for consistently great pours, optimal carbonation, and minimized waste. Adjust CO2 pressure, regulator, beer line length, and maintain proper cleaning for the perfect pint every time.
- Experiment with pressure, temperature, and quality equipment to achieve the ideal balance. Keep a journal, check for leaks, and consider flow control faucets for a refined kegerator experience. Cheers to perfectly poured brews!
Read more: How To Fix The Balance On A Washing Machine
Understanding the Basics of Kegerators
Before we delve into the nitty-gritty of balancing a kegerator, it’s important to have a basic understanding of how these machines work.
A kegerator is essentially a refrigerator that is specifically designed for storing and dispensing kegs of beer. It’s equipped with a cooling system to keep the beer at the optimal temperature and a tap system to dispense the beer on demand.
There are different types of kegerators available on the market, ranging from countertop models to freestanding units. Some are designed for home use, while others are more suited for commercial settings like bars and restaurants.
The key components of a kegerator include:
- Refrigeration System: This is responsible for keeping the beer at the desired temperature, usually between 36-40 degrees Fahrenheit (2-4 degrees Celsius). The temperature control is crucial, as it helps preserve the quality and taste of the beer.
- CO2 System: The CO2 system is used to carbonate the beer and provide pressure to push it out of the keg. It typically consists of a CO2 tank, a regulator, and gas lines.
- Beer Lines and Tap System: These are the conduits through which the beer flows from the keg to your glass. The lines are usually made of food-grade material, such as PVC or nylon, and connected to a tap or faucet that enables easy dispensing.
- Drip Tray: Located beneath the tap, the drip tray collects any spilled beer or condensation, ensuring a clean and neat dispensing area.
Understanding how these components work together is crucial in maintaining the proper balance of your kegerator. By ensuring that each element is functioning correctly and harmoniously, you can guarantee the best pour and overall beer-drinking experience.
Now that we have a grasp of the basics, it’s time to delve into the importance of balancing a kegerator.
Importance of Balancing a Kegerator
When it comes to serving draft beer, the balance of a kegerator plays a crucial role in the overall taste, carbonation, and pour of the beer. Balancing ensures that the pressure of the carbon dioxide (CO2) matches the resistance of the beer lines, resulting in a perfect pour with the right amount of carbonation and minimal foam.
Here are a few reasons why balancing your kegerator is essential:
- Consistent Beer Quality: Balancing your kegerator ensures that every pour is consistent in taste and quality. If the pressure is too high, the beer will come out with excessive foam, leading to a poor pour and wasted beer. On the other hand, if the pressure is too low, the beer will lack carbonation and taste flat. Balancing eliminates these inconsistencies, ensuring a consistently great pint every time.
- Optimal Carbonation: Carbonation is a vital component of beer, as it adds effervescence and enhances the overall flavor profile. Properly balanced kegerators enable the carbonation to be at the perfect level, allowing you to enjoy the beer as the brewer intended. Too much carbonation can make the beer overly fizzy and hard to drink, while too little carbonation can make it taste dull and lifeless.
- Minimized Waste: Balancing your kegerator helps minimize wastage of beer. If the beer lines aren’t properly balanced, you’ll likely experience excessive foaming, resulting in lost beer. By maintaining the correct pressure and resistance, you’ll reduce foam levels and maximize the utilization of your keg, saving you both money and frustration.
- Enhanced Pouring Experience: A perfectly balanced kegerator provides an enjoyable pouring experience. It allows you to effortlessly dispense the beer with minimal foam, ensuring a visually appealing and satisfying pint. Plus, who doesn’t enjoy that smooth, cascading effect as the beer fills the glass?
By understanding the importance of balancing your kegerator, you can take necessary steps to ensure that your beer is always of the highest quality. So let’s move on to the practical steps involved in balancing a kegerator.
Steps to Balance a Kegerator
Now that you understand the significance of balancing your kegerator, let’s walk through the step-by-step process to achieve the perfect balance:
- Step 1: Check CO2 Pressure
- Step 2: Adjust Regulator
- Step 3: Adjust Beer Line Length
- Step 4: Temperature Control
- Step 5: Maintain Proper Cleaning and Maintenance
Start by checking the CO2 pressure in your kegerator. The recommended pressure will depend on the style and carbonation level of the beer you’re serving. Generally, a pressure of 10-12 PSI (pounds per square inch) is a good starting point. Adjust the pressure as needed to achieve the desired carbonation level.
Next, adjust the regulator on your kegerator. This device controls the flow of CO2 into the keg. Turn the regulator clockwise to increase the pressure and counterclockwise to decrease it. Make small adjustments and give the system time to stabilize before checking the pour.
If you’re still experiencing excessive foam or sluggish pours, it may be necessary to adjust the length of the beer lines. Longer lines create more resistance, reducing the speed at which the beer flows. Conversely, shorter lines offer less resistance and can result in faster pours. Experiment with different line lengths until you find the right balance for your setup.
Temperature plays a crucial role in achieving the perfect pour. Ensure that your kegerator is maintaining a consistent temperature between 36-40 degrees Fahrenheit (2-4 degrees Celsius). Fluctuations in temperature can cause changes in carbonation levels and ultimately affect the quality of your beer.
Regular cleaning and maintenance are essential for optimal performance. Clean your kegerator and beer lines regularly to remove any buildup or contaminants that could impact the quality of your beer. Regularly replace O-rings, wash faucet parts, and clean beer taps to avoid any potential issues.
It’s important to note that achieving the perfect balance may require some trial and error. Keep track of the adjustments you make, and test the pour after each adjustment to assess the results. Over time, you’ll become more familiar with your kegerator’s unique requirements and be able to achieve the perfect balance more efficiently.
Now that you know the step-by-step process, let’s explore some additional tips and tricks to help you balance your kegerator like a pro.
Step 1: Check CO2 Pressure
The first step in balancing your kegerator is to check the CO2 pressure. The pressure of the carbon dioxide plays a crucial role in carbonating and dispensing the beer properly. Here’s how you can ensure the correct CO2 pressure:
- Start by examining the pressure gauge on the CO2 tank. The gauge will display the current pressure in PSI (pounds per square inch).
- Refer to the specific beer you are serving or consult a beer carbonation chart to determine the recommended pressure. Different beer styles and personal preferences may require different carbonation levels.
- Adjust the pressure on the CO2 regulator if necessary. The regulator is usually located on the top of the CO2 tank and controls the flow of gas into the keg. To increase the pressure, turn the regulator knob clockwise; to decrease it, turn it counterclockwise. Make small adjustments, as even slight changes in pressure can have a significant impact on the pour.
- After adjusting the pressure, give the system some time to stabilize. This will allow the CO2 to fully dissolve into the beer and achieve the desired carbonation level.
- Check the pour by dispensing a small amount of beer. Observe the flow and the amount of foam being produced. If the beer is pouring with excessive foam or is flat, it may be an indication that the CO2 pressure needs further adjustment.
- Continue adjusting the pressure as needed until you achieve the desired carbonation level and a clean pour with minimal foam. It’s important to note that different beers may require different pressures, so be sure to adjust accordingly for each particular brew.
Remember to periodically check the CO2 pressure, especially if you notice changes in the pour quality over time. Factors such as temperature fluctuations or diminishing CO2 levels in the tank can affect the pressure and subsequently the balance of your kegerator.
By paying close attention to the CO2 pressure and making necessary adjustments, you’ll be well on your way to achieving the perfect balance in your kegerator.
Read more: How To Balance Chemicals In A Swimming Pool
Step 2: Adjust Regulator
After checking the CO2 pressure in your kegerator, the next step to achieving the perfect balance is to adjust the regulator. The regulator is responsible for controlling the flow of carbon dioxide (CO2) into the keg, which ultimately affects the carbonation and dispensing of the beer. Here’s how you can adjust the regulator:
- Locate the regulator, which is typically attached to the top of the CO2 tank. The regulator features a dial or knob that allows you to adjust the pressure.
- Make sure to have a proper understanding of the recommended pressure level for the specific beer you are serving. Different beer styles and personal preferences may require different levels of carbonation.
- To increase the pressure, turn the regulator knob clockwise. This will allow more carbon dioxide to flow into the keg, resulting in higher carbonation levels and stronger dispensing pressure.
- To decrease the pressure, turn the regulator knob counterclockwise. This will mitigate the flow of carbon dioxide into the keg, resulting in lower carbonation and weaker dispensing pressure.
- It’s recommended to make small adjustments to the regulator and monitor the effect on the beer pour. Allow the system some time to stabilize after each adjustment to observe the changes.
- Continue adjusting the regulator as needed until you achieve the desired balance and pour. Be mindful not to make drastic changes all at once, as this can lead to overcarbonation or inefficient dispensing.
It’s important to note that finding the ideal regulator setting can sometimes be a process of trial and error. Different beers, kegerator setups, and personal preferences may require different adjustments. Remember to take note of the regulator settings that work best for each beer, as this will help streamline the balancing process for future pours.
By fine-tuning the regulator to achieve the right balance of pressure, you’ll ensure that your kegerator dispenses beer with the optimal carbonation level, resulting in a smooth and enjoyable drinking experience.
To balance your kegerator, adjust the CO2 pressure to achieve the proper carbonation level for your beer style. Use a flow control faucet to control the pour speed and minimize foam.
Step 3: Adjust Beer Line Length
In order to achieve the perfect balance in your kegerator, it’s important to consider the length of your beer lines. The length of the beer lines can impact the flow rate and resistance of the beer, ultimately affecting the quality of the pour. Here’s how you can adjust the beer line length:
- Start by determining the current length of your beer lines. Measure the distance from the keg coupler to the faucet or tap.
- Understand that longer lines create more resistance, resulting in a slower flow rate, while shorter lines offer less resistance and result in a faster flow rate.
- If you’re experiencing excessive foam or sluggish pours, consider increasing the length of the beer lines. This will increase the resistance and allow for a slower flow, reducing the amount of foam produced during dispensing.
- If the pour is too slow or you’re not getting enough beer, you may need to decrease the length of the beer lines. This will reduce the resistance and allow for a faster flow rate, ensuring that you get a proper amount of beer in a reasonable amount of time.
- Make adjustments to the beer line length gradually. Start with small increments, such as adding or removing half a foot of line, and observe the effect on the pour.
- Test the pour after each adjustment to assess the changes. Look for a pour that is smooth, with minimal foam and a consistent flow rate.
- Continue adjusting the beer line length until you achieve the desired balance and pour quality.
It’s important to note that the optimal beer line length may vary depending on factors such as temperature, CO2 pressure, and the specific beer being served. It’s recommended to experiment with different line lengths and take note of the settings that deliver the best results for each beer.
Remember that balancing a kegerator is often a process of trial and error. By adjusting the beer line length, you can fine-tune the flow rate and resistance, resulting in a perfect pour with the right amount of foam and optimal flavor.
Step 4: Temperature Control
Temperature control is a crucial aspect of balancing your kegerator. Proper temperature ensures that your beer tastes its best and maintains the desired carbonation level. Here’s how you can effectively control the temperature in your kegerator:
- Start by checking the temperature inside your kegerator. Use a thermometer to measure the temperature accurately.
- The ideal temperature range for most beers is between 36-40 degrees Fahrenheit (2-4 degrees Celsius). However, specific beer styles may have different temperature requirements, so refer to the recommendations for the beer you’re serving.
- If the temperature is too high, your beer may pour foamy and lose carbonation. Lower the temperature setting in your kegerator by adjusting the thermostat or temperature control dial. Consult the kegerator manual for instructions on how to adjust the temperature.
- If the temperature is too low, your beer may become too cold and lose some of its flavors. Gradually increase the temperature setting to bring it within the optimal range.
- Monitor the temperature over the course of a few hours or even a day to ensure it remains steady.
- Make any necessary adjustments to maintain a consistent temperature within the desired range.
- Remember that fluctuations in temperature can impact the carbonation and overall quality of your beer. Avoid opening the kegerator frequently, as this can cause temperature fluctuations. Also, keep in mind that kegerator settings may need occasional adjustments due to changes in ambient temperature or seasonal variations.
By maintaining the appropriate temperature in your kegerator, you can ensure that your beer pours perfectly with the right balance of carbonation and flavors. A well-controlled temperature will contribute to a delightful beer-drinking experience and preserve the quality of your brew.
Step 5: Maintain Proper Cleaning and Maintenance
Maintaining proper cleaning and maintenance practices is essential to keep your kegerator in optimal condition and ensure a balanced pour. Regular cleaning helps prevent the buildup of contaminants, bacteria, and off-flavors that can affect the taste and quality of your beer. Here are the steps to maintain proper cleaning and maintenance:
- Clean Beer Lines: Start by cleaning the beer lines regularly. Disconnect the beer lines from the keg coupler and faucet. Flush the lines with a cleaning solution specifically formulated for beer lines, following the instructions on the product. Rinse the lines thoroughly with clean water after cleaning.
- Clean Faucet and Tap: Take apart the faucet and tap components according to the manufacturer’s instructions. Soak the parts in a cleaning solution or use a beer line cleaning brush to remove any residue or debris. Rinse the parts thoroughly and reassemble them.
- Replace O-rings: Inspect the O-rings on the keg coupler, faucet, and tap regularly. If you notice any signs of wear or damage, replace them to ensure a proper seal and prevent leaks.
- Sanitize Kegs: Clean and sanitize the kegs before filling them with beer. Use a brewery-approved sanitizer to eliminate any bacteria or contaminants. Follow the recommended contact time and rinse the kegs thoroughly with clean water before use.
- Regular Deep Cleaning: In addition to regular cleaning of the beer lines and components, perform a deep cleaning of your kegerator every few months. Empty the kegerator and remove all keg couplers, faucets, and tap handles. Wipe down the interior with a mild detergent and warm water. Rinse thoroughly and allow the kegerator to air dry before reassembling.
- Keep CO2 Tank and Regulator Clean: Regularly inspect and clean the CO2 tank and regulator to remove any dust or debris that may affect their performance. Avoid placing the CO2 tank near sources of heat, as it can cause the pressure inside the tank to fluctuate.
By following these cleaning and maintenance practices, you’ll ensure that your kegerator operates at its best and produces a balanced and high-quality pour. Regular cleaning not only maintains the taste of your beer but also extends the lifespan of your kegerator and its components.
Remember to consult the manufacturer’s guidelines and instructions for specific cleaning recommendations for your kegerator model. By incorporating proper cleaning and maintenance into your routine, you can enjoy your favorite brews with confidence and always have a well-balanced pour.
Read more: How To Balance A Lawnmower Blade
Tips and Tricks for Balancing a Kegerator
Balancing a kegerator can be a nuanced process, but with the right tips and tricks, you can achieve a perfect pour every time. Here are some helpful suggestions to enhance your kegerator balancing skills:
- Keep a Balancing Journal: Maintain a journal or record of the adjustments you make while balancing your kegerator. Note the CO2 pressure, regulator settings, beer line lengths, and any other changes you make. This will help you track what works best for each beer and make adjustments more efficiently in the future.
- Experiment with Pressure and Temperature: Don’t be afraid to experiment with different CO2 pressures and temperature settings to find the optimal balance for each beer style. Sometimes, slight adjustments can make a significant difference in the pour and flavor profile of your beer.
- Invest in Quality Equipment: Using high-quality equipment, including well-designed regulators, faucets, and beer lines, can make the balancing process easier and yield better results. Investing in professional-grade components can enhance the overall performance and longevity of your kegerator.
- Avoid Overcarbonation: Be cautious not to overcarbonate your beer, as this can lead to excessive foam and an unpleasant drinking experience. Start with lower CO2 pressure settings and gradually increase if necessary, taking note of the carbonation levels that suit your preferences and the beers you’re serving.
- Regularly Check for Leaks: Leaks can disrupt the balance of your kegerator and lead to inefficient pours. Regularly check all connections, including the CO2 tank, regulator, and beer lines, for any signs of leaks. Apply a soapy water solution to identify any bubbles, and tighten or replace any components as needed.
- Don’t Neglect Line Cleaning: Regularly clean your beer lines to prevent buildup and maintain the flavor and quality of your beer. In addition to routine cleaning, consider implementing a regular line-cleaning schedule to ensure consistent performance.
- Consider a Flow Control Faucet: Flow control faucets give you more control over the speed and flow of beer, making it easier to achieve a balanced pour. These faucets allow you to adjust the flow rate directly on the tap, reducing the need for extensive adjustments to CO2 pressure or beer line length.
Remember, balancing a kegerator takes time, patience, and practice. It’s important to understand that different beers may require different balancing techniques due to varying carbonation levels and dispensing preferences. With these tips and tricks, along with your own experimentation, you’ll become adept at balancing your kegerator and serving the perfect pint every time.
Conclusion
Balancing a kegerator is a crucial step in ensuring that you can enjoy a perfectly poured, well-carbonated beer with every sip. By understanding the basics of kegerators, the importance of balance, and following the steps outlined in this article, you can achieve the ideal equilibrium between CO2 pressure and beer line resistance.
Remember to check the CO2 pressure and adjust the regulator accordingly to achieve the desired carbonation level. Adjust the beer line length to control the flow rate and resistance, and maintain a consistent temperature to preserve the quality of your beer. Regular cleaning and maintenance will keep your kegerator in optimal condition and prevent any issues that may affect the balance of your pours.
As you go through the process of balancing your kegerator, keep in mind the tips and tricks shared in this article. They will help you refine your technique and troubleshoot any challenges along the way. Don’t be afraid to experiment and make adjustments based on your personal preferences and the specific beer styles you are serving.
With a well-balanced kegerator, you can impress your family and friends, and enjoy that pub-like experience in the comfort of your own home. So, grab your favorite beer, fine-tune your kegerator, and savor every sip of the perfectly poured brew. Cheers!
Frequently Asked Questions about How To Balance Kegerator
Was this page helpful?
At Storables.com, we guarantee accurate and reliable information. Our content, validated by Expert Board Contributors, is crafted following stringent Editorial Policies. We're committed to providing you with well-researched, expert-backed insights for all your informational needs.





0 thoughts on “How To Balance Kegerator”