Articles
How To Balance Garage Door
Modified: October 28, 2024
Learn the best methods to balance your garage door with our informative articles. Achieve smooth and efficient operation for your garage door.
(Many of the links in this article redirect to a specific reviewed product. Your purchase of these products through affiliate links helps to generate commission for Storables.com, at no extra cost. Learn more)
Introduction
Having a garage door that is properly balanced is essential for its smooth operation and longevity. A balanced garage door not only ensures easy opening and closing but also prevents excessive strain on the door opener and other components. If your garage door is showing signs of imbalance, it’s important to address the issue promptly to avoid further damage.
In this article, we will guide you through the process of balancing a garage door. We will discuss how to identify signs of imbalance and provide step-by-step instructions for adjusting the springs to achieve optimal balance. But before we delve into the details, let’s first understand the concept of garage door balance.
Key Takeaways:
- Maintaining a balanced garage door is crucial for smooth operation, longevity, and safety. Signs of imbalance include difficulty opening, uneven movement, and gaps. Prioritize safety and seek professional help if unsure.
- Balancing a garage door involves testing, adjusting springs, and reconnecting to the opener. Safety precautions are essential, and regular maintenance ensures optimal functionality and prolongs the door’s lifespan.
Read more: How To Maintain Garage Door
Understanding Garage Door Balance
Garage door balance refers to the distribution of weight across the door system. It is crucial for the garage door to be properly balanced to ensure smooth and effortless operation. When a garage door is balanced, it can be easily opened and closed manually, without any excessive force.
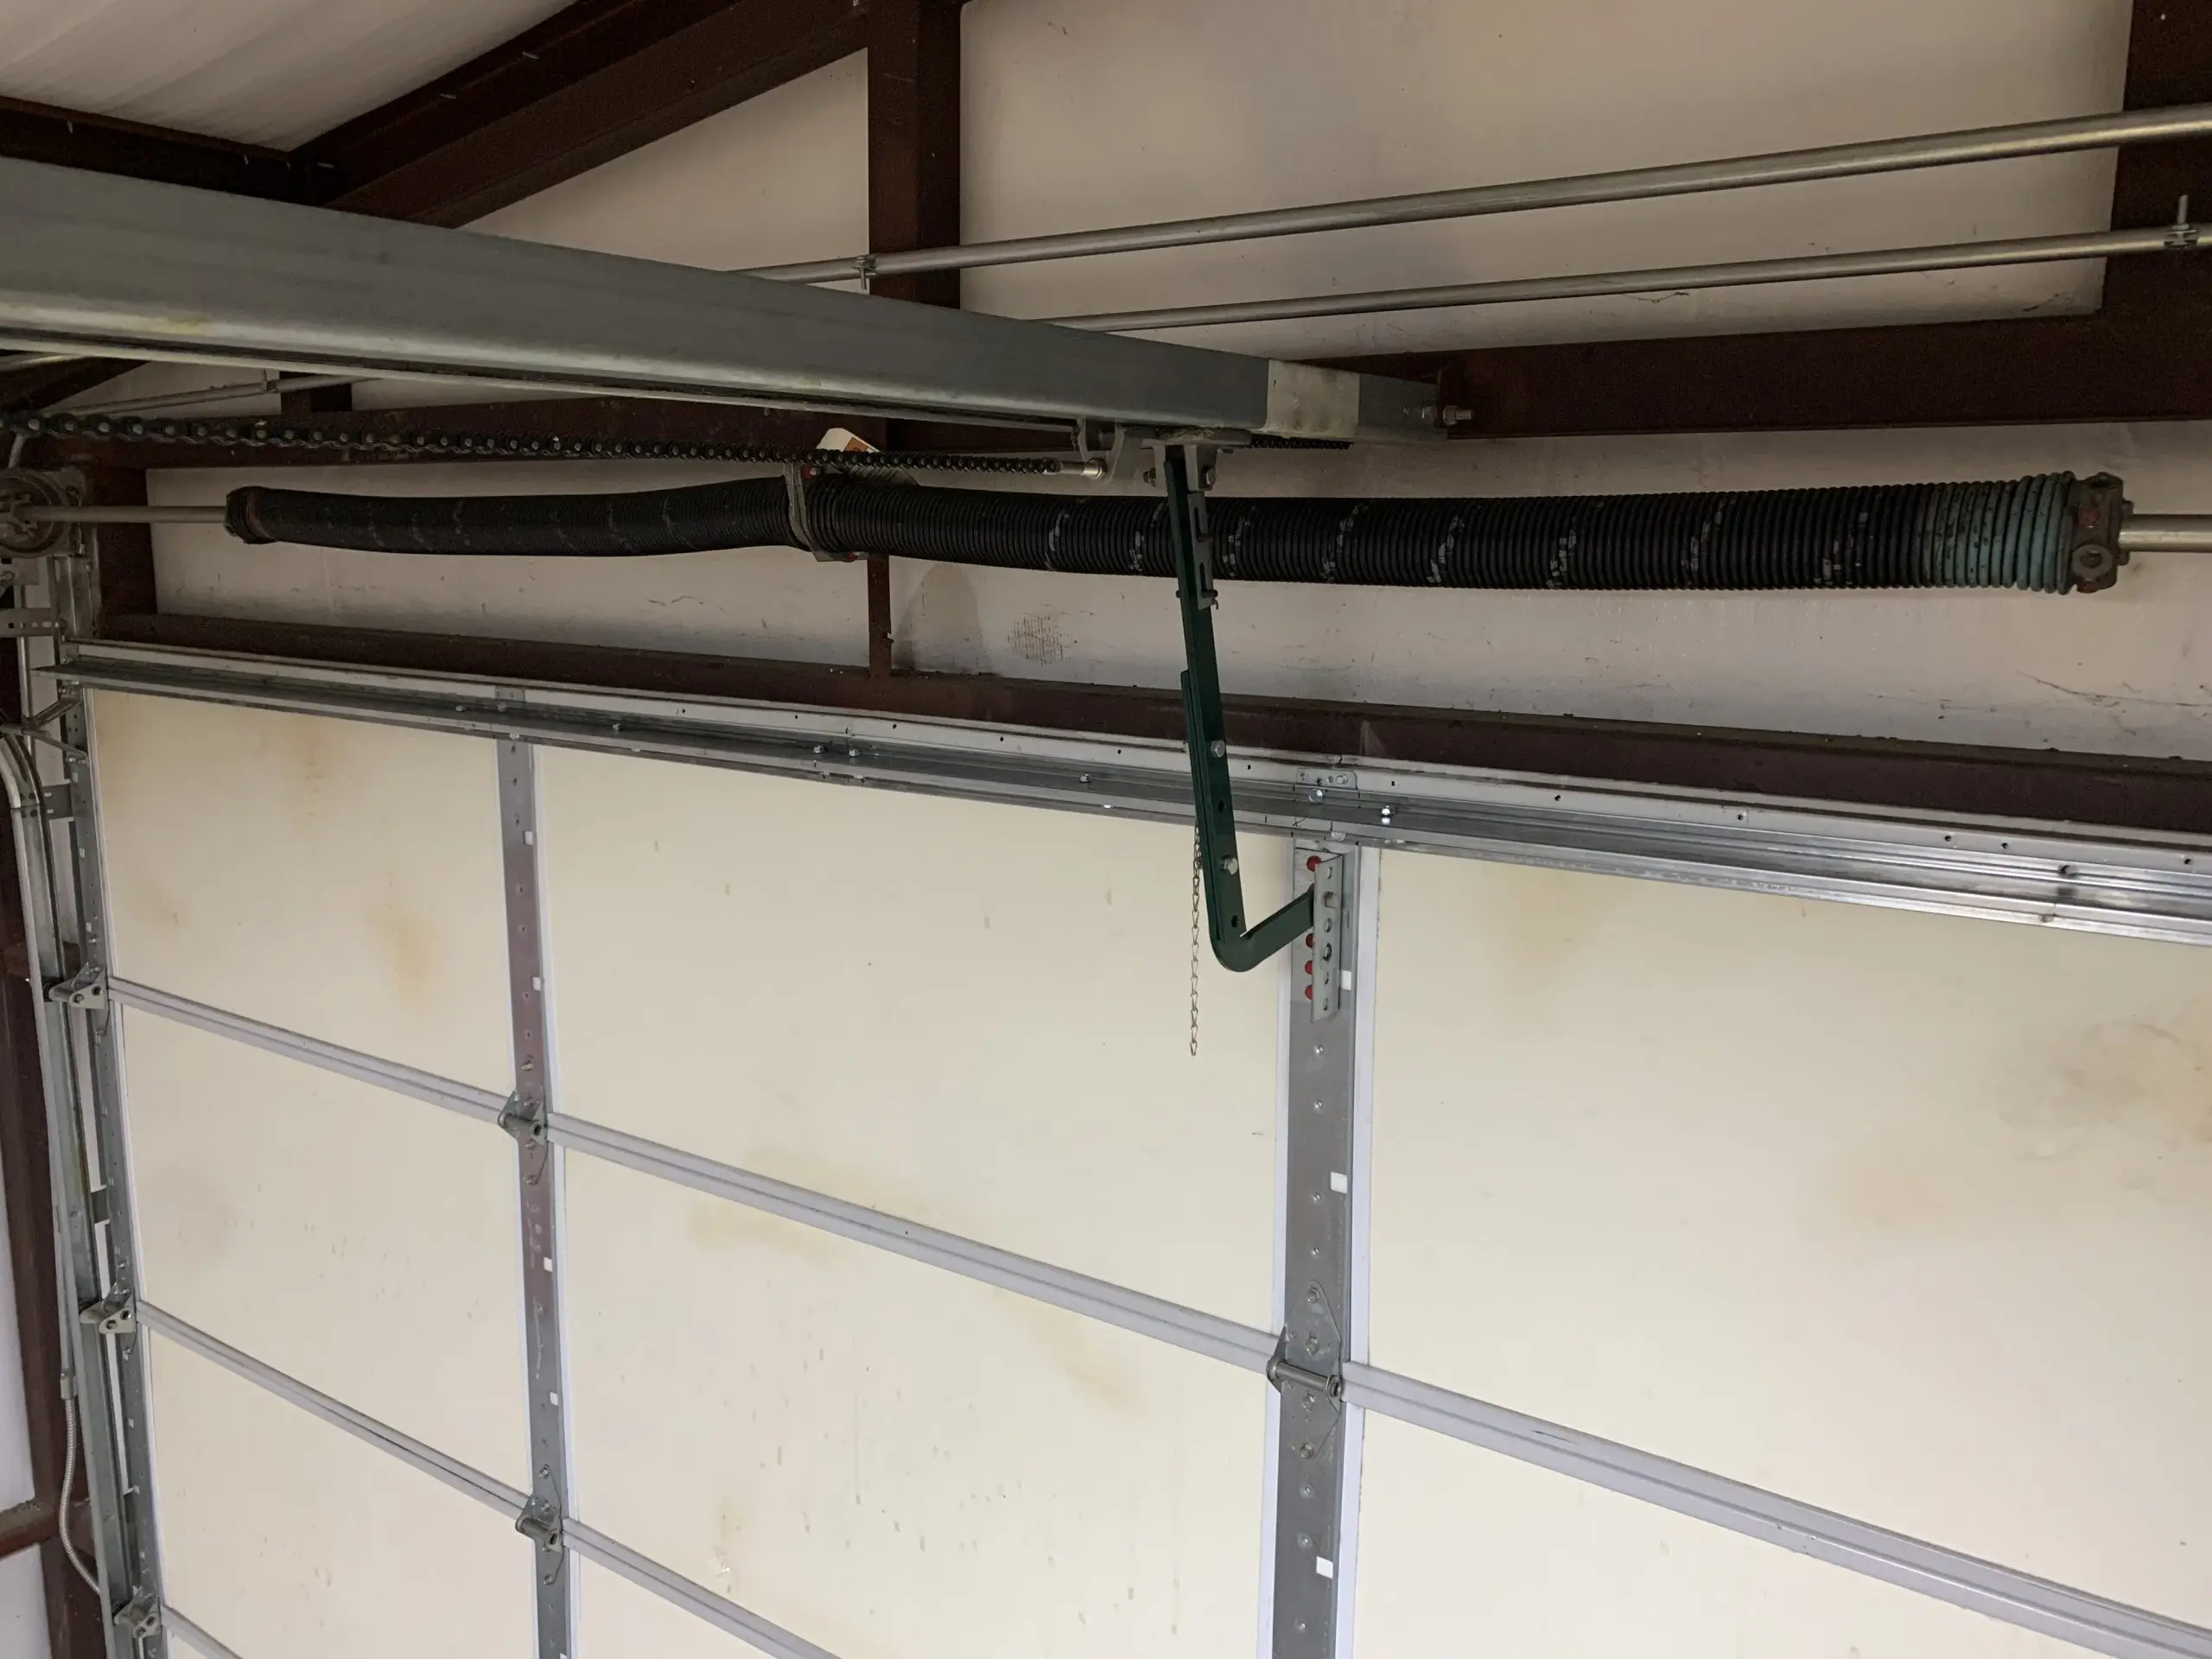
A garage door consists of various components, including the springs, cables, rollers, and tracks. The springs, in particular, play a critical role in balancing the door. There are two types of springs commonly used in garage doors: extension springs and torsion springs. Extension springs are typically found on one or both sides of the door, while torsion springs are installed directly above the door.
The purpose of the springs is to counterbalance the weight of the door, making it easier to open and close. When the door is properly balanced, the springs are under the right amount of tension, providing the necessary support. However, if the springs are either too loose or too tight, the door will become imbalanced.
An imbalanced garage door can cause a range of issues. If the door is too heavy on one side, it may slam shut or open unevenly. This can put stress on the opener and other components, potentially leading to premature wear and tear. On the other hand, if the door is too light on one side, it may not close properly, leaving a gap that compromises security and energy efficiency.
Understanding the importance of garage door balance is the first step in maintaining the functionality and longevity of your door. In the next section, we will explore the signs that indicate an imbalanced garage door.
Signs of an Imbalanced Garage Door
An imbalanced garage door can be problematic and potentially dangerous if left unaddressed. It’s crucial to be aware of the signs that indicate your garage door is not properly balanced. Here are some common signs to look out for:
- Difficulty Opening or Closing: If you find that your garage door is becoming increasingly difficult to open or close manually, it could be a sign of imbalance. An imbalanced door may require excessive force to operate, making it cumbersome and frustrating.
- Uneven Door Movement: Observe the movement of your garage door as it opens or closes. If you notice that one side is moving faster than the other or that the door is tilting to one side, it indicates an imbalance. This can be caused by uneven tension in the springs or issues with the rollers and tracks.
- Noise and Jerky Movement: An imbalanced garage door can create unusual noises during operation. You may hear grinding or screeching sounds as the door moves, indicating that certain components are under stress. Additionally, the door may exhibit jerky or uneven movement, further emphasizing the need for balance adjustment.
- Gaps and Misalignment: Take a close look at the gaps around your garage door when it is closed. If you notice uneven or inconsistent gaps between the door and the ground, it suggests that the door is not sitting evenly. This misalignment can compromise the security and insulation of your garage.
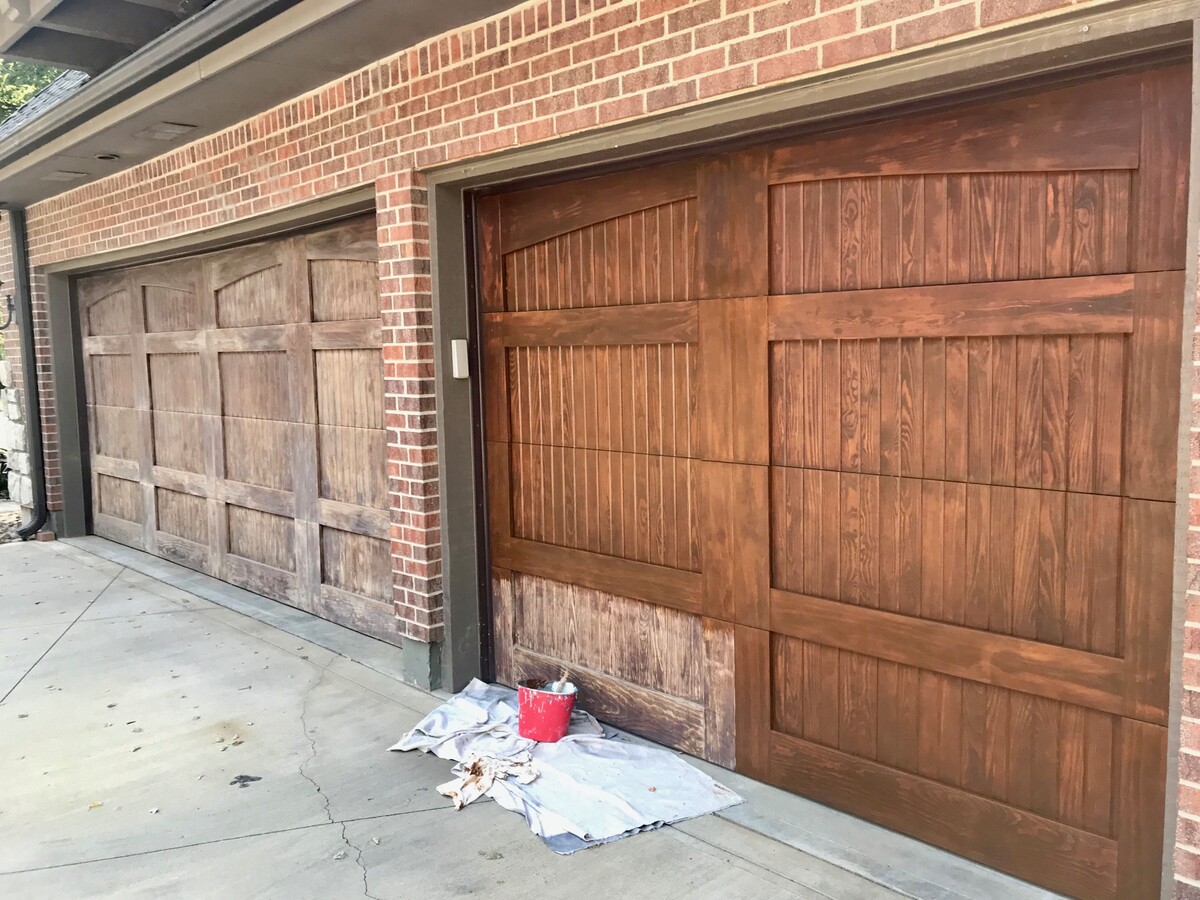
- Sagging or Bulging: Inspect the physical appearance of the garage door. If you notice any sagging or bulging in certain areas, it indicates an imbalance. This can occur when the springs are not distributing the weight evenly, causing excessive strain on specific sections of the door.
If you observe any of these signs, it’s essential to take action to rebalance your garage door. Ignoring the problem can lead to further damage to the door and its components, potentially resulting in costly repairs. In the next section, we will outline the tools and equipment you will need to balance your garage door effectively.
Tools and Equipment Needed
Before you begin the process of balancing your garage door, it’s important to gather the necessary tools and equipment. Having the right tools will make the process smoother and more efficient. Here is a list of the essential items you will need:
- Adjustable Wrench: An adjustable wrench is a versatile tool that will be useful for adjusting the tension in the springs and other hardware.
- Safety Glasses: Safety glasses are essential to protect your eyes from any debris or flying objects while working on your garage door.
- Step Ladder: A sturdy step ladder will allow you to safely reach and access the various parts of your garage door system.
- Socket Wrench Set: A socket wrench set is needed to loosen and tighten the nuts and bolts on the garage door hardware.
- Safety Gloves: Safety gloves will protect your hands from sharp edges, pinch points, and other potential hazards.
- Tape Measure: A tape measure will be useful for taking measurements and ensuring that the spring tension is properly adjusted.
- Marker or Labeling Tape: Having a marker or labeling tape will make it easier to mark and identify the original positions of the springs and hardware.
It’s important to note that working with garage door components can be dangerous, so it’s crucial to prioritize safety. Make sure to wear safety glasses and gloves throughout the process and exercise caution when handling tools and equipment. If you’re unsure about any step or don’t have the necessary experience, it’s always best to consult a professional garage door technician.
Now that you have gathered all the required tools and equipment, it’s time to familiarize yourself with some essential safety precautions before starting the balancing process. We will cover these precautions in the next section.
Safety Precautions
Working on a garage door involves dealing with heavy components and potentially high tension springs. To ensure your safety and avoid injuries, it is important to follow these safety precautions:
- Disconnect the Power: Before you start working on your garage door, disconnect the power to the opener. This will prevent any accidental operation of the door while you’re working on it.
- Wear Protective Gear: Always wear safety glasses and gloves to protect your eyes and hands from debris and potential hazards.
- Use Proper Lifting Techniques: When lifting and maneuvering heavy garage door components, use proper lifting techniques, such as bending at the knees and not at the waist, to avoid straining your back.
- Secure the Door: Ensure that the garage door is securely supported and stable before attempting any adjustments. If possible, use clamps or blocks to hold the door in place.
- Do Not Adjust Tension Beyond Your Skill Level: Adjusting the tension in the springs can be dangerous if done incorrectly. If you’re not confident in your abilities or lack experience, it’s best to leave this task to a professional garage door technician.
- Be Mindful of Cables and Wires: Pay attention to the cables and wires connected to the garage door opener. Avoid any contact or entanglement with these components.
- Consult the Manufacturer’s Instructions: Refer to the manufacturer’s instructions or user manual for your specific garage door model. These instructions often provide valuable safety information and guidance on maintenance procedures.
- Do Not Work Alone: It’s always recommended to have someone else present while working on your garage door. They can assist you if needed and provide an extra level of safety.
By following these safety precautions, you can minimize the risk of accidents and ensure a safer working environment. Now that you’re aware of the safety measures, let’s move on to the step-by-step process of balancing your garage door.
Read more: How To Remove A Garage Door
Step 1: Disconnect the Door from the Opener
Before you begin balancing your garage door, it’s important to disconnect the door from the opener to ensure your safety. This will prevent any accidental activation of the opener while you’re working on the door. Follow these steps to disconnect the door:
- Switch off the Power: Locate the power source for your garage door opener and switch it off. This may involve unplugging the opener or flipping the circuit breaker that controls the power.
- Locate the Emergency Release Handle: Look for the emergency release handle on the track or carriage of your garage door opener. It is usually a red cord or handle hanging from the opener mechanism.
- Pull the Emergency Release Handle: Slowly and firmly pull the emergency release handle downward or away from the opener. This will disengage the trolley from the opener carriage.
- Manually Move the Door: Once the door is disconnected from the opener, test its movement by manually lifting and lowering it. It should move smoothly without any resistance or binding.
By disconnecting the door from the opener, you eliminate the risk of the opener being activated accidentally while you’re working on the door. This step ensures a safe working environment and allows you to assess the balance of the garage door more accurately.
Once you have disconnected the door from the opener, you can proceed to the next step, which involves testing the balance of the garage door. We will cover this step in detail in the following section.
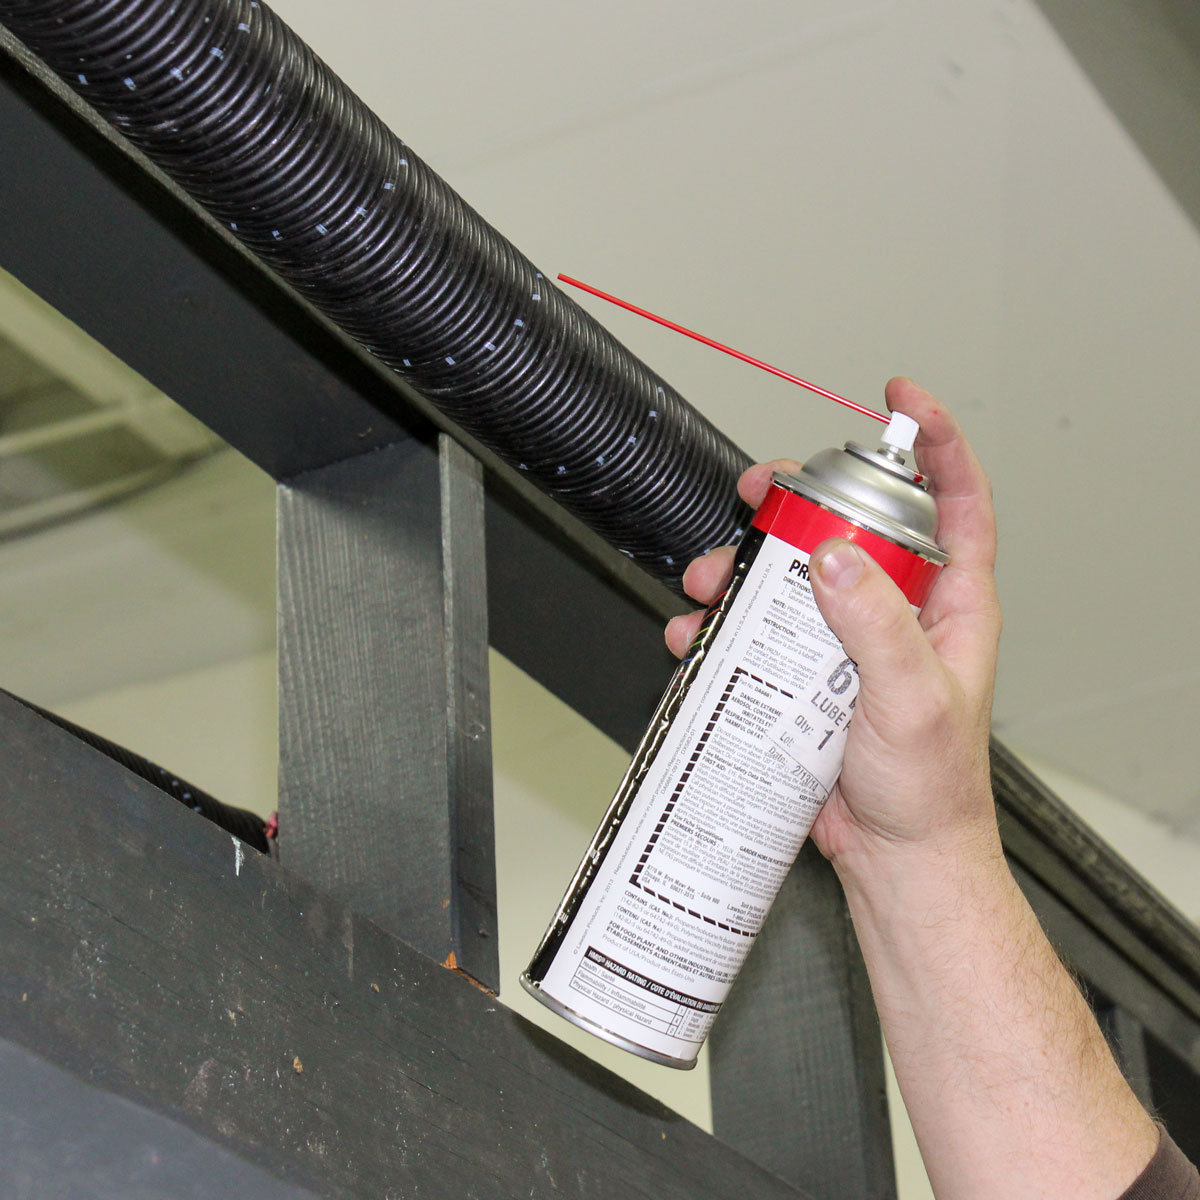
Regularly lubricate the moving parts of your garage door, such as the tracks, rollers, and hinges, to ensure smooth operation and prevent excessive wear and tear.
Step 2: Test the Balance of the Garage Door
In this step, you will assess the balance of your garage door to determine whether it is imbalanced and in need of adjustment. Here’s how you can test the balance:
- Close the Garage Door: Lower the garage door completely and ensure that it is fully closed and latched.
- Step Back and Observe: Stand back and visually inspect the garage door. Look for any signs of imbalance, such as one side of the door sitting higher than the other or an obvious tilt.
- Manually Lift the Door: Standing inside the garage, grip the bottom of the door with both hands and attempt to manually lift it. Pay attention to how easy or difficult it is to lift the door and whether it remains relatively level or starts to tilt to one side.
- Lower the Door: Carefully lower the door back down, ensuring that it is fully closed and latched once again.
During the testing process, it’s important to note the following observations:
- If the door feels excessively heavy and requires significant force to lift, it is a sign that the door is imbalanced and the springs may need adjustment.
- If the door tilts or starts to move unevenly when lifted manually, it indicates an imbalance issue.
- A balanced door should lift easily without excessive force and remain relatively level as it is lifted.
By conducting this simple balance test, you can determine if your garage door is indeed imbalanced. If any of the mentioned signs are present, you can proceed to the next step, which involves adjusting the springs to achieve proper balance. We will discuss this step in detail in the following section.
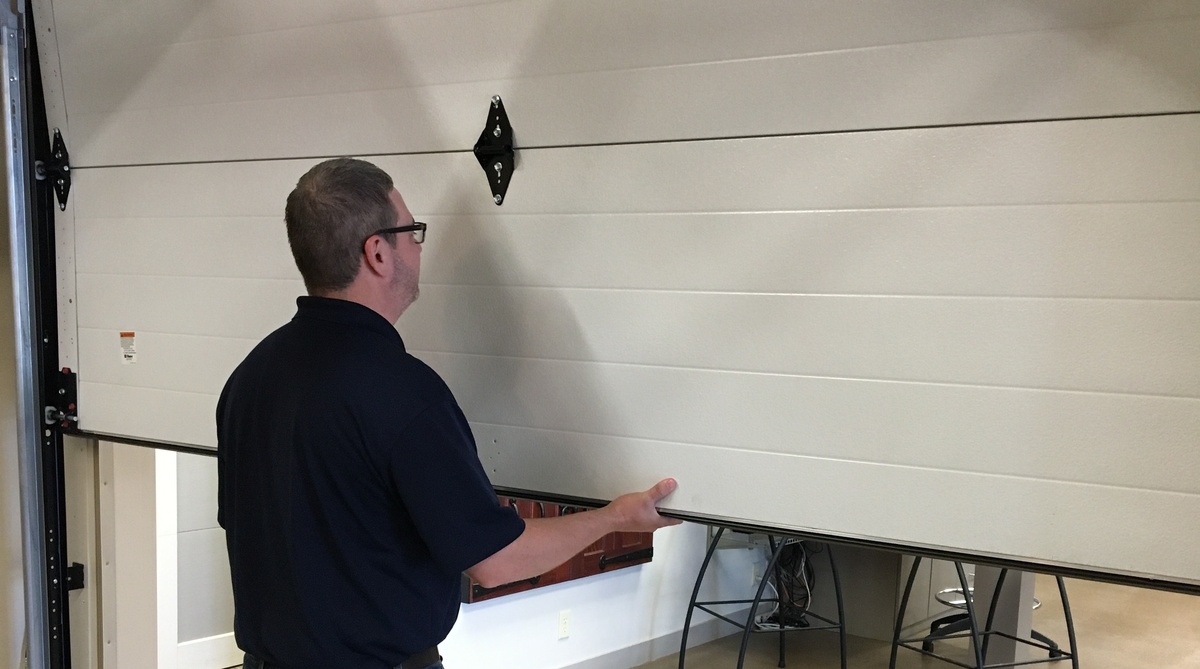
Step 3: Adjusting the Springs
Adjusting the springs is a crucial step in balancing your garage door. The springs counterbalance the weight of the door, and if they are not properly adjusted, the door will remain imbalanced. Here’s how you can adjust the springs:
- Identify the Type of Springs: Determine whether your garage door has extension springs or torsion springs. Extension springs are located on the sides of the door, while torsion springs are mounted horizontally above the door.
- Extension Springs: If your door has extension springs, use an adjustable wrench to loosen the set screws on the side of the springs. Gradually increase the tension by adjusting the position of the S-hooks or by adding or removing spring tension. This can be done by moving the S-hook to a higher or lower hole on the bracket.
- Torsion Springs: If your door has torsion springs, use a socket wrench to loosen the set screws on the torsion spring cones. To increase tension, turn the cone in the direction that tightens the spring. Be cautious while adjusting torsion springs, as they are under high tension and should only be adjusted by experienced individuals.
- Gradual Adjustments: Make small adjustments to the springs and test the balance of the door after each adjustment. It may take a few iterations to achieve the desired balance.
- Equal Tension: Ensure that the tension is equal on both sides of the door. The springs should be adjusted in a way that the door opens and closes smoothly, without any tilting or uneven movement.
- Keep Track of Adjustments: As you make adjustments, mark the original positions of the springs and hardware. This will allow you to revert any changes if needed and ensure that everything is properly aligned.
It’s important to note that adjusting garage door springs can be dangerous, especially for torsion springs. If you’re inexperienced or uncomfortable with this task, it’s highly recommended to seek the assistance of a professional garage door technician. They have the necessary knowledge and tools to safely adjust the springs and balance your garage door.
Once you have made the necessary adjustments to the springs, you can move on to reconnecting the door to the opener, which we will discuss in the next step.
Step 4: Reconnect the Door to the Opener
After adjusting the springs to achieve the proper balance of your garage door, it’s time to reconnect the door to the opener. Follow these steps to reconnect the door:
- Ensure the Door is Closed: Make sure that the garage door is completely closed and latched before proceeding.
- Locate the Emergency Release Handle: Find the emergency release handle on the track or carriage of the garage door opener. It should be in the same position where you pulled it to disconnect the door.
- Move the Emergency Release Handle: Push the emergency release handle back into its original position. This will re-engage the trolley with the opener carriage.
- Test the Opener: Once the door is reconnected to the opener, test the garage door opener to ensure that it operates smoothly and without any issues. Use the wall button or the remote control to open and close the door.
During the testing process, pay attention to any unusual noises or jerky movements of the door. If you notice any issues, double-check the adjustments you made to the springs and ensure they are properly set. It may be necessary to make further adjustments to achieve optimal balance.
Reconnecting the door to the opener concludes the balancing process. However, it is important to test the balance of the door once again to ensure that it is functioning properly. We will cover this final step in the next section.
Read more: How To Make A Garage Door
Step 5: Test the Balance Again
After completing the adjustments and reconnecting the garage door to the opener, it’s crucial to test the balance of the door once again. This final step allows you to verify that the door is properly balanced and operating smoothly. Follow these steps to test the balance:
- Close the Garage Door: Ensure that the garage door is fully closed and latched.
- Step Back and Observe: Stand back and visually inspect the garage door. Look for any signs of imbalance, such as uneven gaps, tilting, or a crooked appearance.
- Manually Lift the Door: Inside the garage, grip the bottom of the door with both hands and attempt to manually lift it. The door should lift easily and smoothly, without excessive force or any tilting to one side.
- Lower the Door: Carefully lower the door back down, ensuring that it is fully closed and latched.
During the testing process, note the following observations:
- A properly balanced garage door should open and close smoothly, without any resistance or uneven movement.
- The bottom of the door should remain level and parallel to the ground throughout its opening and closing cycles.
- If any signs of imbalance or irregularities persist, it may be necessary to make further adjustments to the springs or consult a professional garage door technician.
By conducting a final balance test, you can ensure that your garage door is functioning optimally and efficiently. A balanced door not only prolongs the lifespan of the door and its components but also improves the overall safety and convenience of its operation.
With the completion of the testing, you have successfully balanced your garage door. In the next section, we will conclude our article and recap the importance of maintaining a balanced garage door.
Conclusion
Balancing your garage door is essential for its smooth operation, longevity, and overall safety. An imbalanced garage door can lead to various issues, including difficulty in opening and closing, uneven movements, and increased strain on the door opener and other components.
In this article, we have provided a comprehensive guide on how to balance your garage door. We covered the importance of garage door balance, signs of an imbalanced door, the tools and equipment needed for the task, important safety precautions to follow, and the step-by-step process to adjust the springs and reconnect the door to the opener.
It is crucial to approach the balancing process with caution and prioritize your safety. If you are unsure or uncomfortable with any step of the process, it is always recommended to seek the assistance of a professional garage door technician who has the expertise and experience to handle the task effectively.
By maintaining a properly balanced garage door, you can ensure its smooth and effortless operation, minimize unnecessary strain on the opener and other components, and prolong the lifespan of the door. Regularly testing the balance of your garage door and making any necessary adjustments will help you catch and address any issues before they become more severe.
Remember, a balanced garage door not only enhances convenience but also improves the overall safety and security of your home. So, don’t overlook the importance of garage door balance and take the necessary steps to keep your door in optimal condition.
Frequently Asked Questions about How To Balance Garage Door
Was this page helpful?
At Storables.com, we guarantee accurate and reliable information. Our content, validated by Expert Board Contributors, is crafted following stringent Editorial Policies. We're committed to providing you with well-researched, expert-backed insights for all your informational needs.


0 thoughts on “How To Balance Garage Door”