Articles
How To Bolt A Toilet To The Floor
Modified: October 18, 2024
Learn the step-by-step process of bolting a toilet to the floor with this comprehensive article. Gain valuable insights and tips for a secure installation.
(Many of the links in this article redirect to a specific reviewed product. Your purchase of these products through affiliate links helps to generate commission for Storables.com, at no extra cost. Learn more)
Introduction
When it comes to installing a toilet, one of the most important steps is to properly secure it to the floor. A secure toilet not only prevents wobbling or shifting, but it also ensures a watertight seal, preventing leaks and potential damage to your bathroom floor. Bolting a toilet to the floor is a straightforward process that can be done with a few tools and materials.
In this guide, we will walk you through the steps to properly bolt a toilet to the floor. Whether you are installing a new toilet or repositioning an existing one, this article will provide you with the knowledge and techniques to do the job correctly.
Before we dive into the steps, let’s quickly go over the tools and materials you will need:
- Adjustable wrench
- Socket wrench
- Screwdriver
- Toilet bolts
- Toilet wax ring
- Plumber’s putty
- Level
With these tools and materials on hand, you’ll be ready to tackle the task of bolting your toilet securely to the floor. So, let’s get started!
Key Takeaways:
- Properly bolting a toilet to the floor is essential for stability and leak prevention. Follow step-by-step instructions to ensure a secure and reliable toilet installation in your bathroom.
- Take the time to gather the necessary tools and materials before bolting your toilet to the floor. Proper preparation and attention to detail will result in a successful and long-lasting installation.
Read more: How To Bolt Safe To Floor
Tools and Materials Needed
Before you begin the process of bolting a toilet to the floor, it’s important to gather all the necessary tools and materials. Having everything ready beforehand will save you time and ensure a smooth installation process. Here’s a list of the tools and materials you’ll need:
Tools:
- Adjustable wrench: You’ll need this to disconnect the water supply line and remove the old bolts.
- Socket wrench: This will be used to tighten the new toilet bolts securely.
- Screwdriver: You may need a screwdriver to remove any screws or bolts holding the toilet seat in place.
- Level: This tool will help you ensure that the toilet is perfectly level once it’s installed.
Materials:
- Toilet bolts: These are the long bolts that will anchor the toilet to the floor.
- Toilet wax ring: The wax ring creates a watertight seal between the toilet flange and the toilet base.
- Plumber’s putty: This can be used to create a waterproof seal around the base of the toilet.
Having these tools and materials ready will make the process of bolting your toilet to the floor much easier. It’s always a good idea to double-check that you have everything you need before you begin, so you don’t have to pause the installation to go grab something.
Now that you have all the necessary tools and materials, we can move on to the step-by-step process of bolting your toilet to the floor. So, let’s get started!
Step 1: Remove the Existing Toilet
The first step in bolting a toilet to the floor is to remove the existing toilet. This is necessary whether you are installing a new toilet or repositioning an old one. Here’s how to do it:
- Turn off the water supply: Locate and turn off the water supply valve behind the toilet. You can do this by turning the valve clockwise.
- Flush the toilet: This will remove most of the water from the toilet bowl and tank.
- Remove the water supply line: Take an adjustable wrench and disconnect the water supply line from the bottom of the toilet tank. Place a bucket or towels underneath to catch any excess water.
- Remove the toilet tank: Use a screwdriver or a socket wrench to remove the bolts securing the toilet tank to the bowl. Carefully lift the toilet tank off and set it aside.
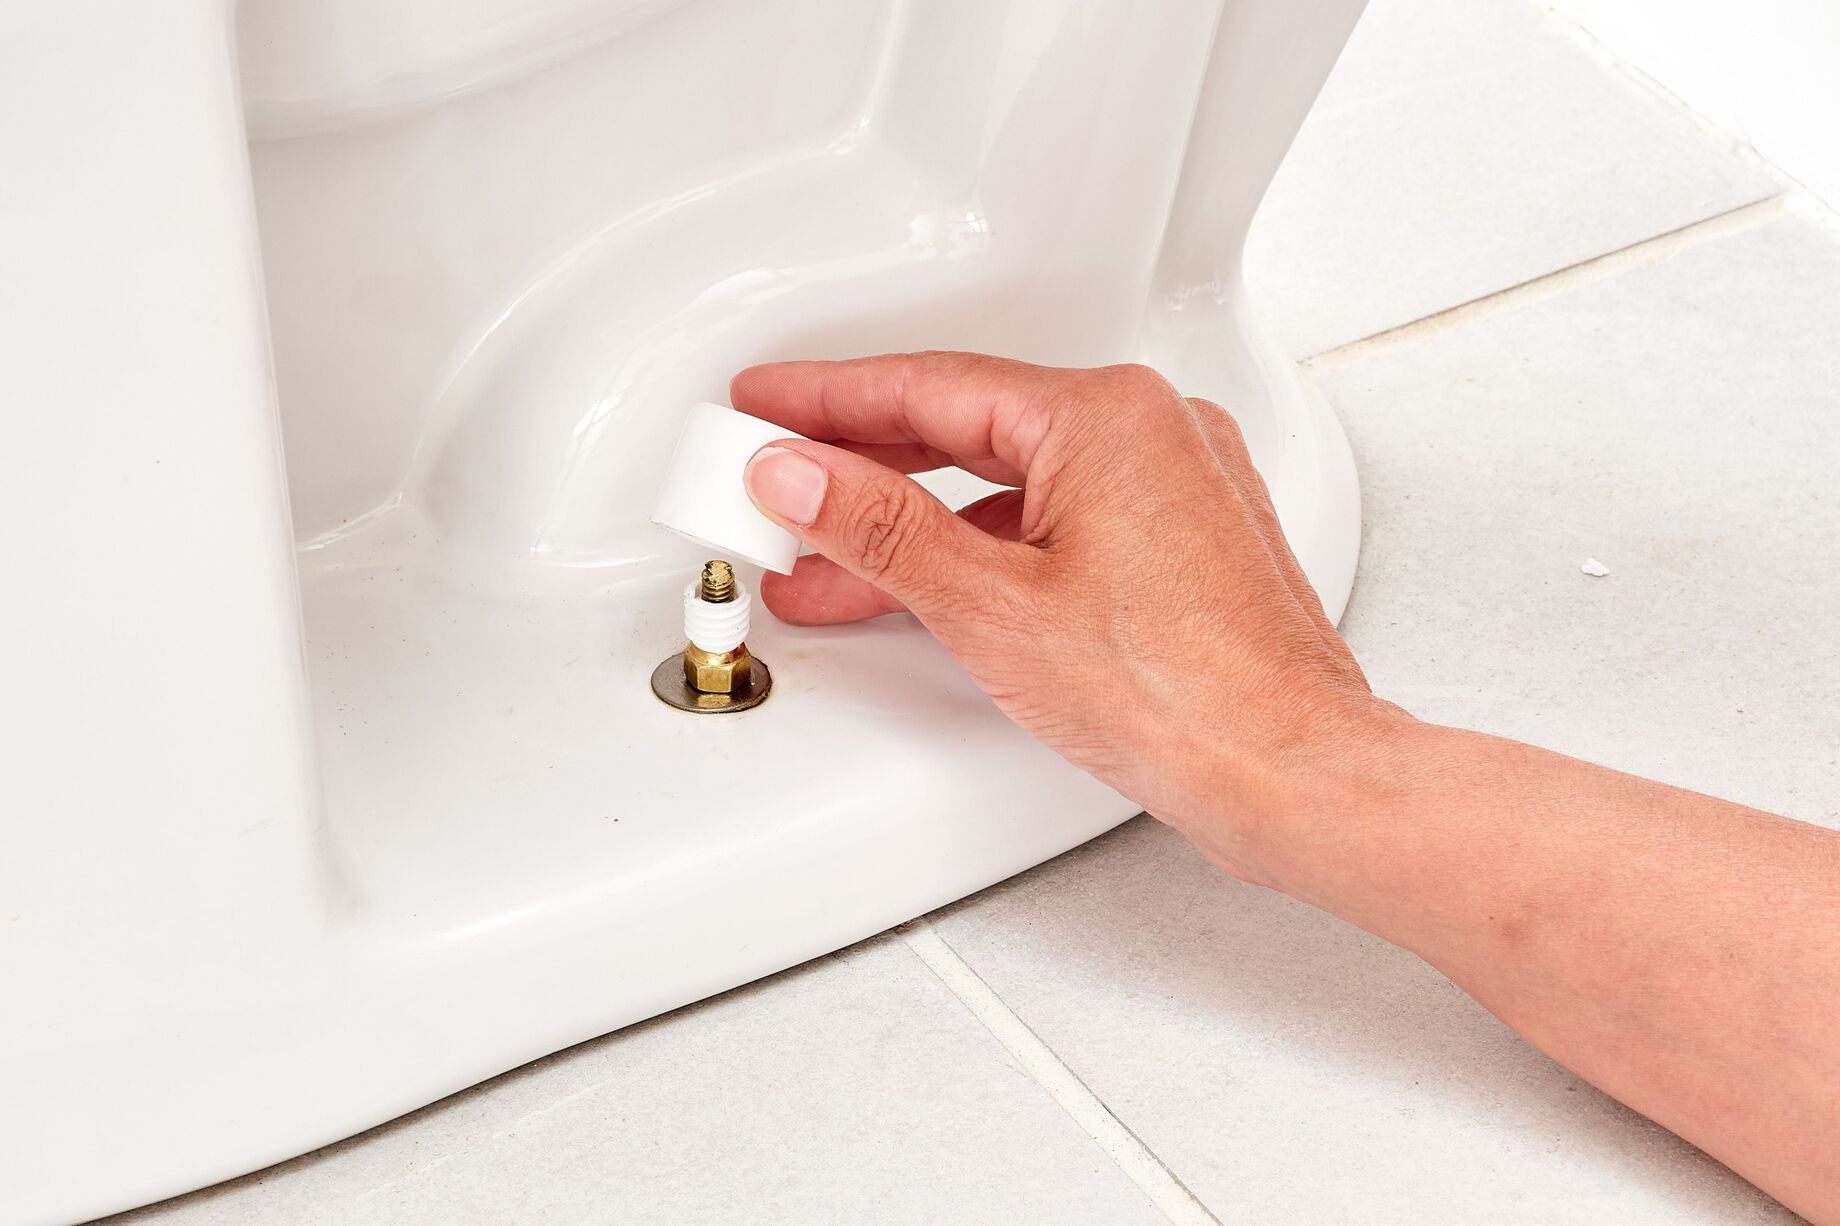
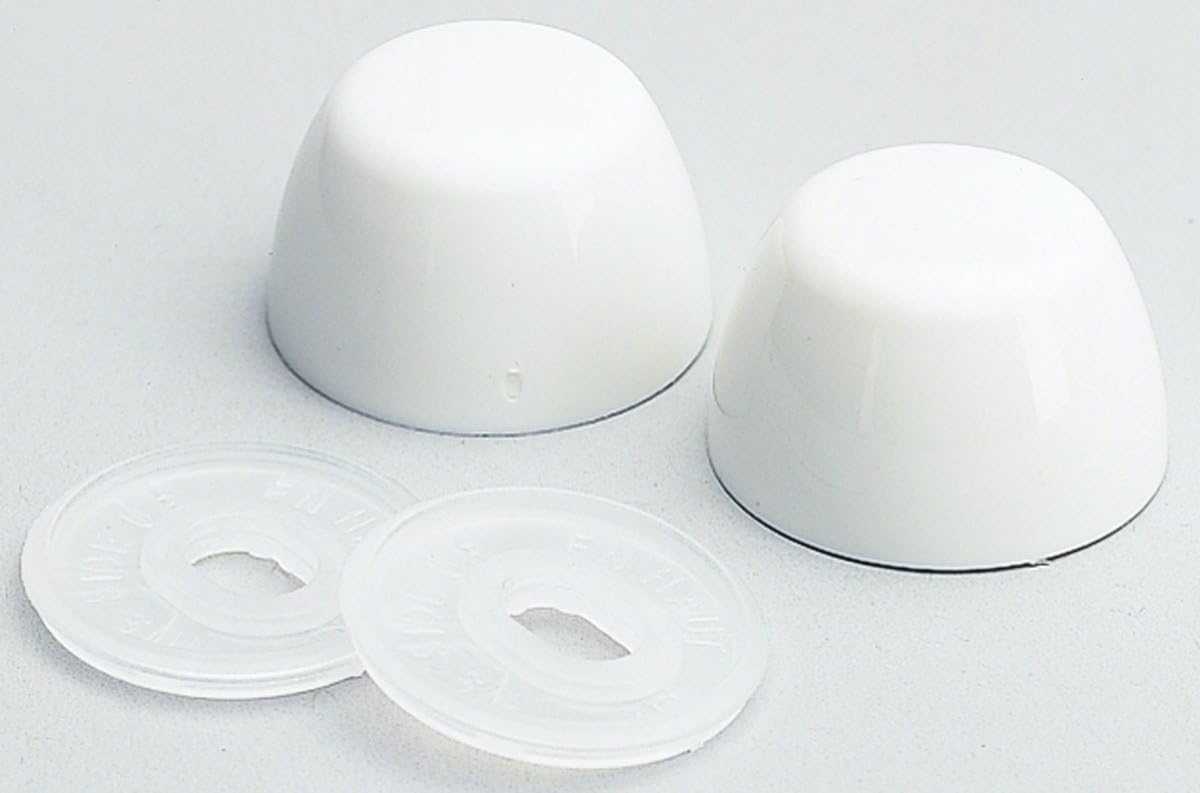
- Remove the toilet bowl: Locate the bolts at the base of the toilet bowl. These bolts may be covered by decorative caps that you can pry off with a flathead screwdriver. Use a socket wrench or an adjustable wrench to loosen and remove these bolts.
- Lift off the toilet bowl: With the bolts removed, carefully lift the toilet bowl straight up and away from the floor. It may be helpful to have a second person assist you with this step, as toilets can be heavy and awkward to maneuver.
- Remove the old wax ring: Once the toilet bowl is removed, you will see a wax ring on the floor flange. Take a scraper or putty knife and gently scrape off the old wax ring from the flange. Dispose of the old ring properly.
By following these steps, you will successfully remove the existing toilet and prepare the bathroom floor for the new installation. It’s important to take your time and handle the toilet bowl and tank with care to prevent any damage. Now, let’s move on to the next step: preparing the toilet and floor for installation.
Read more: How To Replace Toilet Seat With Hidden Bolts
Step 2: Prepare the Toilet and Floor
After removing the existing toilet, the next step in bolting a toilet to the floor is to prepare both the toilet and the floor for the new installation. This step is crucial to ensure a proper and secure fit. Here’s what you need to do:
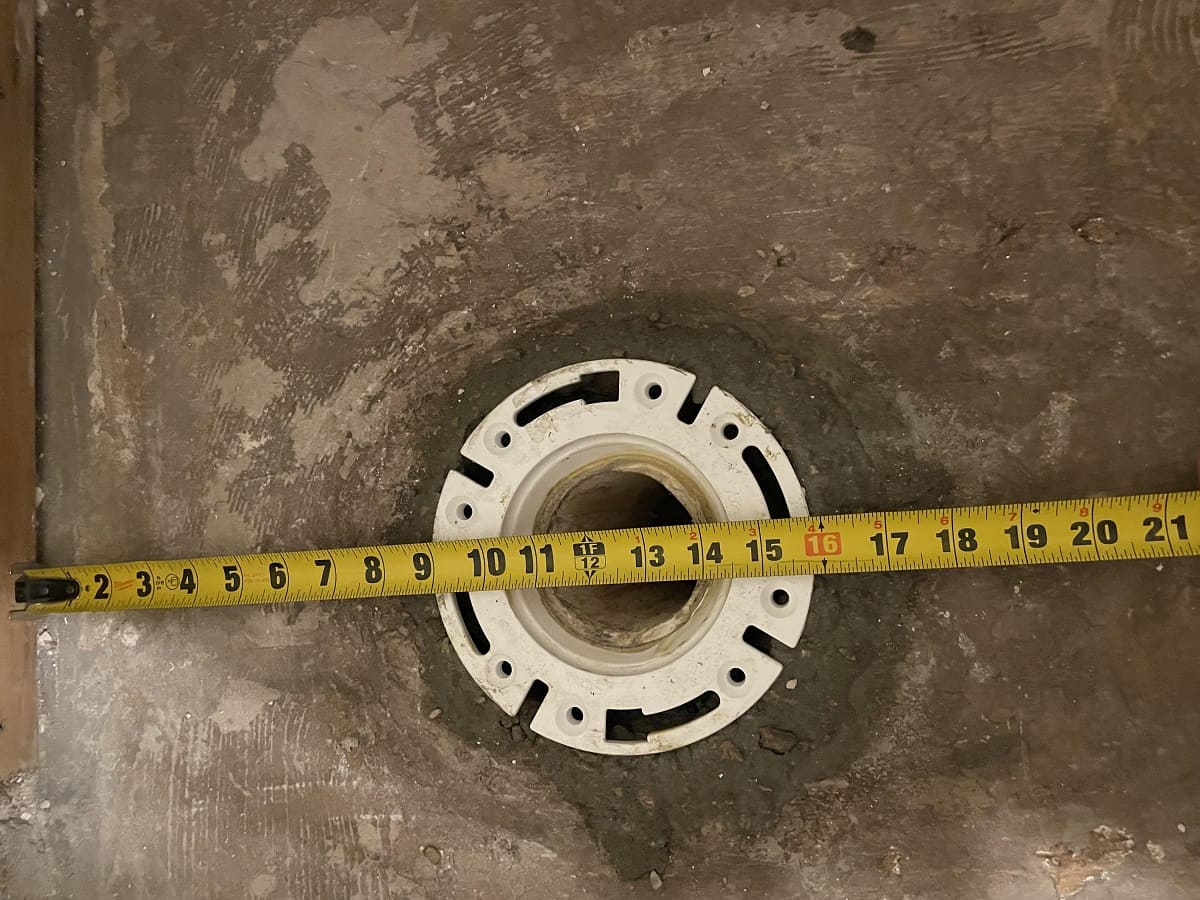
- Clean the flange: Take a damp cloth or sponge and clean any residue or debris from the toilet flange. The flange is the circular opening in the floor where the toilet connects. Removing any dirt or grime will allow for a better seal.
- Inspect the floor: Take a close look at the floor around the flange area. Make sure it is free from any damage or rot. If you notice any issues, such as a soft or uneven floor, it may be necessary to repair or reinforce it before proceeding.
- Measure and adjust the toilet bolts: Check the length of the new toilet bolts and compare them to the thickness of the toilet base. If the bolts are too long, you will need to use a hacksaw or bolt cutters to trim them to the correct length. The bolts should be long enough to extend through the flange and secure the toilet, but not so long that they stick out too far.
- Install the new wax ring: Place the new wax ring onto the flange, ensuring that it is centered properly. The wax ring creates a watertight seal between the toilet base and the floor. Press down firmly to secure the wax ring in place.
By following these steps, you will effectively prepare both the toilet and the floor for the new installation. Taking the time to clean the flange, inspect the floor, and properly install the wax ring will ensure a solid foundation for your toilet. Once you’ve completed these preparations, you’re ready to move on to the next step: positioning the toilet on the flange.
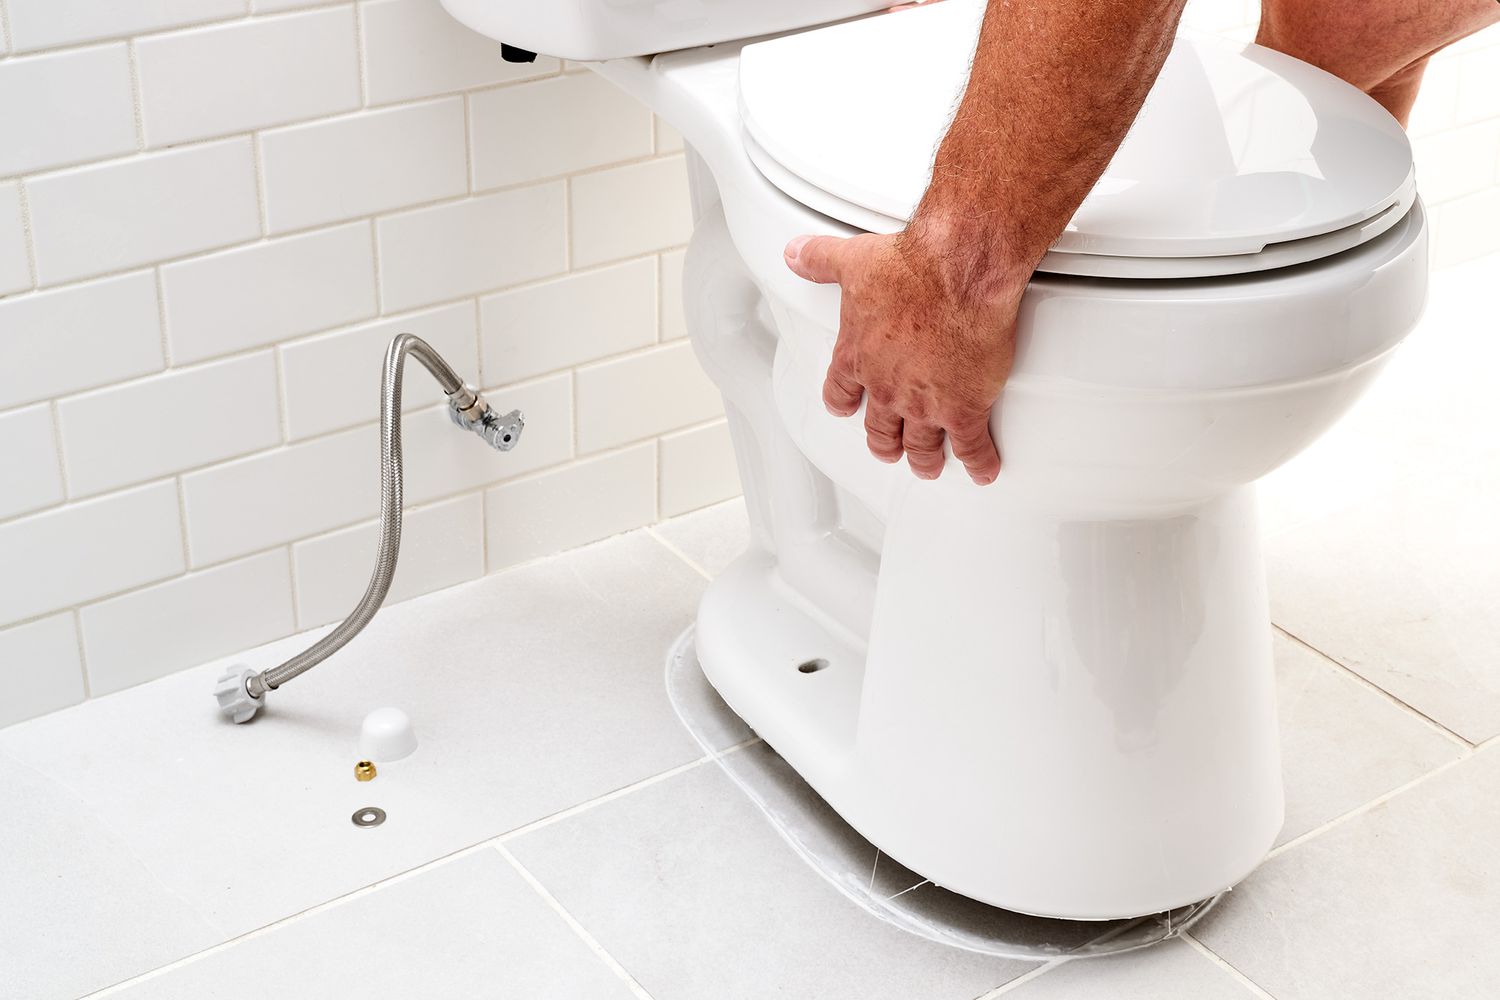
Step 3: Position the Toilet on the Flange
With the toilet and floor prepared, the next step in bolting a toilet to the floor is to position the toilet on the flange. This step requires careful alignment to ensure a proper fit. Here’s how to do it:
- Lift the toilet: Carefully lift the toilet bowl and position it directly over the wax ring. Be cautious not to disrupt the wax ring or misalign the bolts.
- Align the bolts: Lower the toilet bowl onto the flange, making sure to align the bolts on the base of the toilet with the holes in the flange. Take your time to check that the toilet is sitting evenly and centered on the wax ring.
- Apply pressure: Once the toilet is properly aligned, press down firmly on the bowl to compress the wax ring. Apply even pressure to create a strong seal between the toilet and the flange.
It is important to note that once the toilet is placed on the flange, avoid wiggling or rocking it as it could compromise the seal of the wax ring. Take extra care not to put excessive pressure on the toilet, as it could potentially crack or damage the porcelain.
Once the toilet is positioned correctly on the flange, you’re ready to move on to the next step: securing the toilet to the floor.
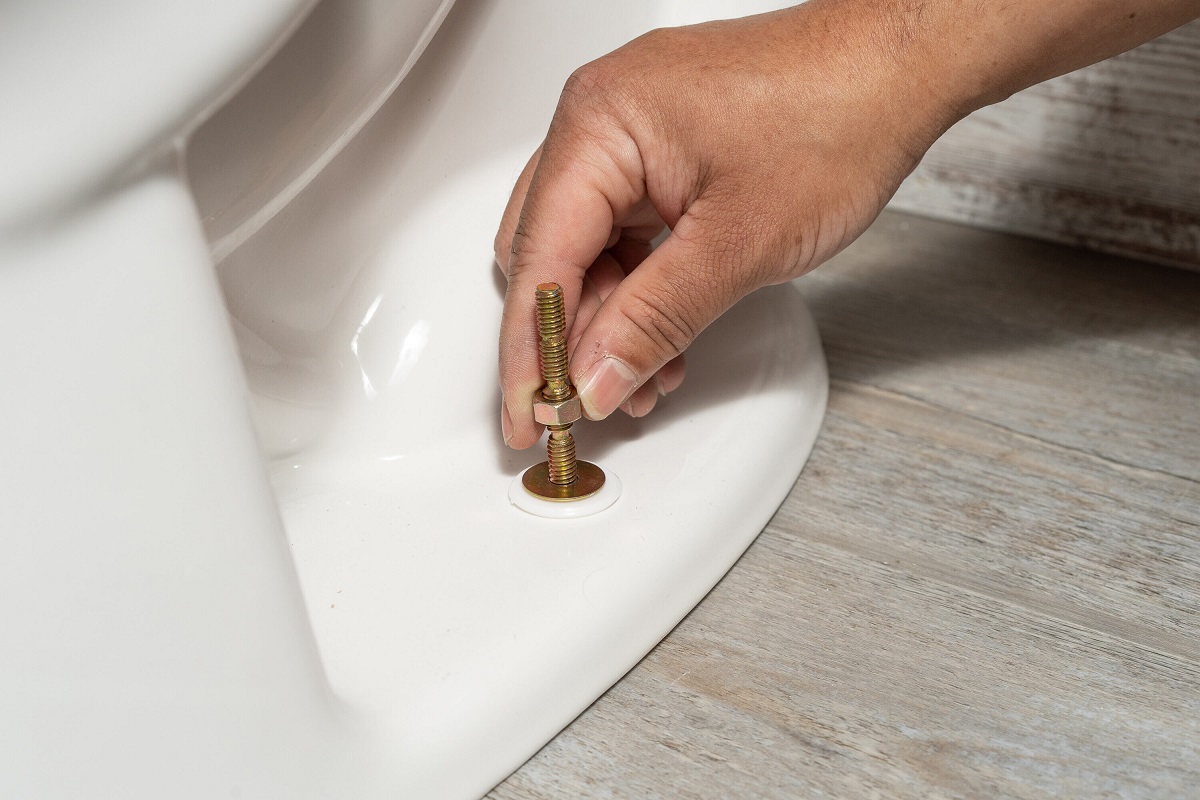
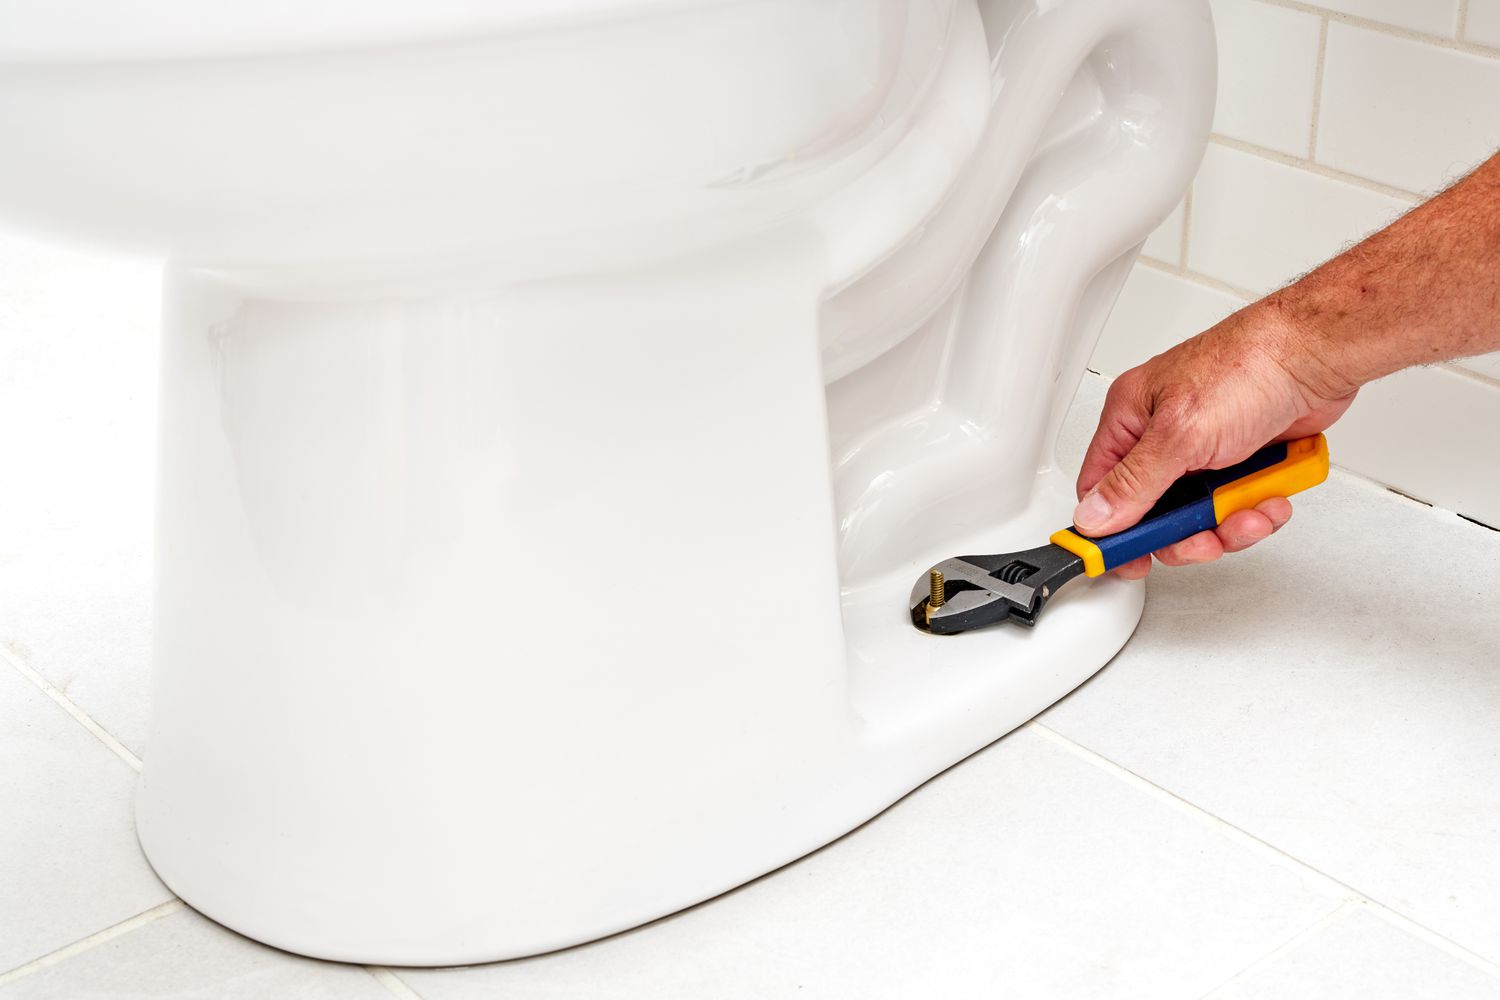
Step 4: Secure the Toilet to the Floor
After positioning the toilet on the flange, the next step in bolting a toilet to the floor is to secure it in place. This will ensure stability and prevent any movement or leaks. Here’s how to securely fasten the toilet to the floor:
- Tighten the nuts: Take the nuts provided with the bolts and thread them onto the bolts, below the toilet base. Using a socket wrench or an adjustable wrench, tighten the nuts evenly on both sides. Be careful not to overtighten, as it could crack the toilet base.
- Check for stability: Once the nuts are tightened, gently rock the toilet back and forth to check for any wobbling or movement. If the toilet is not stable, you may need to adjust the nuts slightly until it sits securely on the floor.
- Level the toilet: Place a level on top of the toilet tank or on the edge of the toilet bowl. Adjust the toilet as needed to ensure it is perfectly level. This step is crucial for proper flushing and preventing any water leakage.
Keep in mind that when tightening the nuts, it’s essential to alternate sides and apply even pressure. This helps distribute the pressure evenly and prevents any undue stress on the toilet bowl.
By following these steps, you will effectively secure the toilet to the floor, ensuring stability and eliminating the risk of leaks. Once the toilet is securely fastened, you can proceed to the next step: reconnecting the water supply.
Use a wax ring to create a watertight seal between the toilet and the floor. Secure the toilet to the floor with closet bolts and washers, and then caulk around the base for added stability.
Step 5: Reconnect the Water Supply
With the toilet securely bolted to the floor, the next step in the process is to reconnect the water supply. This will allow for the proper functioning of the toilet. Here’s how to reconnect the water supply:
- Turn on the water supply valve: Locate the water supply valve behind the toilet. Slowly turn the valve counterclockwise to open it. This will allow water to flow into the toilet tank.
- Check for leaks: As the water fills the tank, pay close attention to any signs of leakage. Look around the base of the toilet, the water supply line, and the tank connections. If you notice any leaks, tighten the connections or replace any faulty parts as necessary.
- Adjust the water level: Once the toilet tank is full, adjust the water level by adjusting the float or fill valve. The water level should be below the overflow tube to prevent overflow when flushing.
It’s important to ensure that there are no leaks before proceeding further. Leaks can lead to water damage and compromise the integrity of the installation. Take the time to double-check all connections and make any necessary adjustments to prevent leaks.
Now that the water supply is reconnected and there are no leaks, you’re ready to move on to the final step: testing for stability and leaks.
Read more: How To Remove Rusted Toilet Seat Bolt
Step 6: Test for Stability and Leaks
The final step in bolting a toilet to the floor is to test for stability and leaks. This step ensures that the installation is secure and functioning properly. Here’s how to test for stability and leaks:
- Test for stability: Sit on the toilet and shift your weight from side to side. Additionally, lean forward and backward to check for any wobbling or movement. If the toilet feels secure and stable, it is properly bolted to the floor.
- Check for leaks: Flush the toilet a few times while observing the base, supply line, and tank for any signs of water leakage. Pay close attention to any drips, pooling water, or wet spots. If you notice any leaks, tighten the connections or replace any faulty parts as needed.
- Inspect the seal: After flushing, visually inspect the area around the base of the toilet. There should be no water pooling or dampness. A properly installed wax ring should provide a watertight seal.
By performing these tests, you can ensure that the toilet is stable and there are no leaks. It’s crucial to address any issues promptly to prevent water damage and maintain the integrity of the installation.
If you discover any instability or leaks during the testing process, it may be necessary to revisit the previous steps to reposition and secure the toilet properly. Always take the time to double-check and make any necessary adjustments to ensure a fully functional and leak-free toilet.
Once you’re satisfied that the toilet is stable, leak-free, and functioning properly, congratulations! You have successfully bolted your toilet to the floor.
Conclusion
Bolting a toilet to the floor is a crucial step in the installation process to ensure stability and prevent leaks. With the right tools, materials, and proper technique, you can successfully secure your toilet and have a fully functional bathroom fixture. Here’s a summary of the steps involved:
- Remove the existing toilet by disconnecting the water supply, removing the tank and bowl, and scraping off the old wax ring.
- Prepare the toilet and floor by cleaning the flange, inspecting the floor for any damage, and installing a new wax ring.
- Position the toilet on the flange, aligning the bolts and pressing down to compress the wax ring.
- Secure the toilet to the floor by tightening the nuts evenly and checking for stability.
- Reconnect the water supply by turning on the valve, checking for leaks, and adjusting the water level.
- Test for stability and leaks by sitting on the toilet, shifting weight, flushing, and inspecting for any signs of movement or water leakage.
Remember, taking the time to properly bolt a toilet to the floor will ensure its longevity and prevent future issues. If you encounter any difficulties or complications, it’s always recommended to consult a professional plumber for assistance.
We hope this guide has provided you with valuable insights and step-by-step instructions to successfully bolt your toilet to the floor. By following these steps, you can enjoy a secure and reliable toilet installation in your bathroom.
Thank you for reading, and happy DIY plumbing!
Frequently Asked Questions about How To Bolt A Toilet To The Floor
Was this page helpful?
At Storables.com, we guarantee accurate and reliable information. Our content, validated by Expert Board Contributors, is crafted following stringent Editorial Policies. We're committed to providing you with well-researched, expert-backed insights for all your informational needs.


0 thoughts on “How To Bolt A Toilet To The Floor”