Home>Articles>How To Install Toilet Flange On Concrete Floor
Articles
How To Install Toilet Flange On Concrete Floor
Modified: May 6, 2024
Learn how to install a toilet flange on a concrete floor with our comprehensive step-by-step articles. Ensure a secure and durable installation for your bathroom.
(Many of the links in this article redirect to a specific reviewed product. Your purchase of these products through affiliate links helps to generate commission for Storables.com, at no extra cost. Learn more)
Introduction
Installing a toilet flange on a concrete floor is a crucial step when it comes to properly connecting a toilet to the plumbing system. The toilet flange serves as a secure anchor for the toilet bowl, allowing for a tight and leak-free connection with the drainpipe. While the process may seem daunting, with the right tools and a step-by-step approach, you can easily install a toilet flange on a concrete floor.
In this article, we will guide you through the process of installing a toilet flange on a concrete floor. We will provide you with a list of tools and materials you will need, as well as detailed instructions on how to complete each step. By the end of this article, you will have the knowledge and confidence to successfully install a toilet flange, ensuring a sturdy and reliable connection for your toilet.
Before we begin, it’s important to note that safety should always be a top priority. Be sure to wear appropriate protective gear, such as safety goggles and gloves, when working with tools and materials. Additionally, make sure to follow any manufacturer instructions provided with the specific products you are using.
Now, let’s gather our tools and materials and get started on installing a toilet flange on a concrete floor.
Key Takeaways:
- Proper preparation of the concrete floor, accurate positioning of the toilet flange, and secure attachment using anchor bolts and screws are essential for a stable and reliable toilet installation on concrete floors.
- Testing for stability and connecting the toilet to the flange are crucial final steps to ensure a leak-free and properly functioning toilet. Following manufacturer instructions and consulting a professional plumber if needed will help maintain the installation for years to come.
Read more: What Is A Toilet Flange
Tools and Materials Needed
Before you begin the installation process, it’s important to gather all the necessary tools and materials. Having everything on hand will ensure a smooth and efficient installation. Here is a list of the tools and materials you will need:
- Adjustable wrench
- Hammer
- Screwdriver (Phillips or flathead, depending on the screws used)
- Electric drill
- Masonry drill bit
- Tape measure
- Pencil or marker
- Toilet flange kit (including the flange, bolts, and wax ring)
- Anchor bolts
- Concrete screws
- Concrete adhesive (optional)
- Silicone sealant
- Rag or sponge
It’s important to ensure that all the tools and materials are of good quality to guarantee a durable installation. Additionally, make sure to check the specifications and requirements of your specific toilet flange kit and consult the manufacturer’s instructions for any additional tools or materials that may be needed.
Once you have gathered all the necessary tools and materials, you are ready to move on to the next step: preparing the concrete floor for the installation of the toilet flange.
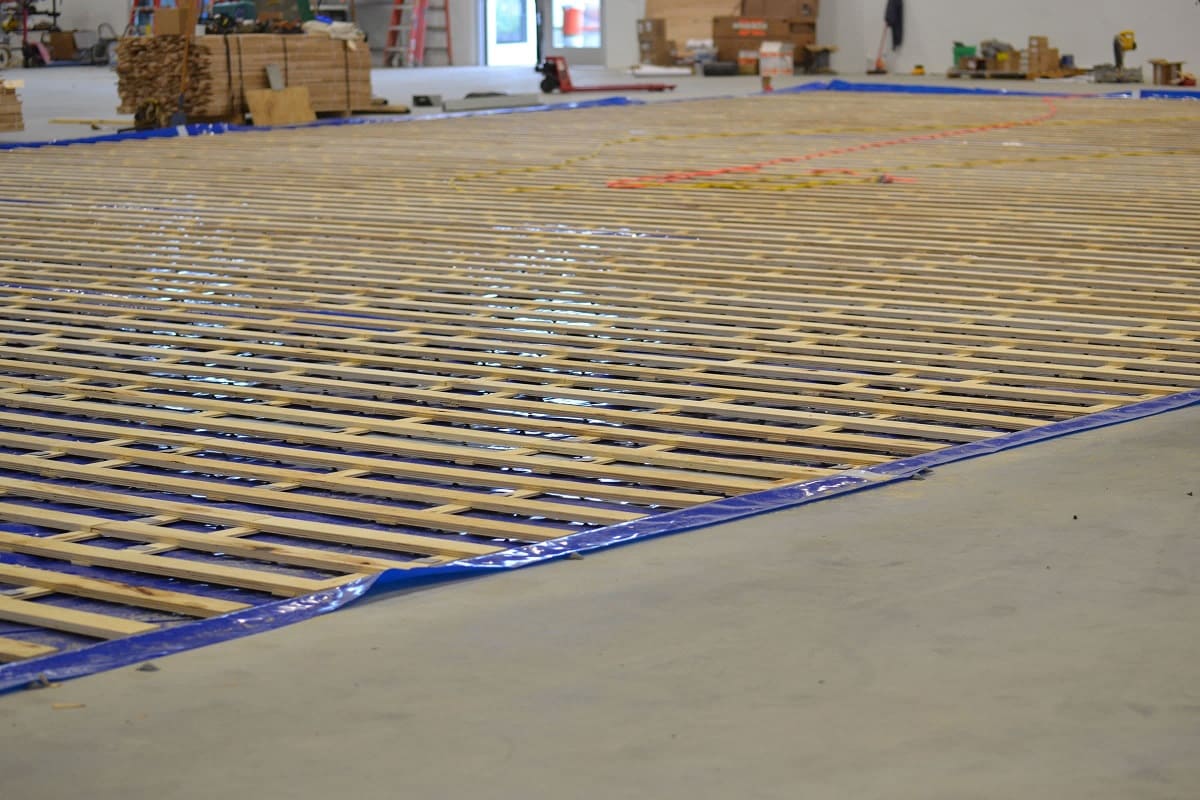
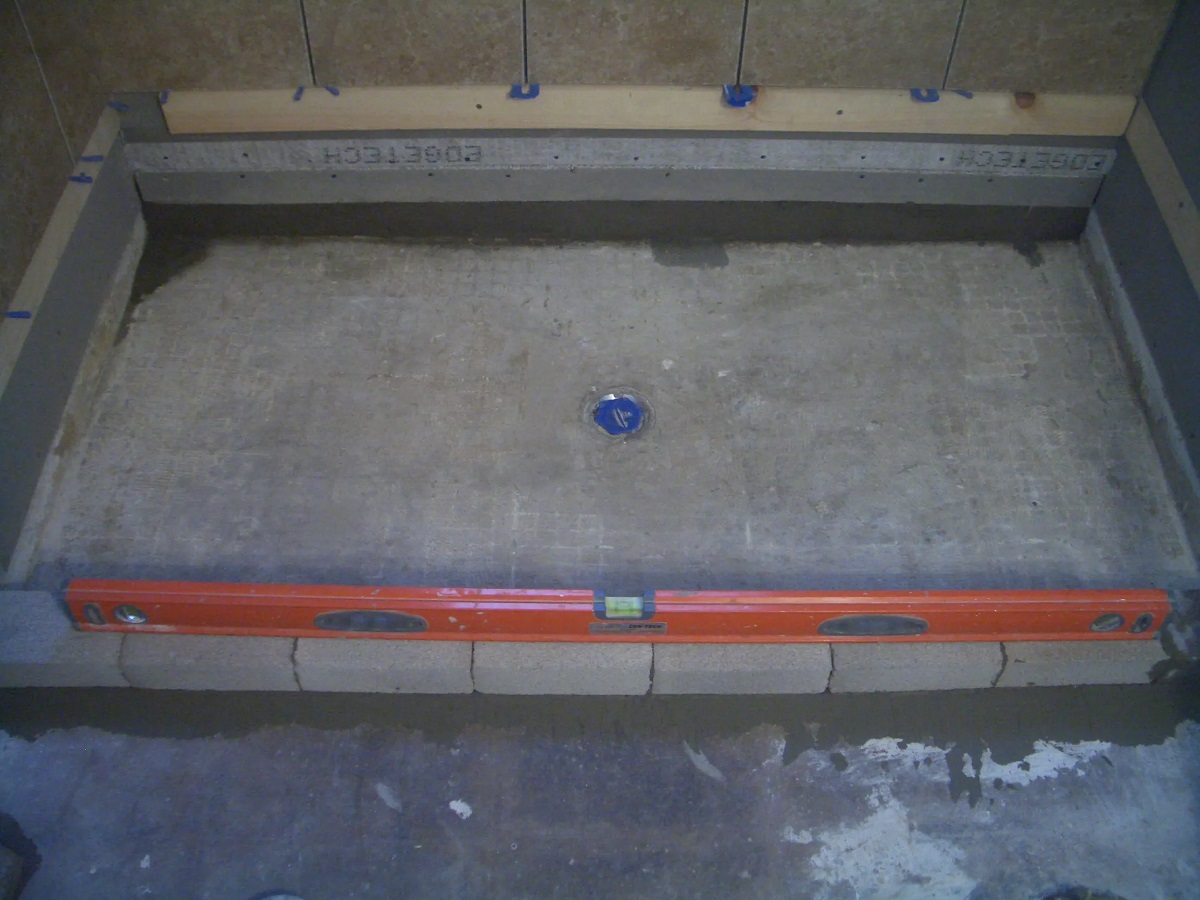
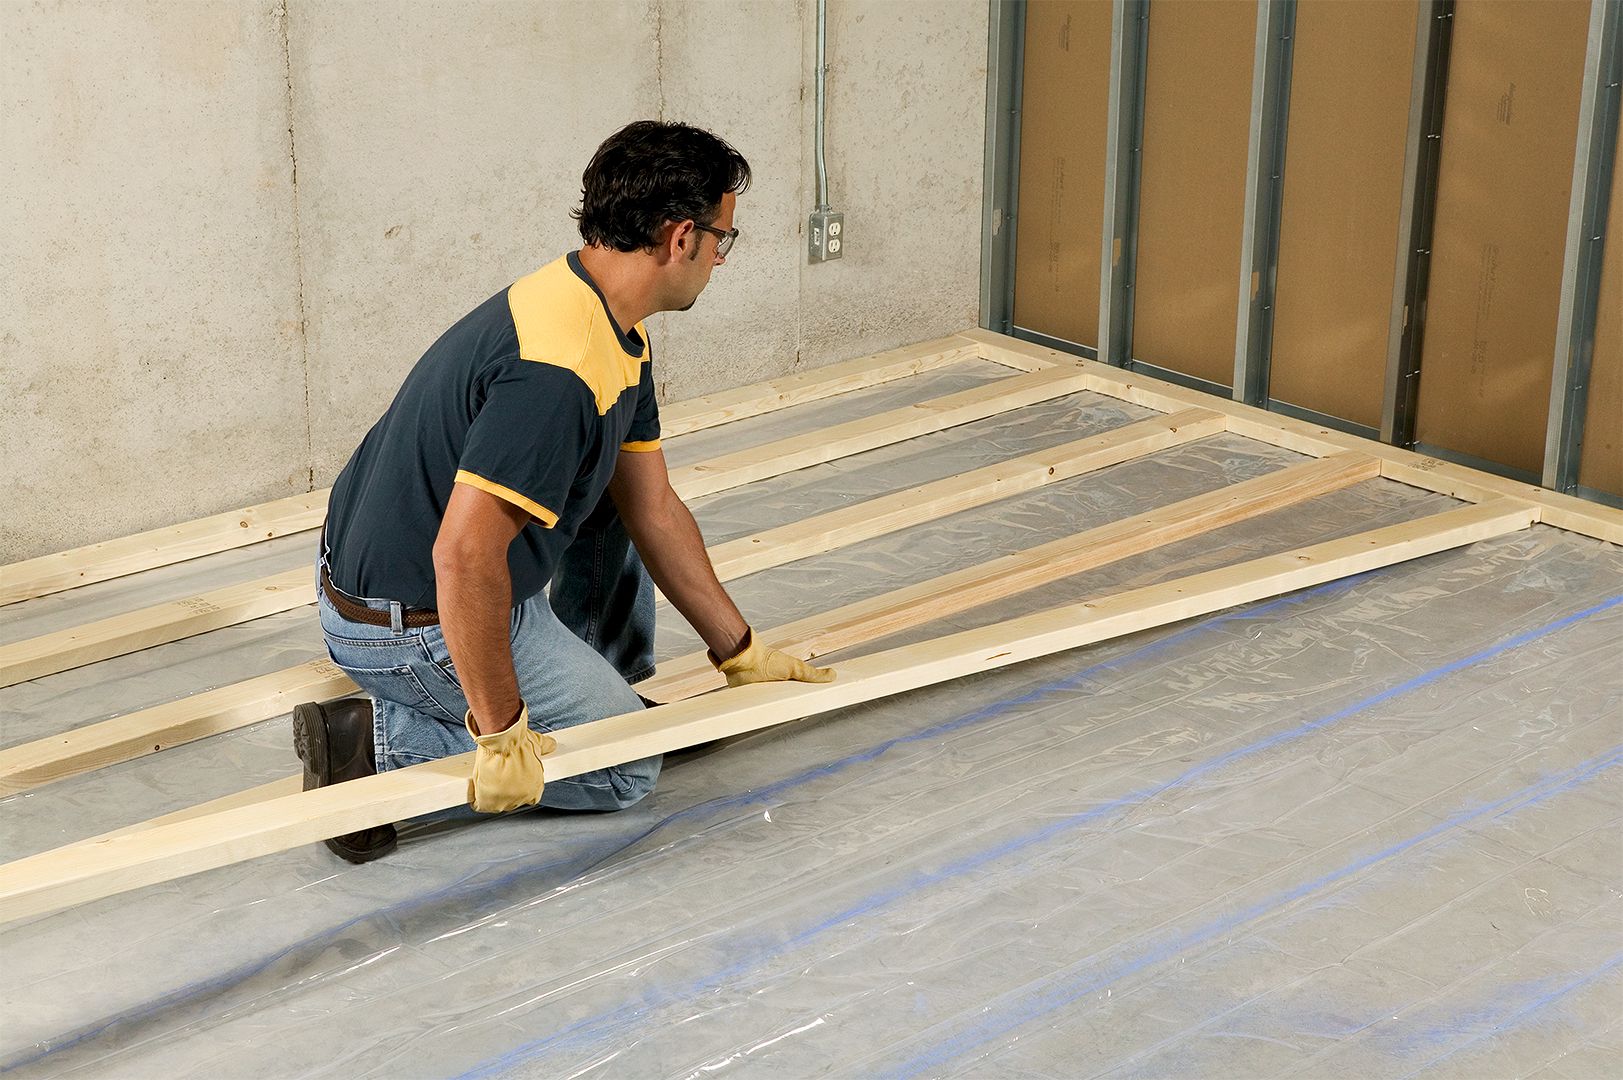
Step 1: Prepare the Concrete Floor
Before you can install the toilet flange, it is important to ensure that the concrete floor is clean and free from any debris or obstacles. Follow these steps to prepare the concrete floor for the installation:
- Clear the area: Remove any items, such as rugs or furniture, from the area around the toilet location to create a clear workspace.
- Clean the floor: Sweep or vacuum the concrete floor to remove any dirt, dust, or loose particles. Use a damp cloth or mop to wipe away any stubborn stains or residue.
- Inspect the floor: Thoroughly inspect the concrete floor for any cracks or damage. If you notice any cracks, it is recommended to repair them before proceeding with the installation. Consult a professional if necessary.
- Level the floor: Use a level tool to ensure that the floor is level and even. If you notice any uneven areas, you may need to use a self-leveling compound to fix them. Follow the manufacturer’s instructions for the compound and allow it to dry completely before moving forward.
By preparing the concrete floor properly, you will create a solid foundation for the toilet flange installation. This step is crucial for ensuring stability and preventing any future issues with the toilet’s connection to the plumbing system.
Once you have completed the preparation of the concrete floor, you are ready to move on to the next step: positioning the toilet flange.
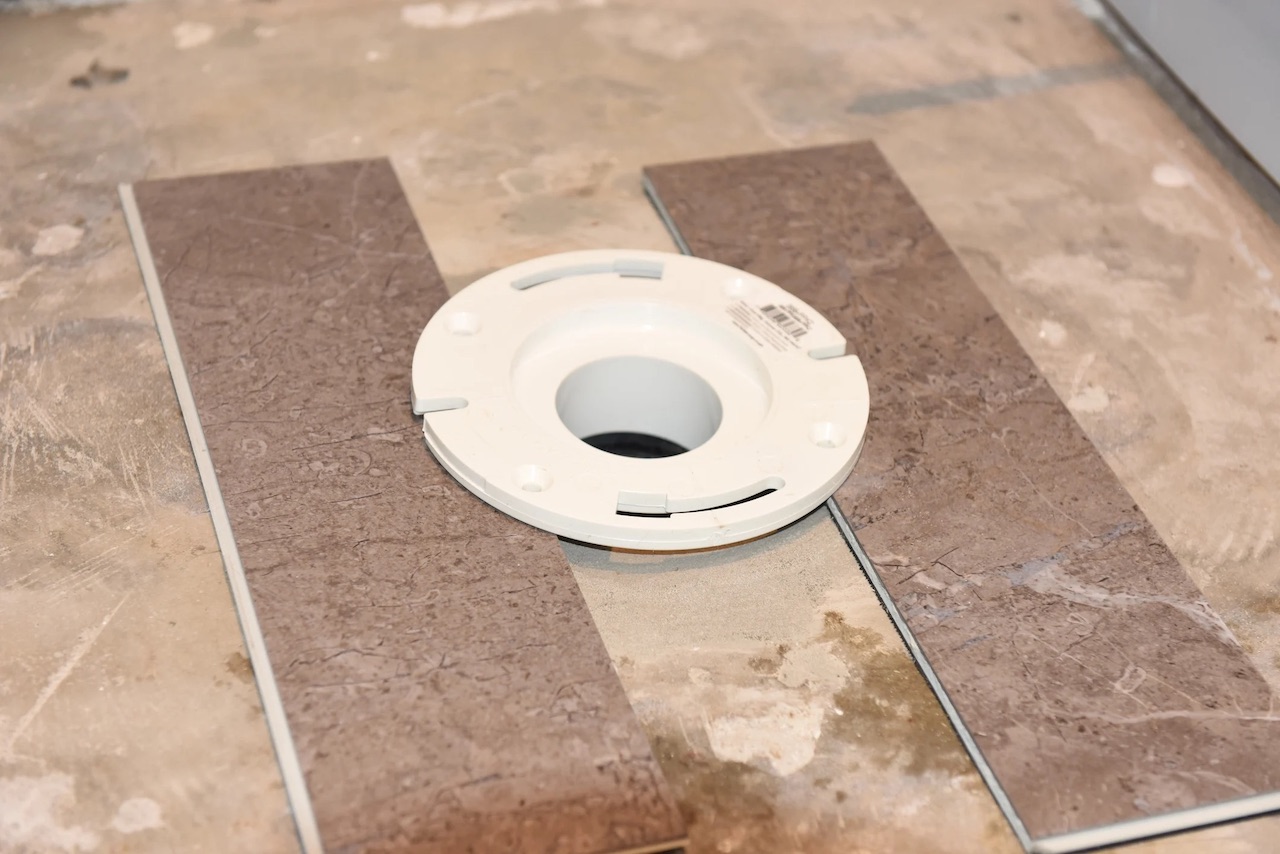
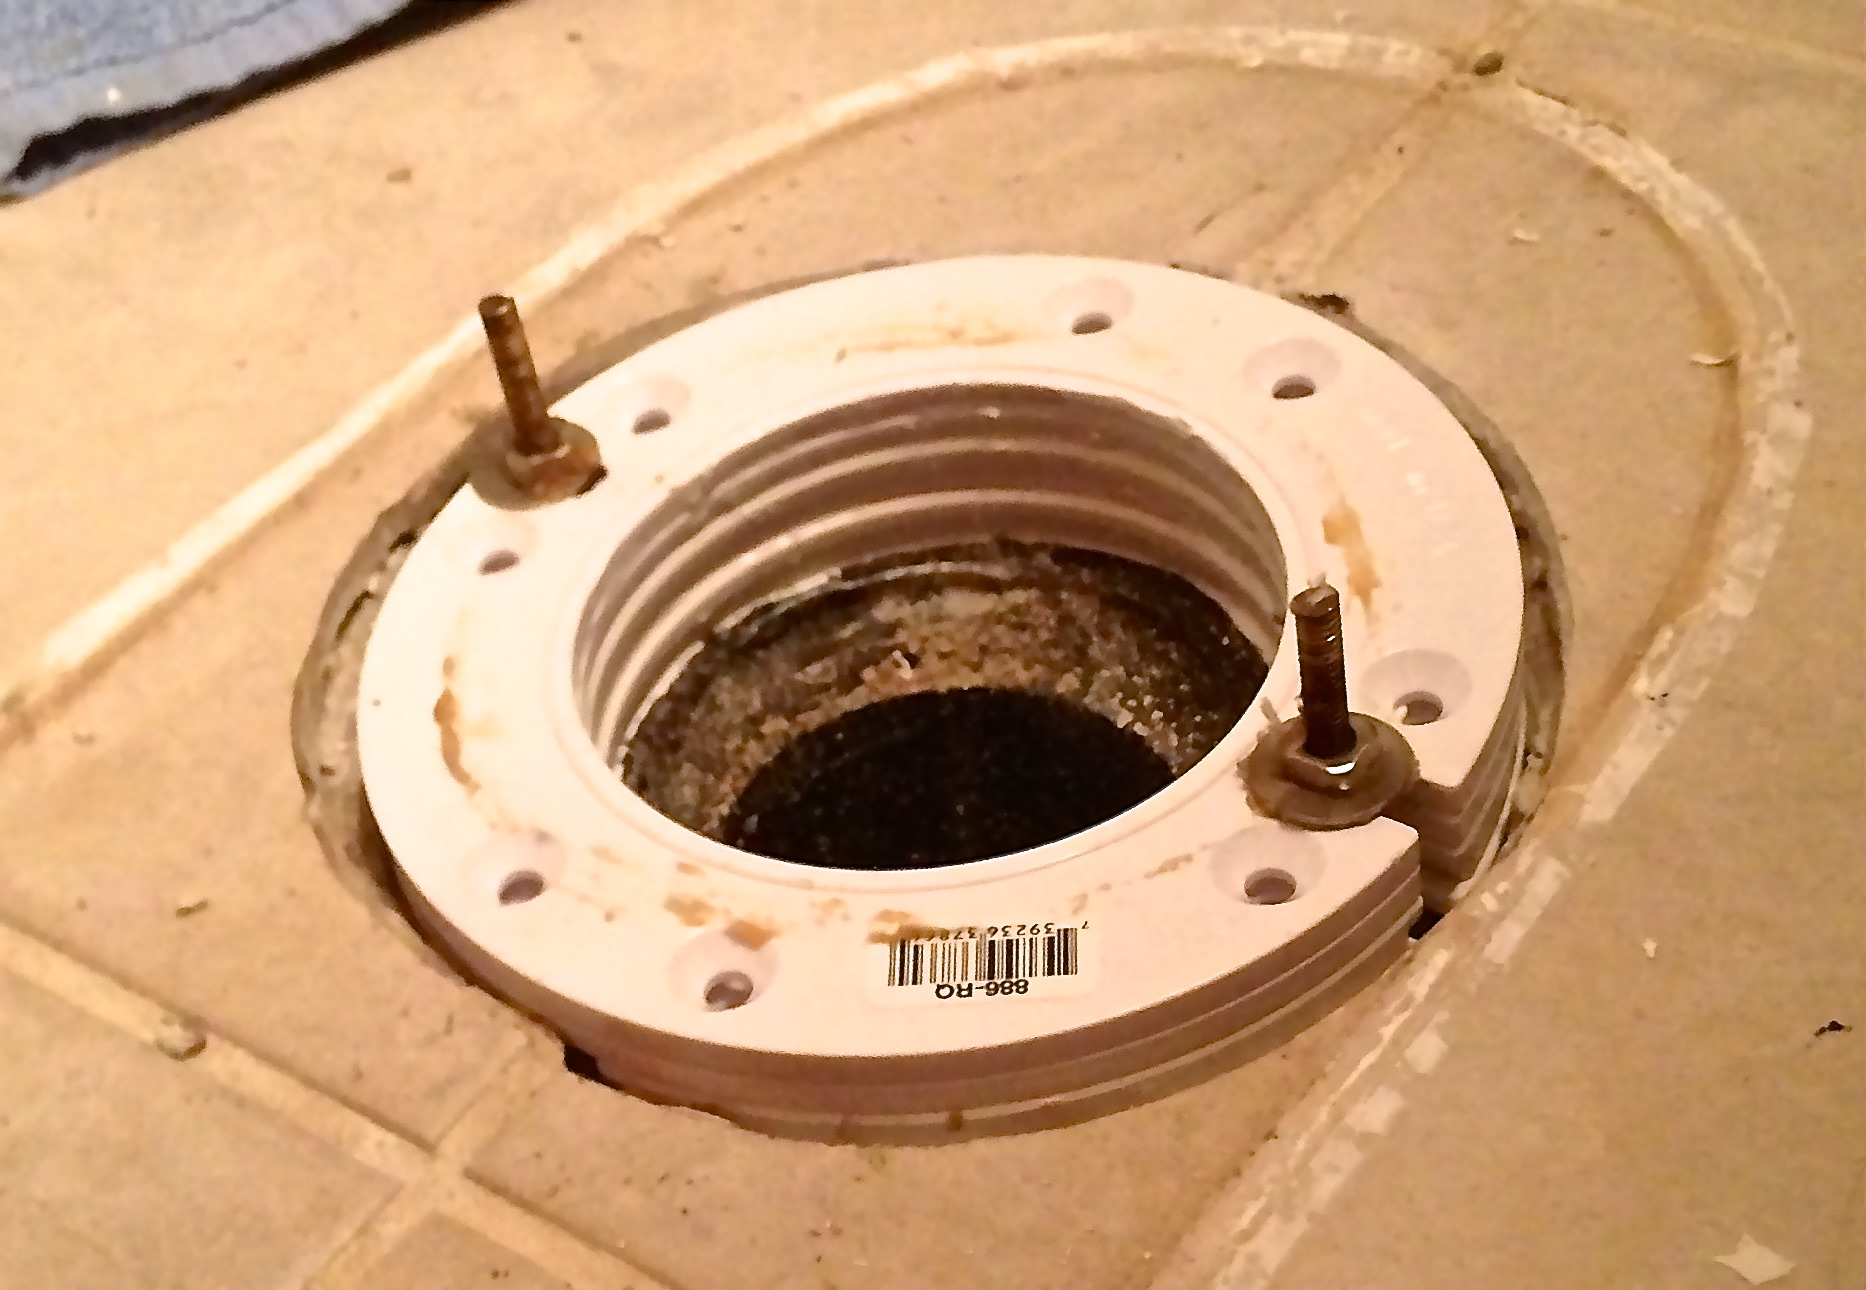
Step 2: Position the Toilet Flange
Now that you have prepared the concrete floor, it’s time to position the toilet flange in the correct location. Follow these steps to ensure proper placement:
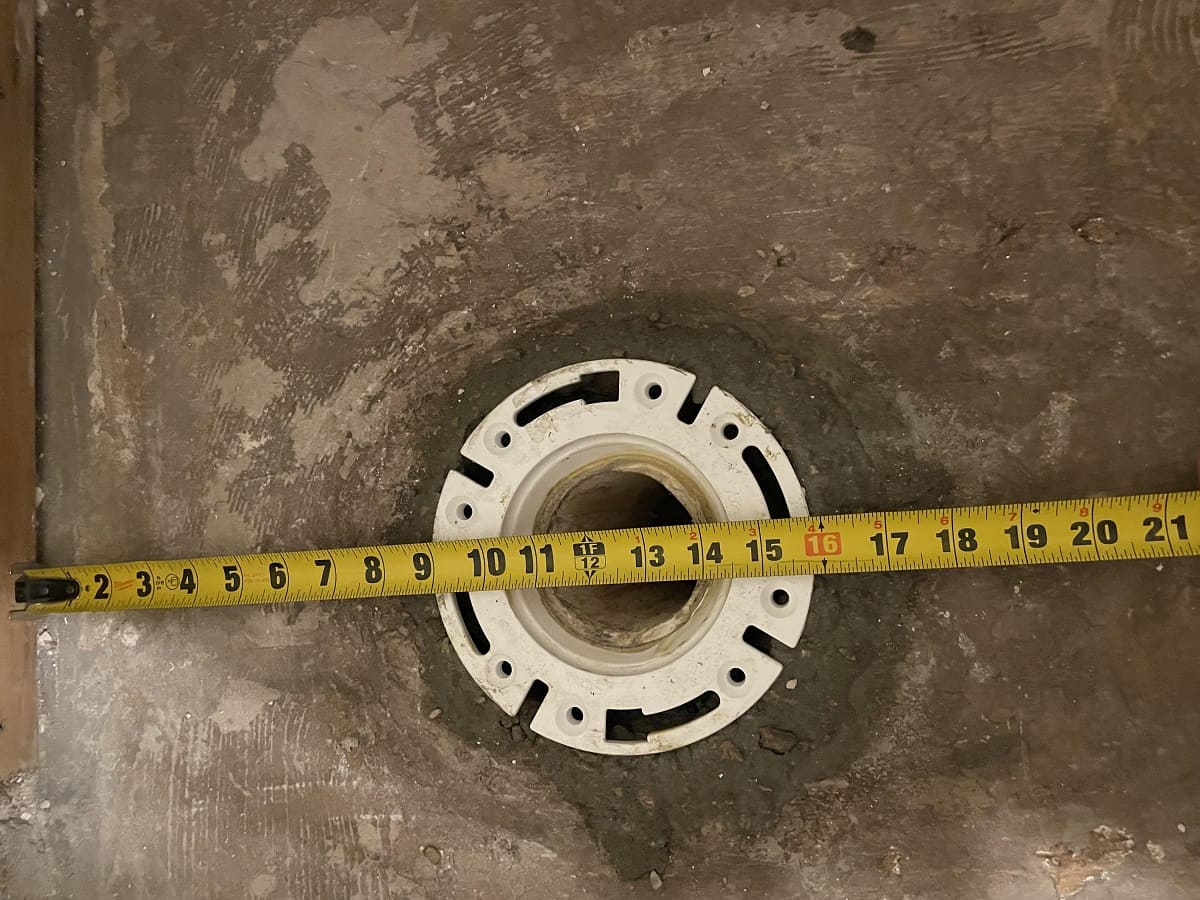
- Locate the centerline: Use a tape measure to find the centerline of the drainpipe. Mark this point on the concrete floor using a pencil or marker. This will serve as a reference for positioning the toilet flange.
- Align the flange: Place the toilet flange over the centerline mark, aligning it with the drainpipe. Ensure that the flange is level and flush with the floor surface. Adjust the position as needed for a proper fit.
- Check clearance: Check the clearance between the flange and the surrounding floor. Ideally, there should be a small gap of about 1/8 to 1/4 inch to accommodate the wax ring and ensure a secure seal.
- Trace the outline: Once you are satisfied with the positioning of the flange, trace its outline on the concrete floor using a pencil or marker. This will serve as a guide when attaching the flange to the floor in the next step.
Properly positioning the toilet flange is essential for a secure and leak-free connection with the drainpipe. Take your time to ensure accurate placement and alignment.
With the toilet flange positioned, you are now ready to move on to the next step: marking the anchor points on the concrete floor.
Step 3: Mark the Anchor Points
Once you have positioned the toilet flange on the concrete floor, the next step is to mark the anchor points. These anchor points will guide you when drilling and installing the anchor bolts. Follow these steps to mark the anchor points:
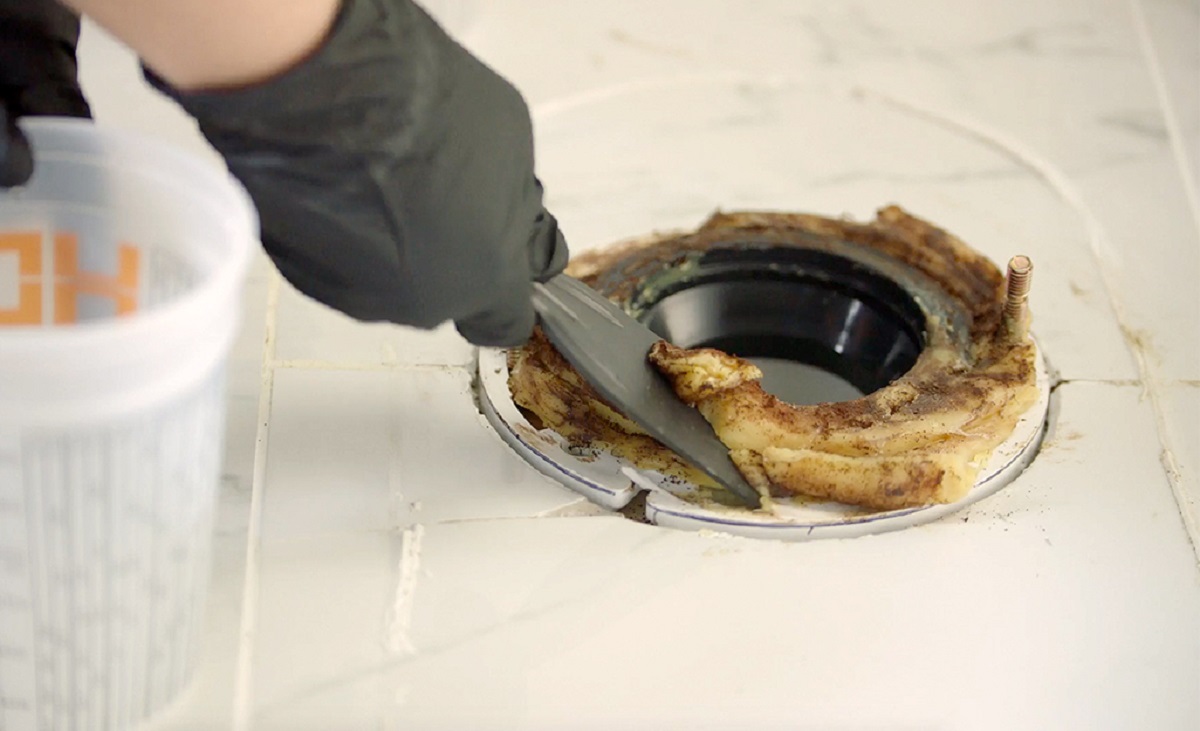
- Remove the flange: Carefully lift the toilet flange off the concrete floor, taking note of its position.
- Mark the anchor points: Using the traced outline of the flange as a reference, mark the locations for the anchor points on the concrete floor. Typically, there are four anchor points spaced evenly around the flange.
- Measure and align: Measure the distance from the centerline mark to each anchor point. Ensure that these measurements are consistent and symmetrical.
- Double-check the alignment: Before proceeding, double-check the alignment of the anchor points to ensure they match the holes on the flange. Any misalignment could lead to difficulties during installation.
Accurately marking the anchor points is crucial for a secure attachment of the toilet flange to the concrete floor. Take your time to ensure precise measurements and alignment.
With the anchor points marked, you are now ready to move on to the next step: drilling pilot holes in the concrete floor.
Read more: How To Install Wood Floor On Concrete
Step 4: Drill Pilot Holes
After marking the anchor points for the toilet flange, the next step is to drill pilot holes in the concrete floor. These pilot holes will act as guides for installing the anchor bolts securely. Follow these steps to drill pilot holes:
- Attach the masonry drill bit: Insert the appropriate-sized masonry drill bit into your electric drill. Ensure that the drill bit is securely attached.
- Set the drill to the appropriate speed: Adjust the drill to a low speed setting. This will prevent overheating and ensure controlled drilling.
- Start drilling: Place the tip of the drill bit on one of the marked anchor points and apply gentle pressure. Begin drilling slowly, allowing the drill bit to penetrate the concrete floor.
- Drill to the desired depth: Continue drilling until you reach the desired depth for the pilot hole. The depth should be slightly shorter than the length of the anchor bolts being used. Refer to the manufacturer’s instructions for specific depth recommendations.
- Repeat for the remaining anchor points: Move to the next marked anchor point and repeat the drilling process. Continue drilling pilot holes for each of the anchor points.
Take care to maintain a steady hand and apply consistent pressure while drilling. It is important to drill straight and perpendicular to the concrete floor to ensure proper alignment.
With the pilot holes drilled, you are now ready to move on to the next step: installing the anchor bolts.
Before installing a toilet flange on a concrete floor, make sure the surface is clean and level. Use a hammer drill to create pilot holes for the flange screws, then secure the flange with concrete screws or anchors for a sturdy installation.
Step 5: Install the Anchor Bolts
With the pilot holes drilled in the concrete floor, it’s time to install the anchor bolts. These bolts will provide a strong and stable foundation for the toilet flange. Follow these steps to install the anchor bolts:
- Prepare the anchor bolts: Insert the anchor bolts into the pilot holes, ensuring that the threaded ends are facing upwards. The bolts should fit snugly in the holes.
- Tighten the anchor bolts: Use an adjustable wrench to tighten the anchor bolts. Apply firm and even pressure to secure the bolts tightly in place.
- Check the level: Place a level tool over the top of the anchor bolts to ensure they are level and aligned with each other. Make any necessary adjustments to achieve a level installation.
- Apply concrete adhesive (optional): If desired, you can apply a small amount of concrete adhesive around the base of each anchor bolt. This will provide additional stability and prevent any movement once the concrete adhesive has cured.
It is important to tighten the anchor bolts securely, but be cautious not to overtighten them, as this could cause the concrete floor to crack or the anchor bolts to break.
With the anchor bolts installed, you are now ready to move on to the next step: attaching the toilet flange to the concrete floor.
Step 6: Attach the Flange to the Floor
Now that the anchor bolts are securely in place, it’s time to attach the toilet flange to the concrete floor. This step will ensure that the flange is firmly secured and ready to support the weight of the toilet. Follow these steps to attach the flange:
- Apply silicone sealant: Apply a thin bead of silicone sealant around the inside edge of the traced outline on the concrete floor. The sealant will help create a watertight seal between the flange and the floor.
- Place the flange over the anchor bolts: Carefully lower the toilet flange over the anchor bolts, ensuring that the bolts fit through the holes in the flange. Press the flange down firmly to ensure it makes contact with the sealant.
- Secure the flange with screws: Insert the screws provided with the flange kit into the pre-drilled holes on the flange. Use a screwdriver to tighten the screws, ensuring that they are firmly secured to the concrete floor.
- Check for stability: Give the flange a gentle shake to ensure that it is stable and securely attached to the floor. Any movement could indicate that the screws need to be tightened further.
Make sure to follow the manufacturer’s instructions for the specific flange and screw type you are using. Some flange kits may require different installation methods or tools.
With the flange securely attached to the concrete floor, you are now ready to move on to the next step: testing for stability.
Step 7: Test for Stability
Once the toilet flange is attached to the concrete floor, it’s important to test for stability. This step will ensure that the flange is securely installed and ready to support the weight of the toilet. Follow these steps to test for stability:
- Place pressure on the flange: Carefully place your weight on the flange, applying downward pressure. This simulates the weight and movement that will occur when the toilet is in use.
- Check for movement or wobbling: Pay close attention to any movement or wobbling of the flange. If you notice any movement, it indicates that the flange may not be securely attached or that the anchor bolts need to be tightened further.
- Tighten the screws if necessary: If there is any movement or wobbling, use a screwdriver to further tighten the screws that attach the flange to the concrete floor. Make sure to check for stability after each adjustment.
- Ensure a solid connection: The flange should feel stable and secure, with minimal to no movement. This ensures a proper connection between the toilet and the drainpipe.
If you are unable to achieve stability or if you have any concerns about the installation, it is recommended to consult a professional plumber for further assistance. They can evaluate the installation and make any necessary adjustments.
With the toilet flange securely attached and tested for stability, you are now ready to move on to the final step: connecting the toilet to the flange.
Read more: How To Install Heated Floors On Concrete
Step 8: Connect the Toilet to the Flange
Now that the toilet flange is securely installed and stable, it’s time to connect the toilet to the flange. This step will ensure a proper and leak-free connection between the toilet and the plumbing system. Follow these steps to connect the toilet:
- Position the toilet: Carefully position the toilet bowl over the flange, aligning the mounting holes on the toilet base with the bolts on the flange.
- Lower the toilet onto the flange: Lower the toilet bowl onto the flange, making sure that the wax ring comes into contact with the flange. Apply gentle pressure to compress the wax ring and create a watertight seal.
- Secure the toilet bolts: Place a washer and nut onto each anchor bolt and hand tighten them. Use a wrench to tighten the nuts, alternating between the two sides, until the toilet is securely fastened to the flange.
- Check for level: Place a level tool on the top of the toilet tank and adjust the toilet as needed to ensure it is level. Make any necessary adjustments by tightening or loosening the nuts.
- Attach the tank and seat: If your toilet has a separate tank, follow the manufacturer’s instructions to attach it securely to the bowl. Then, attach the toilet seat according to the manufacturer’s instructions.
Once the toilet is securely connected to the flange, give it a gentle shake to ensure that it is stable and there are no leaks around the wax ring. If you notice any movement or leaks, tighten the nuts further or consult a professional plumber for assistance.
With the toilet properly connected to the flange, you have successfully completed the installation process. Take a moment to admire your work, and double-check for any leaks or stability issues before using the toilet.
Congratulations! You have installed a toilet flange on a concrete floor, creating a secure and reliable connection for your toilet. Enjoy the convenience and comfort of your newly installed toilet, knowing that it is properly attached to your plumbing system.
Remember to follow any additional instructions or recommendations provided by the toilet and flange manufacturers to ensure proper maintenance and longevity of your toilet installation.
Thank you for following this step-by-step guide. We hope it has been helpful in your toilet flange installation process. Happy plumbing!
Conclusion
Installing a toilet flange on a concrete floor may seem like a daunting task, but with the right tools, materials, and step-by-step guidance, it can be a straightforward process. By following the outlined steps in this article, you have learned how to prepare the concrete floor, position the toilet flange, mark the anchor points, drill pilot holes, install the anchor bolts, attach the flange to the floor, test for stability, and connect the toilet to the flange.
Proper installation of the toilet flange is crucial for ensuring a secure and leak-free connection between the toilet and the plumbing system. By taking the time to prepare the concrete floor, accurately position the flange, and securely attach it using anchor bolts and screws, you have created a solid foundation for your toilet. The stability and reliability of this installation will provide you with peace of mind knowing that your toilet is securely connected and ready for use.
Remember, safety is always paramount, so be sure to wear appropriate protective gear and follow all manufacturer instructions. For any installation issues or concerns, it’s advisable to consult a professional plumber who can provide expert assistance.
Congratulations on successfully installing a toilet flange on a concrete floor! Now, you can enjoy the convenience and functionality of your toilet knowing that it is properly connected to the plumbing system. Regular maintenance and care will help extend the lifespan of your installation, ensuring its longevity and performance in the years to come.
Thank you for following this comprehensive guide. We hope it has been informative and helpful in your toilet flange installation process. Happy plumbing!
Now that you've got the hang of setting up a toilet flange, why stop there? Transforming your bathroom involves more than just installing fixtures. For those curious about timing and planning, our detailed guide on bathroom renovations unravels how long such a makeover typically takes. Whether you're scheduling contractors or doing parts yourself, understanding the timeline helps in managing expectations and ensures smoother progress.
Frequently Asked Questions about How To Install Toilet Flange On Concrete Floor
Was this page helpful?
At Storables.com, we guarantee accurate and reliable information. Our content, validated by Expert Board Contributors, is crafted following stringent Editorial Policies. We're committed to providing you with well-researched, expert-backed insights for all your informational needs.


0 thoughts on “How To Install Toilet Flange On Concrete Floor”