Articles
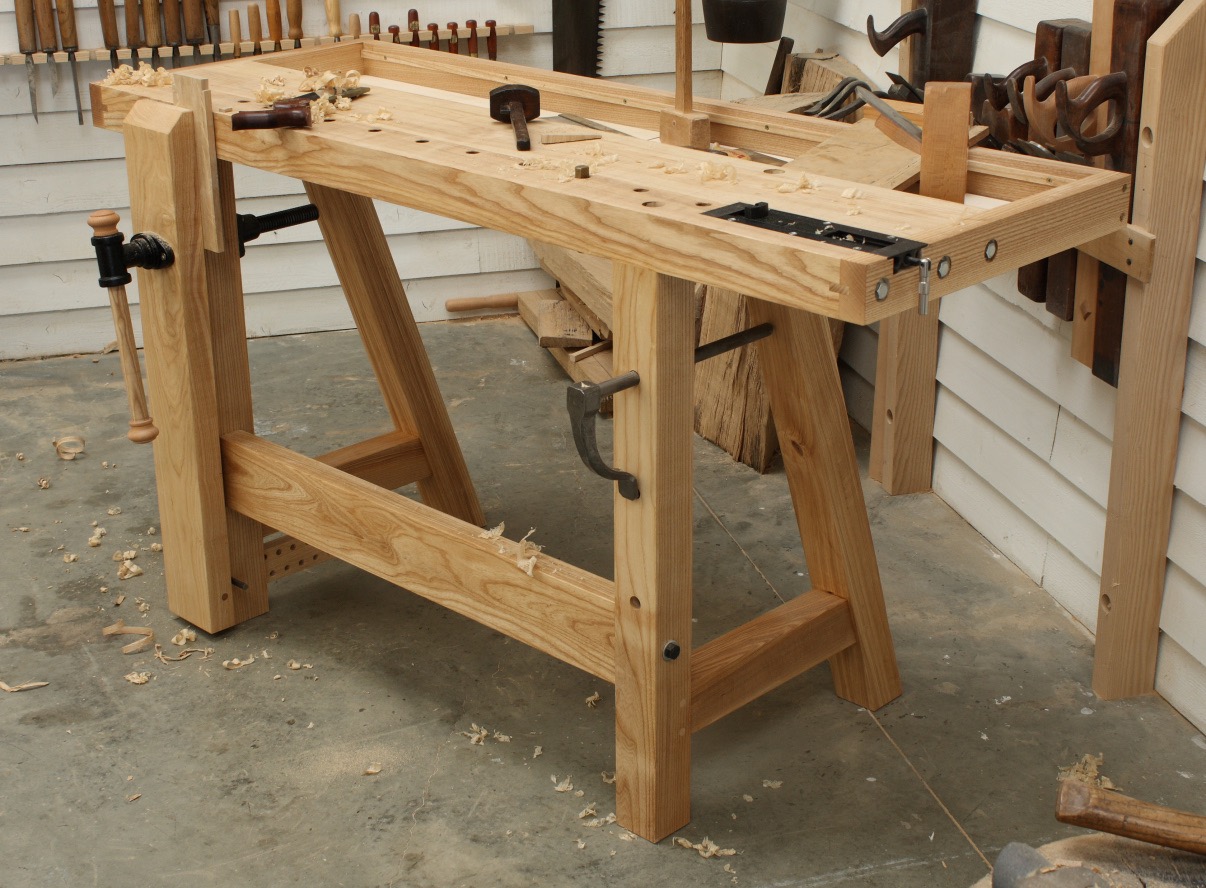
How To Build A Workbench With Hand Tools
Modified: January 24, 2024
Learn how to build a sturdy workbench using only hand tools in this comprehensive collection of articles. Find step-by-step instructions and expert tips to create the perfect workbench for your woodworking projects.
(Many of the links in this article redirect to a specific reviewed product. Your purchase of these products through affiliate links helps to generate commission for Storables.com, at no extra cost. Learn more)
Introduction
When it comes to woodworking, having a durable and sturdy workbench is essential. It provides a stable surface for various projects and allows you to work with precision. While there are many pre-made workbenches available on the market, building one with hand tools can be a rewarding and satisfying experience.
In this article, we will guide you through the process of building a workbench using only hand tools. Whether you’re a woodworking enthusiast or a beginner looking to enhance your skills, this project will not only help you create a functional workbench but also develop your craftsmanship.
The journey of building a workbench can be an exciting and fulfilling one. It allows you to intimately connect with the materials and the tools, understanding the intricacies of woodworking while creating a practical tool for your future projects. So, let’s roll up our sleeves, gather our hand tools, and embark on this woodworking adventure!
Key Takeaways:
- Building a workbench with hand tools is a rewarding and personalized experience that allows you to connect with the materials and develop woodworking skills, creating a sturdy and functional workspace for future projects.
- Careful wood selection, precise measurements, accurate joinery, and proper finishing are essential steps in creating a durable workbench that provides a stable and reliable surface for woodworking tasks.
Read more: How To Build A Desk With Hand Tools
Choosing the Right Wood
Before you start building your workbench, it’s crucial to choose the right type of wood. The wood you select will determine the durability, strength, and overall appearance of your workbench. Here are a few factors to consider when choosing the wood:
- Hardwood vs. Softwood: Hardwood varieties like oak, beech, or maple are excellent choices for workbenches due to their strength and durability. Softwoods like pine or fir can also be suitable, especially if you’re on a budget. Consider the type of projects you’ll be working on and your personal preferences when choosing between hardwood and softwood.
- Wood Grain and Stability: Look for wood with straight grain as it tends to be stronger and more stable. Avoid wood with knots or excessive defects, as they can weaken the structure of the workbench.
- Moisture Content: Wood with a moisture content of around 6-8% is ideal for workbenches, as it will be less prone to warping or shrinking. Use a moisture meter to check the moisture content of the wood before purchasing.
- Budget: Consider your budget when selecting wood for your workbench. Hardwoods tend to be more expensive, but they offer superior durability and longevity. Softwoods are generally more affordable, making them a suitable option if you’re working within a limited budget.
Once you’ve considered these factors, visit a local lumberyard or supplier to choose your wood. It’s always a good idea to handpick the boards to ensure they are of high quality, free from defects, and meet your requirements. Buying extra boards is also recommended in case you make any mistakes or need additional pieces.
Remember, the type of wood you choose will impact not only the strength of your workbench but also its overall appearance. So, take your time in making this decision and select a wood that meets your needs and preferences.
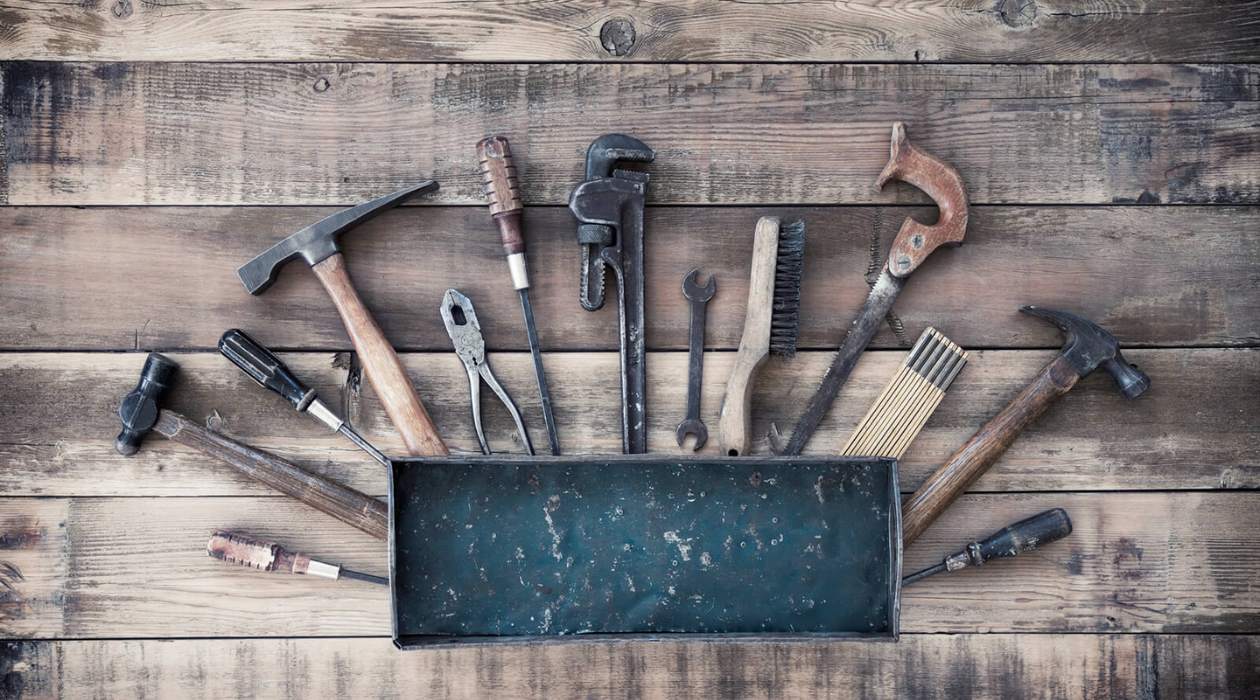
Gathering the Necessary Hand Tools
Before you start building your workbench, it’s important to gather all the necessary hand tools. The right tools will make the process smoother and more efficient. Here’s a list of essential hand tools you’ll need:
- Workbench Vise: A sturdy workbench vise is an invaluable tool for holding your workpieces in place while you work on them. It allows for greater stability and control during woodworking tasks.
- Hand Saw: A quality hand saw is essential for cutting the wood to size. Look for a saw with a fine-tooth blade for cleaner cuts.
- Chisels: Chisels are used for shaping wood and creating mortises and tenons. Invest in a set of high-quality chisels with different sizes to accommodate various woodworking tasks.
- Hand Plane: A hand plane is used to smooth and flatten the wood surfaces. Look for a well-made plane with a sharp blade for optimal results.
- Mallet: A wooden or rubber mallet is used in conjunction with chisels or to tap pieces together during assembly.
- Measuring and Marking Tools: You’ll need a combination square, a tape measure, and a pencil to accurately measure and mark the wood for cutting and joining.
- Clamps: Clamps are essential for holding the pieces together during glue-up or assembly. Invest in a variety of sizes and types, such as bar clamps, C-clamps, and spring clamps.
- Screwdrivers: Screwdrivers will come in handy when attaching the workbench top or other components. Have a set of different sizes and types, including both flathead and Phillips head screwdrivers.
- Sharpening Tools: Keep your hand tools sharp and ready for use with a sharpening stone or honing guide.
While this list covers the essential hand tools needed for building a workbench, depending on your specific design or preferences, you may require additional tools such as a router, drill, or miter saw. Assess your project requirements and make sure you have all the necessary tools before you begin.
Having the right tools at hand will not only make the workbench construction smoother but also ensure that the end result is of high quality. So, gather your tools, keep them organized, and get ready to dive into the woodworking process!
Preparing the Workbench Design
Before you start cutting and assembling the wood, it’s important to have a well-thought-out design for your workbench. Having a clear plan will help you ensure that all the components fit together properly and that the final product meets your needs. Here are some steps to help you prepare the workbench design:
- Decide on the Size: Determine the dimensions of your workbench based on your available space, the type of projects you’ll be working on, and your personal preference. Consider the height, width, and depth of the workbench.
- Consider the Workbench Features: Think about the features you want your workbench to have. For example, do you want a built-in storage shelf or drawers? Do you need a tool tray or a dedicated area for power tool storage? Consider these functional aspects to make your workbench more practical and efficient.
- Sketch the Design: Use graph paper or design software to sketch and plan your workbench. Take into account the dimensions and features you’ve decided on. This will give you a visual representation of how the workbench will look and help you identify any potential issues before you start building.
- Research Workbench Designs: Look for inspiration and ideas from woodworking magazines, online resources, or even existing workbenches. Take note of design elements that appeal to you and incorporate them into your own design.
- Consider Material Thickness: Take into account the thickness of the wood you’ll be using for the workbench top and other components. This will affect the overall stability and strength of the workbench.
By taking the time to prepare a detailed workbench design, you’ll have a clear vision of what you want to achieve. This will minimize errors and ensure that the construction process proceeds smoothly. It will also help you gather the necessary materials and estimate the required quantities accurately. So, grab your pencil and paper, or fire up your design software, and start preparing your workbench design!
Measuring and Marking the Wood
Accurate measurements and precise markings are crucial for the successful construction of your workbench. Taking the time to measure and mark the wood properly will ensure that the components fit together seamlessly. Here’s a step-by-step guide on how to measure and mark the wood:
- Gather your Measuring Tools: Ensure that you have a tape measure, a combination square, and a marking pencil at the ready. These tools will help you achieve precise measurements and markings.
- Measure Twice, Cut Once: The age-old adage holds true for woodworking. Double-check your measurements before making any cuts to avoid costly mistakes. Measure the length, width, and thickness of the wood pieces accurately.
- Mark your Dimensions: Use a pencil to mark the measurements on the wood. Use a combination square to ensure that the markings are straight and square.
- Account for Joinery: If your workbench design includes joinery, such as mortise and tenon or dovetail joints, make sure to mark those areas as well. These markings will guide you during the cutting and assembly process.
- Consider Grain Direction: Take into account the direction of the wood grain when making your markings. This will help you align the pieces correctly and ensure optimal strength and stability.
- Identify Top and Bottom Surfaces: To maintain consistency during assembly, mark the top and bottom surfaces of the wood pieces. This will help you orient the components correctly.
- Add Cut Lines: Along with your measurements, add clear cut lines on the wood pieces using a pencil or a marking knife. This will guide your sawing and ensure precise cuts.
Remember to take your time when measuring and marking the wood. Rushing through this step can result in inaccuracies and complications during the later stages of construction. It’s always better to be meticulous and ensure that your measurements and markings are spot-on.
With the wood properly measured and marked, you’re ready to move on to the next step: cutting the wood to size.
Read more: How To Build A Drawer With Hand Tools
Cutting the Wood to Size
Once you have accurately measured and marked the wood, it’s time to cut it to the desired dimensions. Cutting the wood to size is a critical step in constructing your workbench, and precision is key. Here’s a guide on how to cut the wood effectively:
- Gather the Necessary Tools: Ensure that you have a reliable hand saw or a circular saw, along with a sharp blade suitable for cutting wood. Additionally, have a stable work surface or sawhorses to support the wood during cutting.
- Follow the Markings: Use your markings as a guide for cutting the wood. Always cut just outside the marked lines to leave room for fine-tuning and fitting the pieces together accurately.
- Choose the Right Sawing Technique: The most common sawing technique for cutting wood is the crosscut. This involves making cuts perpendicular to the wood grain. However, if you need to make cuts parallel to the grain, use a rip sawing technique.
- Secure the Wood: If possible, secure the wood to a workbench or sawhorses using clamps. This will prevent the wood from moving during the cutting process, ensuring cleaner and more precise cuts.
- Take your Time: Cutting the wood requires patience and focus. Take slow, steady strokes with the saw, allowing the teeth to do the work. Rushing can lead to inaccurate cuts or even accidents.
- Test the Fit: After each cut, test the fit of the wood pieces to ensure they align properly. Use a hand plane or sandpaper to make any necessary adjustments for a snug fit.
Remember to always practice proper safety procedures when cutting wood. Wear safety goggles to protect your eyes from sawdust and other debris, and keep your fingers clear of the saw blade.
By carefully cutting the wood to the appropriate size, you’re one step closer to assembling your workbench. Take your time, be precise, and enjoy the process of bringing your workbench to life!
When building a workbench with hand tools, make sure to carefully measure and mark all your cuts before using a saw. This will help ensure accuracy and a professional-looking finished product.
Joining the Pieces Together
With the wood cut to the desired dimensions, it’s time to join the pieces together to form the framework of your workbench. The joining process is crucial for creating a sturdy and stable workbench. Here are the steps to effectively join the wood pieces:
- Choose the Right Joinery Technique: There are various joinery techniques you can use, depending on your skill level and the design of your workbench. Some common techniques include mortise and tenon, dovetail, or simple butt joints.
- Prepare the Tools: Ensure that you have the necessary tools and equipment for your chosen joinery technique. This may include chisels, a mallet, a marking gauge, clamps, and appropriate adhesives or fasteners.
- Accurately Mark the Joinery: Use your markings from earlier to guide the placement of your joints. Take measurements and transfer them onto the wood pieces to ensure accurate and precise joint placement.
- Execute the Joinery: Carefully follow the appropriate techniques for your chosen joinery method. Whether it involves cutting mortises and tenons, creating dovetail joints, or simply butt joining and reinforcing with screws or dowels, take your time to ensure a proper fit and solid connection.
- Apply Adhesives and Fasteners: Once the joints are prepared, apply wood glue or appropriate adhesives to strengthen the connection. Use clamps to hold the pieces together securely while the glue dries. Additionally, consider using screws, nails, or dowels for added stability.
- Check for Alignment and Squareness: Periodically check the alignment and squareness of your workbench frame as you join the pieces together. This will ensure that the workbench remains level and sturdy.
Remember, the strength and stability of your workbench depend on the integrity of the joinery. Take the time to execute the joinery techniques accurately and securely, and make any necessary adjustments along the way for a proper fit.
Once the pieces are joined together, you’ll have a solid foundation for your workbench. Now, it’s time to move on to the next step: creating the workbench legs.
Creating the Workbench Legs
The legs are an integral part of any workbench, providing stability and support for your projects. In this step, we will guide you through the process of creating the workbench legs. Follow these steps to ensure sturdy and reliable legs for your workbench:
- Measure and Cut the Leg Pieces: Take the measurements provided in your workbench design and mark them on your chosen wood. Use a hand saw or a circular saw to carefully cut the leg pieces to the desired length.
- Shape the Legs: Decide on the shape you want for your workbench legs. The most common shapes are rectangular or tapered. Use a hand plane or chisel to shape the legs accordingly.
- Make the Mortises: Depending on the joinery technique you selected, measure and mark the locations for the mortises on both the legs and the workbench frame. Use a marking gauge and chisels to carefully create the mortises, ensuring a snug fit.
- Create the Tenons: If you’re using mortise and tenon joinery, carefully shape the tenons on the ends of the workbench frame pieces. The tenons should fit precisely into the mortises created in the legs.
- Test Fit and Adjust: Before applying any adhesives or fasteners, perform a test fit of the leg assemblies with the workbench frame. Make any necessary adjustments to ensure a tight and secure fit.
- Apply Adhesives and Assemble: Once you’re satisfied with the fit, apply wood glue or appropriate adhesives to the mortise and tenon joints. Assemble the legs and workbench frame together, ensuring that the joints are fully seated.
- Reinforce the Joints: To add strength and stability, consider reinforcing the leg joints with screws, dowels, or additional support brackets. This will help to prevent any wobbling or movement in the legs.
Creating sturdy and well-constructed legs is essential for a durable workbench. Take your time to ensure precise measurements, accurate joinery, and a strong assembly. Test the stability of the legs before proceeding to the next step in the construction process.
With the legs in place, you’re now ready to assemble the workbench frame and bring your project one step closer to completion.
Assembling the Workbench Frame
The workbench frame serves as the backbone of your workbench, providing stability and support for the work surface. In this step, we will guide you through the process of assembling the workbench frame. Follow these steps to ensure a sturdy and well-constructed frame:
- Gather the Frame Components: Collect the previously prepared leg assemblies and the remaining frame pieces according to your workbench design. Ensure they are clean, dry, and free from any debris.
- Align and Square the Frame: Begin by aligning the legs and frame pieces according to your desired workbench dimensions. Use clamps to hold the pieces in place while you check for squareness using a combination square or a measuring tape.
- Check for Level: Place a level across the frame to ensure it is horizontal and not tilted. Adjust the placement of the legs or frame pieces as necessary to achieve a level surface.
- Apply Adhesives and Fasteners: Once the frame is properly aligned, apply wood glue or appropriate adhesives to the joints. This will strengthen the connection between the leg assemblies and the frame pieces. Secure the joints with screws, nails, or dowels as per your design and personal preference.
- Double-Check Joint Reinforcement: Take a moment to ensure that any additional joint reinforcement, such as brackets or cross supports, is securely in place. These reinforcements will further enhance the stability and strength of the workbench frame.
- Allow for Proper Drying Time: Give the adhesive enough time to dry and cure as per the manufacturer’s instructions. This will ensure a strong bond between the joints and promote the overall durability of the workbench frame.
- Perform a Stability Test: Once the frame is assembled and the adhesive is fully dried, perform a stability test. Gently shake and apply pressure to the workbench frame to ensure it remains firm and sturdy.
Properly assembling the workbench frame is crucial for a reliable and durable workbench. Take your time to ensure accurate alignment, squareness, and levelness. Reinforce the joints and allow for sufficient drying time to create a solid and dependable work surface.
With the frame successfully assembled, it’s time to move on to the next step: attaching the workbench top.
Read more: How To Build A Guitar With Hand Tools
Attaching the Workbench Top
The workbench top is where you’ll be carrying out your woodworking projects, so it’s essential to attach it securely to the frame. In this step, we will guide you through the process of attaching the workbench top. Follow these steps to ensure a stable and functional workbench:
- Gather the Workbench Top: Depending on your design, the workbench top may be a solid piece of wood, multiple boards joined together, or even a laminated surface. Ensure it is well-prepared, sanded, and clean before proceeding.
- Position the Workbench Top: Place the workbench top on the frame, ensuring that it is centered and properly aligned. Use clamps to hold it in place temporarily, allowing you to check for any adjustments that may be needed.
- Mark the Attachment Points: Use a pencil or marking knife to mark the locations where the workbench top will be attached to the frame. These marks will guide you during the attachment process and ensure proper alignment.
- Pre-drill the Holes: To prevent the wood from splitting, pre-drill holes at the marked attachment points. Use a drill bit slightly smaller than the diameter of the screws or bolts you’ll be using.
- Attach the Workbench Top: With the pre-drilled holes in place, use screws, bolts, or other appropriate fasteners to secure the workbench top to the frame. Place the fasteners evenly along the attachment points for a secure and balanced connection.
- Check for Stability: Once the workbench top is attached, carefully check the stability of the workbench. Apply pressure to various areas of the top to ensure it remains firmly in place. Make any necessary adjustments or tighten the fasteners as needed.
- Finish the Workbench Top: If desired, apply a protective finish to the workbench top to enhance its durability and resist stains or damage. Choose a finish that is suitable for woodworking projects and follow the manufacturer’s instructions for application.
Attaching the workbench top is a critical step in completing your workbench. Taking the time to properly align and secure the top will ensure a stable and functional workspace for your woodworking projects. Test the stability of the workbench after attachment and make any necessary adjustments for optimal performance.
With the workbench top securely attached, you’re one step closer to finishing your workbench. The final step is to sand and finish the workbench to enhance its appearance and protect it from wear and tear.
Sanding and Finishing the Workbench
Sanding and finishing the workbench is the final step in completing your project. This process not only enhances the appearance of your workbench but also provides protection from moisture, stains, and general wear and tear. Follow these steps to achieve a smooth and well-finished workbench:
- Prepare the Workbench: Remove any dust, debris, or loose particles from the workbench surface. Wipe it down with a clean, dry cloth to ensure a clean starting point for sanding.
- Sand the Workbench: Use sandpaper or a power sander to sand the entire workbench surface. Start with a coarser grit (around 80 or 120) to remove any rough edges or imperfections. Gradually move to finer grits (such as 220 or 320) until the surface is smooth and free of visible scratches.
- Round the Edges: If desired, use sandpaper or a router to round the edges of the workbench. This not only provides a comfortable working surface but also improves the overall aesthetics of the bench.
- Clean the Workbench: After sanding, clean away any dust or debris from the workbench surface. Use a brush or vacuum to ensure that no particles are left behind.
- Choose a Finish: Select an appropriate finish for your workbench. This can include oil-based finishes, water-based finishes, or even natural alternatives such as beeswax or varnish. Consider factors such as durability, ease of application, and the desired appearance of the workbench.
- Apply the Finish: Follow the manufacturer’s instructions for applying the chosen finish. Use a brush or a cloth to evenly coat the workbench surface, making sure to cover all areas. Allow the finish to dry completely as per the manufacturer’s recommended drying time.
- Apply Multiple Coats: For added protection and a smoother finish, apply multiple coats of the chosen finish. Sand lightly between each coat to remove any imperfections and promote adherence.
- Final Touches: Once the finish is fully dry and cured, inspect the workbench for any areas that need additional touch-ups or adjustments. Make any necessary corrections to ensure a flawless final result.
Sanding and finishing your workbench not only improves its appearance but also extends its lifespan. A well-finished workbench not only looks professional but also enhances the overall satisfaction and experience of your woodworking projects.
With the sanding and finishing process complete, step back and admire your work. Your handcrafted workbench is now ready to assist you in countless woodworking endeavors.
Conclusion
Congratulations on completing your journey of building a workbench with hand tools! Through careful selection of wood, gathering the necessary hand tools, preparing the design, measuring and marking the wood, cutting it to size, joining the pieces, creating the legs, assembling the frame, attaching the top, and finally, sanding and finishing the workbench, you’ve created a sturdy, functional, and personalized workspace for your woodworking projects.
Building a workbench with hand tools is not only a practical endeavor but also a rewarding experience that allows you to connect with the materials and develop your woodworking skills. By following the step-by-step process outlined in this article, you have taken control of the entire construction process, ensuring the quality and longevity of your workbench.
Remember, a well-built workbench will provide you with a stable surface to carry out your woodworking tasks with accuracy and precision. It will be a reliable companion throughout all your future projects, supporting you in your woodworking journey.
As you embark on your woodworking endeavors, make sure to maintain your workbench by regularly cleaning it and inspecting for any necessary repairs or adjustments. With proper care, your handcrafted workbench will serve you well for years to come.
Now that you have a solid foundation for your woodworking projects, embrace the endless possibilities and enjoy the satisfaction of working on a bench crafted with your own hands. Happy woodworking!
Frequently Asked Questions about How To Build A Workbench With Hand Tools
Was this page helpful?
At Storables.com, we guarantee accurate and reliable information. Our content, validated by Expert Board Contributors, is crafted following stringent Editorial Policies. We're committed to providing you with well-researched, expert-backed insights for all your informational needs.


0 thoughts on “How To Build A Workbench With Hand Tools”