Articles
How To Tear A Building Down With Hand Tools
Modified: October 20, 2024
Learn the step-by-step process of tearing down a building using only hand tools in this informative and practical article. Strengthen your knowledge and skills with these insightful tips.
(Many of the links in this article redirect to a specific reviewed product. Your purchase of these products through affiliate links helps to generate commission for Storables.com, at no extra cost. Learn more)
Introduction
Welcome to the exciting world of DIY demolition! Have you ever wondered how it’s possible to tear down a building using just hand tools? Well, wonder no more! In this article, we will dive into the process of demolishing a building with nothing but your trusty hand tools. While it may seem like a daunting task, with proper planning and safety precautions, you can successfully bring down a structure and clear the way for something new.
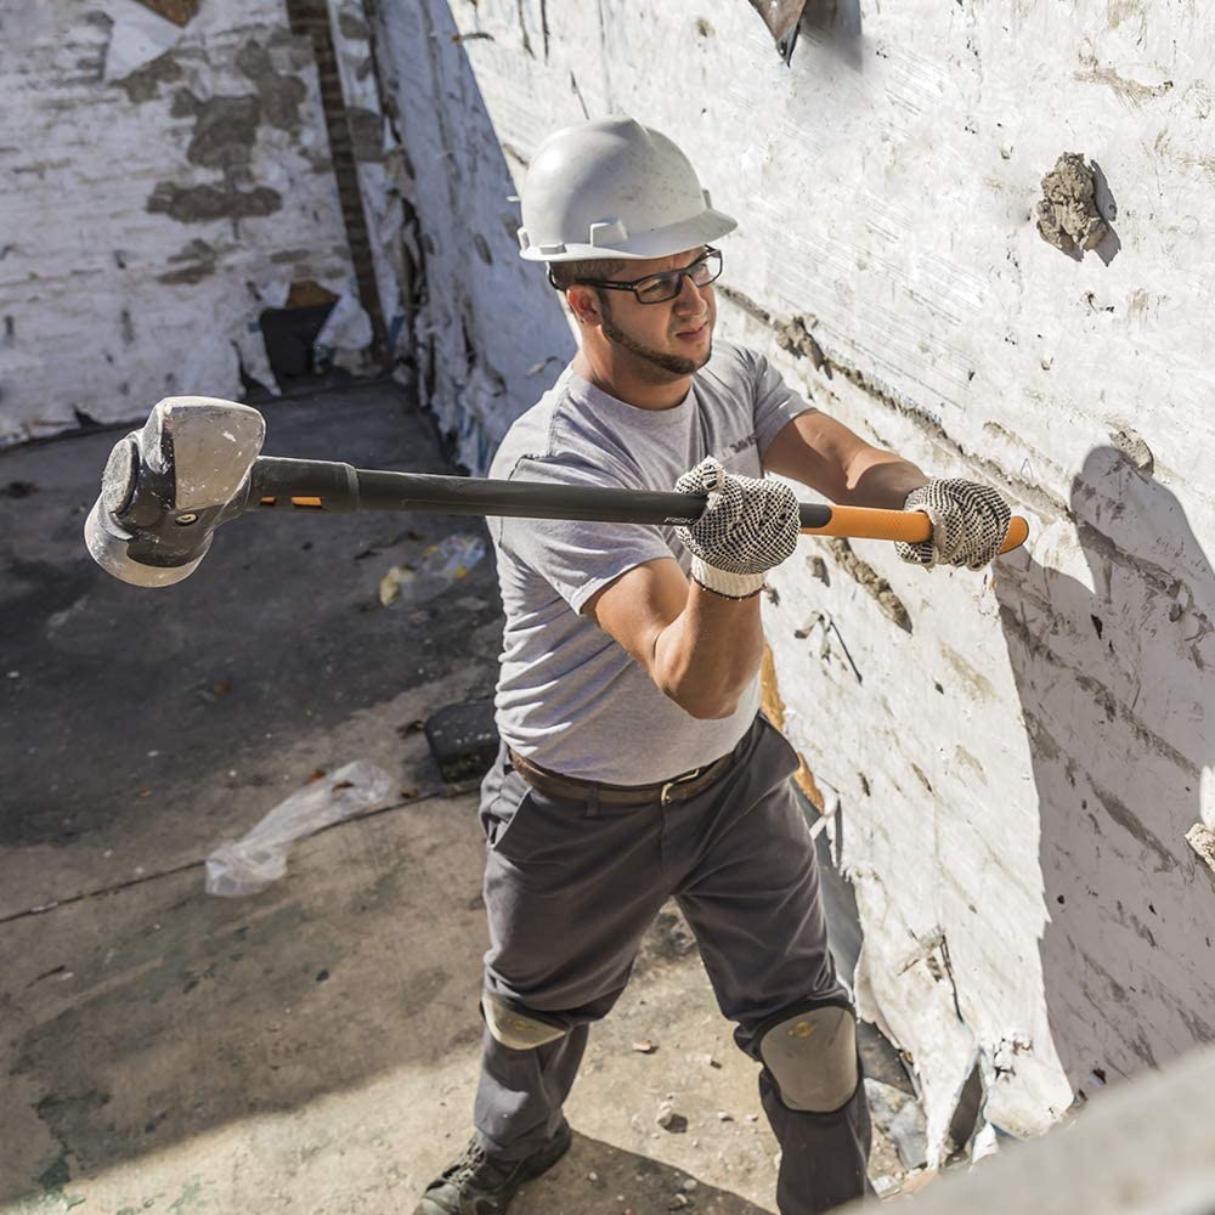
Before we jump into the nitty-gritty details of the demolition process, it’s crucial to emphasize the importance of safety. Demolition work can be hazardous, so it’s essential to take necessary precautions to protect yourself and others. Remember to wear appropriate personal protective equipment (PPE), such as safety goggles, gloves, and a hard hat. Additionally, be aware of your surroundings, especially when working at heights or near power lines.
Now that safety is at the forefront, let’s discuss the necessary hand tools you’ll need for the demolition project. The right tools can make all the difference in efficiency and effectiveness.
Key Takeaways:
- Safety is paramount when demolishing a building with hand tools. From assessing structural integrity to wearing proper PPE, prioritizing safety measures ensures a smoother and safer demolition process.
- Selecting the right hand tools and assessing the building’s structure are crucial for an efficient demolition. Careful planning, proper tools, and environmental considerations contribute to a successful building teardown.
Read more: How To Tear Down A Shed
Safety Precautions
When it comes to demolition, safety should always be the top priority. Here are some essential safety precautions to follow when tearing down a building with hand tools:
- Assess the structural integrity of the building: Before you begin any demolition work, thoroughly inspect the building to identify any weaknesses or potential hazards. Look for cracks, signs of water damage, or other structural issues that could affect the stability of the building.
- Secure the work area: Clear the surrounding area of any obstacles or debris that could pose a tripping or falling hazard. Mark off the work area with caution tape or barriers to prevent unauthorized access.
- Wear appropriate personal protective equipment (PPE): Protect yourself by wearing safety goggles to shield your eyes from flying debris, gloves to safeguard your hands, and a hard hat to protect against potential head injuries.
- Use respiratory protection: If there is a risk of dust or hazardous materials being released during the demolition process, wear a mask or respirator to prevent inhalation of harmful particles.
- Work with a partner: Having a partner can provide an extra set of eyes to watch for potential dangers and assist in case of an emergency. Communicate with your partner throughout the demolition process to ensure everyone is on the same page.
- Take breaks and stay hydrated: Demolition work can be physically demanding, so make sure to take regular breaks and stay hydrated to avoid fatigue and dehydration.
- Follow proper lifting techniques: When lifting heavy objects or using hand tools, use correct lifting techniques to prevent strain or injury. Bend your knees, keep your back straight, and use your leg muscles to lift.
- Be cautious of electrical wires: If the building has electricity connected, be cautious of electrical wires and ensure they are properly disconnected before beginning any demolition work.
- Dispose of waste properly: Have a plan in place for proper waste disposal. Sort materials into different categories such as recyclables, hazardous waste, and general waste, and dispose of them accordingly.
By following these safety precautions, you can significantly reduce the risks associated with demolishing a building and ensure a safer working environment for you and those around you.
Selecting the Right Hand Tools
Choosing the appropriate hand tools for a demolition project can greatly impact your efficiency and the outcome of the job. Here are some essential hand tools to consider:
- Hammer: A good quality claw hammer is a must-have tool for any demolition work. It can be used for removing nails, breaking down walls, and other general tasks.
- Crowbar: A sturdy crowbar is excellent for prying and levering heavy objects. It can help you remove stubborn fixtures, dismantle wooden structures, and create access points.
- Sledgehammer: When it comes to knocking down walls or breaking concrete, a sledgehammer is a powerful tool. Choose a sledgehammer with a comfortable grip and a weight suitable for your strength.
- Chisel: A chisel is perfect for precision work, such as removing tiles, breaking up concrete, or removing stubborn pieces of material. Look for a chisel with a sharp and durable blade.
- Pry bar: Similar to a crowbar, a pry bar is designed to help you pry and lift objects. It’s especially useful when removing baseboards, trim, or door frames.
- Hacksaw: A hacksaw can be handy for cutting through metal pipes or other materials that may need to be removed during demolition.
- Bolt cutters: If there are metal chains, wires, or fences that need to be cut during the demolition process, bolt cutters are the tool for the job.
- Utility knife: A utility knife is essential for cutting through materials like drywall or insulation. Look for a knife with a retractable blade and replace the blade regularly for optimal cutting performance.
- Demolition bar: A demolition bar, also known as a wrecking bar, is a multi-purpose tool that can be used for prying, removing nails, and general demolishing tasks.
These are just a few of the hand tools that can be useful for a demolition project. Depending on the specifics of the building and your personal preferences, there may be additional tools that you will find valuable. Invest in high-quality tools that are durable and comfortable to work with, as they can make all the difference in completing your demolition project efficiently.
Assessing the Building
Before you begin tearing down a building, it’s crucial to assess its structure and understand its vulnerabilities. This assessment will help you plan your demolition strategy and ensure that the process is carried out safely and efficiently.
Here are the key steps to follow when assessing a building:
- Inspect the building’s blueprints: If available, review the original blueprints of the building. This will provide valuable insights into its layout, foundation, load-bearing walls, and other structural aspects.
- Conduct a visual inspection: Carefully examine the building from different angles, both inside and outside. Look for cracks, gaps, sagging, or any signs of deterioration. Pay close attention to load-bearing walls, beams, and columns.
- Identify potential hazards: Identify any potential hazards that may pose a risk during the demolition process, such as asbestos, mold, or structural weaknesses.
- Determine the presence of utilities: Locate and mark the positions of electrical wires, gas lines, plumbing, and any other utilities. Ensure that these utilities are properly shut off or disconnected before starting the demolition work.
- Consider environmental factors: Take into account the surrounding environment and local regulations. If the building is close to other structures, roads, or public areas, plan your demolition approach accordingly to minimize any potential risks.
- Assess the accessibility: Evaluate the accessibility of the building and consider how it may affect the demolition process. Determine the best entry and exit points for removing debris and bringing in equipment.
- Consult professionals if needed: If you are unsure about any aspect of the assessment or encounter potential issues that require expertise, consult with professionals such as structural engineers or demolition experts.
By thoroughly assessing the building before demolition, you can identify potential risks and plan your approach accordingly. This preparation will help ensure the safety of everyone involved and contribute to a smoother and more efficient demolition process.
Removing Fixtures and Fittings
Once you have assessed the building and are ready to begin the demolition process, it’s time to remove the fixtures and fittings. This step is essential in preparing the building for demolition and clearing out any salvageable items.
Here are the steps to follow when removing fixtures and fittings:
- Disconnect utilities: Before removing any fixtures, ensure that all utilities, such as water, electricity, and gas, are disconnected and turned off. This step will prevent any accidents or damage during the removal process.
- Prepare necessary tools: Gather the appropriate tools for removing fixtures and fittings, such as wrenches, screwdrivers, pliers, and adjustable spanners. Having the right tools will make the process much smoother.
- Start with smaller fixtures: Begin by removing smaller fixtures such as light fixtures, switches, outlet covers, and door knobs. Use the appropriate tools to disconnect and remove these items carefully.
- Move on to larger fixtures: Once the smaller fixtures are removed, you can proceed to larger items such as sinks, toilets, bathtubs, cabinets, and countertops. Disconnect plumbing connections and use tools like wrenches and screwdrivers to detach them from the walls or floor.
- Remove doors and windows: Take out doors and windows by removing the screws and hinges. If there are any glass panes, use caution and protective gloves to avoid injuries.
- Detach built-in furniture: If there are any built-in furniture pieces, such as shelves or built-in closets, carefully detach them from the surrounding walls, one piece at a time.
- Label and store salvageable items: As you remove fixtures and fittings, sort and label items that may be salvageable or reusable. This could include appliances, cabinets, or decorative elements. Properly store these items for future use or donation.
- Dispose of unwanted items: Dispose of any fixtures or fittings that cannot be salvaged or reused. Separate materials for recycling, and arrange for proper disposal of any hazardous materials.
Remember to exercise caution while removing fixtures and fittings, as some items may be heavy or contain sharp edges. By carefully following these steps and using the right tools, you can efficiently remove fixtures and fittings in preparation for the building’s demolition.
When tearing down a building with hand tools, start by removing any salvageable materials such as doors, windows, and fixtures before beginning demolition to reduce waste and maximize reuse.
Read more: How To Build A Desk With Hand Tools
Demolishing Walls
Now that you have removed the fixtures and fittings, it’s time to tackle the walls. Demolishing walls can be one of the most labor-intensive parts of the demolition process, but with the right approach and tools, it can be done effectively.
Here are the steps to follow when demolishing walls:
- Clear the surrounding area: Before you begin, remove any debris or objects near the wall that may obstruct your movement or create hazards. This will provide you with a clear workspace.
- Identify load-bearing walls: Determine which walls are load-bearing and must be demolished with caution. If you are unsure, consult with a structural engineer or a professional to ensure you do not compromise the building’s integrity.
- Start with the non-load-bearing walls: Begin by focusing on non-load-bearing walls. These walls are not essential for the building’s structure and can be taken down more easily.
- Use a pry bar or crowbar: Insert a pry bar or crowbar behind the baseboard or trim and gently pry it away from the wall. This will expose the edges of the wall and make it easier to start demolishing it.
- Make a starting point: With a hammer or sledgehammer, create a hole or notch in the wall. This will provide an entry point for further demolition.
- Choose your method: Depending on the wall material, there are different methods you can use for demolition. For example, if it’s a drywall, you can use a sledgehammer to break it into manageable pieces. For brick or concrete walls, you may need to use a chisel and hammer to chip away at the material.
- Work from top to bottom: Start from the top of the wall and work your way down. This will prevent excessive damage to the surrounding area and make it easier to handle the debris.
- Remove electrical wires and plumbing: If there are any electrical wires or plumbing running through the walls, ensure they are properly disconnected and removed before continuing with the demolition.
- Dispose of debris: As you progress, gather and dispose of the demolished materials. Sort them into appropriate categories for recycling or disposal.
- Take precautions with load-bearing walls: If you need to demolish load-bearing walls, consult with a professional to determine the best approach. In some cases, temporary supports or braces may need to be installed to ensure the building’s stability during the demolition process.
Demolishing walls can be a physically demanding task, so take regular breaks and stay hydrated. Additionally, be mindful of any hazardous materials that may be present during the demolition process. By following these steps and safety precautions, you can successfully demolish the walls and make progress in your building demolition project.
Taking Down the Roof
As you continue with the building demolition process, one of the significant tasks is taking down the roof. Removing the roof requires careful planning, proper tools, and adherence to safety precautions to ensure a successful and safe demolition.
Here are the steps to follow when taking down the roof:
- Prepare the area: Clear the area around the building from any potential obstacles or hazards. Remove any loose debris or objects that might interfere with the roof removal process.
- Assess the roof materials: Determine the type of roofing material you are dealing with. Common roofing materials include asphalt shingles, metal sheets, clay tiles, or cedar shakes. Each material may require different techniques and tools for removal.
- Work from the top down: Start by removing any ridge caps or vents from the top of the roof. Carefully pry them off and set them aside for disposal or potential salvage.
- Remove shingles or metal sheets: If the roof is covered with shingles, use a roofing shovel or pry bar to lift and separate them from the roof surface. Work your way down, removing one row at a time. For metal roofs, use the appropriate tools such as tin snips or a circular saw to cut and remove the metal sheets.
- Handle clay tiles or cedar shakes: If the roof is made of clay tiles or cedar shakes, exercise extra caution in their removal. Use a roof tile ripper or specialized tools to pry them off individually, ensuring you don’t damage the surrounding tiles or shakes.
- Dispose of debris: As you remove the roof materials, collect and dispose of them properly. Sort materials for recycling or disposal according to local regulations and guidelines.
- Consider professional assistance: Depending on the size and complexity of the roof, it may be advisable to seek professional assistance. Structural engineers or roofing contractors can help guide you through the roof removal process, particularly if it involves trusses or other intricate roof structures.
- Ensure structural integrity: Once the roof is removed, inspect the exposed building structure. Check for any damage or signs of weakness in the supporting beams or rafters. Address any issues promptly to maintain the structural integrity of the building.
Throughout the roof removal process, prioritize safety. Use appropriate personal protective equipment (PPE), including gloves, safety glasses, and a hard hat. Be cautious when working at heights and ensure you have a secure footing on the roof surface.
Remember to consult local regulations and secure any necessary permits before starting the roof demolition. By following these steps and safety precautions, you can safely and effectively remove the roof, bringing you closer to the completion of your building demolition project.
Disposing of Debris
As you progress with the building demolition, it’s important to have a proper plan in place for disposing of the debris. Clearing the site and disposing of the debris responsibly is not only essential for safety but also for environmental considerations.
Here are the steps to follow when disposing of debris:
- Sort and separate materials: As the demolition progresses, sort the debris into different categories based on their material composition. Common categories include wood, metal, concrete, plaster, and general waste. Separating the materials will make recycling and disposal more efficient.
- Recycle reusable materials: Identify any salvageable or reusable materials, such as doors, windows, fixtures, or furniture. Set them aside for donation, resale, or repurposing. Recycling these materials contributes to environmental sustainability and reduces waste.
- Contact recycling centers: Research local recycling centers or construction debris recycling services in your area. Contact them to determine their specific requirements and any fees associated with disposing of the different materials. Many recycling facilities accept materials like concrete, metal, and wood.
- Dispose of hazardous materials: If you come across any hazardous materials during the demolition, such as asbestos, lead-based paint, or insulation, take extra precautions. Consult with professionals who specialize in hazardous waste removal and disposal to ensure compliance with safety regulations.
- Arrange for waste removal services: For general waste or materials that cannot be recycled, arrange for waste removal services. Contact your local waste management or dumpster rental services to schedule the collection and disposal of the debris.
- Comply with disposal regulations: Ensure that you follow local regulations and guidelines for disposal. Some materials may require special handling or permits, so familiarize yourself with the specific requirements in your area.
- Maintain a clean work area: As you dispose of the debris, regularly clean and organize the work area. This will help prevent accidents and keep the site safe and manageable.
- Keep track of disposal records: Maintain records of the debris disposal, including receipts, invoices, or waste manifests. These records may be required for accountability purposes or for future reference.
Remember that responsible debris disposal is crucial for protecting the environment, adhering to local regulations, and maintaining a safe and orderly demolition site. By following these steps and working with local recycling and waste management services, you can ensure that the debris is disposed of appropriately, minimizing the impact on the environment.
Conclusion
Congratulations, you have reached the end of our comprehensive guide on tearing down a building with hand tools! Demolishing a building may seem like a daunting task, but with proper planning, safety precautions, and the right hand tools, it can be accomplished successfully.
Throughout this article, we discussed the importance of safety and the necessary steps to take to protect yourself and others during the demolition process. We also highlighted the significance of selecting the right hand tools for the job, assessing the building, removing fixtures and fittings, demolishing walls, taking down the roof, and disposing of debris responsibly.
Remember, safety should always be the top priority. Ensure you wear appropriate personal protective equipment (PPE) at all times and follow proper lifting techniques to prevent accidents or injuries. Take breaks, stay hydrated, and work with a partner to ensure a smoother and safer demolition process.
Additionally, be mindful of environmental considerations by recycling salvageable materials and disposing of debris responsibly. Contact local recycling centers and waste management services to adhere to regulations and guidelines for proper waste disposal.
Whether you’re undertaking a small DIY project or engaging in a larger-scale demolition, following these guidelines will help you successfully tear down a building with hand tools. Take your time, stay organized, and consult professionals when needed to ensure a smooth and efficient demolition process.
Good luck with your building demolition project, and may you make way for something new and exciting!
Frequently Asked Questions about How To Tear A Building Down With Hand Tools
Was this page helpful?
At Storables.com, we guarantee accurate and reliable information. Our content, validated by Expert Board Contributors, is crafted following stringent Editorial Policies. We're committed to providing you with well-researched, expert-backed insights for all your informational needs.


0 thoughts on “How To Tear A Building Down With Hand Tools”