Home>Furniture>Living Room Furniture>How To Make A Window Seat With Storage
Living Room Furniture
How To Make A Window Seat With Storage
Modified: August 27, 2024
Learn how to create a stylish and functional window seat with storage in your living room. Maximize space with this DIY living room furniture project.
(Many of the links in this article redirect to a specific reviewed product. Your purchase of these products through affiliate links helps to generate commission for Storables.com, at no extra cost. Learn more)
Introduction
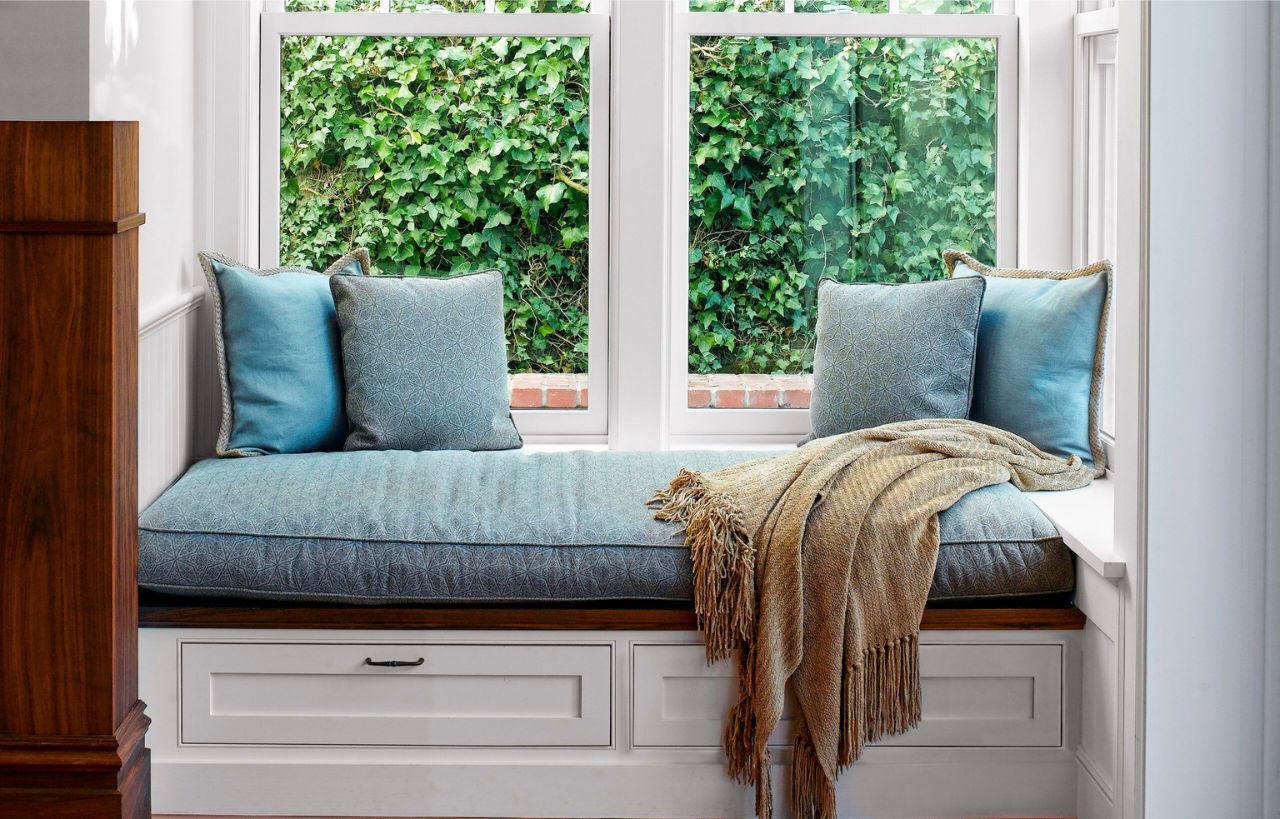
Welcome to the world of cozy and functional living room furniture! If you’re looking to add both style and functionality to your living space, a window seat with storage is the perfect solution. Not only does it provide additional seating, but it also offers a clever way to utilize the often-overlooked space beneath your windows. Whether you want a cozy reading nook, a place to relax and enjoy the view, or simply some extra storage, a window seat can be a great addition to any home.
In this article, we will guide you through the process of creating your own window seat with storage. We’ll cover everything from planning and choosing the right design to gathering the necessary materials and tools. So, grab your measuring tape and let’s get started on this rewarding and creative project!
Key Takeaways:
- Create a cozy window seat with storage by measuring, planning, and building a base frame with compartments. Add a comfortable cushion and finishing touches for a stylish and functional addition to your living room.
- Transform an underutilized space into a stylish and functional window seat with storage. Gather materials, build the base frame, add storage compartments, and finish with a comfortable cushion and personalized touches for a cozy and inviting spot in your living room.
Read more: How To Make A Bay Window Seat
Materials and Tools Needed
Before embarking on your window seat project, it’s important to gather all the necessary materials and tools to ensure a smooth and successful build. Here’s a list of what you’ll need:
- Measuring tape
- Pencil
- Electric or hand saw
- Drill
- Screwdriver
- Wood screws
- Wood glue
- Plywood or MDF board
- 2×4 lumber for frame
- Foam cushion or upholstery foam
- Fabric for cushion cover
- Staple gun
- Paint or stain
- Paintbrush or roller
- Sandpaper
These materials should cover the basics of what you’ll need, but keep in mind that the specific requirements may vary depending on the design you choose and the size of your window seat.
Additionally, it’s always a good idea to have some safety equipment on hand, such as safety glasses and a dust mask, especially if you’ll be working with power tools or sanding the wood.
Once you have everything prepared, it’s time to move on to the next step: measuring and planning your window seat.
Step 1: Measure and Plan
The first step in creating your window seat with storage is to measure the area where you plan to install it. This will help you determine the dimensions and ensure a proper fit.
Start by measuring the width of the window where you want to place the seat. Take note of any obstructions such as radiators or electrical outlets that may affect the size of your window seat. Next, measure the height from the floor to the window sill or bottom of the window. This will determine the height of the seat and how much space you have underneath for storage.
Once you have the width and height measurements, you can decide how deep you want the seat to be. A depth of around 18-24 inches is usually comfortable for sitting, but you can adjust this according to your preference. Consider the overall proportions of your room and ensure that the depth of the seat is proportionate to the window and surrounding furniture.
Now that you have your measurements, it’s time to sketch out a plan for your window seat design. Consider the style and aesthetic you want to achieve. Do you prefer a simple and minimalist look, or do you want to incorporate decorative elements like molding or trim? Think about how the window seat will blend with the existing decor of your room.
It’s also important to plan for the storage compartments. Decide if you want open shelves, drawers, or a combination of both. Consider what items you will be storing and how accessible you want them to be. Sketch out the arrangement and dimensions of the storage compartments. This will help you determine the overall dimensions of your window seat.
Take the time to plan and visualize your window seat design before moving on to the next step. This will ensure that you have a clear vision and minimize any mistakes or rework later on. Once you’re satisfied with your plan, it’s time to move on to choosing a window seat design.
Step 2: Choose a Window Seat Design
Choosing the right window seat design is crucial to achieving the desired look and functionality for your living room. There are various design options to consider, ranging from simple and classic to more intricate and decorative. Here are a few popular window seat designs to inspire you:
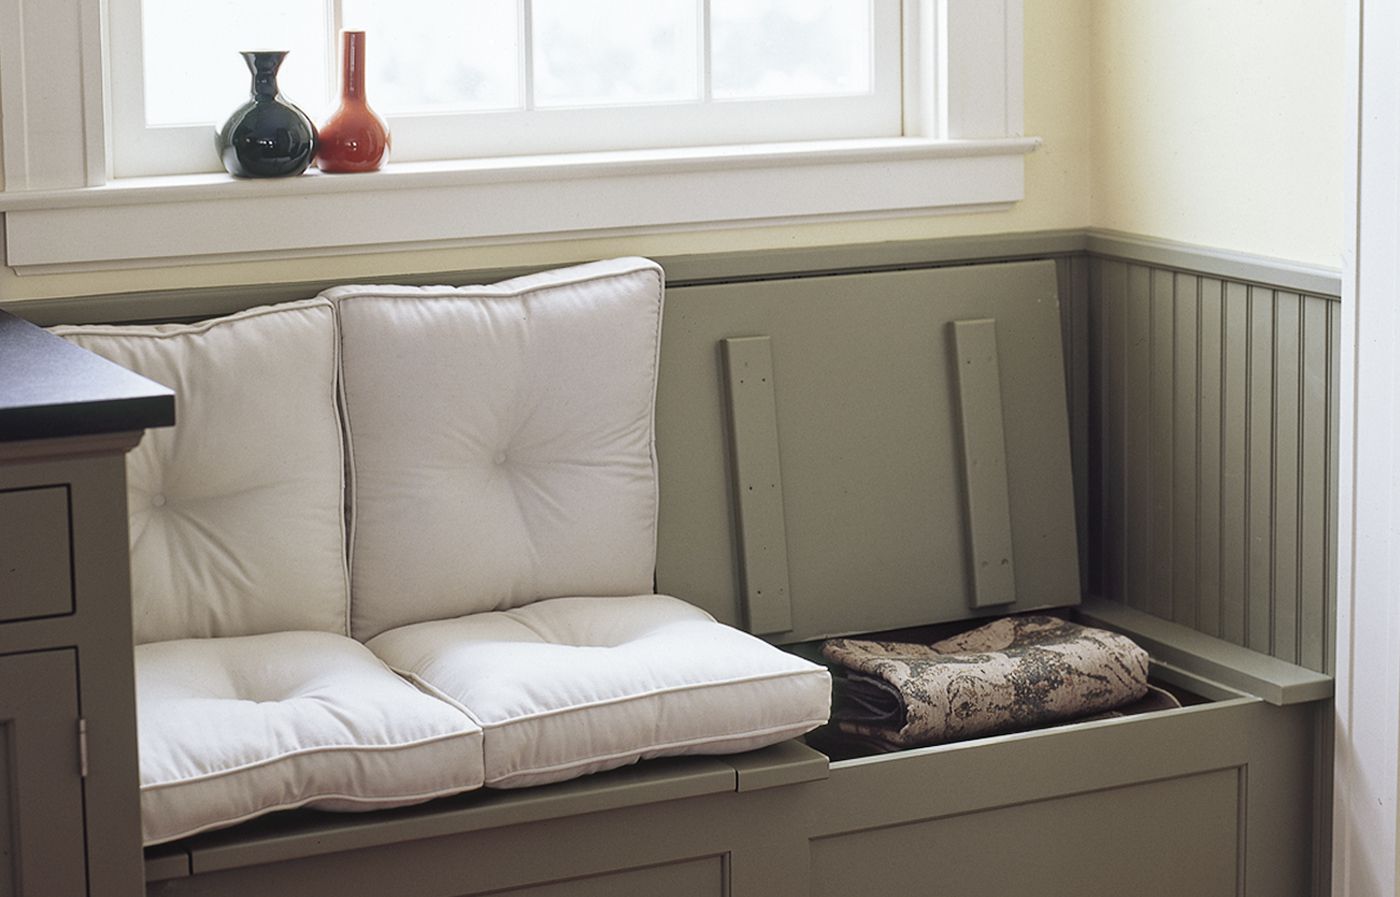
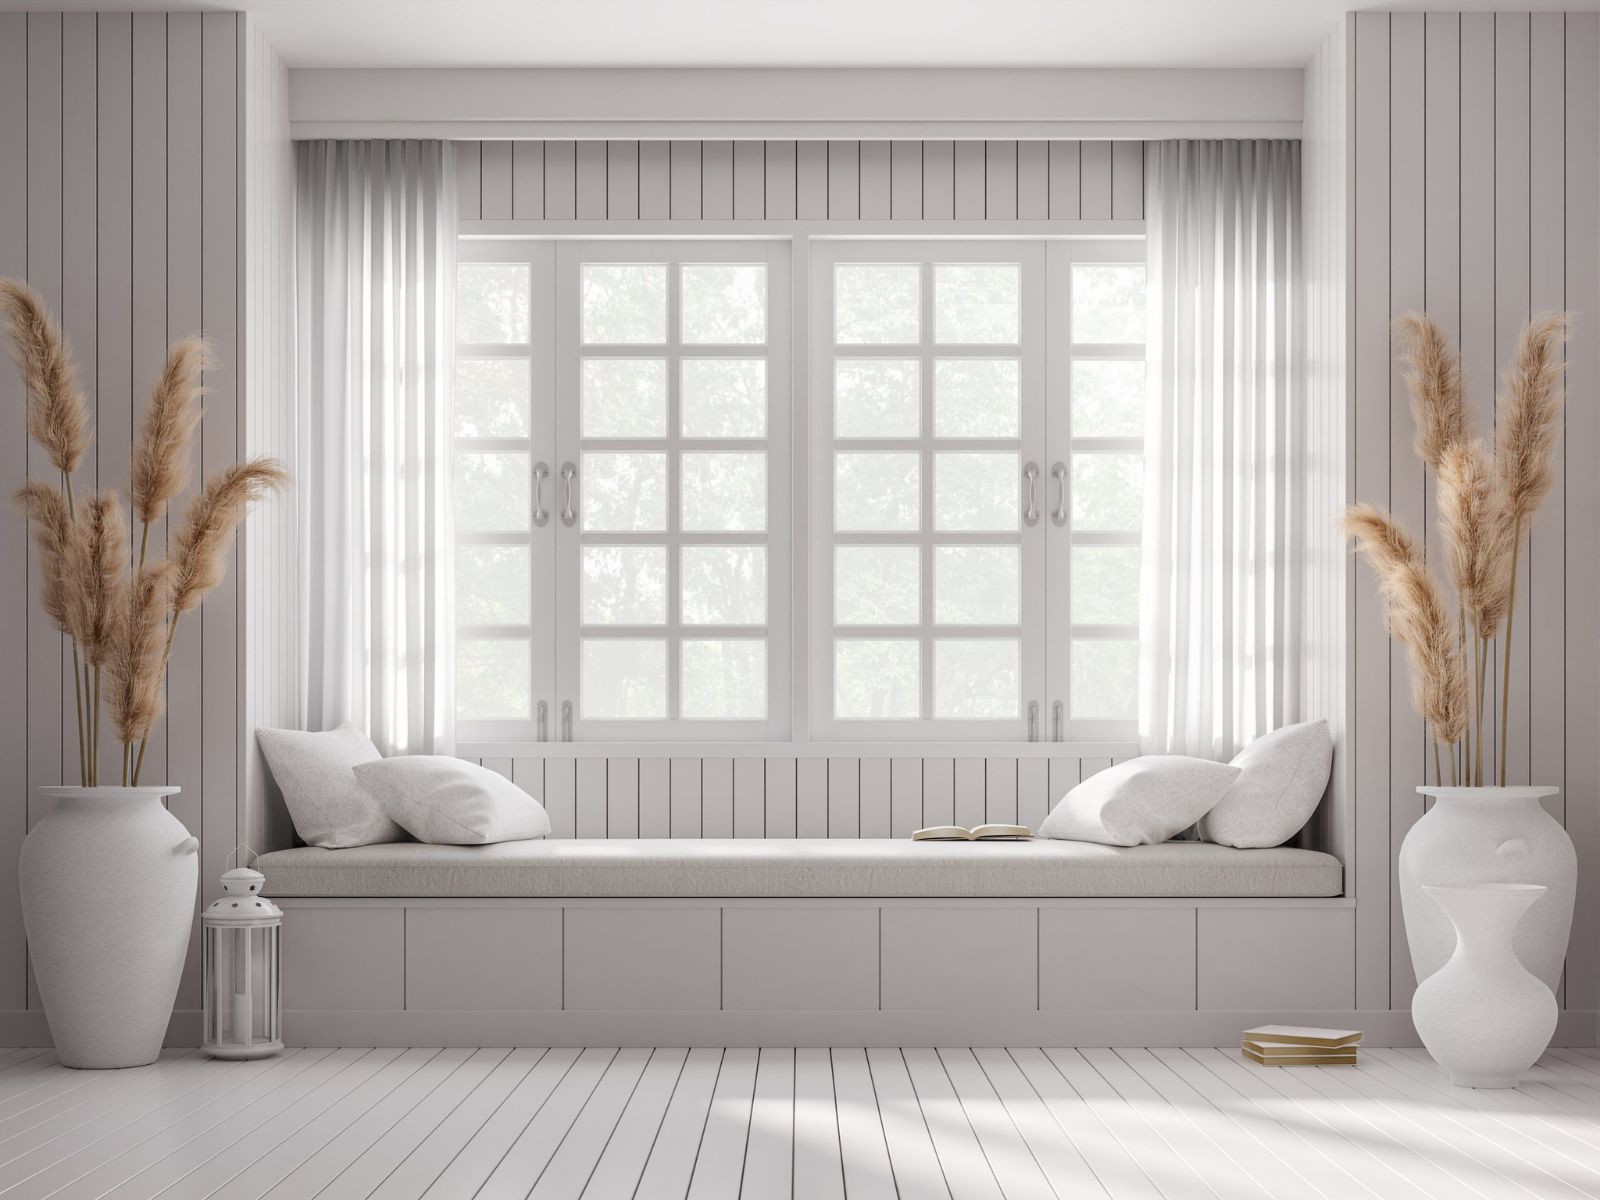
- Bench-style seat: This design features a long, continuous bench-like seat that stretches beneath the window. It’s a versatile and straightforward option that provides ample seating and storage space. You can further customize it by adding cushions, pillows, or decorative trims.
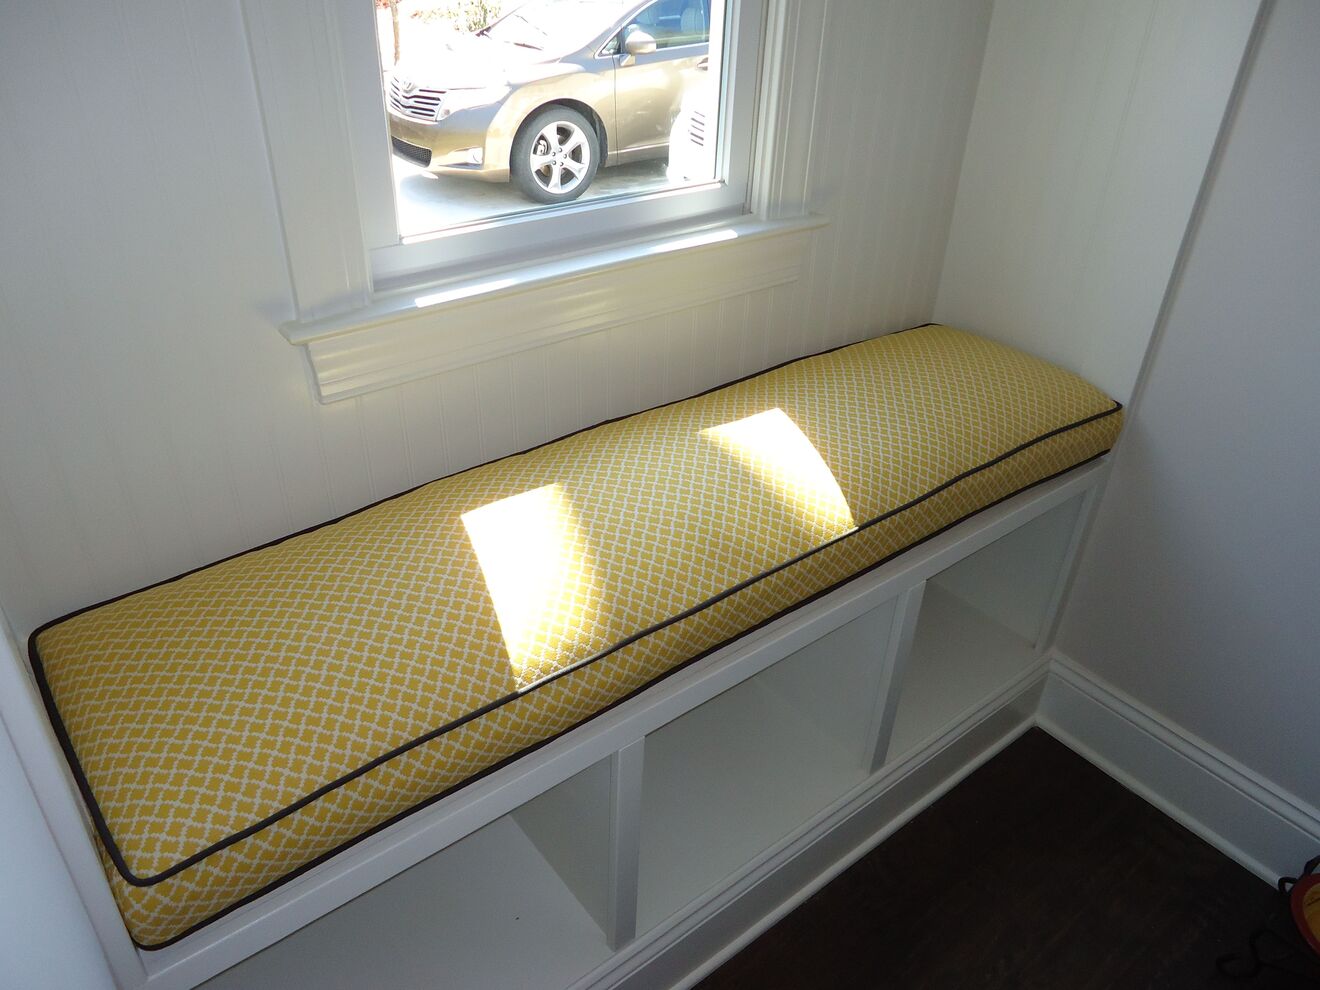
- Cubby-style seat: This design incorporates individual cubbies or compartments beneath the seat. You can have open cubbies for easy access to items or opt for drawers for a tidier appearance. This design is great for organization and can be customized to fit your storage needs.
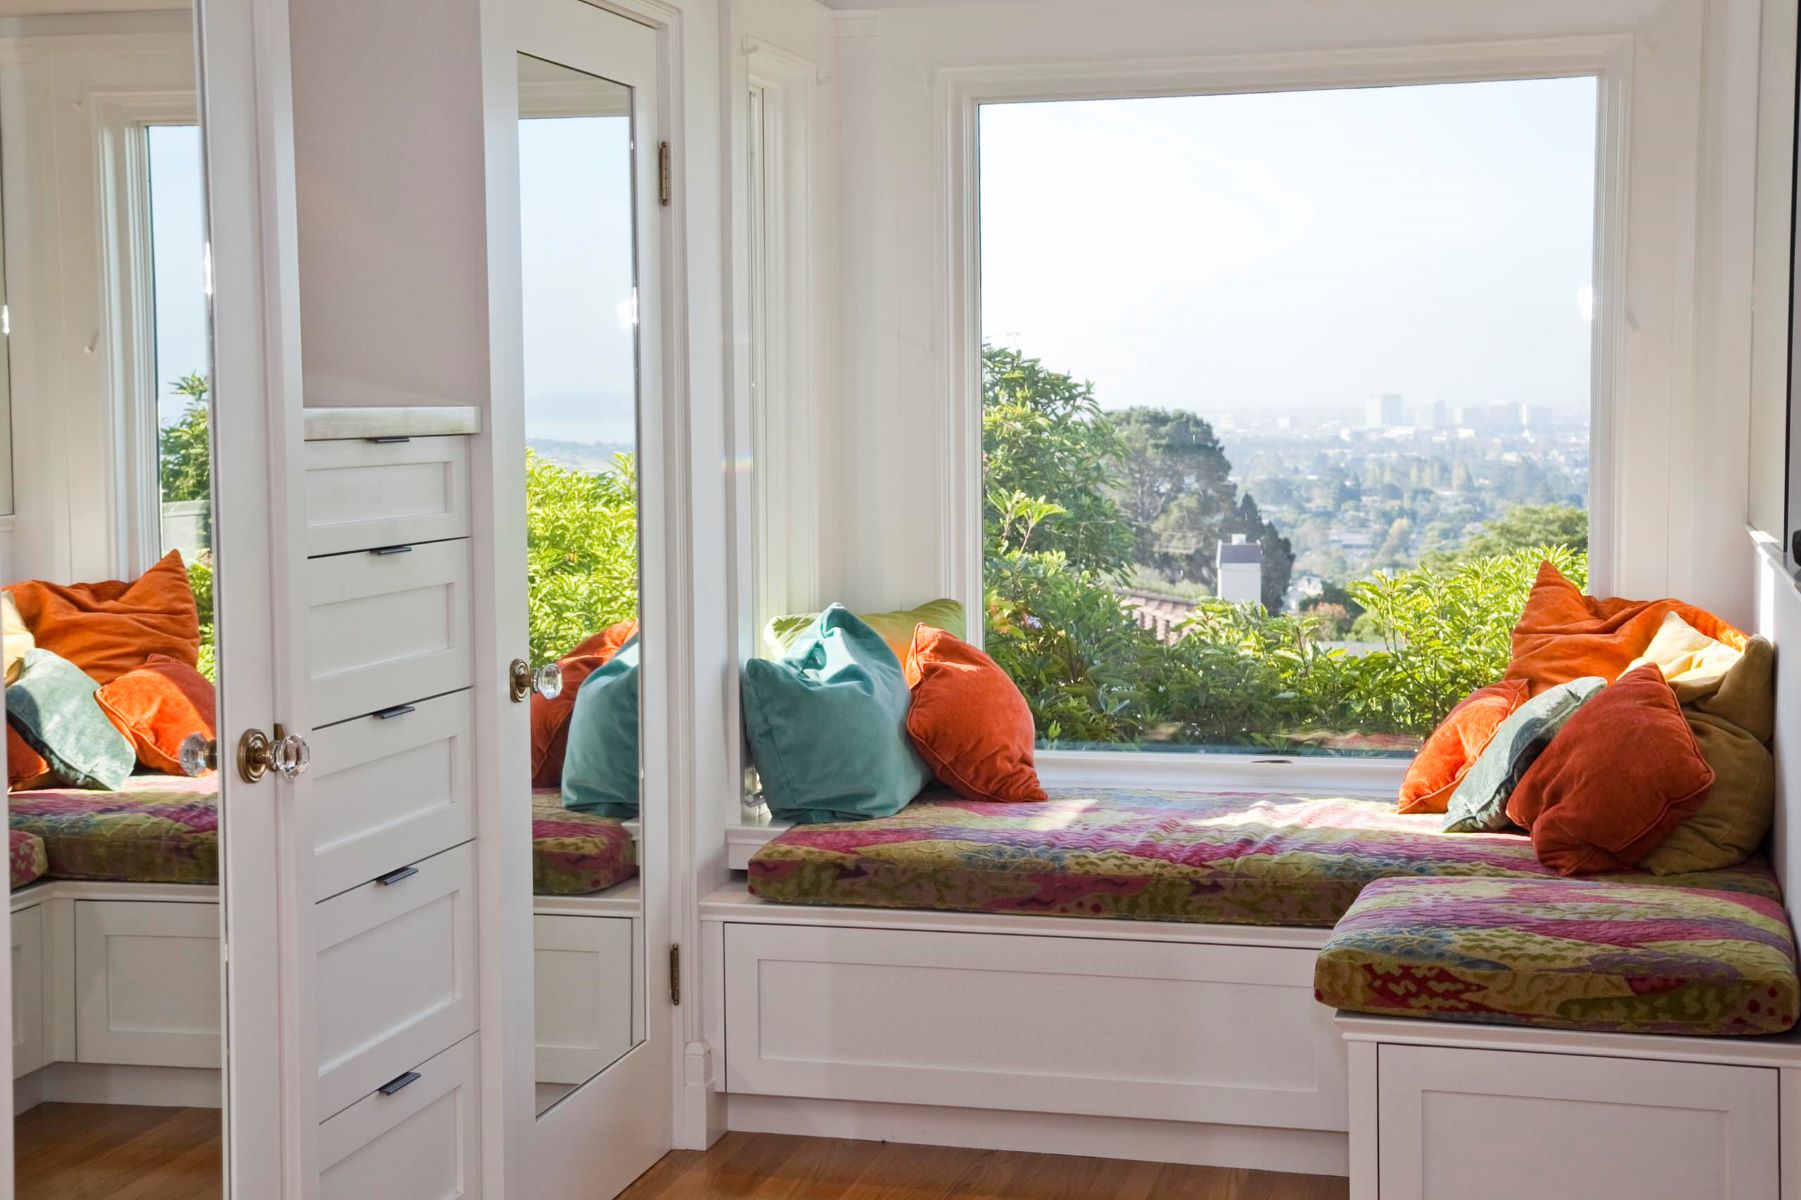
- Bay window seat: If you have a bay window, consider utilizing the space by creating a curved or angled window seat. This design can provide a cozy and intimate seating area with a panoramic view.
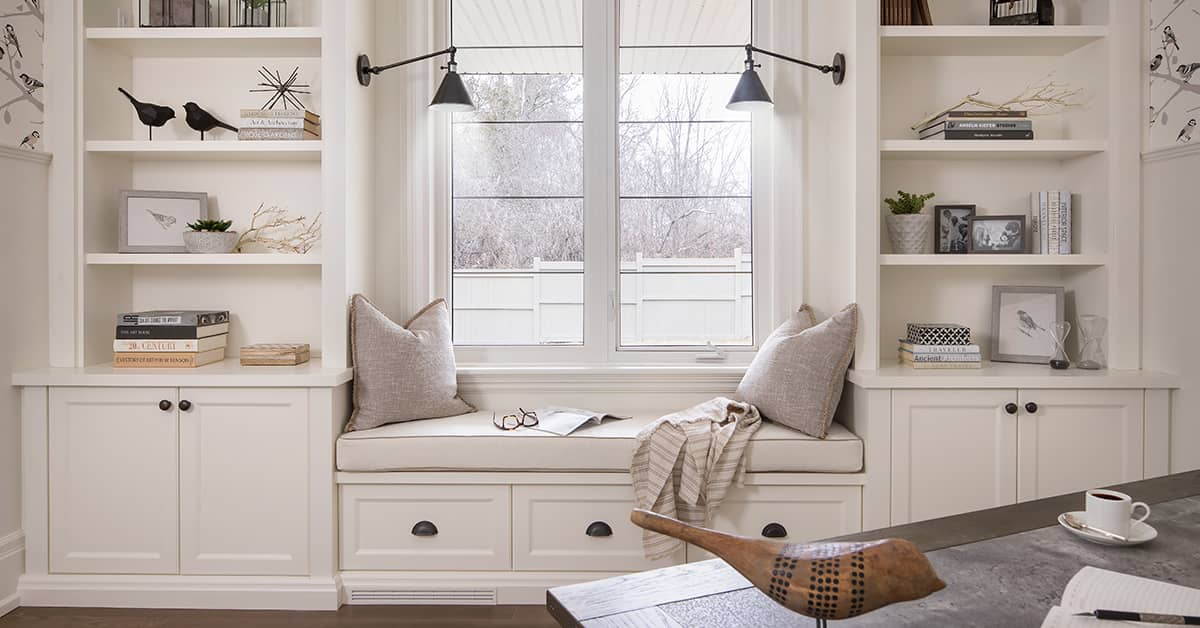
- Window seat with built-in bookshelves: If you’re an avid reader or love displaying books, consider adding built-in bookshelves on either side of the window seat. This design not only provides extra storage for your collection but also creates a charming and functional reading nook.
When choosing a design, consider the style and aesthetics of your room. Whether you prefer a modern, rustic, or traditional look, select a design that complements the existing decor and architectural features of your space.
Additionally, take into account the functionality you want to achieve. Do you need ample storage space for blankets, toys, or other items? Or is comfortable seating your main priority? Consider the specific needs and requirements of your household when selecting a design.
Once you’ve chosen a window seat design that suits your style and needs, it’s time to gather the necessary materials for your project. In the next step, we will discuss the materials required and how to obtain them.
Step 3: Gather the Materials
Now that you have a clear plan and design in mind for your window seat, it’s time to gather the materials and tools needed to bring your vision to life. Here’s a breakdown of the materials you’ll need:
- Wood: You’ll need plywood or MDF (medium-density fibreboard) for constructing the base and partitions of the seat. Choose a sturdy and durable material that is suitable for the design and dimensions of your window seat.
- 2×4 lumber: This will be used to build the frame and support structure for the seat. Select the appropriate length and quantity based on your measurements and design.
- Screws and screwdriver: Invest in quality wood screws that are suitable for the thickness of the wood you’re using. A drill with a screwdriver bit will make the assembly process much easier and efficient.
- Wood glue: It’s always a good idea to reinforce the joints with wood glue for added strength and durability. Ensure that the wood glue you choose is suitable for the type of wood you’re using.
- Foam cushion or upholstery foam: For comfortable seating, you’ll need foam cushion or upholstery foam that fits the dimensions of your window seat. Consider the desired thickness and density for optimal comfort.
- Fabric for cushion cover: Choose a durable and high-quality fabric that matches your interior style and complements the overall design of your window seat. Make sure you have enough fabric to cover the foam cushion and allow for sewing or stapling.
- Staple gun: A staple gun is essential for attaching the fabric to the foam cushion and securing it in place. Make sure you have enough staples for the job.
- Paint or stain: If you plan to paint or stain the wood, choose a finish that matches your desired aesthetic. Consider the durability and suitability of the paint or stain for the type of wood you’re using.
- Paintbrush or roller: Depending on the finish you choose, you’ll need a paintbrush or roller to apply the paint or stain evenly and smoothly.
- Sandpaper: Sandpaper is essential for smooth and even surfaces. Have different grits of sandpaper on hand to ensure proper preparation and finishing of the wood.
These are the basic materials needed for building a window seat with storage. Remember, the specific requirements may vary depending on your design and dimensions. Be sure to double-check your measurements and consult with experts at your local hardware store if you have any questions regarding the materials.
Read more: How To Make A Window Seat Cushion
Step 4: Prepare the Area
Before you begin building your window seat with storage, it’s crucial to prepare the area where it will be installed. This step ensures a smooth construction process and helps create a clean and professional finish. Follow these steps to prepare the area:
- Clean the space: Clear the area beneath the window of any furniture, rugs, or decorations. This will give you a clean slate to work with and allow for easy access during the construction process.
- Fix any damages: Inspect the walls, floor, and windowsill for any damages or imperfections. Repair any cracks or uneven surfaces to ensure a stable foundation for your window seat. This step is important for both structural integrity and aesthetics.
- Remove the window trim: Depending on the design of your window seat, you may need to remove the window trim to create a flush finish. Carefully pry off the trim using a pry bar or trim removal tool. Be cautious not to damage it as you may need to reinstall it later.
- Level the floor: If the floor beneath the window is not level, it’s necessary to even it out. Use a level and shims to adjust and stabilize the floor. This will prevent any wobbling or unevenness in your window seat.
- Paint or wallpaper the wall: Since the area beneath the window seat may be difficult to access once it’s built, it’s a good idea to paint or wallpaper the wall beforehand. Choose a color or pattern that complements your interior design and apply the paint or wallpaper to the wall. Allow it to dry completely before proceeding.
By taking the time to prepare the area properly, you’ll ensure a clean and professional look for your window seat installation. It will also make the construction process smoother and more efficient. Once the area is prepared, you’re ready to move on to the next step: building the base frame of your window seat.
When building a window seat with storage, make sure to measure the space accurately to ensure a perfect fit. Use sturdy materials and consider adding hinges to the seat for easy access to the storage area.
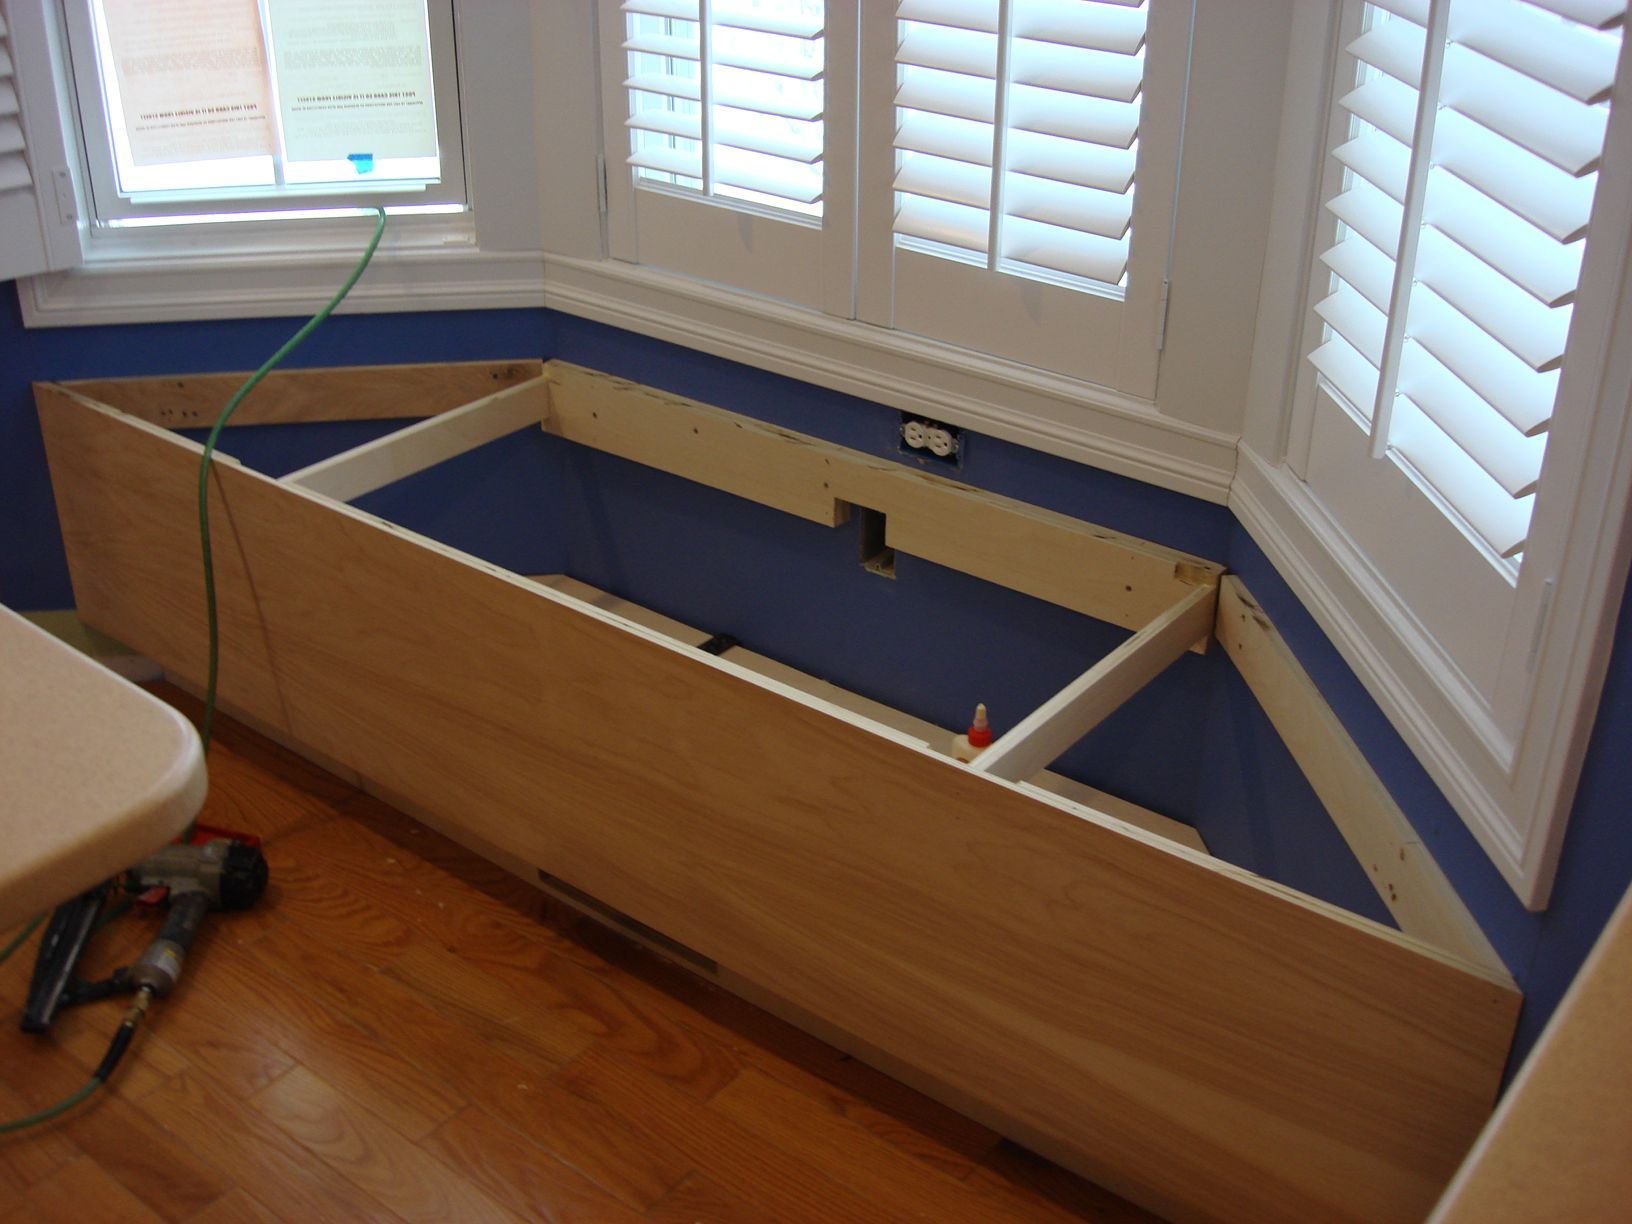
Step 5: Build the Base Frame
With the area prepared, it’s time to start constructing the base frame of your window seat. The base frame serves as the foundation for the entire structure and provides support for the seating and storage compartments. Follow these steps to build the base frame:
- Measure and cut the lumber: Using your measurements from Step 1, measure and cut the 2×4 lumber to create the front, back, and side pieces of the base frame. Make sure to accurately measure and mark the cuts to ensure a proper fit. Use a saw to cut the lumber.
- Assemble the front and back pieces: Place the front and back pieces of the base frame parallel to each other on the floor. Position them according to your measurements and use a square and level to ensure they are straight and level. Connect the pieces together by placing a wood screw through the front piece into the end of the back piece. Repeat this process for all the connecting points.
- Add the side pieces: Position the side pieces of the base frame perpendicular to the front and back pieces. Again, use a square and level to ensure they are straight and level. Attach them to the front and back pieces by placing wood screws through the sides into the ends of the front and back pieces.
- Secure the corners: To reinforce the corners and add stability to the base frame, use corner brackets or L-shaped metal brackets. Attach the brackets to the inside corners of the frame using wood screws.
- Check for stability: Once the base frame is assembled, check for stability by placing it in the designated area and ensuring it sits level on the floor. Make any necessary adjustments or reinforcements if needed.
Building the base frame is a critical step in creating a sturdy and functional window seat. Take your time to measure accurately, align the pieces properly, and secure them firmly. This will ensure the success of your window seat construction. In the next step, we will discuss how to add storage compartments to your base frame.
Step 6: Add the Storage Compartments
Now that the base frame of your window seat is complete, it’s time to add the storage compartments. These compartments will provide you with a convenient and organized way to store items such as blankets, books, or toys. Follow these steps to add the storage compartments:
- Measure and cut the partitions: Measure the width and depth of the inside of the base frame. Cut pieces of plywood or MDF to create the partitions for the storage compartments. The number and size of partitions will depend on your design and storage needs.
- Attach the partitions: Lay the partitions inside the base frame, positioning them according to your desired storage configuration. Use wood screws to attach the partitions to the base frame. Make sure they are securely fastened.
- Add shelves or drawers: If you want to have shelves or drawers in your storage compartments, measure and cut additional plywood or MDF to create these components. Attach them to the partitions using shelf brackets or drawer slides.
- Secure the partitions: To reinforce the partitions and prevent any movement or instability, use corner brackets or L-shaped metal brackets to secure them to the base frame.
Once the storage compartments are added, take the time to double-check their dimensions and ensure they fit securely within the base frame. Test the compartments to ensure they open and close smoothly, and make any necessary adjustments or reinforcements if needed.
It’s important to consider the functionality and accessibility of the storage compartments. If you want easy access to certain items, consider leaving some compartments open or adding pull-out baskets. Customize the storage compartments based on your specific needs and preferences, making the most of the available space.
With the storage compartments in place, your window seat is starting to take shape! In the next step, we will discuss how to install the seat cushion for added comfort.
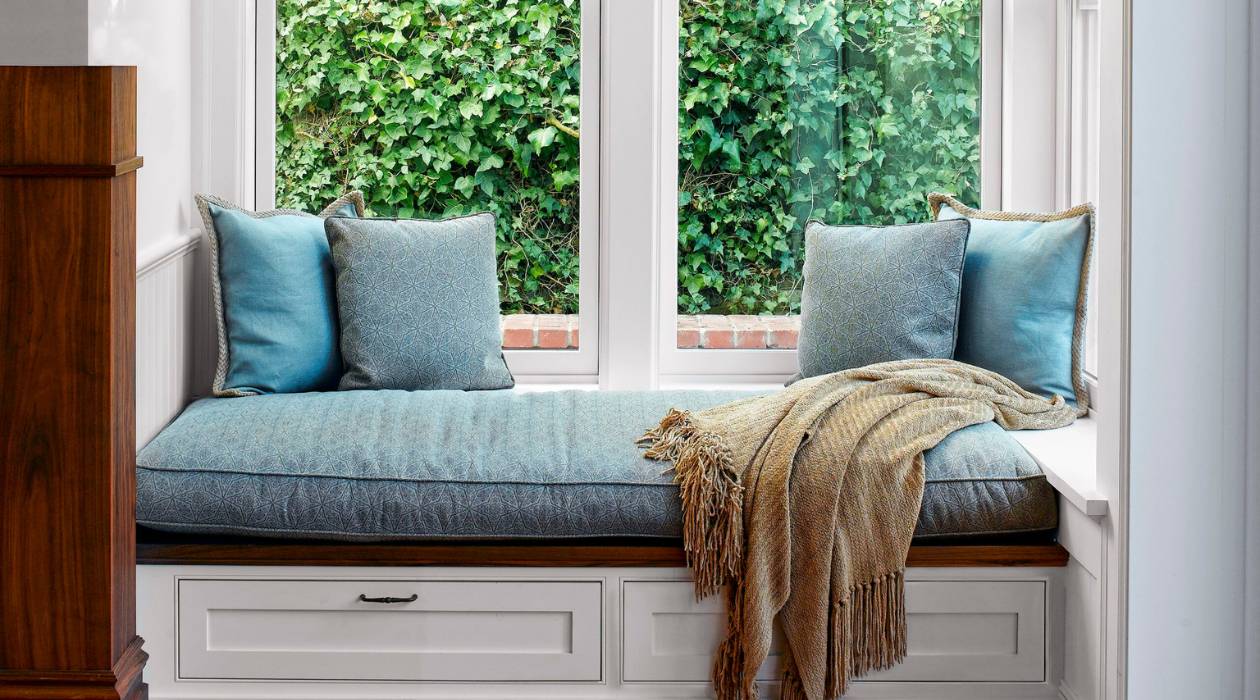
Step 7: Install the Seat Cushion
With the base frame and storage compartments complete, it’s time to add the seat cushion to your window seat. The cushion will not only provide a comfortable seating area but also enhance the overall appeal of your window seat. Follow these steps to install the seat cushion:
- Measure and cut the foam: Measure the dimensions of the seat area on top of the base frame. Use these measurements to cut the foam cushion or upholstery foam to fit the seat. You can use a serrated knife or electric foam cutter for a clean cut.
- Cover the foam: Once the foam is cut to size, cover it with a layer of batting or fabric, if desired. This will create a smooth and finished look for the cushion.
- Cut the fabric: Measure and cut your fabric, leaving enough room for folding and stapling. Ensure the fabric is large enough to cover the foam cushion and wrap around the edges of the base frame.
- Secure the fabric: Start by attaching one side of the fabric to the underside of the base frame using a staple gun. Pull the fabric tightly and continue stapling along each side, pulling the fabric taut as you go. Trim any excess fabric as needed.
- Finish the corners: When you reach the corners, fold the fabric neatly and securely staple it in place. There are various techniques for corner folds, such as a double fold or a pleated fold, depending on your fabric and preference.
Once the fabric is securely attached, give the cushion a quick test by placing it on top of the storage compartments within the base frame. Ensure it fits properly and sits evenly. If needed, make any adjustments or trim the fabric to achieve the desired look and fit.
Finally, give the seat cushion a gentle pat and admire your handiwork. The seat cushion adds the final touch to your window seat and provides a cozy and inviting spot to relax, read, or simply enjoy the view.
Congratulations! You have successfully installed the seat cushion. In the final step, we will discuss adding finishing touches to complete your window seat with storage.
Read more: Which Seat Is The Window Seat In Flight
Step 8: Add Finishing Touches
You’re almost there! In the final step, it’s time to add the finishing touches to your window seat with storage. These small details will elevate the look of your project and make it feel polished and complete. Here are some ideas for adding those finishing touches:
- Paint or stain: If you haven’t already done so, consider painting or staining the wood to match your desired color and finish. This step will enhance the overall appearance of your window seat and protect the wood from wear and tear.
- Add decorative trim: Installing decorative trim around the edges of the base frame can add a touch of elegance and sophistication to your window seat. Choose a trim that complements the style of your room and attach it using wood glue or small finishing nails.
- Install a kick plate: Adding a kick plate to the front of the base frame can protect it from scuff marks and provide a clean and finished look. Measure and cut a piece of plywood or MDF to fit the width of the base frame and attach it with screws or nails.
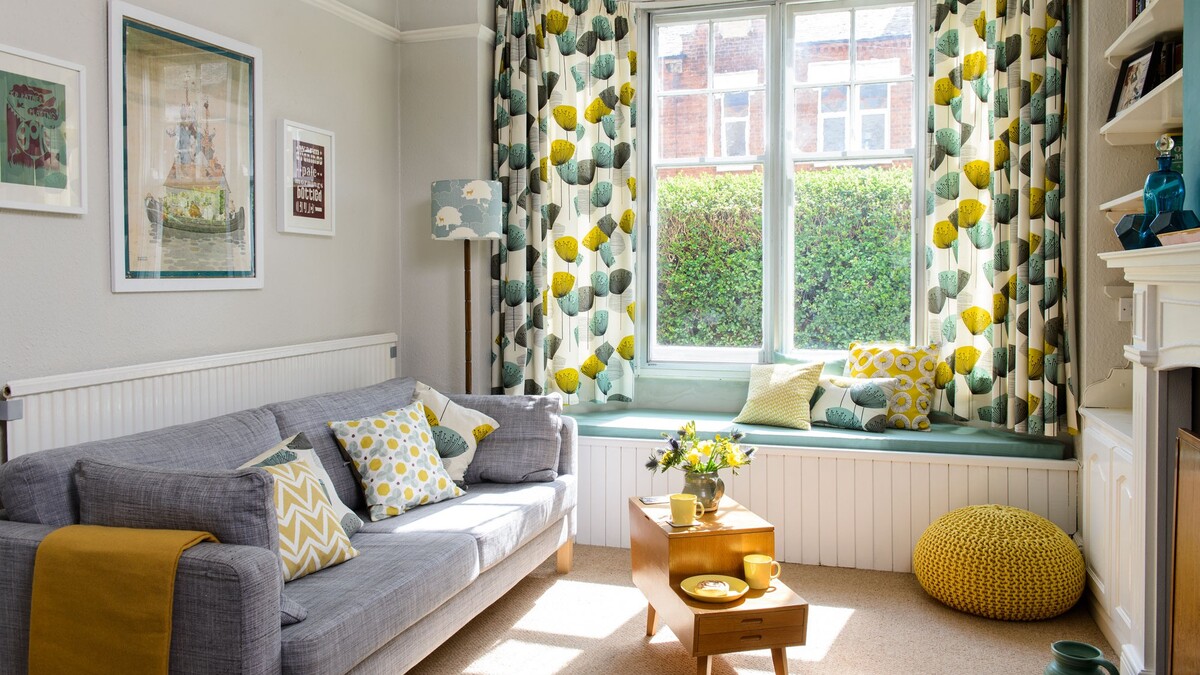
- Accessorize with cushions and pillows: To enhance comfort and aesthetics, accessorize your window seat with cushions and pillows. Choose fabrics and patterns that coordinate with your overall room decor. Arrange them in an inviting and visually appealing way.
- Personalize with decor: Add your personal touch by decorating the space around the window seat. Consider hanging artwork or a gallery wall above it, placing potted plants nearby, or adding a small side table or lamp for convenience.
Don’t rush this final step – take the time to carefully select and arrange these finishing touches to ensure they complement your window seat and reflect your personal style. Step back and take a moment to appreciate the transformation of your space.
Congratulations! You have successfully built a functional and stylish window seat with storage. Now it’s time to sit back, relax, and enjoy your new cozy corner in your living room.
Remember that this guide provides a general overview of the process. The specific steps and techniques may vary depending on your design and materials. Don’t be afraid to adapt and make adjustments along the way to suit your needs and preferences.
Conclusion
Congratulations on completing your window seat with storage! You have transformed an underutilized space into a functional and stylish addition to your living room. By carefully measuring, planning, and executing each step, you have created a cozy spot for relaxation, storage, and enjoying the view from your window.
Throughout the construction process, you learned how to gather the necessary materials and tools, measure and plan the space, choose a design that matches your style and needs, build the base frame, add storage compartments, install the seat cushion, and add the finishing touches. Each step contributed to the overall success and functionality of your window seat.
Not only does your window seat with storage provide extra seating and storage space, but it also adds character and charm to your living room. It can be a centerpiece for cozy evenings curled up with a book or a gathering place for family and friends to enjoy each other’s company.
Remember, this project allows for personalization and customization. You can further enhance your window seat by adding decorative elements, choosing unique fabrics for the cushion cover, or incorporating additional features to suit your specific needs.
Now that you’ve completed this rewarding and creative project, take some time to relax and enjoy your new window seat. Sit back, put your feet up, and revel in the satisfaction of a job well done. Whether you’re using it as a quiet reading nook, a place to soak up the sunlight, or a cozy spot to gather with loved ones, your window seat will undoubtedly become a cherished part of your home.
Thank you for joining us on this journey of creating a window seat with storage. We hope this guide has provided you with the knowledge and inspiration to embark on your own DIY project. Happy building!
Frequently Asked Questions about How To Make A Window Seat With Storage
Was this page helpful?
At Storables.com, we guarantee accurate and reliable information. Our content, validated by Expert Board Contributors, is crafted following stringent Editorial Policies. We're committed to providing you with well-researched, expert-backed insights for all your informational needs.


0 thoughts on “How To Make A Window Seat With Storage”