Articles
How To Build Outdoor Concrete Countertops
Modified: December 7, 2023
Discover expert articles on how to build outdoor concrete countertops. Learn step-by-step methods and expert tips for a beautiful and durable outdoor kitchen centerpiece.
(Many of the links in this article redirect to a specific reviewed product. Your purchase of these products through affiliate links helps to generate commission for Storables.com, at no extra cost. Learn more)
Introduction
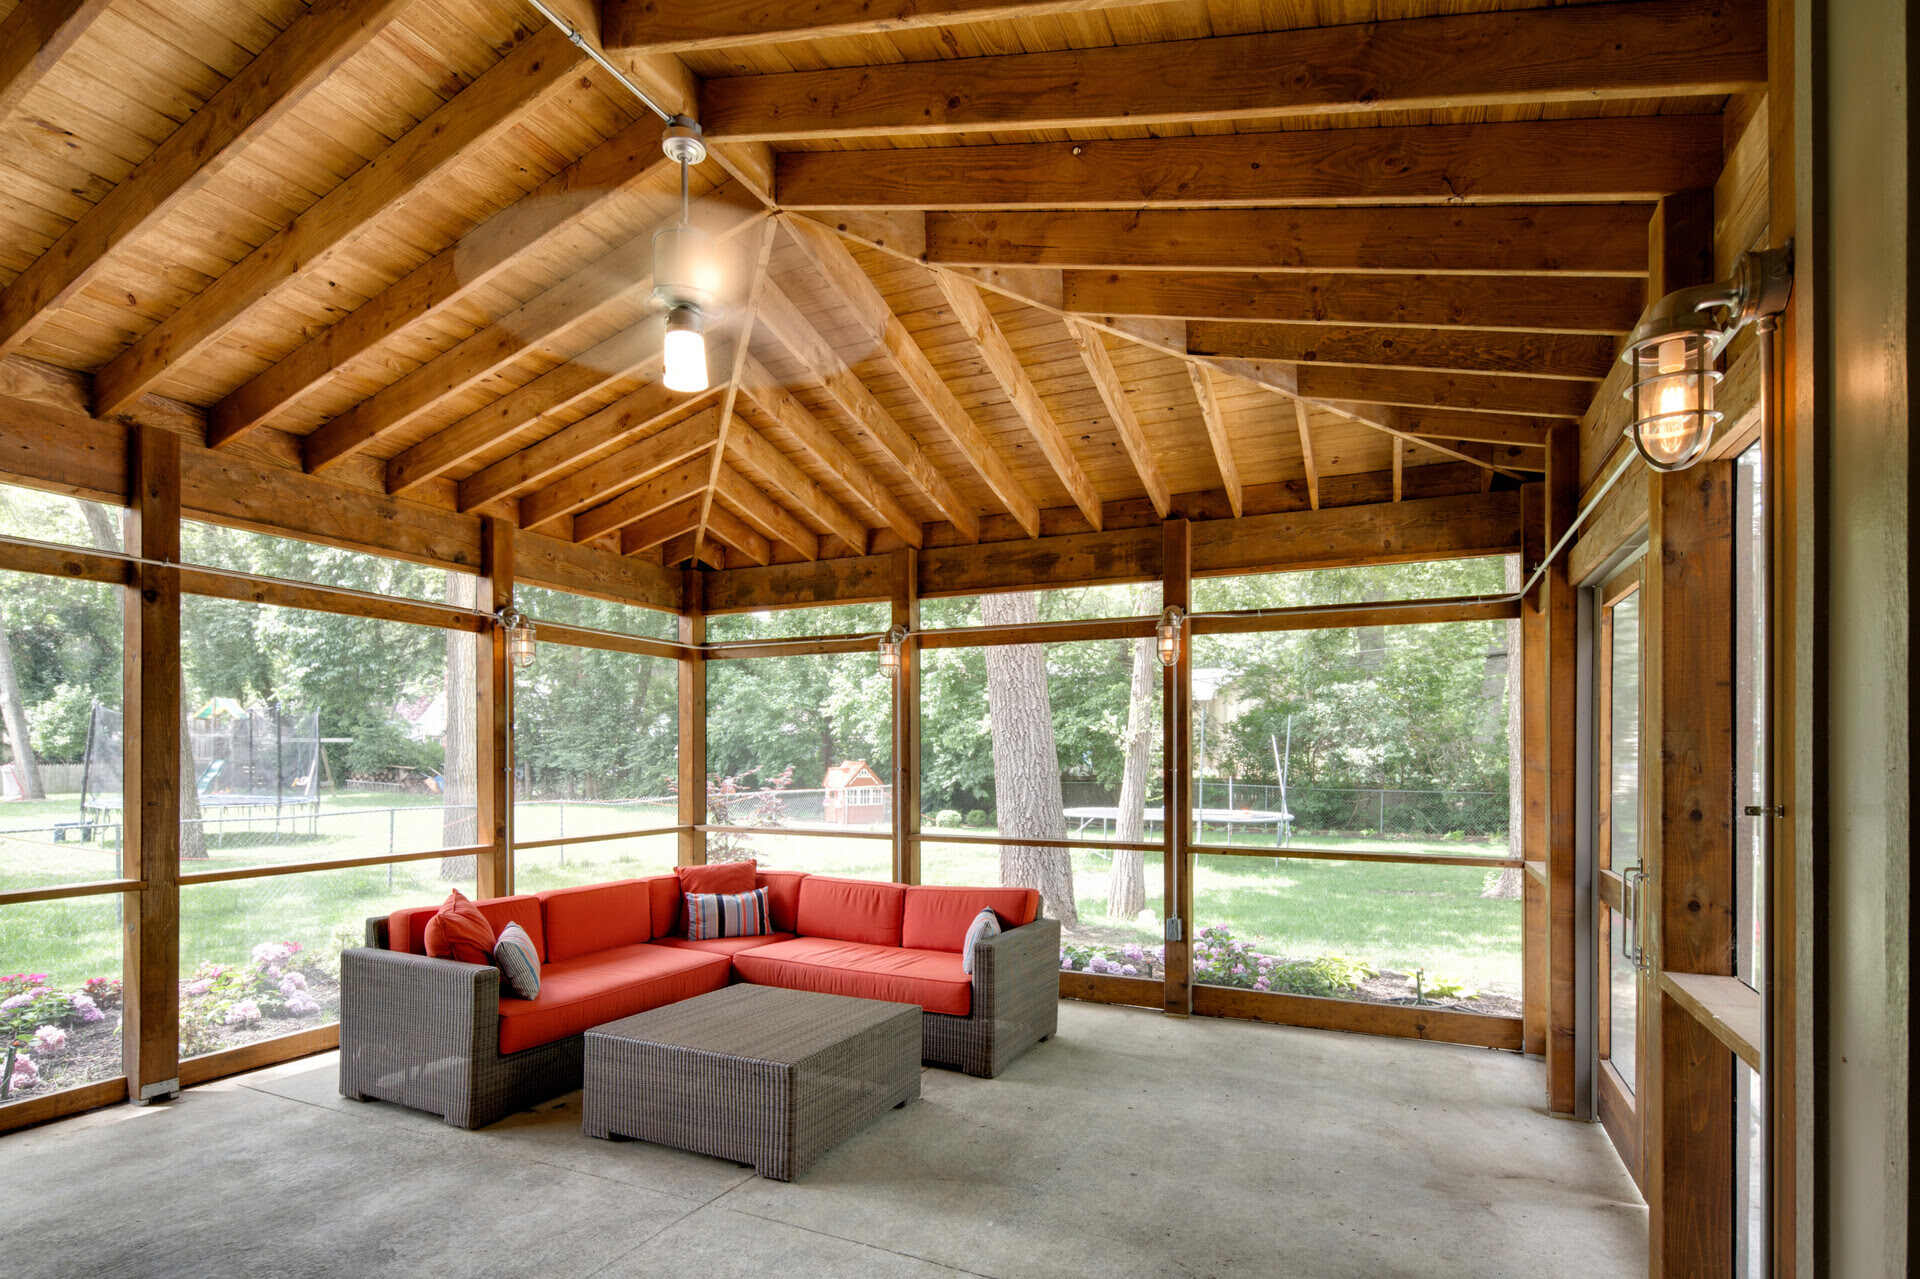
Outdoor concrete countertops are a stylish and durable addition to any outdoor space, whether it’s a patio, kitchen, or bar area. Not only do they provide a functional surface for preparing food or serving drinks, but they also add an aesthetic appeal to your outdoor living area. Building your own outdoor concrete countertops may seem like a daunting task, but with careful planning and preparation, it can be a rewarding DIY project.
In this article, we will guide you through the step-by-step process of building outdoor concrete countertops. From planning and preparation to installation, we will cover all the necessary steps to help you create beautiful and functional countertops that will withstand the elements.
Before we dive into the details, it’s essential to consider some key factors. First and foremost, determine the location and purpose of your outdoor countertops. Are you building a countertop for a built-in outdoor kitchen or a standalone bar area? Understanding the specific requirements and dimensions will help you plan the project more effectively.
Next, think about the design and style of your outdoor space. Concrete countertops offer various customization options, such as different colors, textures, and finishes. Take into account the overall aesthetic of the area and decide on a design that complements your outdoor decor.
Additionally, it’s important to consider the weather and climate conditions in your area. Concrete countertops are highly durable, but they may require additional sealing or protection if you live in a region with extreme temperatures or frequent exposure to moisture. Research the best materials and methods for your specific climate to ensure the longevity of your outdoor countertops.
Once you have taken these factors into consideration, you are ready to begin the process of building your outdoor concrete countertops. With the right tools, materials, and techniques, you can create a stunning and functional addition to your outdoor living space that will withstand the test of time.
Key Takeaways:
- Planning and preparation are crucial for building outdoor concrete countertops. Consider factors like location, design, climate, and drainage to ensure a successful and durable DIY project.
- From mixing and pouring concrete to finishing and installation, attention to detail and safety are essential. With the right techniques and maintenance, you can create stunning and long-lasting outdoor concrete countertops.
Read more: How To Build Outdoor Concrete Countertop
Step 1: Planning and Preparation
Before you start building your outdoor concrete countertops, it’s crucial to have a solid plan in place. Careful planning and thorough preparation will help ensure a successful and hassle-free construction process. Here’s what you need to do:
- Measure and Sketch: Start by measuring the area where you want to install the countertops. Consider the dimensions of any appliances or fixtures that will be incorporated into the design. With accurate measurements, sketch a rough layout of the countertops, including any curves, corners, or special features. This will serve as a guide during the construction process.
- Gather Materials and Tools: Determine the materials and tools you will need for the project. This typically includes concrete mix, reinforcement mesh, formwork materials, a trowel, a concrete mixer or wheelbarrow, a level, and various hand tools. Make a list and gather all the necessary supplies before starting the construction.
- Choose the Right Concrete Mix: Selecting the right concrete mix is crucial for the success of your countertops. Determine the strength and mix design based on your specific needs. Consult with a concrete supplier or expert to ensure you choose a mix that is suitable for outdoor use and will provide the desired durability and appearance.
- Create a Budget: Establish a budget for your outdoor concrete countertop project. Consider the cost of materials, tools, and any professional help you may require. Having a budget will help you prioritize expenses and make informed decisions throughout the construction process.
- Research Local Building Codes: Familiarize yourself with any local building codes or regulations that may apply to outdoor countertop construction. Ensure that your design and installation methods comply with the relevant guidelines to avoid any legal issues or safety concerns.
- Consider Drainage and Support: Think about the drainage and support system for your outdoor countertops. Ensure that the design allows for proper water runoff and that the countertops are adequately supported to prevent cracking or sagging under the weight of the concrete and any additional items.
- Plan for Sealing and Maintenance: Outdoor concrete countertops require regular sealing and maintenance to protect them from the elements. Research the best sealing products and maintenance routines for your specific countertop design and local climate. Consider factors such as UV resistance, stain resistance, and ease of reapplication when choosing a sealer.
By carefully planning and preparing for your outdoor concrete countertop project, you will set yourself up for success. Taking the time to measure, gather materials, choose the right mix, create a budget, research building codes, consider drainage and support, and plan for sealing and maintenance will ensure a smooth construction process and long-lasting countertops that you can enjoy for years to come.
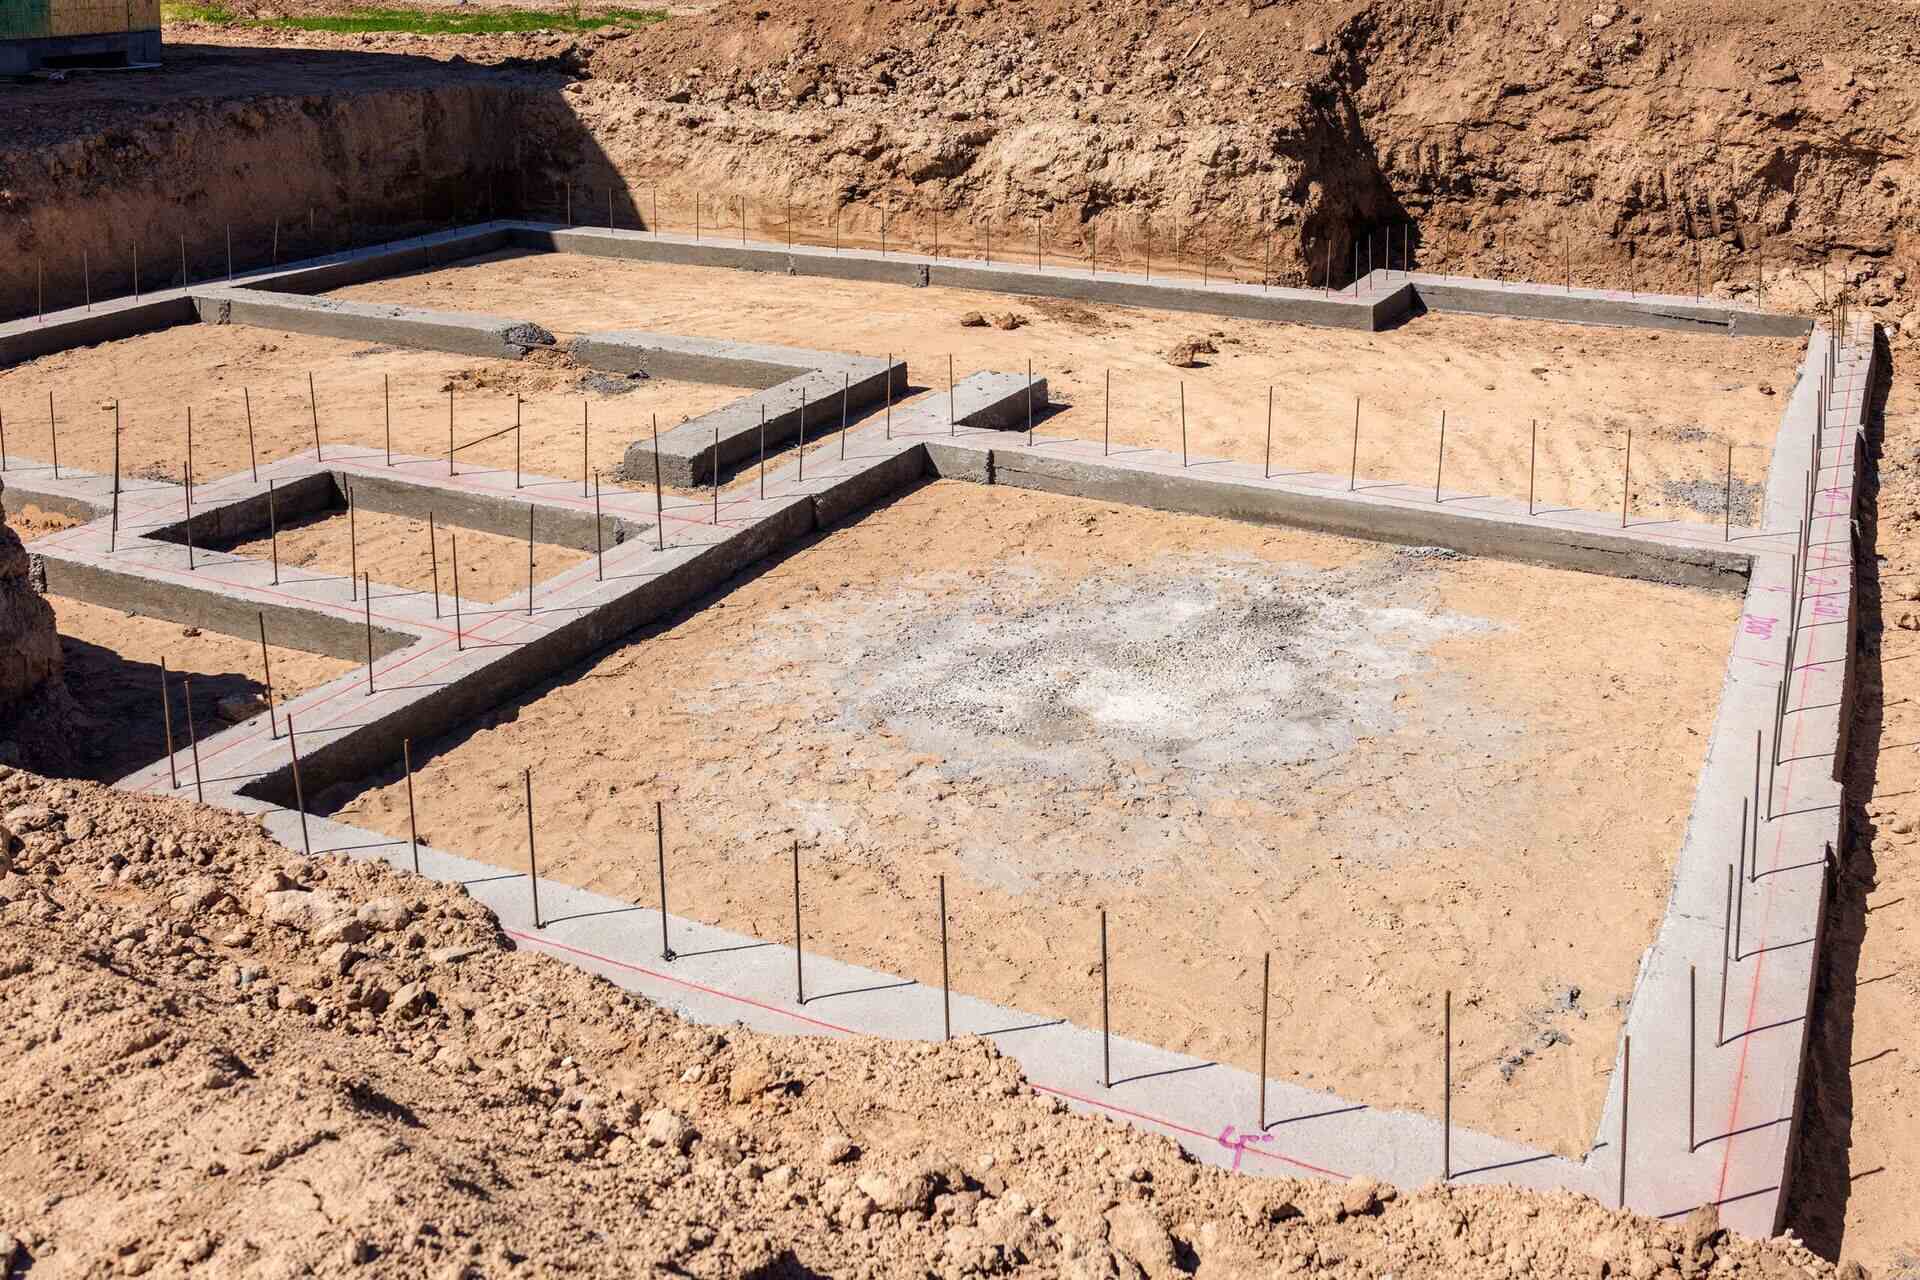
Step 2: Creating the Formwork
Once you have completed the planning and preparation phase, it’s time to move on to creating the formwork for your outdoor concrete countertops. The formwork serves as a mold that will determine the shape and dimensions of the countertops. Follow these steps to create the formwork:
- Prepare the Work Area: Clear the area where you will be constructing the countertops. Ensure that the surface is level and free from any debris or obstacles.
- Measure and Cut the Formwork: Using the measurements and layout sketched during the planning phase, cut the formwork materials accordingly. Typically, formwork for concrete countertops is made from melamine or plywood. Cut the pieces to the desired length and height.
- Assemble the Formwork: Assemble the cut pieces of formwork to create a box-like structure that will hold the concrete. Use screws or clamps to secure the pieces together, ensuring they are tightly aligned to prevent any leaks or misalignment.
- Add Reinforcement: Place reinforcement mesh or rebar within the formwork to add strength and prevent cracking. Position the reinforcement evenly throughout the countertop area, ensuring it is slightly elevated from the base of the formwork to allow for proper concrete coverage.
- Seal the Joints: To prevent any concrete leakage, seal the joints between the formwork pieces using silicone caulk or duct tape. This will ensure that the concrete stays contained within the formwork during pouring and curing.
- Double-Check Alignment and Levelness: Before proceeding to the next step, double-check the alignment and levelness of the formwork. Use a level and measuring tape to ensure that all sides are even and level. Make any necessary adjustments to achieve the desired shape and dimensions.
The formwork is a crucial element in the construction of outdoor concrete countertops, as it determines the final shape and appearance. Take your time to measure accurately, cut the formwork pieces precisely, assemble them securely, add reinforcement, seal the joints, and check for alignment and levelness. By creating a sturdy and well-aligned formwork, you are setting the foundation for a successful countertop construction process.
Step 3: Mixing and Pouring the Concrete
With the formwork in place, it’s time to move on to the next step: mixing and pouring the concrete for your outdoor countertops. Follow these steps to ensure a successful and smooth process:
- Prepare the Concrete: Start by preparing the concrete mix according to the manufacturer’s instructions. It’s crucial to use a high-quality concrete mix suitable for outdoor use. Add water gradually, mixing until you achieve a workable consistency. Avoid adding too much water, as it can weaken the concrete.
- Pour the Concrete: Slowly pour the concrete mixture into the formwork, starting from one end and working your way to the other. Use a shovel or trowel to spread the concrete evenly, ensuring it fills all the corners and edges of the formwork.
- Consolidate the Concrete: To remove any air bubbles and achieve a smooth surface, consolidate the concrete by tapping the formwork gently with a rubber mallet. This will help prevent voids or imperfections in the finished countertops.
- Level the Concrete: Use a screed board or straight edge to level the surface of the concrete. Slide the screed board back and forth across the formwork, using a sawing motion. This will help remove excess concrete and create a level and smooth surface.
- Smooth the Edges: Use a trowel or edging tool to smooth the edges of the concrete countertops. Create a slight beveled edge for a clean and finished look. Smooth out any imperfections or ridges on the surface of the concrete.
- Clean Up: Once the concrete is poured, clean up any spills or excess concrete around the formwork. Use a trowel or damp cloth to remove any excess concrete from the edges or sides of the formwork.
After pouring the concrete and completing these steps, allow the concrete to cure as per the manufacturer’s instructions. Curing time may vary depending on the type of concrete mix used and the weather conditions in your area. Ensure that the countertops are protected from extreme temperatures, direct sunlight, and moisture during the curing process.
It’s important to note that working with concrete requires caution and attention to detail. Wear protective clothing, gloves, and safety goggles to prevent any accidents or injuries. Follow proper concrete mixing and pouring techniques to achieve a high-quality finish.
By following these steps and taking the time to properly mix and pour the concrete, you are well on your way to creating beautiful and durable outdoor countertops for your space.
When building outdoor concrete countertops, make sure to use a high-quality concrete mix designed for outdoor use and add a sealer to protect the surface from the elements.
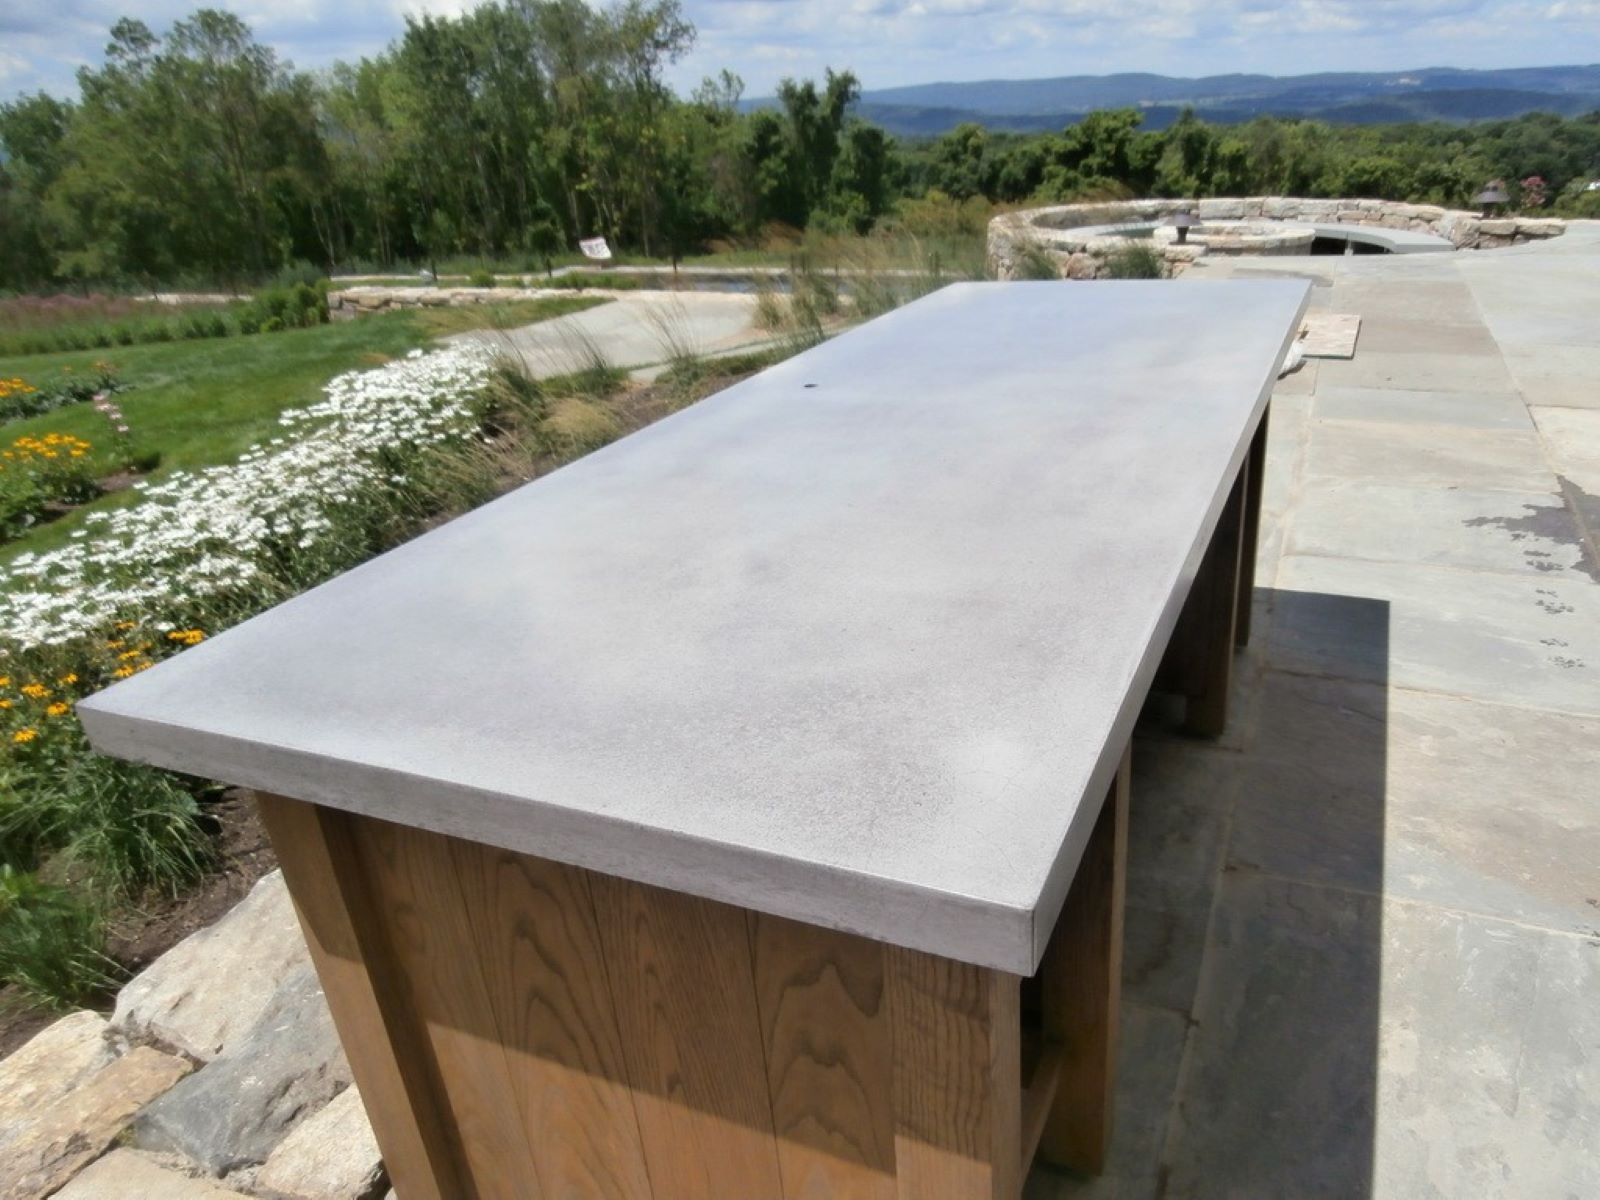
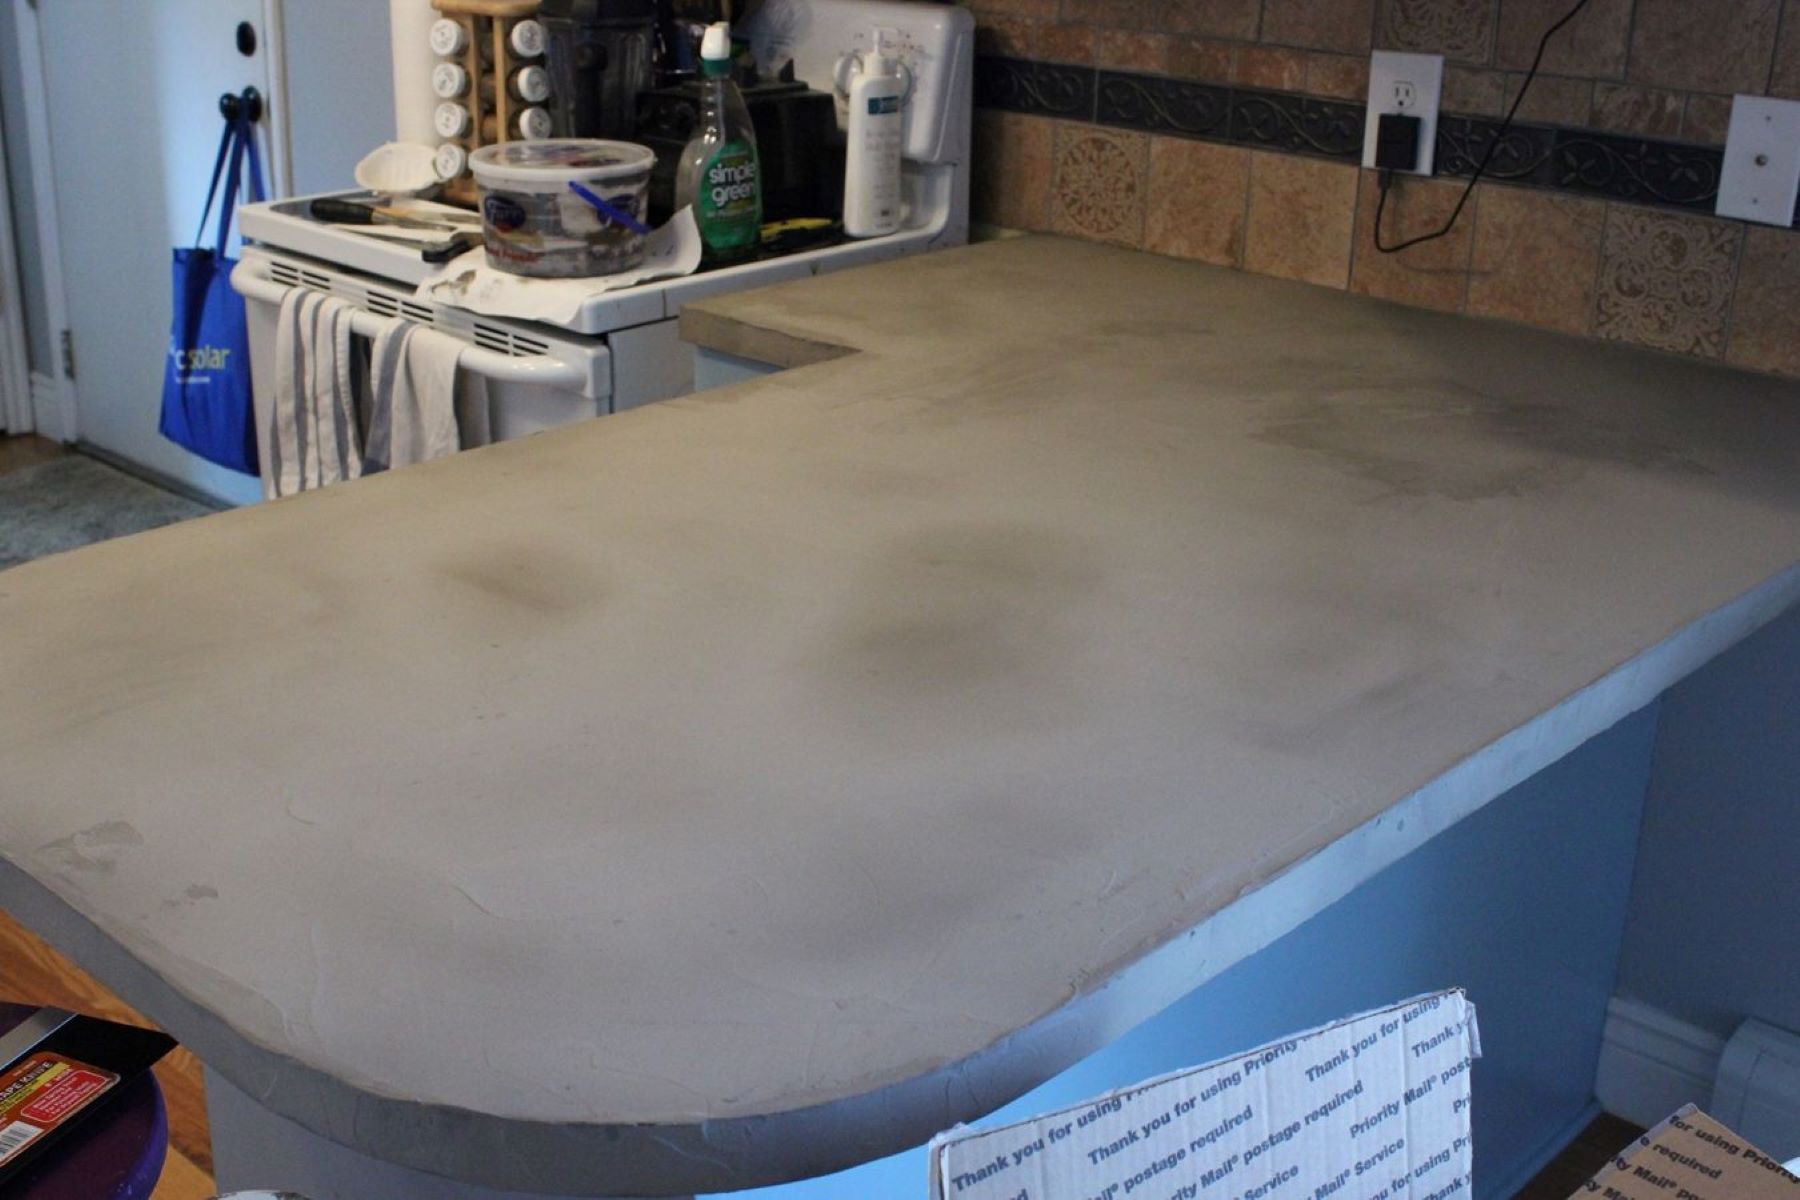
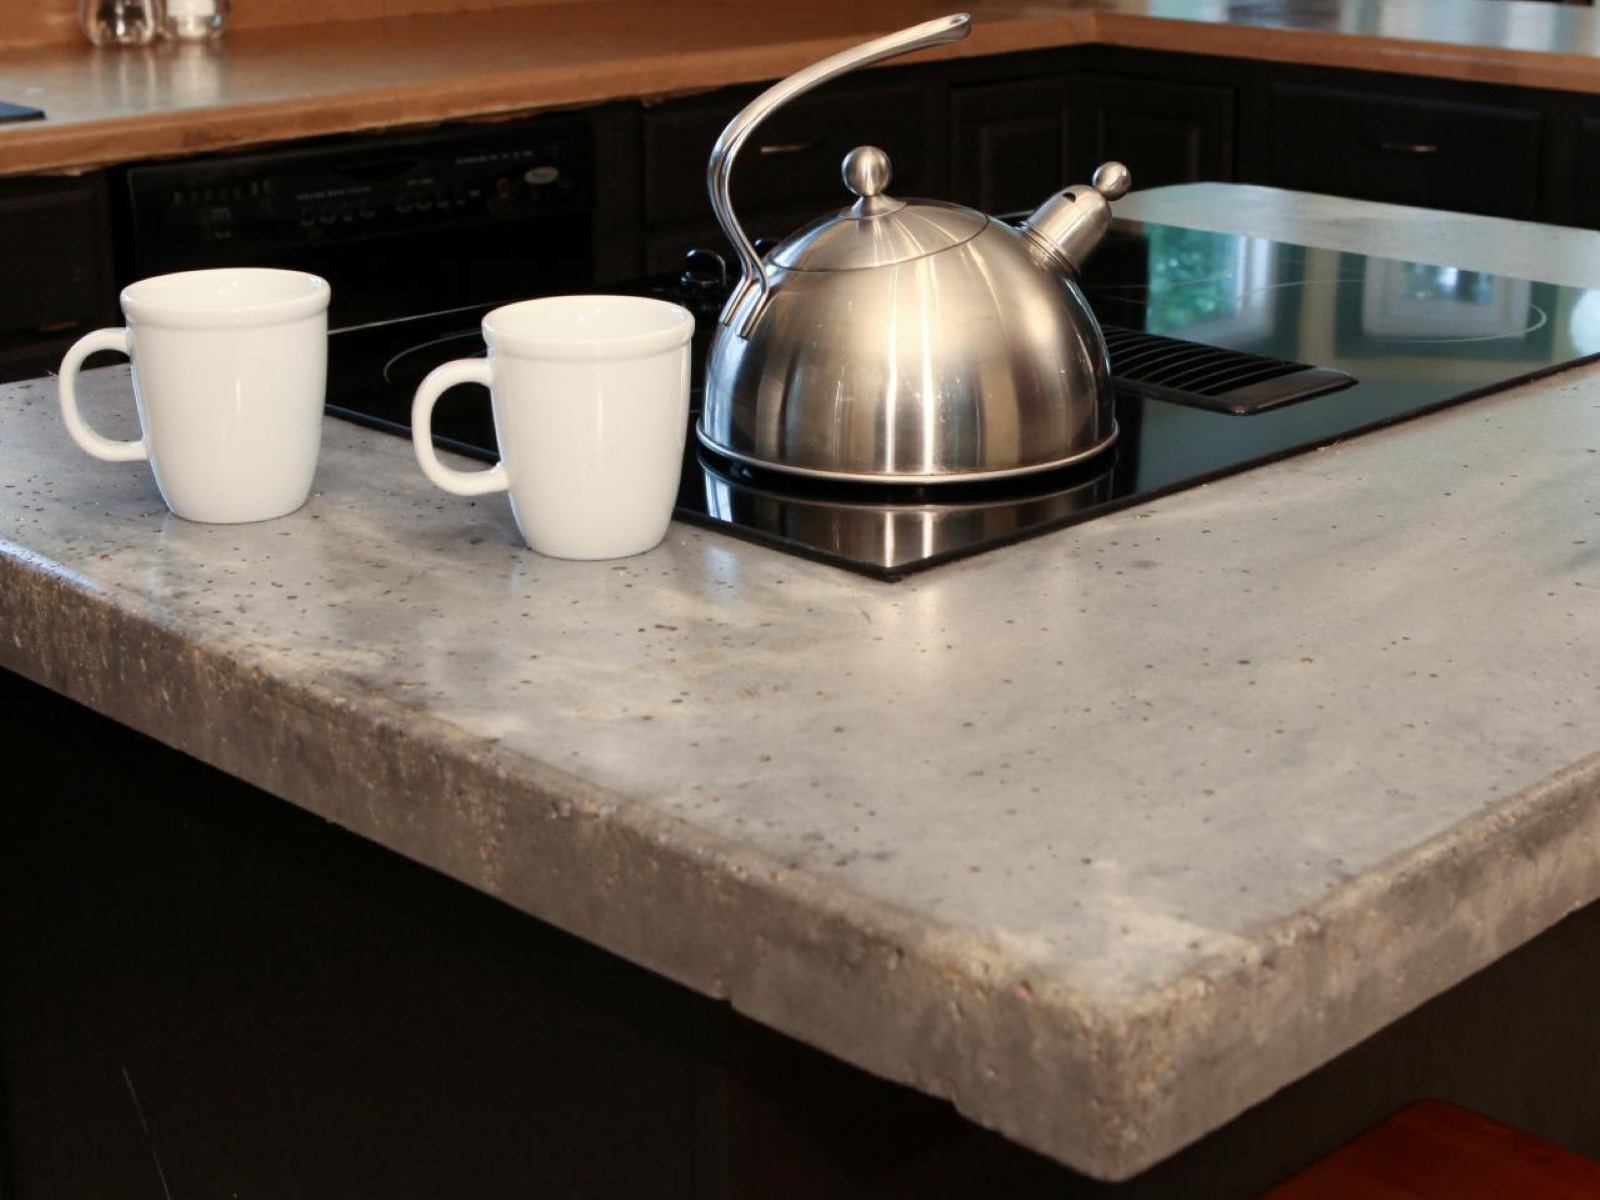
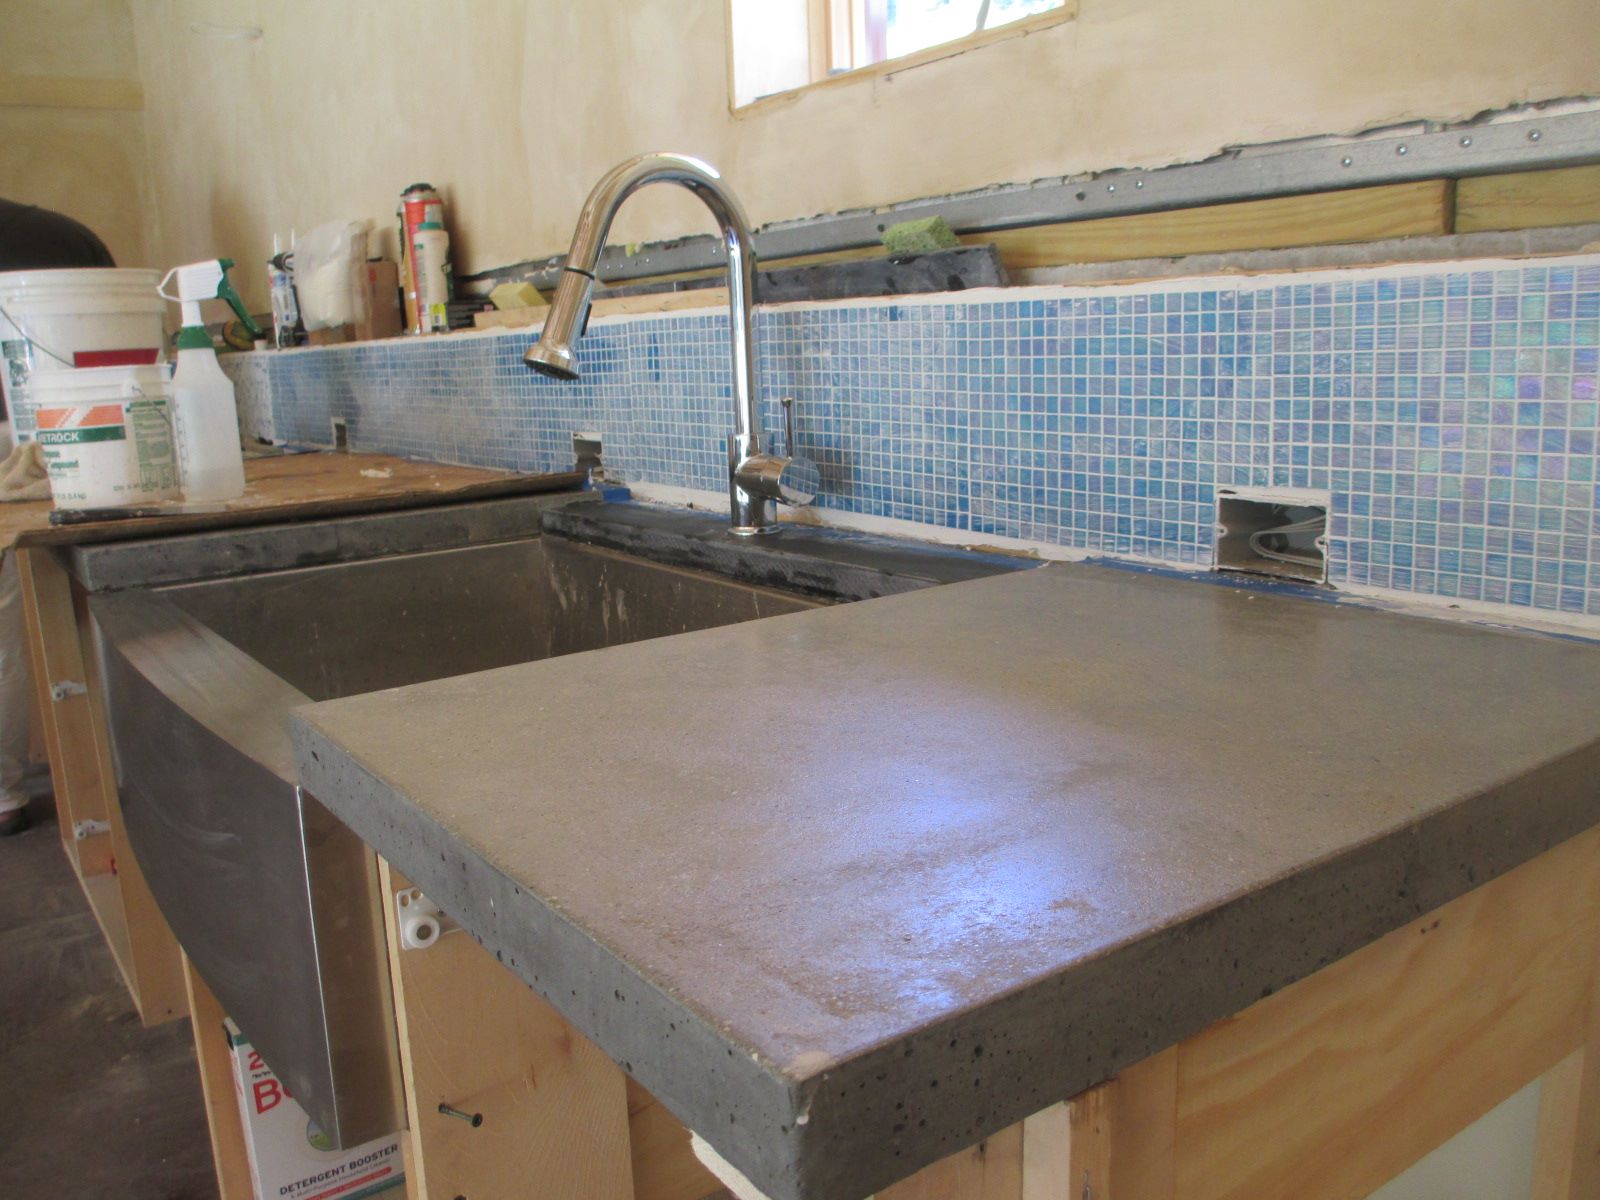
Step 4: Finishing the Countertop Surface
Once the concrete has cured, it’s time to move on to the next step: finishing the surface of your outdoor countertops. This is where you can add your personal touch and achieve the desired look and texture. Follow these steps to give your countertops a polished and professional finish:
- Sand the Surface: Start by sanding the surface of the cured concrete countertops with progressively finer grit sandpaper. This will help smooth out any imperfections or rough areas on the surface. Begin with a coarser grit and gradually move to a finer grit until you achieve the desired smoothness.
- Add Texture (Optional): If you want to add texture to your countertops, this is the time to do it. You can use various techniques such as stamping, etching, or brushing to create the desired texture or pattern on the surface. Follow the instructions for the specific technique you choose.
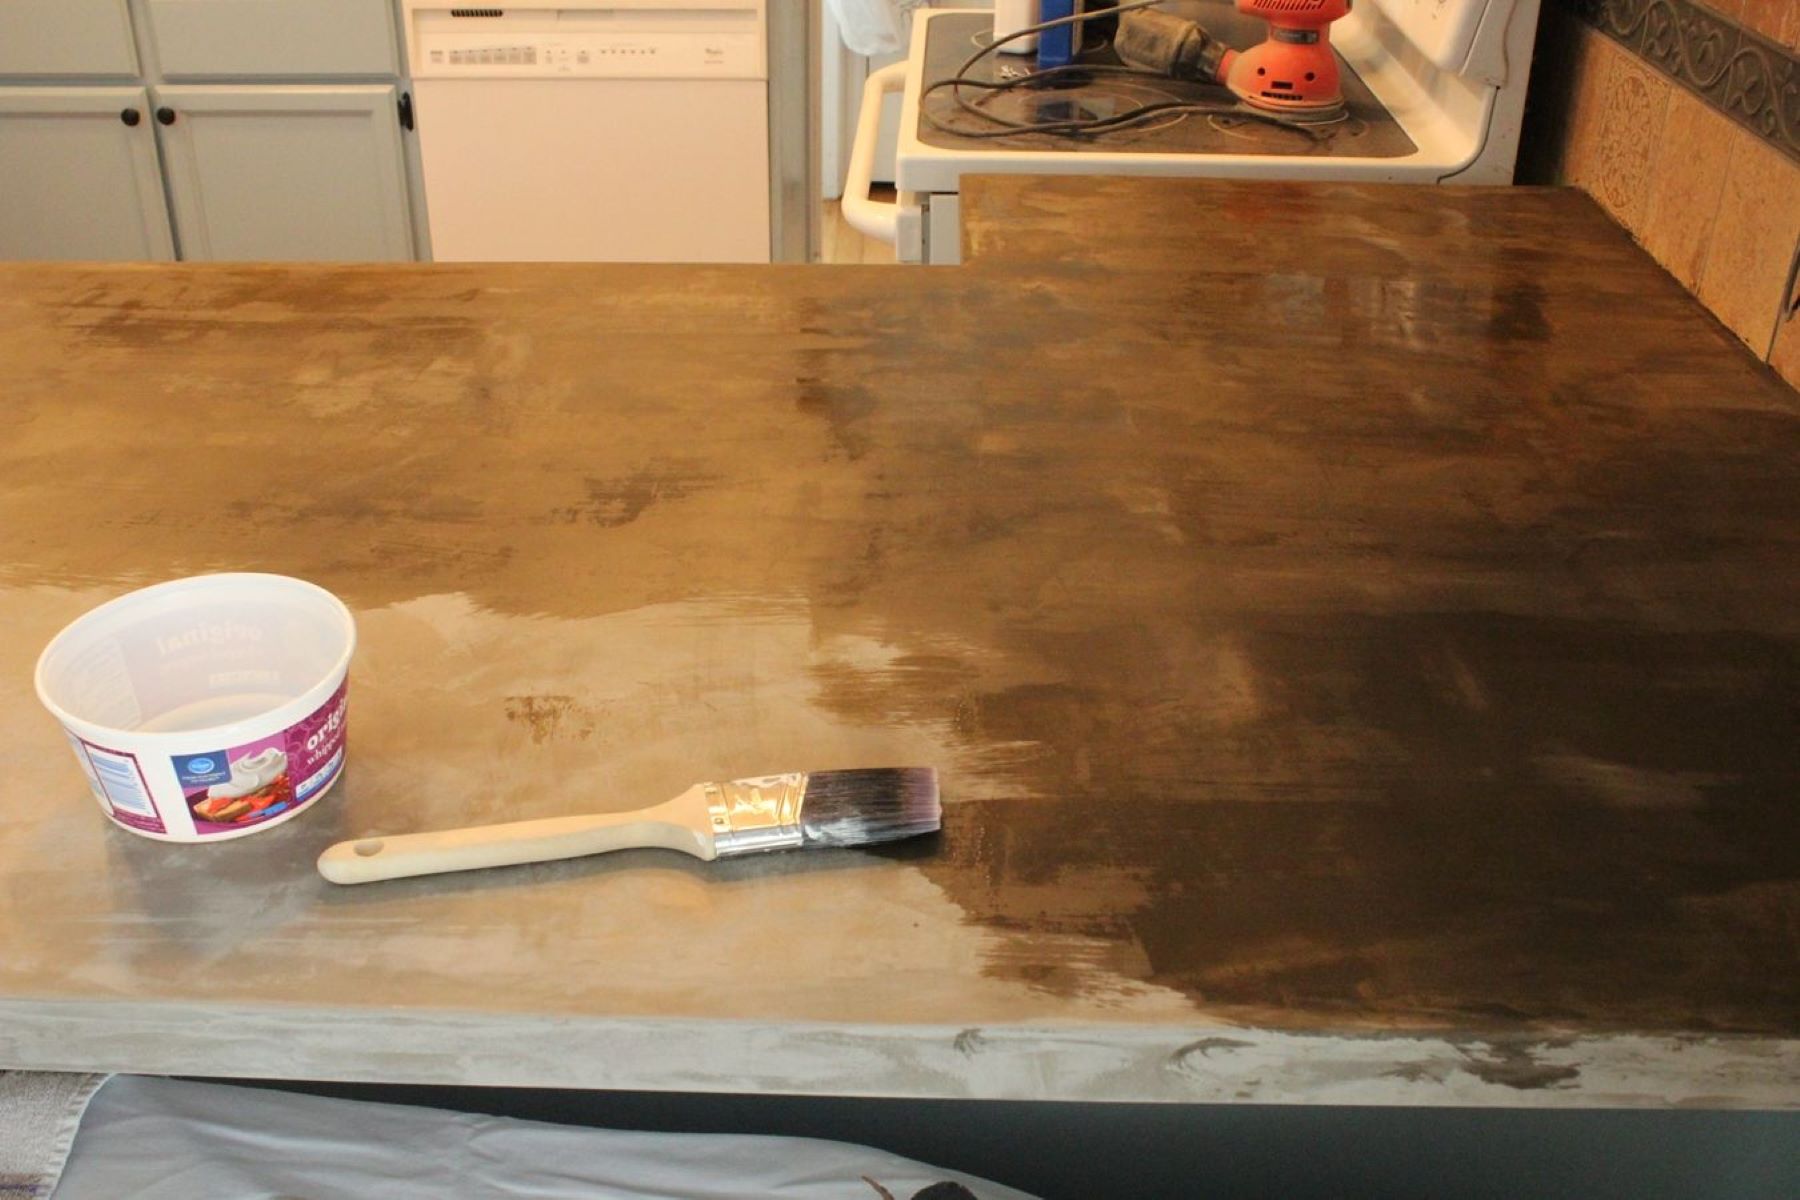
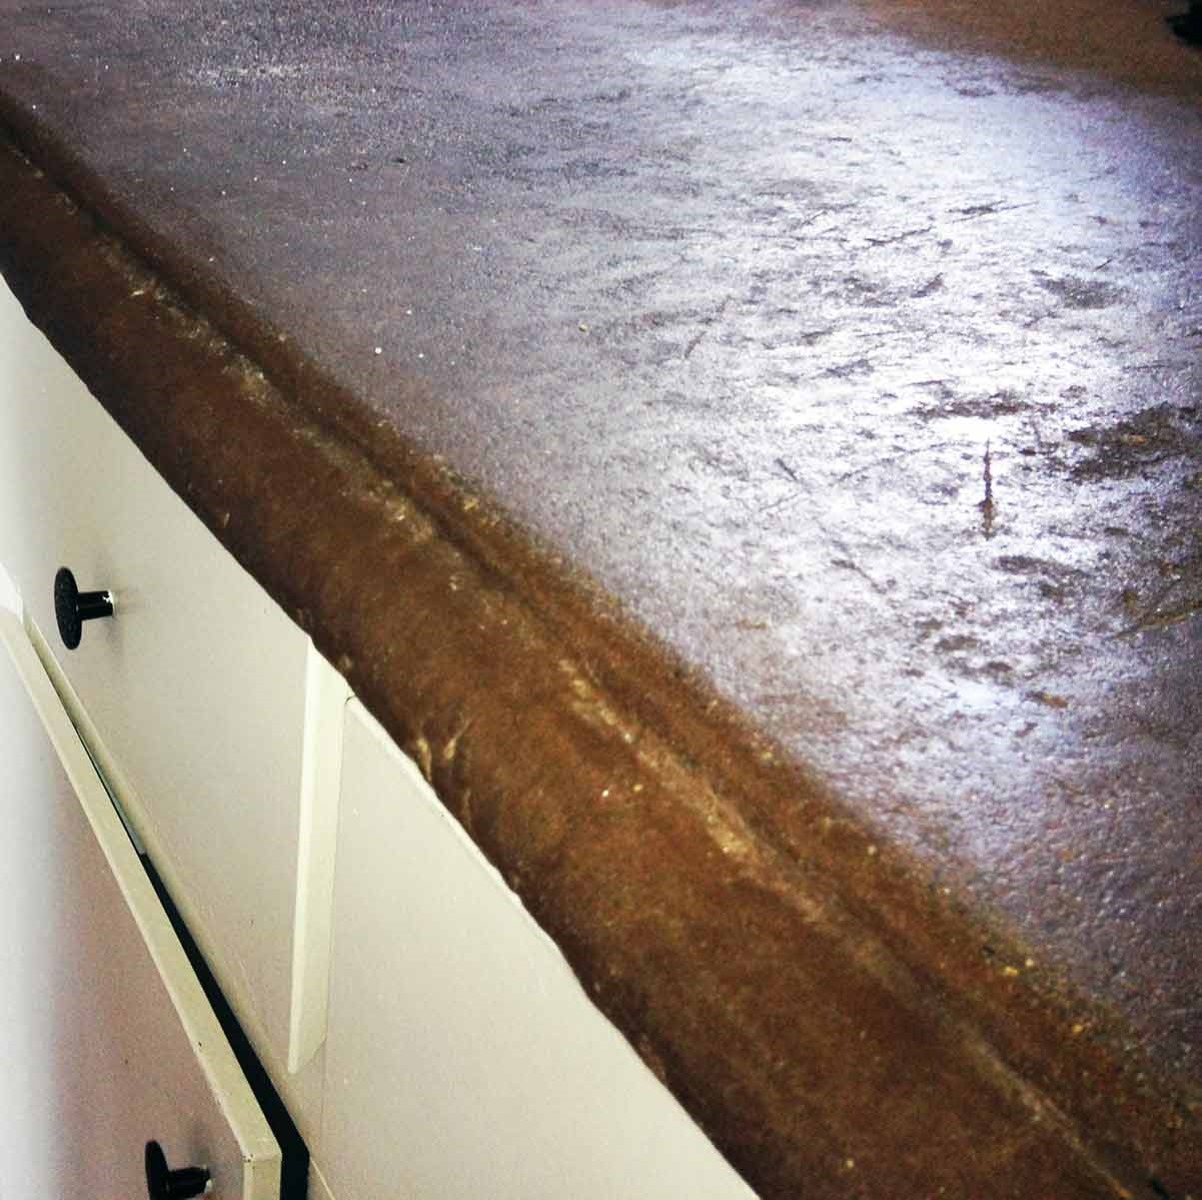
- Apply a Finish: To enhance the appearance and protect the surface of your outdoor countertops, apply a suitable finish. There are several options available, including sealers, stains, or coatings. Choose a finish that is specifically designed for concrete countertops and is suitable for outdoor use. Apply the finish according to the manufacturer’s instructions, ensuring even coverage on the entire surface.
- Allow for Drying Time: After applying the finish, allow sufficient drying time as per the manufacturer’s instructions. This is crucial to ensure that the finish properly cures and provides the desired level of protection.
- Final Inspection: Once the finish has dried, inspect the surface of the countertops for any imperfections or areas that may require touch-ups. Use sandpaper or a fine grit pad to smooth out any uneven spots or rough areas. Make any necessary adjustments to achieve a flawless finish.
- Polishing (Optional): If you want to achieve a glossy or shiny look, you can further polish the surface of the countertops. Use a concrete polishing compound and a polishing pad to bring out the natural luster of the concrete. Follow the manufacturer’s instructions for the polishing process.
Finishing the surface of your outdoor concrete countertops is a crucial step to achieve the desired look and enhance their durability. Taking the time to sand the surface, add texture if desired, apply a suitable finish, allow for drying time, conduct a final inspection, and optionally polish the surface will result in beautifully finished countertops that will withstand the elements.
Remember to always follow the manufacturer’s instructions for the specific products you are using and take proper safety precautions when working with finishes and polishing compounds. With attention to detail and careful execution, you’ll be able to achieve stunning outdoor concrete countertops that will be the centerpiece of your outdoor space.
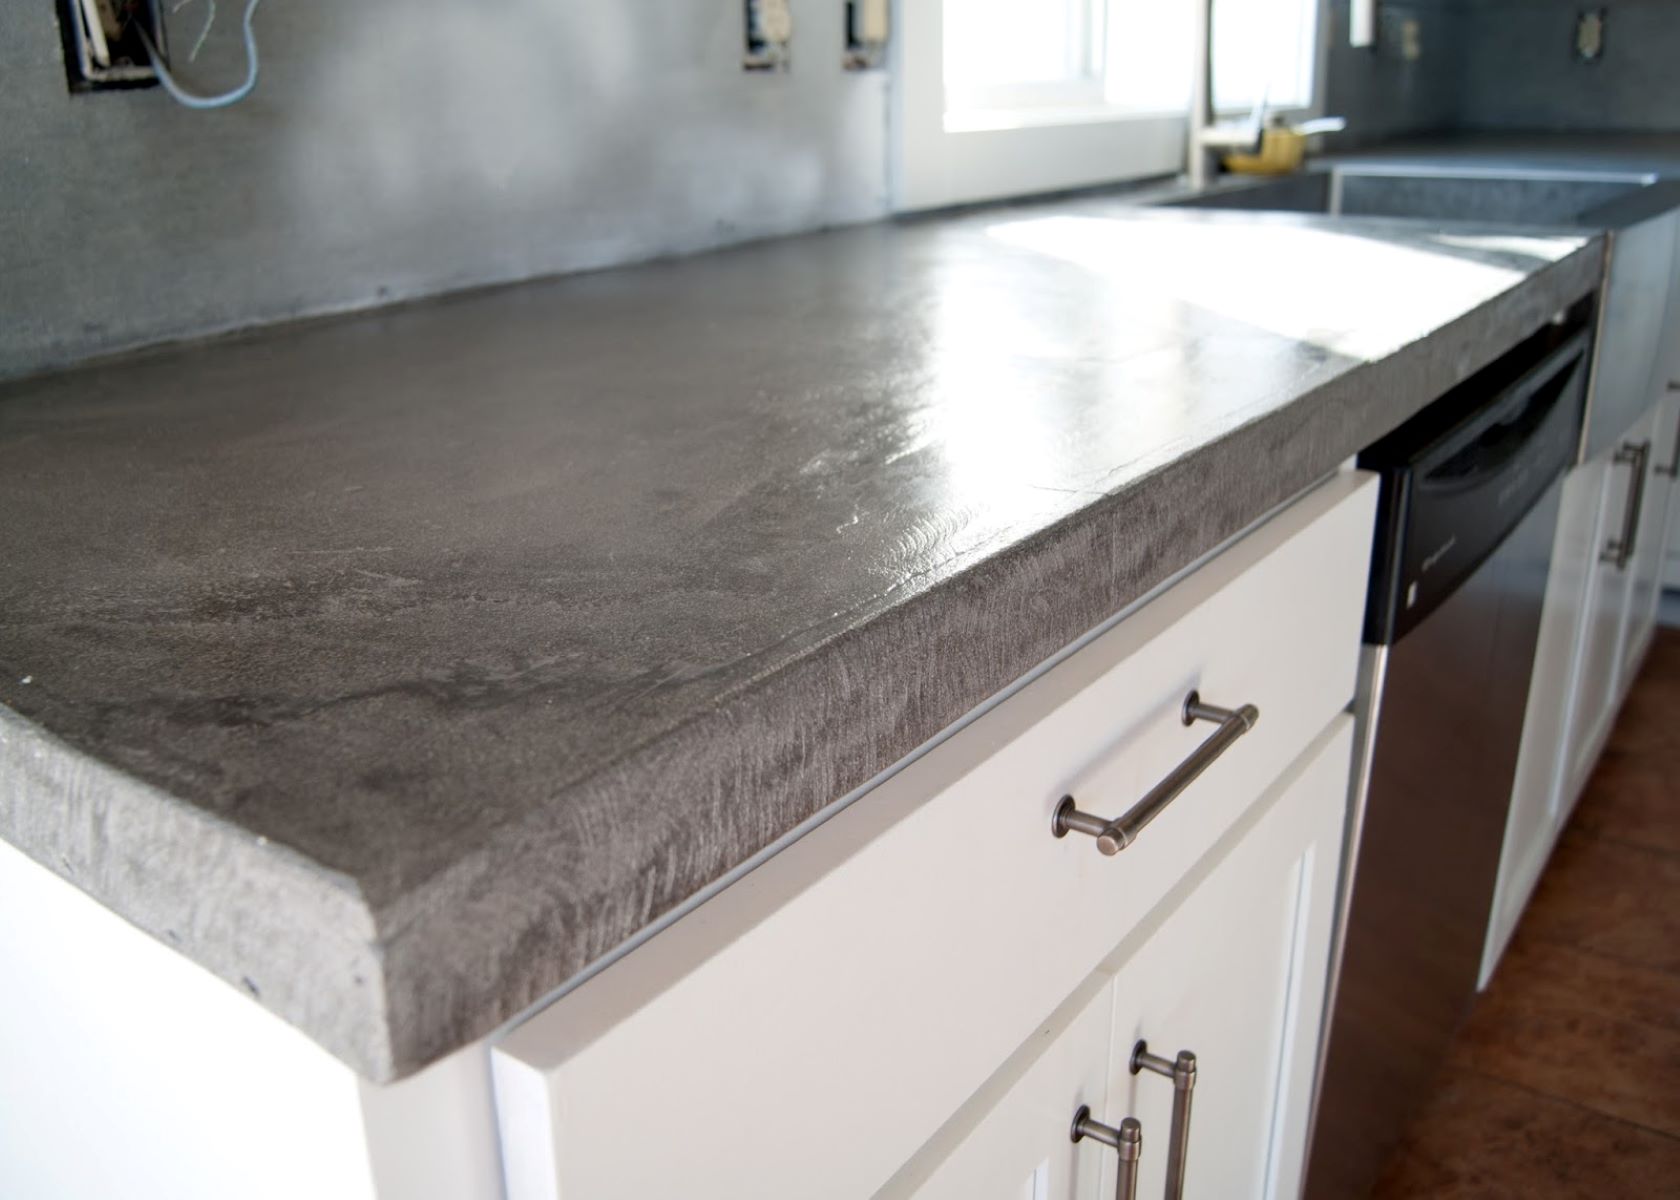
Step 5: Curing and Sealing the Countertops
After finishing the surface of your outdoor concrete countertops, the next step is to cure and seal them. Curing and sealing are essential for ensuring the longevity and durability of your countertops. Follow these steps to properly cure and seal your outdoor concrete countertops:
- Curing: Curing is the process of allowing the concrete to fully hydrate and strengthen. It helps prevent cracking and enhances the overall durability of the countertops. Begin by lightly misting the countertops with water to keep them moist. You can cover them with plastic wrap or use a curing compound to retain moisture and promote proper curing. Follow the manufacturer’s instructions for the specific curing method you choose.
- Allow Sufficient Curing Time: The curing time for concrete countertops can vary depending on the type of concrete mix used and the weather conditions. Typically, countertops need to cure for a minimum of 7 to 14 days. Ensure that the countertops are protected from any extreme temperatures or direct sunlight during this curing period.
- Remove the Formwork: Once the curing period is complete, carefully remove the formwork from the countertops. Take your time to avoid any damage to the freshly cured surface.
- Sealing Preparation: Before applying the sealer, ensure that the countertops are clean and free from any dust or debris. Use a mild detergent and water to wash the surface, and allow it to dry completely.
- Choose the Right Sealer: Select a high-quality sealer that is specifically designed for concrete countertops and suitable for outdoor use. Consider factors such as UV resistance, stain resistance, and ease of application. Consult with a professional or a supplier to determine the best sealer for your specific needs.
- Apply the Sealer: Follow the manufacturer’s instructions to apply the sealer to the surface of your countertops. Use a brush or roller to evenly apply the sealer, ensuring complete coverage. Allow the sealer to dry as per the manufacturer’s recommended drying time.
- Additional Coats (Optional): Depending on the level of protection you desire, you may choose to apply multiple coats of sealer. Ensure that each coat is allowed to dry before applying the next one, and follow the manufacturer’s instructions for application and drying times.
- Maintain and Reapply Sealer: Outdoor concrete countertops require periodic sealing and maintenance to protect them from the elements. Follow the recommended maintenance routine for the specific sealer you have used. This may include regular cleaning, reapplication of the sealer after a certain period, and avoiding harsh chemicals or abrasive cleaners that can damage the sealer.
Curing and sealing your outdoor concrete countertops is crucial for their long-term durability and protection. By following these steps and allowing for sufficient curing time, applying a high-quality sealer, and maintaining the countertops regularly, you can ensure that your outdoor countertops remain functional and beautiful for years to come.
Remember, always follow the manufacturer’s instructions for the specific curing compound and sealer you are using and take proper safety precautions during application. With proper care and maintenance, your outdoor concrete countertops will continue to be a stylish and functional addition to your outdoor space.
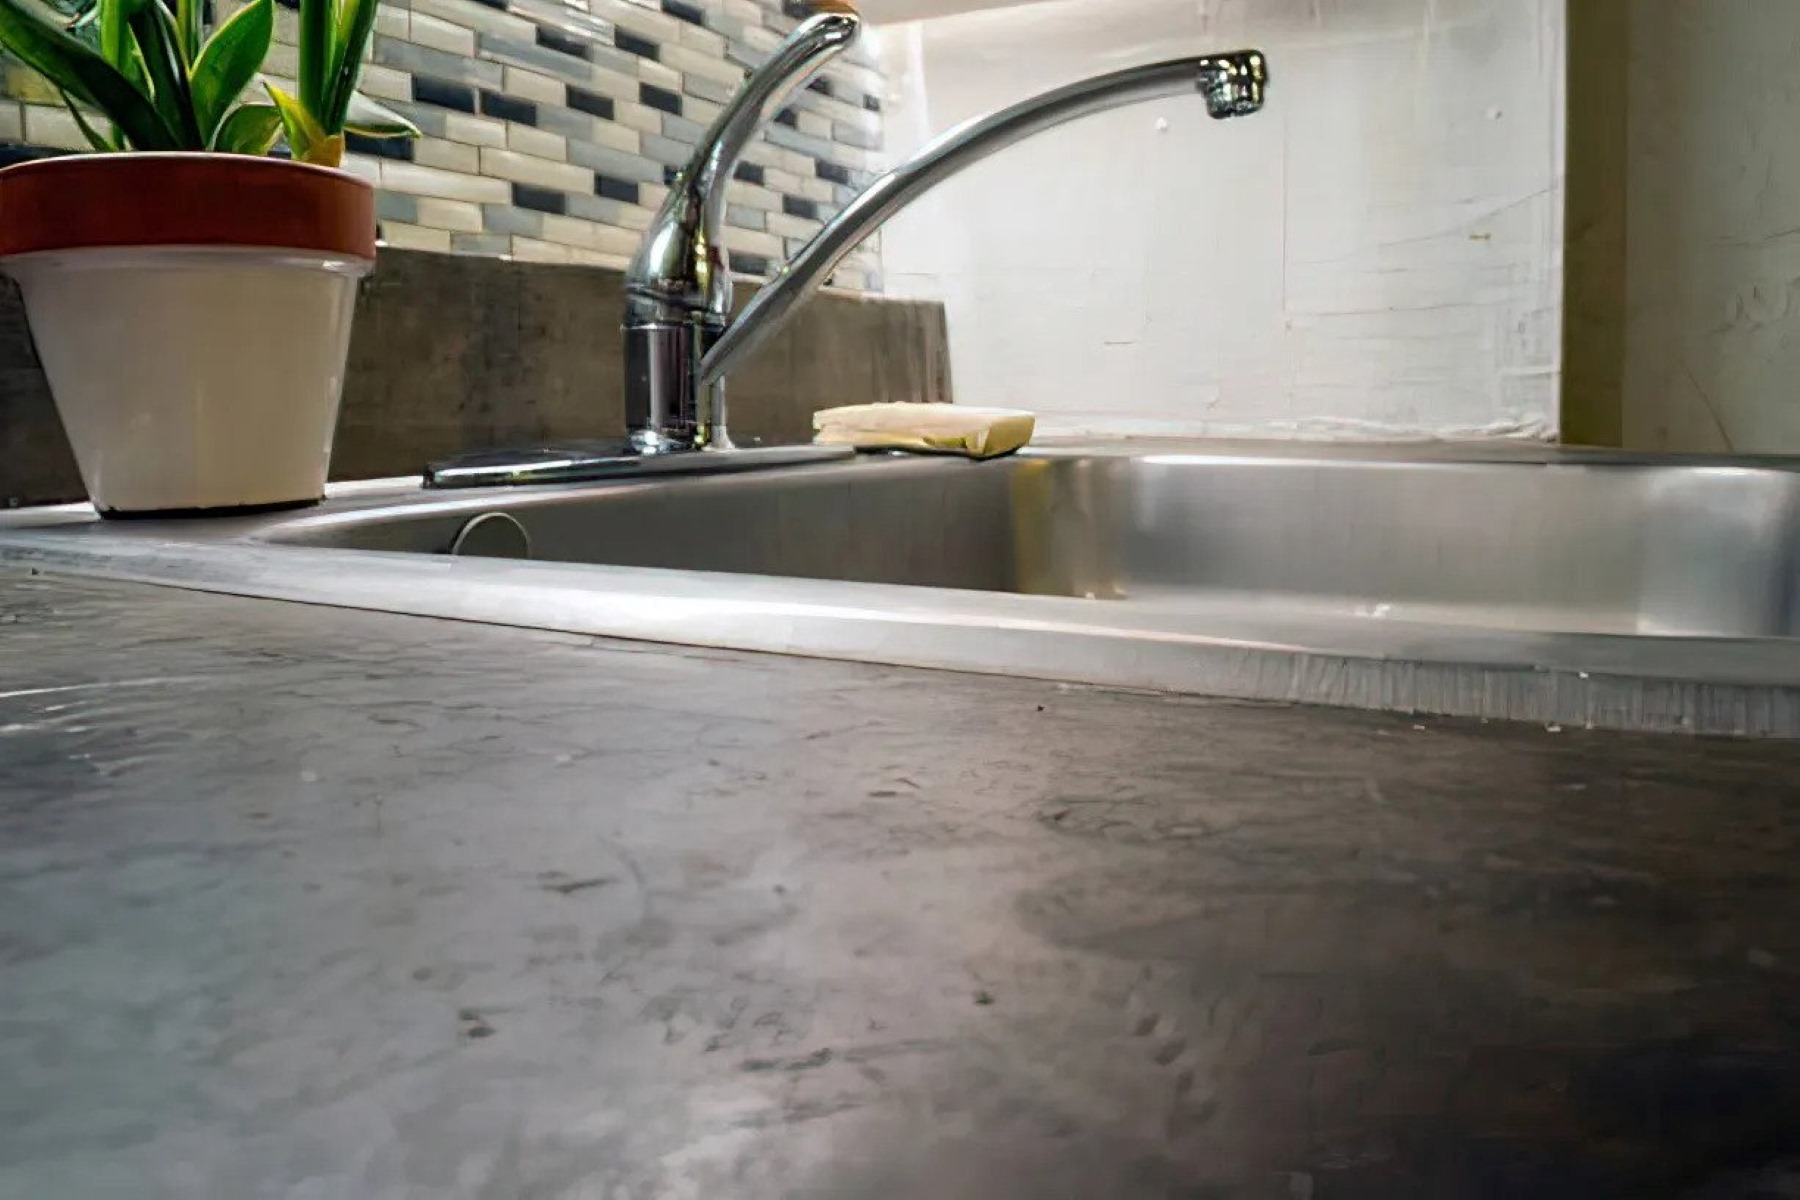
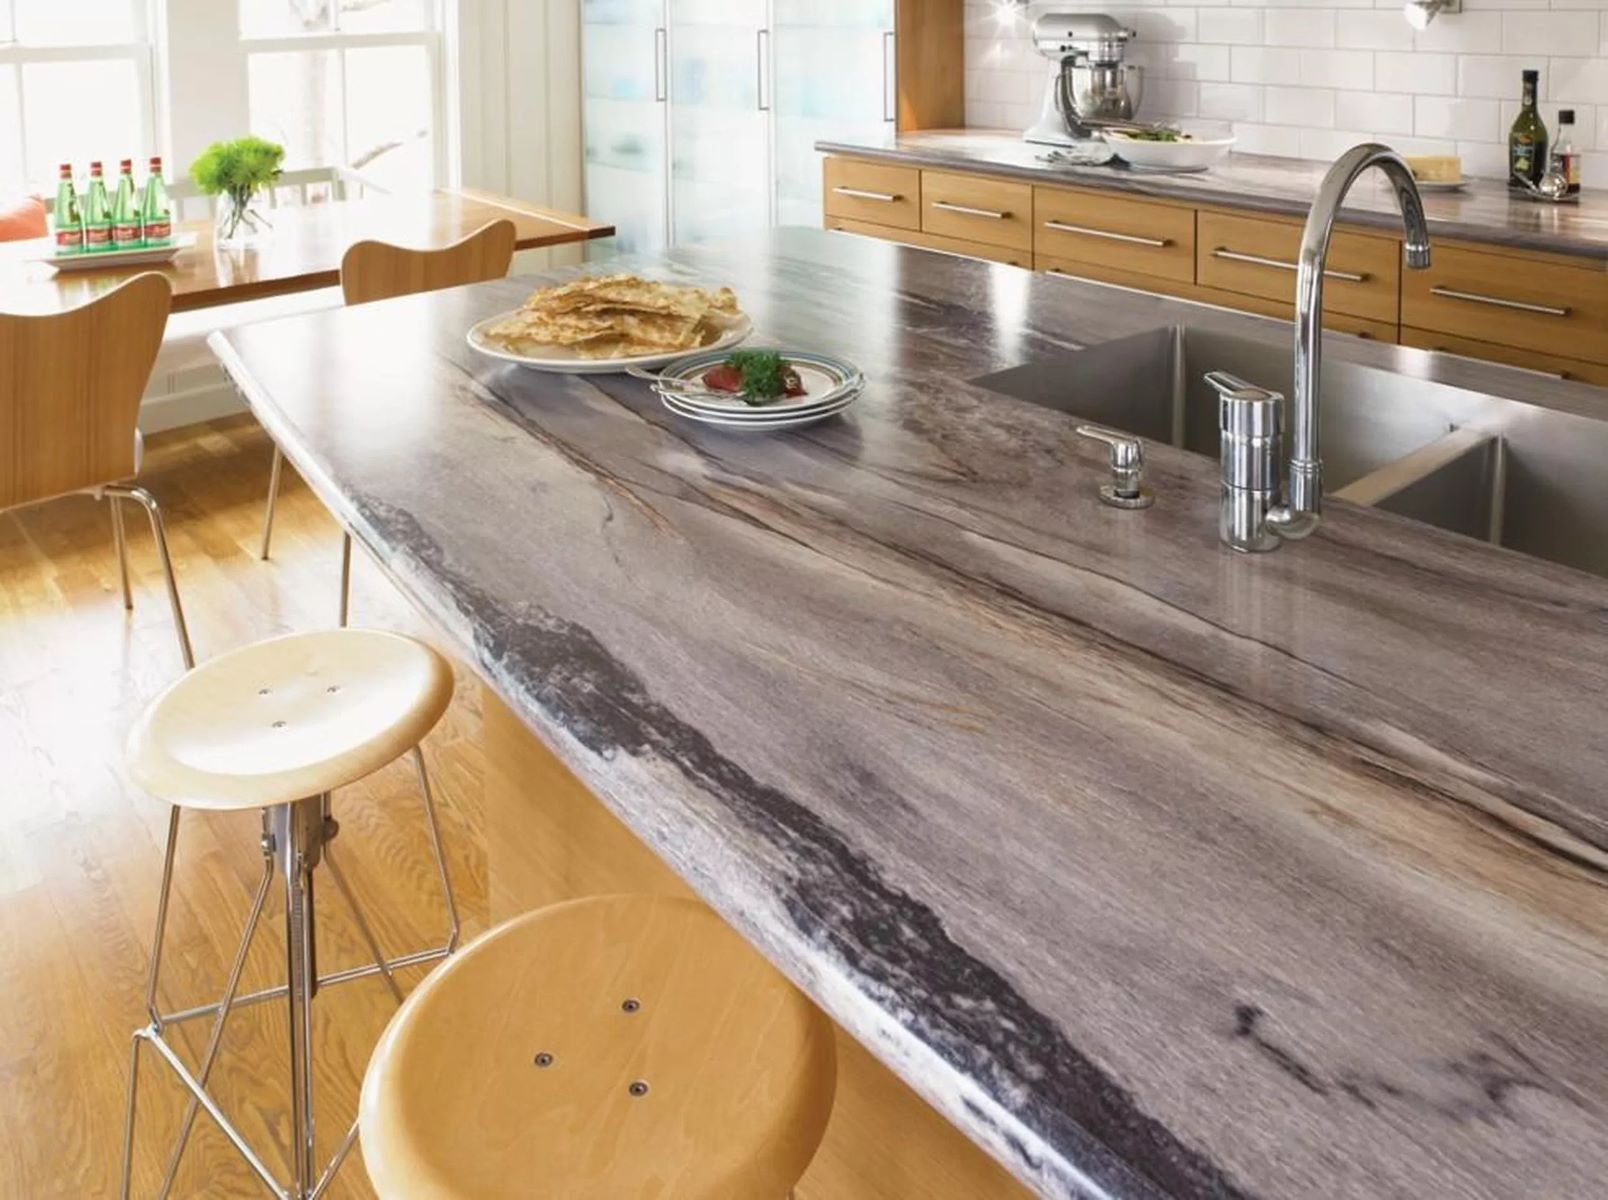
Step 6: Installing the Countertops
After completing the curing and sealing process, it’s time for the final step: installing your outdoor concrete countertops. Proper installation is crucial to ensure stability, durability, and a secure fit. Follow these steps to successfully install your countertops:
- Prepare the Installation Area: Ensure that the installation area is clean, level, and ready for the countertops. Remove any debris or obstructions that may interfere with the installation process.
- Apply Adhesive: Apply a suitable adhesive or mortar to the base on which the countertops will be installed. Use a trowel to spread the adhesive evenly on the surface, ensuring complete coverage.
- Place the Countertops: Carefully lift and place the countertops onto the adhesive, aligning them with the desired position. Ensure that they are level and properly aligned with the surrounding surfaces.
- Secure the Countertops: Once the countertops are in place, secure them by applying pressure and tapping them down gently with a rubber mallet. This will help ensure a tight bond between the countertops and the adhesive.
- Check for Levelness: Use a level to check for levelness across the entire surface of the countertops. Make any necessary adjustments by adding shims or adjusting the adhesive as needed.
- Seal the Edges: Apply a bead of silicone caulk along the edges of the countertops to seal them and prevent any moisture or debris from getting in between. Smooth out the caulk with a caulk smoothing tool or your finger for a neat finish.
- Allow for Drying Time: Allow the adhesive and caulk to dry and cure as per the manufacturer’s instructions. This will ensure a secure and long-lasting installation.
- Connect Plumbing and Electrical: If your outdoor countertops require plumbing or electrical connections, hire a professional to handle these installations. Properly connect the necessary fixtures and ensure that they are in working order.
- Final Touches: Once the installation is complete, clean the countertops and surrounding area, removing any dust or debris. Make any final adjustments or touch-ups to the caulk or edges as needed.
Properly installing your outdoor concrete countertops is essential for their functionality and longevity. By following these steps and ensuring a secure and level installation, you can enjoy your beautiful countertops in your outdoor space for years to come.
Remember, if you are unsure about any aspect of the installation process or if it involves complex plumbing or electrical work, it’s always best to consult with a professional to ensure a safe and successful installation.
Conclusion
Building outdoor concrete countertops is a rewarding DIY project that can enhance the functionality and aesthetics of your outdoor space. By following the steps outlined in this article, you can create durable and stylish countertops that will withstand the elements and provide a beautiful surface for your outdoor activities.
From planning and preparation to installation, each step plays a crucial role in the success of your project. Careful measurements, selection of quality materials, proper mixing and pouring of concrete, precise finishing techniques, and thorough curing and sealing all contribute to the overall outcome of your outdoor concrete countertops.
Remember to take into consideration factors such as your specific design preferences, the climate of your area, and local building codes. These considerations will help guide your choices throughout the project and ensure that you create countertops that are not only visually appealing but also practical and long-lasting.
Always prioritize safety when working with concrete and follow the instructions provided by manufacturers for all products and materials used. Protect yourself with appropriate attire and equipment, and exercise caution to avoid injuries during the construction process.
Once your outdoor concrete countertops are installed, be sure to maintain them regularly by cleaning and resealing as needed. This will ensure that they remain in optimal condition and continue to enhance your outdoor space for years to come.
With patience, attention to detail, and a little creativity, you can create outdoor concrete countertops that add value, functionality, and beauty to your outdoor living area. Enjoy the fruits of your labor and take pride in your DIY project!
Frequently Asked Questions about How To Build Outdoor Concrete Countertops
Was this page helpful?
At Storables.com, we guarantee accurate and reliable information. Our content, validated by Expert Board Contributors, is crafted following stringent Editorial Policies. We're committed to providing you with well-researched, expert-backed insights for all your informational needs.


0 thoughts on “How To Build Outdoor Concrete Countertops”